
1. Genel Bakış
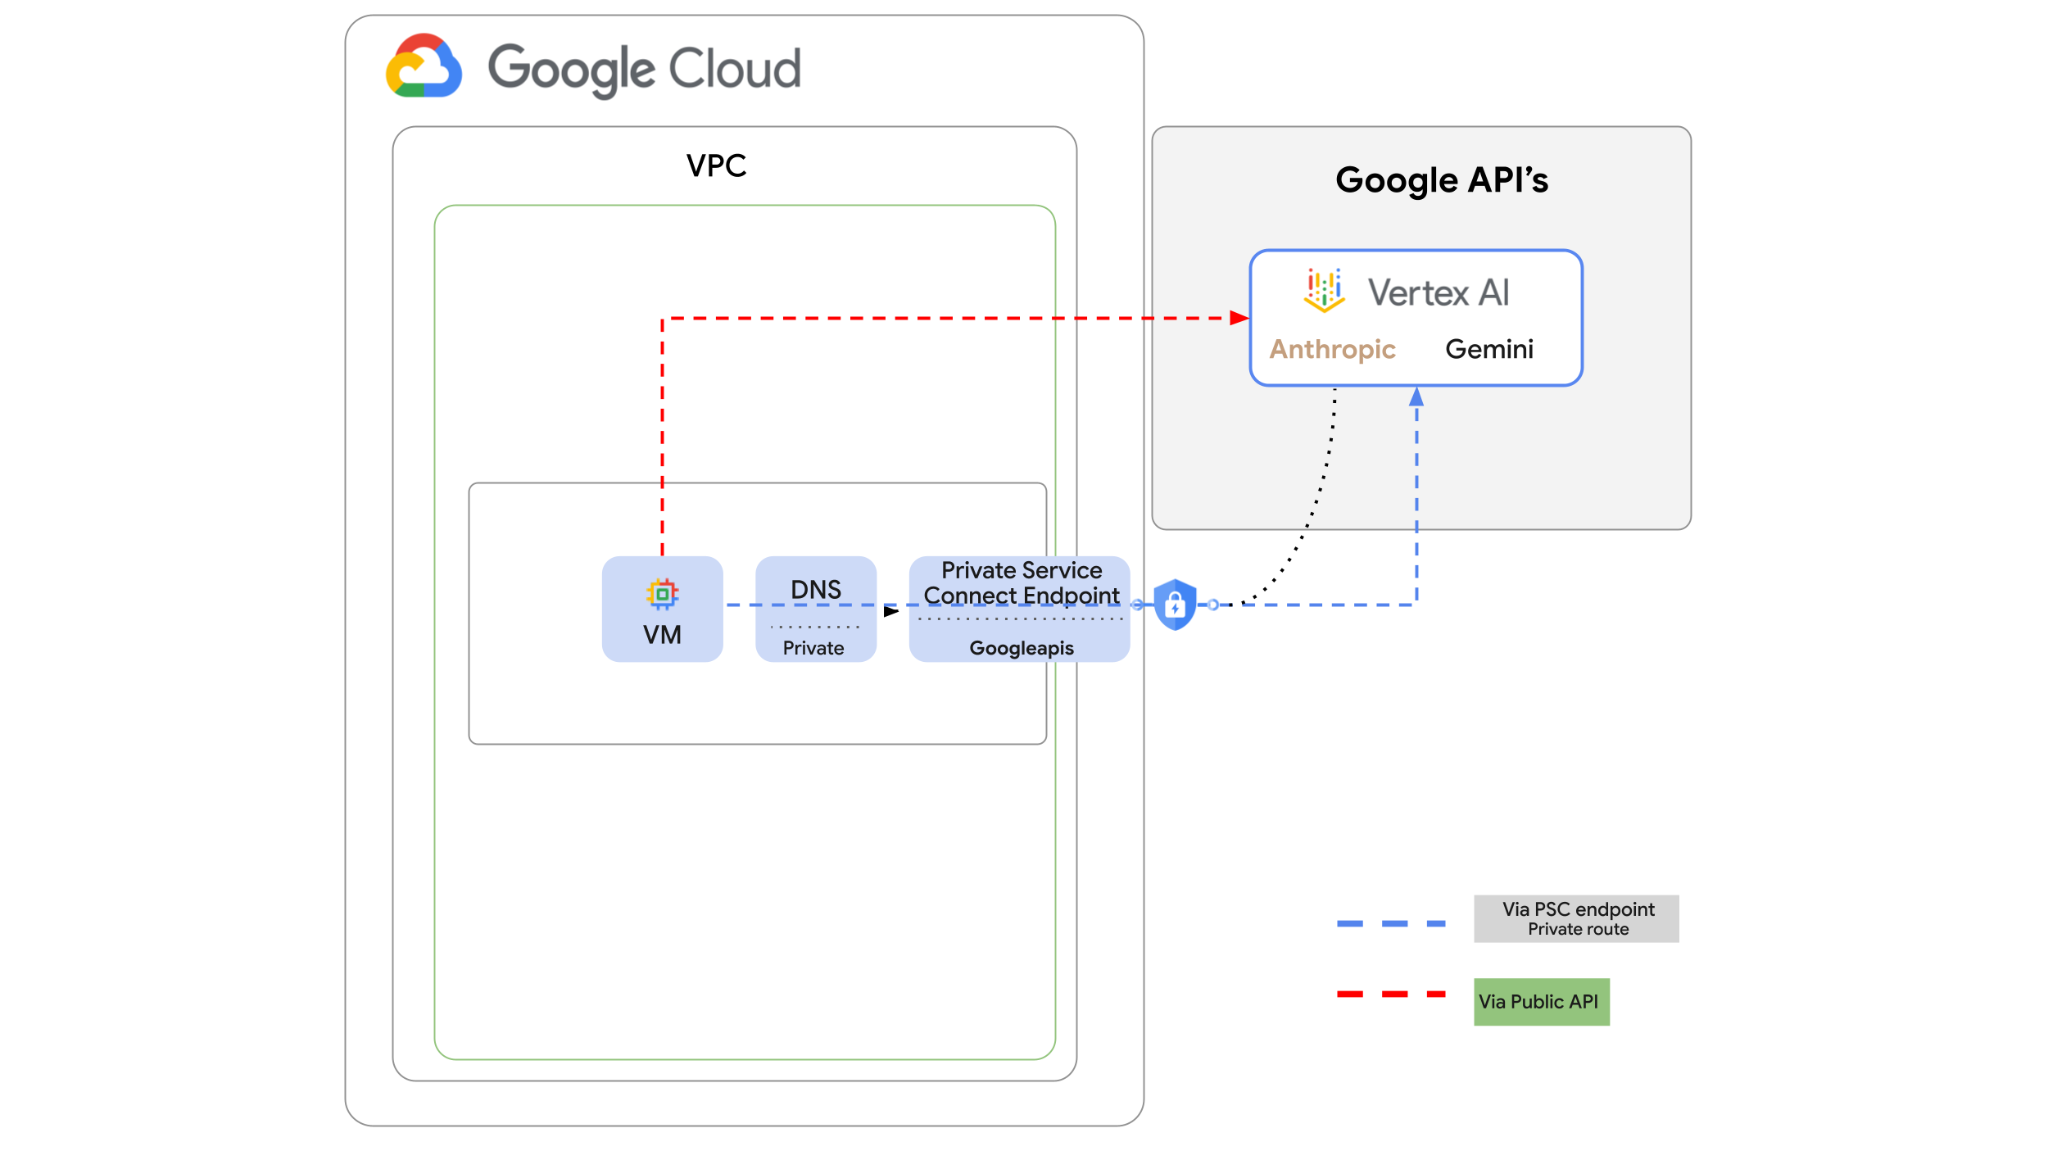
Vertex AI API'ye internet üzerinden erişilebilir. Ancak kuruluşunuzda Vertex AI API'ye internet üzerinden gitmeden özel olarak erişmek isteyebilirsiniz. Bu laboratuvarda öncelikle genel internet üzerinden bir sanal makine örneğinde çalışan Python SDK aracılığıyla Vertex'teki Anthropic Claude Opus 4.6 ve Gemini 3.1 Pro'ya erişeceksiniz.
Ardından, Googleapis için bir Private Service Connect uç noktası oluşturacak ve Vertex API'ye bağlanmak üzere özel uç noktayı kullanmak için trafik akışını değiştireceksiniz.
Python kodu örneği, giriş sorularını alıp Claude Opus'a ileterek yanıt oluşturur. Bu çıkış, metin özeti oluşturmak ve resim üretmek için Gemini 3'e iletilir.
Bu laboratuvarda aşağıdaki kalıbı oluşturacaksınız.
Şekil 1.
2. Hedefler
Bu laboratuvarda, aşağıdaki görevi nasıl gerçekleştireceğinizi öğreneceksiniz:
- Python SDK'sını kullanmak için sanal makine örneğini ayarlama
- Vertex AI'da Anthropic model kartını etkinleştirme
- Python komut dosyası aracılığıyla Anthropic Claude Opus 4.6 ve Gemini 3.1 Pro'ya bağlanma
- Googleapis'e bağlanmak için PSC uç noktasını yapılandırma
- Manuel DNS girişlerini yapılandırma
- Googleais'e bağlantı yolunu doğrulama
- Modellere sorgu göndermek için Python komut dosyası yürütme
Laboratuvar kurulumu
Yönlendirmesiz ortam kurulumu
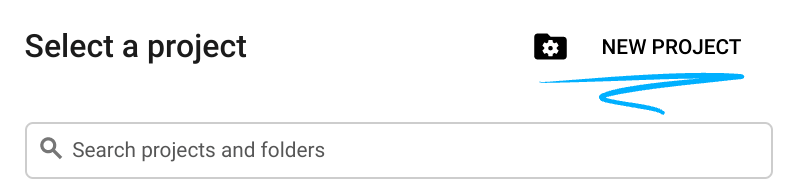
- Google Cloud Console'da oturum açın ve yeni bir proje oluşturun veya mevcut bir projeyi yeniden kullanın. Gmail veya Google Workspace hesabınız yoksa hesap oluşturmanız gerekir.

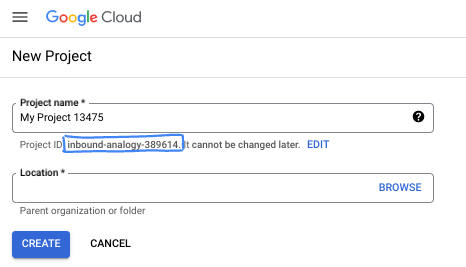
- Proje adı, bu projenin katılımcıları için görünen addır. Google API'leri tarafından kullanılmayan bir karakter dizisidir. Bu bilgiyi istediğiniz zaman güncelleyebilirsiniz.
- Proje kimliği, tüm Google Cloud projelerinde benzersizdir ve sabittir (ayarlandıktan sonra değiştirilemez). Cloud Console, benzersiz bir dizeyi otomatik olarak oluşturur. Genellikle bu dizenin ne olduğuyla ilgilenmezsiniz. Çoğu codelab'de proje kimliğinize (genellikle
PROJECT_IDolarak tanımlanır) başvurmanız gerekir. Oluşturulan kimliği beğenmezseniz başka bir rastgele kimlik oluşturabilirsiniz. Dilerseniz kendi adınızı deneyerek kullanılabilir olup olmadığını kontrol edebilirsiniz. Bu adım tamamlandıktan sonra değiştirilemez ve proje süresince geçerli kalır. - Bazı API'lerin kullandığı üçüncü bir değer olan Proje Numarası da vardır. Bu üç değer hakkında daha fazla bilgiyi belgelerde bulabilirsiniz.
- Ardından, Cloud kaynaklarını/API'lerini kullanmak için Cloud Console'da faturalandırmayı etkinleştirmeniz gerekir. Bu codelab'i tamamlamak çok az maliyetli veya ücretsizdir. Bu eğitimin ötesinde faturalandırılmayı önlemek için kaynakları kapatmak üzere oluşturduğunuz kaynakları veya projeyi silebilirsiniz. Yeni Google Cloud kullanıcıları 300 ABD doları değerinde ücretsiz deneme programından yararlanabilir.
Cloud Shell'i başlatma
Google Cloud, dizüstü bilgisayarınızdan uzaktan çalıştırılabilir. Ancak bu codelab'de, Cloud'da çalışan bir komut satırı ortamı olan Google Cloud Shell'i kullanacaksınız.
Google Cloud Console'da sağ üstteki araç çubuğunda Cloud Shell simgesini tıklayın:

Ortamın temel hazırlığı ve bağlantı kurulması yalnızca birkaç dakikanızı alır. İşlem tamamlandığında aşağıdakine benzer bir sonuç görürsünüz:

Bu sanal makine, ihtiyaç duyacağınız tüm geliştirme araçlarını içerir. 5 GB boyutunda kalıcı bir ana dizin sunar ve Google Cloud üzerinde çalışır. Bu sayede ağ performansı ve kimlik doğrulama önemli ölçüde güçlenir. Bu codelab'deki tüm çalışmalarınızı tarayıcıda yapabilirsiniz. Herhangi bir şey yüklemeniz gerekmez.
3. Ortamı ayarlama
Güvenlik duvarı kuralları içeren özel bir VPC oluşturacağız. Zaten bir VPC ve projeniz varsa bu bölümü atlayabilirsiniz.
Konsolunuzun sağ üst kısmında bulunan Cloud Shell'i açın. Aşağıdaki gibi yapılandırın: 
- Bu laboratuvarda kullanacağımız API'lerden bazılarını etkinleştirin.
gcloud services enable dns.googleapis.com
gcloud services enable aiplatform.googleapis.com
gcloud services enable servicedirectory.googleapis.com
- Bazı değişkenleri ayarlayın. Bu değişkenler, özel VPC'nin proje kimliği ve ağ kimliğidir (VPC'yi 4. adımda oluşturacaksınız).
projectid=$(gcloud config get-value project)
networkid=anthropic-net
echo $projectid
echo $networkid
- Şimdi özel bir VPC (anthropic-net), alt ağ (vm1-subnet) ve güvenlik duvarı kuralları oluşturun.
gcloud compute networks create $networkid \
--project=$projectid \
--subnet-mode=custom \
--mtu=1460 \
--bgp-routing-mode=global

gcloud compute networks subnets create vm-subnet \
--project=$projectid --range=10.0.88.0/24 \
--stack-type=IPV4_ONLY --network=$networkid \
--region=us-east1

gcloud compute firewall-rules create $networkid-allow-icmp --project=$projectid \
--network=$networkid \
--description="Allows ICMP connections from any source to any instance on the network." \
--direction=INGRESS \
--priority=65534 \
--source-ranges=0.0.0.0/0 \
--action=ALLOW \
--rules=icmp

gcloud compute firewall-rules create $networkid-allow-ssh \
--project=$projectid \
--network=$networkid \
--description="Allows TCP connections from any source to any instance on the network using port 22." \
--direction=INGRESS --priority=65534 \
--source-ranges=0.0.0.0/0 --action=ALLOW \
--rules=tcp:22

gcloud compute firewall-rules create $networkid-allow-web \
--project=$projectid \
--network=$networkid \
--description="Allows TCP connections on port 8080." \
--direction=INGRESS --priority=1000 \
--source-ranges=0.0.0.0/0 --action=ALLOW \
--rules=tcp:8080
4. Vertex Model Garden'da Anthropic'i etkinleştirme
İnternete giden harici erişim izni vermemiz gerekiyor. Bu nedenle, bir Cloud NAT ağ geçidi oluşturup ekleyelim.
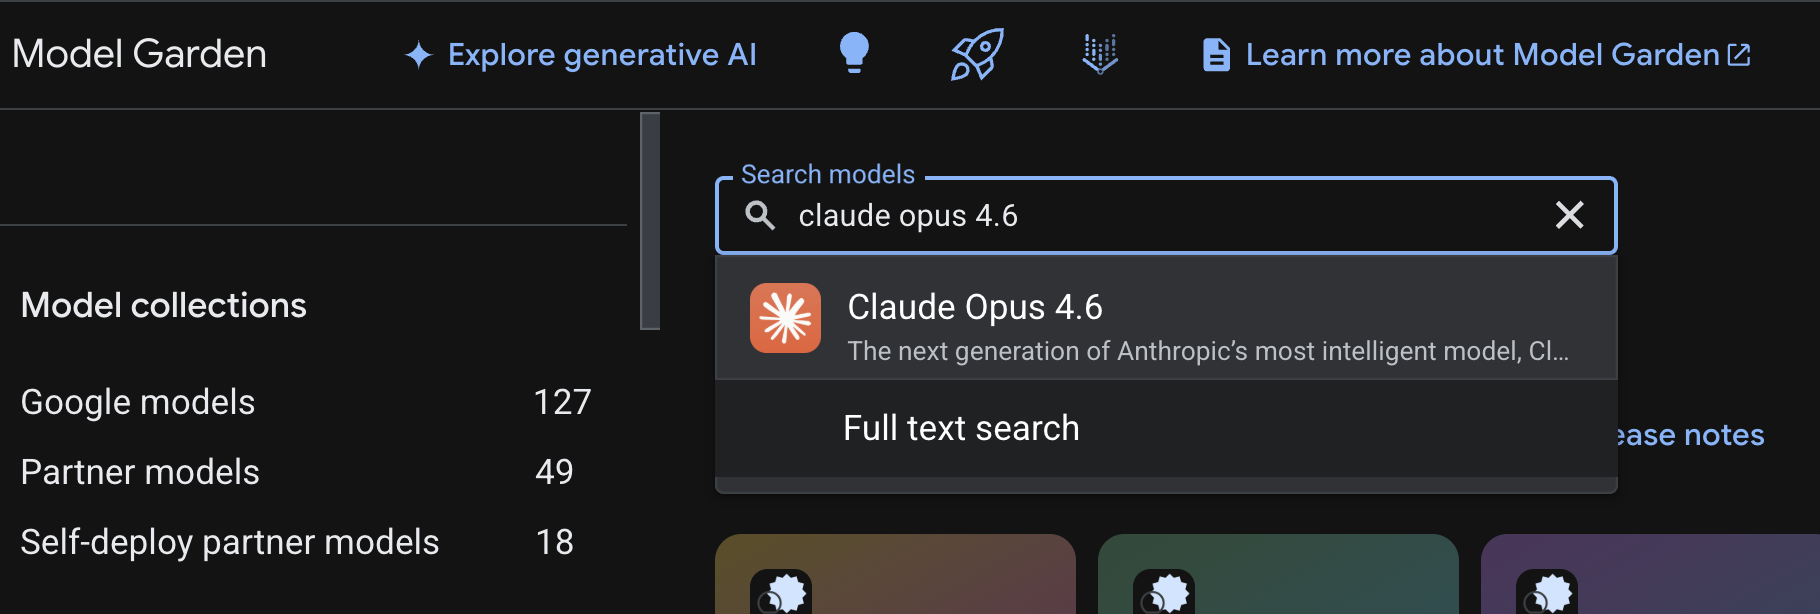
- Vertex AI kontrol paneline gidin ve Model Garden'ı seçin.
- Anthropic'i arayın ve Claude Opus 4.6'yı seçin.
- Etkinleştir'i seçin. Bazı bilgileri doldurmanız gerekir. Formu doldurun ve Sonraki'yi seçin.
- Son sayfada Kabul et'i seçerek Claude 4.6 Opus'u etkinleştirin.
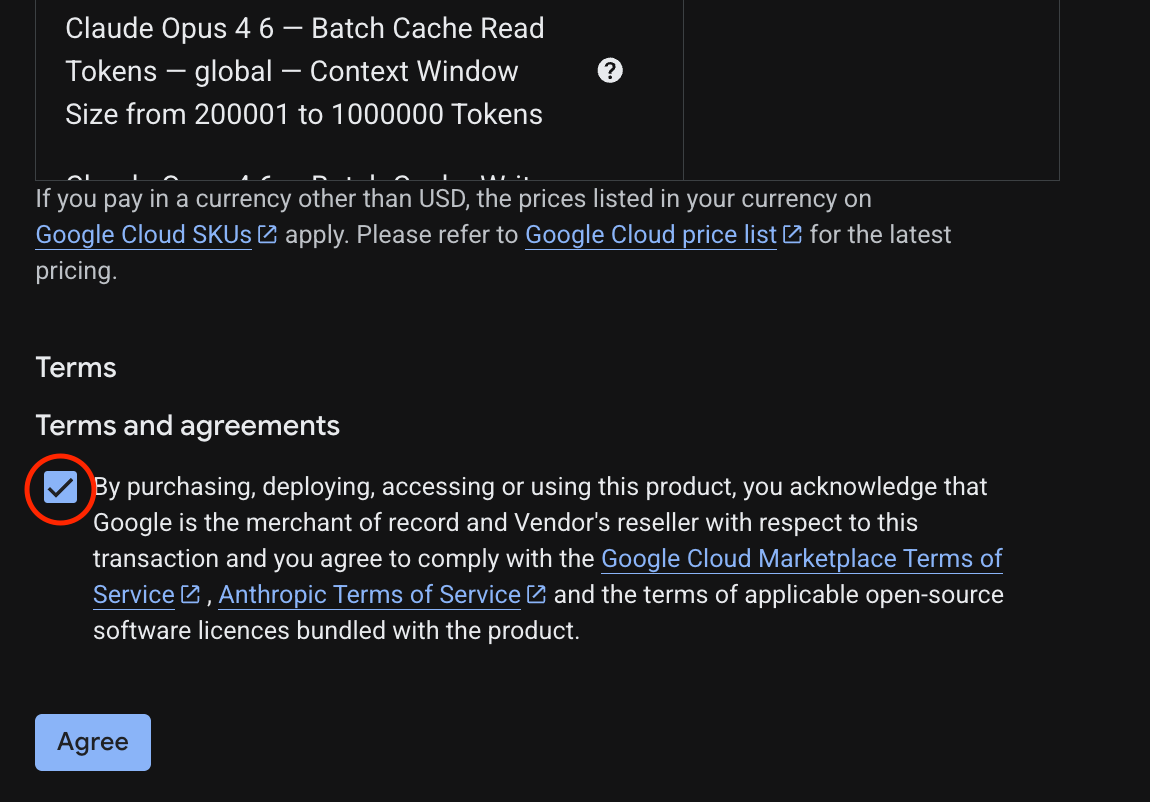
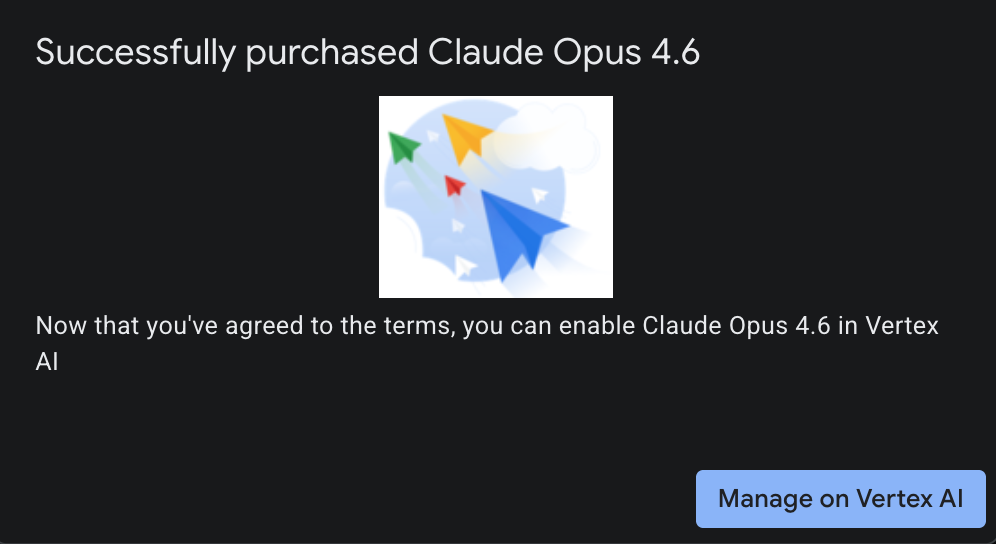
- Başarı sayfasını görmeniz gerekir.
5. NAT ağ geçidi ve sanal makineler oluşturma
İnternete giden harici erişim izni vermemiz gerekiyor. Bu nedenle, bir Cloud NAT ağ geçidi oluşturup ekleyelim.
Cloud Shell'de aşağıdaki komutları kullanın
- Cloud NAT ve Cloud NAT ağ geçidini oluşturma
gcloud compute routers create anthro-out-nat \
    --network $networkid \
    --region us-east1

gcloud compute routers nats create anthro-out-nat-gw \
    --router-region us-east1 \
    --router anthro-out-nat \
    --nat-all-subnet-ip-ranges \
    --auto-allocate-nat-external-ips
Şimdi Python SDK aracılığıyla Vertex AI'da Anthropic'e erişmek için bir sanal makine oluşturalım.
- Aynı Cloud Shell oturumunda aşağıdaki komutu kullanarak anthro-vm'yi oluşturun. (Başlangıç komut dosyası yüklenirken lütfen sanal makinenin etkinleşmesi için 3-4 dakika bekleyin.)
gcloud compute instances create anthro-vm \
--project=$projectid \
--zone=us-east1-b \
--network-interface=stack-type=IPV4_ONLY,subnet=vm-subnet,no-address,network=$networkid \
--metadata startup-script="#! /bin/bash
      apt-get update
      apt-get install python3 python3-dev python3-venv tcpdump dnsutils -y
      python3 -m venv /opt/py-anthro-env
      /opt/py-anthro-env/bin/pip install -U google-genai 'anthropic[vertex]' rich
      chmod -R 777 /opt/py-anthro-env"
Herkese açık IP adresi olmadan oluşturulan bir sanal makine görmelisiniz. Şimdi sanal makinenin
6. Sanal makineyi yapılandırma ve test etme
- Google Cloud Shell'de anthro-vm adlı yeni sanal makineye SSH üzerinden bağlanın. (Sanal makinenin tamamen kurulduğundan emin olmak için 3 dakika beklemeniz gerekebilir.)
gcloud compute ssh anthro-vm \
    --project=$projectid \
    --zone=us-east1-b \
    --tunnel-through-iap \
    -- -L 8080:localhost:8080
- Bağlantı kurulduktan sonra Vertex Gemini API'ye bağlanıp bağlanamadığımızı görmek için hızlı bir test yapalım.
dig *-aiplatform.googleapis.com
- Buna benzer bir şey görmeniz gerekir (adresler farklı olacaktır). API genel bir API olduğundan yolun herkese açık IP adresleri üzerinden olduğunu unutmayın.
; <<>> DiG 9.18.39-0ubuntu0.24.04.2-Ubuntu <<>> *-aiplatform.googleapis.com
;; global options: +cmd
;; Got answer:
;; ->>HEADER<<- opcode: QUERY, status: NOERROR, id: 3728
;; flags: qr rd ra; QUERY: 1, ANSWER: 16, AUTHORITY: 0, ADDITIONAL: 1

;; OPT PSEUDOSECTION:
; EDNS: version: 0, flags:; udp: 512
;; QUESTION SECTION:
;*-aiplatform.googleapis.com.   IN      A

;; ANSWER SECTION:
*-aiplatform.googleapis.com. 300 IN     A       172.217.204.95
*-aiplatform.googleapis.com. 300 IN     A       172.217.203.95
*-aiplatform.googleapis.com. 300 IN     A       173.194.215.95
*-aiplatform.googleapis.com. 300 IN     A       142.250.98.95
*-aiplatform.googleapis.com. 300 IN     A       173.194.217.95
*-aiplatform.googleapis.com. 300 IN     A       142.251.107.95
*-aiplatform.googleapis.com. 300 IN     A       74.125.196.95
- Şimdi venv ortamınızı etkinleştirin:
source /opt/py-anthro-env/bin/activate
- Şimdi de daha sonra test yapmak için bunu doğrulayalım. Sanal makinede aşağıdaki komutu çalıştırın ve istendiğinde y tuşuna basın.
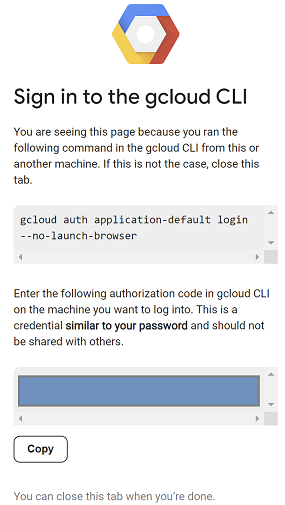
gcloud auth application-default login
- Ardından, https:// ile başlayan URL'yi kopyalayın, laboratuvar tarayıcı pencerenizde yeni bir sekme açın ve URL'yi yapıştırın. İstemleri kabul edin.
- Aşağıdaki metni gördüğünüzde kopyalayın, anthro-vm oturumuna geri dönün ve Enter authorization code: (Yetkilendirme kodunu girin:) bölümüne kopyaladığınız kodu yapıştırıp enter tuşuna basarak kimliğinizi doğrulayın.
- Şimdi
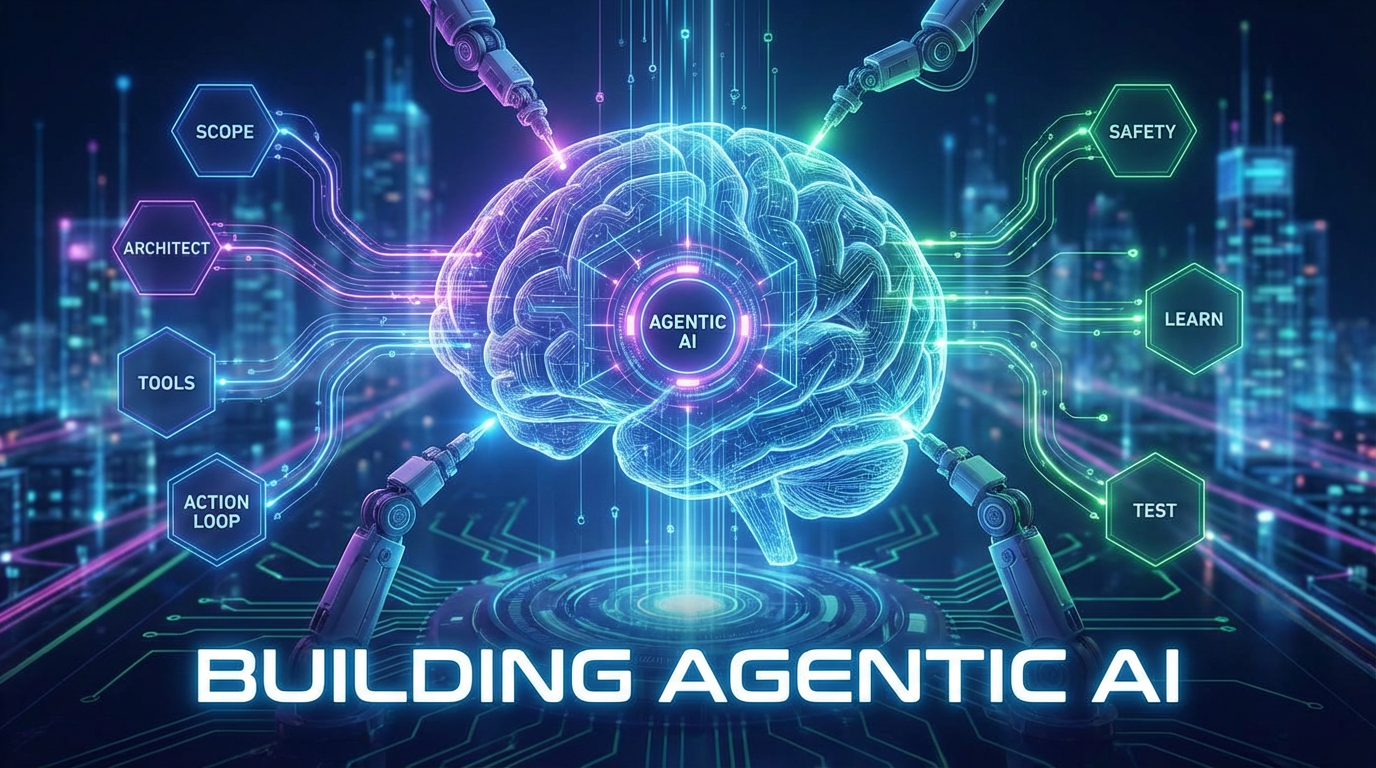
env'da Python'ı kullanalım. Bu işlem,super-gen-ai.pyadlı bir Python dosyası oluşturur ve Claude Opus 4.6'ya "Ajan tabanlı yapay zeka oluşturmanın temel adımları nelerdir?" sorusunu sorar. Ardından, çıktıyı alıp Gemini 3.1 Pro'ya aktarır. Bu model, bir özet oluşturur. Daha sonra Gemini 3 Pro Image, bir görüntü oluşturup VM'ye kaydeder.
Aşağıdakileri kopyalayıp yapıştırın.
cat << 'EOF' > super-gen-ai.py
import os
import subprocess
import google.auth
from google import genai
from google.genai import types
from anthropic import AnthropicVertex
from rich.console import Console
from rich.panel import Panel
from rich.spinner import SPINNERS
from rich.text import Text

# Custom Super Me Animation Spinner - Now with moving power-up!
SPINNERS["super_me"] = {
    "interval": 120,
    "frames": [
        "🧱🦖          🍄",
        "🧱 🦖        🍄 ",
        "🧱  🦖      🍄  ",
        "🧱   🦕    🍄   ",
        "🧱    🦖  🍄    ",
        "🧱     🦖🍄     ",
        "🧱      🌟      ",
        "🧱       🌟     ",
        "🧱        🌟    ",
        "🧱         🌟   ",
        "🧱        🌟    ",
        "🧱       🌟     ",
        "🧱      🌟      ",
        "🧱     🌟       ",
        "🧱    🌟        ",
        "🧱   🌟         ",
        "🧱  🌟          ",
        "🧱 🌟           ",
        "🧱🌟            "
    ]
}

console = Console()

def print_super_me_header():
    super_me_art = """
[bold red]   _____                       [/bold red][bold green]  __  __      _ [/bold green]
[bold red]  / ____|                      [/bold red][bold green] |  \/  |    | |[/bold green]
[bold red] | (___  _   _ _ __   ___ _ __ [/bold red][bold green] | \  / | ___| |[/bold green]
[bold red]  \___ \| | | | '_ \ / _ \ '__|[/bold red][bold green] | |\/| |/ _ \ |[/bold green]
[bold red]  ____) | |_| | |_) |  __/ |   [/bold red][bold green] | |  | |  __/_|[/bold green]
[bold red] |_____/ \__,_| .__/ \___|_|   [/bold red][bold green] |_|  |_|\___(_)[/bold green]
[bold red]              | |              [/bold red][bold green]                 [/bold green]
[bold red]              |_|              [/bold red][bold green]                 [/bold green]
    """
    console.print(super_me_art)
    console.rule("[bold gold1]⭐ LEVEL 1-1: Vertex AI Orchestrator ⭐[/bold gold1]")

def main():
    os.system('clear')  # Clears the terminal for a clean UI
    print_super_me_header()

    # Create the images directory
    os.makedirs("images", exist_ok=True)

    with console.status("[bold yellow]🪙  Collecting Coins (Authenticating)...[/bold yellow]", spinner="super_me"):
        try:
            creds, project_id = google.auth.default()
            LOCATION = "global"
        except Exception as e:
            console.print(f"[bold red]💥 GAME OVER! Authentication failed:[/bold red] {e}")
            return

    with console.status(f"[bold green]🍄 Powering up Clients for {project_id}...[/bold green]", spinner="super_me"):
        google_client = genai.Client(vertexai=True, location=LOCATION, project=project_id)
        claude_client = AnthropicVertex(region=LOCATION, project_id=project_id)

    console.print("\n[bold cyan]The Kingdom needs a strategy![/bold cyan]")

    # Auto-run prompt without user interaction
    question = "What are the key steps to building Agentic AI?"

    console.print(Panel(question, title="[bold green]Green Dino (Claude Opus) is entering the pipe...[/bold green]", border_style="green"))

    with console.status("[bold green]🟢 Green Dino is clearing the level...\n[/bold green]", spinner="super_me"):
        try:
            msg = claude_client.messages.create(
                model="claude-opus-4-6",
                max_tokens=2048,
                messages=[{"role": "user", "content": question}]
            )
            claude_text = msg.content[0].text
            console.print(f"[bold green]✓ Level Cleared! Green Dino generated {len(claude_text)} bytes of strategy.[/bold green]\n")
        except Exception as e:
            console.print(f"[bold red]💥 BOSS ATTACK (Claude API Error):[/bold red] {e}")
            return

    with console.status("[bold red]🔴 Red Hero (Gemini 3.1 Pro Preview) is summarizing the map...\n[/bold red]", spinner="super_me"):
        text_prompt = f"""
        I am providing you with a response generated by Claude.
        1. READ the text below.
        2. GENERATE a concise, bulleted executive summary.

        --- INPUT TEXT ---
        {claude_text}
        """

        try:
            text_response = google_client.models.generate_content(
                model="gemini-3.1-pro-preview",
                contents=text_prompt,
                config=types.GenerateContentConfig(temperature=0.7)
            )
            console.print("[bold red]✓ Super Me! Text Summary Complete.[/bold red]")
        except Exception as e:
            console.print(f"[bold red]💥 CHOMPER PLANT (Gemini Text Error):[/bold red] {e}")
            return

    with console.status("[bold blue]🔵 Mushroom Friend (Gemini 3 Pro Image) is painting the castle...\n[/bold blue]", spinner="super_me"):
        image_prompt = f"""
        CREATE a high-quality, futuristic illustration of autonomous AI agents for a tech blog header (16:9 aspect ratio).
        Base the image directly on the following text summary:

        {text_response.text}
        """

        try:
            image_response = google_client.models.generate_content(
                model="gemini-3-pro-image-preview",
                contents=image_prompt,
                config=types.GenerateContentConfig(
                    response_modalities=['TEXT', 'IMAGE'],
                    temperature=0.7
                )
            )
            console.print("[bold blue]✓ Masterpiece Complete![/bold blue]\n")
        except Exception as e:
            console.print(f"[bold red]💥 FALLING BLOCK (Gemini Image Error):[/bold red] {e}")
            return

    console.rule("[bold gold1]🚩 COURSE CLEAR! 🚩[/bold gold1]")

    if text_response.text:
        console.print(Panel(text_response.text.strip(),
                            title="[bold gold1]Gemini 3.1 Pro Summary[/bold gold1]",
                            border_style="gold1"))

    for part in image_response.parts:
        if image := part.as_image():
            # Save inside the images folder with the focus-specific name
            filename = "images/building-agentic.png"
            image.save(filename)
            console.print(f"\n[bold green]✓ REWARD SAVED:[/bold green] [underline]{os.path.abspath(filename)}[/underline]")

    console.rule("[bold red]Web Server Warp Pipe[/bold red]")
    with console.status("[bold yellow]Opening the warp pipe (HTTP server)...[/bold yellow]", spinner="super_me"):
        # Kill any existing server first so it doesn't crash on port binding
        os.system('pkill -f "http.server" > /dev/null 2>&1')

        # Start the server with the root directory set specifically to 'images'
        subprocess.Popen(
            ["python3", "-m", "http.server", "8080", "--directory", "images"],
            stdout=subprocess.DEVNULL,
            stderr=subprocess.DEVNULL
        )

    console.print("[bold green]✓ Warp Pipe is open in the background![/bold green]")
    console.print("[bold magenta]View your files here (Click Web Preview -> Preview on port 8080):[/bold magenta] [underline]http://localhost:8080/[/underline]\n")

if __name__ == "__main__":
    main()
EOF

python3 super-gen-ai.py
Komut dosyası eğlenceli bir arayüzde çalışır ve görüntü çıkışını görüntüleyebilmeniz için bir web sunucusu başlatır. Komut dosyasını tekrar çalıştırmak için python3 super-gen-ai.pyyazın.
- Cloud Shell'deki web önizleme seçeneği için 8080 bağlantı noktasında önizle'yi seçin.
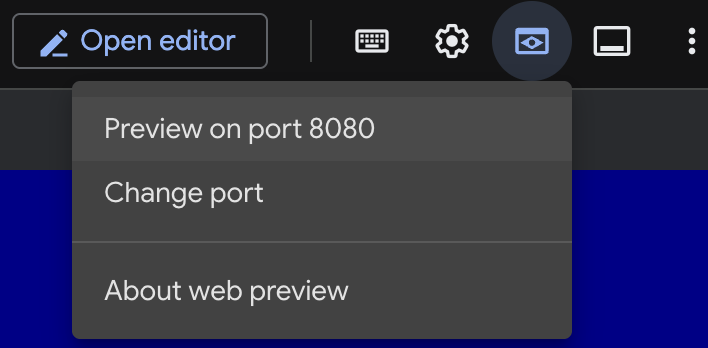
- Açık web oturumunda, oluşturulan resmi görüntülemek için building_agentic.png simgesini seçin. (Aşağıdaki örnek resim yapay zekayla üretilmiştir.)
- Web sunucusundan çıkmak için Cloud Shell'de aşağıdakileri çalıştırın.
pkill -f "http.server"
- Ardından, Cloud Shell ana sayfasına dönmek için
exityazın. İşlem tamamlandıktan sonra devam edelim.
7. googleapis için PSC uç noktası oluşturma
Vertex API uç noktamıza özel bağlantıyı etkinleştirmek için googleapis için bir Private Service Connect uç noktası oluşturacağız. Bu sayede, trafiği ihtiyacımız olan googleapis'e (bu örnekte Vertex Gemini) yönlendirmek için atadığımız özel bir IP adresini kullanabiliriz.
- Henüz açık değilse Cloud Shell'i açın. PSC uç noktası için bir IP oluşturup Private Service Connect uç noktasını oluşturacağız. Bu örnekte 192.168.255.230 adresini kullanacağız.
projectid=$(gcloud config get-value project)
networkid=anthropic-net

gcloud compute addresses create anthro-ip \
    --global \
    --purpose=PRIVATE_SERVICE_CONNECT \
    --addresses=192.168.255.230 \
    --network=$networkid

gcloud compute forwarding-rules create pscanthrovertex \
    --global \
    --network=$networkid \
    --address=anthro-ip \
    --target-google-apis-bundle=all-apis
- Doğrula
gcloud compute addresses list --filter="name=( 'anthro-ip' ...)"

gcloud compute forwarding-rules describe pscanthrovertex --global
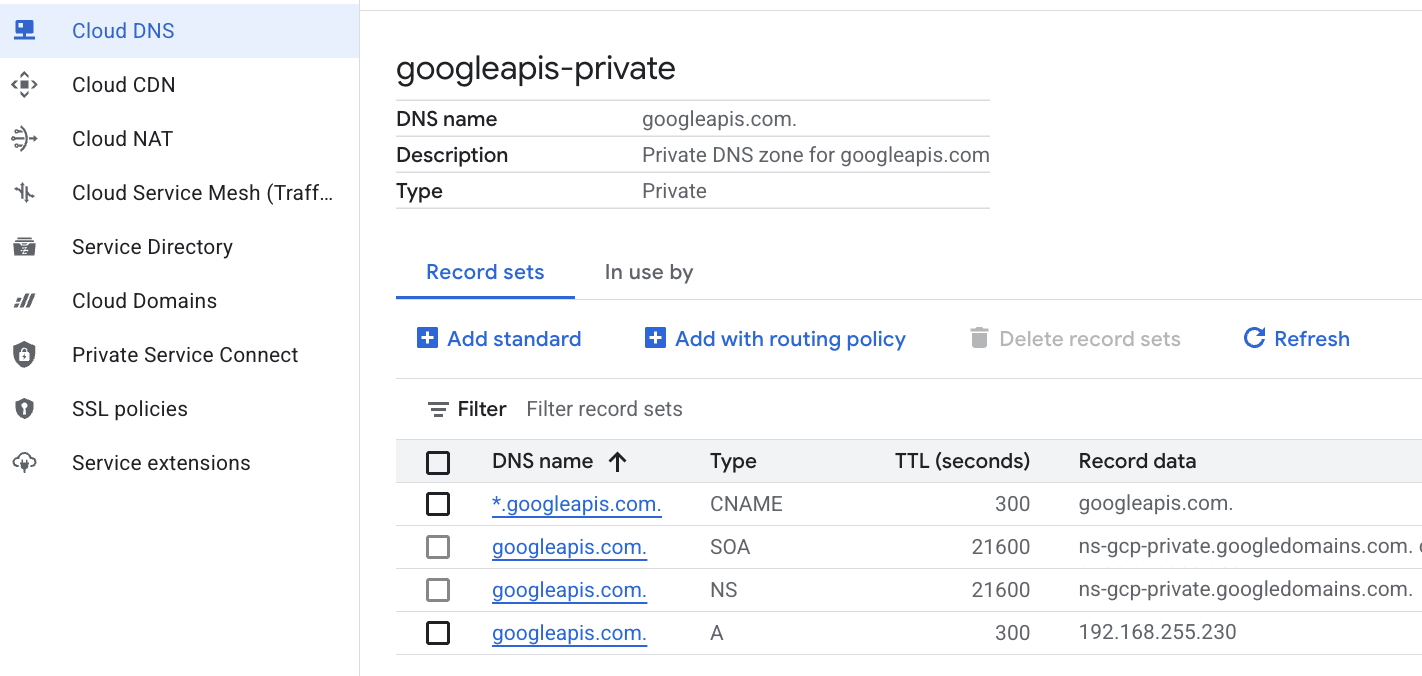
8. googleapis için manuel DNS girişi oluşturma
Özel DNS kullanarak PSC uç noktasına yönlendiren manuel bir DNS girişi oluşturabilirsiniz. Bu durum, atadığınız tüm ağları etkiler. Şimdi aşağıdakileri oluşturacaksınız
- googleapis.com için bir özel DNS bölgesi oluşturun ve bunu anthropic-net ağına ekleyin.
- Kök alanı Private Service Connect uç noktası IP'sine (192.168.255.230) eşleyen bir A kaydı
- Tüm alt alan adlarını (ör. aiplatform.googleapis.com) kök A kaydına yönlendirmek için joker karakter CNAME kaydı
- Cloud Shell'de aşağıdaki komutları çalıştırın.
gcloud dns managed-zones create googleapis-private \
    --description="Private DNS zone for googleapis.com" \
    --dns-name="googleapis.com." \
    --visibility="private" \
    --networks="anthropic-net"

gcloud dns record-sets create "googleapis.com." \
    --zone="googleapis-private" \
    --type="A" \
    --ttl="300" \
    --rrdatas="192.168.255.230"

gcloud dns record-sets create "*.googleapis.com." \
    --zone="googleapis-private" \
    --type="CNAME" \
    --ttl="300" \
    --rrdatas="googleapis.com."
- A kaydının ve CNAME'in doğru şekilde oluşturulduğunu onaylamak için bölgedeki kayıt kümelerini listeleyin.
gcloud dns record-sets list --zone="googleapis-private"
- Konsol görünümünde şöyle görünmelidir. Şuna benzer bir A kaydı ve CNAME içeren bir kurulum görmelisiniz.
- Ardından, anthro-vm üzerinde bu değişikliklerle bağlantıyı doğruluyoruz.
9. IP adresi üzerinden uç nokta bağlantısını doğrulama
Gemini'a bağlanmak için özel uç noktayı kullanarak bağlanalım.
- Google Cloud Shell'de anthro-vm adlı yeni sanal makineye SSH üzerinden bağlanın.
gcloud compute ssh anthro-vm \
    --project=$projectid \
    --zone=us-east1-b \
    --tunnel-through-iap \
    -- -L 8080:localhost:8080
- Sanal makinenizde
digkomutunu kullanarak aiplatform-pscanthrovertex.p.googleapis.com adresine giden bağlantı yolunu kontrol edin. PSC uç noktasının IP'sini görmeniz gerekir.192.168.255.230
dig aiplatform-pscanthrovertex.p.googleapis.com +noall +answer
Gemini'a bağlanmak için özel uç noktayı kullanarak bağlanalım.
- Şimdi Vertex Gemini API'ye bağlanıp bağlanamayacağımızı görmek için
digyapalım.
dig *-aiplatform.googleapis.com
- Buna benzer bir şey görürsünüz (adres farklı olur). Yolun PSC uç noktası IP adresleri üzerinden olduğunu unutmayın.
; <<>> DiG 9.18.41-1~deb12u1-Debian <<>> *-aiplatform.googleapis.com
;; global options: +cmd
;; Got answer:
;; ->>HEADER<<- opcode: QUERY, status: NOERROR, id: 33703
;; flags: qr rd ra; QUERY: 1, ANSWER: 2, AUTHORITY: 0, ADDITIONAL: 1

;; OPT PSEUDOSECTION:
; EDNS: version: 0, flags:; udp: 512
;; QUESTION SECTION:
;*-aiplatform.googleapis.com.   IN      A

;; ANSWER SECTION:
*-aiplatform.googleapis.com. 300 IN     CNAME   googleapis.com.
googleapis.com.         300     IN      A       192.168.255.230

;; Query time: 8 msec
;; SERVER: 169.254.169.254#53(169.254.169.254) (UDP)
;; WHEN: Sat Nov 29 15:19:15 UTC 2025
;; MSG SIZE  rcvd: 86
pingkomutunu kullanma Kısa bir test yapabiliriz. Not: Bu IP, bir PSC uç noktasıdır ve ping işlemleriniz başarısız olur.
ping -c 2 aiplatform.googleapis.com
- Şimdi venv ortamınızı etkinleştirin:
source /opt/py-anthro-env/bin/activate
- Şimdi
env'da Python'ı kullanalım. Bu işlem, Claude Opus 4.6'ya "Yeni başlayanlar için roti yapma tarifini adım adım anlatır mısın?" sorusunu soran bir Python dosyasıstar-me.pyoluşturur. Ardından, çıkışı alıp Gemini 3.1 Pro'ya iletir. Bu model, bir özet oluşturur ve Gemini 3 Pro Image, VM'ye kaydedilen bir görüntü oluşturur.
cat << 'EOF' > star-me.py
import os
import subprocess
import google.auth
from google import genai
from google.genai import types
from anthropic import AnthropicVertex
from rich.console import Console
from rich.panel import Panel
from rich.spinner import SPINNERS
from rich.text import Text

# Custom Star Me Animation Spinner - Directional Flight!
SPINNERS["star_me"] = {
    "interval": 120,
    "frames": [
        "🌌 🚀              🛸 ",
        "🌌  🚀            🛸  ",
        "🌌   🚀          🛸   ",
        "🌌    🚀        🛸    ",
        "🌌     🚀      🛸     ",
        "🌌      🚀    🛸      ",
        "🌌       🚀  🛸       ",
        "🌌        🚀🛸        ",
        "🌌         💥         ",
        "🌌        ✨ ✨       ",
        "🌌       ✨   ✨      ",
        "🌌      ✨     ✨     ",
        "🌌     ✨       ✨    ",
        "🌌                    "
    ]
}

console = Console()

def print_star_me_header():
    star_me_art = """
[bold cyan]   _____ _______       _____    __  __ ______ [/bold cyan]
[bold cyan]  / ____|__   __|/\   |  __ \  |  \/  |  ____|[/bold cyan]
[bold cyan] | (___    | |  /  \  | |__) | | \  / | |__   [/bold cyan]
[bold cyan]  \___ \   | | / /\ \ |  _  /  | |\/| |  __|  [/bold cyan]
[bold cyan]  ____) |  | |/ ____ \| | \ \  | |  | | |____ [/bold cyan]
[bold cyan] |_____/   |_/_/    \_\_|  \_\ |_|  |_|______|[/bold cyan]
    """
    console.print(star_me_art)
    console.rule("[bold gold1]⭐ EPISODE I: The AI Awakening ⭐[/bold gold1]")

def main():
    os.system('clear')  # Clears the terminal for a clean UI
    print_star_me_header()

    # Create the images directory
    os.makedirs("images", exist_ok=True)

    with console.status("[bold yellow]🪙  Bypassing Security (Authenticating)...[/bold yellow]", spinner="star_me"):
        try:
            creds, project_id = google.auth.default()
            LOCATION = "global"
        except Exception as e:
            console.print(f"[bold red]💥 COMM LINK SEVERED! Authentication failed:[/bold red] {e}")
            return

    with console.status(f"[bold cyan]📡 Establishing secure connection for {project_id}...[/bold cyan]", spinner="star_me"):
        google_client = genai.Client(vertexai=True, location=LOCATION, project=project_id)
        claude_client = AnthropicVertex(region=LOCATION, project_id=project_id)

    console.print("\n[bold cyan]The Galaxy needs sustenance![/bold cyan]")

    # Auto-run prompt for the recipe
    question = "Give me a step by step recipe to make a roti for a beginner?"

    console.print(Panel(question, title="[bold green]Space Master (Claude Opus) is searching the archives...[/bold green]", border_style="green"))

    with console.status("[bold green]🟢 Space Master is compiling the ancient texts...\n[/bold green]", spinner="star_me"):
        try:
            msg = claude_client.messages.create(
                model="claude-opus-4-6",
                max_tokens=2048,
                messages=[{"role": "user", "content": question}]
            )
            claude_text = msg.content[0].text
            console.print(f"[bold green]✓ Archives Retrieved! Space Master generated a {len(claude_text)}-character Holocron.[/bold green]\n")
        except Exception as e:
            console.print(f"[bold red]💥 INTERFERENCE DETECTED (Claude API Error):[/bold red] {e}")
            return

    with console.status("[bold gold1]🟡 Protocol Bot (Gemini 3.1 Pro Preview) is translating the recipe...\n[/bold gold1]", spinner="star_me"):
        text_prompt = f"""
        I am providing you with a response generated by a Space Master.
        1. READ the text below.
        2. GENERATE a concise, bulleted executive summary.

        --- INPUT TEXT ---
        {claude_text}
        """

        try:
            text_response = google_client.models.generate_content(
                model="gemini-3.1-pro-preview",
                contents=text_prompt,
                config=types.GenerateContentConfig(temperature=0.7)
            )
            console.print("[bold gold1]✓ Translation Complete! The Protocol Bot has summarized the steps.[/bold gold1]")
        except Exception as e:
            console.print(f"[bold red]💥 SYSTEM FAILURE (Gemini Text Error):[/bold red] {e}")
            return

    with console.status("[bold blue]🔵 Astro Bot (Gemini 3 Pro Image) is projecting the hologram...\n[/bold blue]", spinner="star_me"):
        image_prompt = f"""
        CREATE a high-quality, beautiful illustration for a blog header (16:9 aspect ratio) of someone making roti, but with a subtle sci-fi, cinematic lighting aesthetic.
        Base the image directly on the following text summary:

        {text_response.text}
        """

        try:
            image_response = google_client.models.generate_content(
                model="gemini-3-pro-image-preview",
                contents=image_prompt,
                config=types.GenerateContentConfig(
                    response_modalities=['TEXT', 'IMAGE'],
                    temperature=0.7
                )
            )
            console.print("[bold blue]✓ Hologram Projection Ready![/bold blue]\n")
        except Exception as e:
            console.print(f"[bold red]💥 BAD COMPRESSOR (Gemini Image Error):[/bold red] {e}")
            return

    console.rule("[bold cyan]🚩 MISSION ACCOMPLISHED 🚩[/bold cyan]")

    if text_response.text:
        console.print(Panel(text_response.text.strip(),
                            title="[bold gold1]Protocol Bot Recipe Summary[/bold gold1]",
                            border_style="gold1"))

    for part in image_response.parts:
        if image := part.as_image():
            # Save inside the images folder with the focus-specific name
            filename = "images/cookingroti.png"
            image.save(filename)
            console.print(f"\n[bold green]✓ DATA SECURED:[/bold green] [underline]{os.path.abspath(filename)}[/underline]")

    console.rule("[bold cyan]Hyperlink Uplink[/bold cyan]")
    with console.status("[bold yellow]Opening the frequencies (HTTP server)...[/bold yellow]", spinner="star_me"):
        # Kill any existing server first so it doesn't crash on port binding
        os.system('pkill -f "http.server" > /dev/null 2>&1')

        # Start the server with the root directory set specifically to 'images'
        subprocess.Popen(
            ["python3", "-m", "http.server", "8080", "--directory", "images"],
            stdout=subprocess.DEVNULL,
            stderr=subprocess.DEVNULL
        )

    console.print("[bold green]✓ Transmitting on Port 8080![/bold green]")
    console.print("[bold magenta]View your files here (Click Web Preview -> Preview on port 8080):[/bold magenta] [underline]http://localhost:8080/[/underline]\n")

if __name__ == "__main__":
    main()
EOF

python3 star-me.py
Komut dosyası eğlenceli bir arayüzde çalışır ve görüntü çıkışını görüntüleyebilmeniz için bir web sunucusu başlatır. Komut dosyasını tekrar çalıştırmak için python3 star-me.py yazın.
- Şimdi Cloud Shell'deki web önizleme seçeneğine gidin ve 8080 bağlantı noktasında önizle'yi seçin.
- Oluşturulan resmi görüntülemek için cookingroti.png dosyasını seçin. (Aşağıdaki örnek yapay zekayla üretilmiştir)

- Web sunucusundan çıkıp sanal makineye geri dönmek için Cloud Shell'de aşağıdakileri çalıştırın.
pkill -f "http.server"
- Ardından, Cloud Shell ana sayfasına dönmek için
exityazın.
10. Tebrikler
Tebrikler! Hem herkese açık API adresini hem de Google API'leri için Private Service Connect uç noktasını kullanarak Vertex'te Anthropic Claude Opus 4.6 ve Gemini 3.1 Pro'ya başarıyla bağlandınız. Bu işlev, özel API bağlantısını (Interconnect, Cross-Cloud Interconnect ve VPC) aracılığıyla bağlanan şirket içi/diğer bulut ortamınıza genişletebilir.
Temizleme
gcloud compute instances delete anthro-vm --zone=us-east1-b --quiet

gcloud compute routers nats delete anthro-out-nat-gw --router=anthro-out-nat --region=us-east1 --quiet

gcloud compute routers delete anthro-out-nat --region=us-east1 --quiet

gcloud compute firewall-rules delete anthropic-net-allow-icmp anthropic-net-allow-ssh anthropic-net-allow-web --quiet

gcloud compute forwarding-rules delete pscanthrovertex --global --quiet

gcloud dns record-sets delete googleapis.com. --zone googleapis-private --type A --quiet

gcloud dns record-sets delete *.googleapis.com --zone googleapis-private --type CNAME --quiet

gcloud dns managed-zones delete googleapis-private --quiet

gcloud compute addresses delete anthro-ip --global --quiet

gcloud compute networks subnets delete vm-subnet --region=us-east1 --quiet

gcloud compute networks delete anthropic-net --quiet
Sonraki adımlar / Daha fazla bilgi
Vertex AI ağ iletişimi hakkında daha fazla bilgi edinebilirsiniz.
Codelab: ADK ile Yapay Zeka Ajanları Oluşturma:Temel Bilgiler
Sonraki laboratuvarınıza katılın
Google Cloud ile görevinize devam edin ve aşağıdaki Google Cloud Öğrenim Merkezi laboratuvarlarına göz atın: