
1. Tổng quan
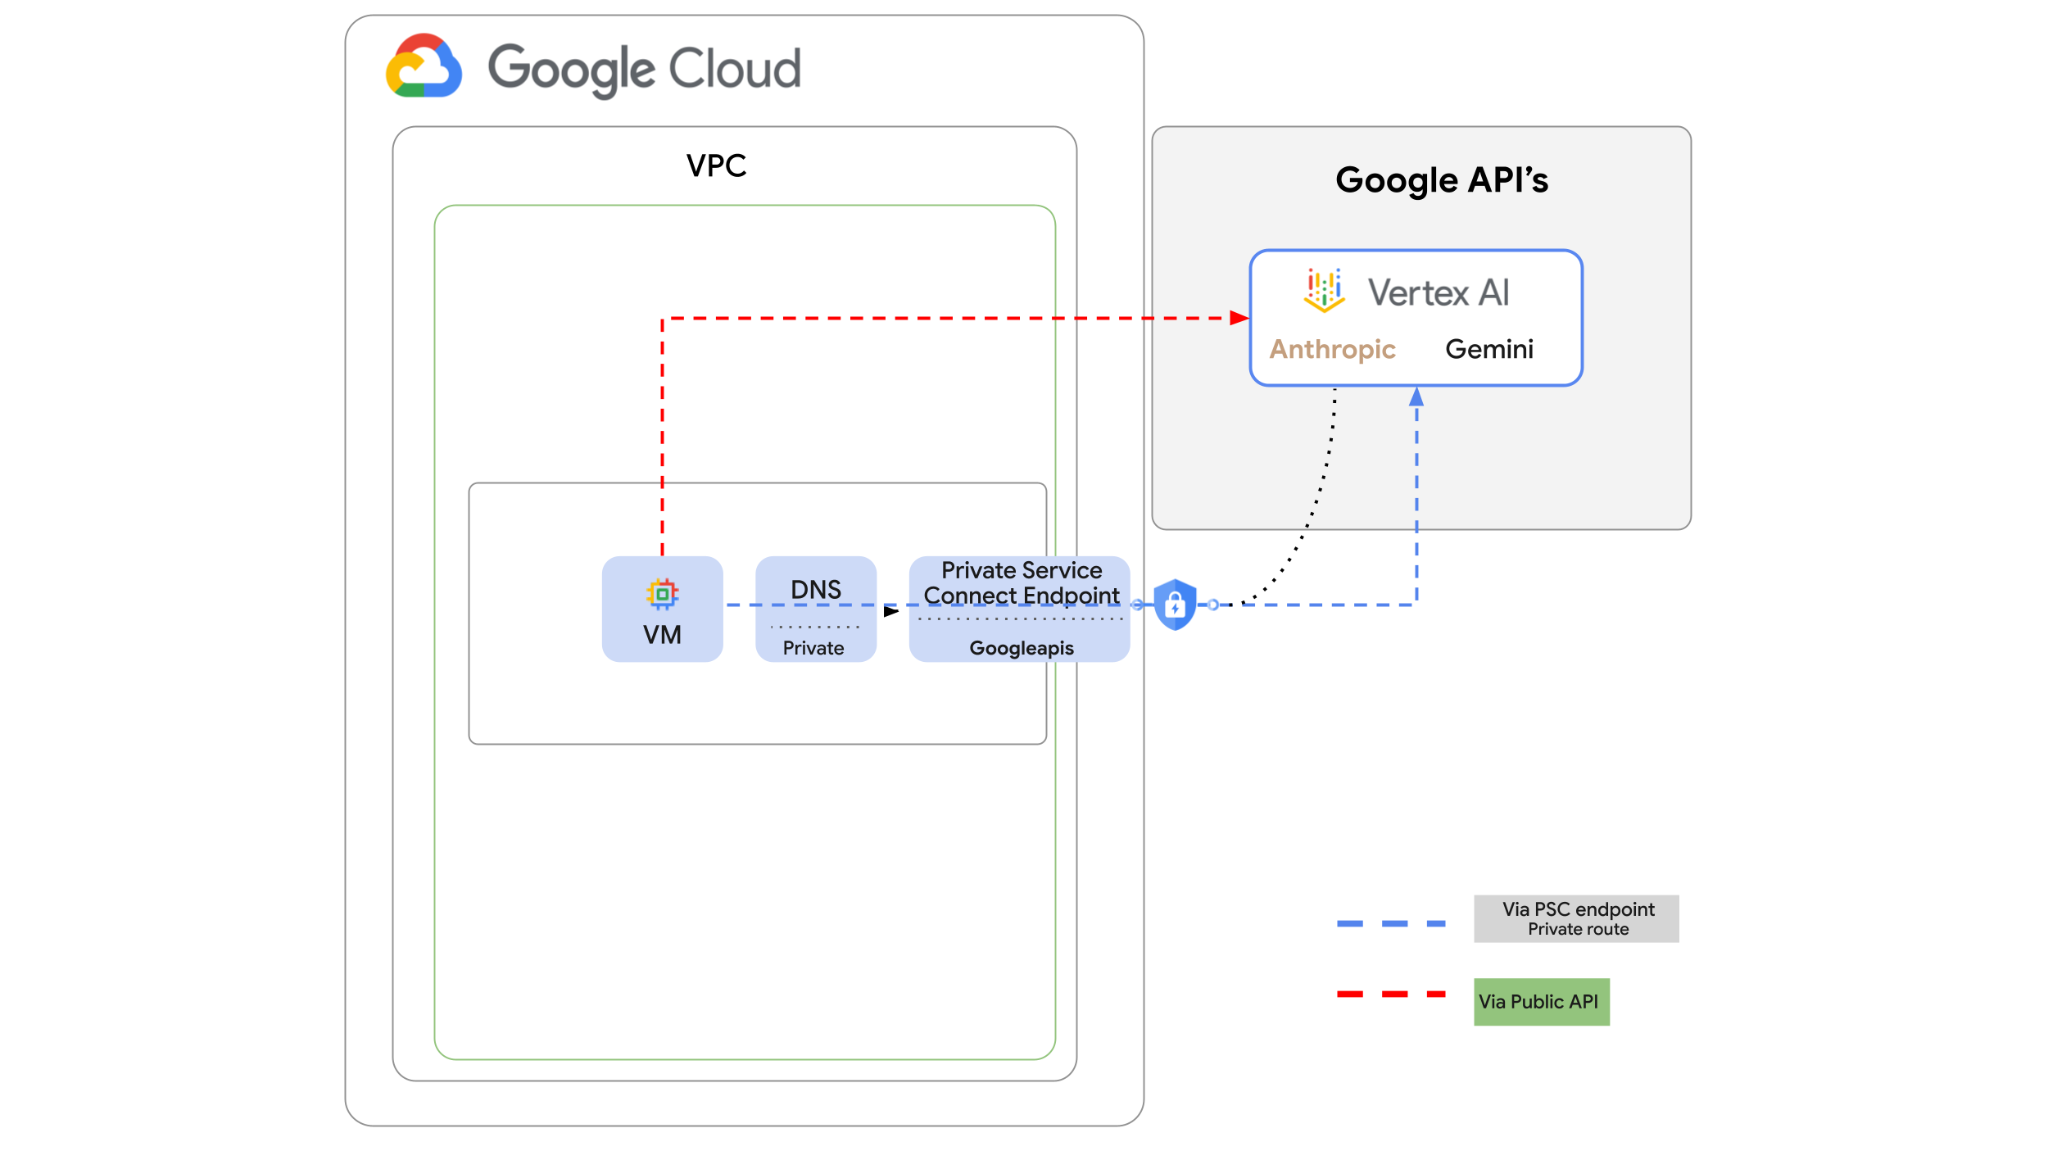
Bạn có thể truy cập vào Vertex AI API qua Internet. Tuy nhiên, trong doanh nghiệp của mình, bạn có thể muốn truy cập vào Vertex AI API một cách riêng tư mà không cần truy cập qua Internet. Trong lớp học này, trước tiên, bạn sẽ truy cập vào Anthropic Claude Opus 4.6 và Gemini 3.1 Pro trên Vertex thông qua Python SDK chạy trên một phiên bản máy ảo thông qua Internet công cộng.
Sau đó, bạn sẽ tạo một điểm cuối Private Service Connect cho Googleapis và thay đổi luồng lưu lượng truy cập để sử dụng điểm cuối riêng tư nhằm kết nối với Vertex API.
Mã mẫu Python sẽ lấy các câu hỏi đầu vào, truyền đến Claude Opus để tạo câu trả lời, đầu ra đó sẽ được truyền đến Gemini 3 để tạo bản tóm tắt văn bản và tạo hình ảnh.
Trong lớp học lập trình này, bạn sẽ tạo mẫu sau.
Hình 1.
2. Mục tiêu
Trong phòng thí nghiệm này, bạn sẽ tìm hiểu cách thực hiện nhiệm vụ sau:
- Thiết lập phiên bản máy ảo để sử dụng Python SDK
- Bật thẻ mô hình Anthropic trong Vertex AI
- Kết nối với Anthropic Claude Opus 4.6 và Gemini 3.1 Pro thông qua tập lệnh Python
- Định cấu hình điểm cuối PSC để kết nối với Googleapis
- Định cấu hình các mục nhập DNS theo cách thủ công
- Xác minh đường dẫn kết nối đến Googleais
- Thực thi tập lệnh python để truy vấn các mô hình
Thiết lập phòng thí nghiệm
Thiết lập môi trường theo tốc độ của riêng bạn
- Đăng nhập vào Google Cloud Console rồi tạo một dự án mới hoặc sử dụng lại một dự án hiện có. Nếu chưa có tài khoản Gmail hoặc Google Workspace, bạn phải tạo một tài khoản.


- Tên dự án là tên hiển thị của những người tham gia dự án này. Đây là một chuỗi ký tự mà các API của Google không sử dụng. Bạn luôn có thể cập nhật thông tin này.
- Mã dự án là giá trị duy nhất trên tất cả các dự án trên Google Cloud và không thể thay đổi (bạn không thể thay đổi mã này sau khi đã đặt). Cloud Console sẽ tự động tạo một chuỗi duy nhất; thường thì bạn không cần quan tâm đến chuỗi này. Trong hầu hết các lớp học lập trình, bạn sẽ cần tham chiếu đến Mã dự án (thường được xác định là
PROJECT_ID). Nếu không thích mã nhận dạng được tạo, bạn có thể tạo một mã nhận dạng ngẫu nhiên khác. Hoặc bạn có thể thử tên người dùng của riêng mình để xem tên đó có được chấp nhận hay không. Bạn không thể thay đổi tên này sau bước này và tên này sẽ tồn tại trong suốt thời gian của dự án. - Để bạn nắm được thông tin, có một giá trị thứ ba là Số dự án mà một số API sử dụng. Tìm hiểu thêm về cả 3 giá trị này trong tài liệu.
- Tiếp theo, bạn cần bật tính năng thanh toán trong Cloud Console để sử dụng các tài nguyên/API trên Cloud. Việc thực hiện lớp học lập trình này sẽ không tốn nhiều chi phí, nếu có. Để tắt các tài nguyên nhằm tránh bị tính phí ngoài phạm vi hướng dẫn này, bạn có thể xoá các tài nguyên đã tạo hoặc xoá dự án. Người dùng mới của Google Cloud đủ điều kiện tham gia chương trình Dùng thử miễn phí trị giá 300 USD.
Khởi động Cloud Shell
Mặc dù có thể vận hành Google Cloud từ xa trên máy tính xách tay, nhưng trong lớp học lập trình này, bạn sẽ sử dụng Google Cloud Shell, một môi trường dòng lệnh chạy trên Cloud.
Trên Bảng điều khiển Google Cloud, hãy nhấp vào biểu tượng Cloud Shell trên thanh công cụ ở trên cùng bên phải:

Quá trình này chỉ mất vài phút để cung cấp và kết nối với môi trường. Khi quá trình này kết thúc, bạn sẽ thấy như sau:

Máy ảo này được trang bị tất cả các công cụ phát triển mà bạn cần. Nền tảng này cung cấp một thư mục chính có dung lượng 5 GB và chạy trên Google Cloud, giúp tăng cường đáng kể hiệu suất mạng và hoạt động xác thực. Bạn có thể thực hiện mọi thao tác trong lớp học lập trình này trong trình duyệt. Bạn không cần cài đặt bất cứ thứ gì.
3. Thiết lập môi trường
Chúng ta sẽ tạo một VPC tuỳ chỉnh có các quy tắc về tường lửa. Nếu đã có VPC và Dự án, bạn có thể bỏ qua phần này.
Mở Cloud Shell ở trên cùng bên phải của bảng điều khiển. Đồng thời định cấu hình như sau: 
- Bật một số API mà chúng ta sẽ sử dụng trong phòng thí nghiệm này
gcloud services enable dns.googleapis.com
gcloud services enable aiplatform.googleapis.com
gcloud services enable servicedirectory.googleapis.com
- Đặt một số biến. Các biến này là Mã dự án và Mã mạng của VPC tuỳ chỉnh (bạn sẽ tạo VPC ở bước 4).
projectid=$(gcloud config get-value project)
networkid=anthropic-net
echo $projectid
echo $networkid
- Bây giờ, hãy tạo một VPC tuỳ chỉnh (anthropic-net), mạng con (vm1-subnet) và các quy tắc về tường lửa
gcloud compute networks create $networkid \
--project=$projectid \
--subnet-mode=custom \
--mtu=1460 \
--bgp-routing-mode=global

gcloud compute networks subnets create vm-subnet \
--project=$projectid --range=10.0.88.0/24 \
--stack-type=IPV4_ONLY --network=$networkid \
--region=us-east1

gcloud compute firewall-rules create $networkid-allow-icmp --project=$projectid \
--network=$networkid \
--description="Allows ICMP connections from any source to any instance on the network." \
--direction=INGRESS \
--priority=65534 \
--source-ranges=0.0.0.0/0 \
--action=ALLOW \
--rules=icmp

gcloud compute firewall-rules create $networkid-allow-ssh \
--project=$projectid \
--network=$networkid \
--description="Allows TCP connections from any source to any instance on the network using port 22." \
--direction=INGRESS --priority=65534 \
--source-ranges=0.0.0.0/0 --action=ALLOW \
--rules=tcp:22

gcloud compute firewall-rules create $networkid-allow-web \
--project=$projectid \
--network=$networkid \
--description="Allows TCP connections on port 8080." \
--direction=INGRESS --priority=1000 \
--source-ranges=0.0.0.0/0 --action=ALLOW \
--rules=tcp:8080
4. Bật Anthropic trong Model Garden của Vertex
Chúng ta cần cấp quyền truy cập ra bên ngoài vào Internet, vì vậy, hãy tạo một cổng Cloud NAT và đính kèm cổng đó.
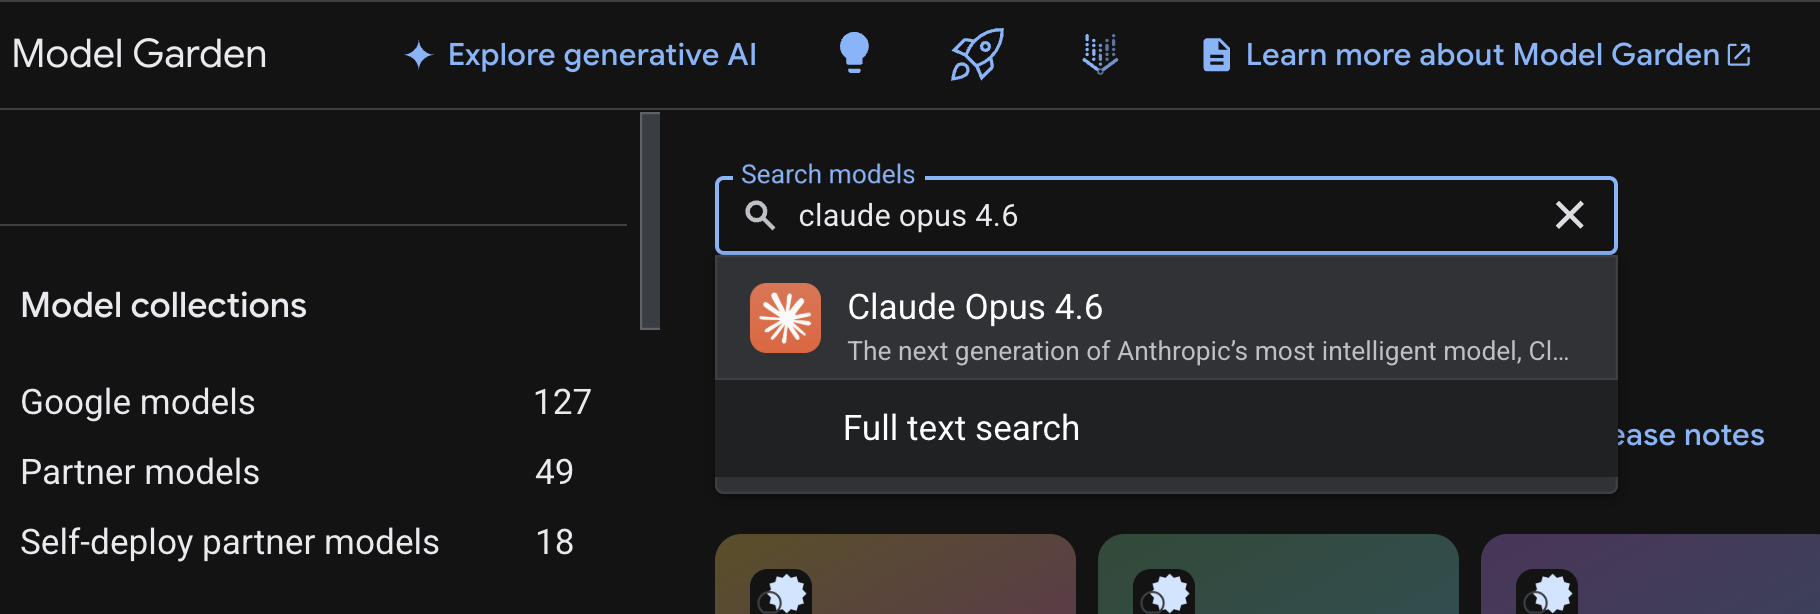
- Chuyển đến trang tổng quan Vertex AI rồi chọn Model Garden
- Tìm kiếm Anthropic rồi chọn Claude Opus 4.6
- Chọn Bật, bạn sẽ phải điền một số thông tin. Điền vào biểu mẫu rồi chọn Tiếp theo
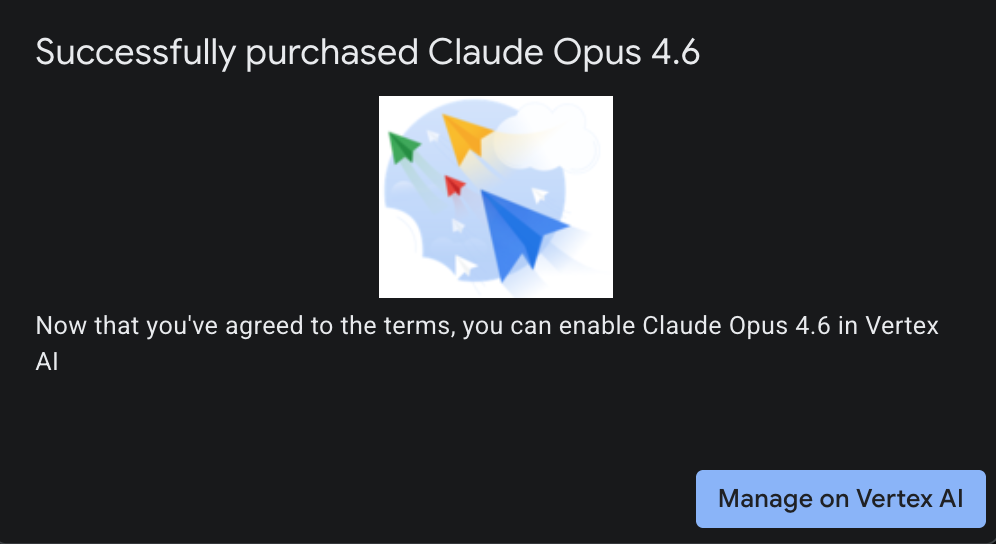
- Trên trang cuối cùng, hãy chọn Đồng ý để bật Claude 4.6 Opus
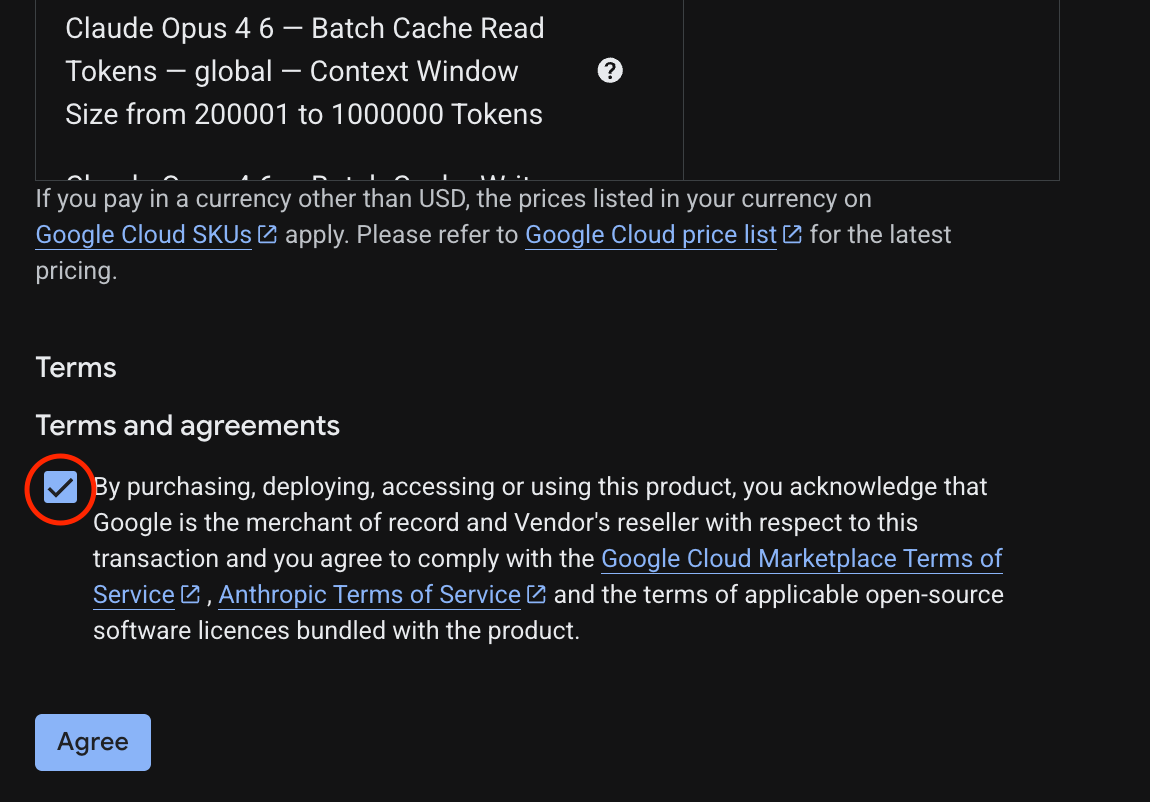
- Bạn sẽ thấy trang thành công.
5. Tạo cổng NAT và máy ảo
Chúng ta cần cấp quyền truy cập ra bên ngoài vào Internet, vì vậy, hãy tạo một cổng Cloud NAT và đính kèm cổng đó.
Trong Cloud Shell, hãy sử dụng các lệnh sau
- Tạo Cloud NAT và cổng Cloud NAT
gcloud compute routers create anthro-out-nat \
    --network $networkid \
    --region us-east1

gcloud compute routers nats create anthro-out-nat-gw \
    --router-region us-east1 \
    --router anthro-out-nat \
    --nat-all-subnet-ip-ranges \
    --auto-allocate-nat-external-ips
Bây giờ, hãy tạo một máy ảo để truy cập Anthropic trên Vertex AI thông qua Python SDK.
- Trong cùng một phiên Cloud Shell, hãy tạo anthro-vm bằng cách sử dụng nội dung sau. (Vui lòng chờ 3 đến 4 phút để VM hoạt động trong khi tập lệnh khởi động đang cài đặt)
gcloud compute instances create anthro-vm \
--project=$projectid \
--zone=us-east1-b \
--network-interface=stack-type=IPV4_ONLY,subnet=vm-subnet,no-address,network=$networkid \
--metadata startup-script="#! /bin/bash
      apt-get update
      apt-get install python3 python3-dev python3-venv tcpdump dnsutils -y
      python3 -m venv /opt/py-anthro-env
      /opt/py-anthro-env/bin/pip install -U google-genai 'anthropic[vertex]' rich
      chmod -R 777 /opt/py-anthro-env"
Bạn sẽ thấy một máy ảo được tạo mà không có địa chỉ IP công khai. Bây giờ, hãy định cấu hình của máy ảo
6. Định cấu hình máy ảo và kiểm thử
- Trong Google Cloud Shell, hãy SSH vào VM mới có tên là anthro-vm. (Bạn có thể cần đợi 3 phút để đảm bảo VM được thiết lập hoàn toàn)
gcloud compute ssh anthro-vm \
    --project=$projectid \
    --zone=us-east1-b \
    --tunnel-through-iap \
    -- -L 8080:localhost:8080
- Sau khi kết nối, hãy kiểm tra nhanh để xem chúng ta có thể kết nối với Vertex Gemini API hay không.
dig *-aiplatform.googleapis.com
- Bạn sẽ thấy nội dung tương tự (địa chỉ sẽ khác). Xin lưu ý rằng đường dẫn này là thông qua địa chỉ IP công khai vì API này là một API công khai.
; <<>> DiG 9.18.39-0ubuntu0.24.04.2-Ubuntu <<>> *-aiplatform.googleapis.com
;; global options: +cmd
;; Got answer:
;; ->>HEADER<<- opcode: QUERY, status: NOERROR, id: 3728
;; flags: qr rd ra; QUERY: 1, ANSWER: 16, AUTHORITY: 0, ADDITIONAL: 1

;; OPT PSEUDOSECTION:
; EDNS: version: 0, flags:; udp: 512
;; QUESTION SECTION:
;*-aiplatform.googleapis.com.   IN      A

;; ANSWER SECTION:
*-aiplatform.googleapis.com. 300 IN     A       172.217.204.95
*-aiplatform.googleapis.com. 300 IN     A       172.217.203.95
*-aiplatform.googleapis.com. 300 IN     A       173.194.215.95
*-aiplatform.googleapis.com. 300 IN     A       142.250.98.95
*-aiplatform.googleapis.com. 300 IN     A       173.194.217.95
*-aiplatform.googleapis.com. 300 IN     A       142.251.107.95
*-aiplatform.googleapis.com. 300 IN     A       74.125.196.95
- Bây giờ, hãy kích hoạt môi trường venv:
source /opt/py-anthro-env/bin/activate
- Bây giờ, hãy xác thực điều này để thực hiện một số kiểm thử sau. Chạy lệnh sau trong máy ảo, nhấn y khi được nhắc.
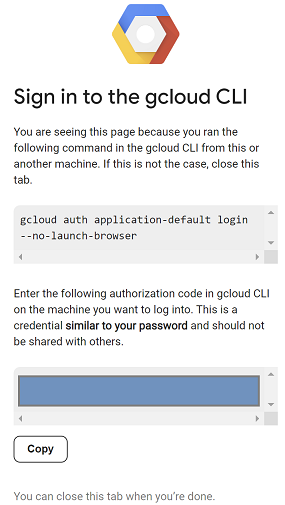
gcloud auth application-default login
- Tiếp theo, hãy sao chép URL xuất hiện trong phần bắt đầu bằng https://, mở một thẻ mới trong cửa sổ trình duyệt phòng thí nghiệm rồi dán URL đó. Chấp nhận lời nhắc.
- Khi bạn thấy lựa chọn sao chép sau đây, hãy chuyển về phiên anthro-vm của máy ảo và đối với Nhập mã uỷ quyền:, hãy dán mã bạn đã sao chép rồi nhấn phím Enter để xác thực.
- Bây giờ, hãy sử dụng python trong
env. Thao tác này sẽ tạo một tệp pythonsuper-gen-ai.pyyêu cầu Claude Opus 4.6 trả lời câu hỏi "Các bước chính để xây dựng AI tác nhân là gì?" sau đó lấy đầu ra và chuyển đến Gemini 3.1 Pro để tạo bản tóm tắt, rồi Gemini 3 Pro Image sẽ tạo một hình ảnh và lưu hình ảnh đó trên máy ảo.
Sao chép và dán nội dung sau.
cat << 'EOF' > super-gen-ai.py
import os
import subprocess
import google.auth
from google import genai
from google.genai import types
from anthropic import AnthropicVertex
from rich.console import Console
from rich.panel import Panel
from rich.spinner import SPINNERS
from rich.text import Text

# Custom Super Me Animation Spinner - Now with moving power-up!
SPINNERS["super_me"] = {
    "interval": 120,
    "frames": [
        "🧱🦖          🍄",
        "🧱 🦖        🍄 ",
        "🧱  🦖      🍄  ",
        "🧱   🦕    🍄   ",
        "🧱    🦖  🍄    ",
        "🧱     🦖🍄     ",
        "🧱      🌟      ",
        "🧱       🌟     ",
        "🧱        🌟    ",
        "🧱         🌟   ",
        "🧱        🌟    ",
        "🧱       🌟     ",
        "🧱      🌟      ",
        "🧱     🌟       ",
        "🧱    🌟        ",
        "🧱   🌟         ",
        "🧱  🌟          ",
        "🧱 🌟           ",
        "🧱🌟            "
    ]
}

console = Console()

def print_super_me_header():
    super_me_art = """
[bold red]   _____                       [/bold red][bold green]  __  __      _ [/bold green]
[bold red]  / ____|                      [/bold red][bold green] |  \/  |    | |[/bold green]
[bold red] | (___  _   _ _ __   ___ _ __ [/bold red][bold green] | \  / | ___| |[/bold green]
[bold red]  \___ \| | | | '_ \ / _ \ '__|[/bold red][bold green] | |\/| |/ _ \ |[/bold green]
[bold red]  ____) | |_| | |_) |  __/ |   [/bold red][bold green] | |  | |  __/_|[/bold green]
[bold red] |_____/ \__,_| .__/ \___|_|   [/bold red][bold green] |_|  |_|\___(_)[/bold green]
[bold red]              | |              [/bold red][bold green]                 [/bold green]
[bold red]              |_|              [/bold red][bold green]                 [/bold green]
    """
    console.print(super_me_art)
    console.rule("[bold gold1]⭐ LEVEL 1-1: Vertex AI Orchestrator ⭐[/bold gold1]")

def main():
    os.system('clear')  # Clears the terminal for a clean UI
    print_super_me_header()

    # Create the images directory
    os.makedirs("images", exist_ok=True)

    with console.status("[bold yellow]🪙  Collecting Coins (Authenticating)...[/bold yellow]", spinner="super_me"):
        try:
            creds, project_id = google.auth.default()
            LOCATION = "global"
        except Exception as e:
            console.print(f"[bold red]💥 GAME OVER! Authentication failed:[/bold red] {e}")
            return

    with console.status(f"[bold green]🍄 Powering up Clients for {project_id}...[/bold green]", spinner="super_me"):
        google_client = genai.Client(vertexai=True, location=LOCATION, project=project_id)
        claude_client = AnthropicVertex(region=LOCATION, project_id=project_id)

    console.print("\n[bold cyan]The Kingdom needs a strategy![/bold cyan]")

    # Auto-run prompt without user interaction
    question = "What are the key steps to building Agentic AI?"

    console.print(Panel(question, title="[bold green]Green Dino (Claude Opus) is entering the pipe...[/bold green]", border_style="green"))

    with console.status("[bold green]🟢 Green Dino is clearing the level...\n[/bold green]", spinner="super_me"):
        try:
            msg = claude_client.messages.create(
                model="claude-opus-4-6",
                max_tokens=2048,
                messages=[{"role": "user", "content": question}]
            )
            claude_text = msg.content[0].text
            console.print(f"[bold green]✓ Level Cleared! Green Dino generated {len(claude_text)} bytes of strategy.[/bold green]\n")
        except Exception as e:
            console.print(f"[bold red]💥 BOSS ATTACK (Claude API Error):[/bold red] {e}")
            return

    with console.status("[bold red]🔴 Red Hero (Gemini 3.1 Pro Preview) is summarizing the map...\n[/bold red]", spinner="super_me"):
        text_prompt = f"""
        I am providing you with a response generated by Claude.
        1. READ the text below.
        2. GENERATE a concise, bulleted executive summary.

        --- INPUT TEXT ---
        {claude_text}
        """

        try:
            text_response = google_client.models.generate_content(
                model="gemini-3.1-pro-preview",
                contents=text_prompt,
                config=types.GenerateContentConfig(temperature=0.7)
            )
            console.print("[bold red]✓ Super Me! Text Summary Complete.[/bold red]")
        except Exception as e:
            console.print(f"[bold red]💥 CHOMPER PLANT (Gemini Text Error):[/bold red] {e}")
            return

    with console.status("[bold blue]🔵 Mushroom Friend (Gemini 3 Pro Image) is painting the castle...\n[/bold blue]", spinner="super_me"):
        image_prompt = f"""
        CREATE a high-quality, futuristic illustration of autonomous AI agents for a tech blog header (16:9 aspect ratio).
        Base the image directly on the following text summary:

        {text_response.text}
        """

        try:
            image_response = google_client.models.generate_content(
                model="gemini-3-pro-image-preview",
                contents=image_prompt,
                config=types.GenerateContentConfig(
                    response_modalities=['TEXT', 'IMAGE'],
                    temperature=0.7
                )
            )
            console.print("[bold blue]✓ Masterpiece Complete![/bold blue]\n")
        except Exception as e:
            console.print(f"[bold red]💥 FALLING BLOCK (Gemini Image Error):[/bold red] {e}")
            return

    console.rule("[bold gold1]🚩 COURSE CLEAR! 🚩[/bold gold1]")

    if text_response.text:
        console.print(Panel(text_response.text.strip(),
                            title="[bold gold1]Gemini 3.1 Pro Summary[/bold gold1]",
                            border_style="gold1"))

    for part in image_response.parts:
        if image := part.as_image():
            # Save inside the images folder with the focus-specific name
            filename = "images/building-agentic.png"
            image.save(filename)
            console.print(f"\n[bold green]✓ REWARD SAVED:[/bold green] [underline]{os.path.abspath(filename)}[/underline]")

    console.rule("[bold red]Web Server Warp Pipe[/bold red]")
    with console.status("[bold yellow]Opening the warp pipe (HTTP server)...[/bold yellow]", spinner="super_me"):
        # Kill any existing server first so it doesn't crash on port binding
        os.system('pkill -f "http.server" > /dev/null 2>&1')

        # Start the server with the root directory set specifically to 'images'
        subprocess.Popen(
            ["python3", "-m", "http.server", "8080", "--directory", "images"],
            stdout=subprocess.DEVNULL,
            stderr=subprocess.DEVNULL
        )

    console.print("[bold green]✓ Warp Pipe is open in the background![/bold green]")
    console.print("[bold magenta]View your files here (Click Web Preview -> Preview on port 8080):[/bold magenta] [underline]http://localhost:8080/[/underline]\n")

if __name__ == "__main__":
    main()
EOF

python3 super-gen-ai.py
Tập lệnh này chạy trong một giao diện thú vị và khởi chạy một máy chủ web để bạn có thể xem đầu ra hình ảnh. Để chạy lại tập lệnh, hãy nhập python3 super-gen-ai.py.
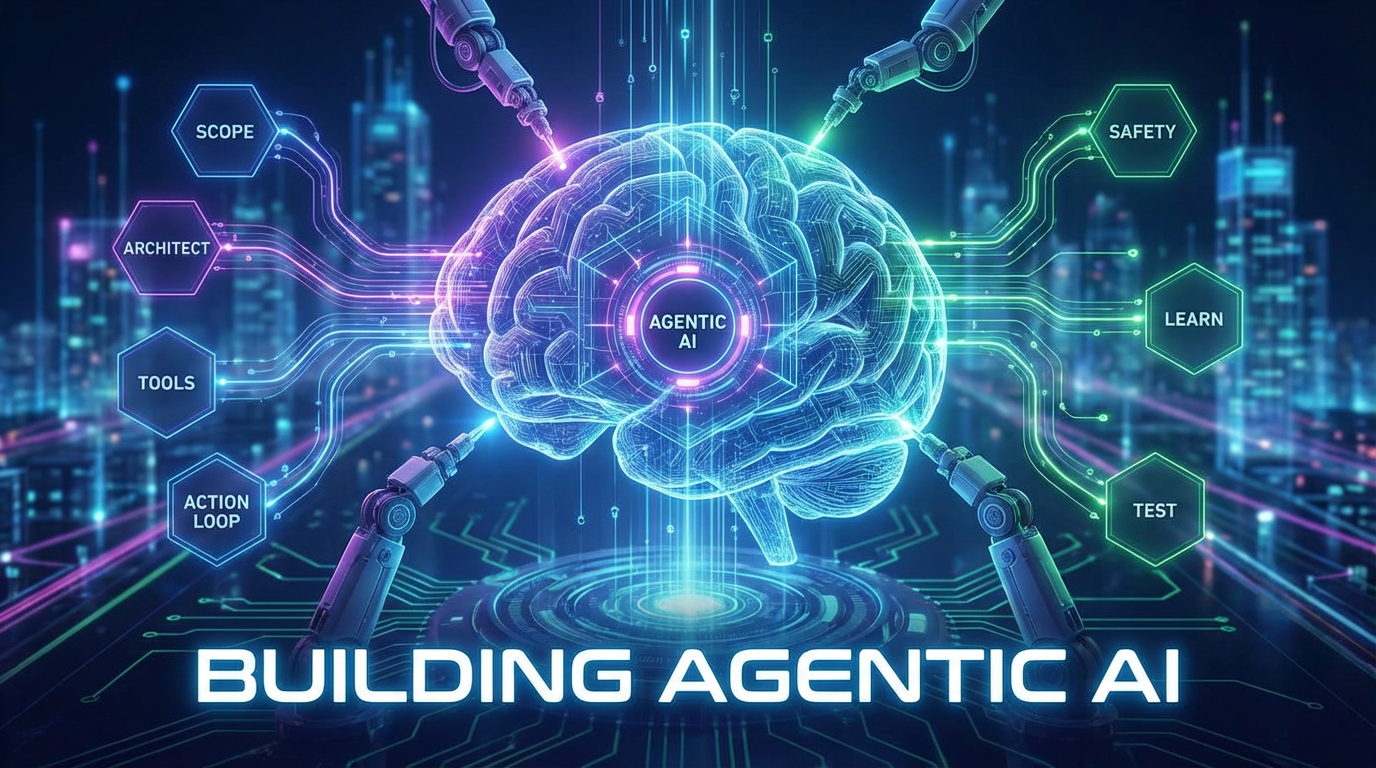
- Để xem trước trên web trong Cloud Shell, hãy chọn xem trước trên cổng 8080
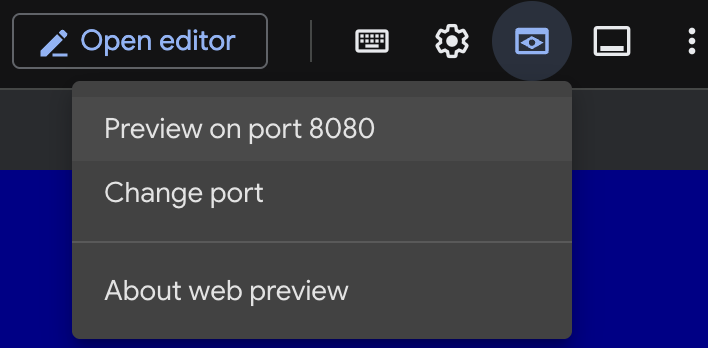
- Trong phiên duyệt web đang mở, hãy chọn building_agentic.png để xem hình ảnh được tạo. (Hình ảnh mẫu bên dưới do AI tạo)
- Trong Cloud Shell, để thoát khỏi máy chủ web, hãy chạy lệnh sau.
pkill -f "http.server"
- Tiếp theo, hãy nhập
exitđể quay lại trang chủ Cloud Shell. Sau khi hoàn tất, hãy tiếp tục.
7. Tạo điểm cuối PSC cho googleapis
Để bật kết nối riêng tư đến điểm cuối Vertex API, chúng ta sẽ tạo một điểm cuối Private Service Connect cho googleapis. Điều này sẽ cho phép chúng ta sử dụng một địa chỉ IP riêng tư mà chúng ta chỉ định để định tuyến lưu lượng truy cập đến các googleapis mà chúng ta cần, trong trường hợp này là Vertex Gemini.
- Mở Cloud Shell nếu chưa mở. Chúng ta sẽ tạo một IP cho điểm cuối PSC và tạo điểm cuối Private Service Connect. Trong trường hợp này, chúng ta sẽ sử dụng 192.168.255.230.
projectid=$(gcloud config get-value project)
networkid=anthropic-net

gcloud compute addresses create anthro-ip \
    --global \
    --purpose=PRIVATE_SERVICE_CONNECT \
    --addresses=192.168.255.230 \
    --network=$networkid

gcloud compute forwarding-rules create pscanthrovertex \
    --global \
    --network=$networkid \
    --address=anthro-ip \
    --target-google-apis-bundle=all-apis
- Xác minh
gcloud compute addresses list --filter="name=( 'anthro-ip' ...)"

gcloud compute forwarding-rules describe pscanthrovertex --global
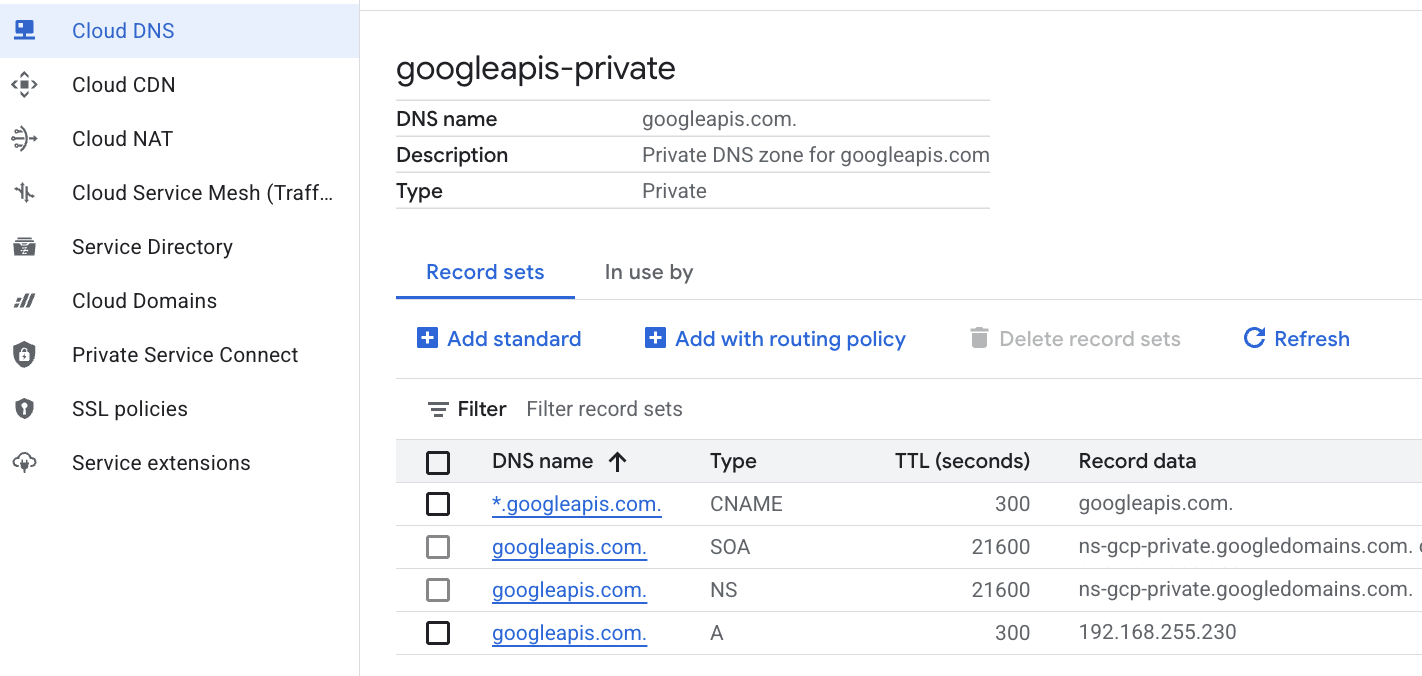
8. Tạo mục nhập DNS thủ công cho googleapis
Bạn có thể tạo một mục nhập DNS theo cách thủ công để trỏ đến điểm cuối PSC bằng DNS riêng tư. Điều này sẽ ảnh hưởng đến tất cả các mạng mà bạn chỉ định cho chiến dịch đó. Bây giờ, bạn sẽ tạo các mục sau
- Một vùng DNS riêng tư cho googleapis.com và đính kèm vùng này vào mạng anthropic-net.
- Bản ghi A ánh xạ miền gốc đến IP điểm cuối Private Service Connect (192.168.255.230)
- Bản ghi CNAME ký tự đại diện để chuyển hướng tất cả các miền con (ví dụ: aiplatform.googleapis.com) đến bản ghi A gốc
- Chạy các lệnh sau trong Cloud Shell.
gcloud dns managed-zones create googleapis-private \
    --description="Private DNS zone for googleapis.com" \
    --dns-name="googleapis.com." \
    --visibility="private" \
    --networks="anthropic-net"

gcloud dns record-sets create "googleapis.com." \
    --zone="googleapis-private" \
    --type="A" \
    --ttl="300" \
    --rrdatas="192.168.255.230"

gcloud dns record-sets create "*.googleapis.com." \
    --zone="googleapis-private" \
    --type="CNAME" \
    --ttl="300" \
    --rrdatas="googleapis.com."
- Liệt kê các nhóm bản ghi trong vùng để xác nhận rằng bản ghi A và CNAME đã được tạo đúng cách.
gcloud dns record-sets list --zone="googleapis-private"
- Trong chế độ xem bảng điều khiển, ứng dụng sẽ có dạng như sau. Bạn sẽ thấy một chế độ thiết lập có bản ghi A và CNAME như thế này, hãy xem
- Tiếp theo, chúng ta xác minh khả năng kết nối với những thay đổi này trên anthro-vm
9. Xác minh khả năng kết nối điểm cuối thông qua địa chỉ IP
Hãy kết nối bằng điểm cuối riêng tư để kết nối với Gemini.
- Trong Google Cloud Shell, hãy SSH vào máy ảo mới có tên là anthro-vm.
gcloud compute ssh anthro-vm \
    --project=$projectid \
    --zone=us-east1-b \
    --tunnel-through-iap \
    -- -L 8080:localhost:8080
- Trong VM, hãy kiểm tra đường dẫn kết nối đến aiplatform-pscanthrovertex.p.googleapis.com bằng lệnh
dig. Bạn sẽ thấy IP của điểm cuối PSC192.168.255.230
dig aiplatform-pscanthrovertex.p.googleapis.com +noall +answer
Hãy kết nối bằng điểm cuối riêng tư để kết nối với Gemini.
- Bây giờ, hãy thực hiện
digđể xem chúng ta có thể kết nối với Vertex Gemini API hay không.
dig *-aiplatform.googleapis.com
- Bạn sẽ thấy nội dung tương tự (địa chỉ sẽ khác). Xin lưu ý rằng đường dẫn này là thông qua địa chỉ IP của điểm cuối PSC.
; <<>> DiG 9.18.41-1~deb12u1-Debian <<>> *-aiplatform.googleapis.com
;; global options: +cmd
;; Got answer:
;; ->>HEADER<<- opcode: QUERY, status: NOERROR, id: 33703
;; flags: qr rd ra; QUERY: 1, ANSWER: 2, AUTHORITY: 0, ADDITIONAL: 1

;; OPT PSEUDOSECTION:
; EDNS: version: 0, flags:; udp: 512
;; QUESTION SECTION:
;*-aiplatform.googleapis.com.   IN      A

;; ANSWER SECTION:
*-aiplatform.googleapis.com. 300 IN     CNAME   googleapis.com.
googleapis.com.         300     IN      A       192.168.255.230

;; Query time: 8 msec
;; SERVER: 169.254.169.254#53(169.254.169.254) (UDP)
;; WHEN: Sat Nov 29 15:19:15 UTC 2025
;; MSG SIZE  rcvd: 86
- Sử dụng lệnh
ping. Chúng ta có thể kiểm tra nhanh. Lưu ý: IP này là một điểm cuối PSC và các lệnh ping của bạn sẽ không thành công.
ping -c 2 aiplatform.googleapis.com
- Bây giờ, hãy kích hoạt môi trường venv:
source /opt/py-anthro-env/bin/activate
- Bây giờ, hãy sử dụng python trong
env. Thao tác này sẽ tạo một tệp pythonstar-me.pyyêu cầu Claude Opus 4.6 "Give me a step by step recipe to make a roti for a beginner?" (Cho tôi công thức từng bước để làm bánh roti cho người mới bắt đầu). sau đó lấy kết quả đầu ra và chuyển kết quả đó đến Gemini 3.1 Pro để tạo bản tóm tắt và Gemini 3 Pro Image để tạo hình ảnh rồi lưu hình ảnh đó trên VM
cat << 'EOF' > star-me.py
import os
import subprocess
import google.auth
from google import genai
from google.genai import types
from anthropic import AnthropicVertex
from rich.console import Console
from rich.panel import Panel
from rich.spinner import SPINNERS
from rich.text import Text

# Custom Star Me Animation Spinner - Directional Flight!
SPINNERS["star_me"] = {
    "interval": 120,
    "frames": [
        "🌌 🚀              🛸 ",
        "🌌  🚀            🛸  ",
        "🌌   🚀          🛸   ",
        "🌌    🚀        🛸    ",
        "🌌     🚀      🛸     ",
        "🌌      🚀    🛸      ",
        "🌌       🚀  🛸       ",
        "🌌        🚀🛸        ",
        "🌌         💥         ",
        "🌌        ✨ ✨       ",
        "🌌       ✨   ✨      ",
        "🌌      ✨     ✨     ",
        "🌌     ✨       ✨    ",
        "🌌                    "
    ]
}

console = Console()

def print_star_me_header():
    star_me_art = """
[bold cyan]   _____ _______       _____    __  __ ______ [/bold cyan]
[bold cyan]  / ____|__   __|/\   |  __ \  |  \/  |  ____|[/bold cyan]
[bold cyan] | (___    | |  /  \  | |__) | | \  / | |__   [/bold cyan]
[bold cyan]  \___ \   | | / /\ \ |  _  /  | |\/| |  __|  [/bold cyan]
[bold cyan]  ____) |  | |/ ____ \| | \ \  | |  | | |____ [/bold cyan]
[bold cyan] |_____/   |_/_/    \_\_|  \_\ |_|  |_|______|[/bold cyan]
    """
    console.print(star_me_art)
    console.rule("[bold gold1]⭐ EPISODE I: The AI Awakening ⭐[/bold gold1]")

def main():
    os.system('clear')  # Clears the terminal for a clean UI
    print_star_me_header()

    # Create the images directory
    os.makedirs("images", exist_ok=True)

    with console.status("[bold yellow]🪙  Bypassing Security (Authenticating)...[/bold yellow]", spinner="star_me"):
        try:
            creds, project_id = google.auth.default()
            LOCATION = "global"
        except Exception as e:
            console.print(f"[bold red]💥 COMM LINK SEVERED! Authentication failed:[/bold red] {e}")
            return

    with console.status(f"[bold cyan]📡 Establishing secure connection for {project_id}...[/bold cyan]", spinner="star_me"):
        google_client = genai.Client(vertexai=True, location=LOCATION, project=project_id)
        claude_client = AnthropicVertex(region=LOCATION, project_id=project_id)

    console.print("\n[bold cyan]The Galaxy needs sustenance![/bold cyan]")

    # Auto-run prompt for the recipe
    question = "Give me a step by step recipe to make a roti for a beginner?"

    console.print(Panel(question, title="[bold green]Space Master (Claude Opus) is searching the archives...[/bold green]", border_style="green"))

    with console.status("[bold green]🟢 Space Master is compiling the ancient texts...\n[/bold green]", spinner="star_me"):
        try:
            msg = claude_client.messages.create(
                model="claude-opus-4-6",
                max_tokens=2048,
                messages=[{"role": "user", "content": question}]
            )
            claude_text = msg.content[0].text
            console.print(f"[bold green]✓ Archives Retrieved! Space Master generated a {len(claude_text)}-character Holocron.[/bold green]\n")
        except Exception as e:
            console.print(f"[bold red]💥 INTERFERENCE DETECTED (Claude API Error):[/bold red] {e}")
            return

    with console.status("[bold gold1]🟡 Protocol Bot (Gemini 3.1 Pro Preview) is translating the recipe...\n[/bold gold1]", spinner="star_me"):
        text_prompt = f"""
        I am providing you with a response generated by a Space Master.
        1. READ the text below.
        2. GENERATE a concise, bulleted executive summary.

        --- INPUT TEXT ---
        {claude_text}
        """

        try:
            text_response = google_client.models.generate_content(
                model="gemini-3.1-pro-preview",
                contents=text_prompt,
                config=types.GenerateContentConfig(temperature=0.7)
            )
            console.print("[bold gold1]✓ Translation Complete! The Protocol Bot has summarized the steps.[/bold gold1]")
        except Exception as e:
            console.print(f"[bold red]💥 SYSTEM FAILURE (Gemini Text Error):[/bold red] {e}")
            return

    with console.status("[bold blue]🔵 Astro Bot (Gemini 3 Pro Image) is projecting the hologram...\n[/bold blue]", spinner="star_me"):
        image_prompt = f"""
        CREATE a high-quality, beautiful illustration for a blog header (16:9 aspect ratio) of someone making roti, but with a subtle sci-fi, cinematic lighting aesthetic.
        Base the image directly on the following text summary:

        {text_response.text}
        """

        try:
            image_response = google_client.models.generate_content(
                model="gemini-3-pro-image-preview",
                contents=image_prompt,
                config=types.GenerateContentConfig(
                    response_modalities=['TEXT', 'IMAGE'],
                    temperature=0.7
                )
            )
            console.print("[bold blue]✓ Hologram Projection Ready![/bold blue]\n")
        except Exception as e:
            console.print(f"[bold red]💥 BAD COMPRESSOR (Gemini Image Error):[/bold red] {e}")
            return

    console.rule("[bold cyan]🚩 MISSION ACCOMPLISHED 🚩[/bold cyan]")

    if text_response.text:
        console.print(Panel(text_response.text.strip(),
                            title="[bold gold1]Protocol Bot Recipe Summary[/bold gold1]",
                            border_style="gold1"))

    for part in image_response.parts:
        if image := part.as_image():
            # Save inside the images folder with the focus-specific name
            filename = "images/cookingroti.png"
            image.save(filename)
            console.print(f"\n[bold green]✓ DATA SECURED:[/bold green] [underline]{os.path.abspath(filename)}[/underline]")

    console.rule("[bold cyan]Hyperlink Uplink[/bold cyan]")
    with console.status("[bold yellow]Opening the frequencies (HTTP server)...[/bold yellow]", spinner="star_me"):
        # Kill any existing server first so it doesn't crash on port binding
        os.system('pkill -f "http.server" > /dev/null 2>&1')

        # Start the server with the root directory set specifically to 'images'
        subprocess.Popen(
            ["python3", "-m", "http.server", "8080", "--directory", "images"],
            stdout=subprocess.DEVNULL,
            stderr=subprocess.DEVNULL
        )

    console.print("[bold green]✓ Transmitting on Port 8080![/bold green]")
    console.print("[bold magenta]View your files here (Click Web Preview -> Preview on port 8080):[/bold magenta] [underline]http://localhost:8080/[/underline]\n")

if __name__ == "__main__":
    main()
EOF

python3 star-me.py
Tập lệnh này chạy trong một giao diện thú vị và khởi chạy một máy chủ web để bạn có thể xem đầu ra hình ảnh. Để chạy lại tập lệnh, hãy nhập python3 star-me.py
- Bây giờ, hãy chuyển đến lựa chọn xem trước trên web trong Cloud Shell, chọn xem trước trên cổng 8080
- Chọn cookingroti.png để xem hình ảnh được tạo. (Mẫu bên dưới do AI tạo)

- Trong Cloud Shell, để thoát khỏi máy chủ web và quay lại máy ảo, hãy chạy lệnh sau.
pkill -f "http.server"
- Tiếp theo, hãy nhập
exitđể quay lại trang chủ Cloud Shell.
10. Xin chúc mừng
Xin chúc mừng! Bạn đã có những trải nghiệm thú vị và kết nối thành công với Anthropic Claude Opus 4.6 và Gemini 3.1 Pro trên Vertex bằng cả địa chỉ API công khai và riêng tư bằng Điểm cuối Kết nối dịch vụ riêng tư cho Googleapis. Chức năng này có thể mở rộng khả năng kết nối API riêng tư vào môi trường tại chỗ/môi trường đám mây khác được kết nối thông qua (Interconnect, Cross-Cloud Interconnect và VPC).
Dọn dẹp
gcloud compute instances delete anthro-vm --zone=us-east1-b --quiet

gcloud compute routers nats delete anthro-out-nat-gw --router=anthro-out-nat --region=us-east1 --quiet

gcloud compute routers delete anthro-out-nat --region=us-east1 --quiet

gcloud compute firewall-rules delete anthropic-net-allow-icmp anthropic-net-allow-ssh anthropic-net-allow-web --quiet

gcloud compute forwarding-rules delete pscanthrovertex --global --quiet

gcloud dns record-sets delete googleapis.com. --zone googleapis-private --type A --quiet

gcloud dns record-sets delete *.googleapis.com --zone googleapis-private --type CNAME --quiet

gcloud dns managed-zones delete googleapis-private --quiet

gcloud compute addresses delete anthro-ip --global --quiet

gcloud compute networks subnets delete vm-subnet --region=us-east1 --quiet

gcloud compute networks delete anthropic-net --quiet
Các bước tiếp theo / Tìm hiểu thêm
Bạn có thể đọc thêm về mạng Vertex AI
Codelab: Tạo tác nhân AI bằng ADK:Nền tảng
Tham gia phòng thí nghiệm tiếp theo
Tiếp tục hành trình khám phá của bạn với Google Cloud và xem các bài tập thực hành khác trên Google Cloud Skills Boost: