
About this codelab
1. Overview
With App Actions, you can use Google Assistant to jump directly into app features and complete tasks using your voice. As an Android developer, you implement capability elements to add App Actions. Capabilities let Assistant know which app features support user voice requests, and how you want those requests fulfilled.
This codelab covers beginner-level concepts for developing with App Actions. You should have prior experience with developing Android apps and Android intents to follow this codelab. If you're new to Android may instead want to get started with one of the codelabs for Android developer fundamentals.
What you'll build
In this codelab, you'll add two App Actions built-in intents (BIIs) to a sample fitness Android app, enabling users to start and stop an exercise timer by using their voice.
What you'll learn
You'll learn how to use BIIs from the Health and Fitness category to extend Assistant to an Android app. You will also learn to use the Google Assistant plugin for Android Studio to test your BIIs.
Prerequisites
Before continuing, make sure you have the following tools in your environment:
- A terminal to run shell commands with git installed.
- The latest version of Android Studio.
- A Google account with access to the [Google Play Console][].
- A physical or virtual Android device with Internet access to the Play Store.
Before continuing make sure the same Google account is signed in to Android Studio, and the Google app on your test device.
2. Understand how it works
App Actions connect users from Google Assistant to your Android app. How do they work?
When a user asks Assistant to perform a task using your app, Assistant matches their query to an App Actions capability defined in your app's shortcuts.xml XML resource.

Figure 1. A flow diagram demonstrating how Assistant processes an App Actions voice query.
Each capability element defines:
- An intent: The App Actions voice intent that should trigger the capability.
- One or more fulfillments: Android intents or deep links that Assistant generates to launch the app and fulfill the user voice request. Fulfillment definitions specify which parameters are expected from the user query, and how those parameters should be encoded into the launch instructions.
Intents
In Natural Language Understanding (NLU), an intent is a group of user phrases that carry similar meanings. Google has made dozens of "built-in" intents (BIIs) covering a wide variety of request types available with App Actions. For example, Assistant is trained to associate the phrases "Order a pizza" or "show me the dessert menu" with the ORDER_MENU_ITEM BII. With App Actions, you can leverage these BIIs to quickly extend common voice requests to app functionality.
Fulfillments
When a user request triggers an App Action in shortcuts.xml, your Android activity must then detect and handle the incoming Android intent or deep link and provide the user with their desired functionality. The result is a voice-driven user experience where Assistant invokes your app in response to a user's query.
3. Prepare your development environment
This codelab uses the Fitness sample app for Android. This app lets users start and stop an exercise timer, and view statistics about their exercise routines.
Download your base files
To get the base files for this codelab, run the following command to clone the GitHub repository:
git clone --branch codelab-start https://github.com/actions-on-google/appactions-fitness-kotlin.git
Once you've cloned the repository, open it in Android Studio:
- In the Welcome to Android Studio dialog, click Import project.
- Find and select the folder where you cloned the repo.
Update the Android application ID
Updating the app's application ID uniquely identifies the app on your test device and avoids a "Duplicate package name" error if the app is uploaded to the Play Console. To update the application ID, open app/build.gradle:
android {
...
  defaultConfig {
    applicationId "com.MYUNIQUENAME.android.fitactions"
    ...
  }
}
Replace "MYUNIQUENAME" in the applicationId field to something unique to you.
Try the app on your device
Before making further changes to the app's code, it's helpful to get an idea of what the sample app can do. Testing the app in your dev environment involves these steps:
- Opening your virtual or physical Android test device.
- Verifying that the Assistant app works.
- Using Android Studio to deploy and run the sample app on your device.
Follow these steps to test your app:
- In Android Studio, select Run > Run app or click Run
 in the toolbar.
 - If using a virtual device, in the Select Deployment Target dialog, select a virtual device and click OK. The recommended OS version is Android 8 (API level 26) or higher, although Actions run on devices as early as Android 5 (API level 21).
- After opening the app, long-press the Home button to set up Assistant and verify that it works. Sign in to Assistant if you haven't already.
- Re-open the app.
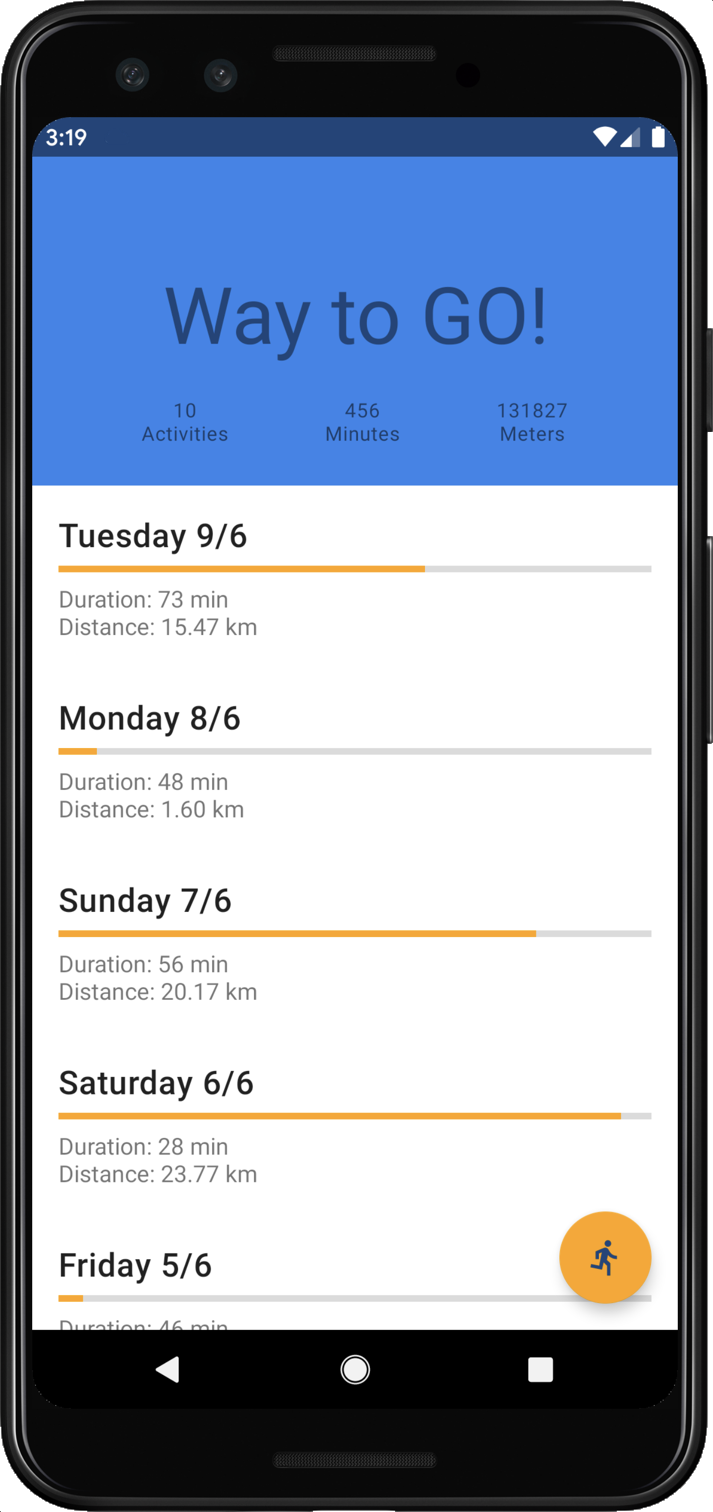
Figure 2. The Fit Actions sample app displaying exercise statistics.
Briefly explore the app to see what it can do. Tapping the Run icon starts an exercise timer, and tapping the X icon then stops the timer. These are the tasks you'll enable for voice control with App Actions.
Install the Google Assistant plugin
The Google Assistant plugin allows you to test your App Actions on a test device. Follow these steps to add it to Android Studio:
- Go to File > Settings (Android Studio > Preferences on MacOS).
- In the Plugins section, go to Marketplace and search for "Google Assistant".
- Install the tool and restart Android Studio.
4. Add the Start Exercise BII capability
The actions.intent.START_EXERCISE BII lets users open an app and start a workout using their voice. In this step, you implement a capability for this BII, which allows users to ask Assistant to start a run in the Fitness app.
Define the capability
Assistant uses capability elements defined in shortcuts.xml to process voice commands voice with the following steps:
- Assistant matches the user voice query to a BII defined in your app's capabilities.
- Assistant extracts values from the query into BII parameters. Each parameter is added to a
Bundleattached to a generatedIntent. - Assistant uses the
Intentto launch the app, giving the app access to the bundled parameters.
The START_EXERCISE BII supports the exercise.name BII parameter. You will use this parameter to allow users to specify the type of exercise to track in the app.
Add the START_EXERCISE BII to your app by adding this capability to shortcuts.xml, located in the app/src/main/res/xml sample project directory:
<!-- shortcuts.xml -->

<capability android:name="actions.intent.START_EXERCISE">
  <intent
    android:action="android.intent.action.VIEW"
    android:targetPackage="PUT_YOUR_APPLICATION_ID_HERE"
    android:targetClass="com.devrel.android.fitactions.FitMainActivity">
    <parameter
      android:name="exercise.name"
      android:key="exerciseType"/>
  </intent>
</capability>
Replace PUT_YOUR_APPLICATION_ID_HERE with the unique applicationId you defined in the previous step.
The preceding sample XML:
- Declares a capability for the
START_EXERCISEBII. - Specifies the Android
intentthat Assistant generates to launch the app:- The
targetPackageandtargetClassattributes specify the receiving activity. - The
parameterattribute maps theexercise.nameBII parameter toexerciseTypein theBundleextras received by the activity.
- The
Handle BII parameters with an inline inventory
BII parameters represent the elements extracted from an Assistant user query. For example, when a user says, "Hey Google, start a run on ExampleApp," Assistant extracts "run" into the exercise.name schema.org BII parameter. For some BIIs, you can instruct Assistant to match BII parameters to a set of identifiers expected by your app.
You do this by binding inline inventory elements to the BII parameter. An inline inventory is a set of supported BII parameter values, such as "run", "hike", and "jog", and their corresponding shortcut ID, like EXERCISE_RUN. This inventory binding enables Assistant to pass the shortcut ID for matching parameters, instead of the raw query value, to your fulfillment activity.
Some BII parameters, like exercise.name, require an inline inventory to function. To handle this parameter, add the following inventory shortcut elements to shortcuts.xml:
<!-- shortcuts.xml -->

<shortcuts>
  <shortcut
    android:shortcutId="running"
    android:shortcutShortLabel="@string/activity_running">
    <capability-binding android:key="actions.intent.START_EXERCISE">
      <parameter-binding
        android:key="exercise.name"
        android:value="@array/runningSynonyms"/>
    </capability-binding>
  </shortcut>

  <shortcut
    android:shortcutId="walking"
    android:shortcutShortLabel="@string/activity_walking">
    <capability-binding android:key="actions.intent.START_EXERCISE">
      <parameter-binding
        android:key="exercise.name"
        android:value="@array/walkingSynonyms"/>
    </capability-binding>
  </shortcut>

  <shortcut
    android:shortcutId="cycling"
    android:shortcutShortLabel="@string/activity_cycling">
    <capability-binding android:key="actions.intent.START_EXERCISE">
      <parameter-binding
        android:key="exercise.name"
        android:value="@array/cyclingSynonyms"/>
    </capability-binding>
  </shortcut>

  <capability> ... </capability>
</shortcuts>
In the preceding code, you defined three shortcuts representing an inline inventory for the app's supported exercise types: running, walking, and cycling. Each shortcut is bound to the capability in the following ways:
- Each
capability-bindingelement'sandroid:keyattribute refers to the sameSTART_EXCERCISEBII defined for the capability. - The
parameter-bindingelement of each shortcut keys to theexercise.nameBII parameter.
Add inline inventory synonyms
The android:value attributes of the parameter-binding element in the preceding inventory shortcuts refer to an array resource of synonyms for each inventory element. Synonyms enable variations of an element type, like "run", "jog", and "sprint" to refer to the same shortcutId. Add the following synonym entries to the project's array.xml resource:
<!-- array.xml -->
<array name="runningSynonyms">
  <item>Run</item>
  <item>Jog</item>
  <item>Jogging</item>
  <item>Sprint</item>
</array>

<array name="walkingSynonyms">
  <item>Walk</item>
  <item>Hike</item>
  <item>Hiking</item>
</array>

<array name="cyclingSynonyms">
  <item>Biking</item>
  <item>Riding</item>
  <item>Pedaling</item>
</array>
Fulfill incoming Android intents
Android intents are messaging objects Android uses to request an action from another app. Assistant fulfills users' voice queries by generating an intent from the configuration details in the triggered capability. In order to fulfill intents for the START_EXERCISE capability, update the FitMainActivity target class to handle the incoming intent and BII parameters.
First, replace the Intent.handleIntent function with the following code:
//FitMainActivity.kt

private fun Intent.handleIntent() {
  when (action) {
    // When the BII is matched, Intent.Action_VIEW will be used
    Intent.ACTION_VIEW -> handleIntent(data)
    // Otherwise start the app as you would normally do.
    else -> showDefaultView()
  }
}
Next, add a new handleIntent function to the class with the following code:
//FitMainActivity.kt

/**
 * Use extras provided by the intent to handle the different BIIs
 */

private fun handleIntent(data: Uri?) {
  // path is normally used to indicate which view should be displayed
  // i.e https://fit-actions.firebaseapp.com/start?exerciseType="Running" -> path = "start"
  var actionHandled = true

  val startExercise = intent?.extras?.getString(START_EXERCISE)
  // Add stopExercise variable here

  if (startExercise != null){
    val type = FitActivity.Type.find(startExercise)
    val arguments = Bundle().apply {
      putSerializable(FitTrackingFragment.PARAM_TYPE, type)
    }
    updateView(FitTrackingFragment::class.java, arguments)
  } // Add conditional for stopExercise
  else{
   // path is not supported or invalid, start normal flow.
   showDefaultView()

   // Unknown or invalid action
   actionHandled = false
  }
  notifyActionSuccess(actionHandled)
}
In the preceding Intent.handleIntent function, when ACTION_VIEW is triggered, the App Action intent data is passed to the handleIntent function. The BII parameters bundled in the START_EXERCISE intent are accessed via intent?.extras?.getString(START_EXERCISE). The rest of the function updates the FitTrackingFragment to display the chosen startExercise fitness type.
Test your App Action
During App Actions development, you use the Google Assistant plugin to preview your Actions on a test device. You can also use the plugin to adjust an Action's intent parameter values to test how your app handles the various ways a user might phrase an Assistant request for your app.
To test your App Action with the plugin, follow these steps:
- Run your app in Android Studio by choosing Run > Run App or by clicking the Run icon on the top toolbar.
- Go to Tools > App Actions > Google Assistant > App Actions Test Tool.
- Click Create Preview. If asked, review and accept the App Actions policies and terms of service.
- Select the
actions.intent.START_EXERCISEbuilt-in intent. - In the exercise box, leave the default running value.
- Click Run App Action. Verify that Assistant deep links into the app's exercise timer, and that the timer has begun a running type workout.
You've implemented your first App Actions with the START_EXERCISE BII. Congrats! Next, we'll enable users to stop a running workout in your app.
5. Add the Stop Exercise BII capability
The actions.intent.STOP_EXERCISE BII allows users to stop a workout session by asking things like, "Hey Google, stop my run on ExampleApp." Implement this BII in the Fitness app by adding a second capability to shortcuts.xml:
<!-- shortcuts.xml -->

<capability android:name="actions.intent.STOP_EXERCISE">
  <intent
    android:action="android.intent.action.VIEW"
    android:targetPackage="PUT_YOUR_APPLICATION_ID_HERE"
    android:targetClass="com.devrel.android.fitactions.FitMainActivity">
    <!-- Eg. name = "Running" -->
    <parameter
        android:name="exercise.name"
        android:key="stopExercise"/>
  </intent>
</capability>
Replace PUT_YOUR_APPLICATION_ID_HERE with your unique applicationId.
Handle BII parameters with an inline inventory
This BII supports the same exercise.name parameter as the START_EXERCISE BII, allowing users to specify which active workout they want to end. To enable this, add a second set of inventory shortcut elements to shortcuts.xml:
<!-- shortcuts.xml -->

<shortcut
  android:shortcutId="running"
  android:shortcutShortLabel="@string/activity_running">
  <capability-binding android:key="actions.intent.STOP_EXERCISE">
      <parameter-binding
          android:key="exercise.name"
          android:value="@array/runningSynonyms"/>
  </capability-binding>
</shortcut>

<shortcut
  android:shortcutId="walking"
  android:shortcutShortLabel="@string/activity_walking">
  <capability-binding android:key="actions.intent.STOP_EXERCISE">
      <parameter-binding
          android:key="exercise.name"
          android:value="@array/walkingSynonyms"/>
  </capability-binding>
</shortcut>

<shortcut
  android:shortcutId="cycling"
  android:shortcutShortLabel="@string/activity_cycling">
  <capability-binding android:key="actions.intent.STOP_EXERCISE">
      <parameter-binding
          android:key="exercise.name"
          android:value="@array/cyclingSynonyms"/>
  </capability-binding>
</shortcut>
Fulfill incoming Android intents
Enable the app to handle incoming STOP_EXERCISE Android intents by updating the FitMainActivity class. First, add a variable to the handleIntent function to hold the STOP_EXERCISE intent data:
// FitMainActivity.kt

private fun handleIntent(data: Uri?) {
  val stopExercise = intent?.extras?.getString(STOP_EXERCISE)
  //...
}
Next, update the handleIntent function's conditional logic to handle STOP_EXERCISE intents:
// FitMainActivity.kt

private fun handleIntent(data: Uri?) {
  //...
  if (startExercise != null){
    val type = FitActivity.Type.find(startExercise)
    val arguments = Bundle().apply {
      putSerializable(FitTrackingFragment.PARAM_TYPE, type)
    }
    updateView(FitTrackingFragment::class.java, arguments)
  } // Add conditional for stopExercise
  <strong>
  } else if(stopExercise != null){
    // Stop the tracking service if any and return to home screen.
    stopService(Intent(this, FitTrackingService::class.java))
    updateView(FitStatsFragment::class.java)
  }
  </strong>
  //...
}
In the preceding code, you updated the handleIntent function to check for the STOP_EXERCISE BII in the incoming Android intent. If found, the function stops the active timer and returns the user to the home screen.
Test your App Action
Test your App Action using the Google Assistant plugin by following these steps:
- Run your app in Android Studio by choosing Run > Run App or by clicking the Run icon on the top toolbar.
- In the app, start a new "running" exercise.
- Open the plugin in Android Studio: go to Tools > App Actions > Google Assistant > App Actions Test Tool.
- Click Create Preview.
- Select the
actions.intent.STOP_EXERCISEbuilt-in intent. - In the exercise box, leave the default running value.
- Click Run App Action. Verify that Assistant stops the workout and returns you to the home screen.
6. Next steps
Congratulations!
You now understand how to voice-enable an Android app using Assistant built-in intents. In this codelab, you learned:
- How to let users deep dive to specific app features using Assistant.
- How to use inline inventory.
- How to test BIIs using the Google Assistant plugin.
What's next
From here, you can try making further refinements to your Fitness app. To reference the finished project, see the main branch on GitHub.
Here are some suggestions for further learning about extending this app with App Actions:
- Check out our other App Actions codelabs.
- Visit the App Actions built-in intents reference to discover more BIIs to extend your apps to Assistant.
To continue your Actions on Google journey, explore these resources:
- developers.google.com/assistant: Official documentation site for Actions on Google.
- App Actions sample index: Sample apps and code for exploring App Actions capabilities.
- Actions on Google GitHub repo: Sample code and libraries.
- r/GoogleAssistantDev: Official Reddit community for developers working with Google Assistant.
Follow us on Twitter @ActionsOnGoogle to stay tuned to our latest announcements, and tweet to #appactions to share what you have built!
Feedback survey
Finally, please fill out this survey to give feedback about your experience with this codelab.