
1. Overview
ARCore is a platform for building augmented reality apps on mobile devices. The Cloud Anchors API gives you the ability to create AR apps that share a common frame-of-reference, enabling multiple users to place virtual content in the same real-world location.
This codelab guides you through the Cloud Anchors API. You will take an existing ARCore app, modify it to use Cloud Anchors, and create a shared AR experience.
ARCore Anchors and Persistent Cloud Anchors
A fundamental concept in ARCore is that of an Anchor, which describes a fixed position in the real world. ARCore automatically adjusts the value of an Anchor's pose as its motion tracking improves over time.
Cloud Anchors are Anchors that are hosted in the cloud. They can be resolved by multiple users to establish a common frame of reference across users and their devices.
Hosting an Anchor
When an anchor is hosted, the following things happen:
- The Anchor's pose with respect to the world is uploaded to the cloud, and a Cloud Anchor ID is obtained.
The Cloud Anchor ID is a string that needs to be sent to anyone who wants to resolve this anchor. - A dataset containing visual data for the anchor is uploaded to Google servers.
This dataset contains visual data seen by the device recently. Moving the device around a bit to capture the area around the anchor from different viewpoints before hosting will result in better localization.
Transferring Cloud Anchor IDs
In this codelab, you will transfer Cloud Anchor IDs using Firebase. You are free to share Cloud Anchor IDs using other means.
Resolving an anchor
You can use the Cloud Anchor API to resolve an anchor using its Cloud Anchor ID. This creates a new anchor in the same physical location as the original hosted anchor. While resolving, the device must look at the same physical environment as the original hosted anchor.
Persistent Cloud Anchors
Prior to 1.20, Cloud Anchors could only be resolved for 24 hours after they are hosted. With the Persistent Cloud Anchors API, you can create a cloud anchor that can be resolved for 1 day to 365 days after creation.
What you will build
In this codelab, you're going to build upon a pre-existing ARCore app. By the end of the codelab, your app will:
- Be able to host persistent Cloud Anchors and obtain Cloud Anchor IDs.
- Save Cloud Anchor IDs on the device for easy retrieval using Android
SharedPreferences. - Use saved Cloud Anchor IDs to resolve previously hosted anchors. This makes it easy for us to simulate a multi user experience with a single device for the purposes of this codelab.
- Share Cloud Anchor IDs with another device running the same app, so multiple users see the Android statue in the same position.
An Android statue is rendered at the position of the Cloud Anchor:

What you'll learn
- How to host Anchors using the ARCore SDK and obtain a Cloud Anchor ID.
- How to use Cloud Anchor IDs to resolve Anchors.
- How to store and share Cloud Anchor IDs between different AR sessions on the same device or on different devices.
What you'll need
- A supported ARCore device, connected via a USB cable to your development machine.
- Google Play Services for AR 1.22 or later.
- A development machine with Android Studio (v3.0 or later).
2. Set up your development environment
Setting up the development machine
Connect your ARCore device to your computer via the USB cable. Make sure that your device allows USB debugging.
Open a terminal and run adb devices, as shown below:
adb devices

List of devices attached
<DEVICE_SERIAL_NUMBER>    device
The <DEVICE_SERIAL_NUMBER> will be a string unique to your device. Make sure that you see exactly one device before continuing.
Downloading and installing the code
You can either clone the repository:
git clone https://github.com/googlecodelabs/arcore-cloud-anchors.git
Or download a ZIP file and extract it:
Launch Android Studio. Click Open an existing Android Studio project. Then, navigate to the directory where you extracted the zip file downloaded above, and double-click on the arcore-cloud-anchors directory.
This is a single Gradle project with multiple modules. If the Project pane on the top left of Android Studio isn't already displayed in the Project pane, click Projects from the drop-down menu. The result should like this:

You will work primarily in the work module. Other modules include a helpers module which contains a set of useful wrapper classes that you will use. There are also complete solutions for each part of the codelab. Except for the helpers module, each module is a buildable app.
If you see a dialog recommending that you upgrade the Android Gradle Plugin, click Don't remind me again for this project:

Click Run > Run... > ‘work'. In the Select Deployment Target dialog that displays, your device should be listed under Connected Devices. Select your device and click OK. Android Studio will build the initial app and run it on your device.
When you run the app for the first time, it will request the CAMERA permission. Tap ALLOW to continue.

How to use the app
- Move the device around to help the app find a plane. A plane will be shown as a dotted surface when it is found.
- Tap somewhere on the plane to place an anchor. An Android figure will be drawn where the anchor was placed. This app only allows you to place one anchor at a time.
- Move the device around. The figure should appear to stay in the same place even though the device is moving around.
- Press the CLEAR button to remove the anchor. This will allow you to place another anchor.

Right now, this app is only using the motion tracking provided by ARCore to track an anchor in a single run of the app. If you decide to quit, kill, and restart the app, the previously placed anchor and any information related to it, including its pose, will be lost.
In the next few sections, you will build on this app to see how anchors can be shared across AR sessions.
3. Host an Anchor
In this section you will modify the work project to host an anchor. Before you write code, you will need to implement a few modifications to the app's configuration.
Declare INTERNET permissions
Because Cloud Anchors require communication with the ARCore Cloud Anchor API service, your app must have permission to access the internet.
In your AndroidManifest.xml file, add the following line just below the android.permission.CAMERA permission declaration:
<!-- Find this line... -->
<uses-permission android:name="android.permission.CAMERA"/>

<!-- Add the line right below -->
<uses-permission android:name="android.permission.INTERNET"/>
Enable the ARCore API
- Go to the ARCore API service page.
- In the projects list, select a project or create a new one.
- Click Enable.
Set up Keyless authentication
To use Persistent Cloud Anchors, you'll need to use Keyless authentication to authenticate with the ARCore API.
- Go to the Google Cloud Platform Console.
- From the projects list, select a project.
- If the APIs & services page isn't already open, open the console left side menu and select APIs & Services.
- On the left, click Credentials.
- Click Create Credentials, then select OAuth client ID.
- Fill in the following values:
- Application type: Android
- Package name:
com.google.ar.core.codelab.cloudanchor
- Retrieve your debug signing certificate fingerprint:
- In your Android Studio project, open the Gradle toolpane.
- In cloud-anchors > work > Tasks > android, run the signingReport task.
- Copy the SHA-1 fingerprint into the SHA-1 certificate fingerprint field in Google Cloud.
Configure ARCore
Next, you will modify the app to host an anchor on a user tap instead of a regular one. To do that, you will need to configure the ARCore Session to enable Cloud Anchors.
In the CloudAnchorFragment.java file, add the following code:
// Find this line...
session = new Session(requireActivity());

// Add these lines right below:
// Configure the session.
Config config = new Config(session);
config.setCloudAnchorMode(CloudAnchorMode.ENABLED);
session.configure(config);
Before proceeding further, build and run your app. Make sure to only build the work module. Your app should build successfully and be running the same as before.
Host an anchor
It's time to host an anchor that will be uploaded to the ARCore API.
Add the following new field to your CloudAnchorFragment class:
// Find this line...
private Anchor currentAnchor = null;

// Add these lines right below.
@Nullable
private Future future = null;
Remember to add an import for com.google.ar.core.Future.
Modify the onClearButtonPressed method as follows:
private void onClearButtonPressed() {
  // Clear the anchor from the scene.
  if (currentAnchor != null) {
    currentAnchor.detach();
    currentAnchor = null;
  }

  // The next part is the new addition.
  // Cancel any ongoing asynchronous operations.
  if (future != null) {
    future.cancel();
    future = null;
  }
}
Next, add the following method to your CloudAnchorFragment class:
private void onHostComplete(String cloudAnchorId, CloudAnchorState cloudState) {
  if (cloudState == CloudAnchorState.SUCCESS) {
    messageSnackbarHelper.showMessage(getActivity(), "Cloud Anchor Hosted. ID: " + cloudAnchorId);
  } else {
    messageSnackbarHelper.showMessage(getActivity(), "Error while hosting: " + cloudState.toString());
  }
}
Find the handleTap method in the CloudAnchorFragment class, and add these lines:
// Find this line...
currentAnchor = hit.createAnchor();

// Add these lines right below:
messageSnackbarHelper.showMessage(getActivity(), "Now hosting anchor...");
future = session.hostCloudAnchorAsync(currentAnchor, 300, this::onHostComplete);
Run your app from Android Studio again. You should see the message "Now hosting anchor..." when you place an anchor. You should see another message when the hosting completes successfully. If you see "Error hosting anchor: ERROR_NOT_AUTHORIZED", verify that your OAuth client is configured properly.

Anyone who knows the anchor ID and is present in the same physical space as the anchor can use the anchor ID to create an anchor at the exact same pose (position and orientation) relative to the environment around them.
However, the anchor ID is long, and not easy for another user to enter manually. In the following sections, you will store Cloud Anchor IDs in an easy-to-retrieve fashion in order to allow anchor resolving on the same or another device.
4. Store IDs and Resolve Anchors
In this part, you will assign short codes to the long Cloud Anchor IDs to make it easier for another user to enter manually. You will use the Shared Preferences API to store the Cloud Anchor IDs as values in a key-value table. This table will persist even if the app is killed and restarted.
A helper class called StorageManager is already provided for you. This is a wrapper around the SharedPreferences API that has methods for generating new unique short codes, and reading/writing Cloud Anchor IDs.
Use StorageManager
Modify CloudAnchorFragment to use StorageManager to store Cloud Anchor IDs with short codes, so they can be retrieved easily.
Create the following new field in CloudAnchorFragment:
// Find this line...
private TapHelper tapHelper;

// And add the storageManager.
private final StorageManager storageManager = new StorageManager();
Then modify the onHostComplete method:
private void onHostComplete(String cloudAnchorId, CloudAnchorState cloudState) {
  if (cloudState == CloudAnchorState.SUCCESS) {
    int shortCode = storageManager.nextShortCode(getActivity());
    storageManager.storeUsingShortCode(getActivity(), shortCode, anchor.getCloudAnchorId());
    messageSnackbarHelper.showMessage(
        getActivity(), "Cloud Anchor Hosted. Short code: " + shortCode);
  } else {
    messageSnackbarHelper.showMessage(getActivity(), "Error while hosting: " + cloudState.toString());
  }
}
Now, build and run the app from Android Studio. You should see short codes being displayed instead of the long Cloud Anchor IDs when you create and host an anchor.
Immediately after placing an anchor | After waiting for a bit |
|
|


Note that the short codes generated by StorageManager are currently always assigned in increasing order.
Next, you will add a few UI elements that will allow you to enter short codes and recreate the anchors.
Add the Resolve Button
You will add another button next to the CLEAR button. This will be the RESOLVE button. Clicking the RESOLVE button will open a dialog box that prompts the user for a short code. The short code is used to retrieve the Cloud Anchor ID from StorageManager and resolve the anchor.
To add the button, you will need to modify the res/layout/cloud_anchor_fragment.xml file. In Android Studio, double-click on the file, then click on the "Text" tab at the bottom to display the raw XML. Make the following modifications:
<!-- Find this element. -->
<Button
    android:text="CLEAR"
    android:id="@+id/clear_button"
    android:layout_width="wrap_content"
    android:layout_height="wrap_content"/>

<!-- Add this element right below. -->
<Button
    android:text="RESOLVE"
    android:id="@+id/resolve_button"
    android:layout_width="wrap_content"
    android:layout_height="wrap_content"/>
Now, add a new field to the CloudAnchorFragment:
private Button resolveButton;
Add a new method:
private void onResolveButtonPressed() {
  ResolveDialogFragment dialog = new ResolveDialogFragment();
  dialog.show(getFragmentMagetActivity().getSupportFragmentManagernager(), "Resolve");
}
Initialize resolveButton in the onCreateView method as follows:
// Find these lines...
Button clearButton = rootView.findViewById(R.id.clear_button);
clearButton.setOnClickListener(v -> onClearButtonPressed());

// Add these lines right below.
resolveButton = rootView.findViewById(R.id.resolve_button);
resolveButton.setOnClickListener(v -> onResolveButtonPressed());
Find the handleTap method, and modify it:
private void handleTap(Frame frame, Camera camera) {
  // ...

  // Find this line.
  currentAnchor = hit.createAnchor();

  // Add this line right below.
  getActivity().runOnUiThread(() -> resolveButton.setEnabled(false));
}
Add a line in the onClearButtonPressed method:
private void onClearButtonPressed() {
  // Clear the anchor from the scene.
    if (currentAnchor != null) {
      currentAnchor.detach();
      currentAnchor = null;
    }

    // Cancel any ongoing async operations.
    if (future != null) {
      future.cancel();
      future = null;
    }

  // The next line is the new addition.
  resolveButton.setEnabled(true);
}
Build and run the app from Android Studio. You should see the RESOLVE button next to the CLEAR button. Clicking the RESOLVE button should result in a dialog popping up as shown below.
The RESOLVE button is now visible | Clicking the button causes this dialog to appear |
|
|


Tapping on the plane and hosting an anchor should disable the RESOLVE button, but tapping on the CLEAR button should enable it again. This is by design, so that only one anchor is in the scene at a time.
The "Resolve Anchor" dialog does nothing, but you will change that now.
Resolve Anchors
Add the following methods in the CloudAnchorFragment class:
private void onShortCodeEntered(int shortCode) {
  String cloudAnchorId = storageManager.getCloudAnchorId(getActivity(), shortCode);
  if (cloudAnchorId == null || cloudAnchorId.isEmpty()) {
    messageSnackbarHelper.showMessage(
        getActivity(),
        "A Cloud Anchor ID for the short code " + shortCode + " was not found.");
    return;
  }
  resolveButton.setEnabled(false);
  future = session.resolveCloudAnchorAsync(
      cloudAnchorId, (anchor, cloudState) -> onResolveComplete(anchor, cloudState, shortCode));
}

private void onResolveComplete(Anchor anchor, CloudAnchorState cloudState, int shortCode) {
  if (cloudState == CloudAnchorState.SUCCESS) {
    messageSnackbarHelper.showMessage(getActivity(), "Cloud Anchor Resolved. Short code: " + shortCode);
    currentAnchor = anchor;
  } else {
    messageSnackbarHelper.showMessage(
        getActivity(),
        "Error while resolving anchor with short code "
            + shortCode
            + ". Error: "
            + cloudState.toString());
    resolveButton.setEnabled(true);
  }
}
Then, modify the onResolveButtonPressed method:
private void onResolveButtonPressed() {
  ResolveDialogFragment dialog = ResolveDialogFragment.createWithOkListener(
      this::onShortCodeEntered);
  dialog.show(getActivity().getSupportFragmentManager(), "Resolve");
}
Build and run the app from Android Studio, and perform the following steps:
- Create an anchor on a plane and wait for the anchor to be hosted.
Remember the short code. - Press the CLEAR button to delete the anchor.
- Press the RESOLVE button. Enter the short code from step 1.
- You should see an anchor in the same position relative to the environment as you originally placed it.
- Quit and kill the app, and then open it again.
- Repeat steps (3) and (4). You should see a new anchor, again in the same position.
Entering a short code | Anchor is successfully resolved |
|
|


5. Share between devices
You've seen how you can store an anchor's Cloud Anchor ID to your device's local storage, and retrieve it later to recreate the same anchor. But the full potential of Cloud Anchors is only unlocked when you can share the Cloud Anchor IDs between different devices.
How your app shares Cloud Anchor IDs is up to you. Anything can be used to transfer the string from one device to another. For this codelab, you will use the Firebase Realtime Database to transfer Cloud Anchor IDs between instances of the app.
Setting up Firebase
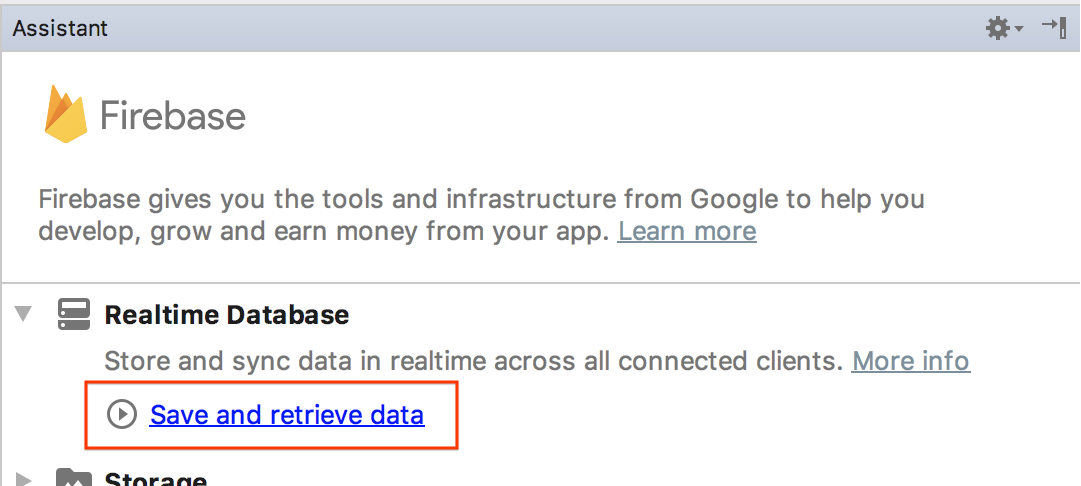
You need to set up a Firebase Realtime Database with your Google account to use with this app. This is easy with the Firebase Assistant in Android Studio.
In Android Studio, click on Tools > Firebase. In the Assistant pane that pops up, click Realtime Database, then click on Save and retrieve data:
Click on the Connect to Firebase button to connect your Android Studio project to a new or existing Firebase project.

This will prompt you to select a module. Select the work module:

The Starting Connect dialog displays. This may take a little while.

Sign in with your Google account, and go through the web workflow for creating a Firebase project for your app until you return to Android Studio.
Next, in the Assistant pane, click add the Realtime Database to your app:
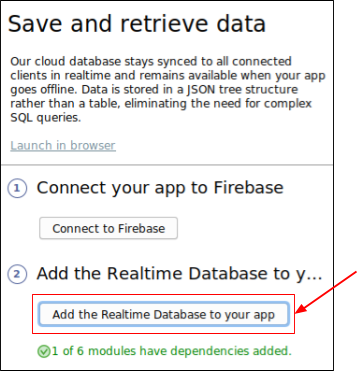
In the dialog that pops up, select work from the Target module drop-down, then click Accept Changes.

This will:
- Add a
google-services.jsonfile to yourworkdirectory - Add a couple of lines to your
build.gradlefile in the same directory. - Build and run the app (and you may see a resolve error about the Firebase database version number).
In the work module build.gradle file, find and remove the following line (the xxxx is a placeholder for the latest version number)
dependencies {
  ...
  implementation 'com.google.firebase:firebase-database:xxxx'
Next, review (but don't follow yet) the instructions linked from the configure your rules for public access page to configure your Firebase Realtime Database to be world writable. This helps simplify testing in this codelab:

From the Firebase Console, select the project you connected your Android Studio project to, then select BUILD > Realtime Database.

Click Create Database to configure and setup the Realtime Database:

Choose any database location.
In the next step, select the test mode security rules and click Enable:

Your app is now configured to use the Firebase database.
Using the FirebaseManager
You will now replace the StorageManager with the FirebaseManager.
In Android Studio, find the CloudAnchorFragment class under the work directory. Replace the StorageManager with a FirebaseManager:
// Find this line.
private final StorageManager storageManager = new StorageManager();

// And replace it with this line.
private FirebaseManager firebaseManager;
Initialize firebaseManager in the onAttach method:
public void onAttach(@NonNull Context context) {
  super.onAttach(context);
  tapHelper = new TapHelper(context);
  trackingStateHelper = new TrackingStateHelper(requireActivity());

  // The next line is the new addition.
  firebaseManager = new FirebaseManager(context);
}
Modify the onShortCodeEntered method as follows:
private void onShortCodeEntered(int shortCode) {
  firebaseManager.getCloudAnchorId(shortCode, cloudAnchorId -> {
    if (cloudAnchorId == null || cloudAnchorId.isEmpty()) {
      messageSnackbarHelper.showMessage(
          getActivity(),
          "A Cloud Anchor ID for the short code " + shortCode + " was not found.");
      return;
    }
    resolveButton.setEnabled(false);
    future = session.resolveCloudAnchorAsync(
        cloudAnchorId, (anchor, cloudState) -> onResolveComplete(anchor, cloudState, shortCode));
  });
}
Then, modify the onHostComplete method as follows:
private void onHostComplete(String cloudAnchorId, CloudAnchorState cloudState) {
  if (cloudState == CloudAnchorState.SUCCESS) {
    firebaseManager.nextShortCode(shortCode -> {
      if (shortCode != null) {
        firebaseManager.storeUsingShortCode(shortCode, cloudAnchorId);
        messageSnackbarHelper.showMessage(getActivity(), "Cloud Anchor Hosted. Short code: " + shortCode);
      } else {
        // Firebase could not provide a short code.
        messageSnackbarHelper.showMessage(getActivity(), "Cloud Anchor Hosted, but could not "
            + "get a short code from Firebase.");
      }
    });
  } else {
    messageSnackbarHelper.showMessage(getActivity(), "Error while hosting: " + cloudState.toString());
  }
}
Build and run your app. You should see the same UI flow as in the previous section, except that now, the online Firebase database is being used to store the Cloud Anchor IDs and short codes instead of device-local storage.
Multi-user testing
To test a multi-user experience, use two different phones:
- Install the app on two devices.
- Use one device to host an anchor and generate a short code.
- Use the other device to resolve the anchor using that short code.
You should be able to host anchors from one device, get a short code, and use the short code on the other device to see the anchor in the same place!
6. Wrap up
Congratulations! You've reached the end of this codelab!
What we've covered
- How to host Anchors using the ARCore SDK and obtain a Cloud Anchor ID.
- How to use Cloud Anchor IDs to resolve Anchors.
- How to store and share Cloud Anchor IDs between different AR Sessions on the same device or on different devices.
Learn more
- Check out the Cloud Anchors overview for Android