
1. 시작하기 전에
ARCore는 휴대기기에서 증강 현실(AR) 앱을 빌드할 수 있는 플랫폼입니다. ARCore는 다양한 API를 사용하여 사용자 기기가 환경에 관한 정보를 관찰 및 수신하고 이 정보와 상호작용할 수 있도록 만들어 줍니다.
이 Codelab에서는 ARCore Depth API를 사용하여 간단한 AR 지원 앱을 빌드하는 프로세스를 안내합니다.
기본 요건
이 Codelab은 기본적인 AR 개념에 관한 지식을 갖춘 개발자를 대상으로 작성되었습니다.
빌드할 항목

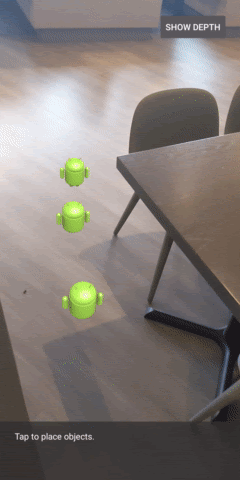
각 프레임의 깊이 이미지를 사용하여 공간의 기하학적 구조를 시각화하고 배치된 가상 애셋에서 오클루전을 실행하는 앱을 빌드합니다. 구체적인 단계는 다음과 같습니다.
- 휴대전화에서 Depth API가 지원되는지 확인하기
- 각 프레임의 깊이 이미지 가져오기
- 여러 방식으로 깊이 정보 시각화하기(위의 애니메이션 참고)
- 깊이를 사용하여 오클루전으로 앱의 현실감 향상하기
- Depth API를 지원하지 않는 휴대전화를 원활하게 처리하기
필요한 항목
하드웨어 요구사항
- 지원되는 ARCore 기기: USB 케이블을 통해 개발 머신에 연결됩니다. 이 기기는 Depth API도 지원해야 합니다. 지원되는 기기 목록을 참고하세요. Depth API는 Android에서만 사용할 수 있습니다.
- 이 기기의 USB 디버깅을 사용 설정합니다.
소프트웨어 요구사항
- ARCore SDK 1.18.0 이상
- Android 스튜디오(v3.0 이상)가 설치된 개발 머신
2. ARCore 및 Depth API
Depth API는 지원되는 기기의 RGB 카메라를 사용하여 깊이 맵(깊이 이미지라고도 함)을 만듭니다. 깊이 맵에서 얻은 정보를 사용하여 가상 객체가 실제 객체 앞이나 뒤에 정확하게 표시되도록 하면 몰입도 높은 현실적인 사용자 경험을 제공할 수 있습니다.
ARCore Depth API는 ARCore 세션에서 제공하는 각 프레임과 일치하는 깊이 이미지에 액세스할 수 있는 기능을 제공합니다. 각 픽셀은 카메라에서 환경까지의 거리 측정값을 제공하여 AR 앱에 향상된 현실감을 제공합니다.
Depth API의 핵심 기능은 오클루전으로, 디지털 객체가 실제 객체에 비례하여 정확하게 표시되는 기능입니다. 마치 객체가 실제로 사용자와 같은 환경에 있는 것처럼 느껴집니다.
이 Codelab에서는 깊이 이미지를 사용하여 실제 세계의 표면 뒤에 있는 가상 객체의 오클루전을 실행하고 이 감지된 공간의 기하학적 구조를 시각화하는 간단한 AR 지원 앱을 빌드하는 프로세스를 안내합니다.
3. 설정
개발 머신 설정
- USB 케이블을 통해 ARCore 기기를 컴퓨터에 연결합니다. 기기에서 USB 디버깅을 허용하는지 확인합니다.
- 터미널을 열고 아래와 같이
adb devices를 실행합니다.
adb devices

List of devices attached
<DEVICE_SERIAL_NUMBER>    device
<DEVICE_SERIAL_NUMBER>는 기기 고유의 문자열입니다. 계속하기 전에 정확히 하나의 기기가 표시되는지 확인하세요.
코드 다운로드 및 설치
- 저장소를 클론할 수 있습니다.
git clone https://github.com/googlecodelabs/arcore-depth
또는 ZIP 파일을 다운로드하고 압축을 풉니다.
- Android 스튜디오를 시작하고 기존 Android 스튜디오 프로젝트 열기를 클릭합니다.
- 위에서 다운로드한 ZIP 파일의 압축을 푼 디렉터리를 찾아
depth_codelab_io2020디렉터리를 엽니다.
여러 모듈이 있는 단일 Gradle 프로젝트입니다. Android 스튜디오의 왼쪽 상단에 있는 프로젝트 창에 아직 프로젝트가 표시되지 않으면 드롭다운 메뉴에서 Projects를 클릭합니다.
다음과 같은 결과가 표시됩니다.
| 이 프로젝트에 있는 모듈은 다음과 같습니다.
|
part0_work 모듈에서 작업하게 됩니다. Codelab의 각 부분에 관한 완전한 해결책도 있습니다. 각 모듈은 빌드 가능한 앱입니다.
4. 시작 앱 실행
- 실행 > 실행… > ‘part0_work'를 클릭합니다. 표시되는 Select Deployment Target 대화상자에서 기기가 Connected Devices 아래에 표시되어야 합니다.
- 기기를 선택하고 확인을 클릭합니다. Android 스튜디오가 기기에서 초기 앱을 빌드하고 실행합니다.
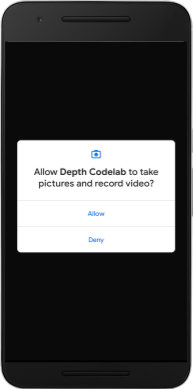
- 앱에서 카메라 권한을 요청합니다. 계속하려면 허용을 탭합니다.
| 앱 사용 방법
|
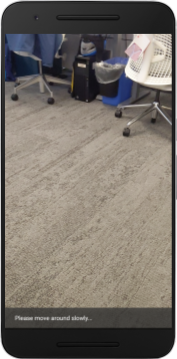
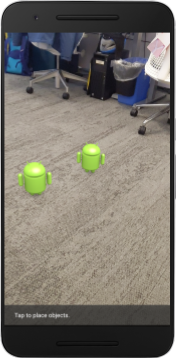
현재는 앱이 매우 간단하며 실제 공간의 기하학적 구조에 관한 정보가 많지 않습니다.
예를 들어 Android 피규어를 의자 뒤에 배치하는 경우, 애플리케이션은 의자가 있으며 Android를 숨겨야 한다는 사실을 모르기 때문에 렌더링이 전면에 붕 뜬 것처럼 보이게 됩니다.
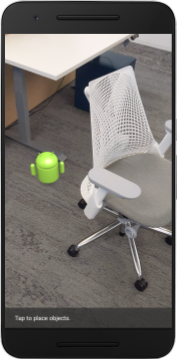
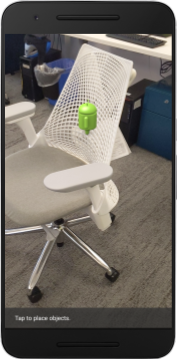
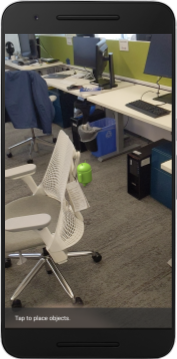
이 문제를 해결하기 위해 Depth API를 사용하여 이 앱의 몰입감과 현실감을 개선할 것입니다.
5. Depth API 지원 여부 확인(1부)
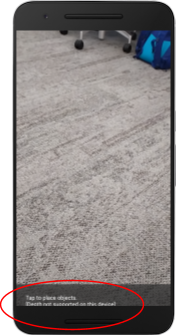
ARCore Depth API는 지원되는 기기의 하위 집합에서만 실행됩니다. 이러한 깊이 이미지를 사용하여 기능을 앱에 통합하려면 먼저 앱이 지원되는 기기에서 실행되는지 확인해야 합니다.
현재 기기가 깊이를 지원하는지를 저장하는 플래그의 역할을 하는 새 비공개 구성원을 DepthCodelabActivity에 추가합니다.
private boolean isDepthSupported;
새 세션이 만들어지는 onResume() 함수 내부에서 이 플래그를 채울 수 있습니다.
기존 코드를 찾습니다.
// Creates the ARCore session.
session = new Session(/* context= */ this);
코드를 다음과 같이 업데이트합니다.
// Creates the ARCore session.
session = new Session(/* context= */ this);
Config config = session.getConfig();
isDepthSupported = session.isDepthModeSupported(Config.DepthMode.AUTOMATIC);
if (isDepthSupported) {
  config.setDepthMode(Config.DepthMode.AUTOMATIC);
} else {
  config.setDepthMode(Config.DepthMode.DISABLED);
}
session.configure(config);
이제 AR 세션이 적절하게 구성되어 앱이 깊이 기반 기능을 사용할 수 있는지를 알 수 있습니다.
또한 이 세션에 깊이가 사용되는지를 사용자에게 알려야 합니다.
Snackbar에 다른 메시지를 추가합니다. 화면 하단에 다음과 같이 표시됩니다.
// Add this line at the top of the file, with the other messages.
private static final String DEPTH_NOT_AVAILABLE_MESSAGE = "[Depth not supported on this device]";
필요에 따라 이 메시지를 onDrawFrame() 내부에 표시할 수 있습니다.
// Add this if-statement above messageSnackbarHelper.showMessage(this, messageToShow).
if (!isDepthSupported) {
  messageToShow += "\n" + DEPTH_NOT_AVAILABLE_MESSAGE;
}
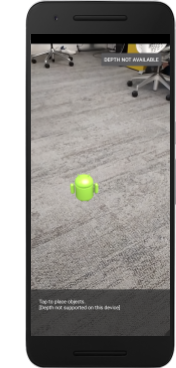
깊이를 지원하지 않는 기기에서 앱을 실행하면 방금 추가한 메시지가 하단에 나타납니다.
다음으로 Depth API를 호출하고 프레임마다 깊이 이미지를 가져오도록 앱을 업데이트하겠습니다.
6. 깊이 이미지 가져오기(2부)
Depth API는 기기 환경의 3D 관찰값을 캡처하고 이 데이터가 포함된 깊이 이미지를 앱에 반환합니다. 깊이 이미지의 각 픽셀은 기기 카메라에서 실제 환경까지의 거리 측정값을 나타냅니다.
이제 이러한 깊이 이미지를 사용하여 앱의 렌더링 및 시각화를 개선합니다. 첫 번째 단계는 각 프레임마다 깊이 이미지를 가져와 GPU에서 사용할 텍스처에 결합하는 것입니다.
먼저 프로젝트에 새 클래스를 추가합니다.DepthTextureHandler는 주어진 ARCore 프레임에 깊이 이미지를 가져옵니다.
다음 파일을 추가합니다.
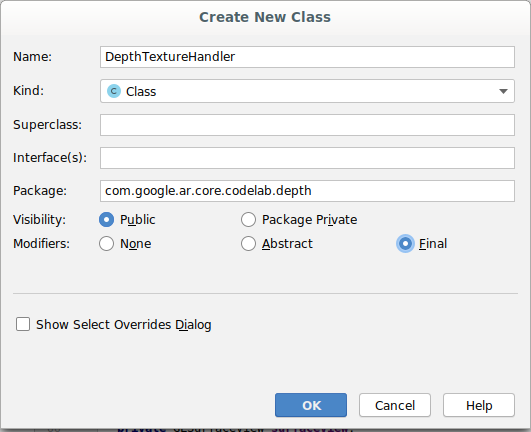
src/main/java/com/google/ar/core/codelab/depth/DepthTextureHandler.java
package com.google.ar.core.codelab.depth;

import static android.opengl.GLES20.GL_CLAMP_TO_EDGE;
import static android.opengl.GLES20.GL_TEXTURE_2D;
import static android.opengl.GLES20.GL_TEXTURE_MAG_FILTER;
import static android.opengl.GLES20.GL_TEXTURE_MIN_FILTER;
import static android.opengl.GLES20.GL_TEXTURE_WRAP_S;
import static android.opengl.GLES20.GL_TEXTURE_WRAP_T;
import static android.opengl.GLES20.GL_UNSIGNED_BYTE;
import static android.opengl.GLES20.glBindTexture;
import static android.opengl.GLES20.glGenTextures;
import static android.opengl.GLES20.glTexImage2D;
import static android.opengl.GLES20.glTexParameteri;
import static android.opengl.GLES30.GL_LINEAR;
import static android.opengl.GLES30.GL_RG;
import static android.opengl.GLES30.GL_RG8;

import android.media.Image;
import com.google.ar.core.Frame;
import com.google.ar.core.exceptions.NotYetAvailableException;

/** Handle RG8 GPU texture containing a DEPTH16 depth image. */
public final class DepthTextureHandler {

  private int depthTextureId = -1;
  private int depthTextureWidth = -1;
  private int depthTextureHeight = -1;

  /**
   * Creates and initializes the depth texture. This method needs to be called on a
   * thread with a EGL context attached.
   */
  public void createOnGlThread() {
    int[] textureId = new int[1];
    glGenTextures(1, textureId, 0);
    depthTextureId = textureId[0];
    glBindTexture(GL_TEXTURE_2D, depthTextureId);
    glTexParameteri(GL_TEXTURE_2D, GL_TEXTURE_WRAP_S, GL_CLAMP_TO_EDGE);
    glTexParameteri(GL_TEXTURE_2D, GL_TEXTURE_WRAP_T, GL_CLAMP_TO_EDGE);
    glTexParameteri(GL_TEXTURE_2D, GL_TEXTURE_MIN_FILTER, GL_LINEAR);
    glTexParameteri(GL_TEXTURE_2D, GL_TEXTURE_MAG_FILTER, GL_LINEAR);
  }

  /**
   * Updates the depth texture with the content from acquireDepthImage().
   * This method needs to be called on a thread with an EGL context attached.
   */
  public void update(final Frame frame) {
    try {
      Image depthImage = frame.acquireDepthImage();
      depthTextureWidth = depthImage.getWidth();
      depthTextureHeight = depthImage.getHeight();
      glBindTexture(GL_TEXTURE_2D, depthTextureId);
      glTexImage2D(
          GL_TEXTURE_2D,
          0,
          GL_RG8,
          depthTextureWidth,
          depthTextureHeight,
          0,
          GL_RG,
          GL_UNSIGNED_BYTE,
          depthImage.getPlanes()[0].getBuffer());
      depthImage.close();
    } catch (NotYetAvailableException e) {
      // This normally means that depth data is not available yet.
    }
  }

  public int getDepthTexture() {
    return depthTextureId;
  }

  public int getDepthWidth() {
    return depthTextureWidth;
  }

  public int getDepthHeight() {
    return depthTextureHeight;
  }
}
이제 이 클래스의 인스턴스를 DepthCodelabActivity에 추가하여 모든 프레임에 쉽게 액세스할 수 있는 깊이 이미지 사본을 만듭니다.
DepthCodelabActivity.java에서 새 클래스의 인스턴스를 비공개 구성원 변수로 추가합니다.
private final DepthTextureHandler depthTexture = new DepthTextureHandler();
다음으로 onSurfaceCreated() 메서드를 업데이트하여 이 텍스처를 GPU 셰이더에서 사용할 수 있도록 초기화합니다.
// Put this at the top of the "try" block in onSurfaceCreated().
depthTexture.createOnGlThread();
마지막으로 최신 깊이 이미지가 있는 모든 프레임마다 이 텍스처를 채웁니다. 이 작업은 session에서 가져온 최신 프레임에 위에서 만든 update() 메서드를 호출하여 완료할 수 있습니다.
이 앱에서는 깊이 지원이 선택사항이므로 깊이를 사용하는 경우에만 이 호출을 실행하세요.
// Add this just after "frame" is created inside onDrawFrame().
if (isDepthSupported) {
  depthTexture.update(frame);
}
이제 프레임마다 업데이트되는 깊이 이미지가 있습니다. 셰이더에서 사용할 준비가 되었습니다.
하지만 앱의 동작은 아직 변경되지 않았습니다. 이제 깊이 이미지를 사용하여 앱을 개선해 보겠습니다.
7. 깊이 이미지 렌더링(3부)
이제 활용할 수 있는 깊이 이미지가 어떻게 표시되는지 살펴보겠습니다. 이 섹션에서는 각 프레임에 깊이를 렌더링하는 버튼을 앱에 추가합니다.
새 셰이더 추가
깊이 이미지를 보는 방법에는 여러 가지가 있습니다. 다음 셰이더는 간단한 색상 매핑 시각화를 제공합니다.
| 새 .vert 셰이더 추가Android 스튜디오에서:
|
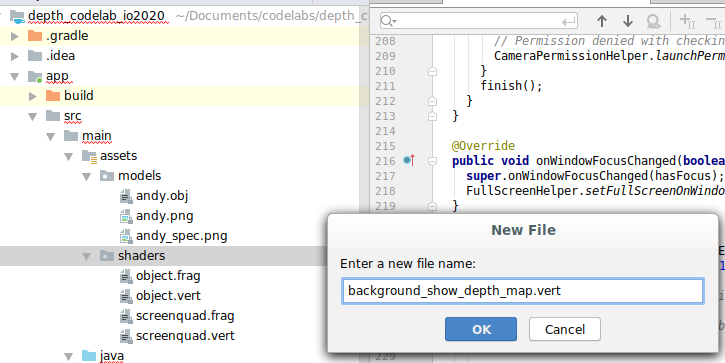
새 파일에 다음 코드를 추가합니다.
src/main/assets/shaders/background_show_depth_map.vert
attribute vec4 a_Position;
attribute vec2 a_TexCoord;

varying vec2 v_TexCoord;

void main() {
   v_TexCoord = a_TexCoord;
   gl_Position = a_Position;
}
위의 단계를 반복하여 동일한 디렉터리에 프래그먼트 셰이더를 만들고 이름을 background_show_depth_map.frag로 지정합니다.
이 새 파일에 다음 코드를 추가합니다.
src/main/assets/shaders/background_show_depth_map.frag
precision mediump float;
uniform sampler2D u_Depth;
varying vec2 v_TexCoord;
const highp float kMaxDepth = 8000.0; // In millimeters.

float GetDepthMillimeters(vec4 depth_pixel_value) {
  return 255.0 * (depth_pixel_value.r + depth_pixel_value.g * 256.0);
}

// Returns an interpolated color in a 6 degree polynomial interpolation.
vec3 GetPolynomialColor(in float x,
  in vec4 kRedVec4, in vec4 kGreenVec4, in vec4 kBlueVec4,
  in vec2 kRedVec2, in vec2 kGreenVec2, in vec2 kBlueVec2) {
  // Moves the color space a little bit to avoid pure red.
  // Removes this line for more contrast.
  x = clamp(x * 0.9 + 0.03, 0.0, 1.0);
  vec4 v4 = vec4(1.0, x, x * x, x * x * x);
  vec2 v2 = v4.zw * v4.z;
  return vec3(
    dot(v4, kRedVec4) + dot(v2, kRedVec2),
    dot(v4, kGreenVec4) + dot(v2, kGreenVec2),
    dot(v4, kBlueVec4) + dot(v2, kBlueVec2)
  );
}

// Returns a smooth Percept colormap based upon the Turbo colormap.
vec3 PerceptColormap(in float x) {
  const vec4 kRedVec4 = vec4(0.55305649, 3.00913185, -5.46192616, -11.11819092);
  const vec4 kGreenVec4 = vec4(0.16207513, 0.17712472, 15.24091500, -36.50657960);
  const vec4 kBlueVec4 = vec4(-0.05195877, 5.18000081, -30.94853351, 81.96403246);
  const vec2 kRedVec2 = vec2(27.81927491, -14.87899417);
  const vec2 kGreenVec2 = vec2(25.95549545, -5.02738237);
  const vec2 kBlueVec2 = vec2(-86.53476570, 30.23299484);
  const float kInvalidDepthThreshold = 0.01;
  return step(kInvalidDepthThreshold, x) *
         GetPolynomialColor(x, kRedVec4, kGreenVec4, kBlueVec4,
                            kRedVec2, kGreenVec2, kBlueVec2);
}

void main() {
  vec4 packed_depth = texture2D(u_Depth, v_TexCoord.xy);
  highp float depth_mm = GetDepthMillimeters(packed_depth);
  highp float normalized_depth = depth_mm / kMaxDepth;
  vec4 depth_color = vec4(PerceptColormap(normalized_depth), 1.0);
  gl_FragColor = depth_color;
}
다음으로 src/main/java/com/google/ar/core/codelab/common/rendering/BackgroundRenderer.java에 있는 이러한 새 셰이더를 사용하도록 BackgroundRenderer 클래스를 업데이트합니다.
클래스 상단에 있는 셰이더에 파일 경로를 추가합니다.
// Add these under the other shader names at the top of the class.
private static final String DEPTH_VERTEX_SHADER_NAME = "shaders/background_show_depth_map.vert";
private static final String DEPTH_FRAGMENT_SHADER_NAME = "shaders/background_show_depth_map.frag";
두 개의 셰이더를 실행할 것이므로 BackgroundRenderer 클래스에 구성원 변수를 더 추가합니다.
// Add to the top of file with the rest of the member variables.
private int depthProgram;
private int depthTextureParam;
private int depthTextureId = -1;
private int depthQuadPositionParam;
private int depthQuadTexCoordParam;
새 메서드를 추가하여 다음 필드를 채웁니다.
// Add this method below createOnGlThread().
public void createDepthShaders(Context context, int depthTextureId) throws IOException {
  int vertexShader =
      ShaderUtil.loadGLShader(
          TAG, context, GLES20.GL_VERTEX_SHADER, DEPTH_VERTEX_SHADER_NAME);
  int fragmentShader =
      ShaderUtil.loadGLShader(
          TAG, context, GLES20.GL_FRAGMENT_SHADER, DEPTH_FRAGMENT_SHADER_NAME);

  depthProgram = GLES20.glCreateProgram();
  GLES20.glAttachShader(depthProgram, vertexShader);
  GLES20.glAttachShader(depthProgram, fragmentShader);
  GLES20.glLinkProgram(depthProgram);
  GLES20.glUseProgram(depthProgram);
  ShaderUtil.checkGLError(TAG, "Program creation");

  depthTextureParam = GLES20.glGetUniformLocation(depthProgram, "u_Depth");
  ShaderUtil.checkGLError(TAG, "Program parameters");

  depthQuadPositionParam = GLES20.glGetAttribLocation(depthProgram, "a_Position");
  depthQuadTexCoordParam = GLES20.glGetAttribLocation(depthProgram, "a_TexCoord");

  this.depthTextureId = depthTextureId;
}
각 프레임에서 다음 셰이더로 그리는 데 사용되는 이 메서드를 추가합니다.
// Put this at the bottom of the file.
public void drawDepth(@NonNull Frame frame) {
  if (frame.hasDisplayGeometryChanged()) {
    frame.transformCoordinates2d(
        Coordinates2d.OPENGL_NORMALIZED_DEVICE_COORDINATES,
        quadCoords,
        Coordinates2d.TEXTURE_NORMALIZED,
        quadTexCoords);
  }

  if (frame.getTimestamp() == 0 || depthTextureId == -1) {
    return;
  }

  // Ensure position is rewound before use.
  quadTexCoords.position(0);

  // No need to test or write depth, the screen quad has arbitrary depth, and is expected
  // to be drawn first.
  GLES20.glDisable(GLES20.GL_DEPTH_TEST);
  GLES20.glDepthMask(false);

  GLES20.glActiveTexture(GLES20.GL_TEXTURE0);
  GLES20.glBindTexture(GLES20.GL_TEXTURE_2D, depthTextureId);
  GLES20.glUseProgram(depthProgram);
  GLES20.glUniform1i(depthTextureParam, 0);

  // Set the vertex positions and texture coordinates.
  GLES20.glVertexAttribPointer(
        depthQuadPositionParam, COORDS_PER_VERTEX, GLES20.GL_FLOAT, false, 0, quadCoords);
  GLES20.glVertexAttribPointer(
        depthQuadTexCoordParam, TEXCOORDS_PER_VERTEX, GLES20.GL_FLOAT, false, 0, quadTexCoords);

  // Draws the quad.
  GLES20.glEnableVertexAttribArray(depthQuadPositionParam);
  GLES20.glEnableVertexAttribArray(depthQuadTexCoordParam);
  GLES20.glDrawArrays(GLES20.GL_TRIANGLE_STRIP, 0, 4);
  GLES20.glDisableVertexAttribArray(depthQuadPositionParam);
  GLES20.glDisableVertexAttribArray(depthQuadTexCoordParam);

  // Restore the depth state for further drawing.
  GLES20.glDepthMask(true);
  GLES20.glEnable(GLES20.GL_DEPTH_TEST);

  ShaderUtil.checkGLError(TAG, "BackgroundRendererDraw");
}
전환 버튼 추가
이제 깊이 맵을 렌더링할 수 있는 기능이 생겼으니 사용해 보겠습니다. 이 렌더링을 켜고 끄는 버튼을 추가합니다.
DepthCodelabActivity 파일 상단에서 사용할 버튼의 가져오기를 추가합니다.
import android.widget.Button;
깊이 렌더링이 전환되는지(기본적으로 꺼짐)를 나타내는 불리언 구성원을 추가하기 위해 클래스를 업데이트합니다.
private boolean showDepthMap = false;
다음으로 showDepthMap 불리언을 제어하는 버튼을 onCreate() 메서드 끝에 추가합니다.
final Button toggleDepthButton = (Button) findViewById(R.id.toggle_depth_button);
    toggleDepthButton.setOnClickListener(
        view -> {
          if (isDepthSupported) {
            showDepthMap = !showDepthMap;
            toggleDepthButton.setText(showDepthMap ? R.string.hide_depth : R.string.show_depth);
          } else {
            showDepthMap = false;
            toggleDepthButton.setText(R.string.depth_not_available);
          }
        });
다음 문자열을 res/values/strings.xml에 추가합니다.
<string translatable="false" name=&q>uot;show_d<epth&qu>o<t;Show Depth/string
string translatable=">;false&quo<t; name>=<"hide_depth"Hide Depth/string
string transla>table="false&q<uot; na>me="depth_not_available"Depth Not Available/string
이 버튼을 res/layout/activity_main.xml의 앱 레이아웃 하단에 추가합니다.
<Button
    android:id="@+id/toggle_depth_button"
    android:layout_width="wrap_content"
    android:layout_height="wrap_content"
    android:layout_margin="20dp"
    android:gravity="center"
    android:text="@string/show_depth"
    android:layout_align>ParentRight="true"
    android:layout_alignParentTop="true"/
버튼은 이제 부울 showDepthMap의 값을 제어합니다. 이 플래그를 사용하여 깊이 맵이 렌더링되는지를 제어합니다.
DepthCodelabActivity에 있는 메서드 onDrawFrame()으로 돌아가서 다음을 추가합니다.
// Add this snippet just under backgroundRenderer.draw(frame);
if (showDepthMap) {
  backgroundRenderer.drawDepth(frame);
}
onSurfaceCreated()에 다음 줄을 추가하여 깊이 텍스처를 backgroundRenderer에 전달합니다.
// Add to onSurfaceCreated() after backgroundRenderer.createonGlThread(/*context=*/ this);
backgroundRenderer.createDepthShaders(/*context=*/ this, depthTexture.getDepthTexture());
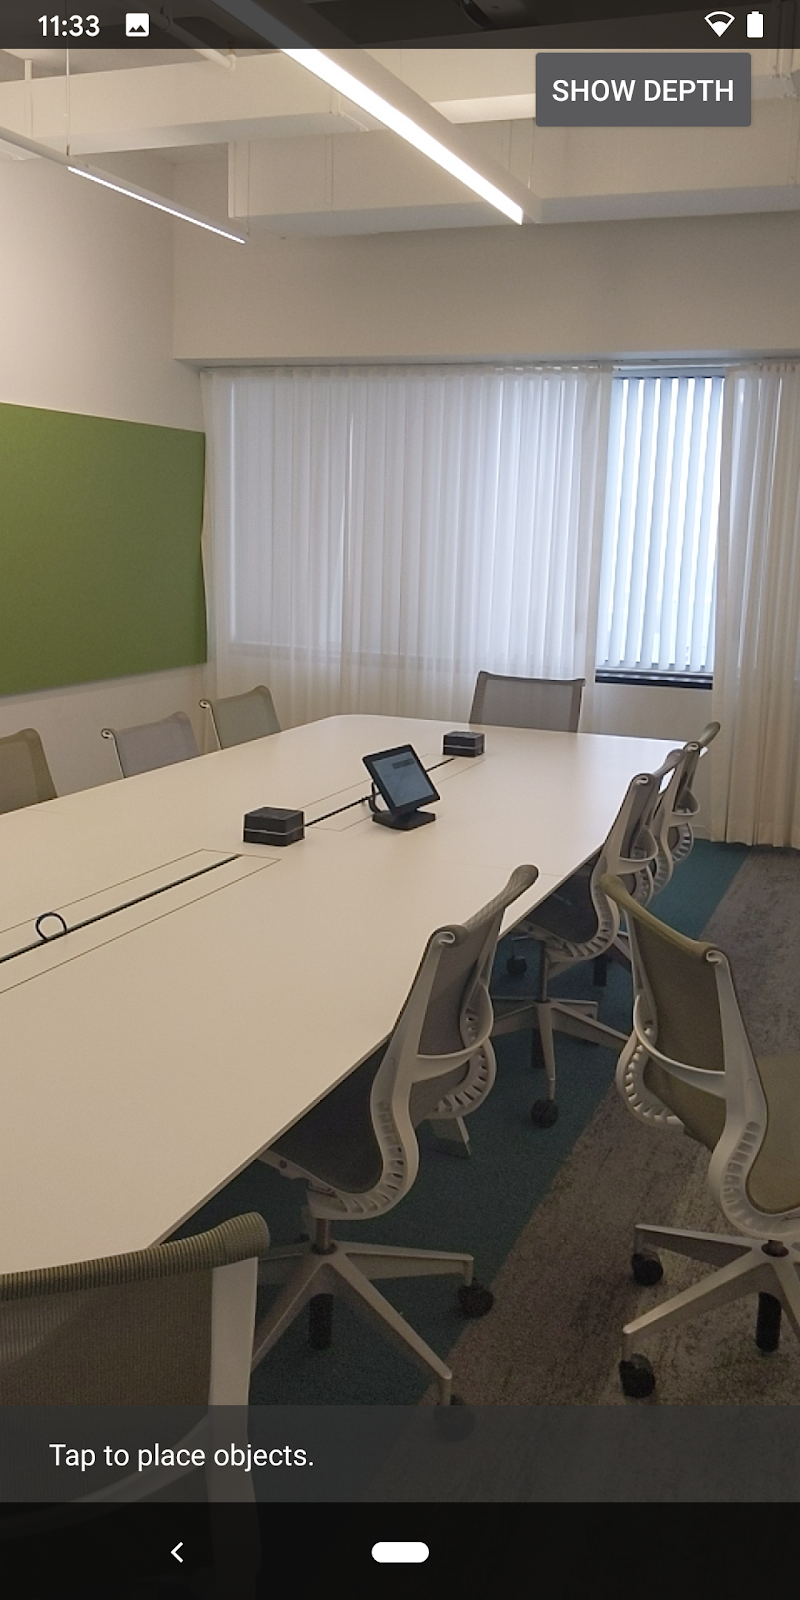
이제 화면 오른쪽 상단의 버튼을 눌러 각 프레임의 깊이 이미지를 볼 수 있습니다.
|
| ||
Depth API 지원 없이 실행 | Depth API 지원으로 실행 | ||
[선택사항] 멋진 깊이 애니메이션
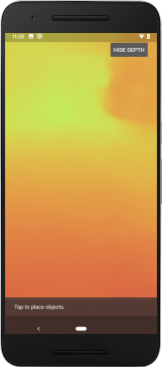
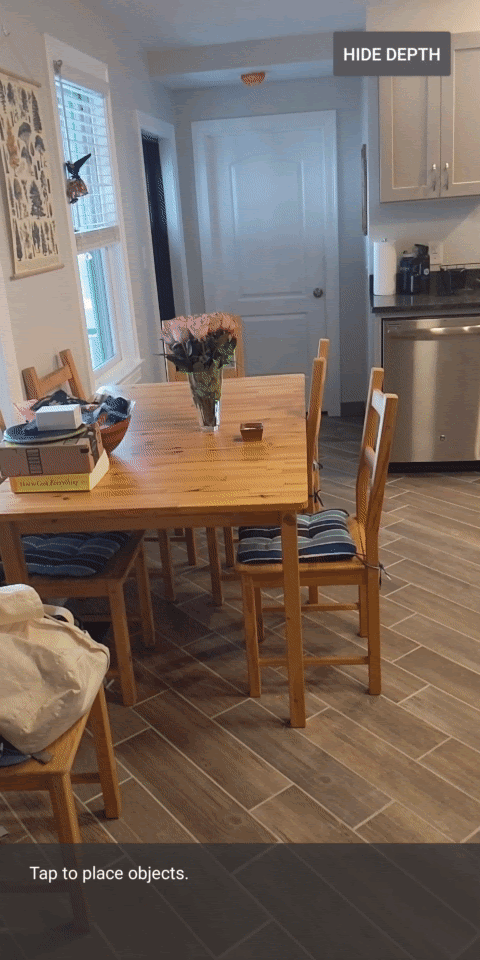
앱은 현재 깊이 맵을 직접 표시합니다. 빨간색 픽셀은 가까운 영역을 나타냅니다. 파란색 픽셀은 멀리 있는 영역을 나타냅니다.
|
|

깊이 정보를 전달하는 방법에는 여러 가지가 있습니다. 이 섹션에서는 카메라에서 반복적으로 멀어지는 대역 내 깊이만 표시하도록 셰이더를 주기적으로 파동 깊이로 수정합니다.
다음 변수를 background_show_depth_map.frag 상단에 추가하여 시작합니다.
uniform float u_DepthRangeToRenderMm;
const float kDepthWidthToRenderMm = 350.0;
- 그런 다음 이 값들을 사용하여 셰이더의
main()함수에서 깊이 값으로 처리할 픽셀을 필터링합니다.
// Add this line at the end of main().
gl_FragColor.a = clamp(1.0 - abs((depth_mm - u_DepthRangeToRenderMm) / kDepthWidthToRenderMm), 0.0, 1.0);
다음으로 이러한 셰이더 매개변수를 유지하도록 BackgroundRenderer.java를 업데이트합니다. 클래스 상단에 다음 필드를 추가합니다.
private static final float MAX_DEPTH_RANGE_TO_RENDER_MM = 10000.0f;
private float depthRangeToRenderMm = 0.0f;
private int depthRangeToRenderMmParam;
createDepthShaders() 메서드 내에 다음을 추가하여 이러한 매개변수를 셰이더 프로그램과 일치시킵니다.
depthRangeToRenderMmParam = GLES20.glGetUniformLocation(depthProgram, "u_DepthRangeToRenderMm");
- 마지막으로
drawDepth()메서드 내에서 시간 경과에 따라 이 범위를 제어할 수 있습니다. 다음 코드를 추가합니다. 그러면 프레임이 그려질 때마다 이 범위가 증분됩니다.
// Enables alpha blending.
GLES20.glEnable(GLES20.GL_BLEND);
GLES20.glBlendFunc(GLES20.GL_SRC_ALPHA, GLES20.GL_ONE_MINUS_SRC_ALPHA);

// Updates range each time draw() is called.
depthRangeToRenderMm += 50.0f;
if (depthRangeToRenderMm > MAX_DEPTH_RANGE_TO_RENDER_MM) {
  depthRangeToRenderMm = 0.0f;
}

// Passes latest value to the shader.
GLES20.glUniform1f(depthRangeToRenderMmParam, depthRangeToRenderMm);
이제 깊이가 장면 전체에 흐르는 애니메이션 파동으로 시각화됩니다.
여기에서 제공된 값을 자유롭게 변경하여 파동을 더 느리거나 더 빠르게, 더 넓거나 더 좁게 만드는 등의 작업을 할 수 있습니다. 셰이더를 변경하여 깊이 정보를 표시하는 새로운 방법을 탐색할 수도 있습니다.
8. 오클루전에 Depth API 사용(4부)
이제 앱에서 객체 오클루전을 처리해보겠습니다.
오클루전이란 가상 객체와 카메라 사이에 실제 객체가 있기 때문에 가상 객체를 완전히 렌더링할 수 없는 경우를 의미합니다. AR 경험 몰입도를 높이려면 오클루전 관리가 필수적입니다.
가상 객체를 실시간으로 적절하게 렌더링하면 증강된 장면의 현실감과 신뢰성이 향상됩니다. 더 많은 예를 보려면 Depth API를 사용해 현실을 혼합하는 방법에 관한 동영상을 참고하세요.
이 섹션에서는 깊이를 사용할 수 있는 경우에만 가상 객체를 포함하도록 앱을 업데이트합니다.
새 객체 셰이더 추가
이전 섹션과 마찬가지로 깊이 정보를 지원하기 위해 새 셰이더를 추가합니다. 이번에는 기존 객체 셰이더를 복사하고 오클루전 기능을 추가할 수 있습니다.
앱에서 실행 중에 깊이를 지원할지 여부를 결정할 수 있도록 두 버전의 객체 셰이더를 모두 유지하는 것이 중요합니다.
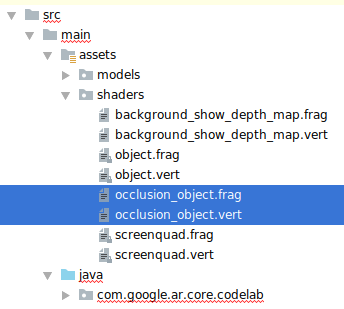
src/main/assets/shaders 디렉터리에 object.vert 셰이더 파일과 object.frag 셰이더 파일의 사본을 만듭니다.
|
|
occlusion_object.vert 내에서 main() 위에 다음 변수를 추가합니다.
varying vec3 v_ScreenSpacePosition;
이 변수를 main() 하단에 설정합니다.
v_ScreenSpacePosition = gl_Position.xyz / gl_Position.w;
파일 상단에서 main() 위에 다음 변수를 추가하여 occlusion_object.frag를 업데이트합니다.
varying vec3 v_ScreenSpacePosition;

uniform sampler2D u_Depth;
uniform mat3 u_UvTransform;
uniform float u_DepthTolerancePerMm;
uniform float u_OcclusionAlpha;
uniform float u_DepthAspectRatio;
- 깊이 정보를 더 쉽게 처리할 수 있도록 셰이더의
main()위에 이러한 도우미 함수를 추가합니다.
float GetDepthMillimeters(in vec2 depth_uv) {
  // Depth is packed into the red and green components of its texture.
  // The texture is a normalized format, storing millimeters.
  vec3 packedDepthAndVisibility = texture2D(u_Depth, depth_uv).xyz;
  return dot(packedDepthAndVisibility.xy, vec2(255.0, 256.0 * 255.0));
}

// Returns linear interpolation position of value between min and max bounds.
// E.g., InverseLerp(1100, 1000, 2000) returns 0.1.
float InverseLerp(in float value, in float min_bound, in float max_bound) {
  return clamp((value - min_bound) / (max_bound - min_bound), 0.0, 1.0);
}

// Returns a value between 0.0 (not visible) and 1.0 (completely visible)
// Which represents how visible or occluded is the pixel in relation to the
// depth map.
float GetVisibility(in vec2 depth_uv, in float asset_depth_mm) {
  float depth_mm = GetDepthMillimeters(depth_uv);

  // Instead of a hard z-buffer test, allow the asset to fade into the
  // background along a 2 * u_DepthTolerancePerMm * asset_depth_mm
  // range centered on the background depth.
  float visibility_occlusion = clamp(0.5 * (depth_mm - asset_depth_mm) /
    (u_DepthTolerancePerMm * asset_depth_mm) + 0.5, 0.0, 1.0);

  // Depth close to zero is most likely invalid, do not use it for occlusions.
  float visibility_depth_near = 1.0 - InverseLerp(
      depth_mm, /*min_depth_mm=*/150.0, /*max_depth_mm=*/200.0);

  // Same for very high depth values.
  float visibility_depth_far = InverseLerp(
      depth_mm, /*min_depth_mm=*/7500.0, /*max_depth_mm=*/8000.0);

  float visibility =
    max(max(visibility_occlusion, u_OcclusionAlpha),
      max(visibility_depth_near, visibility_depth_far));

  return visibility;
}
이제 occlusion_object.frag의 main()을 업데이트하여 깊이를 인식하고 오클루전을 적용합니다. 파일 하단에 다음 줄을 추가합니다.
const float kMToMm = 1000.0;
float asset_depth_mm = v_ViewPosition.z * kMToMm * -1.;
vec2 depth_uvs = (u_UvTransform * vec3(v_ScreenSpacePosition.xy, 1)).xy;
gl_FragColor.a *= GetVisibility(depth_uvs, asset_depth_mm);
이제 객체 셰이더의 새 버전이 있으므로 렌더러 코드를 수정할 수 있습니다.
객체 오클루전 렌더링
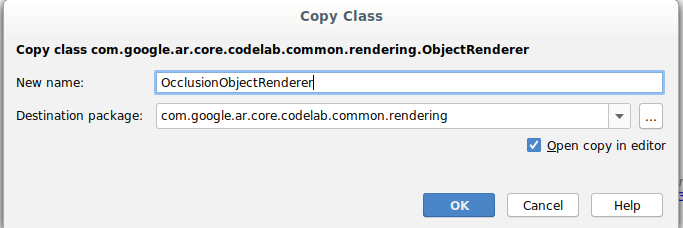
다음으로 src/main/java/com/google/ar/core/codelab/common/rendering/ObjectRenderer.java에 있는 ObjectRenderer 클래스의 사본을 만듭니다.
ObjectRenderer클래스를 선택합니다.- 마우스 오른쪽 버튼을 클릭한 후 Copy를 클릭합니다.
- rendering 폴더를 선택합니다.
- 마우스 오른쪽 버튼을 클릭한 후 Paste를 클릭합니다.
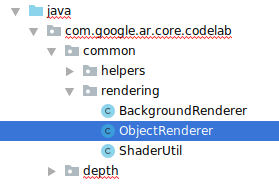
- 클래스 이름을
OcclusionObjectRenderer로 바꿉니다.
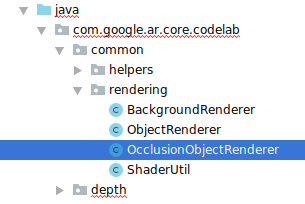
이제 이름을 바꾼 새 클래스가 동일한 폴더에 나타납니다.
새로 만든 OcclusionObjectRenderer.java를 열고 파일 상단에서 셰이더 경로를 변경합니다.
private static final String VERTEX_SHADER_NAME = "shaders/occlusion_object.vert";
private static final String FRAGMENT_SHADER_NAME = "shaders/occlusion_object.frag";
- 다음과 같은 깊이 관련 구성원 변수를 다른 변수와 함께 클래스 상단에 추가합니다. 변수는 오클루전 테두리의 선명도를 조정합니다.
// Shader location: depth texture
private int depthTextureUniform;

// Shader location: transform to depth uvs
private int depthUvTransformUniform;

// Shader location: depth tolerance property
private int depthToleranceUniform;

// Shader location: maximum transparency for the occluded part.
private int occlusionAlphaUniform;

private int depthAspectRatioUniform;

private float[] uvTransform = null;
private int depthTextureId;
클래스 상단에서 기본값을 사용하여 다음 구성원 변수를 만듭니다.
// These values will be changed each frame based on the distance to the object.
private float depthAspectRatio = 0.0f;
private final float depthTolerancePerMm = 0.015f;
private final float occlusionsAlpha = 0.0f;
createOnGlThread() 메서드에서 셰이더의 균일 매개변수를 초기화합니다.
// Occlusions Uniforms.  Add these lines before the first call to ShaderUtil.checkGLError
// inside the createOnGlThread() method.
depthTextureUniform = GLES20.glGetUniformLocation(program, "u_Depth");
depthUvTransformUniform = GLES20.glGetUniformLocation(program, "u_UvTransform");
depthToleranceUniform = GLES20.glGetUniformLocation(program, "u_DepthTolerancePerMm");
occlusionAlphaUniform = GLES20.glGetUniformLocation(program, "u_OcclusionAlpha");
depthAspectRatioUniform = GLES20.glGetUniformLocation(program, "u_DepthAspectRatio");
draw()메서드를 업데이트하여 이러한 값이 그려질 때마다 업데이트되도록 합니다.
// Add after other GLES20.glUniform calls inside draw().
GLES20.glActiveTexture(GLES20.GL_TEXTURE1);
GLES20.glBindTexture(GLES20.GL_TEXTURE_2D, depthTextureId);
GLES20.glUniform1i(depthTextureUniform, 1);
GLES20.glUniformMatrix3fv(depthUvTransformUniform, 1, false, uvTransform, 0);
GLES20.glUniform1f(depthToleranceUniform, depthTolerancePerMm);
GLES20.glUniform1f(occlusionAlphaUniform, occlusionsAlpha);
GLES20.glUniform1f(depthAspectRatioUniform, depthAspectRatio);
draw() 내에 다음 줄을 추가하여 렌더링에서 블렌드 모드를 사용 설정하여 가상 객체가 오클루전될 때 투명도를 적용할 수 있도록 합니다.
// Add these lines just below the code-block labeled "Enable vertex arrays"
GLES20.glEnable(GLES20.GL_BLEND);
GLES20.glBlendFunc(GLES20.GL_SRC_ALPHA, GLES20.GL_ONE_MINUS_SRC_ALPHA);
// Add these lines just above the code-block labeled "Disable vertex arrays"
GLES20.glDisable(GLES20.GL_BLEND);
GLES20.glDepthMask(true);
- 다음 메서드를 추가하여
OcclusionObjectRenderer호출자가 깊이 정보를 제공할 수 있도록 합니다.
// Add these methods at the bottom of the OcclusionObjectRenderer class.
public void setUvTransformMatrix(float[] transform) {
  uvTransform = transform;
}

public void setDepthTexture(int textureId, int width, int height) {
  depthTextureId = textureId;
  depthAspectRatio = (float) width / (float) height;
}
객체 오클루전 제어
이제 새 OcclusionObjectRenderer가 생겼으므로 DepthCodelabActivity에 추가하고 오클루전 렌더링을 사용할 시기와 방법을 선택할 수 있습니다.
ObjectRenderer와 OcclusionObjectRenderer가 모두 DepthCodelabActivity의 구성원이 되도록 OcclusionObjectRenderer 인스턴스를 활동에 추가하여 이 로직을 사용 설정합니다.
// Add this include at the top of the file.
import com.google.ar.core.codelab.common.rendering.OcclusionObjectRenderer;
// Add this member just below the existing "virtualObject", so both are present.
private final OcclusionObjectRenderer occludedVirtualObject = new OcclusionObjectRenderer();
- 다음으로 현재 기기가 Depth API를 지원하는지에 따라 이
occludedVirtualObject가 사용되는 시기를 제어할 수 있습니다.virtualObject가 구성된 부분의 아래에onSurfaceCreated메서드 내에 다음 줄을 추가합니다.
if (isDepthSupported) {
  occludedVirtualObject.createOnGlThread(/*context=*/ this, "models/andy.obj", "models/andy.png");
  occludedVirtualObject.setDepthTexture(
     depthTexture.getDepthTexture(),
     depthTexture.getDepthWidth(),
     depthTexture.getDepthHeight());
  occludedVirtualObject.setMaterialProperties(0.0f, 2.0f, 0.5f, 6.0f);
}
깊이가 지원되지 않는 기기에서는 occludedVirtualObject 인스턴스가 생성되지만 사용되지는 않습니다. 깊이가 지원되는 휴대전화에서는 두 버전이 모두 초기화되며 그릴 때 사용할 렌더러 버전이 런타임에 결정됩니다.
onDrawFrame() 메서드 내에서 기존 코드를 찾습니다.
virtualObject.updateModelMatrix(anchorMatrix, scaleFactor);
virtualObject.draw(viewmtx, projmtx, colorCorrectionRgba, OBJECT_COLOR);
이 코드를 다음 코드로 바꿉니다.
if (isDepthSupported) {
  occludedVirtualObject.updateModelMatrix(anchorMatrix, scaleFactor);
  occludedVirtualObject.draw(viewmtx, projmtx, colorCorrectionRgba, OBJECT_COLOR);
} else {
  virtualObject.updateModelMatrix(anchorMatrix, scaleFactor);
  virtualObject.draw(viewmtx, projmtx, colorCorrectionRgba, OBJECT_COLOR);
}
마지막으로 깊이 이미지가 출력 렌더링에 정확하게 매핑되었는지 확인합니다. 깊이 이미지는 해상도가 다르고 화면과 가로세로 비율이 다를 수 있으므로 깊이 이미지 자체와 카메라 이미지 간에 텍스처 좌표가 다를 수 있습니다.
- 파일 하단에 도우미 메서드
getTextureTransformMatrix()를 추가합니다. 이 메서드는 적용 시 화면 공간 UV가 카메라 피드를 렌더링하는 데 사용되는 쿼드 텍스처 좌표와 정확하게 일치하는 변환 행렬을 반환합니다. 이때 기기 방향도 고려합니다.
private static float[] getTextureTransformMatrix(Frame frame) {
  float[] frameTransform = new float[6];
  float[] uvTransform = new float[9];
  // XY pairs of coordinates in NDC space that constitute the origin and points along the two
  // principal axes.
  float[] ndcBasis = {0, 0, 1, 0, 0, 1};

  // Temporarily store the transformed points into outputTransform.
  frame.transformCoordinates2d(
      Coordinates2d.OPENGL_NORMALIZED_DEVICE_COORDINATES,
      ndcBasis,
      Coordinates2d.TEXTURE_NORMALIZED,
      frameTransform);

  // Convert the transformed points into an affine transform and transpose it.
  float ndcOriginX = frameTransform[0];
  float ndcOriginY = frameTransform[1];
  uvTransform[0] = frameTransform[2] - ndcOriginX;
  uvTransform[1] = frameTransform[3] - ndcOriginY;
  uvTransform[2] = 0;
  uvTransform[3] = frameTransform[4] - ndcOriginX;
  uvTransform[4] = frameTransform[5] - ndcOriginY;
  uvTransform[5] = 0;
  uvTransform[6] = ndcOriginX;
  uvTransform[7] = ndcOriginY;
  uvTransform[8] = 1;

  return uvTransform;
}
getTextureTransformMatrix()에는 파일 상단에서 다음과 같은 가져오기가 필요합니다.
import com.google.ar.core.Coordinates2d;
화면 텍스처가 변경될 때마다(예: 화면 회전 시) 이러한 텍스처 좌표 간의 변환을 계산하려고 합니다. 이 기능은 제한됩니다.
파일 상단에 다음 플래그를 추가합니다.
// Add this member at the top of the file.
private boolean calculateUVTransform = true;
onDrawFrame()내에서 프레임과 카메라가 생성된 후 저장된 변환을 다시 계산해야 하는지 확인합니다.
// Add these lines inside onDrawFrame() after frame.getCamera().
if (frame.hasDisplayGeometryChanged() || calculateUVTransform) {
  calculateUVTransform = false;
  float[] transform = getTextureTransformMatrix(frame);
  occludedVirtualObject.setUvTransformMatrix(transform);
}
이러한 변경 사항이 적용되었으므로 이제 가상 객체 오클루전으로 앱을 실행할 수 있습니다.
이제 앱이 모든 휴대전화에서 정상적으로 실행되어야 하며, 지원되는 경우 오클루전을 고려한 깊이를 자동으로 사용합니다.
|
| ||
Depth API 지원으로 앱 실행 | Depth API 지원 없이 앱 실행 | ||
9. [선택사항] 오클루전 품질 개선
위에서 구현된 깊이 기반 오클루전 메서드는 경계가 선명한 오클루전을 제공합니다. 카메라가 객체에서 멀어질수록 깊이 측정의 정확도가 떨어져 시각적 아티팩트가 발생할 수 있습니다.
오클루전 테스트에 블러를 추가하여 숨겨진 가상 객체에 더 부드러운 가장자리를 생성함으로써 이 문제를 완화할 수 있습니다.
occlusion_object.frag
occlusion_object.frag 상단에 다음 균일 변수를 추가합니다.
uniform float u_OcclusionBlurAmount;
이 도우미 함수를 셰이더의 main() 바로 위에 추가하여 오클루전 샘플링에 커널 블러를 적용합니다.
float GetBlurredVisibilityAroundUV(in vec2 uv, in float asset_depth_mm) {
  // Kernel used:
  // 0   4   7   4   0
  // 4   16  26  16  4
  // 7   26  41  26  7
  // 4   16  26  16  4
  // 0   4   7   4   0
  const float kKernelTotalWeights = 269.0;
  float sum = 0.0;

  vec2 blurriness = vec2(u_OcclusionBlurAmount,
                         u_OcclusionBlurAmount * u_DepthAspectRatio);

  float current = 0.0;

  current += GetVisibility(uv + vec2(-1.0, -2.0) * blurriness, asset_depth_mm);
  current += GetVisibility(uv + vec2(+1.0, -2.0) * blurriness, asset_depth_mm);
  current += GetVisibility(uv + vec2(-1.0, +2.0) * blurriness, asset_depth_mm);
  current += GetVisibility(uv + vec2(+1.0, +2.0) * blurriness, asset_depth_mm);
  current += GetVisibility(uv + vec2(-2.0, +1.0) * blurriness, asset_depth_mm);
  current += GetVisibility(uv + vec2(+2.0, +1.0) * blurriness, asset_depth_mm);
  current += GetVisibility(uv + vec2(-2.0, -1.0) * blurriness, asset_depth_mm);
  current += GetVisibility(uv + vec2(+2.0, -1.0) * blurriness, asset_depth_mm);
  sum += current * 4.0;

  current = 0.0;
  current += GetVisibility(uv + vec2(-2.0, -0.0) * blurriness, asset_depth_mm);
  current += GetVisibility(uv + vec2(+2.0, +0.0) * blurriness, asset_depth_mm);
  current += GetVisibility(uv + vec2(+0.0, +2.0) * blurriness, asset_depth_mm);
  current += GetVisibility(uv + vec2(-0.0, -2.0) * blurriness, asset_depth_mm);
  sum += current * 7.0;

  current = 0.0;
  current += GetVisibility(uv + vec2(-1.0, -1.0) * blurriness, asset_depth_mm);
  current += GetVisibility(uv + vec2(+1.0, -1.0) * blurriness, asset_depth_mm);
  current += GetVisibility(uv + vec2(-1.0, +1.0) * blurriness, asset_depth_mm);
  current += GetVisibility(uv + vec2(+1.0, +1.0) * blurriness, asset_depth_mm);
  sum += current * 16.0;

  current = 0.0;
  current += GetVisibility(uv + vec2(+0.0, +1.0) * blurriness, asset_depth_mm);
  current += GetVisibility(uv + vec2(-0.0, -1.0) * blurriness, asset_depth_mm);
  current += GetVisibility(uv + vec2(-1.0, -0.0) * blurriness, asset_depth_mm);
  current += GetVisibility(uv + vec2(+1.0, +0.0) * blurriness, asset_depth_mm);
  sum += current * 26.0;

  sum += GetVisibility(uv , asset_depth_mm) * 41.0;

  return sum / kKernelTotalWeights;
}
main()의 다음 기존 줄을
gl_FragColor.a *= GetVisibility(depth_uvs, asset_depth_mm);
아래의 줄과 같이 바꿉니다.
gl_FragColor.a *= GetBlurredVisibilityAroundUV(depth_uvs, asset_depth_mm);
이 새로운 셰이더 기능을 활용하려면 렌더러를 업데이트합니다.
OcclusionObjectRenderer.java
클래스 상단에 다음 구성원 변수를 추가합니다.
private int occlusionBlurUniform;
private final float occlusionsBlur = 0.01f;
createOnGlThread 메서드 내에 다음을 추가합니다.
// Add alongside the other calls to GLES20.glGetUniformLocation.
occlusionBlurUniform = GLES20.glGetUniformLocation(program, "u_OcclusionBlurAmount");
draw 메서드 내에 다음을 추가합니다.
// Add alongside the other calls to GLES20.glUniform1f.
GLES20.glUniform1f(occlusionBlurUniform, occlusionsBlur);
| 시각적 비교이러한 변경으로 이제 오클루전 경계가 더 부드럽게 표시됩니다. |
10. 빌드, 실행, 테스트
앱 빌드 및 실행
- USB를 통해 Android 기기를 연결합니다.
- File > Build and Run을 선택합니다.
- ARCodeLab.apk로 저장합니다.
- 앱이 빌드되고 기기에 배포될 때까지 기다립니다.
기기에 앱을 처음으로 배포하는 경우 다음 단계를 수행합니다.
- 기기에서 USB 디버깅을 허용해야 합니다. 계속하려면 OK를 선택합니다.
- 앱에 기기 카메라 사용 권한이 있는지 묻는 메시지가 표시됩니다. AR 기능을 계속 사용하려면 액세스를 허용하세요.
앱 테스트
앱을 실행할 때 기기를 들고 공간을 돌아다니며 천천히 영역을 스캔하여 기본 동작을 테스트할 수 있습니다. 최소 10초 이상 데이터를 수집하고 여러 방향에서 영역을 스캔한 후에 다음 단계로 진행합니다.
문제 해결
Android 기기를 개발용으로 설정
- USB 케이블을 사용하여 기기를 개발 머신에 연결합니다. Windows를 사용하여 개발하는 경우 기기에 맞는 USB 드라이버를 설치해야 할 수도 있습니다.
- 다음 단계를 실행하여 개발자 옵션 창에서 USB 디버깅을 사용 설정합니다.
- 설정 앱을 엽니다.
- 기기에서 Android v8.0 이상을 사용한다면 System을 선택합니다. 그렇지 않은 경우 다음 단계로 진행합니다.
- 아래로 스크롤하여 휴대전화 정보를 선택합니다.
- 아래로 스크롤하여 빌드 번호를 7번 탭합니다.
- 이전 화면으로 돌아가서 하단으로 스크롤한 다음 개발자 옵션을 탭합니다.
- 개발자 옵션 창에서 하단으로 스크롤하여 USB 디버깅을 찾아 사용 설정합니다.
이 프로세스에 관한 세부정보는 Google의 Android 개발자 웹사이트를 참고하세요.
라이선스 관련 빌드 실패
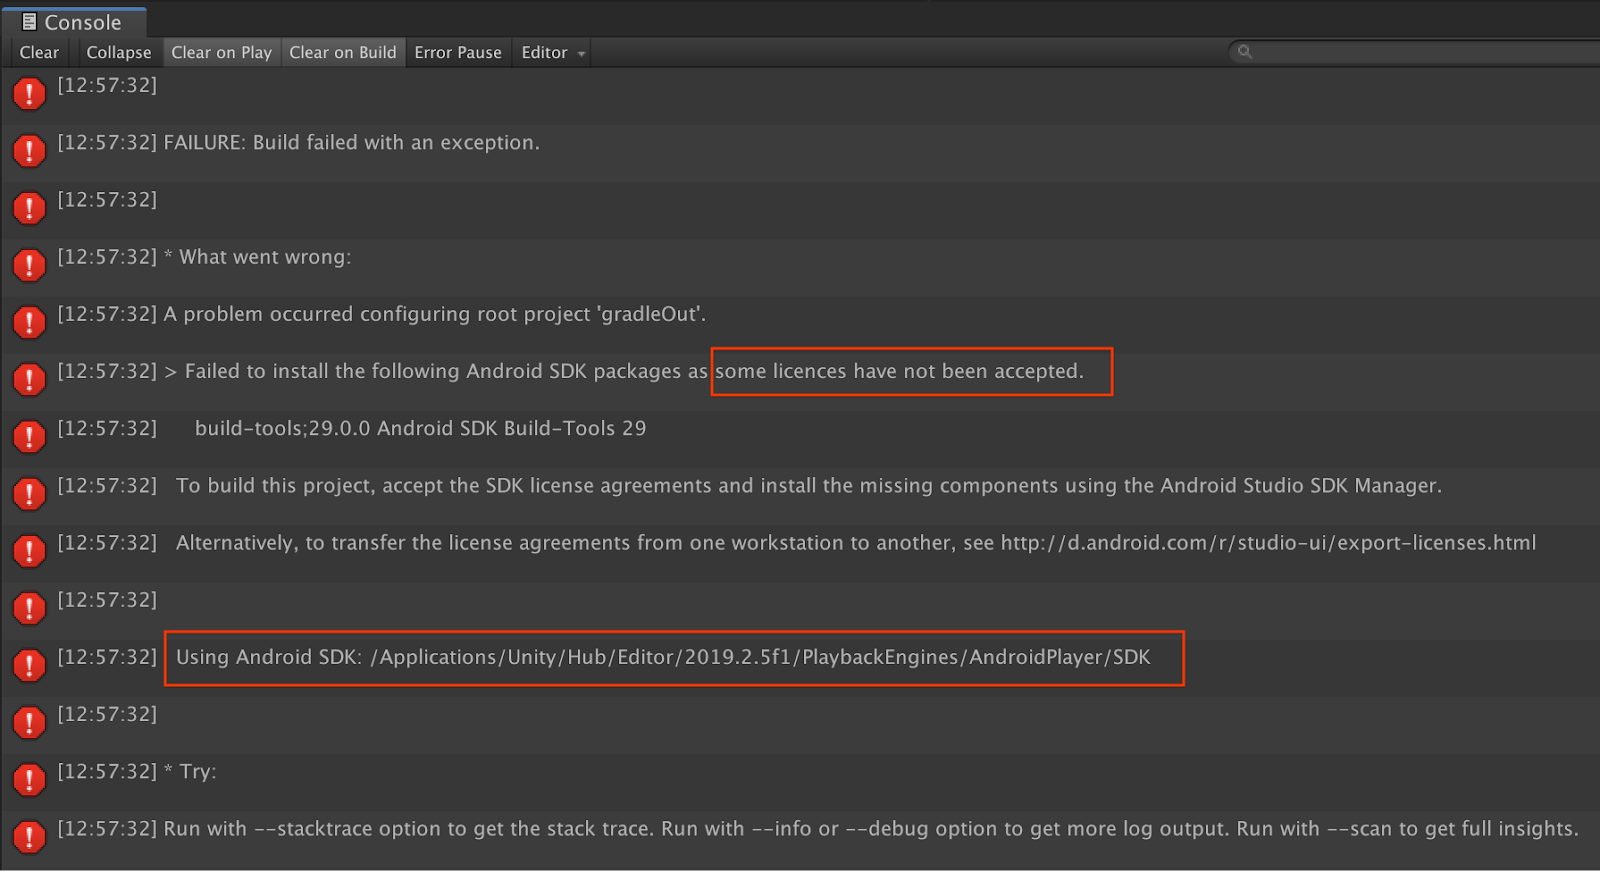
라이선스와 관련된 빌드 실패(일부 라이선스가 허용되지 않아 다음 Android SDK 패키지를 설치할 수 없음)가 발생하는 경우 다음 명령어를 사용하여 이러한 라이선스를 검토하고 수락할 수 있습니다.
cd <path to Android SDK>
tools/bin/sdkmanager --licenses
11. 축하합니다
축하합니다. Google의 ARCore Depth API를 사용하여 첫 번째 깊이 기반 증강 현실 앱을 성공적으로 빌드하고 실행했습니다.