
1. Introduction
Being able to save an AR experience to an MP4 file and play back from the MP4 file can be useful to both the app developers and the end users.
Debug and test new features from your desk
The most straightforward usage of the ARCore Record & Playback API is for developers. Gone are the days where you have to build and run the app on a test device, disconnect the USB cable, and walk around just to test a small code change. Now you only need to record an MP4 in the test environment with expected phone movement, and test right from your desk.
Record and play back from different devices
With the Recording and Playback APIs, one user can record a session using one device, and another can play back the same session on a different device. It's possible to share an AR experience with another user. There are a lot of possibilities!
Is this your first time making an ARCore app?
How will you use this codelab?
What you'll build
In this codelab, you will use the Recording & Playback API to create an app that both records an AR experience into an MP4 file and plays the experience back from the same file. You will learn:
- How to use the Recording API to save an AR session into an MP4 file.
- How to use the Playback API to replay an AR session from an MP4 file.
- How to record an AR session on one device and replay it on another.
What you'll need
In this codelab, you will modify the Hello AR Java app, which is built with the ARCore Android SDK. You'll need specific hardware and software to follow along.
Hardware requirements
- An ARCore supported device with Developer Options turned on. and USB debugging enabled, connected via a USB cable to your development machine.
- A development machine where you run Android Studio.
- Access to the internet, for downloading libraries during development.
Software requirements
- Google Play Services for AR (ARCore) 1.24 or later on your development ARCore device. This service is normally automatically installed on the device via the Play Store. You can also install it manually on ARCore supported device.
- Android Studio (v3.1 or later) on the development machine.
You should also have a basic understanding of ARCore for best results.
2. Set up your development environment
Begin by setting up your development environment.
Download the ARCore Android SDK
Click the to download the SDK.
Unzip ARCore Android SDK
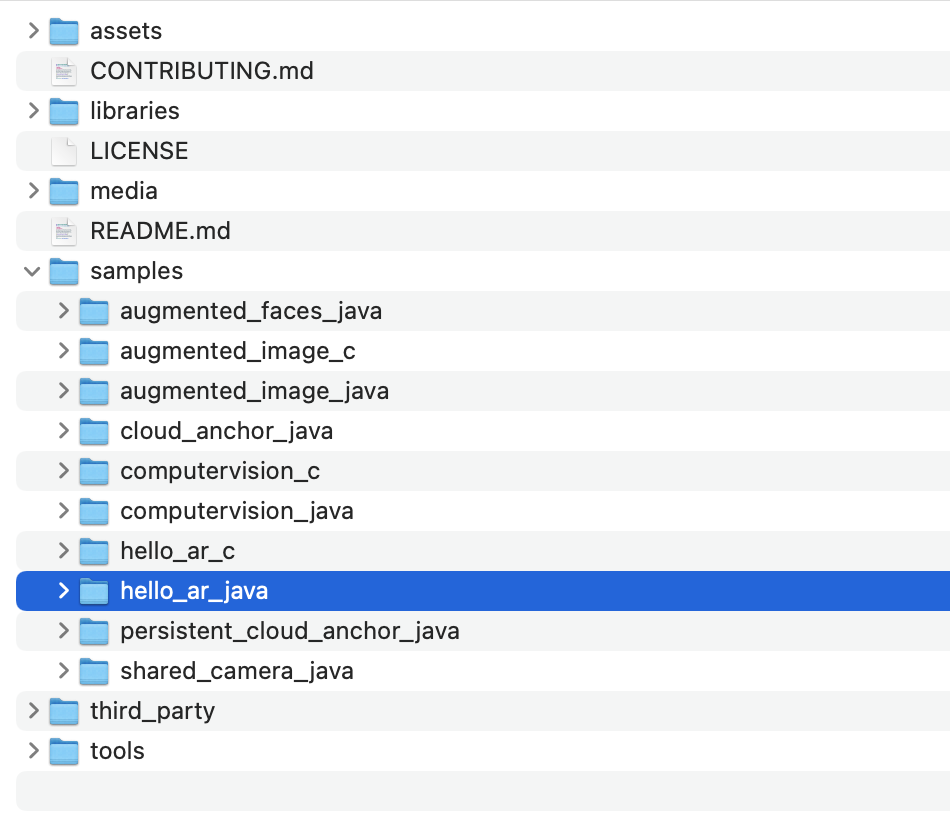
Once you have downloaded the Android SDK to your machine, unzip the file and navigate to the arcore-android-sdk-1.24/samples/hello_ar_java directory. This is the root directory of the app that you will be working with.
Load Hello AR Java into Android Studio
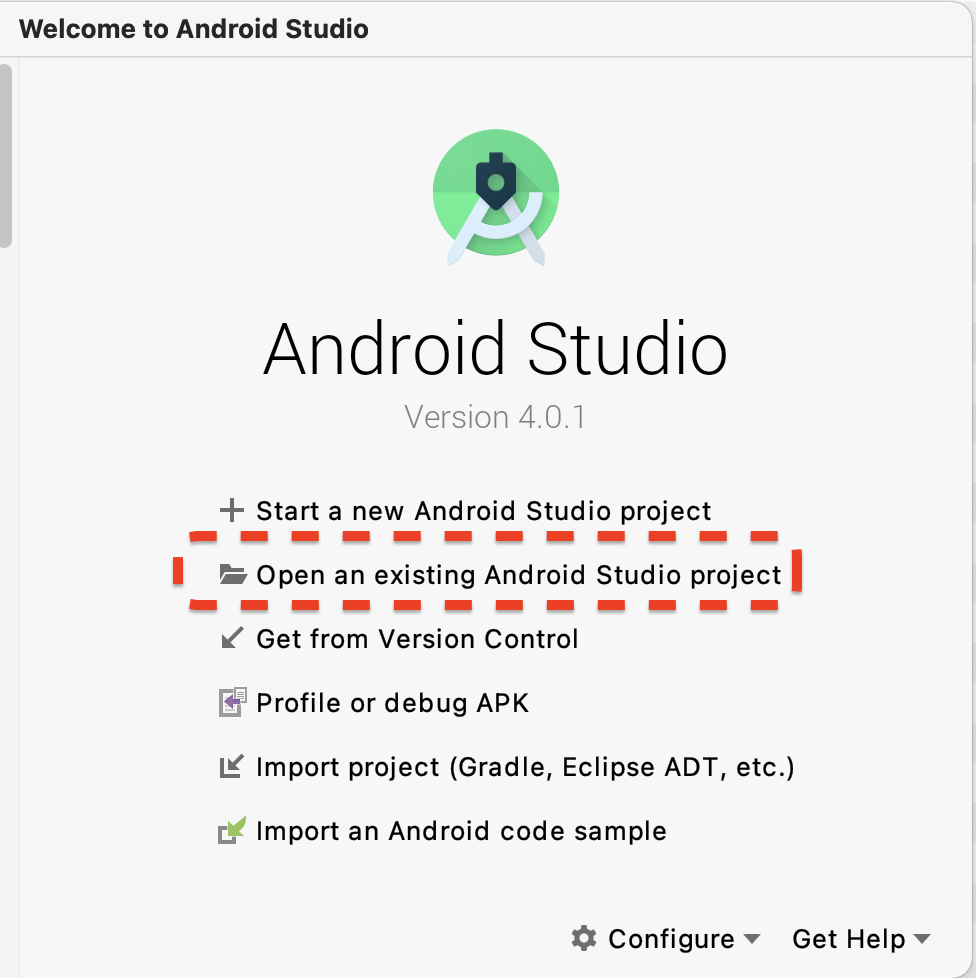
Launch Android Studio and click Open an existing Android Studio project.
In the resulting dialog window, select arcore-android-sdk-1.24/samples/hello_ar_java and click Open.
Wait for Android Studio to finish syncing the project. If there are missing component, importing the project may fail with error messages. Fix these problems before continuing.
Run the sample app
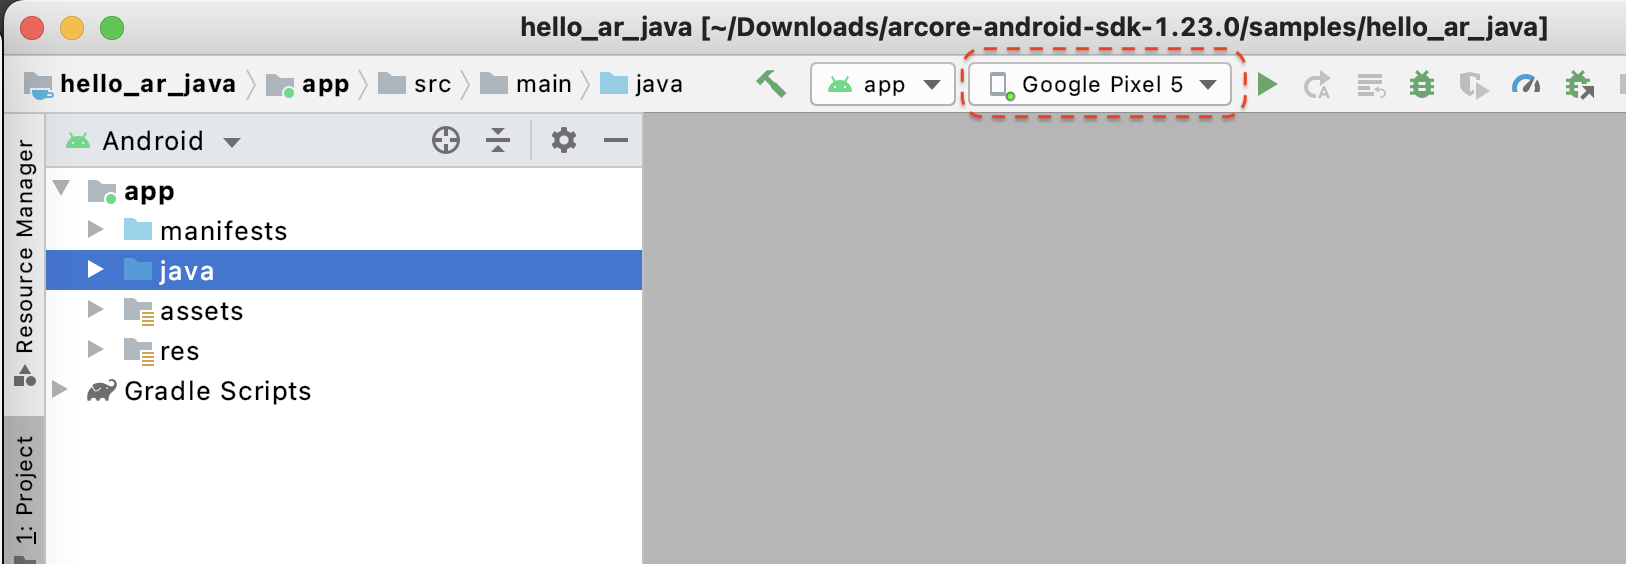
- Connect an ARCore supported device to your development machine.
- If the device is recognized properly, you should see the device name show up in Android Studio.
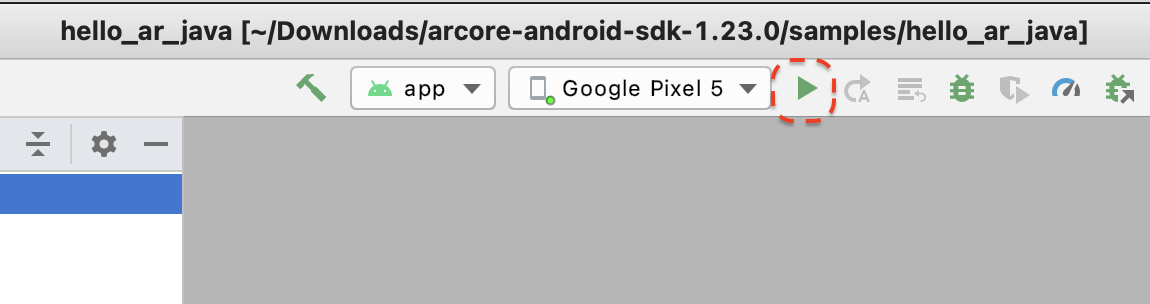
- Click the Run button or select Run > Run ‘app' to have Android Studio install and launch the app on the device.
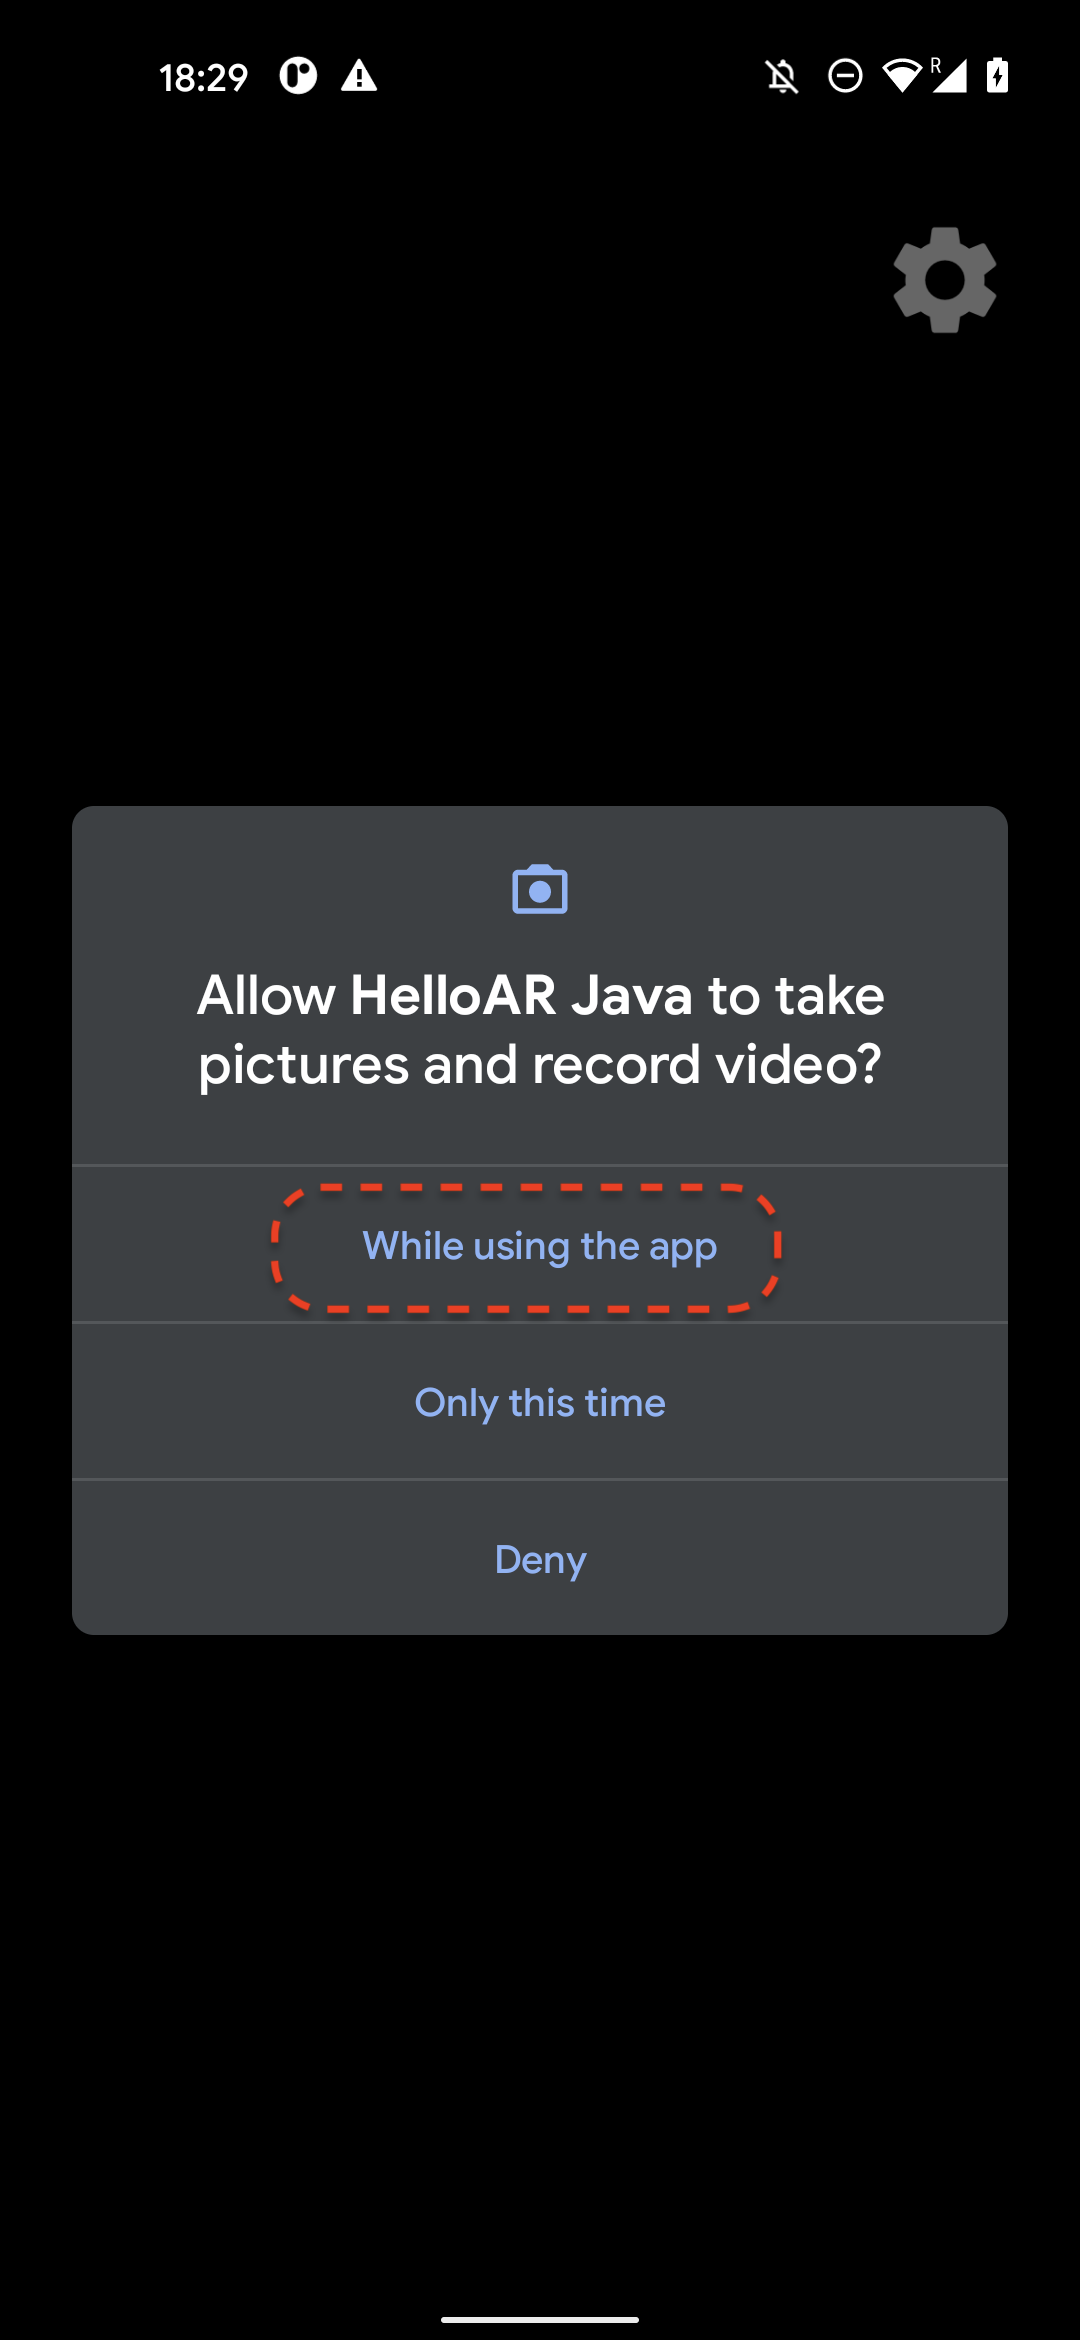
- You will see a prompt asking for permission to take pictures and record video. Select While using this app, to grant the app Camera permissions. Then you will see your real-world environment on the device's screen.
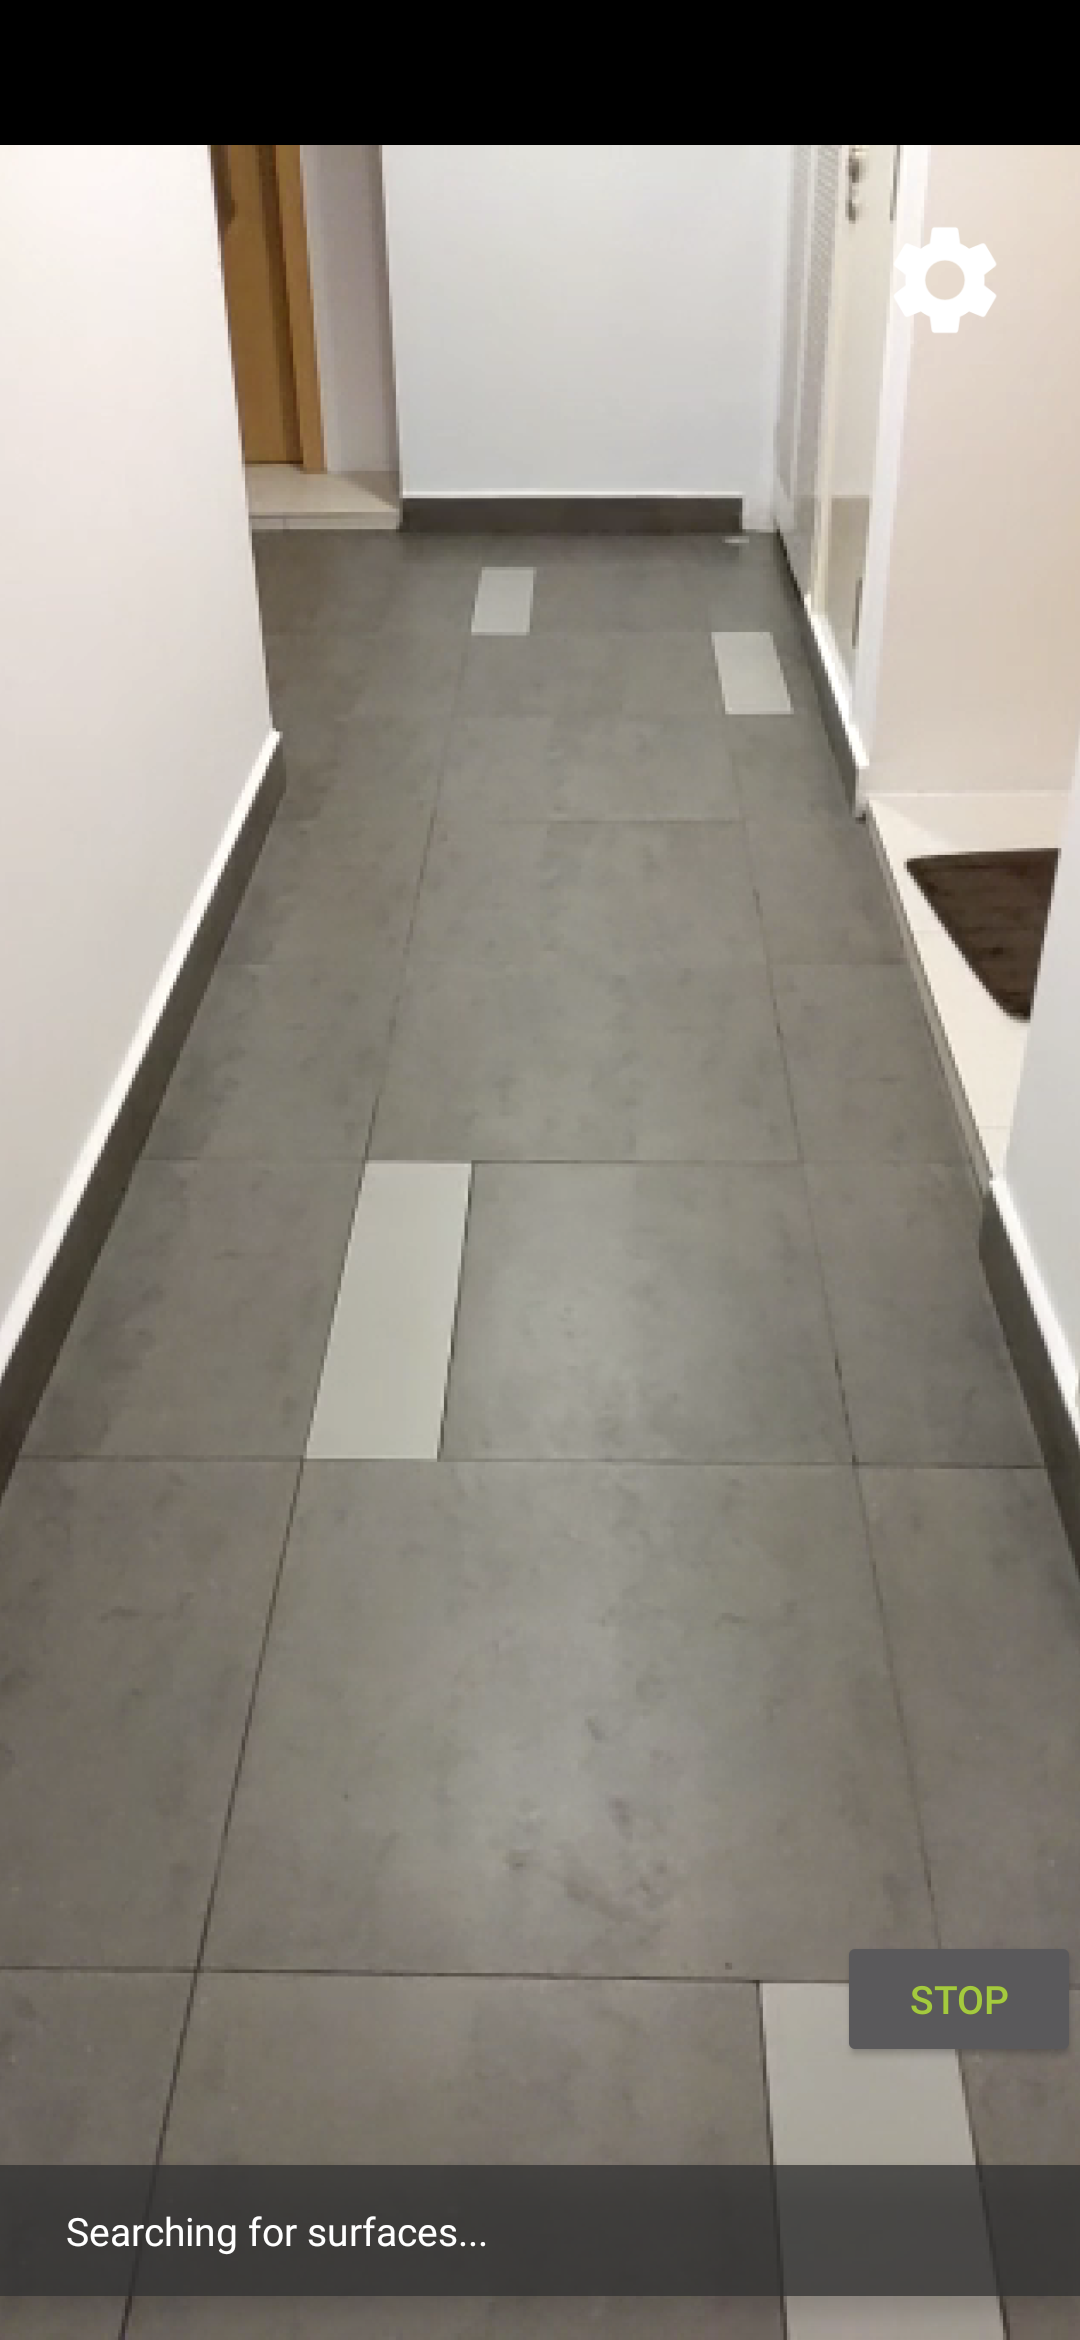
- Move the device horizontally to scan for planes.
- A white grid appears when the app detects a plane. Tap on it to place a marker on that plane.

What you have done in this step
- Set up the Hello AR Java project
- Built and run the sample app on an ARCore supported device
Next, you will record an AR session to an MP4 file.
3. Record an ARCore session to an MP4 file
We will add the recording feature in this step. It is composed of:
- A button to start or stop the recording.
- Storage functions to save the MP4 file on device.
- Calls to start or stop ARCore session recording.
Add UI for Record button
Before you implement recording, add a button on the UI so that the user can inform ARCore when to start or stop recording.
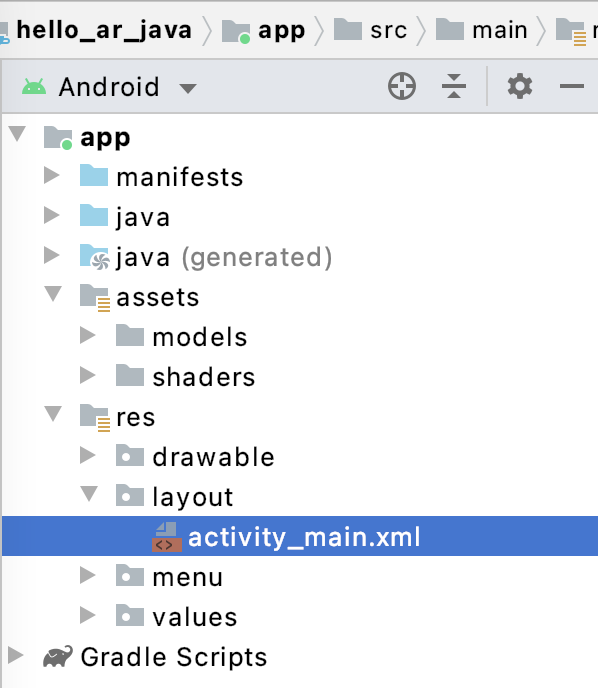
In the Project panel, open the app/res/layout/activity_main.xml file.
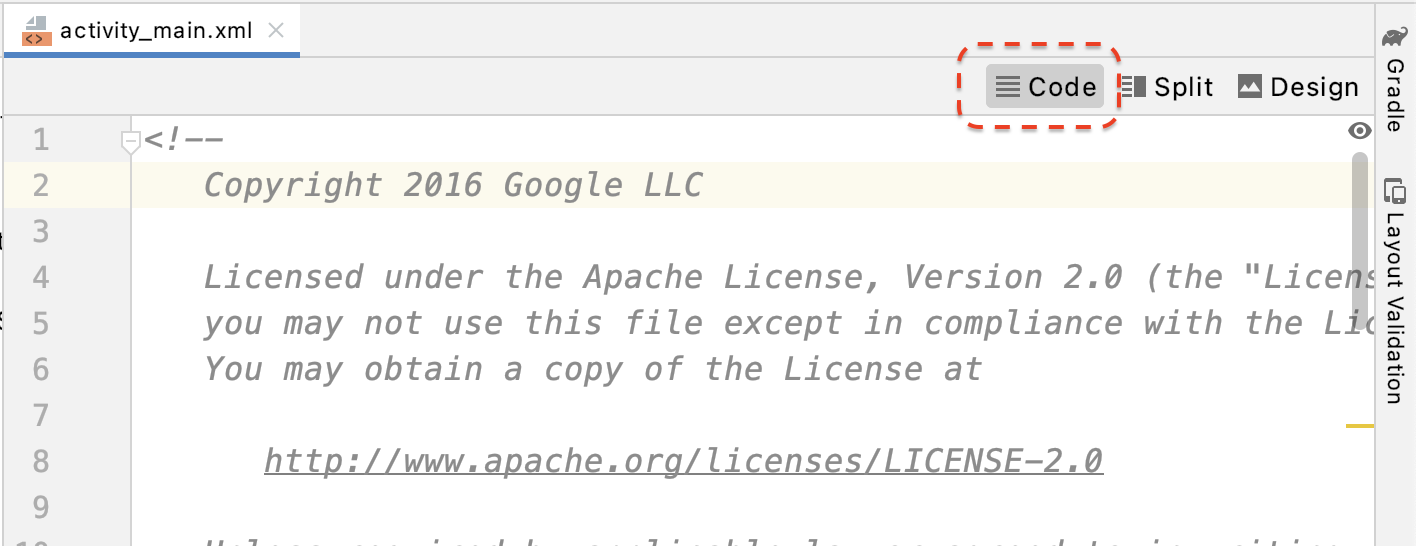
By default, Android Studio will use the design view after you open the app/res/layout/activity_main.xml file. Click the Code button at the top right corner of the tab to switch to the code view.
In activity_main.xml, add the following code before the closing tag to create the new Record button and set its event handler to a method called onClickRecord():
  <!--
    Add a new "Record" button with those attributes:
        text is "Record",
        onClick event handler is "onClickRecord",
        text color is "red".
  -->
  <Button
      android:id="@+id/record_button"
      android:layout_width="wrap_content"
      android:layout_height="wrap_content"
      android:layout_alignLeft="@id/surfaceview"
      android:layout_alignBottom="@id/surfaceview"
      android:layout_marginBottom="100dp"
      android:onClick="onClickRecord"
      android:text="Record"
      android:textColor="@android:color/holo_red_light" />
After you added the above code, an error may be temporarily displayed: Corresponding method handler 'public void onClickRecord(android.view.View)' not found". This is expected. You will resolve the error by creating the onClickRecord() function in the next few steps.
Change text on button based on state
The Record button actually handles both recording and stopping. When the app is not recording data, it should display the word "Record". When the app is recording data, the button should change to display the word "Stop."
In order to give the button this functionality, the app must know its current state. The following code creates a new enum called AppState to represent the app's working state and tracks specific state changes through a private member variable called appState. Add it to HelloArActivity.java, at the beginning of the HelloArActivity class.
  // Represents the app's working state.
  public enum AppState {
    Idle,
    Recording
  }

  // Tracks app's specific state changes.
  private AppState appState = AppState.Idle;
Now that you can track the app's internal state, create a function called updateRecordButton() that changes the button's text based on the app's current state. Add the following code inside the HelloArActivity class in HelloArActivity.java.
// Add imports to the beginning of the file.
import android.widget.Button;

  // Update the "Record" button based on app's internal state.
  private void updateRecordButton() {
    View buttonView = findViewById(R.id.record_button);
    Button button = (Button) buttonView;

    switch (appState) {
      case Idle:
        button.setText("Record");
        break;
      case Recording:
        button.setText("Stop");
        break;
    }
  }
Next, create the onClickRecord() method that checks the app's state, changes it to the next one, and calls updateRecordButton() to change the button's UI. Add the following code inside the HelloArActivity class in HelloArActivity.java.
  // Handle the "Record" button click event.
  public void onClickRecord(View view) {
    Log.d(TAG, "onClickRecord");

    // Check the app's internal state and switch to the new state if needed.
    switch (appState) {
        // If the app is not recording, begin recording.
      case Idle: {
        boolean hasStarted = startRecording();
        Log.d(TAG, String.format("onClickRecord start: hasStarted %b", hasStarted));

        if (hasStarted)
          appState = AppState.Recording;

        break;
      }

      // If the app is recording, stop recording.
      case Recording: {
        boolean hasStopped = stopRecording();
        Log.d(TAG, String.format("onClickRecord stop: hasStopped %b", hasStopped));

        if (hasStopped)
          appState = AppState.Idle;

        break;
      }

      default:
        // Do nothing.
        break;
    }

    updateRecordButton();
  }
Enable the app to start recording
You only need to do two things to start recording in ARCore:
- Specify the recording file URI in a
RecordingConfigobject. - Call
session.startRecordingwith theRecordingConfigobject
The rest is just boilerplate code: configuration, logging and checking for correctness.
Create a new function called startRecording() that records data and saves it to an MP4 URI. Add the following code inside the HelloArActivity class in HelloArActivity.java.
// Add imports to the beginning of the file.
import android.net.Uri;
import com.google.ar.core.RecordingConfig;
import com.google.ar.core.RecordingStatus;
import com.google.ar.core.exceptions.RecordingFailedException;

  private boolean startRecording() {
    Uri mp4FileUri = createMp4File();
    if (mp4FileUri == null)
      return false;

    Log.d(TAG, "startRecording at: " + mp4FileUri);

    pauseARCoreSession();

    // Configure the ARCore session to start recording.
    RecordingConfig recordingConfig = new RecordingConfig(session)
        .setMp4DatasetUri(mp4FileUri)
        .setAutoStopOnPause(true);

    try {
      // Prepare the session for recording, but do not start recording yet.
      session.startRecording(recordingConfig);
    } catch (RecordingFailedException e) {
      Log.e(TAG, "startRecording - Failed to prepare to start recording", e);
      return false;
    }

    boolean canResume = resumeARCoreSession();
    if (!canResume)
      return false;

    // Correctness checking: check the ARCore session's RecordingState.
    RecordingStatus recordingStatus = session.getRecordingStatus();
    Log.d(TAG, String.format("startRecording - recordingStatus %s", recordingStatus));
    return recordingStatus == RecordingStatus.OK;
  }
To safely pause and resume an ARCore session, create pauseARCoreSession() and resumeARCoreSession() in HelloArActivity.java.
  private void pauseARCoreSession() {
    // Pause the GLSurfaceView so that it doesn't update the ARCore session.
    // Pause the ARCore session so that we can update its configuration.
    // If the GLSurfaceView is not paused,
    //   onDrawFrame() will try to update the ARCore session
    //   while it's paused, resulting in a crash.
    surfaceView.onPause();
    session.pause();
  }

  private boolean resumeARCoreSession() {
    // We must resume the ARCore session before the GLSurfaceView.
    // Otherwise, the GLSurfaceView will try to update the ARCore session.
    try {
      session.resume();
    } catch (CameraNotAvailableException e) {
      Log.e(TAG, "CameraNotAvailableException in resumeARCoreSession", e);
      return false;
    }

    surfaceView.onResume();
    return true;
  }
Enable the app to stop recording
Create a function called stopRecording() in HelloArActivity.java to stop your app from recording new data. This function calls session.stopRecording() and sends an error to the console log if the app cannot stop recording.
  private boolean stopRecording() {
    try {
      session.stopRecording();
    } catch (RecordingFailedException e) {
      Log.e(TAG, "stopRecording - Failed to stop recording", e);
      return false;
    }

    // Correctness checking: check if the session stopped recording.
    return session.getRecordingStatus() == RecordingStatus.NONE;
  }
Design file storage using Android 11 scoped storage
The storage related functions in this codelab are designed following the new Android 11 scoped storage requirements.
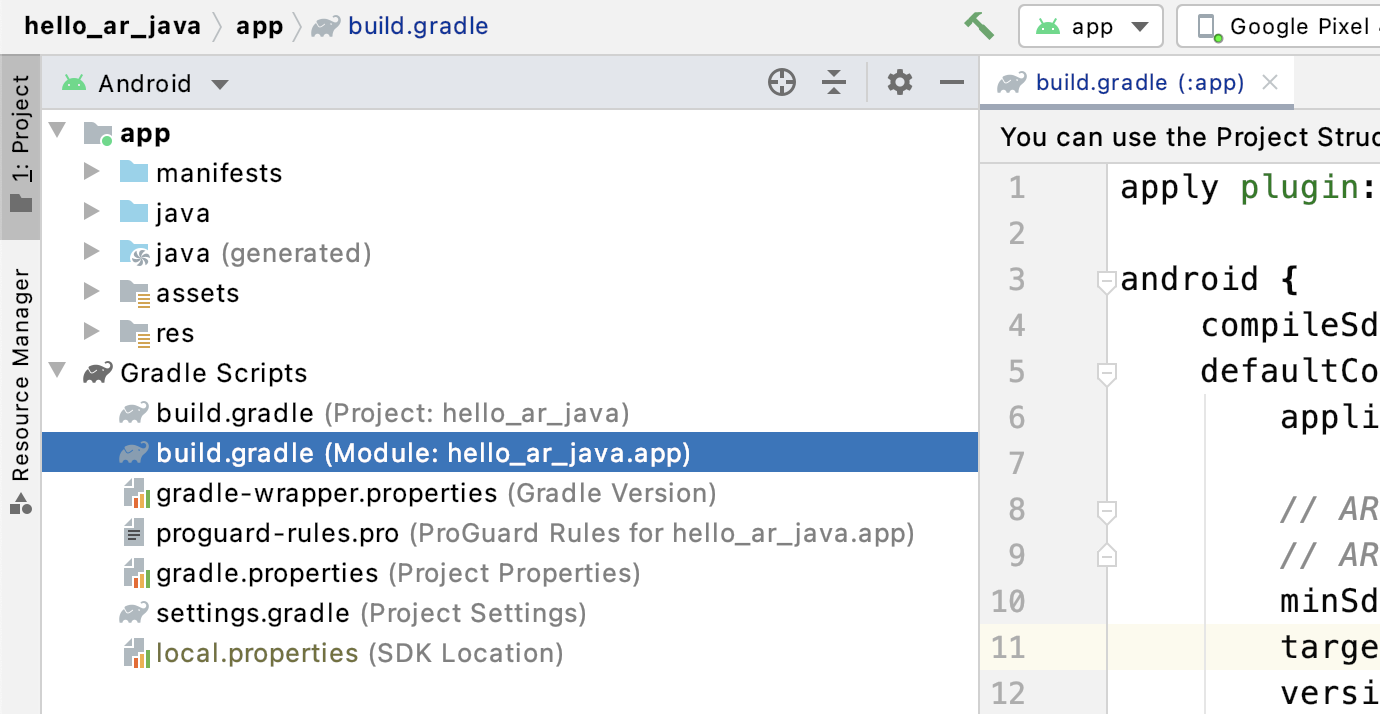
Make some small changes in the app/build.gradle file to target Android 11. In the Android Studio Project panel, this file is under the Gradle Scripts node, associated with the app module.
Change the compileSdkVersion and targetSdkVersion to 30.
    compileSdkVersion 30
    defaultConfig {
      targetSdkVersion 30
    }
For Recording, use the Android MediaStore API to create the MP4 file in the shared Movie directory.
Create a function called createMp4File() in HelloArActivity.java:
// Add imports to the beginning of the file.
import java.text.SimpleDateFormat;
import android.content.ContentResolver;
import android.net.Uri;
import android.os.Build;
import android.os.Environment;
import android.provider.MediaStore;
import android.content.ContentValues;
import java.io.File;
import android.content.CursorLoader;
import android.database.Cursor;
import java.util.Date;


  private final String MP4_VIDEO_MIME_TYPE = "video/mp4";

  private Uri createMp4File() {
    SimpleDateFormat dateFormat = new SimpleDateFormat("yyyyMMdd_HHmmss");
    String mp4FileName = "arcore-" + dateFormat.format(new Date()) + ".mp4";

    ContentResolver resolver = this.getContentResolver();

    Uri videoCollection = null;
    if (Build.VERSION.SDK_INT >= Build.VERSION_CODES.Q) {
      videoCollection = MediaStore.Video.Media.getContentUri(
          MediaStore.VOLUME_EXTERNAL_PRIMARY);
    } else {
      videoCollection = MediaStore.Video.Media.EXTERNAL_CONTENT_URI;
    }

    // Create a new Media file record.
    ContentValues newMp4FileDetails = new ContentValues();
    newMp4FileDetails.put(MediaStore.Video.Media.DISPLAY_NAME, mp4FileName);
    newMp4FileDetails.put(MediaStore.Video.Media.MIME_TYPE, MP4_VIDEO_MIME_TYPE);

    if (Build.VERSION.SDK_INT >= Build.VERSION_CODES.Q) {
      // The Relative_Path column is only available since API Level 29.
      newMp4FileDetails.put(MediaStore.Video.Media.RELATIVE_PATH, Environment.DIRECTORY_MOVIES);
    } else {
      // Use the Data column to set path for API Level <= 28.
      File mp4FileDir = Environment.getExternalStoragePublicDirectory(Environment.DIRECTORY_MOVIES);
      String absoluteMp4FilePath = new File(mp4FileDir, mp4FileName).getAbsolutePath();
      newMp4FileDetails.put(MediaStore.Video.Media.DATA, absoluteMp4FilePath);
    }

    Uri newMp4FileUri = resolver.insert(videoCollection, newMp4FileDetails);

    // Ensure that this file exists and can be written.
    if (newMp4FileUri == null) {
      Log.e(TAG, String.format("Failed to insert Video entity in MediaStore. API Level = %d", Build.VERSION.SDK_INT));
      return null;
    }

    // This call ensures the file exist before we pass it to the ARCore API.
    if (!testFileWriteAccess(newMp4FileUri)) {
      return null;
    }

    Log.d(TAG, String.format("createMp4File = %s, API Level = %d", newMp4FileUri, Build.VERSION.SDK_INT));

    return newMp4FileUri;
  }

  // Test if the file represented by the content Uri can be open with write access.
  private boolean testFileWriteAccess(Uri contentUri) {
    try (java.io.OutputStream mp4File = this.getContentResolver().openOutputStream(contentUri)) {
      Log.d(TAG, String.format("Success in testFileWriteAccess %s", contentUri.toString()));
      return true;
    } catch (java.io.FileNotFoundException e) {
      Log.e(TAG, String.format("FileNotFoundException in testFileWriteAccess %s", contentUri.toString()), e);
    } catch (java.io.IOException e) {
      Log.e(TAG, String.format("IOException in testFileWriteAccess %s", contentUri.toString()), e);
    }

    return false;
  }
Handle storage permissions
If you are using an Android 11 device, you can start testing the code. To support Android 10 or lower devices, you will need grant the app storage permissions to save data to the target device's file system.
In AndroidManifest.xml, declare that the app needs storage read and write permissions before Android 11 (API level 30).
  <!-- Inside the <manifest> tag, below the existing Camera permission -->
  <uses-permission android:name="android.permission.WRITE_EXTERNAL_STORAGE"
      android:maxSdkVersion="29" />

  <uses-permission android:name="android.permission.READ_EXTERNAL_STORAGE"
      android:maxSdkVersion="29" />
Add a helper function called checkAndRequestStoragePermission() in HelloArActivity.java to request the WRITE_EXTERNAL_STORAGE permissions during runtime.
// Add imports to the beginning of the file.
import android.Manifest;
import android.content.pm.PackageManager;
import androidx.core.app.ActivityCompat;
import androidx.core.content.ContextCompat;

  private final int REQUEST_WRITE_EXTERNAL_STORAGE = 1;
  public boolean checkAndRequestStoragePermission() {
    if (ContextCompat.checkSelfPermission(this, Manifest.permission.WRITE_EXTERNAL_STORAGE)
        != PackageManager.PERMISSION_GRANTED) {
      ActivityCompat.requestPermissions(this,
          new String[]{Manifest.permission.WRITE_EXTERNAL_STORAGE},
          REQUEST_WRITE_EXTERNAL_STORAGE);
      return false;
    }

    return true;
  }
If you are on API level 29 or earlier, add a check for storage permissions at the top of createMp4File() and exit the function early if the app does not have the correct permissions. API level 30 (Android 11) doesn't require storage permission for accessing files in MediaStore.
  private Uri createMp4File() {
    // Since we use legacy external storage for Android 10,
    // we still need to request for storage permission on Android 10.
    if (Build.VERSION.SDK_INT <= Build.VERSION_CODES.Q) {
      if (!checkAndRequestStoragePermission()) {
        Log.i(TAG, String.format(
            "Didn't createMp4File. No storage permission, API Level = %d",
            Build.VERSION.SDK_INT));
        return null;
      }
    }
    // ... omitted code ...
  }
Record from the target device
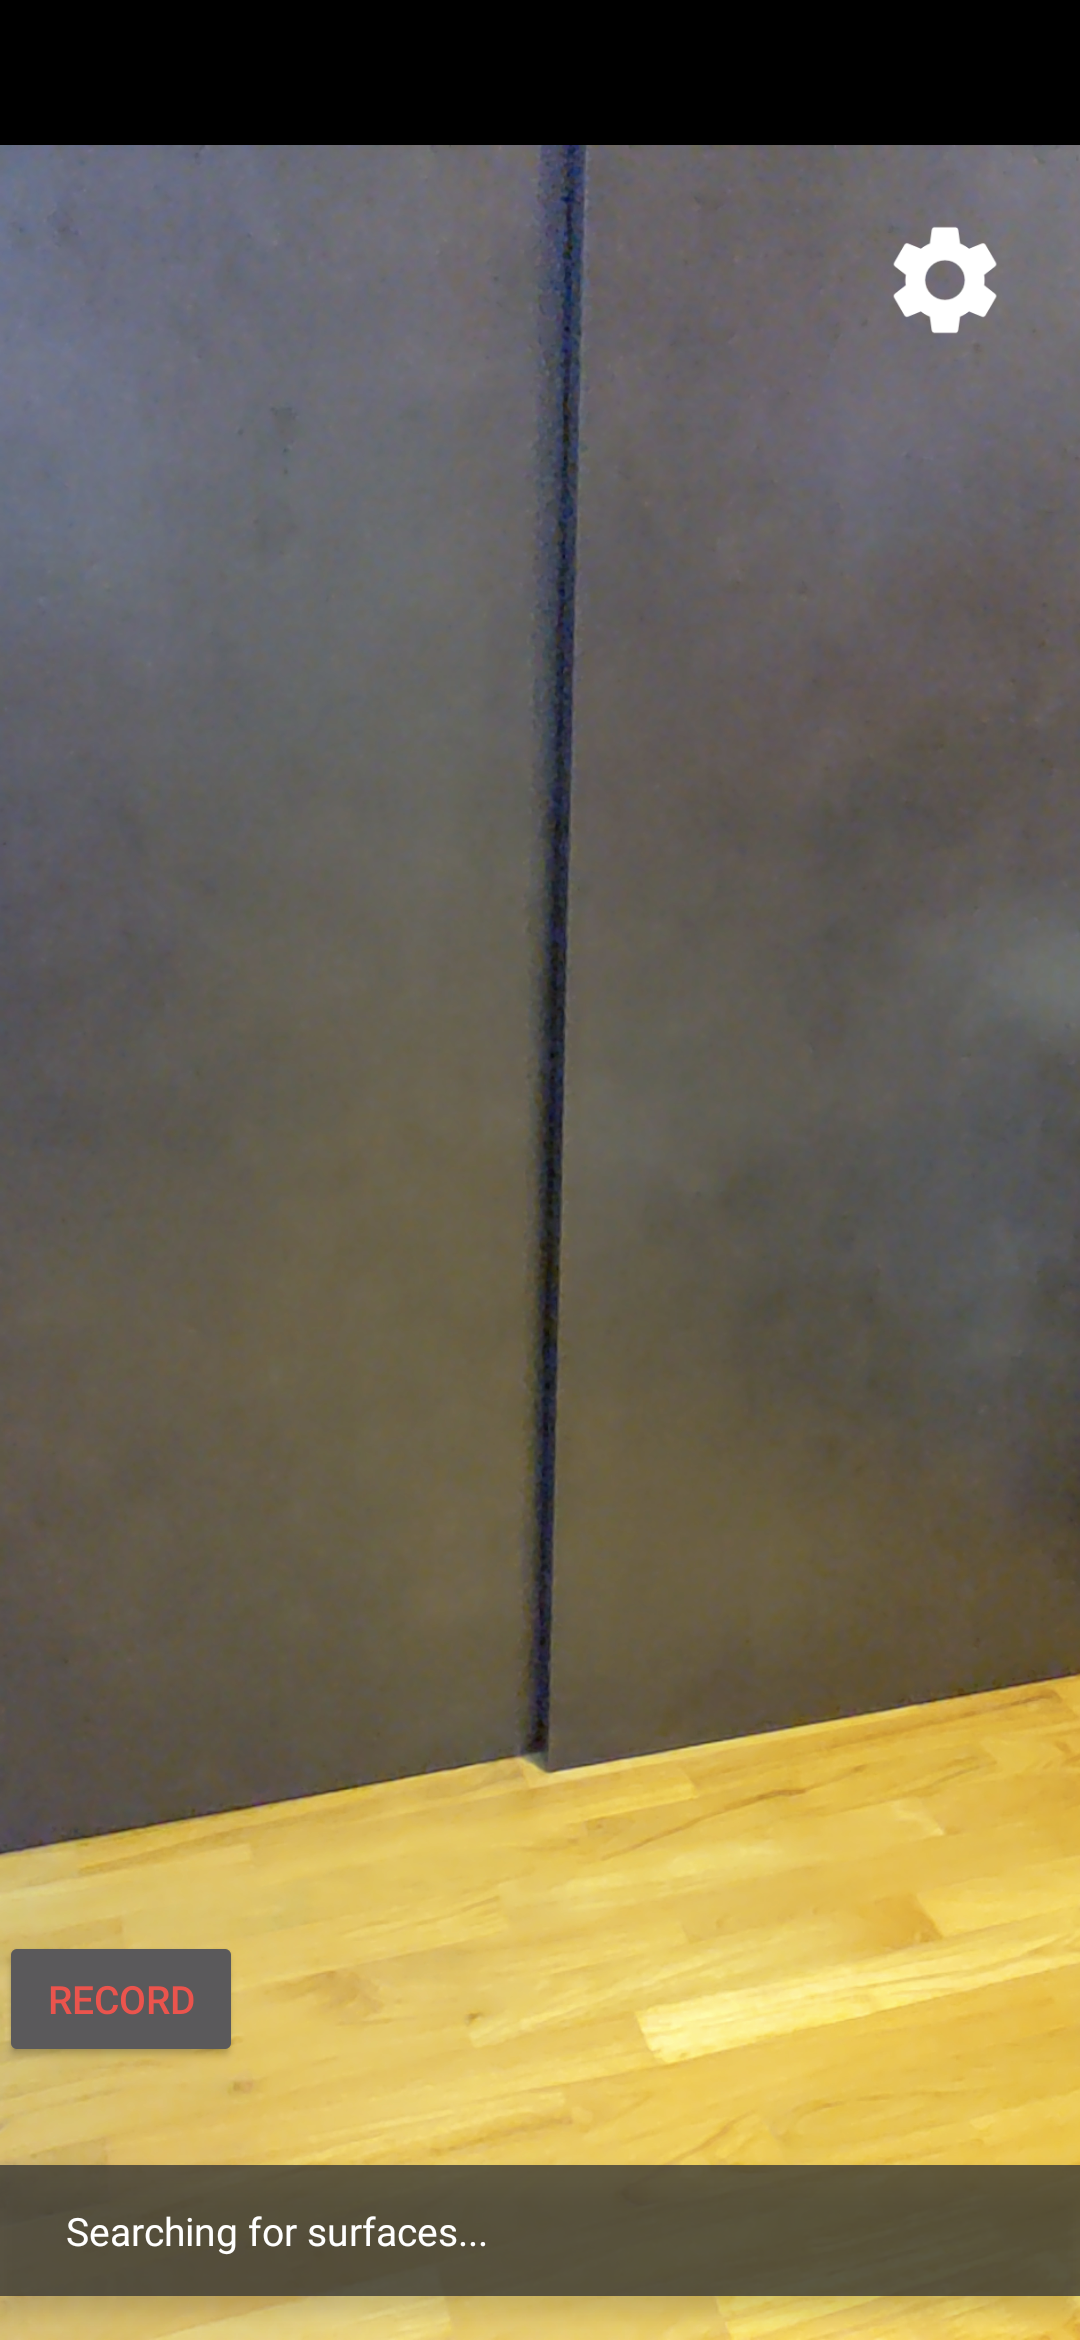
It's time to see what you've built so far. Connect your mobile device to your development machine and click Run in Android Studio.
You should see a red Record button at the bottom left side of the screen. Tapping on it should change the text to Stop. Move your device around to record a session, and click the Stop button when you wish to complete the recording. This should save a new file called arcore-xxxxxx_xxxxxx.mp4 in your device's external storage.
Now, you should have a new arcore-xxxxxx_xxxxxx.mp4 file in your device's external storage. On Pixel 5 devices, the path is /storage/emulated/0/Movies/. The path can be found in the Logcat window after starting a recording.
com.google.ar.core.examples.java.helloar D/HelloArActivity: startRecording at:/storage/emulated/0/Movies/arcore-xxxxxxxx_xxxxxx.mp4
com.google.ar.core.examples.java.helloar D/HelloArActivity: startRecording - RecordingStatus OK
View the recording
You can use a file system app such as Files by Google to view the recording, or copy it to your development machine. Below are the two adb commands to list and fetch files from the Android device:
adb shell ls '$EXTERNAL_STORAGE/Movies/*'to show the files in the Movies directory in external storage on the deviceadb pull /absolute_path_from_previous_adb_shell_ls/arcore-xxxxxxxx_xxxxxx.mp4to copy the file from the device to the development machine
This is an example output after using these two commands (from macOS):
$ adb shell ls '$EXTERNAL_STORAGE/Movies/*'
/sdcard/Movies/arcore-xxxxxxxx_xxxxxx.mp4


$ adb pull /sdcard/Movies/arcore-xxxxxxxx_xxxxxx.mp4
/sdcard/Movies/arcore-xxxxxxxx_xxxxxx.mp4: ... pulled
What you have done in this step
- Added a button to start and stop recording
- Implemented functions to start and stop recording
- Tested the app on device
- Copied the recorded MP4 to your machine and verified it
Next, you will play back an AR session from an MP4 file.
4. Playback an ARCore session from an MP4 file
You now have a Record button and some MP4 files containing recorded sessions. Now, you will play them back using the ARCore Playback API.
Add UI for Playback button
Before you implement playback, add a button on the UI so that the user can inform ARCore when it should begin and stop playing back the session.
In the Project panel, open the app/res/layout/activity_main.xml file.
In activity_main.xml, add below code before the closing tag to create the new Playback button and set its event handler to a method called onClickPlayback(). This button will be similar to the Record button, and will display at the right side of the screen.
  <!--
    Add a new "Playback" button with those attributes:
        text is "Playback",
        onClick event handler is "onClickPlayback",
        text color is "green".
  -->
  <Button
      android:id="@+id/playback_button"
      android:layout_width="wrap_content"
      android:layout_height="wrap_content"
      android:layout_alignEnd="@id/surfaceview"
      android:layout_alignBottom="@id/surfaceview"
      android:layout_marginBottom="100dp"
      android:onClick="onClickPlayback"
      android:text="Playback"
      android:textColor="@android:color/holo_green_light" />
Update Buttons during Playback
The app now has a new state called Playingback. Update the AppState enum and all existing functions that take appState as an argument to handle this.
Add Playingback to the AppState enum in HelloArActivity.java:
  public enum AppState {
    Idle,
    Recording,
    Playingback // New enum value.
  }
If the Record button is still on screen during playback, the user may click it by accident. To avoid this, hide the Record button during Playback. This way you don't need to handle the for Playingback state in onClickRecord().
Modify the updateRecordButton() function in HelloArActivity.java to hide the Record button when the app is in the Playingback state.
  // Update the "Record" button based on app's internal state.
  private void updateRecordButton() {
    View buttonView = findViewById(R.id.record_button);
    Button button = (Button)buttonView;

    switch (appState) {

      // The app is neither recording nor playing back. The "Record" button is visible.
      case Idle:
        button.setText("Record");
        button.setVisibility(View.VISIBLE);
        break;

      // While recording, the "Record" button is visible and says "Stop".
      case Recording:
        button.setText("Stop");
        button.setVisibility(View.VISIBLE);
        break;

      // During playback, the "Record" button is not visible.
      case Playingback:
        button.setVisibility(View.INVISIBLE);
        break;
    }
  }
Similarly, hide the Playback button when the user is recording a session, and change it to say "Stop" when the user is actively playing back a session. This way, they can stop a playback without having to wait for it to complete on its own.
Add an updatePlaybackButton() function in HelloArActivity.java:
  // Update the "Playback" button based on app's internal state.
  private void updatePlaybackButton() {
    View buttonView = findViewById(R.id.playback_button);
    Button button = (Button)buttonView;

    switch (appState) {

      // The app is neither recording nor playing back. The "Playback" button is visible.
      case Idle:
        button.setText("Playback");
        button.setVisibility(View.VISIBLE);
        break;

      // While playing back, the "Playback" button is visible and says "Stop".
      case Playingback:
        button.setText("Stop");
        button.setVisibility(View.VISIBLE);
        break;

      // During recording, the "Playback" button is not visible.
      case Recording:
        button.setVisibility(View.INVISIBLE);
        break;
    }
  }
At last, update onClickRecord() to call updatePlaybackButton(). Add the following line to HelloArActivity.java:
  public void onClickRecord(View view) {
    // ... omitted code ...
    updatePlaybackButton(); // Add this line to the end of the function.
  }
Select a file with the Playback button
When tapped, the Playback button should allow the user to select a file to play back. On Android, file selection is handled in the system file picker in another Activity. This is through Storage Access Framework (SAF). Once the user selects a file, the app receives a callback called onActivityResult(). You will start the actual playback inside this callback function.
In HelloArActivity.java, create an onClickPlayback() function to do the file selection and stop playing back.
  // Handle the click event of the "Playback" button.
  public void onClickPlayback(View view) {
    Log.d(TAG, "onClickPlayback");

    switch (appState) {

      // If the app is not playing back, open the file picker.
      case Idle: {
        boolean hasStarted = selectFileToPlayback();
        Log.d(TAG, String.format("onClickPlayback start: selectFileToPlayback %b", hasStarted));
        break;
      }

      // If the app is playing back, stop playing back.
      case Playingback: {
        boolean hasStopped = stopPlayingback();
        Log.d(TAG, String.format("onClickPlayback stop: hasStopped %b", hasStopped));
        break;
      }

      default:
        // Recording - do nothing.
        break;
    }

    // Update the UI for the "Record" and "Playback" buttons.
    updateRecordButton();
    updatePlaybackButton();
  }
In HelloArActivity.java, create a selectFileToPlayback() function that selects a file from the device. To select a file from Android File System, use an ACTION_OPEN_DOCUMENT Intent.
// Add imports to the beginning of the file.
import android.content.Intent;
import android.provider.DocumentsContract;

  private boolean selectFileToPlayback() {
    // Start file selection from Movies directory.
    // Android 10 and above requires VOLUME_EXTERNAL_PRIMARY to write to MediaStore.
    Uri videoCollection;
    if (Build.VERSION.SDK_INT >= Build.VERSION_CODES.Q) {
      videoCollection = MediaStore.Video.Media.getContentUri(
          MediaStore.VOLUME_EXTERNAL_PRIMARY);
    } else {
      videoCollection = MediaStore.Video.Media.EXTERNAL_CONTENT_URI;
    }

    // Create an Intent to select a file.
    Intent intent = new Intent(Intent.ACTION_OPEN_DOCUMENT);

    // Add file filters such as the MIME type, the default directory and the file category.
    intent.setType(MP4_VIDEO_MIME_TYPE); // Only select *.mp4 files
    intent.putExtra(DocumentsContract.EXTRA_INITIAL_URI, videoCollection); // Set default directory
    intent.addCategory(Intent.CATEGORY_OPENABLE); // Must be files that can be opened

    this.startActivityForResult(intent, REQUEST_MP4_SELECTOR);

    return true;
  }
REQUEST_MP4_SELECTOR is a constant to identify this request. You can define it using any placeholder value inside HelloArActivity in HelloArActivity.java:
private int REQUEST_MP4_SELECTOR = 1;
Override the onActivityResult() function in HelloArActivity.java to handle the callback from the file picker.
  // Begin playback once the user has selected the file.
  @Override
  protected void onActivityResult(int requestCode, int resultCode, Intent data) {
    // Check request status. Log an error if the selection fails.
    if (resultCode != android.app.Activity.RESULT_OK || requestCode != REQUEST_MP4_SELECTOR) {
      Log.e(TAG, "onActivityResult select file failed");
      return;
    }

    Uri mp4FileUri = data.getData();
    Log.d(TAG, String.format("onActivityResult result is %s", mp4FileUri));

    // Begin playback.
    startPlayingback(mp4FileUri);
  }
Enable the app to start playback
An ARCore session requires three API calls to playback an MP4 file:
session.pause()session.setPlaybackDataset()session.resume()
In HelloArActivity.java, create the startPlayingback() function.
// Add imports to the beginning of the file.
import com.google.ar.core.PlaybackStatus;
import com.google.ar.core.exceptions.PlaybackFailedException;

  private boolean startPlayingback(Uri mp4FileUri) {
    if (mp4FileUri == null)
      return false;

    Log.d(TAG, "startPlayingback at:" + mp4FileUri);

    pauseARCoreSession();

    try {
      session.setPlaybackDatasetUri(mp4FileUri);
    } catch (PlaybackFailedException e) {
      Log.e(TAG, "startPlayingback - setPlaybackDataset failed", e);
    }

    // The session's camera texture name becomes invalid when the
    // ARCore session is set to play back.
    // Workaround: Reset the Texture to start Playback
    // so it doesn't crashes with AR_ERROR_TEXTURE_NOT_SET.
    hasSetTextureNames = false;

    boolean canResume = resumeARCoreSession();
    if (!canResume)
      return false;

    PlaybackStatus playbackStatus = session.getPlaybackStatus();
    Log.d(TAG, String.format("startPlayingback - playbackStatus %s", playbackStatus));


    if (playbackStatus != PlaybackStatus.OK) { // Correctness check
      return false;
    }

    appState = AppState.Playingback;
    updateRecordButton();
    updatePlaybackButton();

    return true;
  }
Enable the app to stop playback
Create a function called stopPlayingback() in HelloArActivity.java to handle the app state changes after:
- The MP4 playback was stopped by the user
- The MP4 playback completed on its own
If the user stopped the playback, the app should return to the same state that it was in when the user first launched it.
  // Stop the current playback, and restore app status to Idle.
  private boolean stopPlayingback() {
    // Correctness check, only stop playing back when the app is playing back.
    if (appState != AppState.Playingback)
      return false;

    pauseARCoreSession();

    // Close the current session and create a new session.
    session.close();
    try {
      session = new Session(this);
    } catch (UnavailableArcoreNotInstalledException
        |UnavailableApkTooOldException
        |UnavailableSdkTooOldException
        |UnavailableDeviceNotCompatibleException e) {
      Log.e(TAG, "Error in return to Idle state. Cannot create new ARCore session", e);
      return false;
    }
    configureSession();

    boolean canResume = resumeARCoreSession();
    if (!canResume)
      return false;

    // A new session will not have a camera texture name.
    // Manually set hasSetTextureNames to false to trigger a reset.
    hasSetTextureNames = false;

    // Reset appState to Idle, and update the "Record" and "Playback" buttons.
    appState = AppState.Idle;
    updateRecordButton();
    updatePlaybackButton();

    return true;
  }
A playback can also naturally stop after the player has reached the end of the MP4 file. When this happens, stopPlayingback() should switch the app's state back to Idle. In onDrawFrame(), check the PlaybackStatus. If it is FINISHED, call the stopPlayingback() function on the UI thread.
  public void onDrawFrame(SampleRender render) {
      // ... omitted code ...

      // Insert before this line:
      // frame = session.update();

      // Check the playback status and return early if playback reaches the end.
      if (appState == AppState.Playingback
          && session.getPlaybackStatus() == PlaybackStatus.FINISHED) {
        this.runOnUiThread(this::stopPlayingback);
        return;
      }

      // ... omitted code ...
  }
Play back from the target device
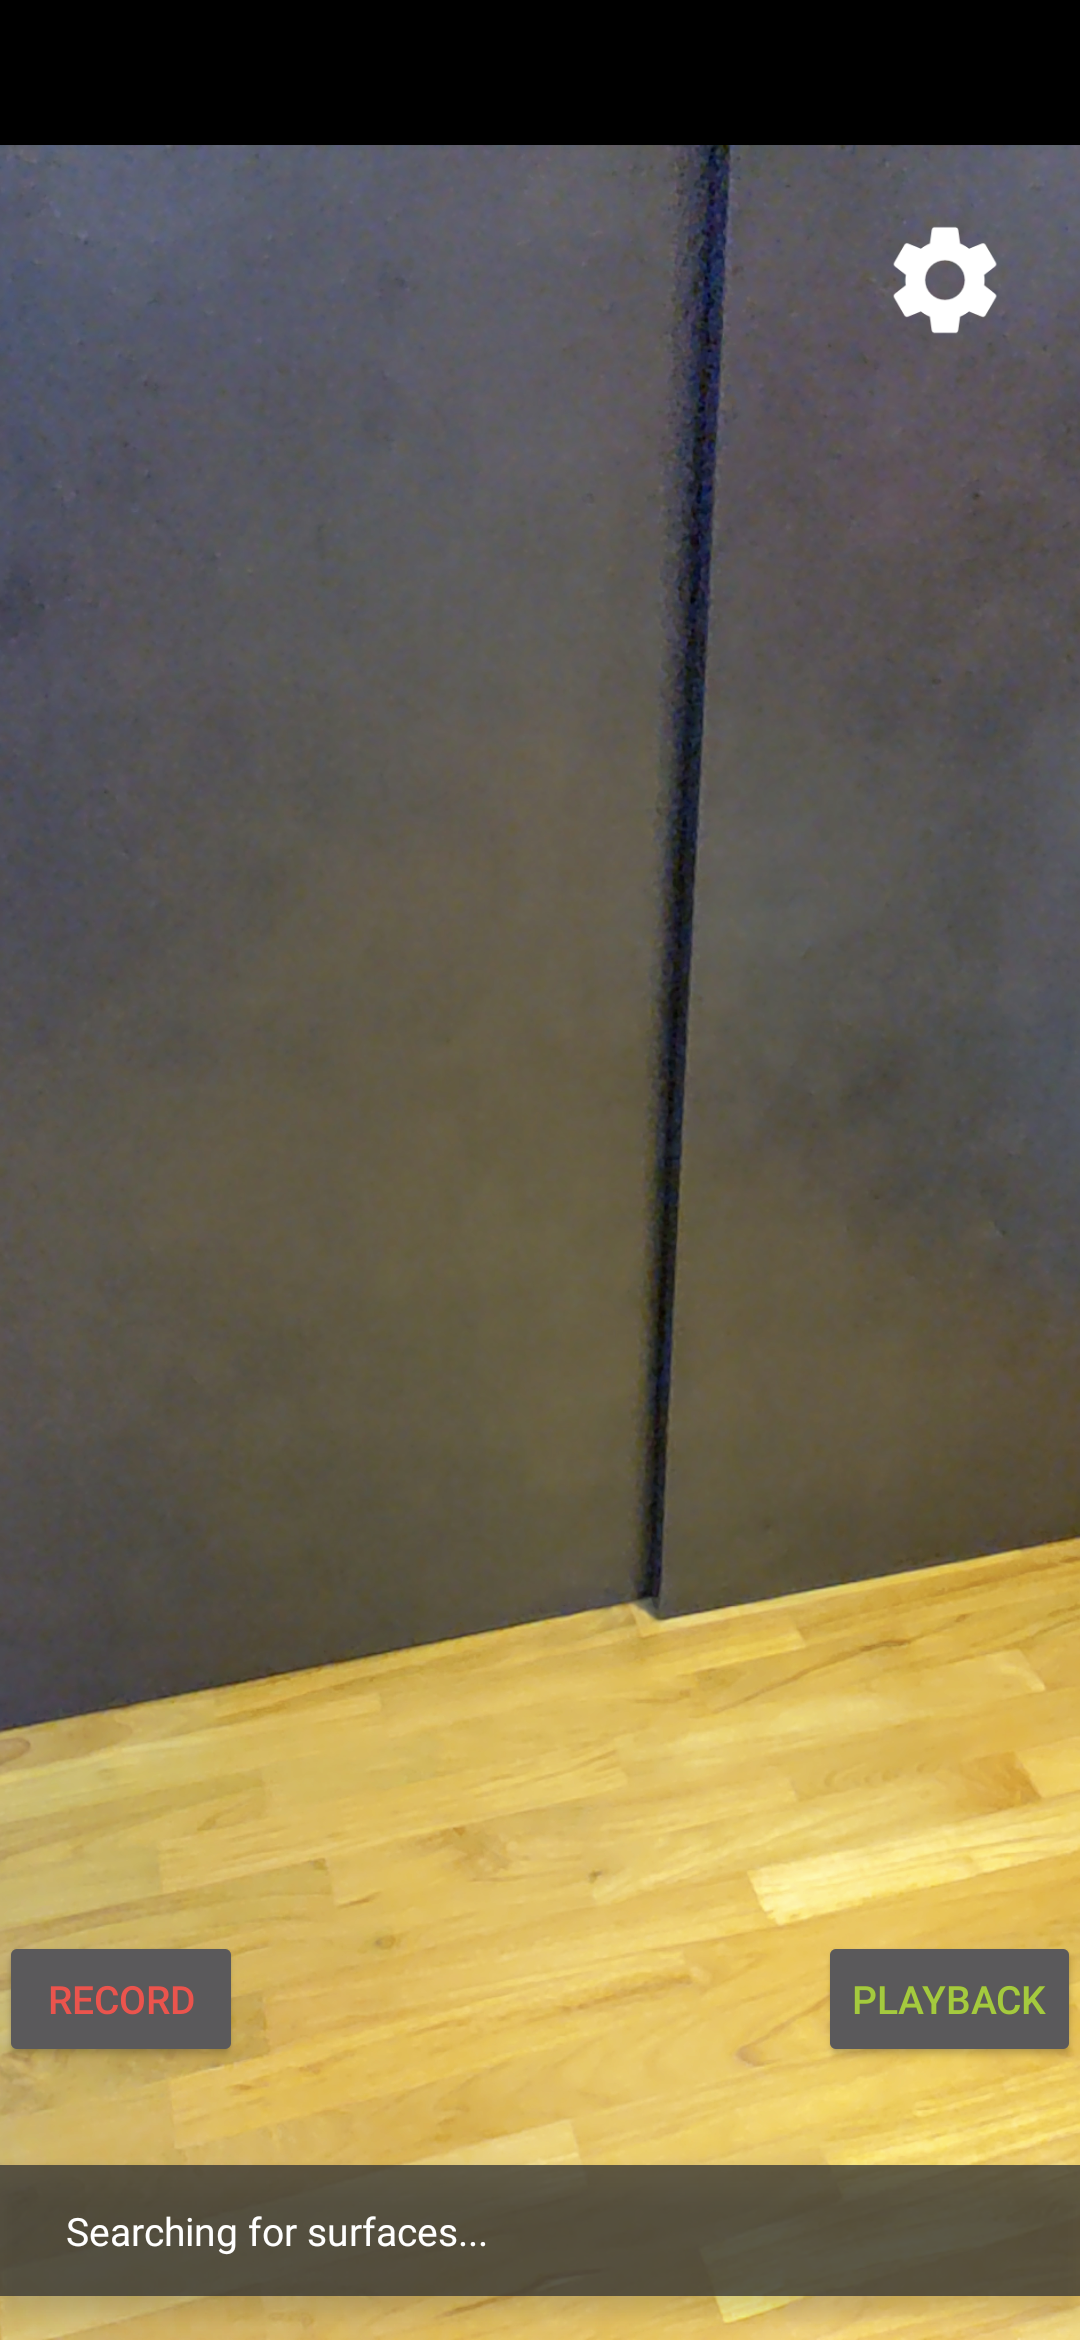
It's time to see what you've built so far. Connect your mobile device to your development machine and click Run in Android Studio.
When the app launches, you should see a screen with a red Record button on the left and a green Playback button on the right.
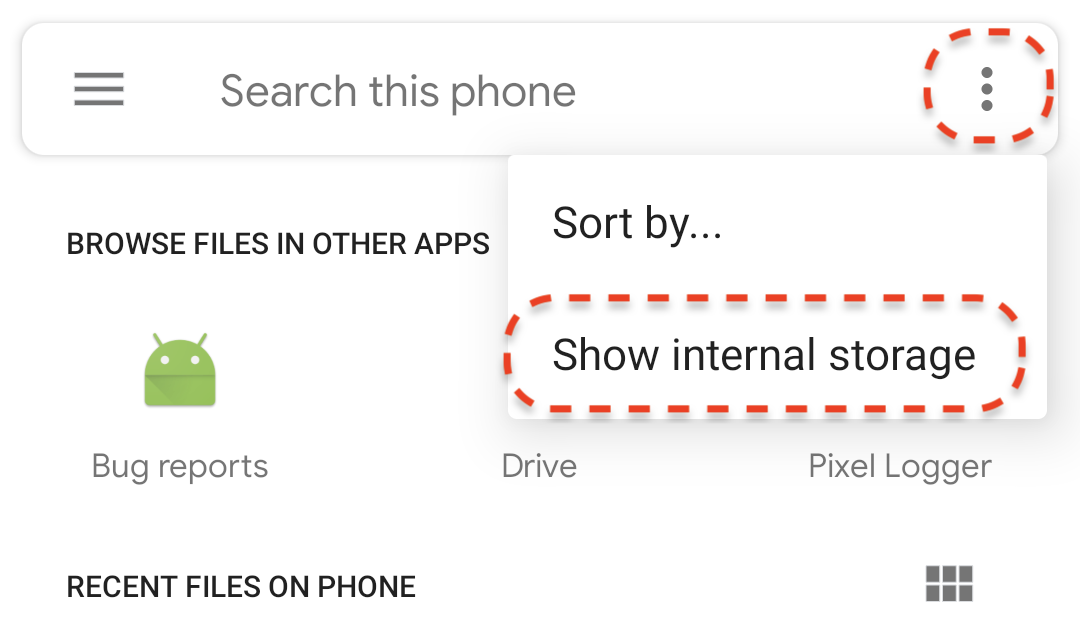
Tap the Playback button and select one of the MP4 files that you just recorded. If you don't see any filenames starting with arcore-, maybe your device is not showing the Movies folder. In this case, navigate to the Phone model > Movies folder using the menu at the top left corner. You may also need to enable Show internal storage option to reveal the phone model folder.
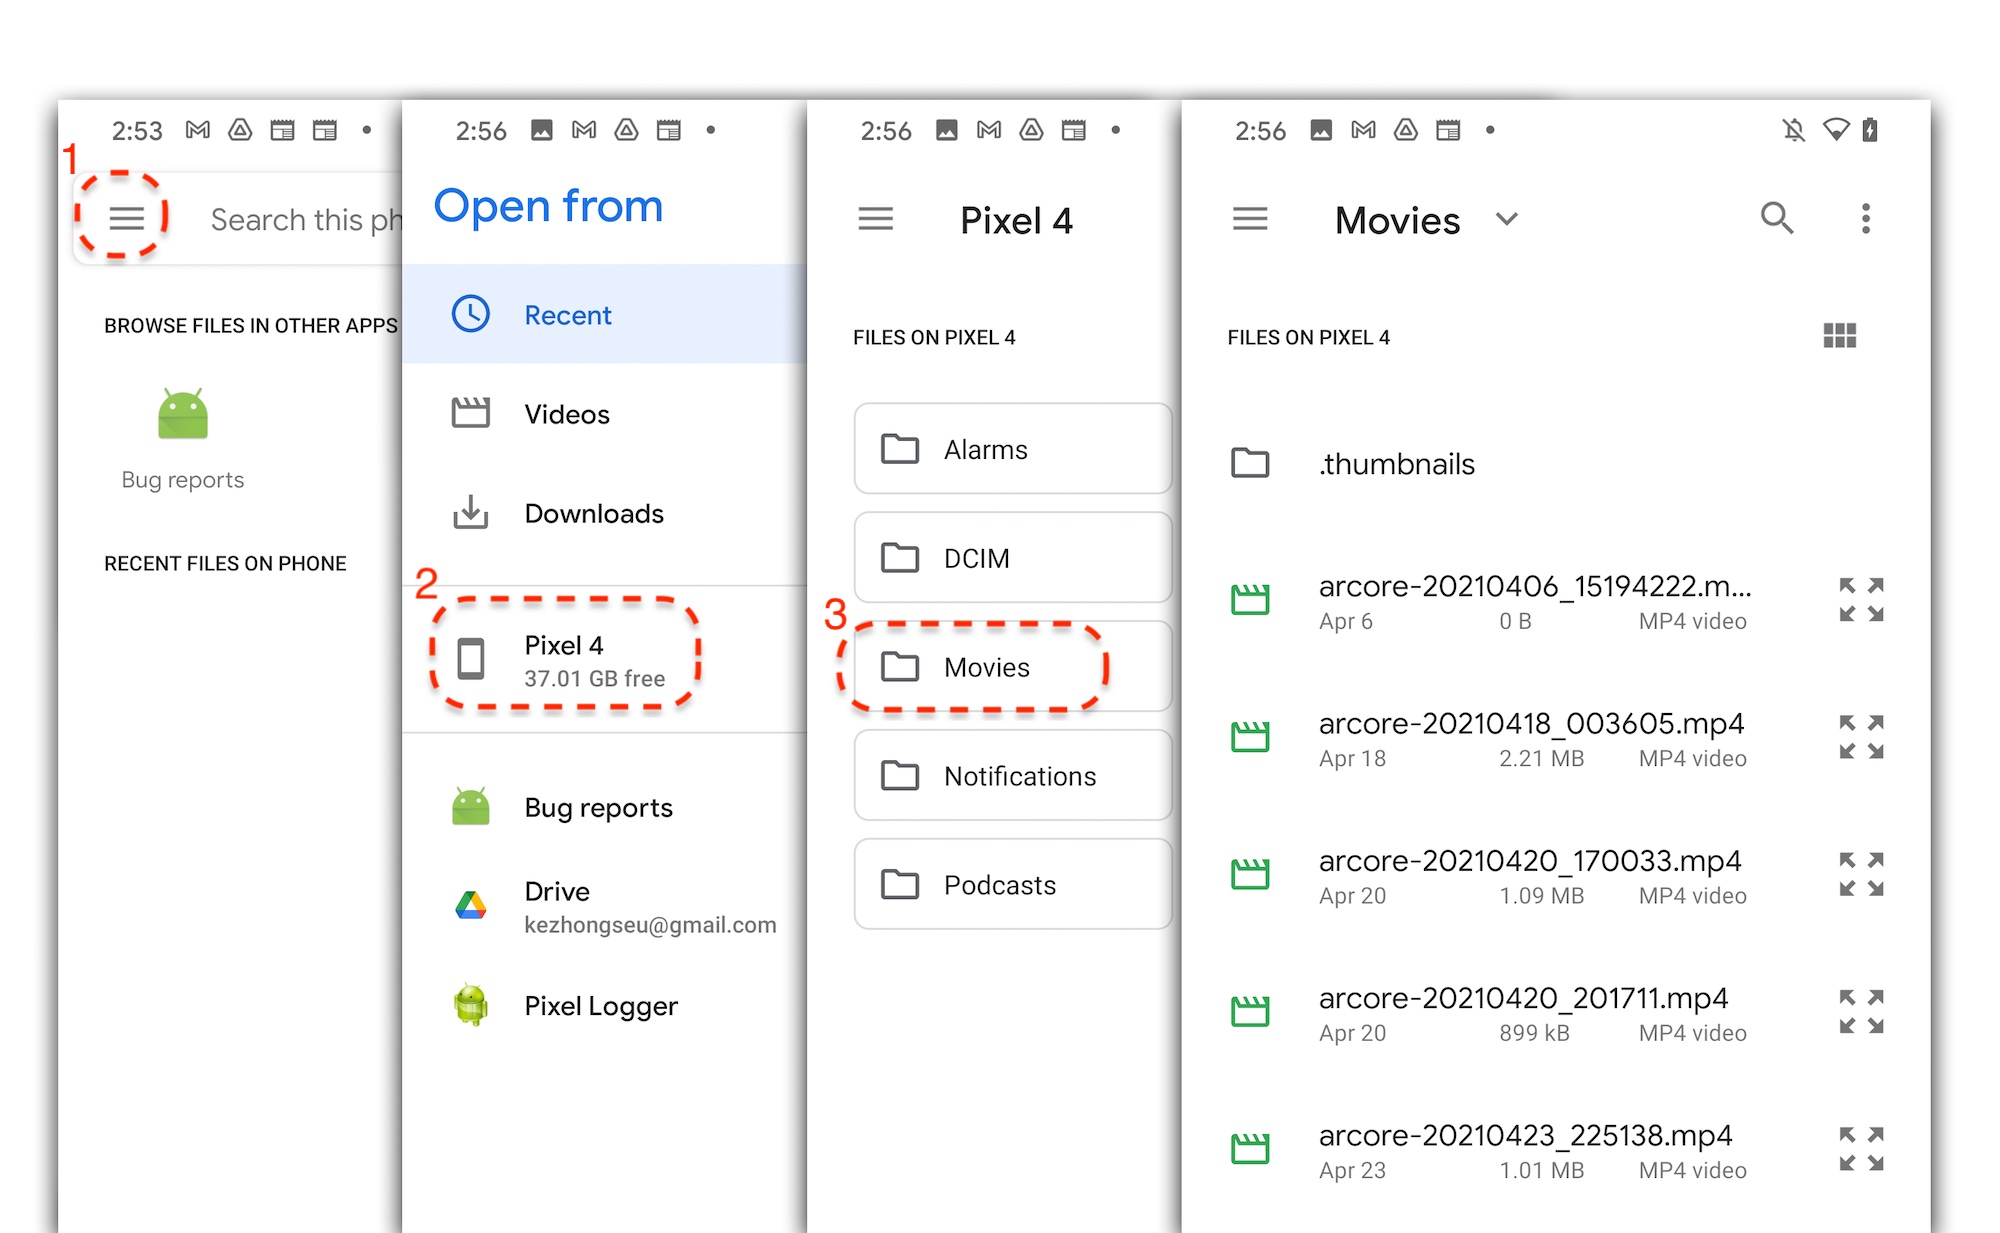
Tap a filename on the screen to select the MP4 file. The app should play back the MP4 file.
A difference between playing back a session and playing back an ordinary video is that you can interact with the recorded session. Tap on a detected plane to place markers on the screen.
What you have done in this step
- Added a button to start and stop playback
- Implemented a function to make the app start and stop recording
- Played back a previously recorded ARCore session on the device
5. Record additional data in the MP4
With ARCore 1.24, it is possible to record additional information in the MP4 file. You can record the Pose of AR object placements, then during the playback, create the AR objects at the same location.
Configure the new track to record
Define a new track with an UUID and a MIME tag in HelloArActivity.java.
// Add imports to the beginning of the file.
import java.util.UUID;
import com.google.ar.core.Track;

  // Inside the HelloArActiity class.
  private static final UUID ANCHOR_TRACK_ID = UUID.fromString("53069eb5-21ef-4946-b71c-6ac4979216a6");;
  private static final String ANCHOR_TRACK_MIME_TYPE = "application/recording-playback-anchor";

  private boolean startRecording() {
    // ... omitted code ...

    // Insert after line:
    //   pauseARCoreSession();

    // Create a new Track, with an ID and MIME tag.
    Track anchorTrack = new Track(session)
        .setId(ANCHOR_TRACK_ID).
        .setMimeType(ANCHOR_TRACK_MIME_TYPE);
    // ... omitted code ...
  }
Update the exiting code to create the RecordingConfig object with a call to addTrack().
  private boolean startRecording() {
    // ... omitted code ...

    // Update the lines below with a call to the addTrack() function:
    //   RecordingConfig recordingConfig = new RecordingConfig(session)
    //    .setMp4DatasetUri(mp4FileUri)
    //    .setAutoStopOnPause(true);

    RecordingConfig recordingConfig = new RecordingConfig(session)
        .setMp4DatasetUri(mp4FileUri)
        .setAutoStopOnPause(true)
        .addTrack(anchorTrack); // add the new track onto the recordingConfig

    // ... omitted code ...
  }
Save anchor pose during recording
Every time the user taps on a detected plane, an AR marker will be placed on an Anchor, whose pose will be updated by ARCore.
Record the pose of an Anchor at the frame it is created, if you are still recording the ARCore session.
Modify the handleTap() function in HelloArActivity.java.
// Add imports to the beginning of the file.
import com.google.ar.core.Pose;
import java.nio.FloatBuffer;

  private void handleTap(Frame frame, Camera camera) {
          // ... omitted code ...

          // Insert after line:
          // anchors.add(hit.createAnchor());

          // If the app is recording a session,
          // save the new Anchor pose (relative to the camera)
          // into the ANCHOR_TRACK_ID track.
          if (appState == AppState.Recording) {
            // Get the pose relative to the camera pose.
            Pose cameraRelativePose = camera.getPose().inverse().compose(hit.getHitPose());
            float[] translation = cameraRelativePose.getTranslation();
            float[] quaternion = cameraRelativePose.getRotationQuaternion();
            ByteBuffer payload = ByteBuffer.allocate(4 * (translation.length + quaternion.length));
            FloatBuffer floatBuffer = payload.asFloatBuffer();
            floatBuffer.put(translation);
            floatBuffer.put(quaternion);

            try {
              frame.recordTrackData(ANCHOR_TRACK_ID, payload);
            } catch (IllegalStateException e) {
              Log.e(TAG, "Error in recording anchor into external data track.", e);
            }
          }
          // ... omitted code ...
  }
The reason why we persist the camera relative Pose rather than the world relative Pose is because the world origin of a recording session and the world origin of a playback session are not the same. The world origin of a recording session starts the first time the session is resumed, when Session.resume() is first called. The world origin of a playback session starts when the first frame is recorded, when Session.resume() is first called after Session.startRecording().
Playback anchor creation
Re-creating an Anchor is straightforward. Add a function called createRecordedAnchors() in HelloArActivity.java.
// Add imports to the beginning of the file.
import com.google.ar.core.TrackData;

  // Extract poses from the ANCHOR_TRACK_ID track, and create new anchors.
  private void createRecordedAnchors(Frame frame, Camera camera) {
    // Get all `ANCHOR_TRACK_ID` TrackData from the frame.
    for (TrackData trackData : frame.getUpdatedTrackData(ANCHOR_TRACK_ID)) {
      ByteBuffer payload = trackData.getData();
      FloatBuffer floatBuffer = payload.asFloatBuffer();

      // Extract translation and quaternion from TrackData payload.
      float[] translation = new float[3];
      float[] quaternion = new float[4];

      floatBuffer.get(translation);
      floatBuffer.get(quaternion);

      // Transform the recorded anchor pose
      // from the camera coordinate
      // into world coordinates.
      Pose worldPose = camera.getPose().compose(new Pose(translation, quaternion));

      // Re-create an anchor at the recorded pose.
      Anchor recordedAnchor = session.createAnchor(worldPose);

      // Add the new anchor into the list of anchors so that
      // the AR marker can be displayed on top.
      anchors.add(recordedAnchor);
    }
  }
Call createRecordedAnchors() in the onDrawFrame() function in HelloArActivity.java.
  public void onDrawFrame(SampleRender render) {
    // ... omitted code ...

    // Insert after this line:
    // handleTap(frame, camera);

    // If the app is currently playing back a session, create recorded anchors.
    if (appState == AppState.Playingback) {
      createRecordedAnchors(frame, camera);
    }
    // ... omitted code ...
  }
Test on the target device
Connect your mobile device to your development machine and click Run in Android Studio.
First, tap the Record button to record a session. During recording, tap on detected planes to place a few AR markers.
After recording stops, tap the Playback button and select the file you just recorded. The playback should begin. Notice how your previous AR marker placements appear just as you were tapping on the app.
That's all the coding you'll have to do for this codelab.
6. Congratulations
Congratulations, you have reached the end of this codelab! Let's look back at what you've done in this codelab:
- Built and run the ARCore Hello AR Java sample.
- Added a Record button to the app to save an AR session into an MP4 file
- Added a Playback button to the app to play back an AR session from an MP4 file
- Added a new feature to save anchors created by the user in the MP4 for play back