
1. 소개
AR 환경을 MP4 파일로 저장하고 MP4 파일에서 재생하는 것은 앱 개발자와 최종 사용자 모두에게 유용합니다.
책상에 앉아 새로운 기능 디버그 및 테스트
ARCore Record & Playback API는 개발자들에게 가장 유용할 것입니다. 테스트 기기에서 앱을 빌드하고 실행하여 USB 케이블 연결을 해제하고 사소한 코드 변경을 테스트하기 위해 돌아다녀야만 하는 시절은 이제 지났습니다. 이제 휴대전화 이동이 예상되는 테스트 환경에서 MP4를 녹화하기만 하면 책상에 앉아 바로 테스트할 수 있습니다.
여러 기기에서 녹화 및 재생
Recording and Playback API를 사용하면 한 사용자가 한 기기를 사용하여 세션을 녹화하고 다른 사용자는 다른 기기에서 동일한 세션을 재생할 수 있습니다. 다른 사용자와 AR 환경을 공유할 수 있습니다. 방법은 다양합니다.
ARCore 앱을 처음 만드나요?
이 Codelab을 어떻게 사용할 예정인가요?
빌드할 항목
이 Codelab에서는 Recording & Playback API를 사용하여 AR 경험을 MP4 파일로 녹화하고 동일한 파일에서 환경을 재생하는 앱을 만듭니다. 학습 내용
- Recording API를 사용하여 AR 세션을 MP4 파일로 저장하는 방법
- Playback API를 사용하여 MP4 파일에서 AR 세션을 재생하는 방법
- 한 기기에서 AR 세션을 녹화하고 다른 기기에서 재생하는 방법
필요한 항목
이 Codelab에서는 ARCore Android SDK로 빌드된 Hello AR 자바 앱을 수정합니다. 따라하려면 특정 하드웨어와 소프트웨어가 필요합니다.
하드웨어 요구사항
- 개발자 옵션이 사용 설정된 ARCore 지원 기기가 필요합니다. USB 디버깅을 사용 설정하여 USB 케이블을 통해 개발 머신에 연결해야 합니다.
- Android 스튜디오를 실행하는 개발 머신
- 인터넷 액세스: 개발 중에 라이브러리를 다운로드할 때 필요합니다.
소프트웨어 요구사항
- 개발 ARCore 기기에 Google Play AR 서비스(ARCore) 1.24 이상이 설치되어야 합니다. 이 서비스는 일반적으로 Play 스토어를 통해 기기에 자동으로 설치됩니다. ARCore 지원 기기에 수동으로 설치할 수도 있습니다.
- 개발 머신에 Android 스튜디오(v3.1 이상)이 설치되어야 합니다.
최상의 결과를 얻으려면 ARCore에 대한 기본적인 이해도 갖추어야 합니다.
2. 개발 환경 설정
개발 환경을 설정하여 시작하세요.
ARCore Android SDK 다운로드
ARCore Android SDK 압축 해제
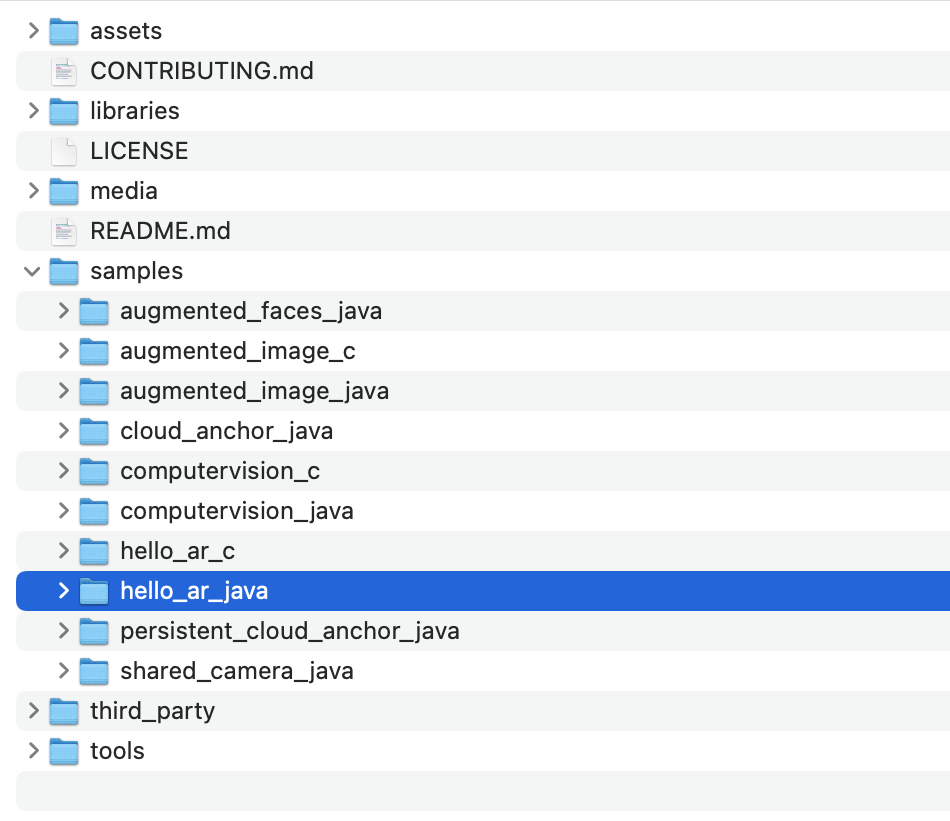
Android SDK를 컴퓨터에 다운로드한 후 파일의 압축을 풀고 arcore-android-sdk-1.24/samples/hello_ar_java 디렉터리로 이동합니다. 작업할 앱의 루트 디렉터리입니다.
Hello AR 자바를 Android 스튜디오에 로드
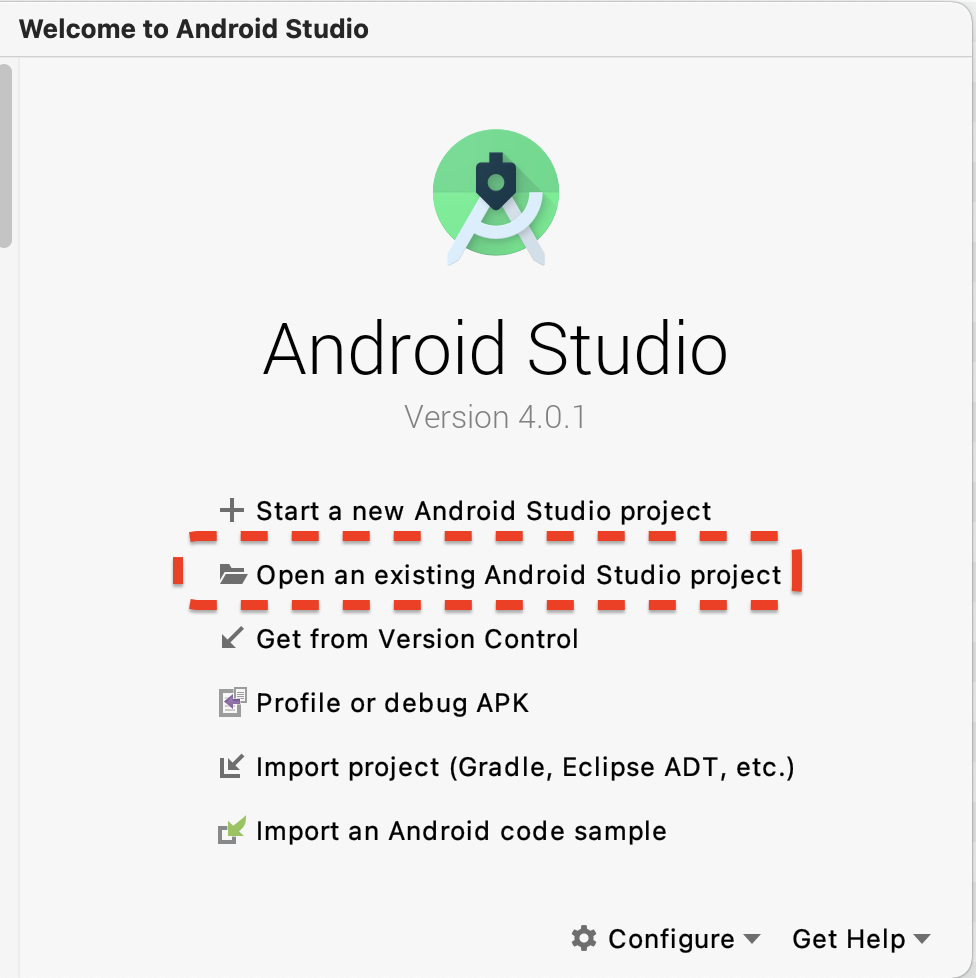
Android 스튜디오를 시작하고 Open an existing Android Studio project를 클릭합니다.
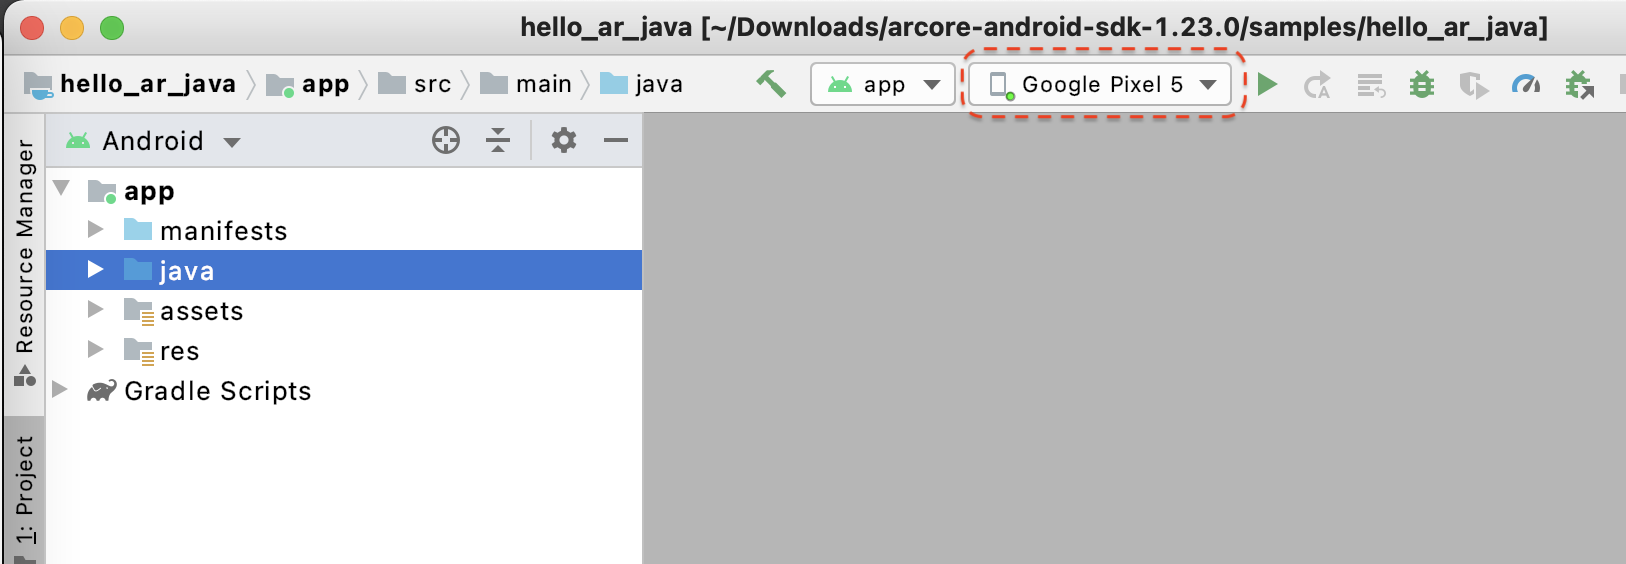
표시되는 대화상자 창에서 arcore-android-sdk-1.24/samples/hello_ar_java를 선택하고 Open을 클릭합니다.
Android 스튜디오가 프로젝트 동기화를 마칠 때까지 기다립니다. 구성요소가 누락된 경우 프로젝트 가져오기가 실패하고 오류 메시지가 표시될 수 있습니다. 계속하기 전에 문제를 해결하세요.
샘플 앱 실행
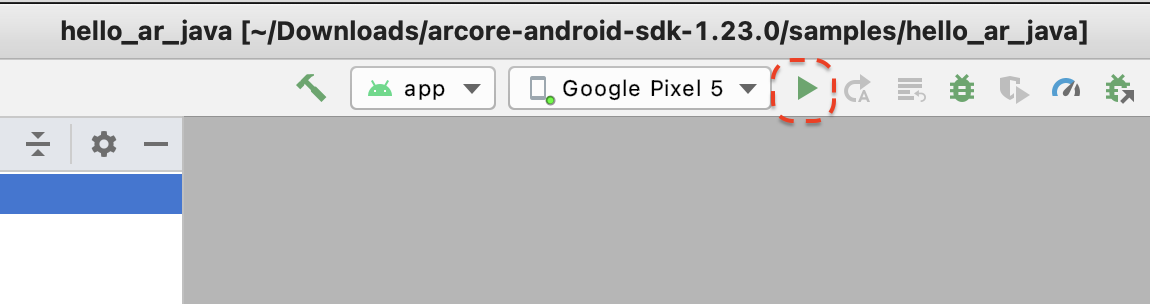
- ARCore 지원 기기를 개발 머신에 연결합니다.
- 기기가 제대로 인식되면 Android 스튜디오에 기기 이름이 표시됩니다.
- 실행 버튼을 클릭하거나 Run > Run 'app'을 선택하여 Android 스튜디오가 기기에 앱을 설치하고 실행하도록 합니다.
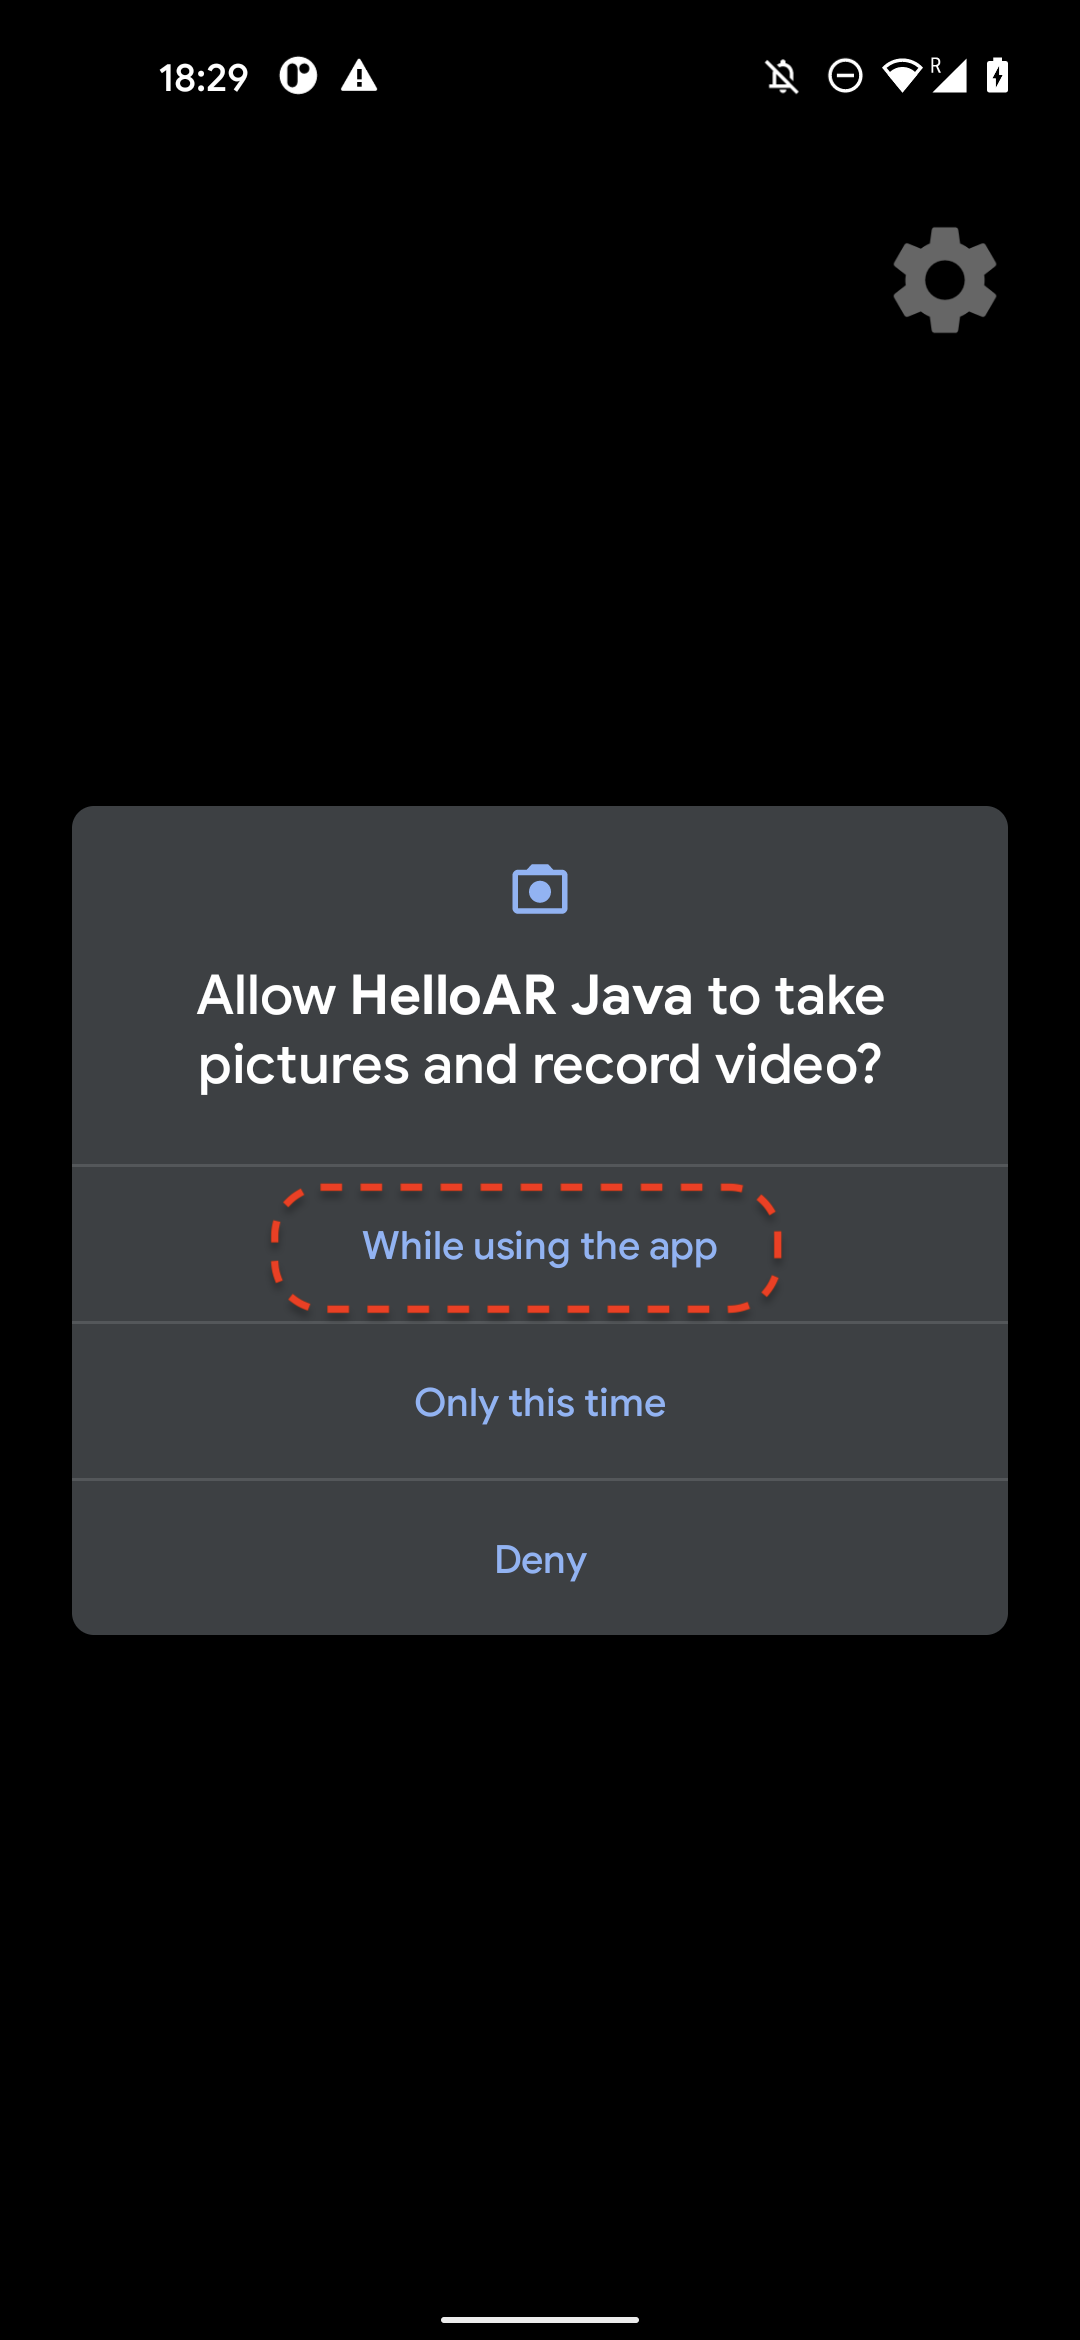
- 사진 촬영 및 동영상 녹화 권한을 요청하는 메시지가 표시됩니다. While using this app을 선택하여 앱에 카메라 권한을 부여합니다. 그러면 기기 화면에 실제 환경이 표시됩니다.
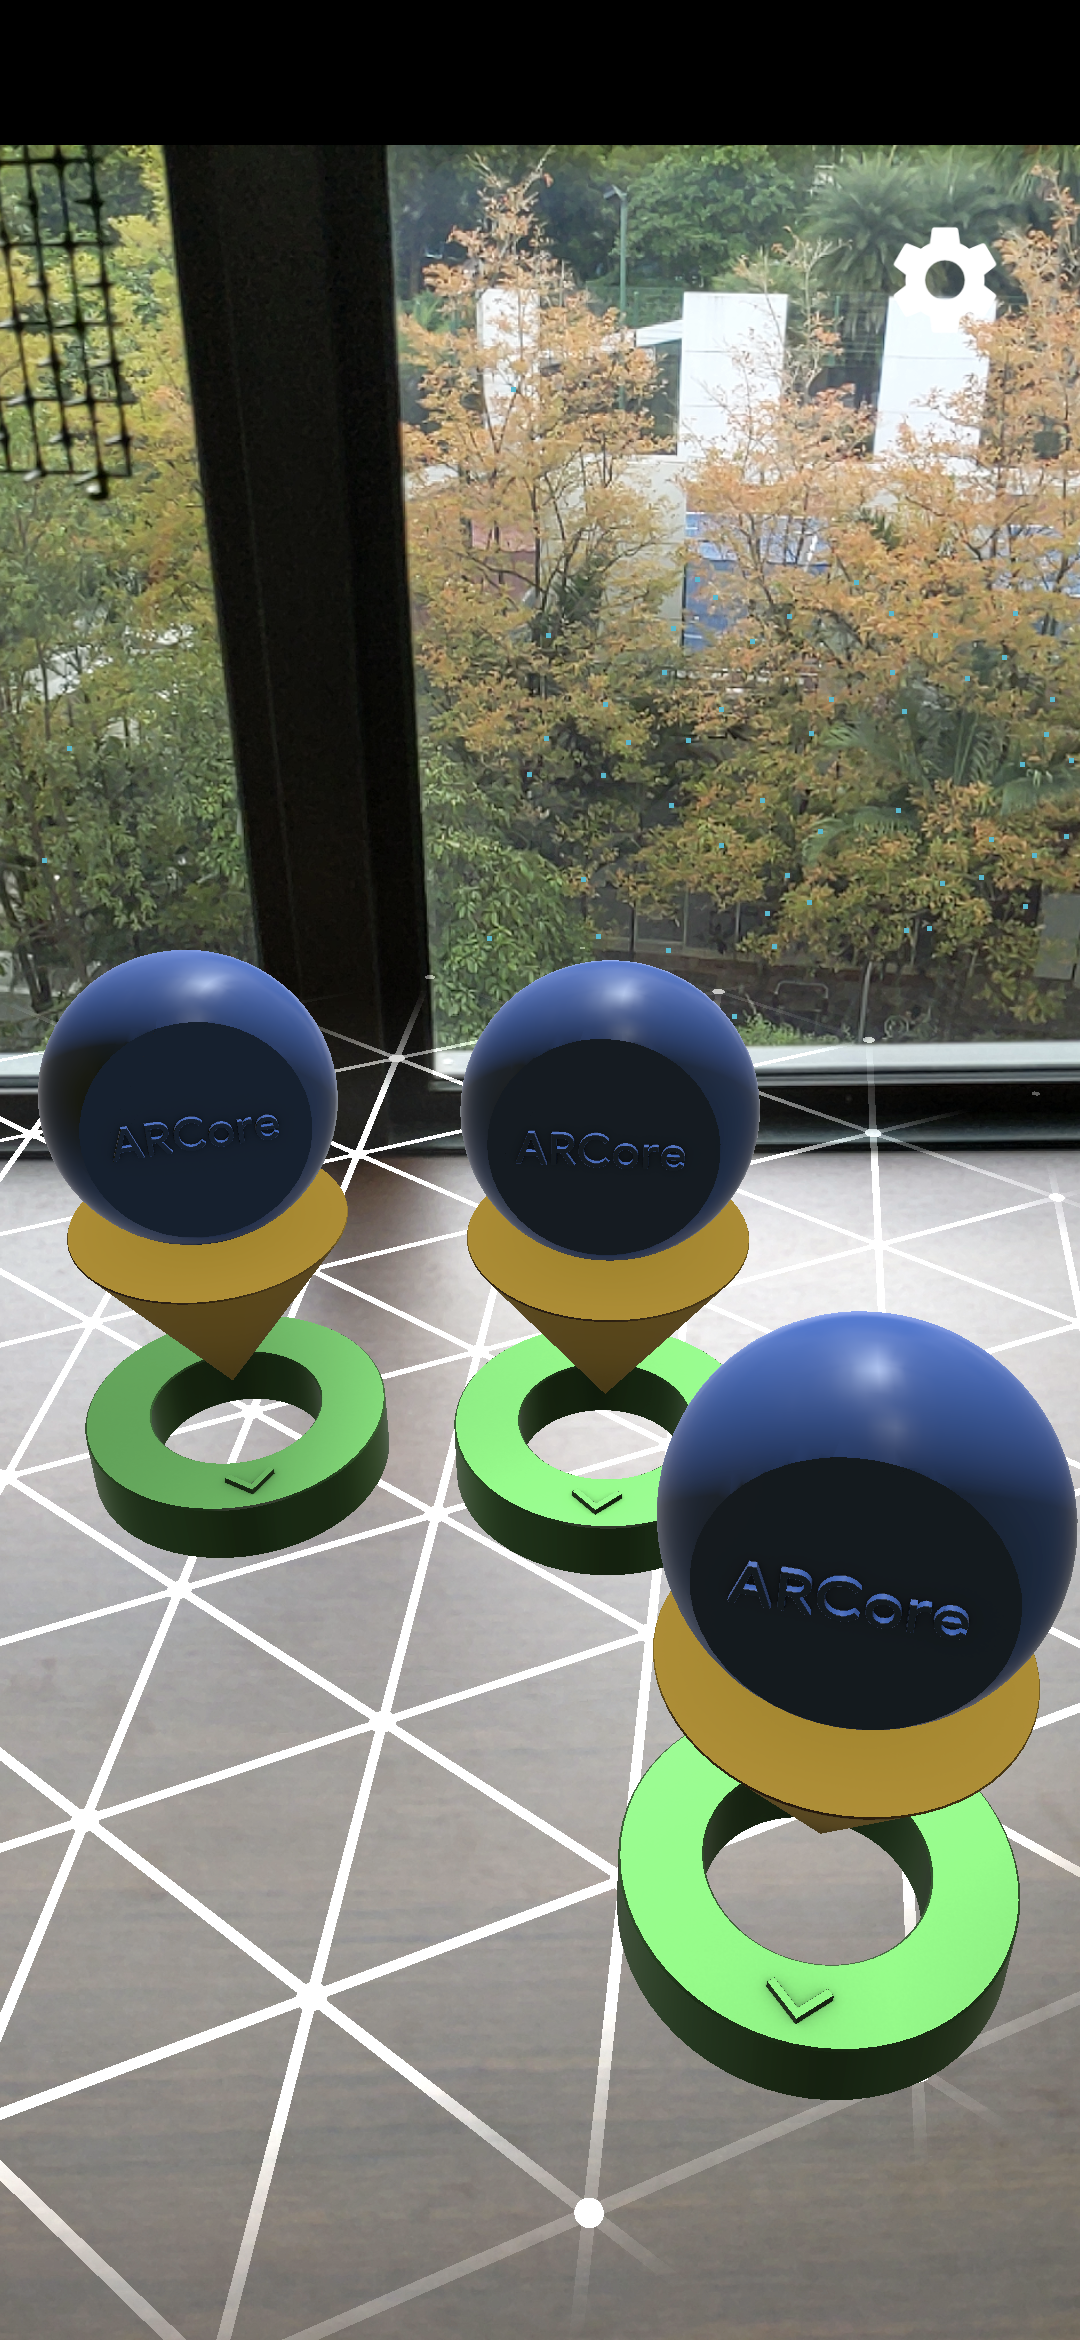
- 기기를 수평으로 움직여 평면을 스캔합니다.
- 앱에서 평면을 감지하면 흰색 그리드가 표시됩니다. 평면에 마커를 배치하려면 탭하세요.
이 단계에서 수행한 작업
- Hello AR 자바 프로젝트 설정
- ARCore 지원 기기에서 샘플 앱 빌드 및 실행
다음으로 MP4 파일에 AR 세션을 녹화합니다.
3. MP4 파일에 ARCore 세션 녹화
이 단계에서 녹화 기능을 추가할 것입니다. 다음으로 구성됩니다.
- 녹화를 시작하거나 중지하는 버튼
- 저장소 함수를 사용하여 기기에 MP4 파일 저장
- ARCore 세션 녹화를 시작하거나 중지하는 호출
Record 버튼 UI 추가
녹화를 구현하기 전에 사용자가 ARCore에 녹화를 시작하거나 중지할 시점을 알릴 수 있도록 UI에 버튼을 추가합니다.
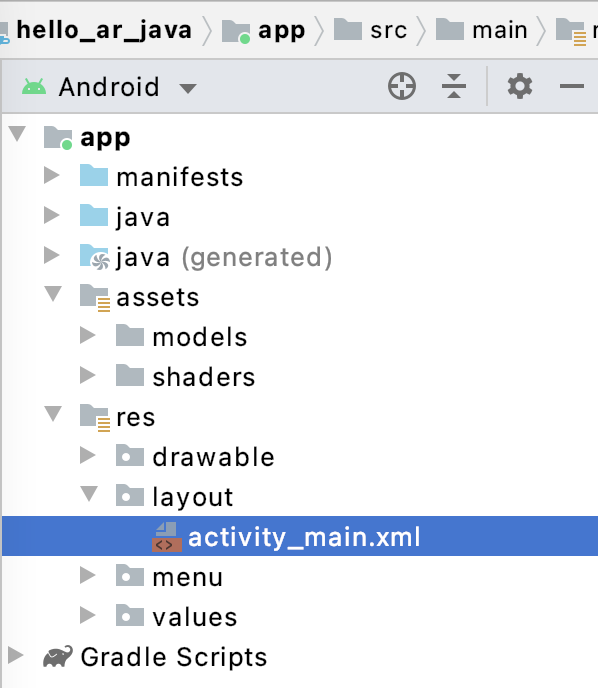
프로젝트 패널에서 app/res/layout/activity_main.xml 파일을 엽니다.
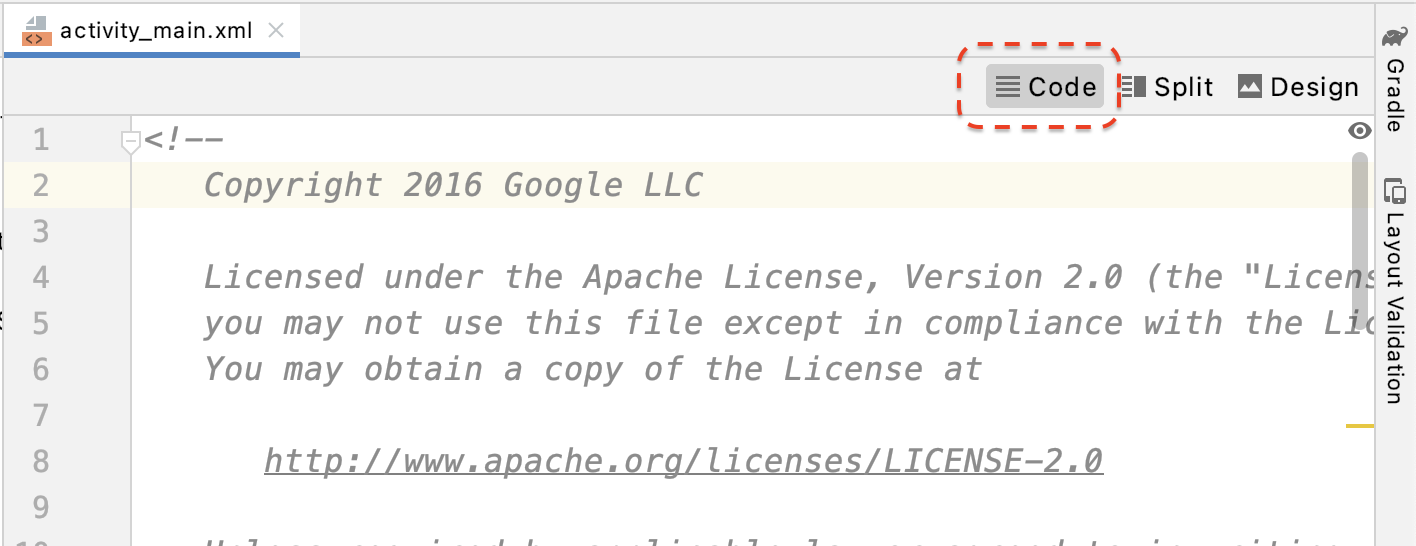
Android 스튜디오는 기본적으로 app/res/layout/activity_main.xml 파일을 연 후 디자인 보기를 사용합니다. 코드 보기로 전환하려면 탭의 오른쪽 상단에 있는 Code 버튼을 클릭합니다.
activity_main.xml에서 닫는 태그 앞에 다음 코드를 추가하여 새 Record 버튼을 만들고 이벤트 핸들러를 onClickRecord()라는 메서드로 설정합니다.
  <!--
    Add a new "Record" button with those attributes:
        text is "Record",
        onClick event handler is "onClickRecord",
        text color is "red".
  -->
  <Button
      android:id="@+id/record_button"
      android:layout_width="wrap_content"
      android:layout_height="wrap_content"
      android:layout_alignLeft="@id/surfaceview"
      android:layout_alignBottom="@id/surfaceview"
      android:layout_marginBottom="100dp"
      android:onClick="onClickRecord"
      android:text="Record"
      android:textColor="@android:color/holo_red_light" />
위 코드를 추가한 후 일시적으로 오류가 표시될 수 있습니다. Corresponding method handler 'public void onClickRecord(android.view.View)' not found" 이는 정상적인 동작입니다. 다음 몇 단계에서 onClickRecord() 함수를 만들어 오류를 해결합니다.
상태에 따라 버튼 텍스트 변경
Record 버튼은 실제로 녹화와 중지를 모두 처리합니다. 앱에서 데이터를 녹화하지 않는 경우 'Record'라는 단어가 표시됩니다. 앱에서 데이터를 녹화하는 경우 'Stop'이라는 단어를 표시하도록 버튼이 변경됩니다.
버튼에 이 기능을 제공하려면 앱이 현재 상태를 알아야 합니다. 다음 코드는 AppState라는 새 enum을 만들어 앱의 작업 상태를 나타내고, appState라는 비공개 멤버 변수를 통해 특정 상태 변경사항을 추적합니다. HelloArActivity 클래스의 시작 부분에 있는 HelloArActivity.java에 추가합니다.
  // Represents the app's working state.
  public enum AppState {
    Idle,
    Recording
  }

  // Tracks app's specific state changes.
  private AppState appState = AppState.Idle;
이제 앱의 내부 상태를 추적할 수 있으므로 앱의 현재 상태에 따라 버튼의 텍스트를 변경하는 updateRecordButton()라는 함수를 만듭니다. HelloArActivity.java의 HelloArActivity 클래스 내에 다음 코드를 추가합니다.
// Add imports to the beginning of the file.
import android.widget.Button;

  // Update the "Record" button based on app's internal state.
  private void updateRecordButton() {
    View buttonView = findViewById(R.id.record_button);
    Button button = (Button) buttonView;

    switch (appState) {
      case Idle:
        button.setText("Record");
        break;
      case Recording:
        button.setText("Stop");
        break;
    }
  }
그런 다음, 앱 상태를 확인하고 다음 상태로 변경하고 updateRecordButton()을 호출하여 버튼의 UI를 변경하는 onClickRecord() 메서드를 만듭니다. HelloArActivity.java의 HelloArActivity 클래스 내에 다음 코드를 추가합니다.
  // Handle the "Record" button click event.
  public void onClickRecord(View view) {
    Log.d(TAG, "onClickRecord");

    // Check the app's internal state and switch to the new state if needed.
    switch (appState) {
        // If the app is not recording, begin recording.
      case Idle: {
        boolean hasStarted = startRecording();
        Log.d(TAG, String.format("onClickRecord start: hasStarted %b", hasStarted));

        if (hasStarted)
          appState = AppState.Recording;

        break;
      }

      // If the app is recording, stop recording.
      case Recording: {
        boolean hasStopped = stopRecording();
        Log.d(TAG, String.format("onClickRecord stop: hasStopped %b", hasStopped));

        if (hasStopped)
          appState = AppState.Idle;

        break;
      }

      default:
        // Do nothing.
        break;
    }

    updateRecordButton();
  }
녹화를 시작하도록 앱 사용 설정
ARCore에서 녹화를 시작하려면 두 가지 작업만 수행하면 됩니다.
RecordingConfig객체에 녹화 파일 URI를 지정합니다.RecordingConfig객체를 사용하여session.startRecording을 호출합니다.
나머지는 상용구 코드 즉, 구성, 로깅, 정확성 검사입니다.
데이터를 녹화하고 MP4 URI에 저장하는 startRecording()이라는 새 함수를 만듭니다. HelloArActivity.java의 HelloArActivity 클래스 내에 다음 코드를 추가합니다.
// Add imports to the beginning of the file.
import android.net.Uri;
import com.google.ar.core.RecordingConfig;
import com.google.ar.core.RecordingStatus;
import com.google.ar.core.exceptions.RecordingFailedException;

  private boolean startRecording() {
    Uri mp4FileUri = createMp4File();
    if (mp4FileUri == null)
      return false;

    Log.d(TAG, "startRecording at: " + mp4FileUri);

    pauseARCoreSession();

    // Configure the ARCore session to start recording.
    RecordingConfig recordingConfig = new RecordingConfig(session)
        .setMp4DatasetUri(mp4FileUri)
        .setAutoStopOnPause(true);

    try {
      // Prepare the session for recording, but do not start recording yet.
      session.startRecording(recordingConfig);
    } catch (RecordingFailedException e) {
      Log.e(TAG, "startRecording - Failed to prepare to start recording", e);
      return false;
    }

    boolean canResume = resumeARCoreSession();
    if (!canResume)
      return false;

    // Correctness checking: check the ARCore session's RecordingState.
    RecordingStatus recordingStatus = session.getRecordingStatus();
    Log.d(TAG, String.format("startRecording - recordingStatus %s", recordingStatus));
    return recordingStatus == RecordingStatus.OK;
  }
ARCore 세션을 안전하게 일시중지하고 재개하려면 HelloArActivity.java에서 pauseARCoreSession() 및 resumeARCoreSession()을 만듭니다.
  private void pauseARCoreSession() {
    // Pause the GLSurfaceView so that it doesn't update the ARCore session.
    // Pause the ARCore session so that we can update its configuration.
    // If the GLSurfaceView is not paused,
    //   onDrawFrame() will try to update the ARCore session
    //   while it's paused, resulting in a crash.
    surfaceView.onPause();
    session.pause();
  }

  private boolean resumeARCoreSession() {
    // We must resume the ARCore session before the GLSurfaceView.
    // Otherwise, the GLSurfaceView will try to update the ARCore session.
    try {
      session.resume();
    } catch (CameraNotAvailableException e) {
      Log.e(TAG, "CameraNotAvailableException in resumeARCoreSession", e);
      return false;
    }

    surfaceView.onResume();
    return true;
  }
녹화를 중지하도록 앱 사용 설정
앱이 새 데이터를 녹화하지 않도록 하려면 HelloArActivity.java에 stopRecording()이라는 함수를 만듭니다. 이 함수는 session.stopRecording()을 호출하고 앱이 녹화를 중지할 수 없는 경우 콘솔 로그에 오류를 전송합니다.
  private boolean stopRecording() {
    try {
      session.stopRecording();
    } catch (RecordingFailedException e) {
      Log.e(TAG, "stopRecording - Failed to stop recording", e);
      return false;
    }

    // Correctness checking: check if the session stopped recording.
    return session.getRecordingStatus() == RecordingStatus.NONE;
  }
Android 11 범위 지정 저장소를 사용하여 파일 저장소 설계
이 Codelab의 저장소 관련 함수는 새로운 Android 11 범위 지정 저장소 요구사항에 따라 설계되었습니다.
Android 11을 타겟팅하도록 app/build.gradle 파일을 약간 변경합니다. Android 스튜디오 프로젝트 패널에서 이 파일은 앱 모듈과 연결된 Gradle Scripts 노드 아래에 있습니다.

compileSdkVersion 및 targetSdkVersion을 30으로 변경합니다.
    compileSdkVersion 30
    defaultConfig {
      targetSdkVersion 30
    }
녹화의 경우 Android MediaStore API를 사용하여 공유 Movie 디렉터리에 MP4 파일을 만듭니다.
HelloArActivity.java에 createMp4File()이라는 함수를 만듭니다.
// Add imports to the beginning of the file.
import java.text.SimpleDateFormat;
import android.content.ContentResolver;
import android.net.Uri;
import android.os.Build;
import android.os.Environment;
import android.provider.MediaStore;
import android.content.ContentValues;
import java.io.File;
import android.content.CursorLoader;
import android.database.Cursor;
import java.util.Date;

  private final String MP4_VIDEO_MIME_TYPE = "video/mp4";

  private Uri createMp4File() {
    SimpleDateFormat dateFormat = new SimpleDateFormat("yyyyMMdd_HHmmss");
    String mp4FileName = "arcore-" + dateFormat.format(new Date()) + ".mp4";

    ContentResolver resolver = this.getContentResolver();

    Uri videoCollection = null;
    if (Build.VERSION.SDK_INT >= Build.VERSION_CODES.Q) {
      videoCollection = MediaStore.Video.Media.getContentUri(
          MediaStore.VOLUME_EXTERNAL_PRIMARY);
    } else {
      videoCollection = MediaStore.Video.Media.EXTERNAL_CONTENT_URI;
    }

    // Create a new Media file record.
    ContentValues newMp4FileDetails = new ContentValues();
    newMp4FileDetails.put(MediaStore.Video.Media.DISPLAY_NAME, mp4FileName);
    newMp4FileDetails.put(MediaStore.Video.Media.MIME_TYPE, MP4_VIDEO_MIME_TYPE);

    if (Build.VERSION.SDK_INT >= Build.VERSION_CODES.Q) {
      // The Relative_Path column is only available since API Level 29.
      newMp4FileDetails.put(MediaStore.Video.Media.RELATIVE_PATH, Environment.DIRECTORY_MOVIES);
    } else {
      // Use the Data column to set path for API Level <= 28.
      File mp4FileDir = Environment.getExternalStoragePublicDirectory(Environment.DIRECTORY_MOVIES);
      String absoluteMp4FilePath = new File(mp4FileDir, mp4FileName).getAbsolutePath();
      newMp4FileDetails.put(MediaStore.Video.Media.DATA, absoluteMp4FilePath);
    }

    Uri newMp4FileUri = resolver.insert(videoCollection, newMp4FileDetails);

    // Ensure that this file exists and can be written.
    if (newMp4FileUri == null) {
      Log.e(TAG, String.format("Failed to insert Video entity in MediaStore. API Level = %d", Build.VERSION.SDK_INT));
      return null;
    }

    // This call ensures the file exist before we pass it to the ARCore API.
    if (!testFileWriteAccess(newMp4FileUri)) {
      return null;
    }

    Log.d(TAG, String.format("createMp4File = %s, API Level = %d", newMp4FileUri, Build.VERSION.SDK_INT));

    return newMp4FileUri;
  }

  // Test if the file represented by the content Uri can be open with write access.
  private boolean testFileWriteAccess(Uri contentUri) {
    try (java.io.OutputStream mp4File = this.getContentResolver().openOutputStream(contentUri)) {
      Log.d(TAG, String.format("Success in testFileWriteAccess %s", contentUri.toString()));
      return true;
    } catch (java.io.FileNotFoundException e) {
      Log.e(TAG, String.format("FileNotFoundException in testFileWriteAccess %s", contentUri.toString()), e);
    } catch (java.io.IOException e) {
      Log.e(TAG, String.format("IOException in testFileWriteAccess %s", contentUri.toString()), e);
    }

    return false;
  }
저장소 권한 처리
Android 11 기기를 사용 중인 경우 코드 테스트를 시작할 수 있습니다. Android 10 이하의 기기를 지원하려면 대상 기기의 파일 시스템에 데이터를 저장할 수 있는 앱 저장소 권한을 부여해야 합니다.
AndroidManifest.xml에서 Android 11(API 수준 30) 이전의 앱에 저장소 읽기 및 쓰기 권한이 필요하다고 선언합니다.
  <!-- Inside the <manifest> tag, below the existing Camera permission -->
  <uses-permission android:name="android.permission.WRITE_EXTERNAL_STORAGE"
      android:maxSdkVersion="29" />

  <uses-permission android:name="android.permission.READ_EXTERNAL_STORAGE"
      android:maxSdkVersion="29" />
런타임 중에 WRITE_EXTERNAL_STORAGE 권한을 요청하는 checkAndRequestStoragePermission()이라는 도우미 함수를 HelloArActivity.java에 추가합니다.
// Add imports to the beginning of the file.
import android.Manifest;
import android.content.pm.PackageManager;
import androidx.core.app.ActivityCompat;
import androidx.core.content.ContextCompat;

  private final int REQUEST_WRITE_EXTERNAL_STORAGE = 1;
  public boolean checkAndRequestStoragePermission() {
    if (ContextCompat.checkSelfPermission(this, Manifest.permission.WRITE_EXTERNAL_STORAGE)
        != PackageManager.PERMISSION_GRANTED) {
      ActivityCompat.requestPermissions(this,
          new String[]{Manifest.permission.WRITE_EXTERNAL_STORAGE},
          REQUEST_WRITE_EXTERNAL_STORAGE);
      return false;
    }

    return true;
  }
API 수준 29 이하를 사용하는 경우 createMp4File() 상단에 저장소 권한 확인을 추가하고 앱에 올바른 권한이 없으면 함수를 일찍 종료합니다. API 수준 30(Android 11)에는 MediaStore의 파일에 액세스하기 위한 저장소 권한이 필요하지 않습니다.
  private Uri createMp4File() {
    // Since we use legacy external storage for Android 10,
    // we still need to request for storage permission on Android 10.
    if (Build.VERSION.SDK_INT <= Build.VERSION_CODES.Q) {
      if (!checkAndRequestStoragePermission()) {
        Log.i(TAG, String.format(
            "Didn't createMp4File. No storage permission, API Level = %d",
            Build.VERSION.SDK_INT));
        return null;
      }
    }
    // ... omitted code ...
  }
대상 기기에서 녹화
이제 빌드한 것을 확인할 차례입니다. 휴대기기를 개발 머신에 연결하고 Android 스튜디오에서 Run을 클릭합니다.
화면 왼쪽 하단에 빨간색 Record 버튼이 표시됩니다. 이 버튼을 탭하면 텍스트가 Stop으로 변경됩니다. 기기를 이리저리 움직여 세션을 녹화한 후 녹화를 완료하려면 Stop 버튼을 클릭합니다. 이렇게 하면 arcore-xxxxxx_xxxxxx.mp4라는 새 파일이 기기의 외부 저장소에 저장됩니다.

이제 기기의 외부 저장소에 새 arcore-xxxxxx_xxxxxx.mp4 파일이 있습니다. Pixel 5 기기에서 경로는 /storage/emulated/0/Movies/입니다. 경로는 녹화를 시작한 후 Logcat 창에서 찾을 수 있습니다.
com.google.ar.core.examples.java.helloar D/HelloArActivity: startRecording at:/storage/emulated/0/Movies/arcore-xxxxxxxx_xxxxxx.mp4
com.google.ar.core.examples.java.helloar D/HelloArActivity: startRecording - RecordingStatus OK
녹화 파일 보기
Files by Google과 같은 파일 시스템 앱을 사용하여 녹화 파일을 보거나 개발 머신에 복사할 수 있습니다. 다음은 Android 기기에서 파일을 나열하고 가져오는 두 개의 adb 명령어입니다.
adb shell ls '$EXTERNAL_STORAGE/Movies/*'- 기기의 외부 저장소에 있는 Movies 디렉터리의 파일 표시adb pull /absolute_path_from_previous_adb_shell_ls/arcore-xxxxxxxx_xxxxxx.mp4- 기기에서 개발 머신으로 파일 복사
MacOS에서 다음 두 명령어를 사용한 출력 예시입니다.
$ adb shell ls '$EXTERNAL_STORAGE/Movies/*'
/sdcard/Movies/arcore-xxxxxxxx_xxxxxx.mp4

$ adb pull /sdcard/Movies/arcore-xxxxxxxx_xxxxxx.mp4
/sdcard/Movies/arcore-xxxxxxxx_xxxxxx.mp4: ... pulled
이 단계에서 수행한 작업
- 녹화를 시작하고 중지하는 버튼 추가
- 녹화를 시작하고 중지하는 함수 구현
- 기기에서 앱 테스트
- 녹화된 MP4를 머신에 복사하고 확인
다음으로 MP4 파일에서 AR 세션을 재생해보겠습니다.
4. MP4 파일에서 ARCore 세션 재생
이제 Record 버튼이 생겼으며 일부 MP4 파일에는 녹화된 세션이 포함되어 있습니다. 이제 ARCore Playback API를 사용하여 재생하겠습니다.
Playback 버튼 UI 추가
재생을 구현하기 전에 사용자가 ARCore에서 세션 재생을 시작하고 중지할 때를 알릴 수 있도록 UI에 버튼을 추가합니다.
프로젝트 패널에서 app/res/layout/activity_main.xml 파일을 엽니다.
activity_main.xml에서 닫는 태그 앞에 다음 코드를 추가하여 새 Playback 버튼을 만들고 이벤트 핸들러를 onClickPlayback()이라는 메서드로 설정합니다. 이 버튼은 Record 버튼과 유사하며 화면 오른쪽에 표시됩니다.
  <!--
    Add a new "Playback" button with those attributes:
        text is "Playback",
        onClick event handler is "onClickPlayback",
        text color is "green".
  -->
  <Button
      android:id="@+id/playback_button"
      android:layout_width="wrap_content"
      android:layout_height="wrap_content"
      android:layout_alignEnd="@id/surfaceview"
      android:layout_alignBottom="@id/surfaceview"
      android:layout_marginBottom="100dp"
      android:onClick="onClickPlayback"
      android:text="Playback"
      android:textColor="@android:color/holo_green_light" />
재생 중에 버튼 업데이트
이제 앱에 Playingback이라는 새 상태가 표시됩니다. AppState enum 및 appState를 인수로 사용하여 이를 처리하는 모든 기존 함수를 업데이트합니다.
다음과 같이 Playingback을 HelloArActivity.java의 AppState enum에 추가합니다.
  public enum AppState {
    Idle,
    Recording,
    Playingback // New enum value.
  }
재생 중에 Record 버튼이 여전히 화면에 표시되는 경우 사용자가 실수로 클릭할 수도 있습니다. 이를 방지하려면 재생 중에 Record 버튼을 숨깁니다. 이렇게 하면 onClickRecord()에서 Playingback 상태를 처리할 필요가 없습니다.
앱이 Playingback 상태일 때 Record 버튼을 숨기도록 HelloArActivity.java의 updateRecordButton() 함수를 수정합니다.
  // Update the "Record" button based on app's internal state.
  private void updateRecordButton() {
    View buttonView = findViewById(R.id.record_button);
    Button button = (Button)buttonView;

    switch (appState) {

      // The app is neither recording nor playing back. The "Record" button is visible.
      case Idle:
        button.setText("Record");
        button.setVisibility(View.VISIBLE);
        break;

      // While recording, the "Record" button is visible and says "Stop".
      case Recording:
        button.setText("Stop");
        button.setVisibility(View.VISIBLE);
        break;

      // During playback, the "Record" button is not visible.
      case Playingback:
        button.setVisibility(View.INVISIBLE);
        break;
    }
  }
마찬가지로 사용자가 세션을 녹화할 때는 Playback 버튼을 숨기고, 사용자가 세션을 적극적으로 재생할 때는 'Stop'으로 변경합니다. 이렇게 하면 재생이 완료될 때까지 기다리지 않고 재생을 중지할 수 있습니다.
HelloArActivity.java에 updatePlaybackButton() 함수를 추가합니다.
  // Update the "Playback" button based on app's internal state.
  private void updatePlaybackButton() {
    View buttonView = findViewById(R.id.playback_button);
    Button button = (Button)buttonView;

    switch (appState) {

      // The app is neither recording nor playing back. The "Playback" button is visible.
      case Idle:
        button.setText("Playback");
        button.setVisibility(View.VISIBLE);
        break;

      // While playing back, the "Playback" button is visible and says "Stop".
      case Playingback:
        button.setText("Stop");
        button.setVisibility(View.VISIBLE);
        break;

      // During recording, the "Playback" button is not visible.
      case Recording:
        button.setVisibility(View.INVISIBLE);
        break;
    }
  }
마지막으로 updatePlaybackButton()을 호출하도록 onClickRecord()를 업데이트합니다. HelloArActivity.java에 다음 줄을 추가합니다.
  public void onClickRecord(View view) {
    // ... omitted code ...
    updatePlaybackButton(); // Add this line to the end of the function.
  }
Playback 버튼으로 파일 선택
Playback 버튼을 탭하면 사용자가 재생할 파일을 선택할 수 있습니다. Android에서는 파일 선택이 다른 활동의 시스템 파일 선택 도구에서 처리됩니다. 이는 저장소 액세스 프레임워크(SAF)를 통해 이루어집니다. 사용자가 파일을 선택하면 앱이 onActivityResult()라는 콜백을 수신합니다. 이 콜백 함수 내에서 실제 재생을 시작합니다.
HelloArActivity.java에서 파일 선택을 실행하고 재생을 중지하는 onClickPlayback() 함수를 만듭니다.
  // Handle the click event of the "Playback" button.
  public void onClickPlayback(View view) {
    Log.d(TAG, "onClickPlayback");

    switch (appState) {

      // If the app is not playing back, open the file picker.
      case Idle: {
        boolean hasStarted = selectFileToPlayback();
        Log.d(TAG, String.format("onClickPlayback start: selectFileToPlayback %b", hasStarted));
        break;
      }

      // If the app is playing back, stop playing back.
      case Playingback: {
        boolean hasStopped = stopPlayingback();
        Log.d(TAG, String.format("onClickPlayback stop: hasStopped %b", hasStopped));
        break;
      }

      default:
        // Recording - do nothing.
        break;
    }

    // Update the UI for the "Record" and "Playback" buttons.
    updateRecordButton();
    updatePlaybackButton();
  }
HelloArActivity.java에서 기기에서 파일을 선택하는 selectFileToPlayback() 함수를 만듭니다. Android 파일 시스템에서 파일을 선택하려면 ACTION_OPEN_DOCUMENT 인텐트를 사용합니다.
// Add imports to the beginning of the file.
import android.content.Intent;
import android.provider.DocumentsContract;

  private boolean selectFileToPlayback() {
    // Start file selection from Movies directory.
    // Android 10 and above requires VOLUME_EXTERNAL_PRIMARY to write to MediaStore.
    Uri videoCollection;
    if (Build.VERSION.SDK_INT >= Build.VERSION_CODES.Q) {
      videoCollection = MediaStore.Video.Media.getContentUri(
          MediaStore.VOLUME_EXTERNAL_PRIMARY);
    } else {
      videoCollection = MediaStore.Video.Media.EXTERNAL_CONTENT_URI;
    }

    // Create an Intent to select a file.
    Intent intent = new Intent(Intent.ACTION_OPEN_DOCUMENT);

    // Add file filters such as the MIME type, the default directory and the file category.
    intent.setType(MP4_VIDEO_MIME_TYPE); // Only select *.mp4 files
    intent.putExtra(DocumentsContract.EXTRA_INITIAL_URI, videoCollection); // Set default directory
    intent.addCategory(Intent.CATEGORY_OPENABLE); // Must be files that can be opened

    this.startActivityForResult(intent, REQUEST_MP4_SELECTOR);

    return true;
  }
REQUEST_MP4_SELECTOR는 이 요청을 식별하는 상수입니다. HelloArActivity.java의 HelloArActivity 내부에 있는 모든 자리표시자 값을 사용하여 정의할 수 있습니다.
private int REQUEST_MP4_SELECTOR = 1;
파일 선택 도구의 콜백을 처리하도록 HelloArActivity.java의 onActivityResult() 함수를 재정의합니다.
  // Begin playback once the user has selected the file.
  @Override
  protected void onActivityResult(int requestCode, int resultCode, Intent data) {
    // Check request status. Log an error if the selection fails.
    if (resultCode != android.app.Activity.RESULT_OK || requestCode != REQUEST_MP4_SELECTOR) {
      Log.e(TAG, "onActivityResult select file failed");
      return;
    }

    Uri mp4FileUri = data.getData();
    Log.d(TAG, String.format("onActivityResult result is %s", mp4FileUri));

    // Begin playback.
    startPlayingback(mp4FileUri);
  }
재생을 시작하도록 앱 사용 설정
MP4 파일을 재생하려면 ARCore 세션은 세 번의 API 호출이 필요합니다.
session.pause()session.setPlaybackDataset()session.resume()
HelloArActivity.java에서 startPlayingback() 함수를 만듭니다.
// Add imports to the beginning of the file.
import com.google.ar.core.PlaybackStatus;
import com.google.ar.core.exceptions.PlaybackFailedException;

  private boolean startPlayingback(Uri mp4FileUri) {
    if (mp4FileUri == null)
      return false;

    Log.d(TAG, "startPlayingback at:" + mp4FileUri);

    pauseARCoreSession();

    try {
      session.setPlaybackDatasetUri(mp4FileUri);
    } catch (PlaybackFailedException e) {
      Log.e(TAG, "startPlayingback - setPlaybackDataset failed", e);
    }

    // The session's camera texture name becomes invalid when the
    // ARCore session is set to play back.
    // Workaround: Reset the Texture to start Playback
    // so it doesn't crashes with AR_ERROR_TEXTURE_NOT_SET.
    hasSetTextureNames = false;

    boolean canResume = resumeARCoreSession();
    if (!canResume)
      return false;

    PlaybackStatus playbackStatus = session.getPlaybackStatus();
    Log.d(TAG, String.format("startPlayingback - playbackStatus %s", playbackStatus));

    if (playbackStatus != PlaybackStatus.OK) { // Correctness check
      return false;
    }

    appState = AppState.Playingback;
    updateRecordButton();
    updatePlaybackButton();

    return true;
  }
재생을 중지하도록 앱 사용 설정
다음과 같은 상황이 발생하면 앱 상태 변경을 처리하는 stopPlayingback()이라는 함수를 HelloArActivity.java에 만듭니다.
- 사용자가 MP4 재생을 중지했습니다.
- MP4 재생이 자체적으로 완료되었습니다.
사용자가 재생을 중지했다면 앱은 사용자가 처음 실행했을 때와 같은 상태로 돌아가야 합니다.
  // Stop the current playback, and restore app status to Idle.
  private boolean stopPlayingback() {
    // Correctness check, only stop playing back when the app is playing back.
    if (appState != AppState.Playingback)
      return false;

    pauseARCoreSession();

    // Close the current session and create a new session.
    session.close();
    try {
      session = new Session(this);
    } catch (UnavailableArcoreNotInstalledException
        |UnavailableApkTooOldException
        |UnavailableSdkTooOldException
        |UnavailableDeviceNotCompatibleException e) {
      Log.e(TAG, "Error in return to Idle state. Cannot create new ARCore session", e);
      return false;
    }
    configureSession();

    boolean canResume = resumeARCoreSession();
    if (!canResume)
      return false;

    // A new session will not have a camera texture name.
    // Manually set hasSetTextureNames to false to trigger a reset.
    hasSetTextureNames = false;

    // Reset appState to Idle, and update the "Record" and "Playback" buttons.
    appState = AppState.Idle;
    updateRecordButton();
    updatePlaybackButton();

    return true;
  }
플레이어가 MP4 파일의 끝에 도달하면 재생이 자연스럽게 중단될 수도 있습니다. 이 경우 stopPlayingback()이 앱의 상태를 다시 Idle로 전환해야 합니다. onDrawFrame()에서 PlaybackStatus를 확인합니다. FINISHED인 경우 UI 스레드에서 stopPlayingback() 함수를 호출합니다.
  public void onDrawFrame(SampleRender render) {
      // ... omitted code ...

      // Insert before this line:
      // frame = session.update();

      // Check the playback status and return early if playback reaches the end.
      if (appState == AppState.Playingback
          && session.getPlaybackStatus() == PlaybackStatus.FINISHED) {
        this.runOnUiThread(this::stopPlayingback);
        return;
      }

      // ... omitted code ...
  }
대상 기기에서 재생
이제 빌드한 것을 확인할 차례입니다. 휴대기기를 개발 머신에 연결하고 Android 스튜디오에서 Run을 클릭합니다.
앱이 실행되면 왼쪽에 빨간색 Record 버튼이, 오른쪽에 녹색 Playback 버튼이 있는 화면이 표시됩니다.

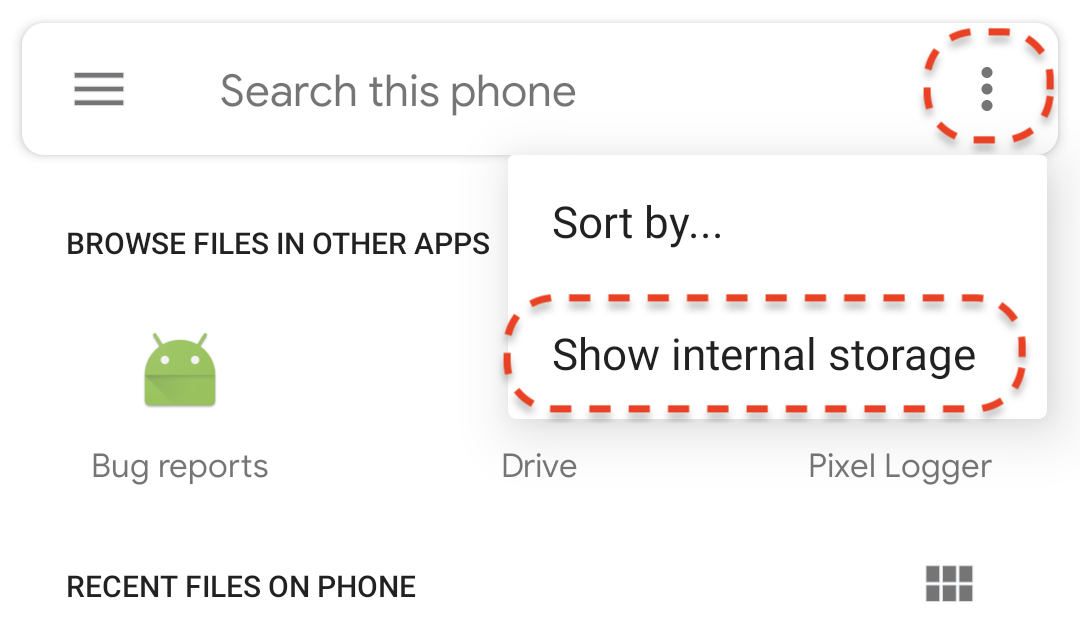
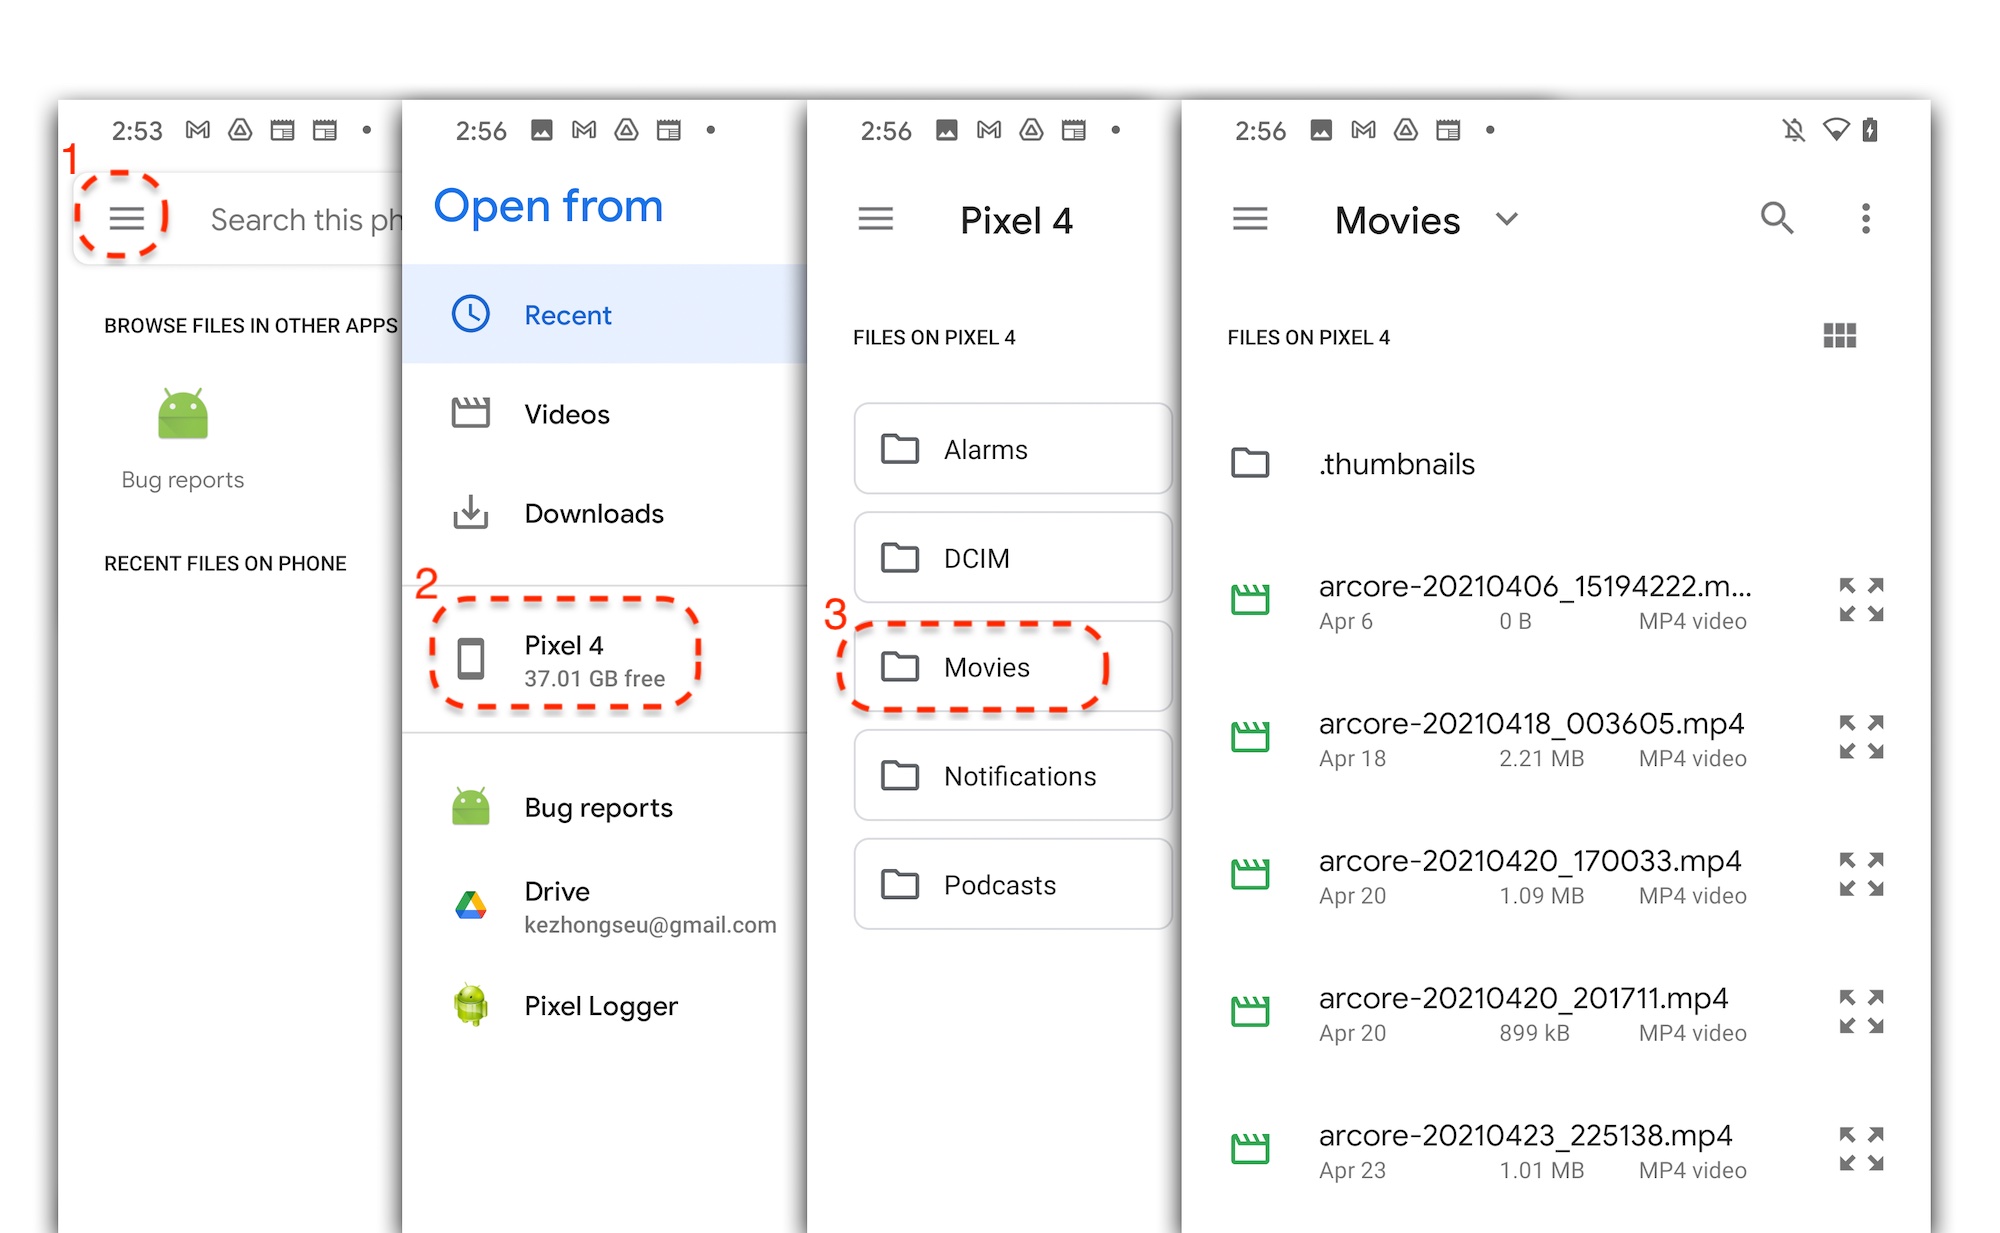
Playback 버튼을 탭하고 방금 녹화한 MP4 파일 중 하나를 선택합니다. arcore-로 시작하는 파일 이름이 표시되지 않는 경우 기기에 Movies 폴더가 표시되지 않을 수 있습니다. 이 경우 왼쪽 상단의 메뉴를 사용하여 Phone model > Movies 폴더로 이동합니다. Phone model 폴더를 표시하려면 Show internal storage 옵션을 사용 설정해야 할 수도 있습니다.
화면의 파일 이름을 탭하여 MP4 파일을 선택합니다. 앱이 MP4 파일을 재생합니다.
세션 재생과 일반 동영상 재생의 차이점은 녹화된 세션과 상호작용할 수 있다는 점입니다. 감지된 평면을 탭하여 화면에 마커를 배치합니다.
이 단계에서 수행한 작업
- 재생을 시작하고 중지하는 버튼 추가
- 앱이 녹화를 시작하고 중지하도록 하는 함수 구현
- 기기에서 이전에 녹화된 ARCore 세션 재생
5. MP4에 추가 데이터 녹화
ARCore 1.24에서는 MP4 파일에 추가 정보를 기록할 수 있습니다. AR 객체 위치의 Pose를 기록한 후 재생 중에 동일한 위치에 AR 객체를 만들 수 있습니다.
녹음할 새 트랙 구성
HelloArActivity.java에서 UUID 및 MIME 태그를 사용하여 새 트랙을 정의합니다.
// Add imports to the beginning of the file.
import java.util.UUID;
import com.google.ar.core.Track;

  // Inside the HelloArActiity class.
  private static final UUID ANCHOR_TRACK_ID = UUID.fromString("53069eb5-21ef-4946-b71c-6ac4979216a6");;
  private static final String ANCHOR_TRACK_MIME_TYPE = "application/recording-playback-anchor";

  private boolean startRecording() {
    // ... omitted code ...

    // Insert after line:
    //   pauseARCoreSession();

    // Create a new Track, with an ID and MIME tag.
    Track anchorTrack = new Track(session)
        .setId(ANCHOR_TRACK_ID).
        .setMimeType(ANCHOR_TRACK_MIME_TYPE);
    // ... omitted code ...
  }
종료 코드를 업데이트하여 addTrack() 호출로 RecordingConfig 객체를 만듭니다.
  private boolean startRecording() {
    // ... omitted code ...

    // Update the lines below with a call to the addTrack() function:
    //   RecordingConfig recordingConfig = new RecordingConfig(session)
    //    .setMp4DatasetUri(mp4FileUri)
    //    .setAutoStopOnPause(true);

    RecordingConfig recordingConfig = new RecordingConfig(session)
        .setMp4DatasetUri(mp4FileUri)
        .setAutoStopOnPause(true)
        .addTrack(anchorTrack); // add the new track onto the recordingConfig

    // ... omitted code ...
  }
녹화 중 앵커 포즈 저장
사용자가 감지된 평면을 탭할 때마다 AR 마커가 Anchor에 배치되며, 포즈는 ARCore에서 업데이트됩니다.
ARCore 세션을 계속 녹화하는 경우 생성된 프레임에서 Anchor의 포즈를 녹화합니다.
HelloArActivity.java의 handleTap() 함수를 수정합니다.
// Add imports to the beginning of the file.
import com.google.ar.core.Pose;
import java.nio.FloatBuffer;

  private void handleTap(Frame frame, Camera camera) {
          // ... omitted code ...

          // Insert after line:
          // anchors.add(hit.createAnchor());

          // If the app is recording a session,
          // save the new Anchor pose (relative to the camera)
          // into the ANCHOR_TRACK_ID track.
          if (appState == AppState.Recording) {
            // Get the pose relative to the camera pose.
            Pose cameraRelativePose = camera.getPose().inverse().compose(hit.getHitPose());
            float[] translation = cameraRelativePose.getTranslation();
            float[] quaternion = cameraRelativePose.getRotationQuaternion();
            ByteBuffer payload = ByteBuffer.allocate(4 * (translation.length + quaternion.length));
            FloatBuffer floatBuffer = payload.asFloatBuffer();
            floatBuffer.put(translation);
            floatBuffer.put(quaternion);

            try {
              frame.recordTrackData(ANCHOR_TRACK_ID, payload);
            } catch (IllegalStateException e) {
              Log.e(TAG, "Error in recording anchor into external data track.", e);
            }
          }
          // ... omitted code ...
  }
세계 상대적 Pose가 아닌 카메라 상대적 Pose를 유지하는 이유는 녹화 세션의 세계 원점과 재생 세션의 세계 원점이 동일하지 않기 때문입니다. 세션이 처음 다시 시작될 때(Session.resume()이 처음 호출되었을 때) 녹화 세션의 세계 원점이 시작됩니다. 첫 번째 프레임이 녹화될 때(Session.resume()이 Session.startRecording() 뒤에 처음 호출될 때) 재생 세션의 세계 원점이 시작됩니다.
재생 앵커 만들기
Anchor를 다시 만드는 것은 간단합니다. HelloArActivity.java에 createRecordedAnchors()라는 함수를 추가합니다.
// Add imports to the beginning of the file.
import com.google.ar.core.TrackData;

  // Extract poses from the ANCHOR_TRACK_ID track, and create new anchors.
  private void createRecordedAnchors(Frame frame, Camera camera) {
    // Get all `ANCHOR_TRACK_ID` TrackData from the frame.
    for (TrackData trackData : frame.getUpdatedTrackData(ANCHOR_TRACK_ID)) {
      ByteBuffer payload = trackData.getData();
      FloatBuffer floatBuffer = payload.asFloatBuffer();

      // Extract translation and quaternion from TrackData payload.
      float[] translation = new float[3];
      float[] quaternion = new float[4];

      floatBuffer.get(translation);
      floatBuffer.get(quaternion);

      // Transform the recorded anchor pose
      // from the camera coordinate
      // into world coordinates.
      Pose worldPose = camera.getPose().compose(new Pose(translation, quaternion));

      // Re-create an anchor at the recorded pose.
      Anchor recordedAnchor = session.createAnchor(worldPose);

      // Add the new anchor into the list of anchors so that
      // the AR marker can be displayed on top.
      anchors.add(recordedAnchor);
    }
  }
HelloArActivity.java의 onDrawFrame() 함수에서 createRecordedAnchors()를 호출합니다.
  public void onDrawFrame(SampleRender render) {
    // ... omitted code ...

    // Insert after this line:
    // handleTap(frame, camera);

    // If the app is currently playing back a session, create recorded anchors.
    if (appState == AppState.Playingback) {
      createRecordedAnchors(frame, camera);
    }
    // ... omitted code ...
  }
대상 기기에서 테스트
휴대기기를 개발 머신에 연결하고 Android 스튜디오에서 Run을 클릭합니다.
먼저 Record 버튼을 탭하여 세션을 녹화합니다. 녹화 중에 감지된 평면을 탭하여 AR 마커를 몇 개 배치합니다.
녹화가 중지되면 Playback 버튼을 탭하고 방금 녹화한 파일을 선택합니다. 재생이 시작됩니다. 앱을 탭하는 것처럼 이전 AR 마커 위치가 표시되는지 확인합니다.
이 Codelab에서 수행해야 하는 코딩을 모두 마쳤습니다.
6. 축하합니다
축하합니다. 이 Codelab의 내용을 완료했습니다. 이 Codelab에서 실습한 내용을 다시 살펴보겠습니다.
- ARCore Hello AR 자바 샘플을 빌드하고 실행했습니다.
- AR 세션을 MP4 파일로 저장할 수 있도록 앱에 Record 버튼을 추가했습니다.
- MP4 파일에서 AR 세션을 재생할 수 있도록 앱에 Playback 버튼을 추가했습니다.
- 재생을 위해 MP4에 사용자가 만든 앵커를 저장하는 새로운 기능을 추가했습니다.