

1. บทนำ
การบันทึกประสบการณ์ AR เป็นไฟล์ MP4 และเล่นจากไฟล์ MP4 ได้จะเป็นประโยชน์ทั้งต่อนักพัฒนาแอปและผู้ใช้ปลายทาง
แก้ไขข้อบกพร่องและทดสอบฟีเจอร์ใหม่จากโต๊ะทำงาน
การใช้งาน ARCore Record & Playback API ที่ตรงไปตรงมาที่สุดคือสำหรับนักพัฒนาแอป ในอดีต คุณต้องสร้างและเรียกใช้แอปในอุปกรณ์ทดสอบ ถอดสาย USB และเดินไปมาเพื่อทดสอบการเปลี่ยนแปลงโค้ดเล็กๆ น้อยๆ ตอนนี้คุณเพียงแค่ต้องบันทึก MP4 ในสภาพแวดล้อมการทดสอบโดยให้โทรศัพท์เคลื่อนไหวตามที่คาดไว้ และทดสอบจากโต๊ะทำงานได้เลย
บันทึกและเล่นจากอุปกรณ์ต่างๆ
Recording and Playback API ช่วยให้ผู้ใช้คนหนึ่งบันทึกเซสชันโดยใช้อุปกรณ์เครื่องหนึ่ง และผู้ใช้คนอื่นสามารถเล่นเซสชันเดียวกันในอุปกรณ์เครื่องอื่นได้ คุณแชร์ประสบการณ์ AR กับผู้ใช้รายอื่นได้ ซึ่งมีตัวเลือกมากมาย
นี่เป็นครั้งแรกที่คุณสร้างแอป ARCore ใช่ไหม
คุณจะใช้ Codelab นี้อย่างไร
สิ่งที่คุณจะสร้าง
ใน Codelab นี้ คุณจะได้ใช้ API การบันทึกและการเล่นเพื่อสร้างแอปที่ทั้งบันทึกประสบการณ์ AR ลงในไฟล์ MP4 และเล่นประสบการณ์ดังกล่าวจากไฟล์เดียวกัน คุณจะได้เรียนรู้:
- วิธีใช้ Recording API เพื่อบันทึกเซสชัน AR ลงในไฟล์ MP4
- วิธีใช้ Playback API เพื่อเล่นเซสชัน AR ซ้ำจากไฟล์ MP4
- วิธีบันทึกเซสชัน AR ในอุปกรณ์เครื่องหนึ่งและเล่นซ้ำในอุปกรณ์อีกเครื่อง
สิ่งที่คุณต้องมี
ใน Codelab นี้ คุณจะได้แก้ไขแอป Hello AR Java ซึ่งสร้างด้วย ARCore Android SDK คุณจะต้องมีฮาร์ดแวร์และซอฟต์แวร์ที่เฉพาะเจาะจงเพื่อทำตาม
ข้อกำหนดเกี่ยวกับฮาร์ดแวร์
- อุปกรณ์ที่รองรับ ARCore ซึ่งเปิดตัวเลือกสำหรับนักพัฒนาแอป และเปิดใช้การแก้ไขข้อบกพร่อง USB โดยเชื่อมต่อผ่านสาย USB กับคอมพิวเตอร์สำหรับการพัฒนาซอฟต์แวร์
- คอมพิวเตอร์สำหรับการพัฒนาซอฟต์แวร์ที่คุณใช้ Android Studio
- การเข้าถึงอินเทอร์เน็ตเพื่อดาวน์โหลดไลบรารีในระหว่างการพัฒนา
ข้อกำหนดของซอฟต์แวร์
- บริการ Google Play สำหรับ AR (ARCore) 1.24 ขึ้นไปในอุปกรณ์ ARCore สำหรับการพัฒนา โดยปกติแล้ว ระบบจะติดตั้งบริการนี้ในอุปกรณ์โดยอัตโนมัติผ่าน Play Store คุณยังติดตั้งด้วยตนเองในอุปกรณ์ที่รองรับ ARCore ได้ด้วย
- Android Studio (v3.1 ขึ้นไป) ในคอมพิวเตอร์สำหรับการพัฒนาซอฟต์แวร์
นอกจากนี้ คุณควรมีความเข้าใจพื้นฐานเกี่ยวกับ ARCore เพื่อให้ได้ผลลัพธ์ที่ดีที่สุด
2. ตั้งค่าสภาพแวดล้อมในการพัฒนาซอฟต์แวร์
เริ่มต้นด้วยการตั้งค่าสภาพแวดล้อมในการพัฒนาซอฟต์แวร์
ดาวน์โหลด ARCore Android SDK
คลายซิป ARCore Android SDK
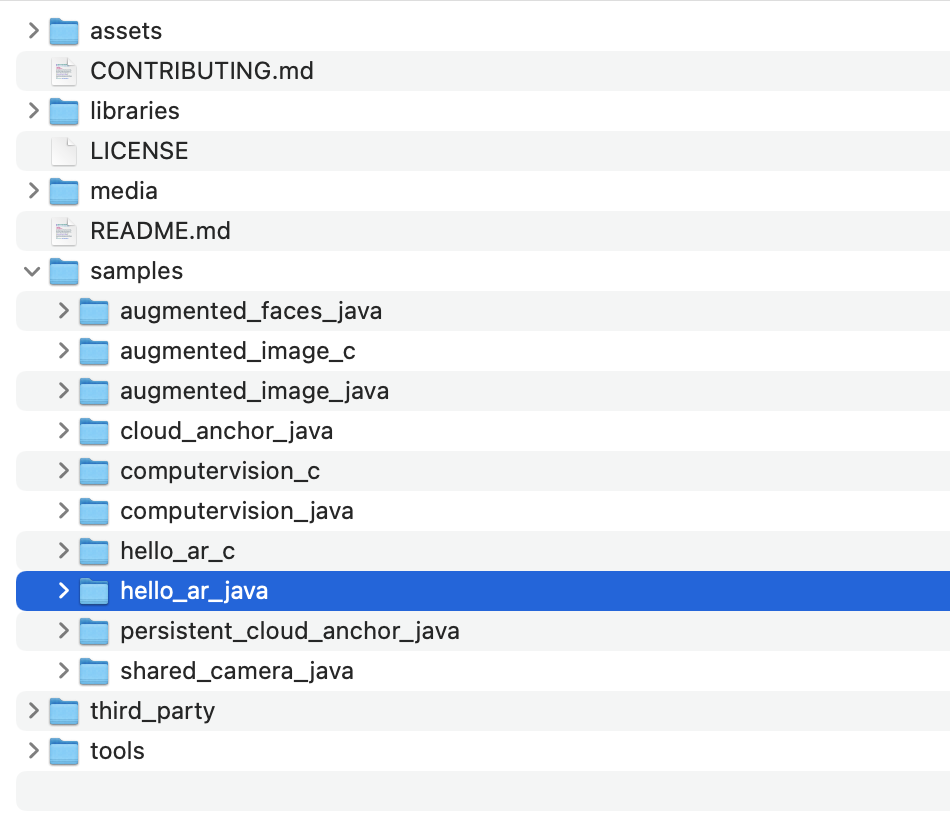
เมื่อดาวน์โหลด Android SDK ลงในเครื่องแล้ว ให้แตกไฟล์และไปที่ไดเรกทอรี arcore-android-sdk-1.24/samples/hello_ar_java นี่คือไดเรกทอรีรากของแอปที่คุณจะใช้
โหลด Hello AR Java ลงใน Android Studio
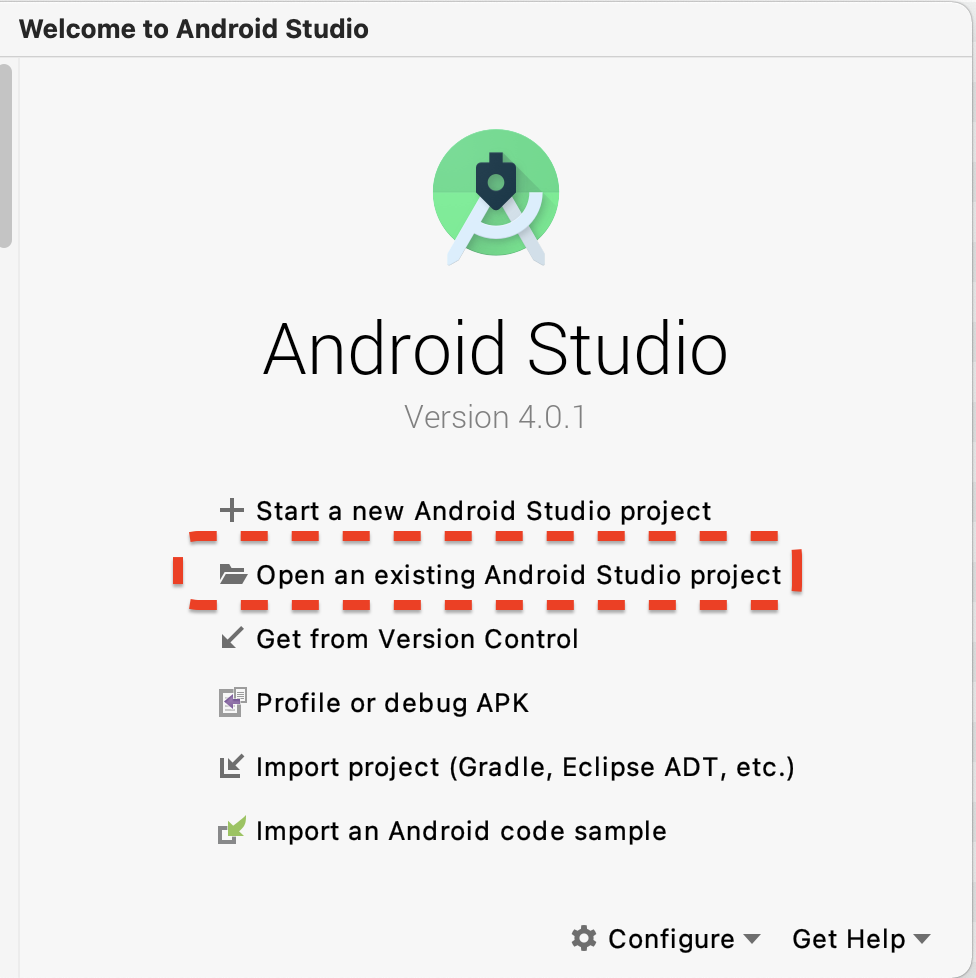
เปิด Android Studio แล้วคลิกเปิดโปรเจ็กต์ Android Studio ที่มีอยู่
ในกล่องโต้ตอบที่ปรากฏขึ้น ให้เลือก arcore-android-sdk-1.24/samples/hello_ar_java แล้วคลิกเปิด
รอให้ Android Studio ซิงค์โปรเจ็กต์เสร็จ หากมีคอมโพเนนต์ขาดหายไป การนำเข้าโปรเจ็กต์อาจล้มเหลวพร้อมข้อความแสดงข้อผิดพลาด โปรดแก้ไขปัญหาเหล่านี้ก่อนดำเนินการต่อ
เรียกใช้แอปตัวอย่าง
- เชื่อมต่ออุปกรณ์ที่รองรับ ARCore กับคอมพิวเตอร์สำหรับการพัฒนาซอฟต์แวร์
- หากระบบรู้จักอุปกรณ์อย่างถูกต้อง คุณควรเห็นชื่ออุปกรณ์ปรากฏใน Android Studio
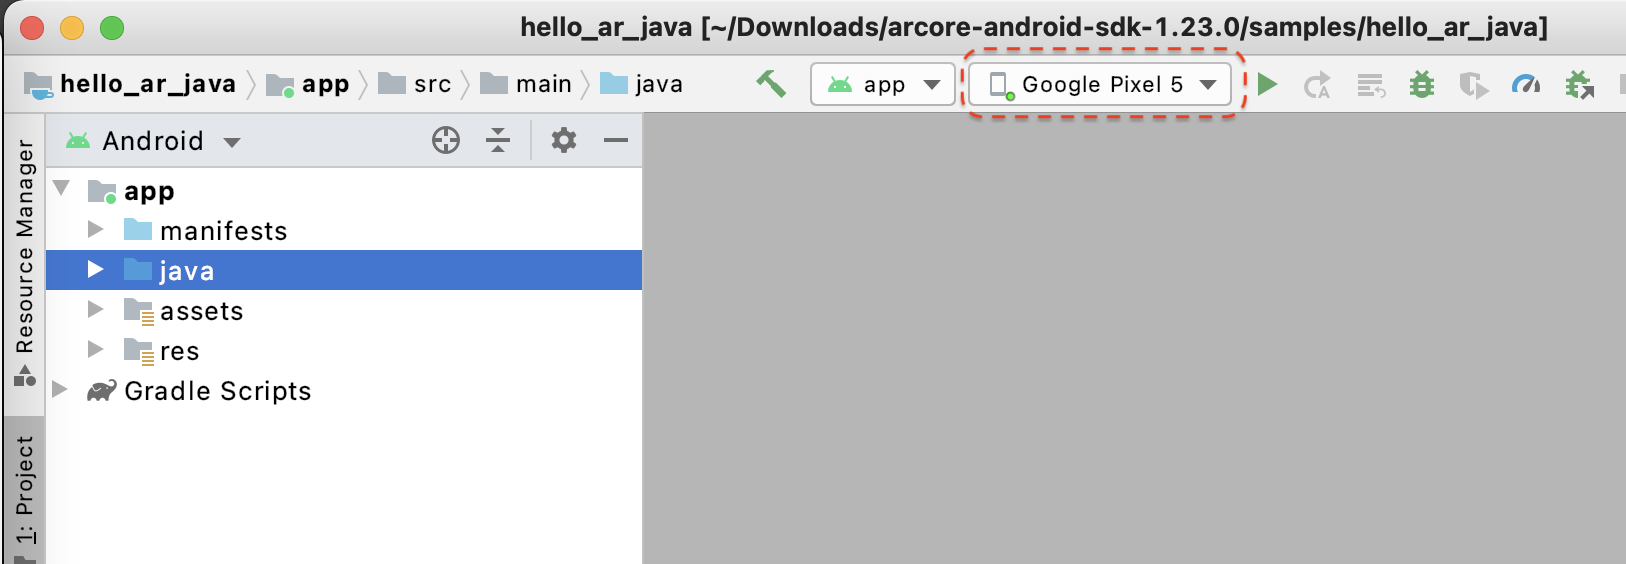
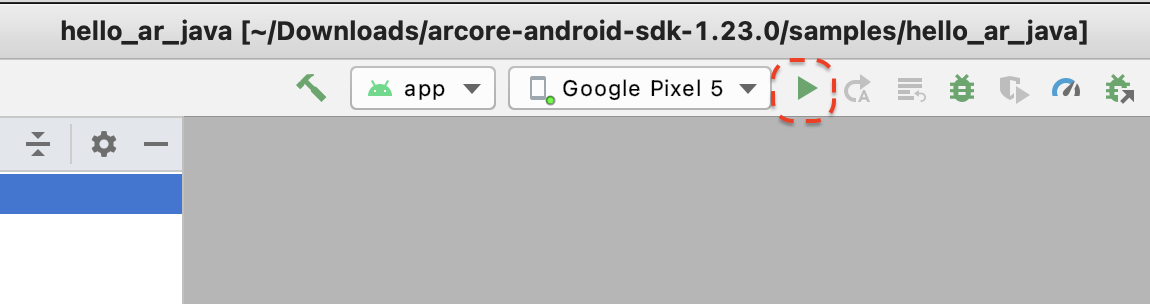
- คลิกปุ่มเรียกใช้ หรือเลือกเรียกใช้ > เรียกใช้ "แอป" เพื่อให้ Android Studio ติดตั้งและเปิดแอปในอุปกรณ์
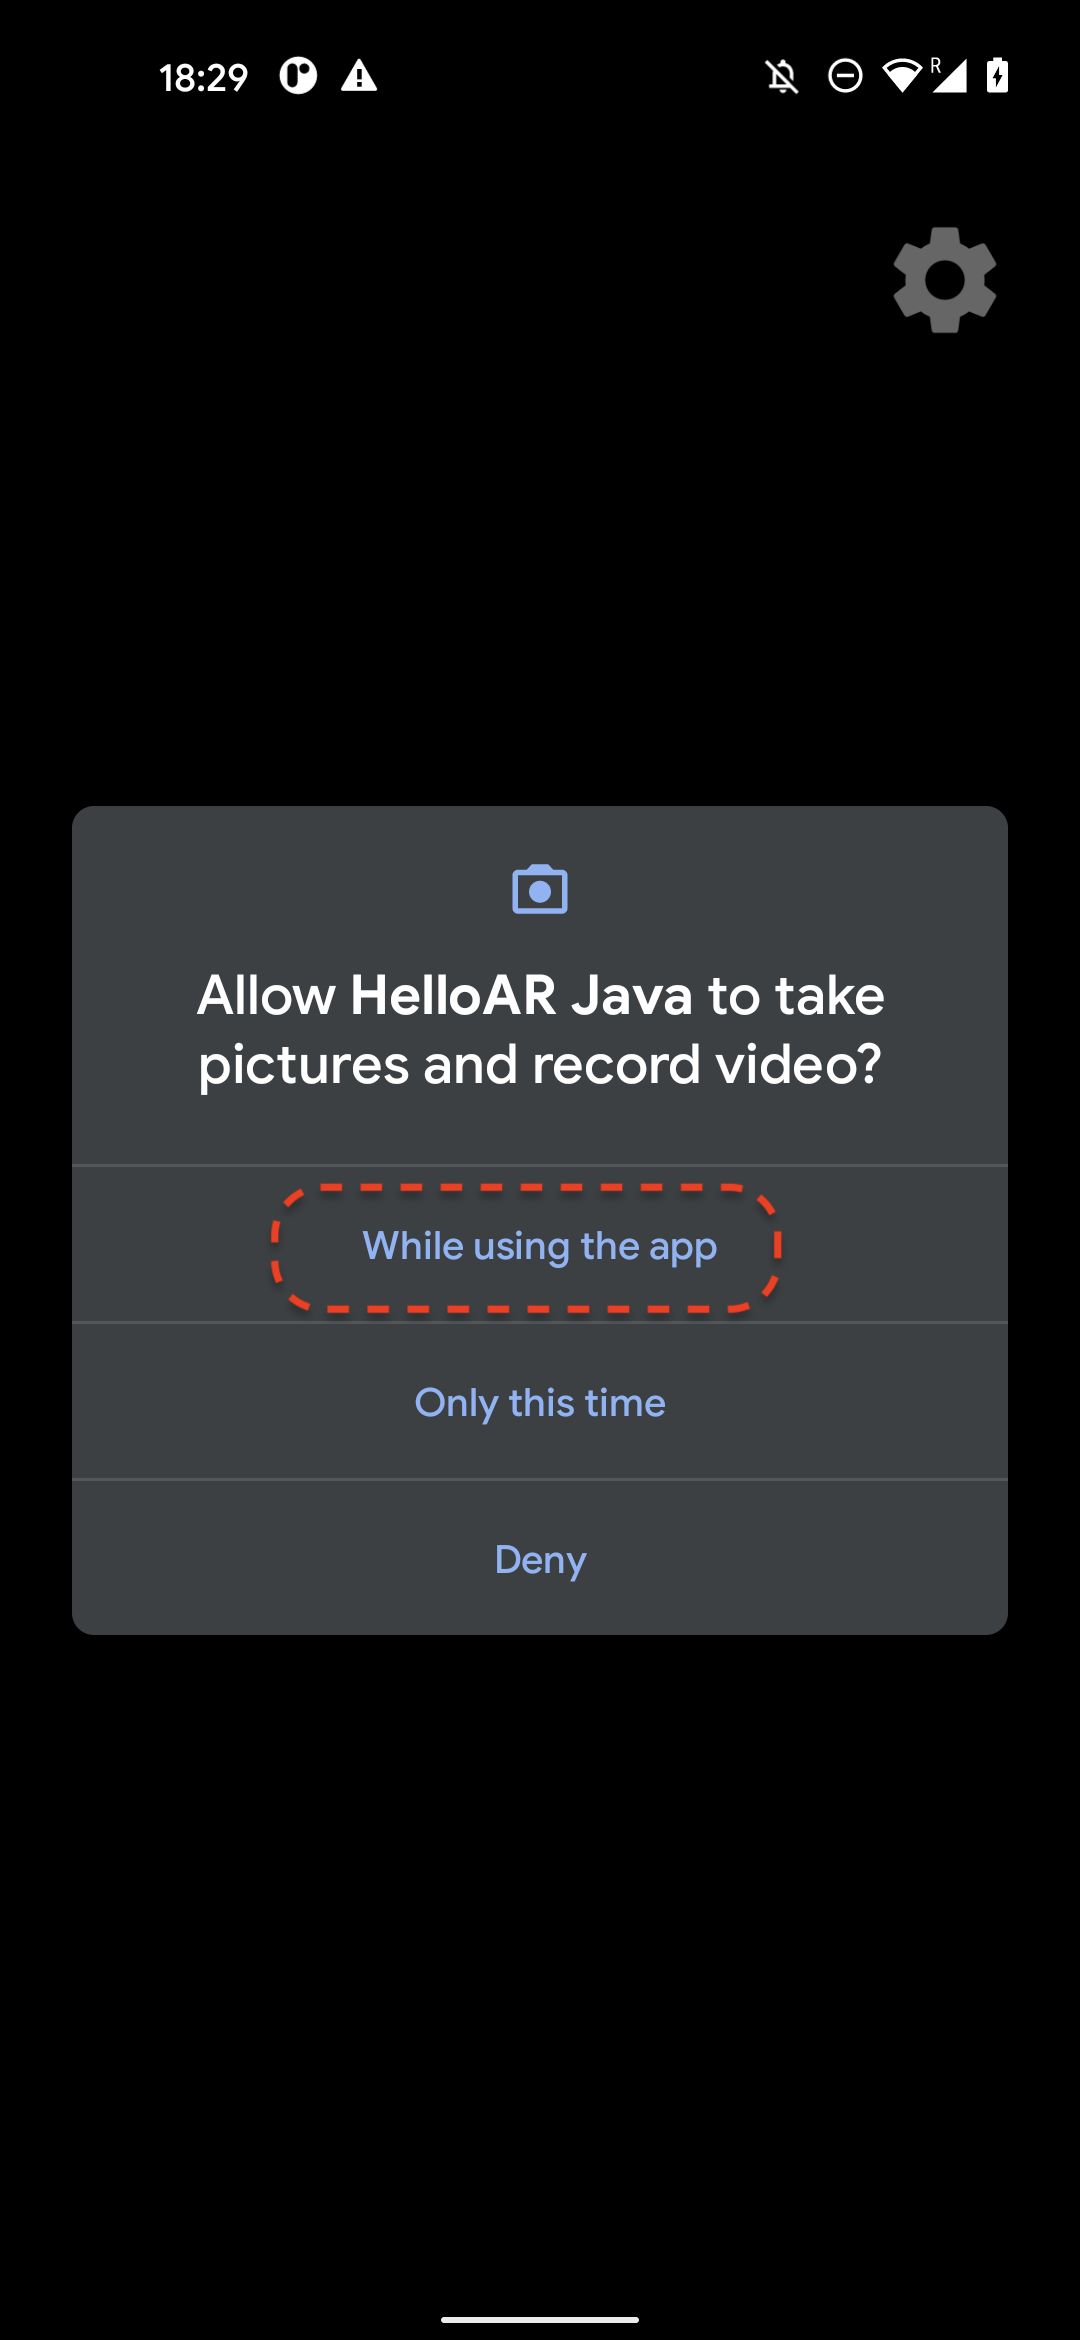
- คุณจะเห็นข้อความแจ้งที่ขอสิทธิ์ในการถ่ายภาพและบันทึกวิดีโอ เลือกขณะใช้แอปนี้เพื่อให้สิทธิ์เข้าถึงกล้องแก่แอป จากนั้นคุณจะเห็นสภาพแวดล้อมจริงบนหน้าจอของอุปกรณ์
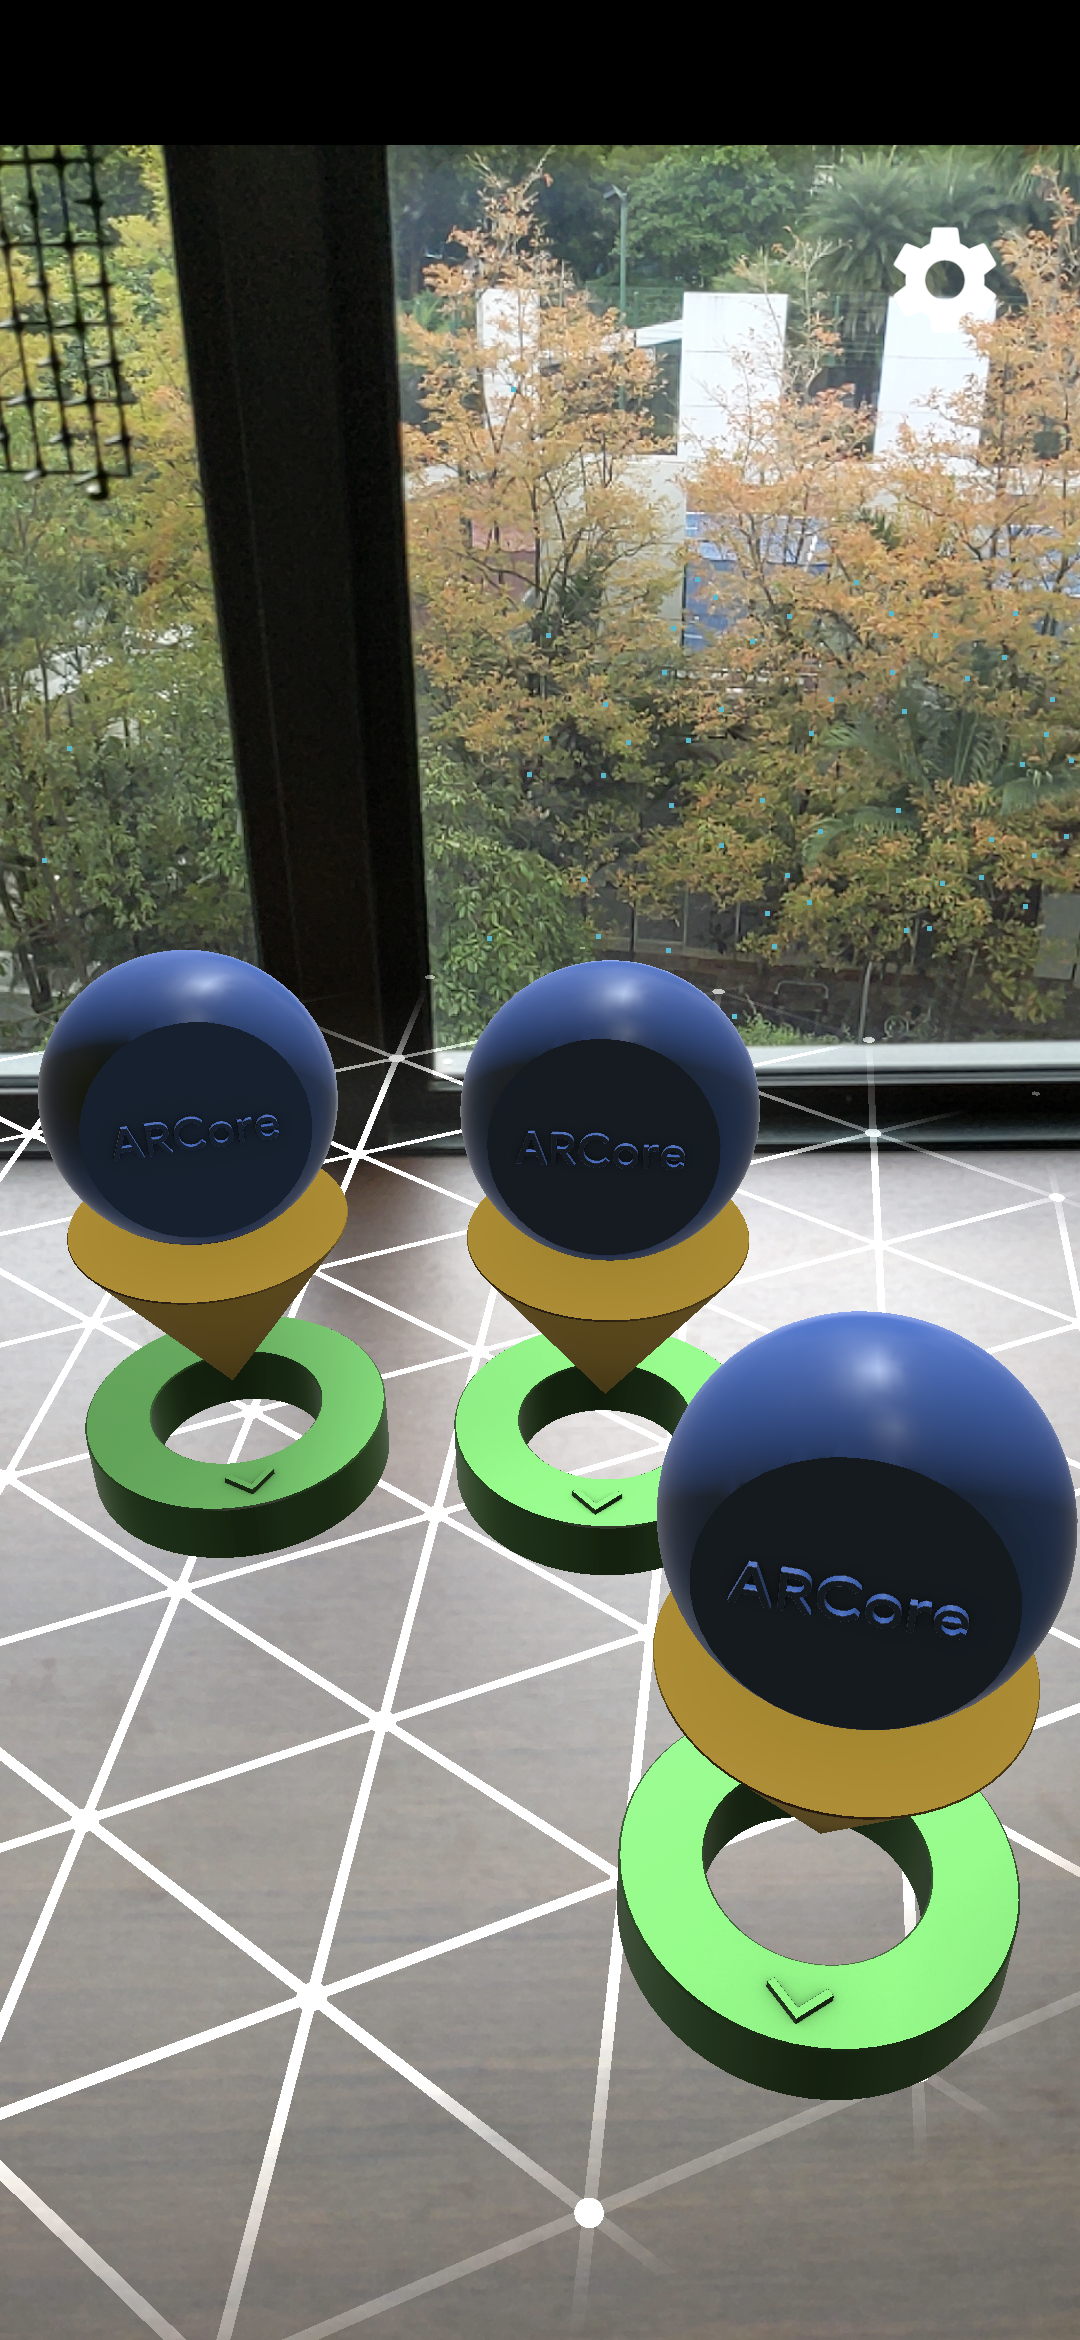
- ขยับอุปกรณ์ในแนวนอนเพื่อสแกนหาเครื่องบิน
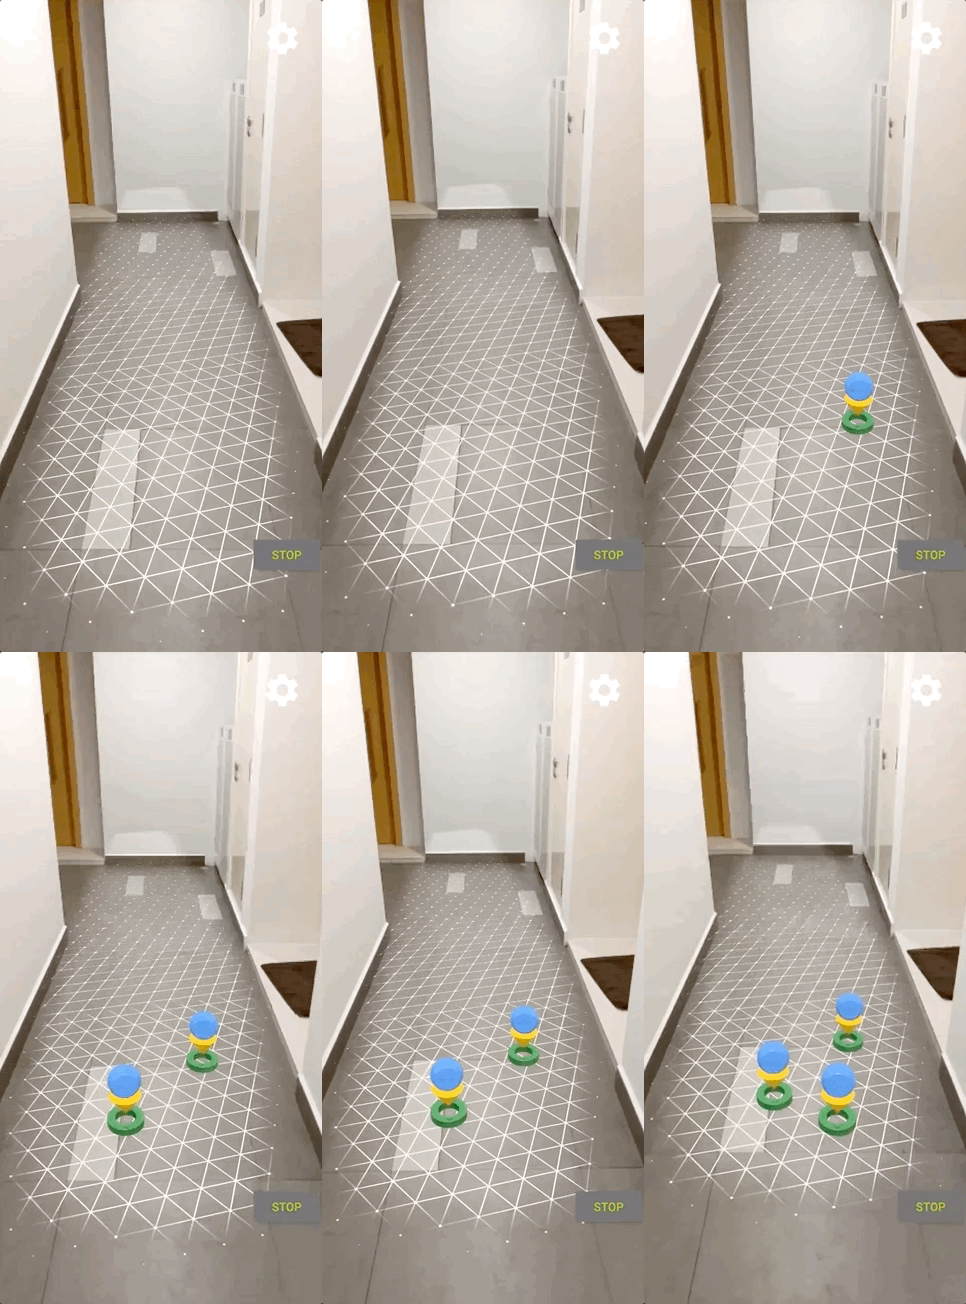
- ตารางกริดสีขาวจะปรากฏขึ้นเมื่อแอปตรวจพบระนาบ แตะเพื่อวางเครื่องหมายบนเครื่องบินนั้น
สิ่งที่คุณทำในขั้นตอนนี้
- ตั้งค่าโปรเจ็กต์ Hello AR Java
- สร้างและเรียกใช้แอปตัวอย่างในอุปกรณ์ที่รองรับ ARCore
จากนั้นคุณจะบันทึกเซสชัน AR เป็นไฟล์ MP4
3. บันทึกเซสชัน ARCore เป็นไฟล์ MP4
เราจะเพิ่มฟีเจอร์การบันทึกในขั้นตอนนี้ โดยประกอบด้วย
- ปุ่มเพื่อเริ่มหรือหยุดการบันทึก
- ฟังก์ชันการจัดเก็บข้อมูลเพื่อบันทึกไฟล์ MP4 ในอุปกรณ์
- การเรียกเพื่อเริ่มหรือหยุดการบันทึกเซสชัน ARCore
เพิ่ม UI สำหรับปุ่มบันทึก
ก่อนที่จะติดตั้งใช้งานการบันทึก ให้เพิ่มปุ่มใน UI เพื่อให้ผู้ใช้แจ้ง ARCore ได้ว่าจะเริ่มหรือหยุดบันทึกเมื่อใด
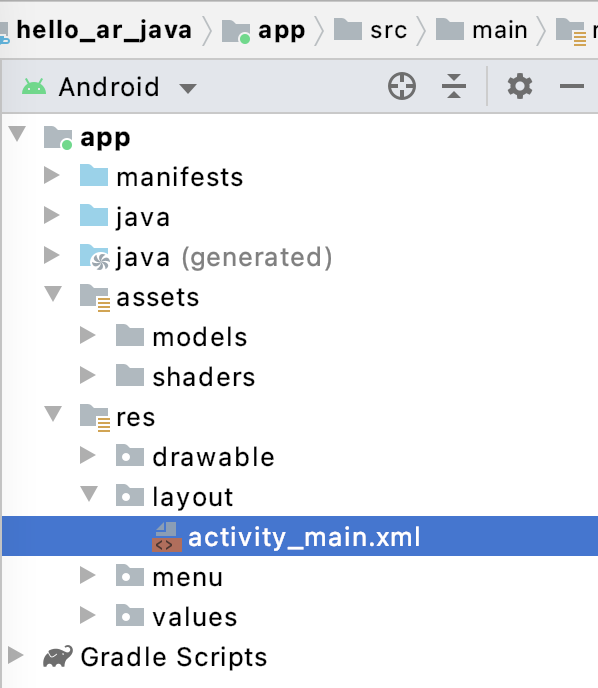
เปิดไฟล์ app/res/layout/activity_main.xml ในแผงโปรเจ็กต์
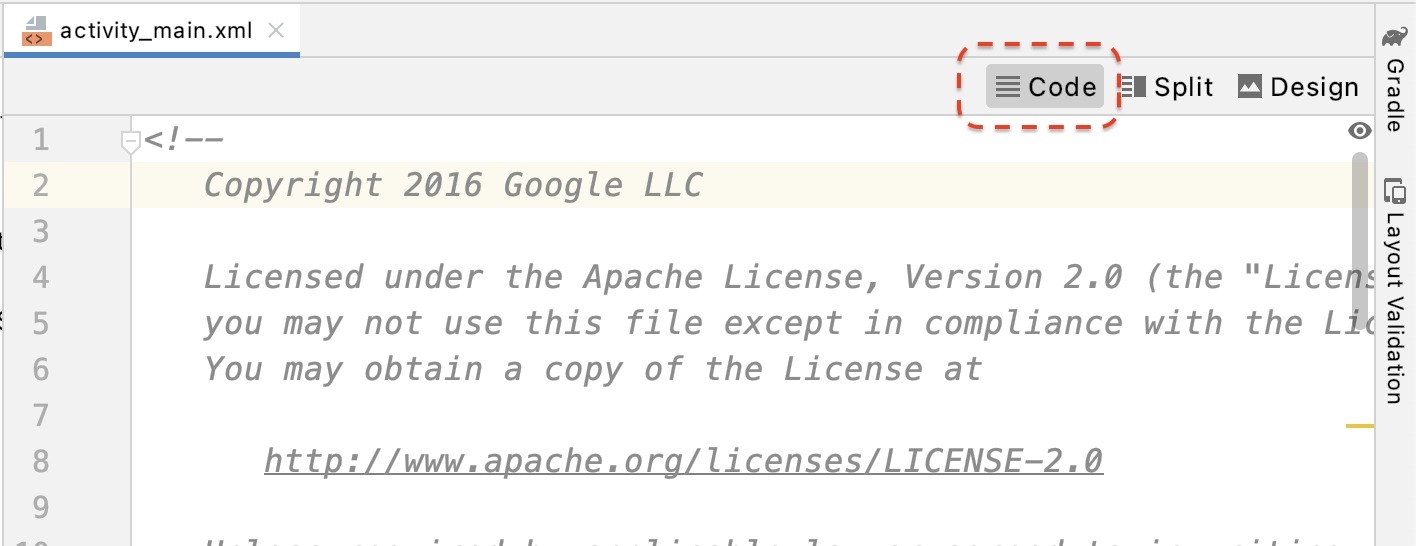
โดยค่าเริ่มต้น Android Studio จะใช้มุมมองการออกแบบหลังจากที่คุณเปิดไฟล์ app/res/layout/activity_main.xml คลิกปุ่มโค้ดที่มุมขวาบนของแท็บเพื่อเปลี่ยนเป็นมุมมองโค้ด
ใน activity_main.xml ให้เพิ่มโค้ดต่อไปนี้ก่อนแท็กปิดเพื่อสร้างปุ่ม Record ใหม่ และตั้งค่าตัวแฮนเดิลเหตุการณ์เป็นเมธอดที่ชื่อ onClickRecord()
  <!--
    Add a new "Record" button with those attributes:
        text is "Record",
        onClick event handler is "onClickRecord",
        text color is "red".
  -->
  <Button
      android:id="@+id/record_button"
      android:layout_width="wrap_content"
      android:layout_height="wrap_content"
      android:layout_alignLeft="@id/surfaceview"
      android:layout_alignBottom="@id/surfaceview"
      android:layout_marginBottom="100dp"
      android:onClick="onClickRecord"
      android:text="Record"
      android:textColor="@android:color/holo_red_light" />
หลังจากเพิ่มโค้ดข้างต้นแล้ว ระบบอาจแสดงข้อผิดพลาดชั่วคราว: Corresponding method handler 'public void onClickRecord(android.view.View)' not found" กรณีนี้เป็นสิ่งที่คาดว่าจะเกิดอยู่แล้ว คุณจะแก้ไขข้อผิดพลาดได้โดยสร้างฟังก์ชัน onClickRecord() ในอีกไม่กี่ขั้นตอนข้างหน้า
เปลี่ยนข้อความในปุ่มตามสถานะ
ปุ่มบันทึกจะจัดการทั้งการบันทึกและการหยุด เมื่อแอปไม่ได้บันทึกข้อมูล แอปควรแสดงคำว่า "บันทึก" เมื่อแอปบันทึกข้อมูล ปุ่มควรเปลี่ยนไปแสดงคำว่า "หยุด"
แอปต้องทราบสถานะปัจจุบันของปุ่มเพื่อให้ปุ่มมีฟังก์ชันการทำงานนี้ โค้ดต่อไปนี้สร้างการแจงนับใหม่ชื่อ AppState เพื่อแสดงสถานะการทำงานของแอป และติดตามการเปลี่ยนแปลงสถานะที่เฉพาะเจาะจงผ่านตัวแปรสมาชิกส่วนตัวที่ชื่อ appState เพิ่มลงใน HelloArActivity.java ที่จุดเริ่มต้นของคลาส HelloArActivity
  // Represents the app's working state.
  public enum AppState {
    Idle,
    Recording
  }

  // Tracks app's specific state changes.
  private AppState appState = AppState.Idle;
ตอนนี้คุณสามารถติดตามสถานะภายในของแอปได้แล้ว ให้สร้างฟังก์ชันชื่อ updateRecordButton() ซึ่งจะเปลี่ยนข้อความของปุ่มตามสถานะปัจจุบันของแอป เพิ่มโค้ดต่อไปนี้ภายในคลาส HelloArActivity ใน HelloArActivity.java
// Add imports to the beginning of the file.
import android.widget.Button;

  // Update the "Record" button based on app's internal state.
  private void updateRecordButton() {
    View buttonView = findViewById(R.id.record_button);
    Button button = (Button) buttonView;

    switch (appState) {
      case Idle:
        button.setText("Record");
        break;
      case Recording:
        button.setText("Stop");
        break;
    }
  }
จากนั้นสร้างเมธอด onClickRecord() ที่ตรวจสอบสถานะของแอป เปลี่ยนเป็นสถานะถัดไป และเรียกใช้ updateRecordButton() เพื่อเปลี่ยน UI ของปุ่ม เพิ่มโค้ดต่อไปนี้ภายในคลาส HelloArActivity ใน HelloArActivity.java
  // Handle the "Record" button click event.
  public void onClickRecord(View view) {
    Log.d(TAG, "onClickRecord");

    // Check the app's internal state and switch to the new state if needed.
    switch (appState) {
        // If the app is not recording, begin recording.
      case Idle: {
        boolean hasStarted = startRecording();
        Log.d(TAG, String.format("onClickRecord start: hasStarted %b", hasStarted));

        if (hasStarted)
          appState = AppState.Recording;

        break;
      }

      // If the app is recording, stop recording.
      case Recording: {
        boolean hasStopped = stopRecording();
        Log.d(TAG, String.format("onClickRecord stop: hasStopped %b", hasStopped));

        if (hasStopped)
          appState = AppState.Idle;

        break;
      }

      default:
        // Do nothing.
        break;
    }

    updateRecordButton();
  }
เปิดใช้แอปเพื่อเริ่มบันทึก
คุณต้องทำเพียง 2 สิ่งเพื่อเริ่มบันทึกใน ARCore
- ระบุ URI ของไฟล์บันทึกในออบเจ็กต์
RecordingConfig - โทรหา
session.startRecordingด้วยออบเจ็กต์RecordingConfig
ส่วนที่เหลือเป็นเพียงโค้ด Boilerplate ได้แก่ การกำหนดค่า การบันทึก และการตรวจสอบความถูกต้อง
สร้างฟังก์ชันใหม่ชื่อ startRecording() ซึ่งจะบันทึกข้อมูลและจัดเก็บไว้ใน URI ของ MP4 เพิ่มโค้ดต่อไปนี้ภายในคลาส HelloArActivity ใน HelloArActivity.java
// Add imports to the beginning of the file.
import android.net.Uri;
import com.google.ar.core.RecordingConfig;
import com.google.ar.core.RecordingStatus;
import com.google.ar.core.exceptions.RecordingFailedException;

  private boolean startRecording() {
    Uri mp4FileUri = createMp4File();
    if (mp4FileUri == null)
      return false;

    Log.d(TAG, "startRecording at: " + mp4FileUri);

    pauseARCoreSession();

    // Configure the ARCore session to start recording.
    RecordingConfig recordingConfig = new RecordingConfig(session)
        .setMp4DatasetUri(mp4FileUri)
        .setAutoStopOnPause(true);

    try {
      // Prepare the session for recording, but do not start recording yet.
      session.startRecording(recordingConfig);
    } catch (RecordingFailedException e) {
      Log.e(TAG, "startRecording - Failed to prepare to start recording", e);
      return false;
    }

    boolean canResume = resumeARCoreSession();
    if (!canResume)
      return false;

    // Correctness checking: check the ARCore session's RecordingState.
    RecordingStatus recordingStatus = session.getRecordingStatus();
    Log.d(TAG, String.format("startRecording - recordingStatus %s", recordingStatus));
    return recordingStatus == RecordingStatus.OK;
  }
หากต้องการหยุดชั่วคราวและกลับมาใช้เซสชัน ARCore ต่ออย่างปลอดภัย ให้สร้าง pauseARCoreSession() และ resumeARCoreSession() ใน HelloArActivity.java
  private void pauseARCoreSession() {
    // Pause the GLSurfaceView so that it doesn't update the ARCore session.
    // Pause the ARCore session so that we can update its configuration.
    // If the GLSurfaceView is not paused,
    //   onDrawFrame() will try to update the ARCore session
    //   while it's paused, resulting in a crash.
    surfaceView.onPause();
    session.pause();
  }

  private boolean resumeARCoreSession() {
    // We must resume the ARCore session before the GLSurfaceView.
    // Otherwise, the GLSurfaceView will try to update the ARCore session.
    try {
      session.resume();
    } catch (CameraNotAvailableException e) {
      Log.e(TAG, "CameraNotAvailableException in resumeARCoreSession", e);
      return false;
    }

    surfaceView.onResume();
    return true;
  }
เปิดใช้แอปเพื่อหยุดบันทึก
สร้างฟังก์ชันชื่อ stopRecording() ใน HelloArActivity.java เพื่อหยุดไม่ให้แอปบันทึกข้อมูลใหม่ ฟังก์ชันนี้จะเรียกใช้ session.stopRecording() และส่งข้อผิดพลาดไปยังบันทึกของคอนโซลหากแอปหยุดบันทึกไม่ได้
  private boolean stopRecording() {
    try {
      session.stopRecording();
    } catch (RecordingFailedException e) {
      Log.e(TAG, "stopRecording - Failed to stop recording", e);
      return false;
    }

    // Correctness checking: check if the session stopped recording.
    return session.getRecordingStatus() == RecordingStatus.NONE;
  }
ออกแบบที่เก็บไฟล์โดยใช้พื้นที่เก็บข้อมูลที่จำกัดขอบเขตของ Android 11
ฟังก์ชันที่เกี่ยวข้องกับพื้นที่เก็บข้อมูลใน Codelab นี้ได้รับการออกแบบตามข้อกำหนดใหม่ของพื้นที่เก็บข้อมูลที่จำกัดขอบเขตใน Android 11
ทำการเปลี่ยนแปลงเล็กน้อยในapp/build.gradleเพื่อกำหนดเป้าหมายเป็น Android 11 ในแผงโปรเจ็กต์ของ Android Studio ไฟล์นี้จะอยู่ใต้โหนดสคริปต์ Gradle ที่เชื่อมโยงกับโมดูล app
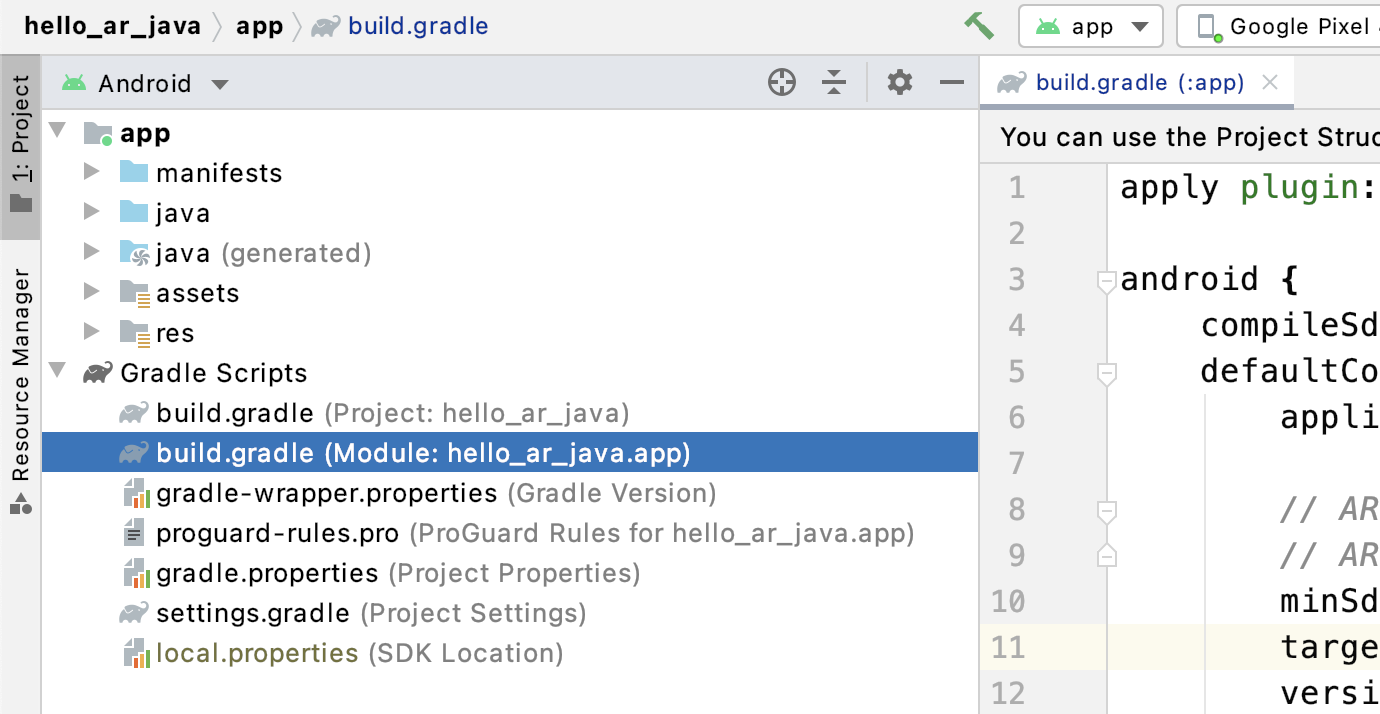
เปลี่ยน compileSdkVersion และ targetSdkVersion เป็น 30
    compileSdkVersion 30
    defaultConfig {
      targetSdkVersion 30
    }
สำหรับการบันทึก ให้ใช้ Android MediaStore API เพื่อสร้างไฟล์ MP4 ในไดเรกทอรีภาพยนตร์ที่แชร์
สร้างฟังก์ชันชื่อ createMp4File() ใน HelloArActivity.java โดยทำดังนี้
// Add imports to the beginning of the file.
import java.text.SimpleDateFormat;
import android.content.ContentResolver;
import android.net.Uri;
import android.os.Build;
import android.os.Environment;
import android.provider.MediaStore;
import android.content.ContentValues;
import java.io.File;
import android.content.CursorLoader;
import android.database.Cursor;
import java.util.Date;


  private final String MP4_VIDEO_MIME_TYPE = "video/mp4";

  private Uri createMp4File() {
    SimpleDateFormat dateFormat = new SimpleDateFormat("yyyyMMdd_HHmmss");
    String mp4FileName = "arcore-" + dateFormat.format(new Date()) + ".mp4";

    ContentResolver resolver = this.getContentResolver();

    Uri videoCollection = null;
    if (Build.VERSION.SDK_INT >= Build.VERSION_CODES.Q) {
      videoCollection = MediaStore.Video.Media.getContentUri(
          MediaStore.VOLUME_EXTERNAL_PRIMARY);
    } else {
      videoCollection = MediaStore.Video.Media.EXTERNAL_CONTENT_URI;
    }

    // Create a new Media file record.
    ContentValues newMp4FileDetails = new ContentValues();
    newMp4FileDetails.put(MediaStore.Video.Media.DISPLAY_NAME, mp4FileName);
    newMp4FileDetails.put(MediaStore.Video.Media.MIME_TYPE, MP4_VIDEO_MIME_TYPE);

    if (Build.VERSION.SDK_INT >= Build.VERSION_CODES.Q) {
      // The Relative_Path column is only available since API Level 29.
      newMp4FileDetails.put(MediaStore.Video.Media.RELATIVE_PATH, Environment.DIRECTORY_MOVIES);
    } else {
      // Use the Data column to set path for API Level <= 28.
      File mp4FileDir = Environment.getExternalStoragePublicDirectory(Environment.DIRECTORY_MOVIES);
      String absoluteMp4FilePath = new File(mp4FileDir, mp4FileName).getAbsolutePath();
      newMp4FileDetails.put(MediaStore.Video.Media.DATA, absoluteMp4FilePath);
    }

    Uri newMp4FileUri = resolver.insert(videoCollection, newMp4FileDetails);

    // Ensure that this file exists and can be written.
    if (newMp4FileUri == null) {
      Log.e(TAG, String.format("Failed to insert Video entity in MediaStore. API Level = %d", Build.VERSION.SDK_INT));
      return null;
    }

    // This call ensures the file exist before we pass it to the ARCore API.
    if (!testFileWriteAccess(newMp4FileUri)) {
      return null;
    }

    Log.d(TAG, String.format("createMp4File = %s, API Level = %d", newMp4FileUri, Build.VERSION.SDK_INT));

    return newMp4FileUri;
  }

  // Test if the file represented by the content Uri can be open with write access.
  private boolean testFileWriteAccess(Uri contentUri) {
    try (java.io.OutputStream mp4File = this.getContentResolver().openOutputStream(contentUri)) {
      Log.d(TAG, String.format("Success in testFileWriteAccess %s", contentUri.toString()));
      return true;
    } catch (java.io.FileNotFoundException e) {
      Log.e(TAG, String.format("FileNotFoundException in testFileWriteAccess %s", contentUri.toString()), e);
    } catch (java.io.IOException e) {
      Log.e(TAG, String.format("IOException in testFileWriteAccess %s", contentUri.toString()), e);
    }

    return false;
  }
จัดการสิทธิ์เข้าถึงพื้นที่เก็บข้อมูล
หากใช้อุปกรณ์ Android 11 คุณจะเริ่มทดสอบโค้ดได้ หากต้องการรองรับอุปกรณ์ Android 10 หรือต่ำกว่า คุณจะต้องให้สิทธิ์พื้นที่เก็บข้อมูลของแอปเพื่อบันทึกข้อมูลลงในระบบไฟล์ของอุปกรณ์เป้าหมาย
ใน AndroidManifest.xml ให้ประกาศว่าแอปต้องมีสิทธิ์อ่านและเขียนพื้นที่เก็บข้อมูลก่อน Android 11 (ระดับ API 30)
  <!-- Inside the <manifest> tag, below the existing Camera permission -->
  <uses-permission android:name="android.permission.WRITE_EXTERNAL_STORAGE"
      android:maxSdkVersion="29" />

  <uses-permission android:name="android.permission.READ_EXTERNAL_STORAGE"
      android:maxSdkVersion="29" />
เพิ่มฟังก์ชันตัวช่วยที่ชื่อ checkAndRequestStoragePermission() ใน HelloArActivity.java เพื่อขอสิทธิ์ WRITE_EXTERNAL_STORAGE ในระหว่างรันไทม์
// Add imports to the beginning of the file.
import android.Manifest;
import android.content.pm.PackageManager;
import androidx.core.app.ActivityCompat;
import androidx.core.content.ContextCompat;

  private final int REQUEST_WRITE_EXTERNAL_STORAGE = 1;
  public boolean checkAndRequestStoragePermission() {
    if (ContextCompat.checkSelfPermission(this, Manifest.permission.WRITE_EXTERNAL_STORAGE)
        != PackageManager.PERMISSION_GRANTED) {
      ActivityCompat.requestPermissions(this,
          new String[]{Manifest.permission.WRITE_EXTERNAL_STORAGE},
          REQUEST_WRITE_EXTERNAL_STORAGE);
      return false;
    }

    return true;
  }
หากใช้ระดับ API 29 หรือต่ำกว่า ให้เพิ่มการตรวจสอบสิทธิ์เข้าถึงพื้นที่เก็บข้อมูลที่ด้านบนของ createMp4File() และออกจากฟังก์ชันก่อนเวลาหากแอปไม่มีสิทธิ์ที่ถูกต้อง ระดับ API 30 (Android 11) ไม่ต้องใช้สิทธิ์เข้าถึงพื้นที่เก็บข้อมูลเพื่อเข้าถึงไฟล์ใน MediaStore
  private Uri createMp4File() {
    // Since we use legacy external storage for Android 10,
    // we still need to request for storage permission on Android 10.
    if (Build.VERSION.SDK_INT <= Build.VERSION_CODES.Q) {
      if (!checkAndRequestStoragePermission()) {
        Log.i(TAG, String.format(
            "Didn't createMp4File. No storage permission, API Level = %d",
            Build.VERSION.SDK_INT));
        return null;
      }
    }
    // ... omitted code ...
  }
บันทึกจากอุปกรณ์เป้าหมาย
ถึงเวลาดูสิ่งที่คุณสร้างมาจนถึงตอนนี้แล้ว เชื่อมต่ออุปกรณ์เคลื่อนที่กับคอมพิวเตอร์สำหรับการพัฒนาซอฟต์แวร์ แล้วคลิกเรียกใช้ใน Android Studio
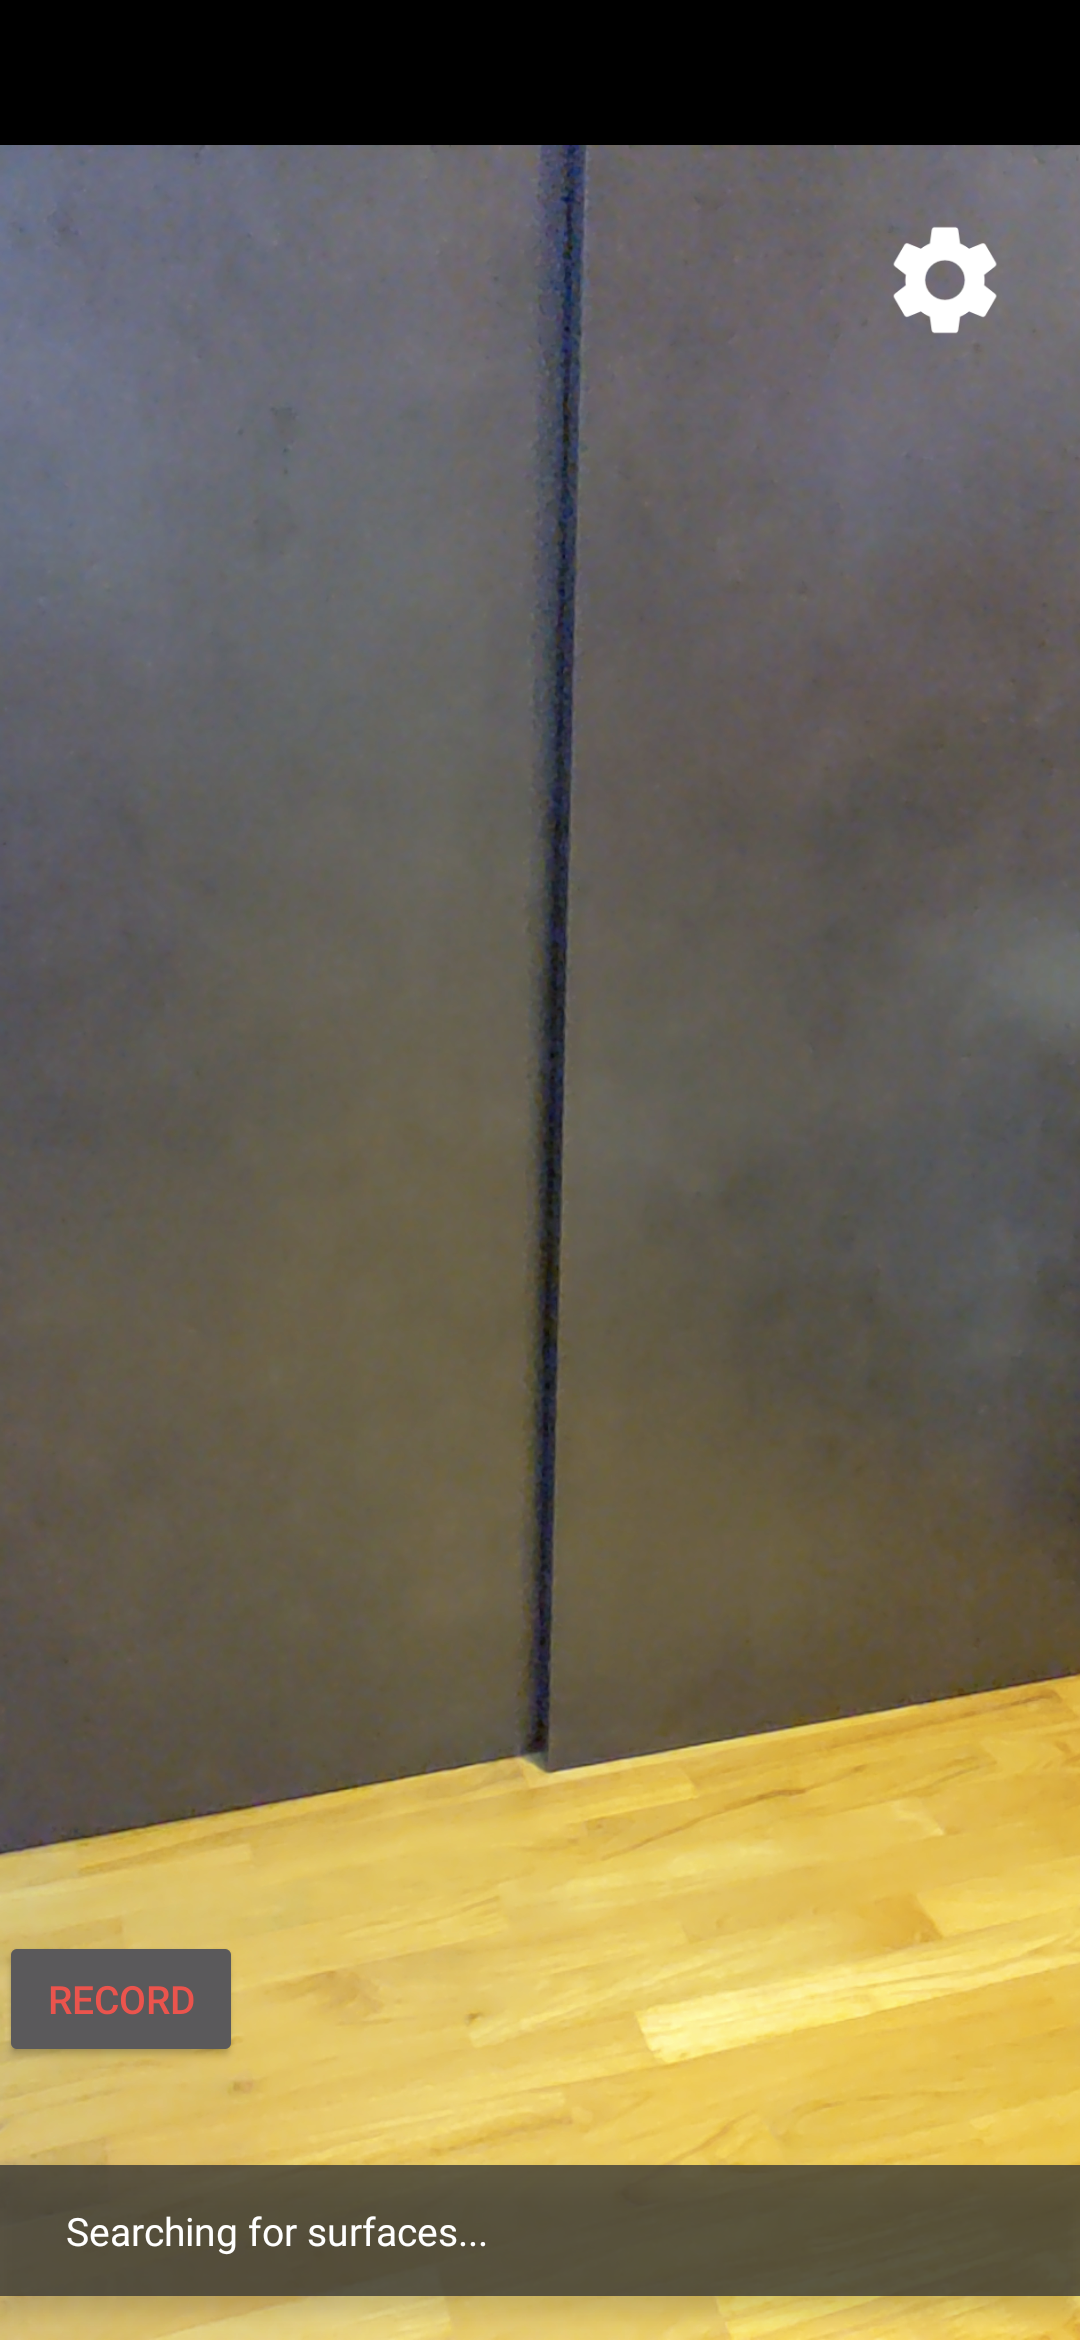
คุณควรเห็นปุ่มบันทึกสีแดงที่ด้านล่างซ้ายของหน้าจอ การแตะปุ่มนี้จะเปลี่ยนข้อความเป็นหยุด ขยับอุปกรณ์ไปรอบๆ เพื่อบันทึกเซสชัน แล้วคลิกปุ่มหยุดเมื่อต้องการบันทึกให้เสร็จสมบูรณ์ การดำเนินการนี้จะบันทึกไฟล์ใหม่ชื่อ arcore-xxxxxx_xxxxxx.mp4 ไว้ในพื้นที่เก็บข้อมูลภายนอกของอุปกรณ์
ตอนนี้คุณควรมีarcore-xxxxxx_xxxxxx.mp4ไฟล์ใหม่ในที่เก็บข้อมูลภายนอกของอุปกรณ์ ในอุปกรณ์ Pixel 5 เส้นทางคือ /storage/emulated/0/Movies/ คุณดูเส้นทางได้ในหน้าต่าง Logcat หลังจากเริ่มบันทึก
com.google.ar.core.examples.java.helloar D/HelloArActivity: startRecording at:/storage/emulated/0/Movies/arcore-xxxxxxxx_xxxxxx.mp4
com.google.ar.core.examples.java.helloar D/HelloArActivity: startRecording - RecordingStatus OK
ดูการบันทึก
คุณสามารถใช้แอประบบไฟล์ เช่น Files by Google เพื่อดูการบันทึก หรือคัดลอกไปยังคอมพิวเตอร์สำหรับการพัฒนาซอฟต์แวร์ ด้านล่างนี้คือคำสั่ง adb 2 รายการสำหรับแสดงและดึงข้อมูลไฟล์จากอุปกรณ์ Android
adb shell ls '$EXTERNAL_STORAGE/Movies/*'เพื่อแสดงไฟล์ในไดเรกทอรีภาพยนตร์ในที่เก็บข้อมูลภายนอกบนอุปกรณ์adb pull /absolute_path_from_previous_adb_shell_ls/arcore-xxxxxxxx_xxxxxx.mp4เพื่อคัดลอกไฟล์จากอุปกรณ์ไปยังคอมพิวเตอร์สำหรับการพัฒนาซอฟต์แวร์
นี่คือตัวอย่างเอาต์พุตหลังจากใช้คำสั่ง 2 รายการนี้ (จาก macOS)
$ adb shell ls '$EXTERNAL_STORAGE/Movies/*'
/sdcard/Movies/arcore-xxxxxxxx_xxxxxx.mp4


$ adb pull /sdcard/Movies/arcore-xxxxxxxx_xxxxxx.mp4
/sdcard/Movies/arcore-xxxxxxxx_xxxxxx.mp4: ... pulled
สิ่งที่คุณทำในขั้นตอนนี้
- เพิ่มปุ่มเพื่อเริ่มและหยุดการบันทึก
- ฟังก์ชันที่ใช้เพื่อเริ่มและหยุดการบันทึก
- ทดสอบแอปในอุปกรณ์
- คัดลอก MP4 ที่บันทึกไว้ไปยังเครื่องของคุณและยืนยันแล้ว
จากนั้นคุณจะเล่นเซสชัน AR จากไฟล์ MP4
4. เล่นเซสชัน ARCore จากไฟล์ MP4
ตอนนี้คุณจะมีปุ่มบันทึกและไฟล์ MP4 บางไฟล์ที่มีเซสชันที่บันทึกไว้ ตอนนี้คุณจะเล่นไฟล์เหล่านั้นได้โดยใช้ ARCore Playback API
เพิ่ม UI สำหรับปุ่มเล่น
ก่อนที่จะใช้การเล่น ให้เพิ่มปุ่มใน UI เพื่อให้ผู้ใช้แจ้ง ARCore ได้ว่าควรเริ่มและหยุดเล่นเซสชันเมื่อใด
เปิดไฟล์ app/res/layout/activity_main.xml ในแผงโปรเจ็กต์
ใน activity_main.xml ให้เพิ่มโค้ดด้านล่างก่อนแท็กปิดเพื่อสร้างปุ่มเล่นใหม่ และตั้งค่าตัวแฮนเดิลเหตุการณ์เป็นเมธอดที่ชื่อ onClickPlayback() ปุ่มนี้จะคล้ายกับปุ่มบันทึกและจะแสดงที่ด้านขวาของหน้าจอ
  <!--
    Add a new "Playback" button with those attributes:
        text is "Playback",
        onClick event handler is "onClickPlayback",
        text color is "green".
  -->
  <Button
      android:id="@+id/playback_button"
      android:layout_width="wrap_content"
      android:layout_height="wrap_content"
      android:layout_alignEnd="@id/surfaceview"
      android:layout_alignBottom="@id/surfaceview"
      android:layout_marginBottom="100dp"
      android:onClick="onClickPlayback"
      android:text="Playback"
      android:textColor="@android:color/holo_green_light" />
ปุ่มอัปเดตระหว่างการเล่น
ตอนนี้แอปมีสถานะใหม่ที่เรียกว่า Playingback อัปเดต AppState enum และฟังก์ชันที่มีอยู่ทั้งหมดที่ใช้ appState เป็นอาร์กิวเมนต์เพื่อจัดการปัญหานี้
เพิ่ม Playingback ลงใน enum AppState ใน HelloArActivity.java ดังนี้
  public enum AppState {
    Idle,
    Recording,
    Playingback // New enum value.
  }
หากปุ่มบันทึกยังคงอยู่บนหน้าจอระหว่างการเล่น ผู้ใช้อาจคลิกปุ่มนี้โดยไม่ตั้งใจ หากต้องการหลีกเลี่ยงปัญหานี้ ให้ซ่อนปุ่มบันทึกระหว่างการเล่น วิธีนี้ช่วยให้คุณไม่ต้องจัดการสถานะสำหรับ Playingback ใน onClickRecord()
แก้ไขฟังก์ชัน updateRecordButton() ใน HelloArActivity.java เพื่อซ่อนปุ่มบันทึกเมื่อแอปอยู่ในสถานะ Playingback
  // Update the "Record" button based on app's internal state.
  private void updateRecordButton() {
    View buttonView = findViewById(R.id.record_button);
    Button button = (Button)buttonView;

    switch (appState) {

      // The app is neither recording nor playing back. The "Record" button is visible.
      case Idle:
        button.setText("Record");
        button.setVisibility(View.VISIBLE);
        break;

      // While recording, the "Record" button is visible and says "Stop".
      case Recording:
        button.setText("Stop");
        button.setVisibility(View.VISIBLE);
        break;

      // During playback, the "Record" button is not visible.
      case Playingback:
        button.setVisibility(View.INVISIBLE);
        break;
    }
  }
ในทำนองเดียวกัน ให้ซ่อนปุ่มเล่นเมื่อผู้ใช้บันทึกเซสชัน และเปลี่ยนปุ่มเป็น "หยุด" เมื่อผู้ใช้เล่นเซสชันอยู่ วิธีนี้จะช่วยให้ผู้ใช้หยุดการเล่นได้โดยไม่ต้องรอให้เล่นจนจบ
วิธีเพิ่มupdatePlaybackButton()ฟังก์ชันใน HelloArActivity.java
  // Update the "Playback" button based on app's internal state.
  private void updatePlaybackButton() {
    View buttonView = findViewById(R.id.playback_button);
    Button button = (Button)buttonView;

    switch (appState) {

      // The app is neither recording nor playing back. The "Playback" button is visible.
      case Idle:
        button.setText("Playback");
        button.setVisibility(View.VISIBLE);
        break;

      // While playing back, the "Playback" button is visible and says "Stop".
      case Playingback:
        button.setText("Stop");
        button.setVisibility(View.VISIBLE);
        break;

      // During recording, the "Playback" button is not visible.
      case Recording:
        button.setVisibility(View.INVISIBLE);
        break;
    }
  }
สุดท้าย ให้อัปเดต onClickRecord() เพื่อเรียกใช้ updatePlaybackButton() เพิ่มบรรทัดต่อไปนี้ใน HelloArActivity.java
  public void onClickRecord(View view) {
    // ... omitted code ...
    updatePlaybackButton(); // Add this line to the end of the function.
  }
เลือกไฟล์ที่มีปุ่มเล่น
เมื่อแตะ ปุ่มเล่นควรอนุญาตให้ผู้ใช้เลือกไฟล์ที่จะเล่น ใน Android การเลือกไฟล์จะได้รับการจัดการในเครื่องมือเลือกไฟล์ของระบบในกิจกรรมอื่น ซึ่งทำได้ผ่าน Storage Access Framework (SAF) เมื่อผู้ใช้เลือกไฟล์แล้ว แอปจะได้รับการเรียกกลับที่ชื่อ onActivityResult() คุณจะเริ่มการเล่นจริงภายในฟังก์ชัน Callback นี้
ใน HelloArActivity.java ให้สร้างฟังก์ชัน onClickPlayback() เพื่อเลือกไฟล์และหยุดเล่น
  // Handle the click event of the "Playback" button.
  public void onClickPlayback(View view) {
    Log.d(TAG, "onClickPlayback");

    switch (appState) {

      // If the app is not playing back, open the file picker.
      case Idle: {
        boolean hasStarted = selectFileToPlayback();
        Log.d(TAG, String.format("onClickPlayback start: selectFileToPlayback %b", hasStarted));
        break;
      }

      // If the app is playing back, stop playing back.
      case Playingback: {
        boolean hasStopped = stopPlayingback();
        Log.d(TAG, String.format("onClickPlayback stop: hasStopped %b", hasStopped));
        break;
      }

      default:
        // Recording - do nothing.
        break;
    }

    // Update the UI for the "Record" and "Playback" buttons.
    updateRecordButton();
    updatePlaybackButton();
  }
ใน HelloArActivity.java ให้สร้างฟังก์ชัน selectFileToPlayback() ที่เลือกไฟล์จากอุปกรณ์ หากต้องการเลือกไฟล์จากระบบไฟล์ Android ให้ใช้ ACTION_OPEN_DOCUMENT Intent
// Add imports to the beginning of the file.
import android.content.Intent;
import android.provider.DocumentsContract;

  private boolean selectFileToPlayback() {
    // Start file selection from Movies directory.
    // Android 10 and above requires VOLUME_EXTERNAL_PRIMARY to write to MediaStore.
    Uri videoCollection;
    if (Build.VERSION.SDK_INT >= Build.VERSION_CODES.Q) {
      videoCollection = MediaStore.Video.Media.getContentUri(
          MediaStore.VOLUME_EXTERNAL_PRIMARY);
    } else {
      videoCollection = MediaStore.Video.Media.EXTERNAL_CONTENT_URI;
    }

    // Create an Intent to select a file.
    Intent intent = new Intent(Intent.ACTION_OPEN_DOCUMENT);

    // Add file filters such as the MIME type, the default directory and the file category.
    intent.setType(MP4_VIDEO_MIME_TYPE); // Only select *.mp4 files
    intent.putExtra(DocumentsContract.EXTRA_INITIAL_URI, videoCollection); // Set default directory
    intent.addCategory(Intent.CATEGORY_OPENABLE); // Must be files that can be opened

    this.startActivityForResult(intent, REQUEST_MP4_SELECTOR);

    return true;
  }
REQUEST_MP4_SELECTOR เป็นค่าคงที่ที่ใช้ระบุคำขอนี้ คุณกำหนดได้โดยใช้ค่าตัวยึดตำแหน่งใดก็ได้ภายใน HelloArActivity ใน HelloArActivity.java ดังนี้
private int REQUEST_MP4_SELECTOR = 1;
ลบล้างฟังก์ชัน onActivityResult() ใน HelloArActivity.java เพื่อจัดการการเรียกกลับจากเครื่องมือเลือกไฟล์
  // Begin playback once the user has selected the file.
  @Override
  protected void onActivityResult(int requestCode, int resultCode, Intent data) {
    // Check request status. Log an error if the selection fails.
    if (resultCode != android.app.Activity.RESULT_OK || requestCode != REQUEST_MP4_SELECTOR) {
      Log.e(TAG, "onActivityResult select file failed");
      return;
    }

    Uri mp4FileUri = data.getData();
    Log.d(TAG, String.format("onActivityResult result is %s", mp4FileUri));

    // Begin playback.
    startPlayingback(mp4FileUri);
  }
เปิดใช้แอปเพื่อเริ่มเล่น
เซสชัน ARCore ต้องมีการเรียก API 3 ครั้งเพื่อเล่นไฟล์ MP4
session.pause()session.setPlaybackDataset()session.resume()
สร้างฟังก์ชัน startPlayingback() ใน HelloArActivity.java
// Add imports to the beginning of the file.
import com.google.ar.core.PlaybackStatus;
import com.google.ar.core.exceptions.PlaybackFailedException;

  private boolean startPlayingback(Uri mp4FileUri) {
    if (mp4FileUri == null)
      return false;

    Log.d(TAG, "startPlayingback at:" + mp4FileUri);

    pauseARCoreSession();

    try {
      session.setPlaybackDatasetUri(mp4FileUri);
    } catch (PlaybackFailedException e) {
      Log.e(TAG, "startPlayingback - setPlaybackDataset failed", e);
    }

    // The session's camera texture name becomes invalid when the
    // ARCore session is set to play back.
    // Workaround: Reset the Texture to start Playback
    // so it doesn't crashes with AR_ERROR_TEXTURE_NOT_SET.
    hasSetTextureNames = false;

    boolean canResume = resumeARCoreSession();
    if (!canResume)
      return false;

    PlaybackStatus playbackStatus = session.getPlaybackStatus();
    Log.d(TAG, String.format("startPlayingback - playbackStatus %s", playbackStatus));


    if (playbackStatus != PlaybackStatus.OK) { // Correctness check
      return false;
    }

    appState = AppState.Playingback;
    updateRecordButton();
    updatePlaybackButton();

    return true;
  }
เปิดใช้แอปเพื่อหยุดการเล่น
สร้างฟังก์ชันชื่อ stopPlayingback() ใน HelloArActivity.java เพื่อจัดการการเปลี่ยนแปลงสถานะของแอปหลังจากเหตุการณ์ต่อไปนี้
- ผู้ใช้หยุดการเล่น MP4
- การเล่น MP4 เสร็จสมบูรณ์แล้ว
หากผู้ใช้หยุดการเล่น แอปควรกลับไปอยู่ในสถานะเดียวกับตอนที่ผู้ใช้เปิดแอปครั้งแรก
  // Stop the current playback, and restore app status to Idle.
  private boolean stopPlayingback() {
    // Correctness check, only stop playing back when the app is playing back.
    if (appState != AppState.Playingback)
      return false;

    pauseARCoreSession();

    // Close the current session and create a new session.
    session.close();
    try {
      session = new Session(this);
    } catch (UnavailableArcoreNotInstalledException
        |UnavailableApkTooOldException
        |UnavailableSdkTooOldException
        |UnavailableDeviceNotCompatibleException e) {
      Log.e(TAG, "Error in return to Idle state. Cannot create new ARCore session", e);
      return false;
    }
    configureSession();

    boolean canResume = resumeARCoreSession();
    if (!canResume)
      return false;

    // A new session will not have a camera texture name.
    // Manually set hasSetTextureNames to false to trigger a reset.
    hasSetTextureNames = false;

    // Reset appState to Idle, and update the "Record" and "Playback" buttons.
    appState = AppState.Idle;
    updateRecordButton();
    updatePlaybackButton();

    return true;
  }
นอกจากนี้ การเล่นยังหยุดลงได้โดยอัตโนมัติหลังจากที่เพลเยอร์เล่นไฟล์ MP4 จนจบ ในกรณีนี้ stopPlayingback() ควรเปลี่ยนสถานะของแอปกลับเป็น Idle ใน onDrawFrame() ให้ตรวจสอบ PlaybackStatus หากเป็น FINISHED ให้เรียกใช้ฟังก์ชัน stopPlayingback() ในเธรด UI
  public void onDrawFrame(SampleRender render) {
      // ... omitted code ...

      // Insert before this line:
      // frame = session.update();

      // Check the playback status and return early if playback reaches the end.
      if (appState == AppState.Playingback
          && session.getPlaybackStatus() == PlaybackStatus.FINISHED) {
        this.runOnUiThread(this::stopPlayingback);
        return;
      }

      // ... omitted code ...
  }
เล่นจากอุปกรณ์เป้าหมาย
ถึงเวลาดูสิ่งที่คุณสร้างมาจนถึงตอนนี้แล้ว เชื่อมต่ออุปกรณ์เคลื่อนที่กับคอมพิวเตอร์สำหรับการพัฒนาซอฟต์แวร์ แล้วคลิกเรียกใช้ใน Android Studio
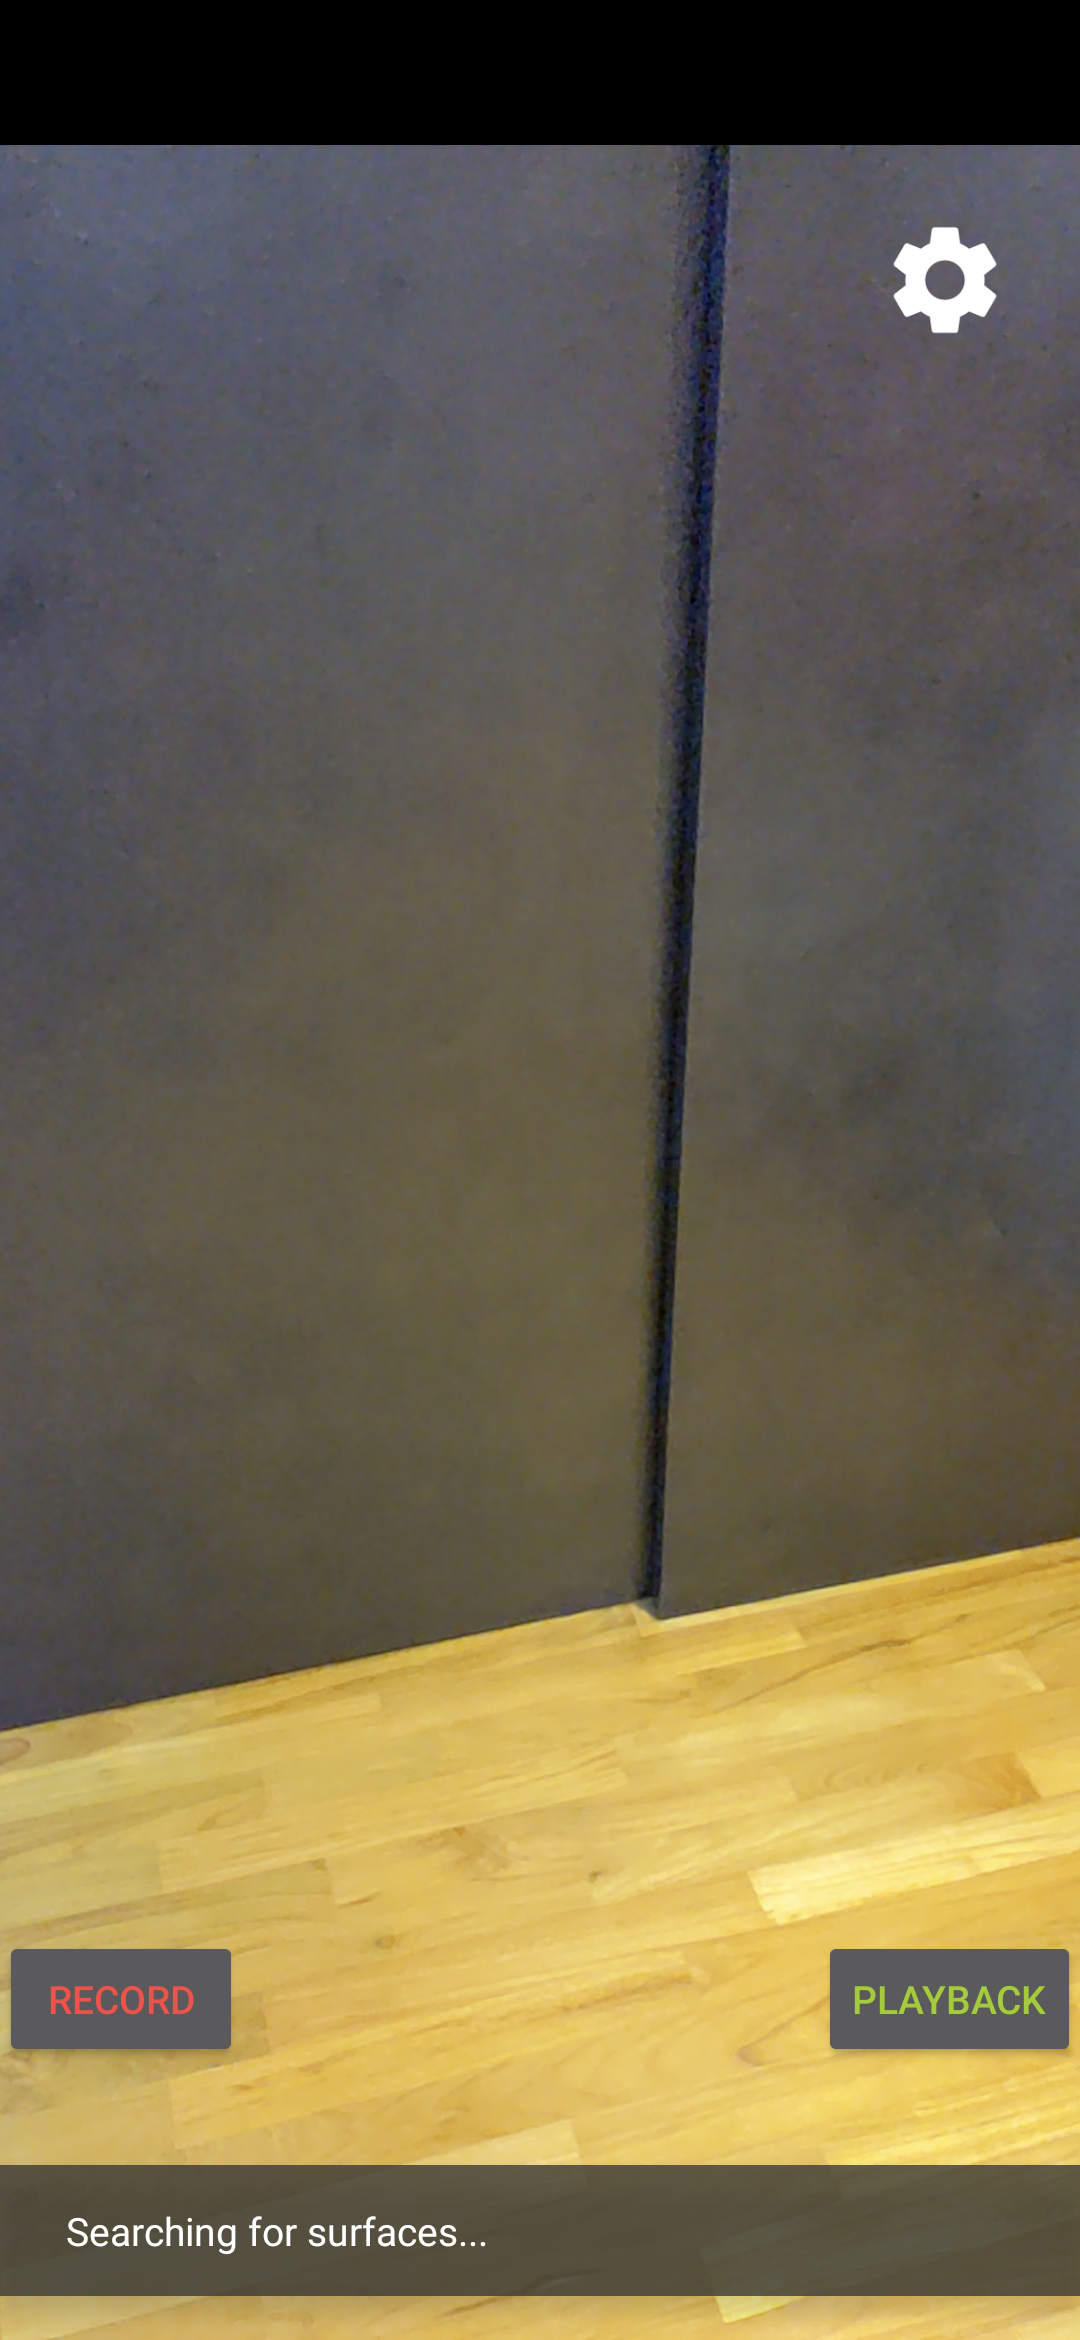
เมื่อเปิดแอป คุณจะเห็นหน้าจอที่มีปุ่มบันทึกสีแดงทางด้านซ้ายและปุ่มเล่นสีเขียวทางด้านขวา
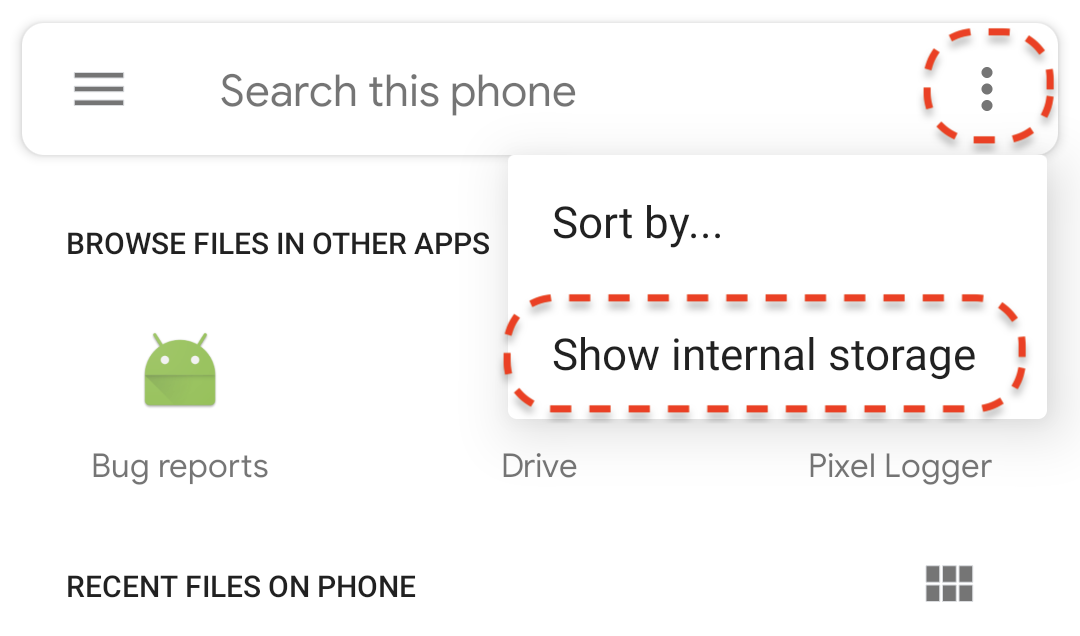
แตะปุ่มเล่น แล้วเลือกไฟล์ MP4 ไฟล์ใดไฟล์หนึ่งที่คุณเพิ่งบันทึก หากไม่เห็นชื่อไฟล์ที่ขึ้นต้นด้วย arcore- แสดงว่าอุปกรณ์อาจไม่แสดงโฟลเดอร์ Movies ในกรณีนี้ ให้ไปที่โฟลเดอร์รุ่นโทรศัพท์ > ภาพยนตร์โดยใช้เมนูที่มุมซ้ายบน นอกจากนี้ คุณอาจต้องเปิดใช้ตัวเลือกแสดงที่จัดเก็บข้อมูลภายในเพื่อแสดงโฟลเดอร์รุ่นโทรศัพท์
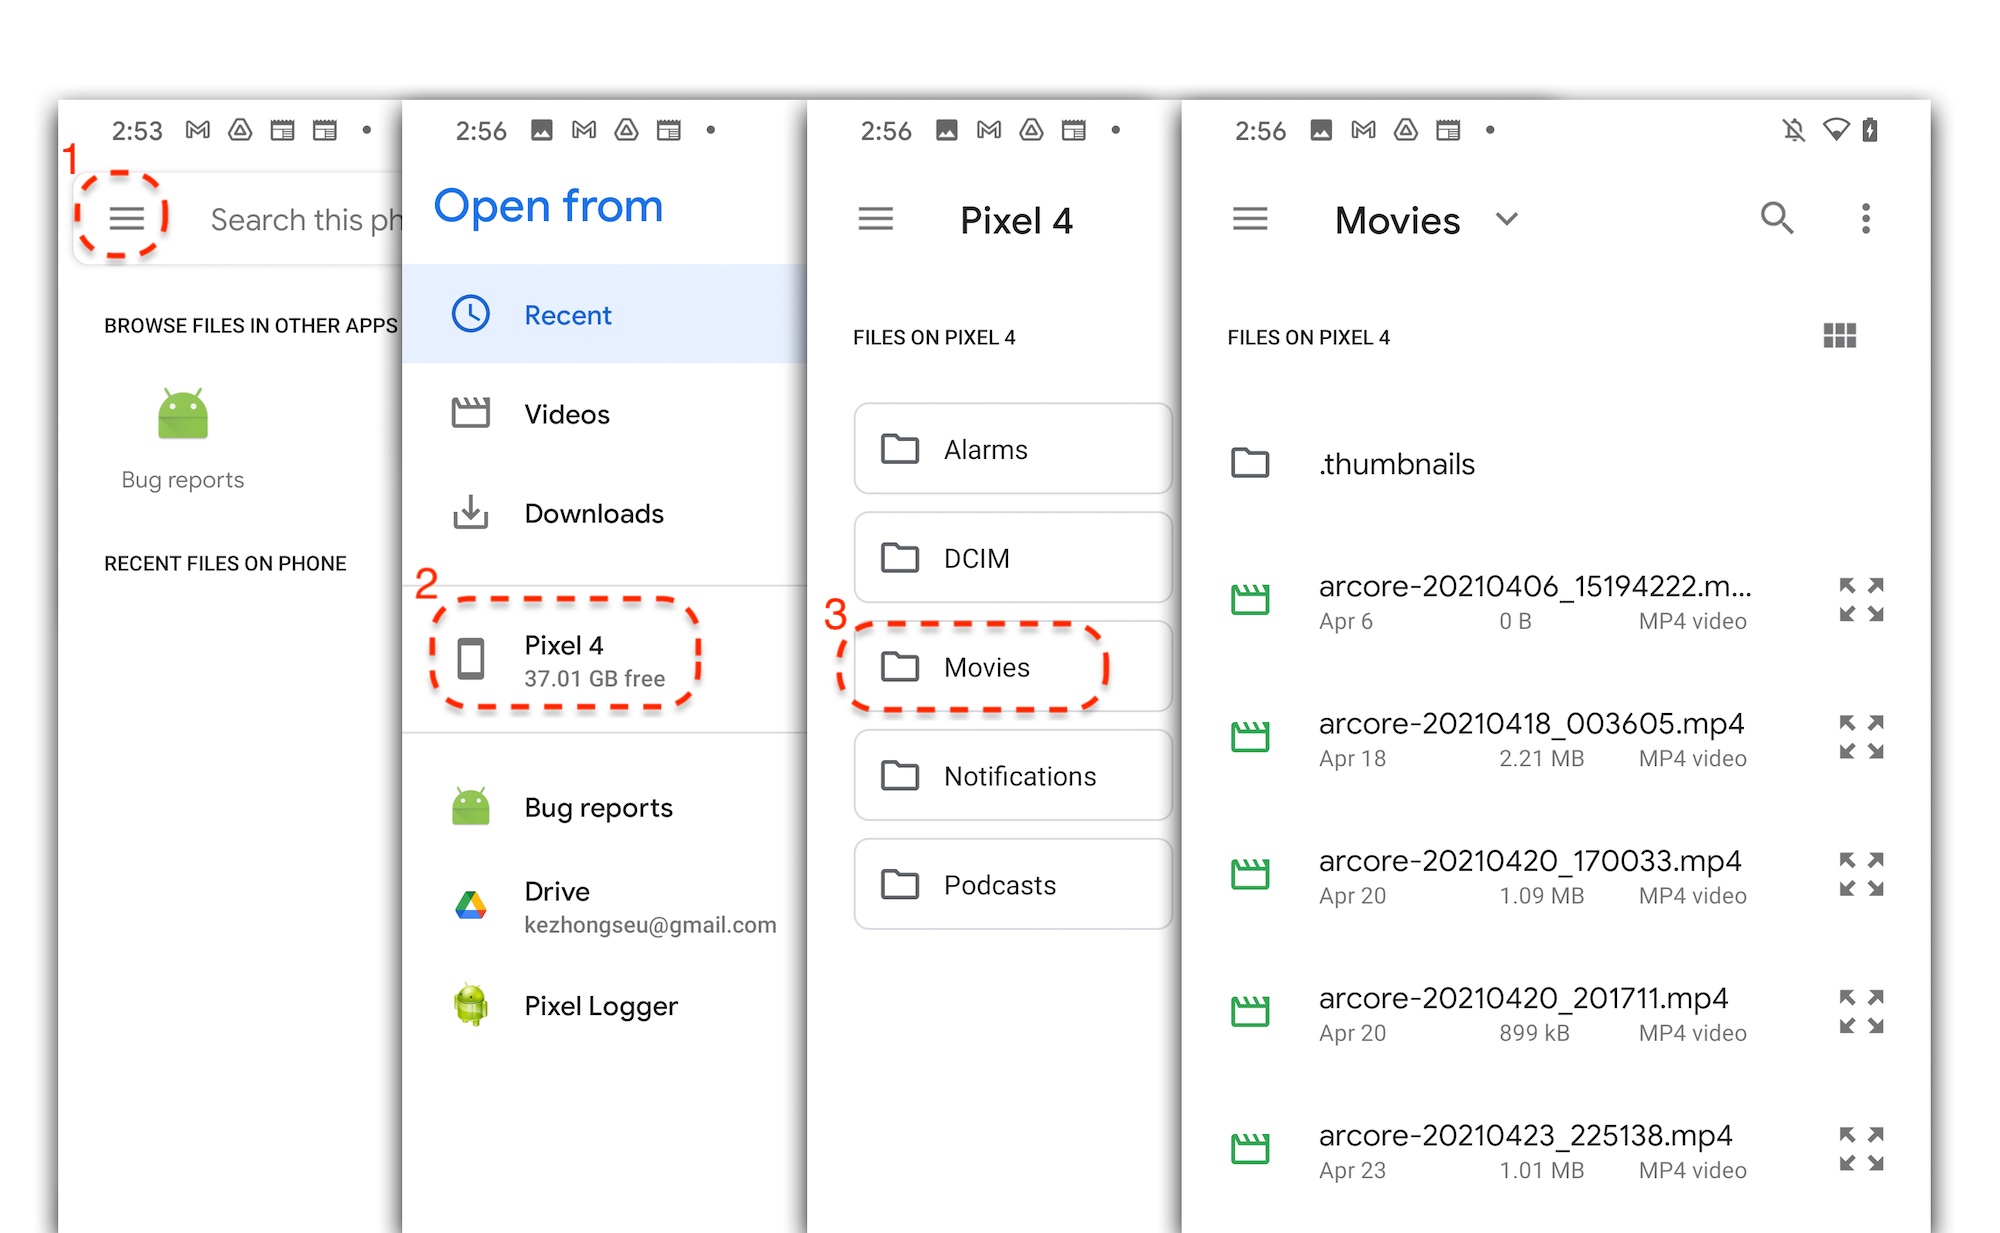
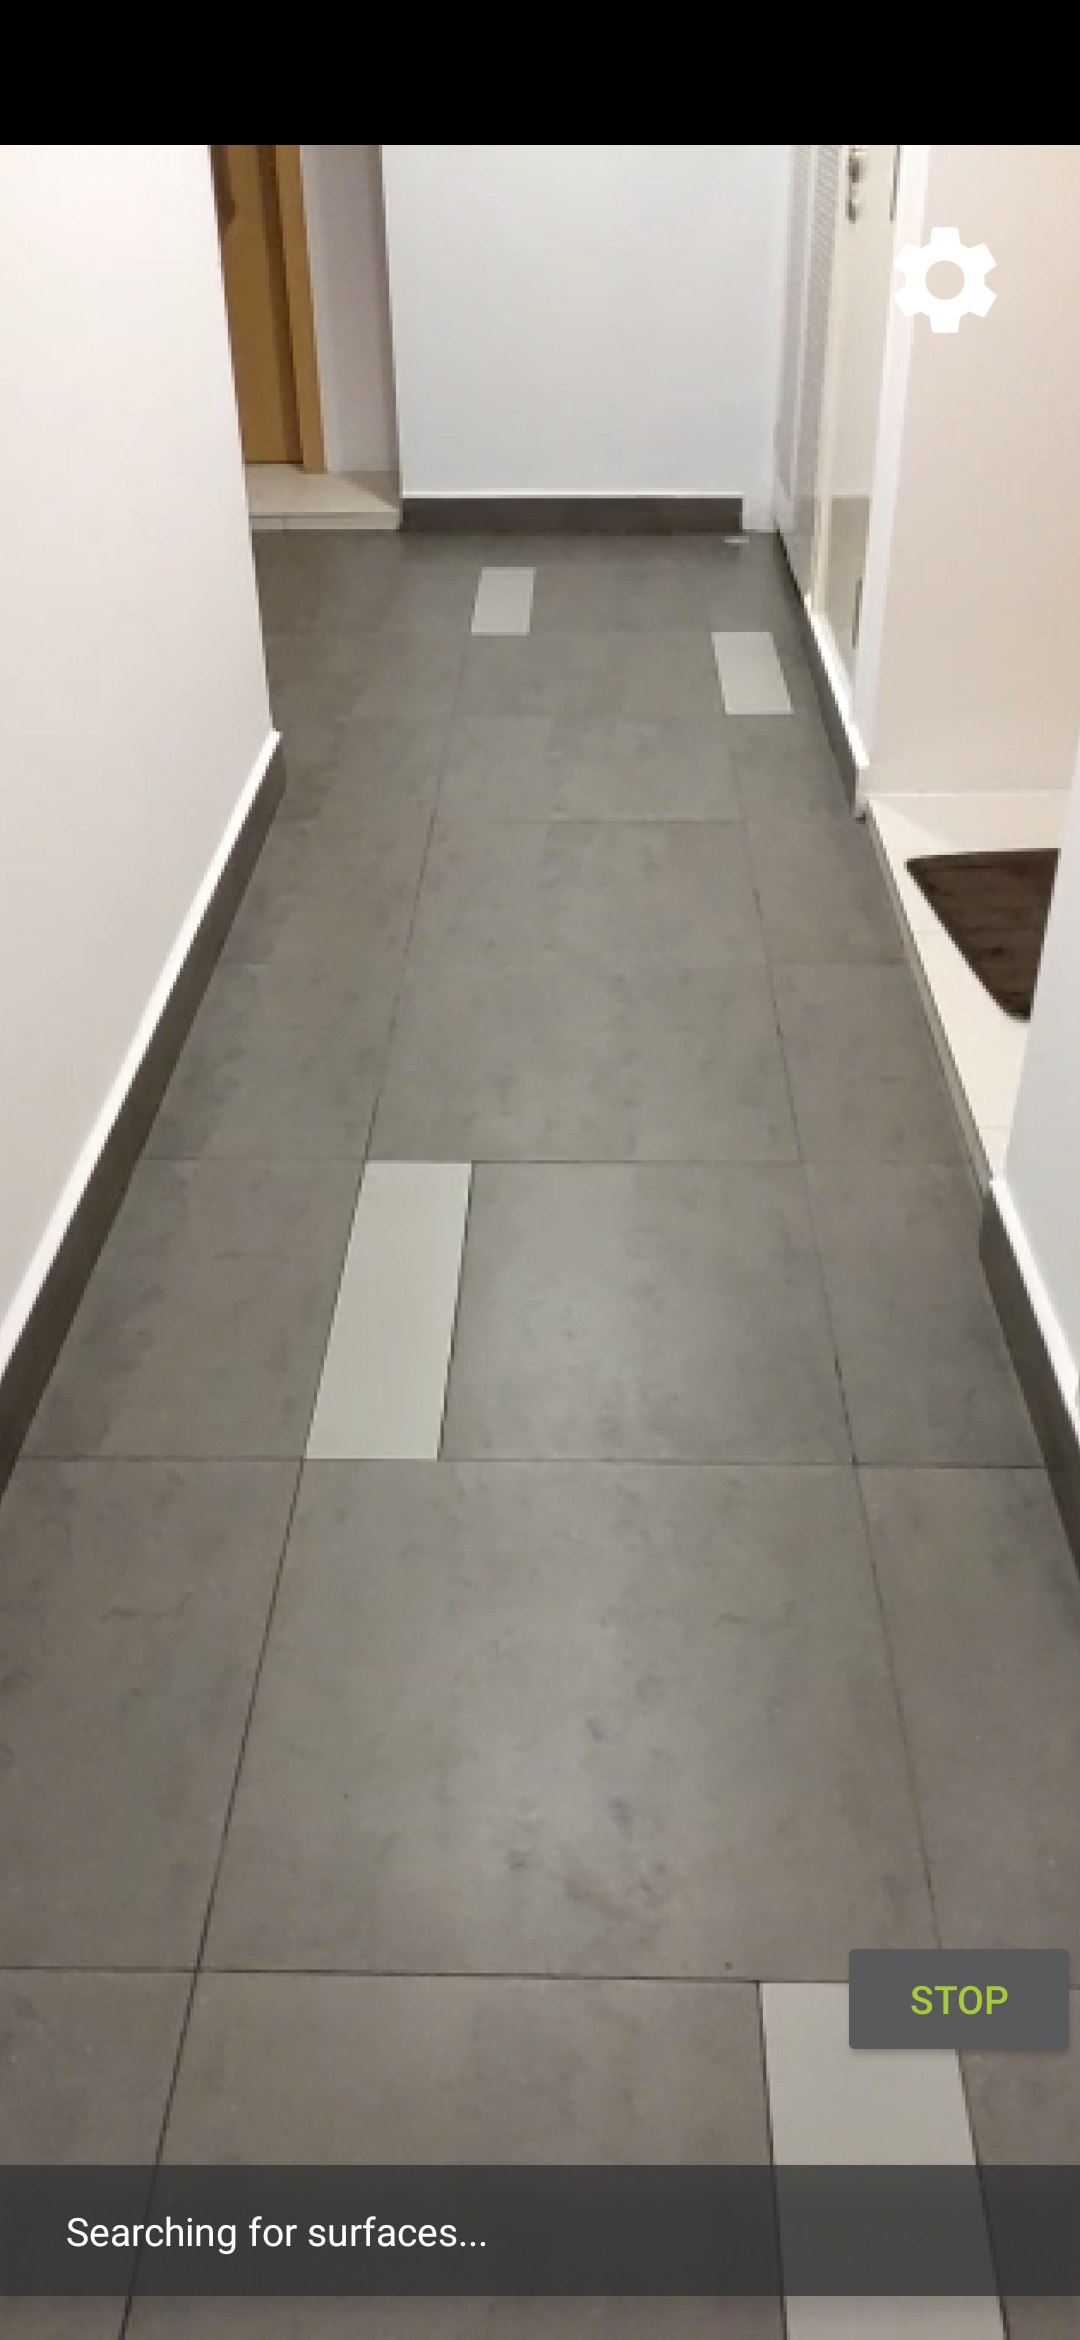
แตะชื่อไฟล์บนหน้าจอเพื่อเลือกไฟล์ MP4 แอปควรเล่นไฟล์ MP4
ความแตกต่างระหว่างการเล่นเซสชันย้อนหลังกับการเล่นวิดีโอทั่วไปคือคุณสามารถโต้ตอบกับเซสชันที่บันทึกไว้ได้ แตะระนาบที่ตรวจพบเพื่อวางเครื่องหมายบนหน้าจอ
สิ่งที่คุณทำในขั้นตอนนี้
- เพิ่มปุ่มเพื่อเริ่มและหยุดการเล่น
- ใช้ฟังก์ชันเพื่อให้แอปเริ่มและหยุดบันทึก
- เล่นเซสชัน ARCore ที่บันทึกไว้ก่อนหน้านี้ในอุปกรณ์
5. บันทึกข้อมูลเพิ่มเติมใน MP4
ARCore 1.24 ช่วยให้บันทึกข้อมูลเพิ่มเติมในไฟล์ MP4 ได้ คุณสามารถบันทึกPoseตำแหน่งของออบเจ็กต์ AR แล้วสร้างออบเจ็กต์ AR ในตำแหน่งเดียวกันระหว่างการเล่น
กำหนดค่าแทร็กใหม่เพื่อบันทึก
กำหนดแทร็กใหม่ด้วย UUID และแท็ก MIME ใน HelloArActivity.java
// Add imports to the beginning of the file.
import java.util.UUID;
import com.google.ar.core.Track;

  // Inside the HelloArActiity class.
  private static final UUID ANCHOR_TRACK_ID = UUID.fromString("53069eb5-21ef-4946-b71c-6ac4979216a6");;
  private static final String ANCHOR_TRACK_MIME_TYPE = "application/recording-playback-anchor";

  private boolean startRecording() {
    // ... omitted code ...

    // Insert after line:
    //   pauseARCoreSession();

    // Create a new Track, with an ID and MIME tag.
    Track anchorTrack = new Track(session)
        .setId(ANCHOR_TRACK_ID).
        .setMimeType(ANCHOR_TRACK_MIME_TYPE);
    // ... omitted code ...
  }
อัปเดตรหัสที่มีอยู่เพื่อสร้างออบเจ็กต์ RecordingConfig ด้วยการเรียกใช้ addTrack()
  private boolean startRecording() {
    // ... omitted code ...

    // Update the lines below with a call to the addTrack() function:
    //   RecordingConfig recordingConfig = new RecordingConfig(session)
    //    .setMp4DatasetUri(mp4FileUri)
    //    .setAutoStopOnPause(true);

    RecordingConfig recordingConfig = new RecordingConfig(session)
        .setMp4DatasetUri(mp4FileUri)
        .setAutoStopOnPause(true)
        .addTrack(anchorTrack); // add the new track onto the recordingConfig

    // ... omitted code ...
  }
บันทึกท่าทางของจุดยึดระหว่างการบันทึก
ทุกครั้งที่ผู้ใช้แตะระนาบที่ตรวจพบ ระบบจะวางเครื่องหมาย AR บน Anchor ซึ่ง ARCore จะอัปเดตท่าทางของเครื่องหมาย
บันทึกท่าทางของ Anchor ที่เฟรมที่สร้างขึ้น หากคุณยังบันทึกเซสชัน ARCore อยู่
แก้ไขฟังก์ชัน handleTap() ใน HelloArActivity.java
// Add imports to the beginning of the file.
import com.google.ar.core.Pose;
import java.nio.FloatBuffer;

  private void handleTap(Frame frame, Camera camera) {
          // ... omitted code ...

          // Insert after line:
          // anchors.add(hit.createAnchor());

          // If the app is recording a session,
          // save the new Anchor pose (relative to the camera)
          // into the ANCHOR_TRACK_ID track.
          if (appState == AppState.Recording) {
            // Get the pose relative to the camera pose.
            Pose cameraRelativePose = camera.getPose().inverse().compose(hit.getHitPose());
            float[] translation = cameraRelativePose.getTranslation();
            float[] quaternion = cameraRelativePose.getRotationQuaternion();
            ByteBuffer payload = ByteBuffer.allocate(4 * (translation.length + quaternion.length));
            FloatBuffer floatBuffer = payload.asFloatBuffer();
            floatBuffer.put(translation);
            floatBuffer.put(quaternion);

            try {
              frame.recordTrackData(ANCHOR_TRACK_ID, payload);
            } catch (IllegalStateException e) {
              Log.e(TAG, "Error in recording anchor into external data track.", e);
            }
          }
          // ... omitted code ...
  }
เหตุผลที่เราเก็บ Pose ที่สัมพันธ์กับกล้องแทนที่จะเป็น Pose ที่สัมพันธ์กับโลกก็คือจุดเริ่มต้นของโลกในเซสชันการบันทึกและจุดเริ่มต้นของโลกในเซสชันการเล่นไม่เหมือนกัน จุดเริ่มต้นของเซสชันการบันทึกจะเริ่มเมื่อกลับมาใช้เซสชันเป็นครั้งแรก เมื่อมีการเรียกใช้ Session.resume() เป็นครั้งแรก ต้นทางของเซสชันการเล่นจะเริ่มขึ้นเมื่อมีการบันทึกเฟรมแรก เมื่อมีการเรียกใช้ Session.resume() เป็นครั้งแรกหลังจาก Session.startRecording()
การสร้างจุดยึดการเล่น
การสร้าง Anchor ใหม่นั้นทำได้ง่ายๆ เพิ่มฟังก์ชันชื่อ createRecordedAnchors() ใน HelloArActivity.java
// Add imports to the beginning of the file.
import com.google.ar.core.TrackData;

  // Extract poses from the ANCHOR_TRACK_ID track, and create new anchors.
  private void createRecordedAnchors(Frame frame, Camera camera) {
    // Get all `ANCHOR_TRACK_ID` TrackData from the frame.
    for (TrackData trackData : frame.getUpdatedTrackData(ANCHOR_TRACK_ID)) {
      ByteBuffer payload = trackData.getData();
      FloatBuffer floatBuffer = payload.asFloatBuffer();

      // Extract translation and quaternion from TrackData payload.
      float[] translation = new float[3];
      float[] quaternion = new float[4];

      floatBuffer.get(translation);
      floatBuffer.get(quaternion);

      // Transform the recorded anchor pose
      // from the camera coordinate
      // into world coordinates.
      Pose worldPose = camera.getPose().compose(new Pose(translation, quaternion));

      // Re-create an anchor at the recorded pose.
      Anchor recordedAnchor = session.createAnchor(worldPose);

      // Add the new anchor into the list of anchors so that
      // the AR marker can be displayed on top.
      anchors.add(recordedAnchor);
    }
  }
เรียกใช้ฟังก์ชัน createRecordedAnchors() ใน onDrawFrame() ใน HelloArActivity.java
  public void onDrawFrame(SampleRender render) {
    // ... omitted code ...

    // Insert after this line:
    // handleTap(frame, camera);

    // If the app is currently playing back a session, create recorded anchors.
    if (appState == AppState.Playingback) {
      createRecordedAnchors(frame, camera);
    }
    // ... omitted code ...
  }
ทดสอบบนอุปกรณ์เป้าหมาย
เชื่อมต่ออุปกรณ์เคลื่อนที่กับคอมพิวเตอร์สำหรับการพัฒนาซอฟต์แวร์ แล้วคลิกเรียกใช้ใน Android Studio
ก่อนอื่น ให้แตะปุ่มบันทึกเพื่อบันทึกเซสชัน ขณะบันทึก ให้แตะเครื่องบินที่ตรวจพบเพื่อวางเครื่องหมาย AR 2-3 อัน
หลังจากหยุดบันทึกแล้ว ให้แตะปุ่มเล่น แล้วเลือกไฟล์ที่เพิ่งบันทึก การเล่นควรจะเริ่มขึ้น สังเกตว่าตำแหน่งเครื่องหมาย AR ก่อนหน้าจะปรากฏขึ้นทันทีที่คุณแตะแอป
การเขียนโค้ดทั้งหมดที่คุณจะต้องทำสำหรับ Codelab นี้
6. ขอแสดงความยินดี
ขอแสดงความยินดี คุณทำ Codelab นี้เสร็จเรียบร้อยแล้ว มาดูสิ่งที่คุณได้ทำใน Codelab นี้กัน
- สร้างและเรียกใช้ตัวอย่าง Hello AR Java ของ ARCore
- เพิ่มปุ่มบันทึกลงในแอปเพื่อบันทึกเซสชัน AR เป็นไฟล์ MP4
- เพิ่มปุ่มเล่นลงในแอปเพื่อเล่นเซสชัน AR จากไฟล์ MP4
- เพิ่มฟีเจอร์ใหม่เพื่อบันทึก Anchor ที่ผู้ใช้สร้างไว้ใน MP4 สำหรับการเล่น