
1. บทนำ
การบันทึกประสบการณ์ AR เป็นไฟล์ MP4 และเล่นจากไฟล์ MP4 ได้จะเป็นประโยชน์ทั้งต่อนักพัฒนาแอปและผู้ใช้ปลายทาง
แก้ไขข้อบกพร่องและทดสอบฟีเจอร์ใหม่จากโต๊ะทำงาน
การใช้งาน ARCore Record & Playback API ที่ตรงไปตรงมาที่สุดคือสำหรับนักพัฒนาแอป สมัยก่อนคุณต้องสร้างและเรียกใช้แอปในอุปกรณ์ทดสอบ ถอดสาย USB และเดินไปมาเพื่อทดสอบการเปลี่ยนแปลงโค้ดเล็กๆ น้อยๆ แต่ตอนนี้ไม่จำเป็นแล้ว ตอนนี้คุณเพียงแค่ต้องบันทึก MP4 ในสภาพแวดล้อมการทดสอบโดยให้โทรศัพท์เคลื่อนไหวตามที่คาดไว้ และทดสอบจากโต๊ะทำงานได้เลย
บันทึกและเล่นจากอุปกรณ์ต่างๆ
Recording and Playback API ช่วยให้ผู้ใช้คนหนึ่งบันทึกเซสชันโดยใช้อุปกรณ์เครื่องหนึ่ง และผู้ใช้คนอื่นสามารถเล่นเซสชันเดียวกันในอุปกรณ์เครื่องอื่นได้ คุณแชร์ประสบการณ์ AR กับผู้ใช้รายอื่นได้ ซึ่งมีตัวเลือกมากมาย
นี่เป็นครั้งแรกที่คุณสร้างแอป ARCore ใช่ไหม
คุณจะใช้ Codelab นี้อย่างไร
สิ่งที่คุณจะสร้าง
ใน Codelab นี้ คุณจะได้ใช้ API การบันทึกและการเล่นเพื่อสร้างแอปที่ทั้งบันทึกประสบการณ์ AR ลงในไฟล์ MP4 และเล่นประสบการณ์ดังกล่าวจากไฟล์เดียวกัน คุณจะได้เรียนรู้:
- วิธีใช้ Recording API เพื่อบันทึกเซสชัน AR เป็นไฟล์ MP4
- วิธีใช้ Playback API เพื่อเล่นเซสชัน AR ซ้ำจากไฟล์ MP4
- วิธีบันทึกเซสชัน AR ในอุปกรณ์เครื่องหนึ่งและเล่นซ้ำในอีกเครื่อง
สิ่งที่คุณต้องมี
ในโค้ดแล็บนี้ คุณจะได้แก้ไขแอป Hello AR Java ซึ่งสร้างด้วย ARCore Android SDK คุณจะต้องมีฮาร์ดแวร์และซอฟต์แวร์ที่เฉพาะเจาะจงเพื่อทำตาม
ข้อกำหนดเกี่ยวกับฮาร์ดแวร์
- อุปกรณ์ที่รองรับ ARCore ซึ่งตัวเลือกสำหรับนักพัฒนาแอปเปิดอยู่ และเปิดใช้การแก้ไขข้อบกพร่อง USB แล้ว โดยเชื่อมต่อผ่านสาย USB กับคอมพิวเตอร์สำหรับการพัฒนาซอฟต์แวร์
- เครื่องพัฒนาที่คุณเรียกใช้ Android Studio
- การเข้าถึงอินเทอร์เน็ตเพื่อดาวน์โหลดไลบรารีในระหว่างการพัฒนา
ข้อกำหนดของซอฟต์แวร์
- บริการ Google Play สำหรับ AR (ARCore) 1.24 ขึ้นไปในอุปกรณ์ ARCore สำหรับการพัฒนา โดยปกติแล้วระบบจะติดตั้งบริการนี้ในอุปกรณ์โดยอัตโนมัติผ่าน Play Store คุณยังติดตั้งด้วยตนเองในอุปกรณ์ที่รองรับ ARCore ได้ด้วย
- Android Studio (v3.1 ขึ้นไป) ในเครื่องที่ใช้พัฒนา
นอกจากนี้ คุณควรมีความเข้าใจพื้นฐานเกี่ยวกับ ARCore เพื่อให้ได้ผลลัพธ์ที่ดีที่สุด
2. ตั้งค่าสภาพแวดล้อมในการพัฒนาซอฟต์แวร์
เริ่มต้นด้วยการตั้งค่าสภาพแวดล้อมในการพัฒนา
ดาวน์โหลด ARCore Android SDK
คลายซิป ARCore Android SDK
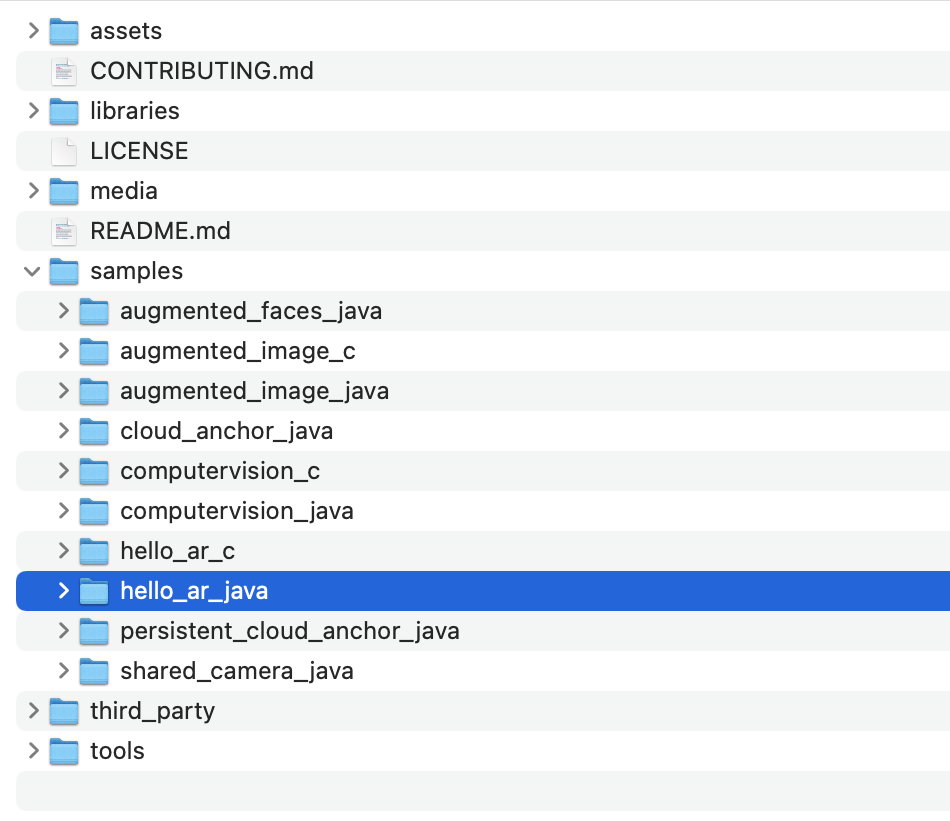
เมื่อดาวน์โหลด Android SDK ลงในเครื่องแล้ว ให้แตกไฟล์และไปที่ไดเรกทอรี arcore-android-sdk-1.24/samples/hello_ar_java นี่คือไดเรกทอรีรากของแอปที่คุณจะใช้
โหลด Hello AR Java ลงใน Android Studio
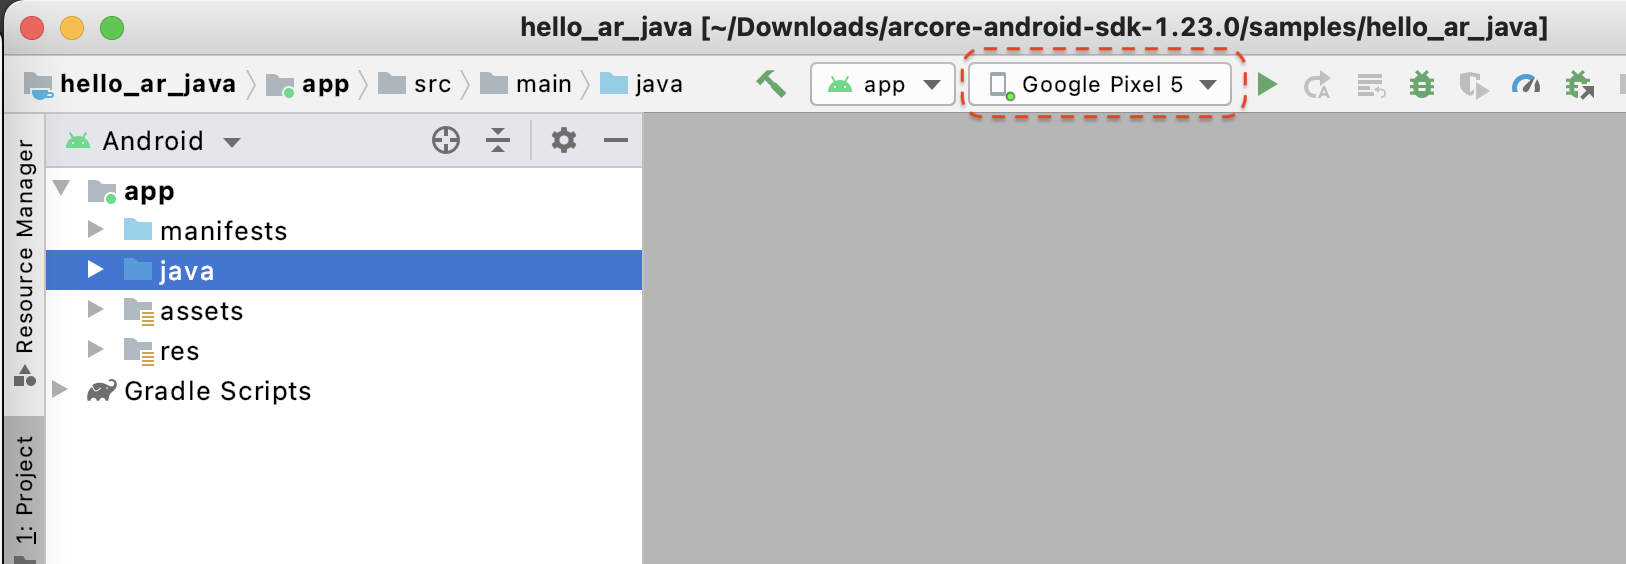
เปิด Android Studio แล้วคลิกเปิดโปรเจ็กต์ Android Studio ที่มีอยู่

ในกล่องโต้ตอบที่ปรากฏขึ้น ให้เลือก arcore-android-sdk-1.24/samples/hello_ar_java แล้วคลิกเปิด
รอให้ Android Studio ซิงค์โปรเจ็กต์เสร็จสมบูรณ์ หากมีคอมโพเนนต์ขาดหายไป การนำเข้าโปรเจ็กต์อาจล้มเหลวพร้อมข้อความแสดงข้อผิดพลาด โปรดแก้ไขปัญหาก่อนดำเนินการต่อ
เรียกใช้แอปตัวอย่าง
- เชื่อมต่ออุปกรณ์ที่รองรับ ARCore กับคอมพิวเตอร์สำหรับการพัฒนาซอฟต์แวร์
- หากระบบรู้จักอุปกรณ์อย่างถูกต้อง คุณควรเห็นชื่ออุปกรณ์ปรากฏใน Android Studio
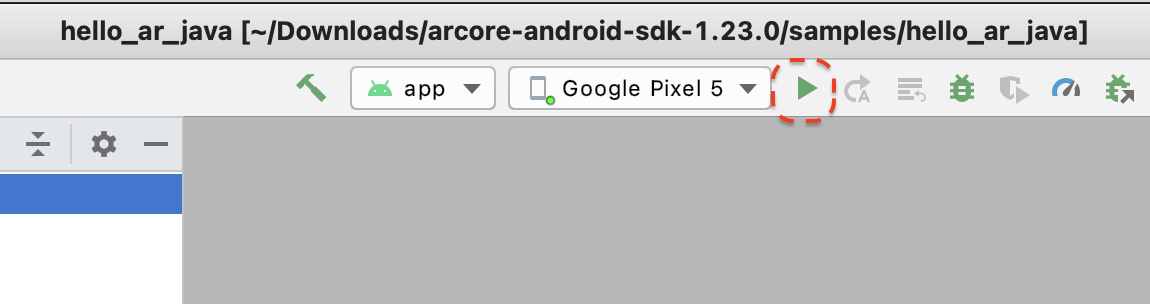
- คลิกปุ่มเรียกใช้หรือเลือกเรียกใช้ > เรียกใช้ "แอป" เพื่อให้ Android Studio ติดตั้งและเปิดแอปในอุปกรณ์
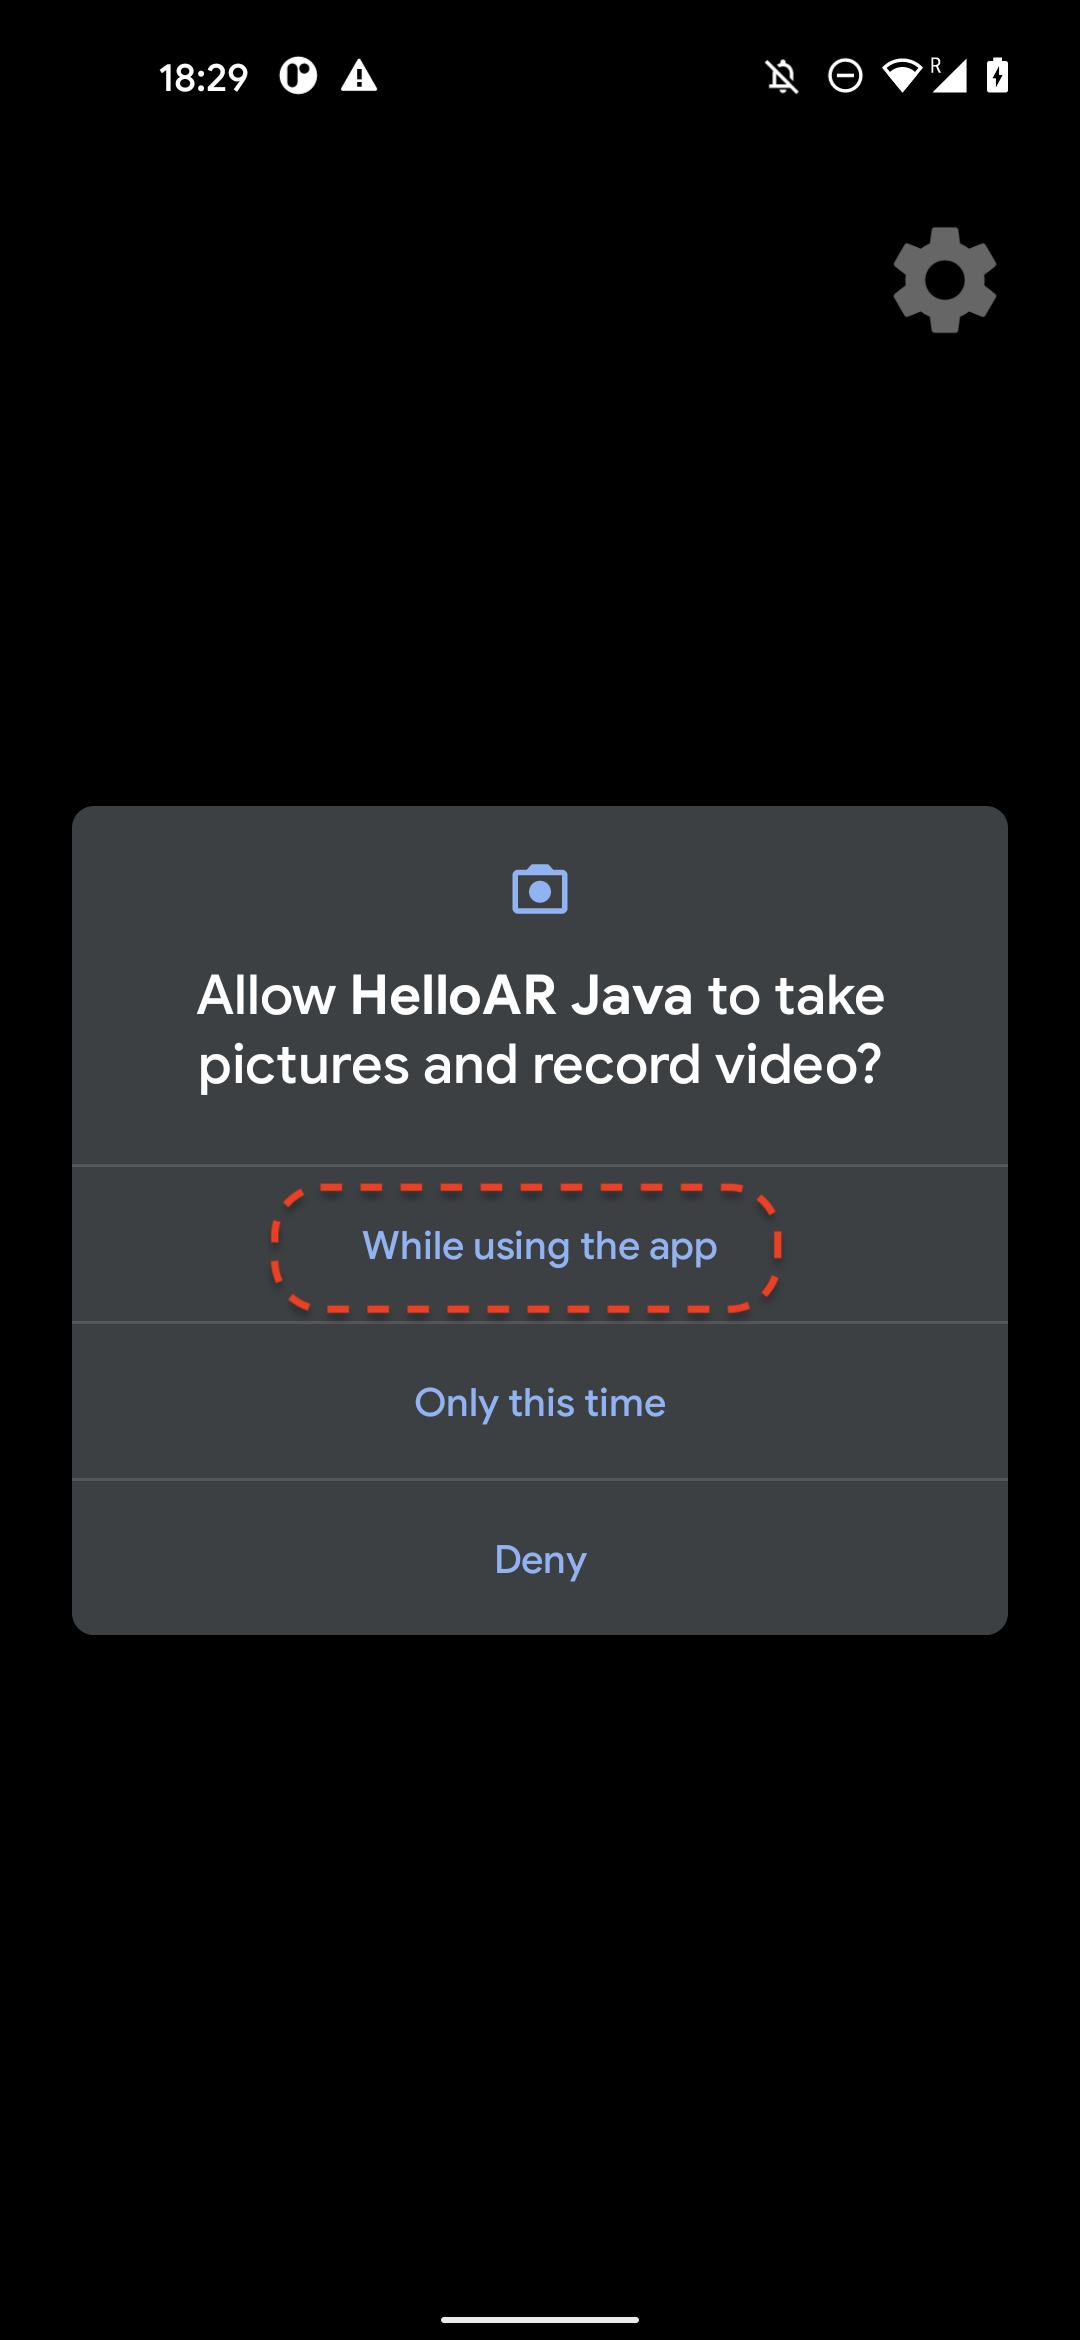
- คุณจะเห็นข้อความแจ้งที่ขอสิทธิ์ในการถ่ายภาพและบันทึกวิดีโอ เลือกขณะใช้แอปนี้เพื่อให้สิทธิ์เข้าถึงกล้องแก่แอป จากนั้นคุณจะเห็นสภาพแวดล้อมจริงบนหน้าจอของอุปกรณ์
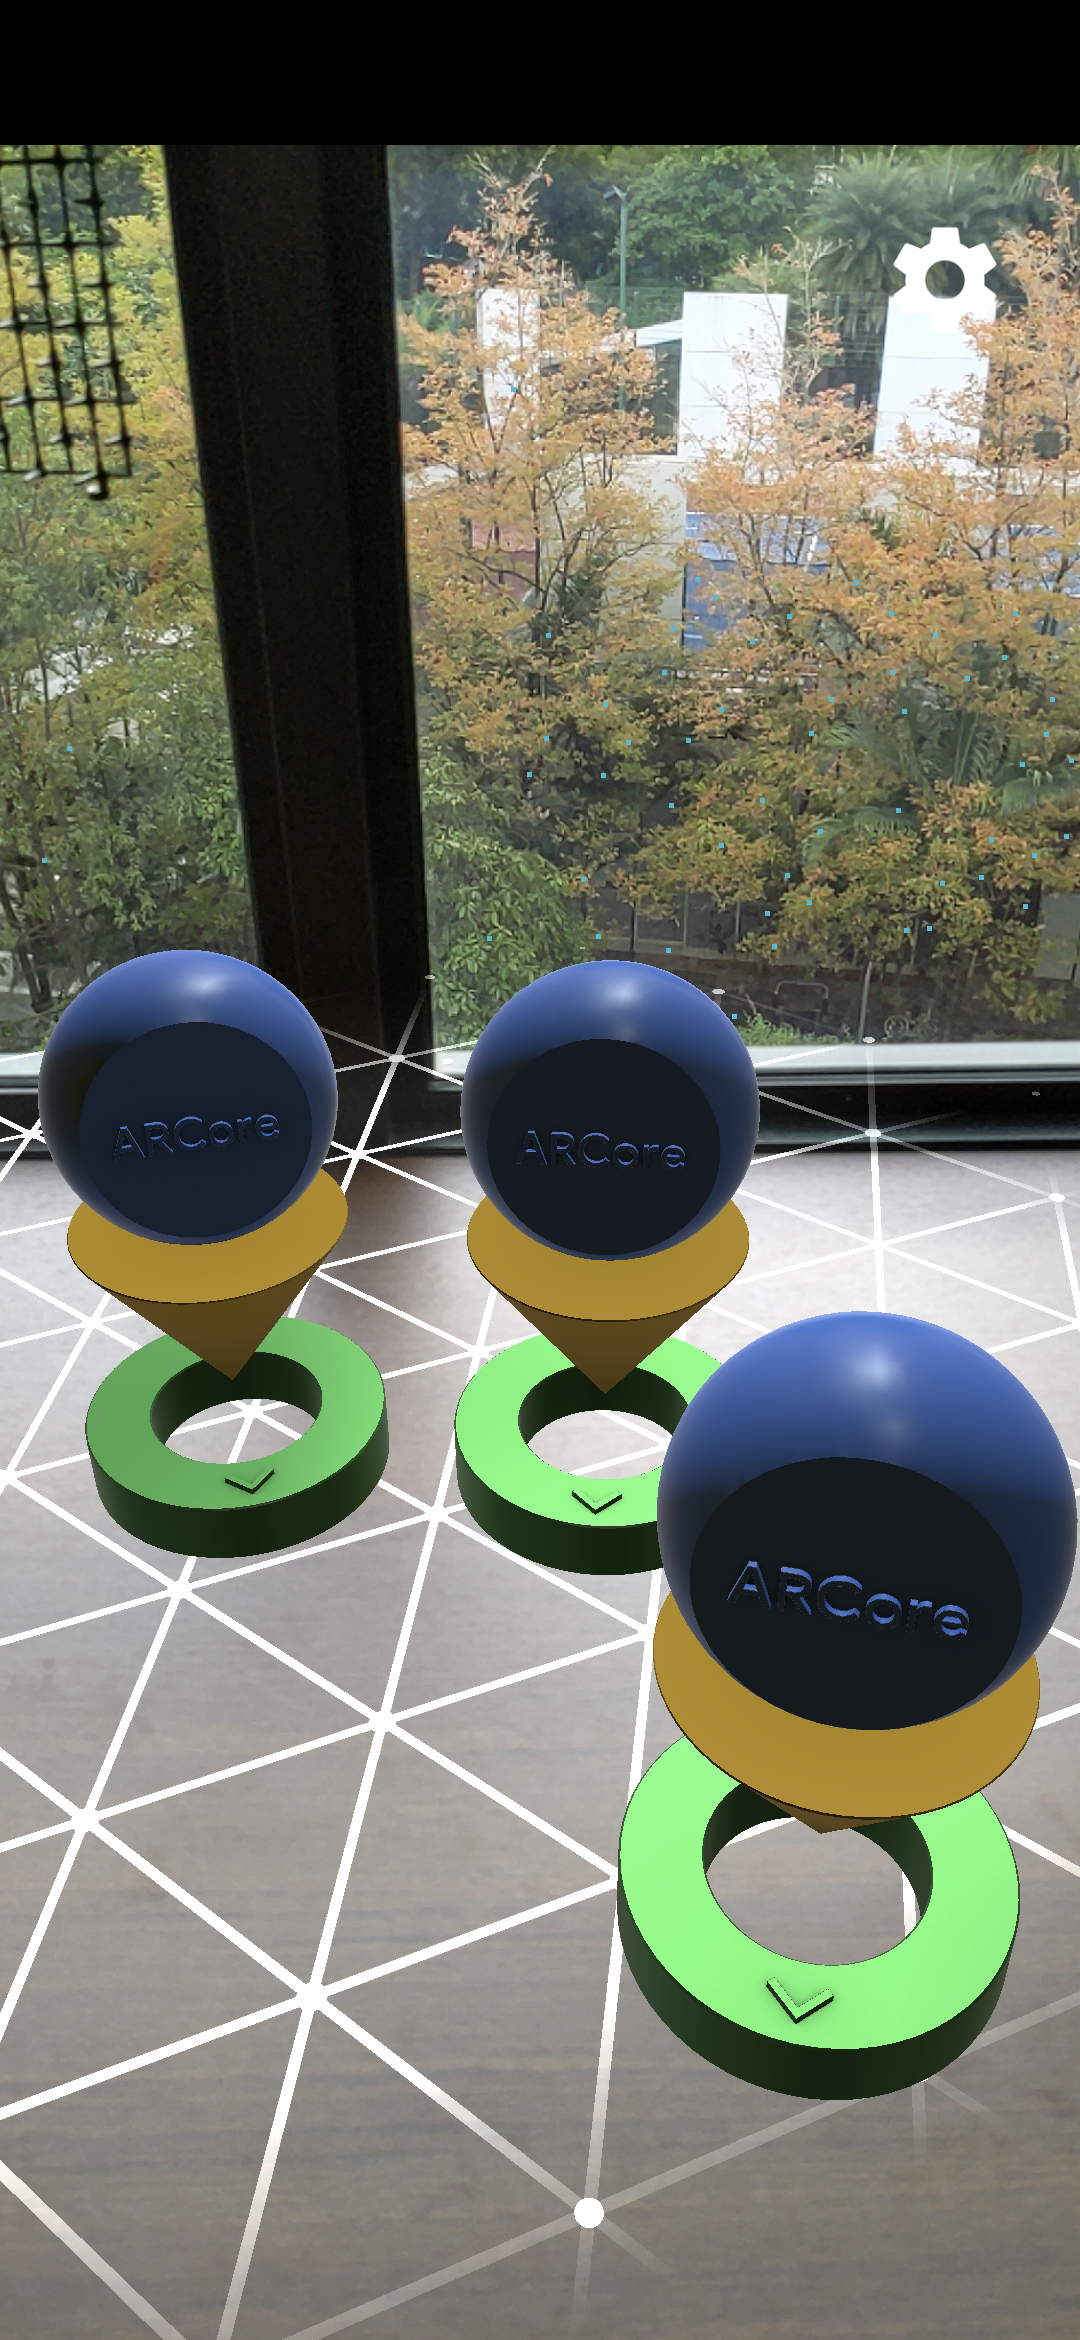
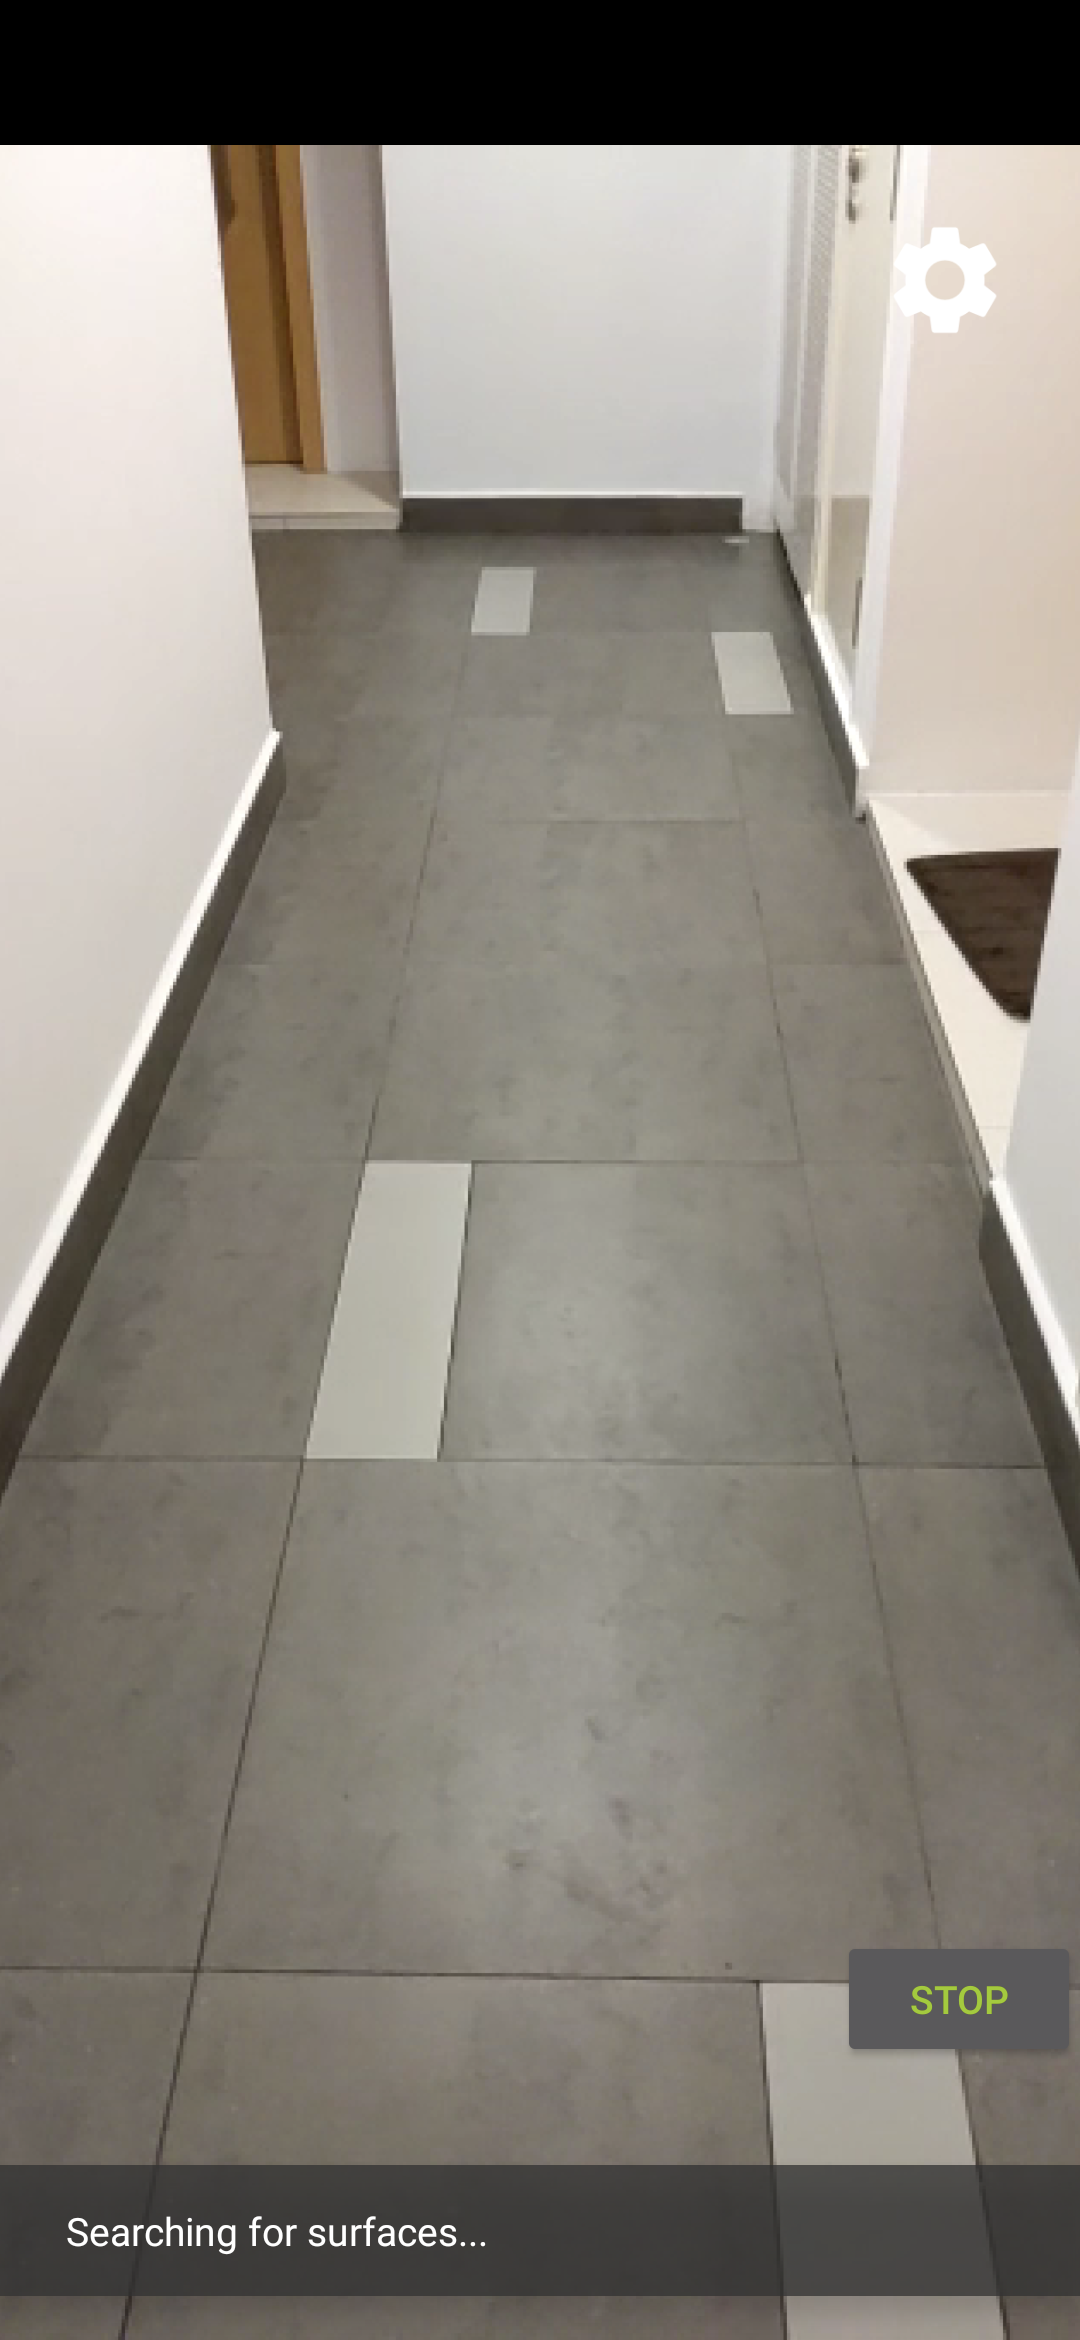
- ขยับอุปกรณ์ในแนวนอนเพื่อสแกนหาเครื่องบิน
- ตารางกริดสีขาวจะปรากฏขึ้นเมื่อแอปตรวจพบระนาบ แตะเพื่อวางเครื่องหมายบนเครื่องบินลำนั้น
สิ่งที่คุณทำในขั้นตอนนี้
- ตั้งค่าโปรเจ็กต์ Hello AR Java
- สร้างและเรียกใช้แอปตัวอย่างในอุปกรณ์ที่รองรับ ARCore
จากนั้นคุณจะบันทึกเซสชัน AR เป็นไฟล์ MP4
3. บันทึกเซสชัน ARCore เป็นไฟล์ MP4
เราจะเพิ่มฟีเจอร์การบันทึกในขั้นตอนนี้ โดยประกอบด้วย
- ปุ่มเพื่อเริ่มหรือหยุดการบันทึก
- ฟังก์ชันการจัดเก็บข้อมูลเพื่อบันทึกไฟล์ MP4 ในอุปกรณ์
- การเรียกเพื่อเริ่มหรือหยุดการบันทึกเซสชัน ARCore
เพิ่ม UI สำหรับปุ่มบันทึก
ก่อนที่จะติดตั้งใช้งานการบันทึก ให้เพิ่มปุ่มใน UI เพื่อให้ผู้ใช้แจ้ง ARCore ได้ว่าจะเริ่มหรือหยุดบันทึกเมื่อใด
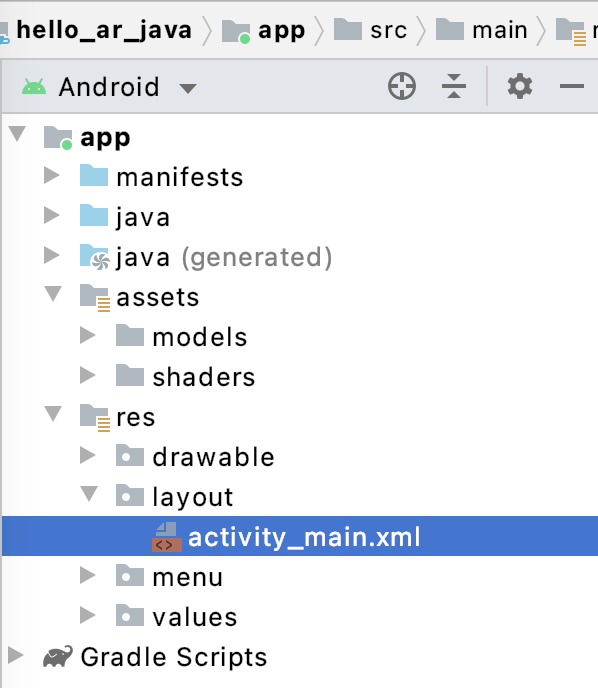
เปิดไฟล์ app/res/layout/activity_main.xml ในแผงโปรเจ็กต์
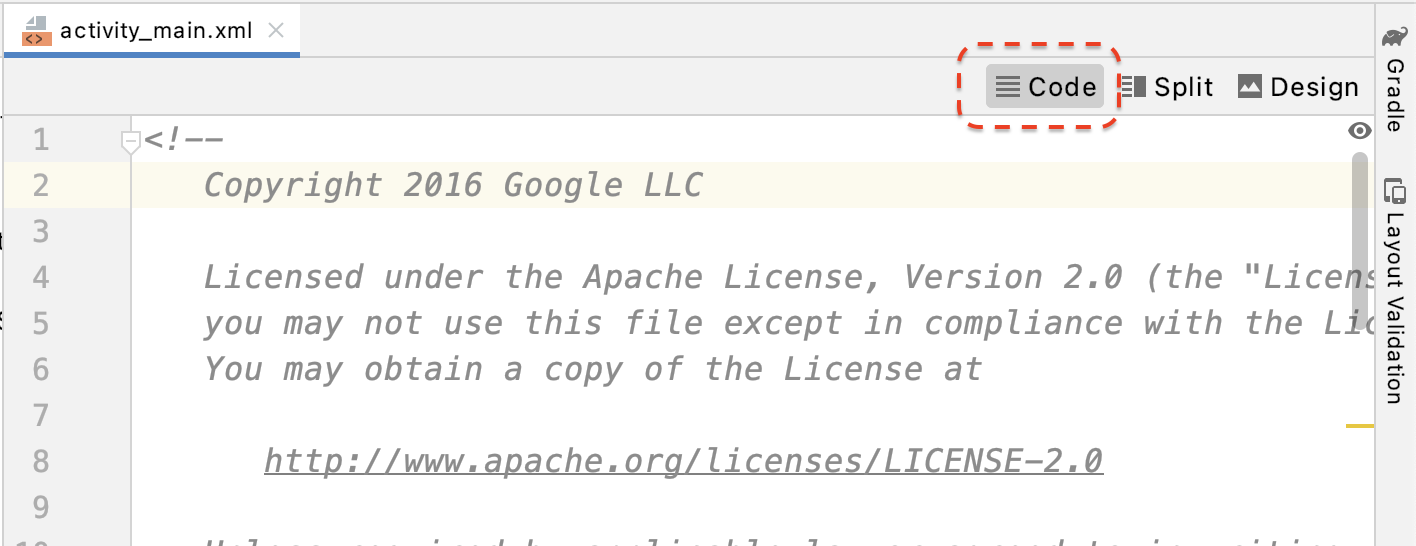
โดยค่าเริ่มต้น Android Studio จะใช้มุมมองการออกแบบหลังจากที่คุณเปิดไฟล์ app/res/layout/activity_main.xml คลิกปุ่มโค้ดที่มุมขวาบนของแท็บเพื่อเปลี่ยนเป็นมุมมองโค้ด
ใน activity_main.xml ให้เพิ่มโค้ดต่อไปนี้ก่อนแท็กปิดเพื่อสร้างปุ่ม Record ใหม่ และตั้งค่าตัวแฮนเดิลเหตุการณ์เป็นเมธอดที่ชื่อ onClickRecord()
  <!--
    Add a new "Record" button with those attributes:
        text is "Record",
        onClick event handler is "onClickRecord",
        text color is "red".
  -->
  <Button
      android:id="@+id/record_button"
      android:layout_width="wrap_content"
      android:layout_height="wrap_content"
      android:layout_alignLeft="@id/surfaceview"
      android:layout_alignBottom="@id/surfaceview"
      android:layout_marginBottom="100dp"
      android:onClick="onClickRecord"
      android:text="Record"
      android:textColor="@android:color/holo_red_light" />
หลังจากเพิ่มโค้ดข้างต้นแล้ว ข้อผิดพลาด Corresponding method handler 'public void onClickRecord(android.view.View)' not found" อาจแสดงชั่วคราว กรณีนี้เป็นสิ่งที่คาดว่าจะเกิดอยู่แล้ว คุณจะแก้ไขข้อผิดพลาดได้โดยการสร้างฟังก์ชัน onClickRecord() ในอีกไม่กี่ขั้นตอนข้างหน้า
เปลี่ยนข้อความในปุ่มตามสถานะ
ปุ่มบันทึกจะจัดการทั้งการบันทึกและการหยุด เมื่อแอปไม่ได้บันทึกข้อมูล แอปควรแสดงคำว่า "บันทึก" เมื่อแอปบันทึกข้อมูล ปุ่มควรเปลี่ยนไปแสดงคำว่า "หยุด"
แอปต้องทราบสถานะปัจจุบันของปุ่มเพื่อให้ปุ่มมีฟังก์ชันนี้ โค้ดต่อไปนี้สร้างการแจงนับใหม่ชื่อ AppState เพื่อแสดงสถานะการทำงานของแอป และติดตามการเปลี่ยนแปลงสถานะที่เฉพาะเจาะจงผ่านตัวแปรสมาชิกส่วนตัวที่ชื่อ appState เพิ่มลงใน HelloArActivity.java ที่จุดเริ่มต้นของคลาส HelloArActivity
  // Represents the app's working state.
  public enum AppState {
    Idle,
    Recording
  }

  // Tracks app's specific state changes.
  private AppState appState = AppState.Idle;
ตอนนี้คุณสามารถติดตามสถานะภายในของแอปได้แล้ว ให้สร้างฟังก์ชันชื่อ updateRecordButton() ที่เปลี่ยนข้อความของปุ่มตามสถานะปัจจุบันของแอป เพิ่มโค้ดต่อไปนี้ภายในคลาส HelloArActivity ใน HelloArActivity.java
// Add imports to the beginning of the file.
import android.widget.Button;

  // Update the "Record" button based on app's internal state.
  private void updateRecordButton() {
    View buttonView = findViewById(R.id.record_button);
    Button button = (Button) buttonView;

    switch (appState) {
      case Idle:
        button.setText("Record");
        break;
      case Recording:
        button.setText("Stop");
        break;
    }
  }
จากนั้นสร้างเมธอด onClickRecord() ที่ตรวจสอบสถานะของแอป เปลี่ยนเป็นสถานะถัดไป และเรียกใช้ updateRecordButton() เพื่อเปลี่ยน UI ของปุ่ม เพิ่มโค้ดต่อไปนี้ภายในคลาส HelloArActivity ใน HelloArActivity.java
  // Handle the "Record" button click event.
  public void onClickRecord(View view) {
    Log.d(TAG, "onClickRecord");

    // Check the app's internal state and switch to the new state if needed.
    switch (appState) {
        // If the app is not recording, begin recording.
      case Idle: {
        boolean hasStarted = startRecording();
        Log.d(TAG, String.format("onClickRecord start: hasStarted %b", hasStarted));

        if (hasStarted)
          appState = AppState.Recording;

        break;
      }

      // If the app is recording, stop recording.
      case Recording: {
        boolean hasStopped = stopRecording();
        Log.d(TAG, String.format("onClickRecord stop: hasStopped %b", hasStopped));

        if (hasStopped)
          appState = AppState.Idle;

        break;
      }

      default:
        // Do nothing.
        break;
    }

    updateRecordButton();
  }
เปิดใช้แอปเพื่อเริ่มบันทึก
คุณต้องทำเพียง 2 สิ่งเพื่อเริ่มบันทึกใน ARCore ดังนี้
- ระบุ URI ของไฟล์บันทึกในออบเจ็กต์
RecordingConfig - โทรหา
session.startRecordingด้วยออบเจ็กต์RecordingConfig
ส่วนที่เหลือเป็นเพียงโค้ดมาตรฐาน ได้แก่ การกำหนดค่า การบันทึก และการตรวจสอบความถูกต้อง
สร้างฟังก์ชันใหม่ชื่อ startRecording() ซึ่งจะบันทึกข้อมูลและจัดเก็บไว้ใน URI ของ MP4 เพิ่มโค้ดต่อไปนี้ภายในคลาส HelloArActivity ใน HelloArActivity.java
// Add imports to the beginning of the file.
import android.net.Uri;
import com.google.ar.core.RecordingConfig;
import com.google.ar.core.RecordingStatus;
import com.google.ar.core.exceptions.RecordingFailedException;

  private boolean startRecording() {
    Uri mp4FileUri = createMp4File();
    if (mp4FileUri == null)
      return false;

    Log.d(TAG, "startRecording at: " + mp4FileUri);

    pauseARCoreSession();

    // Configure the ARCore session to start recording.
    RecordingConfig recordingConfig = new RecordingConfig(session)
        .setMp4DatasetUri(mp4FileUri)
        .setAutoStopOnPause(true);

    try {
      // Prepare the session for recording, but do not start recording yet.
      session.startRecording(recordingConfig);
    } catch (RecordingFailedException e) {
      Log.e(TAG, "startRecording - Failed to prepare to start recording", e);
      return false;
    }

    boolean canResume = resumeARCoreSession();
    if (!canResume)
      return false;

    // Correctness checking: check the ARCore session's RecordingState.
    RecordingStatus recordingStatus = session.getRecordingStatus();
    Log.d(TAG, String.format("startRecording - recordingStatus %s", recordingStatus));
    return recordingStatus == RecordingStatus.OK;
  }
หากต้องการหยุดเซสชัน ARCore ชั่วคราวและเล่นต่ออย่างปลอดภัย ให้สร้าง pauseARCoreSession() และ resumeARCoreSession() ใน HelloArActivity.java
  private void pauseARCoreSession() {
    // Pause the GLSurfaceView so that it doesn't update the ARCore session.
    // Pause the ARCore session so that we can update its configuration.
    // If the GLSurfaceView is not paused,
    //   onDrawFrame() will try to update the ARCore session
    //   while it's paused, resulting in a crash.
    surfaceView.onPause();
    session.pause();
  }

  private boolean resumeARCoreSession() {
    // We must resume the ARCore session before the GLSurfaceView.
    // Otherwise, the GLSurfaceView will try to update the ARCore session.
    try {
      session.resume();
    } catch (CameraNotAvailableException e) {
      Log.e(TAG, "CameraNotAvailableException in resumeARCoreSession", e);
      return false;
    }

    surfaceView.onResume();
    return true;
  }
เปิดใช้แอปเพื่อหยุดบันทึก
สร้างฟังก์ชันชื่อ stopRecording() ใน HelloArActivity.java เพื่อหยุดไม่ให้แอปบันทึกข้อมูลใหม่ ฟังก์ชันนี้จะเรียกใช้ session.stopRecording() และส่งข้อผิดพลาดไปยังบันทึกของคอนโซลหากแอปหยุดบันทึกไม่ได้
  private boolean stopRecording() {
    try {
      session.stopRecording();
    } catch (RecordingFailedException e) {
      Log.e(TAG, "stopRecording - Failed to stop recording", e);
      return false;
    }

    // Correctness checking: check if the session stopped recording.
    return session.getRecordingStatus() == RecordingStatus.NONE;
  }
ออกแบบที่เก็บไฟล์โดยใช้พื้นที่เก็บข้อมูลที่จำกัดขอบเขตของ Android 11
ฟังก์ชันที่เกี่ยวข้องกับพื้นที่เก็บข้อมูลใน Codelab นี้ได้รับการออกแบบตามข้อกำหนดใหม่ของพื้นที่เก็บข้อมูลที่จำกัดขอบเขตใน Android 11
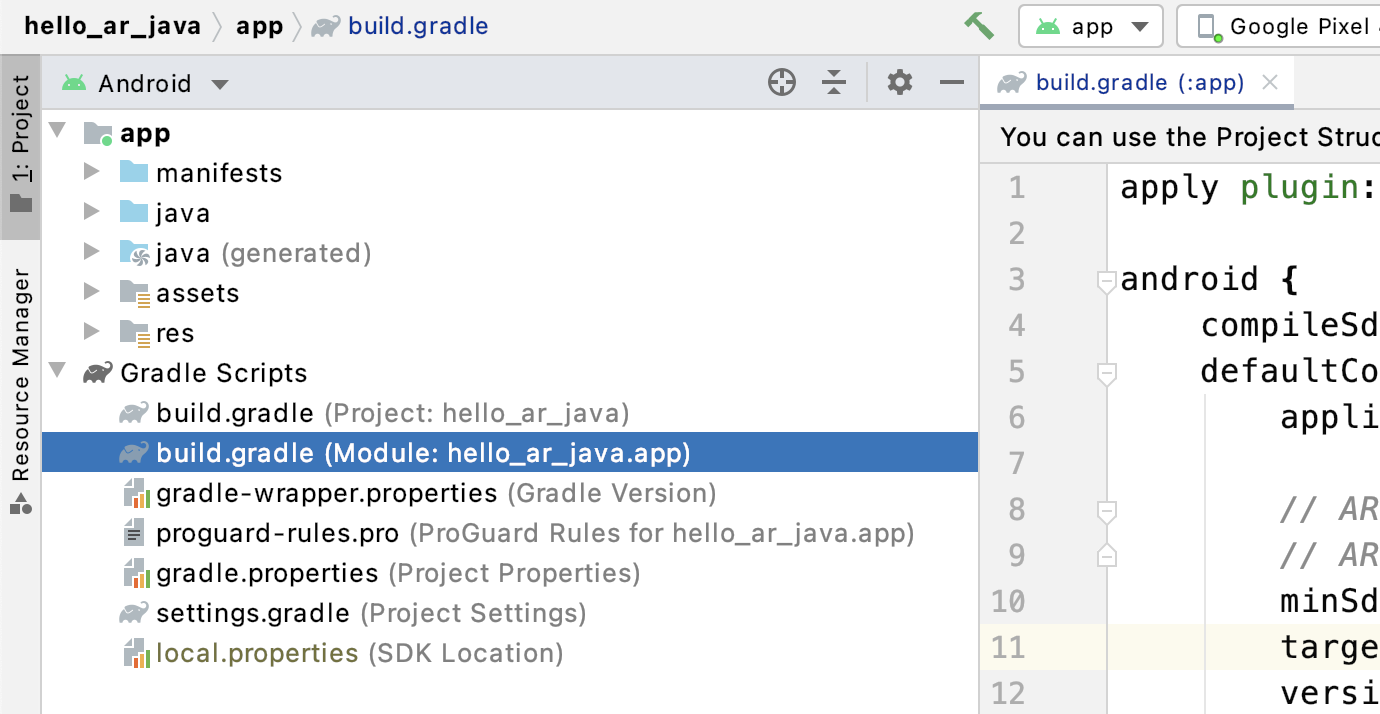
ทำการเปลี่ยนแปลงเล็กน้อยในไฟล์ app/build.gradle เพื่อกำหนดเป้าหมายเป็น Android 11 ในแผงโปรเจ็กต์ของ Android Studio ไฟล์นี้จะอยู่ใต้โหนดสคริปต์ Gradle ที่เชื่อมโยงกับโมดูล app
เปลี่ยน compileSdkVersion และ targetSdkVersion เป็น 30
    compileSdkVersion 30
    defaultConfig {
      targetSdkVersion 30
    }
สำหรับการบันทึก ให้ใช้ Android MediaStore API เพื่อสร้างไฟล์ MP4 ในไดเรกทอรีภาพยนตร์ที่แชร์
สร้างฟังก์ชันชื่อ createMp4File() ใน HelloArActivity.java
// Add imports to the beginning of the file.
import java.text.SimpleDateFormat;
import android.content.ContentResolver;
import android.net.Uri;
import android.os.Build;
import android.os.Environment;
import android.provider.MediaStore;
import android.content.ContentValues;
import java.io.File;
import android.content.CursorLoader;
import android.database.Cursor;
import java.util.Date;


  private final String MP4_VIDEO_MIME_TYPE = "video/mp4";

  private Uri createMp4File() {
    SimpleDateFormat dateFormat = new SimpleDateFormat("yyyyMMdd_HHmmss");
    String mp4FileName = "arcore-" + dateFormat.format(new Date()) + ".mp4";

    ContentResolver resolver = this.getContentResolver();

    Uri videoCollection = null;
    if (Build.VERSION.SDK_INT >= Build.VERSION_CODES.Q) {
      videoCollection = MediaStore.Video.Media.getContentUri(
          MediaStore.VOLUME_EXTERNAL_PRIMARY);
    } else {
      videoCollection = MediaStore.Video.Media.EXTERNAL_CONTENT_URI;
    }

    // Create a new Media file record.
    ContentValues newMp4FileDetails = new ContentValues();
    newMp4FileDetails.put(MediaStore.Video.Media.DISPLAY_NAME, mp4FileName);
    newMp4FileDetails.put(MediaStore.Video.Media.MIME_TYPE, MP4_VIDEO_MIME_TYPE);

    if (Build.VERSION.SDK_INT >= Build.VERSION_CODES.Q) {
      // The Relative_Path column is only available since API Level 29.
      newMp4FileDetails.put(MediaStore.Video.Media.RELATIVE_PATH, Environment.DIRECTORY_MOVIES);
    } else {
      // Use the Data column to set path for API Level <= 28.
      File mp4FileDir = Environment.getExternalStoragePublicDirectory(Environment.DIRECTORY_MOVIES);
      String absoluteMp4FilePath = new File(mp4FileDir, mp4FileName).getAbsolutePath();
      newMp4FileDetails.put(MediaStore.Video.Media.DATA, absoluteMp4FilePath);
    }

    Uri newMp4FileUri = resolver.insert(videoCollection, newMp4FileDetails);

    // Ensure that this file exists and can be written.
    if (newMp4FileUri == null) {
      Log.e(TAG, String.format("Failed to insert Video entity in MediaStore. API Level = %d", Build.VERSION.SDK_INT));
      return null;
    }

    // This call ensures the file exist before we pass it to the ARCore API.
    if (!testFileWriteAccess(newMp4FileUri)) {
      return null;
    }

    Log.d(TAG, String.format("createMp4File = %s, API Level = %d", newMp4FileUri, Build.VERSION.SDK_INT));

    return newMp4FileUri;
  }

  // Test if the file represented by the content Uri can be open with write access.
  private boolean testFileWriteAccess(Uri contentUri) {
    try (java.io.OutputStream mp4File = this.getContentResolver().openOutputStream(contentUri)) {
      Log.d(TAG, String.format("Success in testFileWriteAccess %s", contentUri.toString()));
      return true;
    } catch (java.io.FileNotFoundException e) {
      Log.e(TAG, String.format("FileNotFoundException in testFileWriteAccess %s", contentUri.toString()), e);
    } catch (java.io.IOException e) {
      Log.e(TAG, String.format("IOException in testFileWriteAccess %s", contentUri.toString()), e);
    }

    return false;
  }
จัดการสิทธิ์เข้าถึงพื้นที่เก็บข้อมูล
หากใช้อุปกรณ์ Android 11 คุณจะเริ่มทดสอบโค้ดได้ หากต้องการรองรับอุปกรณ์ Android 10 หรือต่ำกว่า คุณจะต้องให้สิทธิ์พื้นที่เก็บข้อมูลของแอปเพื่อบันทึกข้อมูลลงในระบบไฟล์ของอุปกรณ์เป้าหมาย
ใน AndroidManifest.xml ให้ประกาศว่าแอปต้องมีสิทธิ์อ่านและเขียนพื้นที่เก็บข้อมูลก่อน Android 11 (API ระดับ 30)
  <!-- Inside the <manifest> tag, below the existing Camera permission -->
  <uses-permission android:name="android.permission.WRITE_EXTERNAL_STORAGE"
      android:maxSdkVersion="29" />

  <uses-permission android:name="android.permission.READ_EXTERNAL_STORAGE"
      android:maxSdkVersion="29" />
เพิ่มฟังก์ชันตัวช่วยที่ชื่อ checkAndRequestStoragePermission() ใน HelloArActivity.java เพื่อขอสิทธิ์ WRITE_EXTERNAL_STORAGE ในระหว่างรันไทม์
// Add imports to the beginning of the file.
import android.Manifest;
import android.content.pm.PackageManager;
import androidx.core.app.ActivityCompat;
import androidx.core.content.ContextCompat;

  private final int REQUEST_WRITE_EXTERNAL_STORAGE = 1;
  public boolean checkAndRequestStoragePermission() {
    if (ContextCompat.checkSelfPermission(this, Manifest.permission.WRITE_EXTERNAL_STORAGE)
        != PackageManager.PERMISSION_GRANTED) {
      ActivityCompat.requestPermissions(this,
          new String[]{Manifest.permission.WRITE_EXTERNAL_STORAGE},
          REQUEST_WRITE_EXTERNAL_STORAGE);
      return false;
    }

    return true;
  }
หากใช้ API ระดับ 29 หรือต่ำกว่า ให้เพิ่มการตรวจสอบสิทธิ์พื้นที่เก็บข้อมูลที่ด้านบนของ createMp4File() และออกจากฟังก์ชันก่อนเวลาหากแอปไม่มีสิทธิ์ที่ถูกต้อง API ระดับ 30 (Android 11) ไม่ต้องใช้สิทธิ์เข้าถึงพื้นที่เก็บข้อมูลเพื่อเข้าถึงไฟล์ใน MediaStore
  private Uri createMp4File() {
    // Since we use legacy external storage for Android 10,
    // we still need to request for storage permission on Android 10.
    if (Build.VERSION.SDK_INT <= Build.VERSION_CODES.Q) {
      if (!checkAndRequestStoragePermission()) {
        Log.i(TAG, String.format(
            "Didn't createMp4File. No storage permission, API Level = %d",
            Build.VERSION.SDK_INT));
        return null;
      }
    }
    // ... omitted code ...
  }
บันทึกจากอุปกรณ์เป้าหมาย
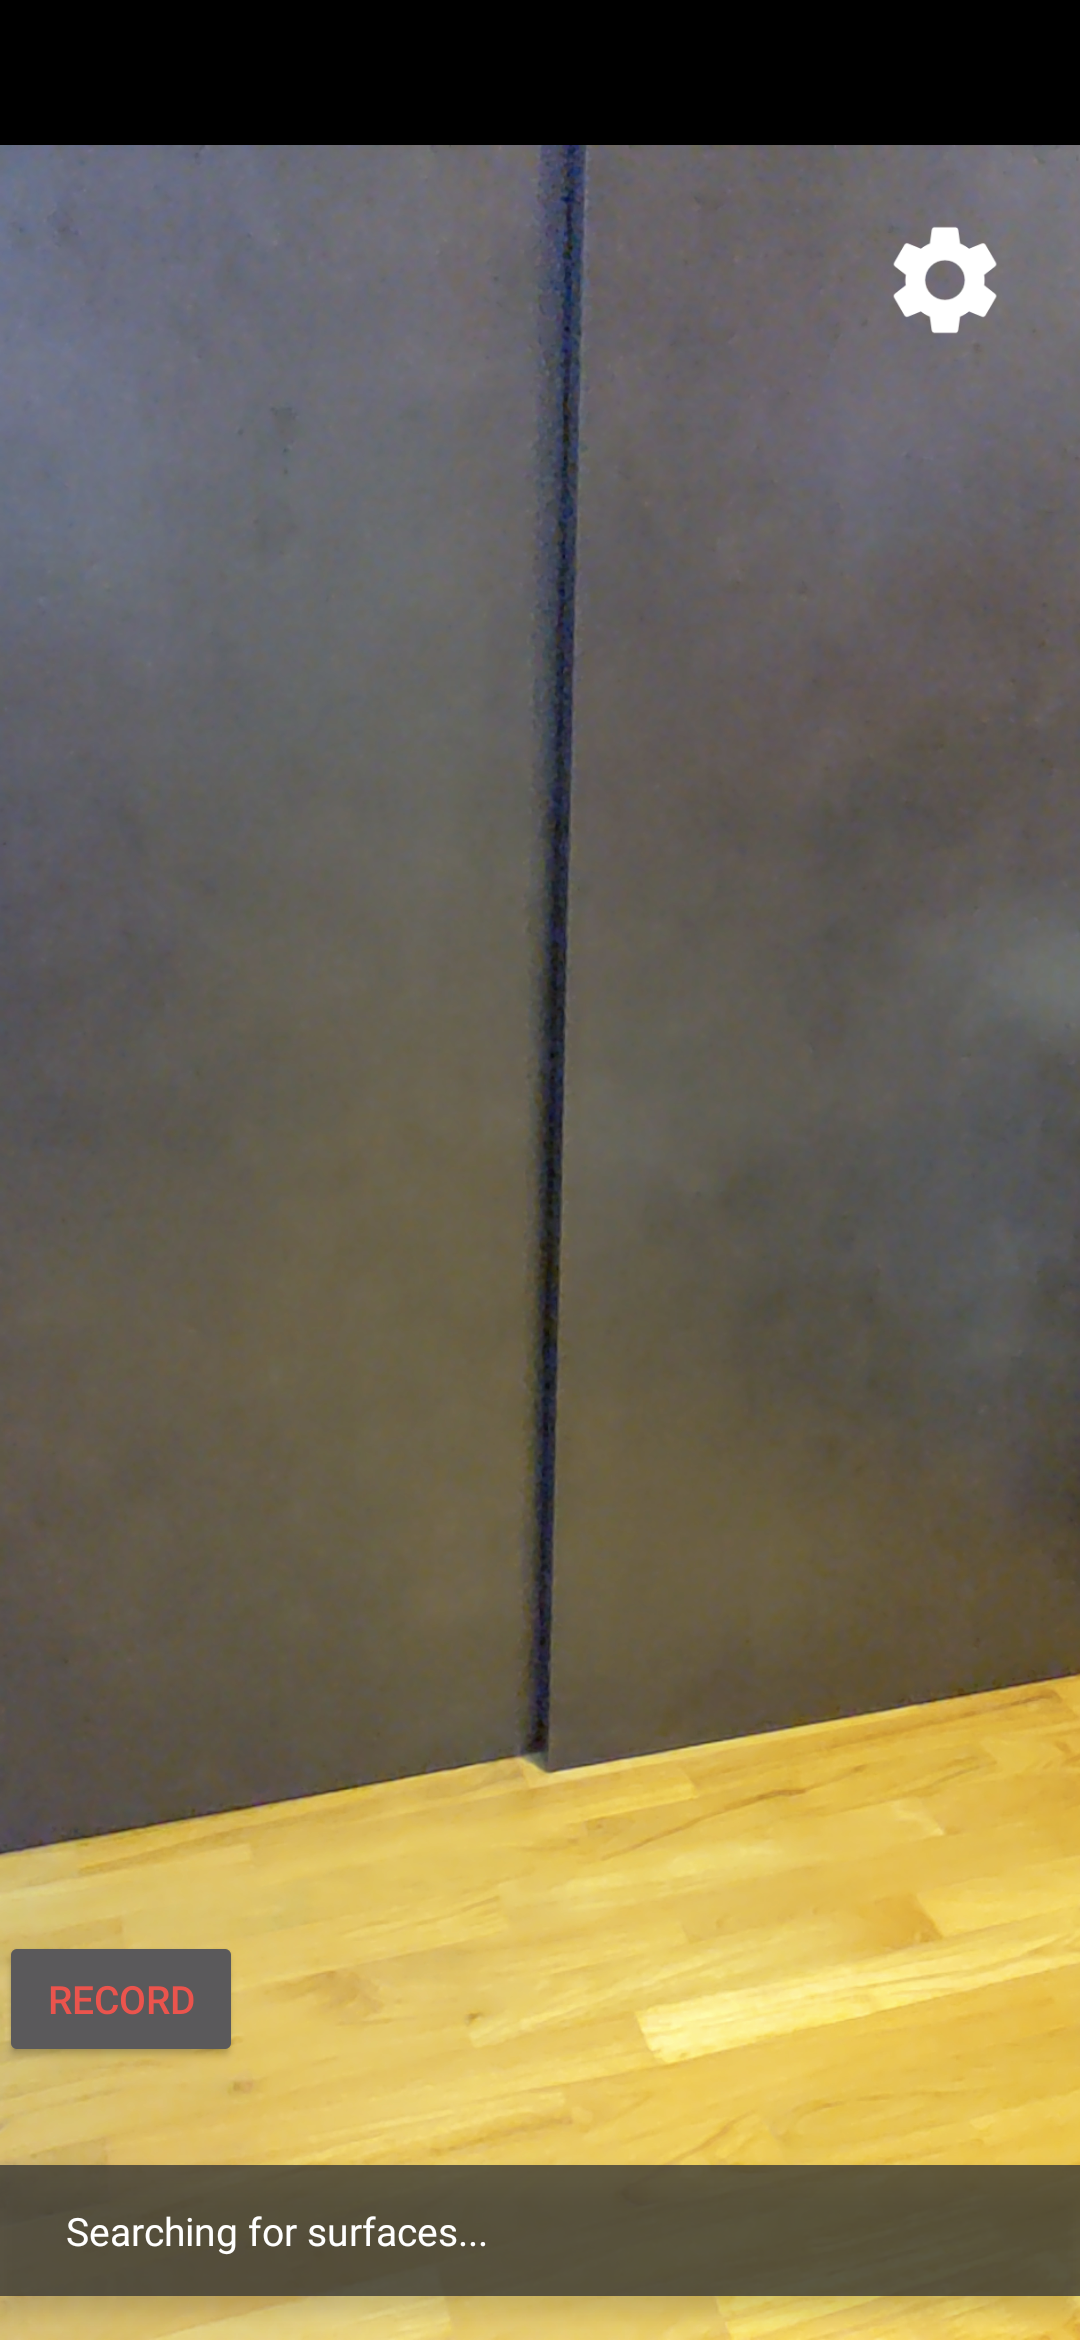
ถึงเวลาดูสิ่งที่คุณสร้างมาจนถึงตอนนี้แล้ว เชื่อมต่ออุปกรณ์เคลื่อนที่กับคอมพิวเตอร์สำหรับการพัฒนาซอฟต์แวร์ แล้วคลิกเรียกใช้ใน Android Studio
คุณควรเห็นปุ่มบันทึกสีแดงที่ด้านล่างซ้ายของหน้าจอ การแตะปุ่มนี้จะเปลี่ยนข้อความเป็นหยุด ขยับอุปกรณ์ไปรอบๆ เพื่อบันทึกเซสชัน แล้วคลิกปุ่มหยุดเมื่อต้องการบันทึกให้เสร็จสมบูรณ์ การดำเนินการนี้จะบันทึกไฟล์ใหม่ชื่อ arcore-xxxxxx_xxxxxx.mp4 ในที่เก็บข้อมูลภายนอกของอุปกรณ์
ตอนนี้คุณควรมีarcore-xxxxxx_xxxxxx.mp4ไฟล์ใหม่ในที่เก็บข้อมูลภายนอกของอุปกรณ์ ในอุปกรณ์ Pixel 5 เส้นทางคือ /storage/emulated/0/Movies/ คุณดูเส้นทางได้ในหน้าต่าง Logcat หลังจากเริ่มบันทึก
com.google.ar.core.examples.java.helloar D/HelloArActivity: startRecording at:/storage/emulated/0/Movies/arcore-xxxxxxxx_xxxxxx.mp4
com.google.ar.core.examples.java.helloar D/HelloArActivity: startRecording - RecordingStatus OK
ดูการบันทึก
คุณสามารถใช้แอประบบไฟล์ เช่น Files by Google เพื่อดูการบันทึก หรือคัดลอกไปยังเครื่องที่ใช้พัฒนา ด้านล่างนี้คือคำสั่ง adb 2 รายการสำหรับแสดงและดึงข้อมูลไฟล์จากอุปกรณ์ Android
adb shell ls '$EXTERNAL_STORAGE/Movies/*'เพื่อแสดงไฟล์ในไดเรกทอรีภาพยนตร์ในที่เก็บข้อมูลภายนอกบนอุปกรณ์adb pull /absolute_path_from_previous_adb_shell_ls/arcore-xxxxxxxx_xxxxxx.mp4เพื่อคัดลอกไฟล์จากอุปกรณ์ไปยังเครื่องที่ใช้พัฒนา
นี่คือตัวอย่างเอาต์พุตหลังจากใช้คำสั่ง 2 รายการนี้ (จาก macOS)
$ adb shell ls '$EXTERNAL_STORAGE/Movies/*'
/sdcard/Movies/arcore-xxxxxxxx_xxxxxx.mp4


$ adb pull /sdcard/Movies/arcore-xxxxxxxx_xxxxxx.mp4
/sdcard/Movies/arcore-xxxxxxxx_xxxxxx.mp4: ... pulled
สิ่งที่คุณทำในขั้นตอนนี้
- เพิ่มปุ่มเพื่อเริ่มและหยุดการบันทึก
- ฟังก์ชันที่ใช้ในการเริ่มและหยุดการบันทึก
- ทดสอบแอปในอุปกรณ์
- คัดลอก MP4 ที่บันทึกไว้ไปยังเครื่องของคุณและยืนยันแล้ว
จากนั้นคุณจะเล่นเซสชัน AR จากไฟล์ MP4
4. เล่นเซสชัน ARCore จากไฟล์ MP4
ตอนนี้คุณจะมีปุ่มบันทึกและไฟล์ MP4 บางไฟล์ที่มีเซสชันที่บันทึกไว้ ตอนนี้คุณจะเล่นไฟล์เหล่านั้นได้โดยใช้ ARCore Playback API
เพิ่ม UI สำหรับปุ่มเล่น
ก่อนที่จะใช้การเล่น ให้เพิ่มปุ่มใน UI เพื่อให้ผู้ใช้แจ้ง ARCore ได้ว่าควรเริ่มและหยุดเล่นเซสชันเมื่อใด
ในแผงโปรเจ็กต์ ให้เปิดไฟล์ app/res/layout/activity_main.xml
ใน activity_main.xml ให้เพิ่มโค้ดด้านล่างก่อนแท็กปิดเพื่อสร้างปุ่มเล่นใหม่ และตั้งค่าตัวแฮนเดิลเหตุการณ์เป็นเมธอดที่ชื่อ onClickPlayback() ปุ่มนี้จะคล้ายกับปุ่มบันทึกและจะแสดงที่ด้านขวาของหน้าจอ
  <!--
    Add a new "Playback" button with those attributes:
        text is "Playback",
        onClick event handler is "onClickPlayback",
        text color is "green".
  -->
  <Button
      android:id="@+id/playback_button"
      android:layout_width="wrap_content"
      android:layout_height="wrap_content"
      android:layout_alignEnd="@id/surfaceview"
      android:layout_alignBottom="@id/surfaceview"
      android:layout_marginBottom="100dp"
      android:onClick="onClickPlayback"
      android:text="Playback"
      android:textColor="@android:color/holo_green_light" />
ปุ่มอัปเดตระหว่างการเล่น
ตอนนี้แอปมีสถานะใหม่ที่เรียกว่า Playingback อัปเดต AppState enum และฟังก์ชันที่มีอยู่ทั้งหมดที่ใช้ appState เป็นอาร์กิวเมนต์เพื่อจัดการปัญหานี้
เพิ่ม Playingback ลงใน Enum AppState ใน HelloArActivity.java ดังนี้
  public enum AppState {
    Idle,
    Recording,
    Playingback // New enum value.
  }
หากปุ่มบันทึกยังคงแสดงบนหน้าจอระหว่างการเล่น ผู้ใช้อาจคลิกปุ่มนี้โดยไม่ตั้งใจ หากต้องการหลีกเลี่ยงปัญหานี้ ให้ซ่อนปุ่มบันทึกระหว่างการเล่น วิธีนี้ช่วยให้คุณไม่ต้องจัดการสถานะสำหรับ Playingback ใน onClickRecord()
แก้ไขฟังก์ชัน updateRecordButton() ใน HelloArActivity.java เพื่อซ่อนปุ่มบันทึกเมื่อแอปอยู่ในสถานะ Playingback
  // Update the "Record" button based on app's internal state.
  private void updateRecordButton() {
    View buttonView = findViewById(R.id.record_button);
    Button button = (Button)buttonView;

    switch (appState) {

      // The app is neither recording nor playing back. The "Record" button is visible.
      case Idle:
        button.setText("Record");
        button.setVisibility(View.VISIBLE);
        break;

      // While recording, the "Record" button is visible and says "Stop".
      case Recording:
        button.setText("Stop");
        button.setVisibility(View.VISIBLE);
        break;

      // During playback, the "Record" button is not visible.
      case Playingback:
        button.setVisibility(View.INVISIBLE);
        break;
    }
  }
ในทำนองเดียวกัน ให้ซ่อนปุ่มเล่นเมื่อผู้ใช้บันทึกเซสชัน และเปลี่ยนปุ่มเป็น "หยุด" เมื่อผู้ใช้เล่นเซสชันอยู่ วิธีนี้จะช่วยให้ผู้ใช้หยุดการเล่นได้โดยไม่ต้องรอให้เล่นจนจบ
วิธีเพิ่มupdatePlaybackButton()ฟังก์ชันใน HelloArActivity.java
  // Update the "Playback" button based on app's internal state.
  private void updatePlaybackButton() {
    View buttonView = findViewById(R.id.playback_button);
    Button button = (Button)buttonView;

    switch (appState) {

      // The app is neither recording nor playing back. The "Playback" button is visible.
      case Idle:
        button.setText("Playback");
        button.setVisibility(View.VISIBLE);
        break;

      // While playing back, the "Playback" button is visible and says "Stop".
      case Playingback:
        button.setText("Stop");
        button.setVisibility(View.VISIBLE);
        break;

      // During recording, the "Playback" button is not visible.
      case Recording:
        button.setVisibility(View.INVISIBLE);
        break;
    }
  }
สุดท้าย ให้อัปเดต onClickRecord() เพื่อเรียกใช้ updatePlaybackButton() เพิ่มบรรทัดต่อไปนี้ใน HelloArActivity.java
  public void onClickRecord(View view) {
    // ... omitted code ...
    updatePlaybackButton(); // Add this line to the end of the function.
  }
เลือกไฟล์ที่มีปุ่มเล่น
เมื่อแตะ ปุ่มเล่นควรอนุญาตให้ผู้ใช้เลือกไฟล์ที่จะเล่น ใน Android การเลือกไฟล์จะได้รับการจัดการในเครื่องมือเลือกไฟล์ของระบบในกิจกรรมอื่น ซึ่งทำได้ผ่าน Storage Access Framework (SAF) เมื่อผู้ใช้เลือกไฟล์แล้ว แอปจะได้รับการเรียกกลับที่ชื่อ onActivityResult() คุณจะเริ่มการเล่นจริงภายในฟังก์ชันการเรียกกลับนี้
ใน HelloArActivity.java ให้สร้างฟังก์ชัน onClickPlayback() เพื่อเลือกไฟล์และหยุดเล่น
  // Handle the click event of the "Playback" button.
  public void onClickPlayback(View view) {
    Log.d(TAG, "onClickPlayback");

    switch (appState) {

      // If the app is not playing back, open the file picker.
      case Idle: {
        boolean hasStarted = selectFileToPlayback();
        Log.d(TAG, String.format("onClickPlayback start: selectFileToPlayback %b", hasStarted));
        break;
      }

      // If the app is playing back, stop playing back.
      case Playingback: {
        boolean hasStopped = stopPlayingback();
        Log.d(TAG, String.format("onClickPlayback stop: hasStopped %b", hasStopped));
        break;
      }

      default:
        // Recording - do nothing.
        break;
    }

    // Update the UI for the "Record" and "Playback" buttons.
    updateRecordButton();
    updatePlaybackButton();
  }
ใน HelloArActivity.java ให้สร้างฟังก์ชัน selectFileToPlayback() ที่เลือกไฟล์จากอุปกรณ์ หากต้องการเลือกไฟล์จากระบบไฟล์ Android ให้ใช้ ACTION_OPEN_DOCUMENT Intent
// Add imports to the beginning of the file.
import android.content.Intent;
import android.provider.DocumentsContract;

  private boolean selectFileToPlayback() {
    // Start file selection from Movies directory.
    // Android 10 and above requires VOLUME_EXTERNAL_PRIMARY to write to MediaStore.
    Uri videoCollection;
    if (Build.VERSION.SDK_INT >= Build.VERSION_CODES.Q) {
      videoCollection = MediaStore.Video.Media.getContentUri(
          MediaStore.VOLUME_EXTERNAL_PRIMARY);
    } else {
      videoCollection = MediaStore.Video.Media.EXTERNAL_CONTENT_URI;
    }

    // Create an Intent to select a file.
    Intent intent = new Intent(Intent.ACTION_OPEN_DOCUMENT);

    // Add file filters such as the MIME type, the default directory and the file category.
    intent.setType(MP4_VIDEO_MIME_TYPE); // Only select *.mp4 files
    intent.putExtra(DocumentsContract.EXTRA_INITIAL_URI, videoCollection); // Set default directory
    intent.addCategory(Intent.CATEGORY_OPENABLE); // Must be files that can be opened

    this.startActivityForResult(intent, REQUEST_MP4_SELECTOR);

    return true;
  }
REQUEST_MP4_SELECTOR เป็นค่าคงที่ที่ใช้ระบุคำขอนี้ คุณกำหนดได้โดยใช้ค่าตัวยึดตำแหน่งใดก็ได้ภายใน HelloArActivity ใน HelloArActivity.java ดังนี้
private int REQUEST_MP4_SELECTOR = 1;
ลบล้างฟังก์ชัน onActivityResult() ใน HelloArActivity.java เพื่อจัดการการเรียกกลับจากเครื่องมือเลือกไฟล์
  // Begin playback once the user has selected the file.
  @Override
  protected void onActivityResult(int requestCode, int resultCode, Intent data) {
    // Check request status. Log an error if the selection fails.
    if (resultCode != android.app.Activity.RESULT_OK || requestCode != REQUEST_MP4_SELECTOR) {
      Log.e(TAG, "onActivityResult select file failed");
      return;
    }

    Uri mp4FileUri = data.getData();
    Log.d(TAG, String.format("onActivityResult result is %s", mp4FileUri));

    // Begin playback.
    startPlayingback(mp4FileUri);
  }
เปิดใช้แอปเพื่อเริ่มเล่น
เซสชัน ARCore ต้องมีการเรียก API 3 ครั้งเพื่อเล่นไฟล์ MP4
session.pause()session.setPlaybackDataset()session.resume()
สร้างฟังก์ชัน startPlayingback() ใน HelloArActivity.java
// Add imports to the beginning of the file.
import com.google.ar.core.PlaybackStatus;
import com.google.ar.core.exceptions.PlaybackFailedException;

  private boolean startPlayingback(Uri mp4FileUri) {
    if (mp4FileUri == null)
      return false;

    Log.d(TAG, "startPlayingback at:" + mp4FileUri);

    pauseARCoreSession();

    try {
      session.setPlaybackDatasetUri(mp4FileUri);
    } catch (PlaybackFailedException e) {
      Log.e(TAG, "startPlayingback - setPlaybackDataset failed", e);
    }

    // The session's camera texture name becomes invalid when the
    // ARCore session is set to play back.
    // Workaround: Reset the Texture to start Playback
    // so it doesn't crashes with AR_ERROR_TEXTURE_NOT_SET.
    hasSetTextureNames = false;

    boolean canResume = resumeARCoreSession();
    if (!canResume)
      return false;

    PlaybackStatus playbackStatus = session.getPlaybackStatus();
    Log.d(TAG, String.format("startPlayingback - playbackStatus %s", playbackStatus));


    if (playbackStatus != PlaybackStatus.OK) { // Correctness check
      return false;
    }

    appState = AppState.Playingback;
    updateRecordButton();
    updatePlaybackButton();

    return true;
  }
เปิดใช้แอปเพื่อหยุดการเล่น
สร้างฟังก์ชันชื่อ stopPlayingback() ใน HelloArActivity.java เพื่อจัดการการเปลี่ยนแปลงสถานะของแอปหลังจากเหตุการณ์ต่อไปนี้
- ผู้ใช้หยุดการเล่น MP4
- การเล่น MP4 เสร็จสมบูรณ์แล้ว
หากผู้ใช้หยุดการเล่น แอปควรกลับสู่สถานะเดิมเมื่อผู้ใช้เปิดแอปครั้งแรก
  // Stop the current playback, and restore app status to Idle.
  private boolean stopPlayingback() {
    // Correctness check, only stop playing back when the app is playing back.
    if (appState != AppState.Playingback)
      return false;

    pauseARCoreSession();

    // Close the current session and create a new session.
    session.close();
    try {
      session = new Session(this);
    } catch (UnavailableArcoreNotInstalledException
        |UnavailableApkTooOldException
        |UnavailableSdkTooOldException
        |UnavailableDeviceNotCompatibleException e) {
      Log.e(TAG, "Error in return to Idle state. Cannot create new ARCore session", e);
      return false;
    }
    configureSession();

    boolean canResume = resumeARCoreSession();
    if (!canResume)
      return false;

    // A new session will not have a camera texture name.
    // Manually set hasSetTextureNames to false to trigger a reset.
    hasSetTextureNames = false;

    // Reset appState to Idle, and update the "Record" and "Playback" buttons.
    appState = AppState.Idle;
    updateRecordButton();
    updatePlaybackButton();

    return true;
  }
นอกจากนี้ การเล่นยังหยุดโดยอัตโนมัติได้หลังจากที่เพลเยอร์เล่นไฟล์ MP4 จนจบ ในกรณีนี้ stopPlayingback() ควรเปลี่ยนสถานะของแอปกลับเป็น Idle ใน onDrawFrame() ให้ตรวจสอบ PlaybackStatus หากเป็น FINISHED ให้เรียกใช้ฟังก์ชัน stopPlayingback() ในเธรด UI
  public void onDrawFrame(SampleRender render) {
      // ... omitted code ...

      // Insert before this line:
      // frame = session.update();

      // Check the playback status and return early if playback reaches the end.
      if (appState == AppState.Playingback
          && session.getPlaybackStatus() == PlaybackStatus.FINISHED) {
        this.runOnUiThread(this::stopPlayingback);
        return;
      }

      // ... omitted code ...
  }
เล่นจากอุปกรณ์เป้าหมาย
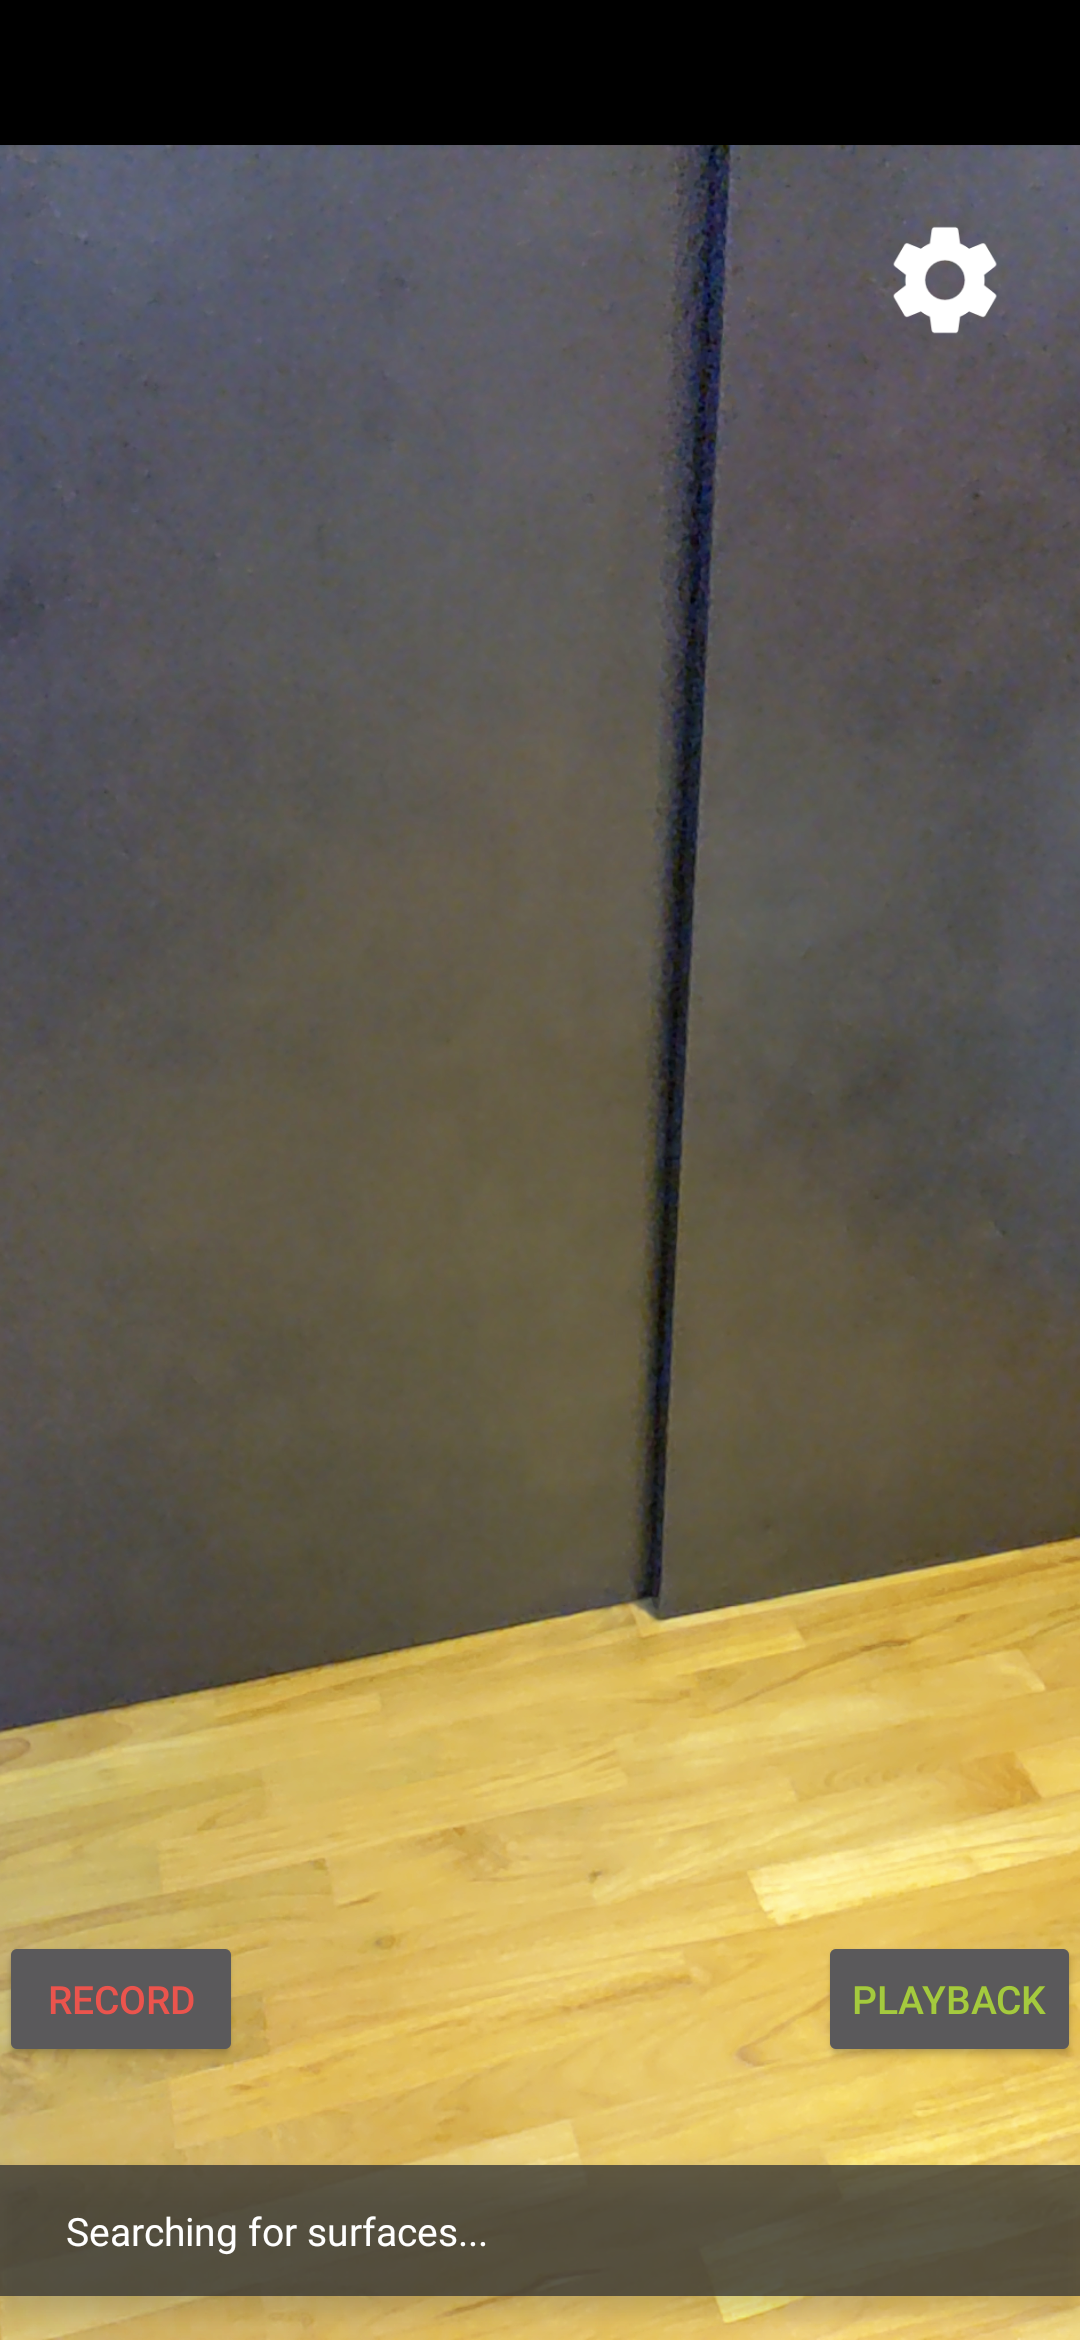
ถึงเวลาดูสิ่งที่คุณสร้างมาจนถึงตอนนี้แล้ว เชื่อมต่ออุปกรณ์เคลื่อนที่กับคอมพิวเตอร์สำหรับการพัฒนาซอฟต์แวร์ แล้วคลิกเรียกใช้ใน Android Studio
เมื่อเปิดแอป คุณจะเห็นหน้าจอที่มีปุ่มบันทึกสีแดงทางด้านซ้ายและปุ่มเล่นสีเขียวทางด้านขวา
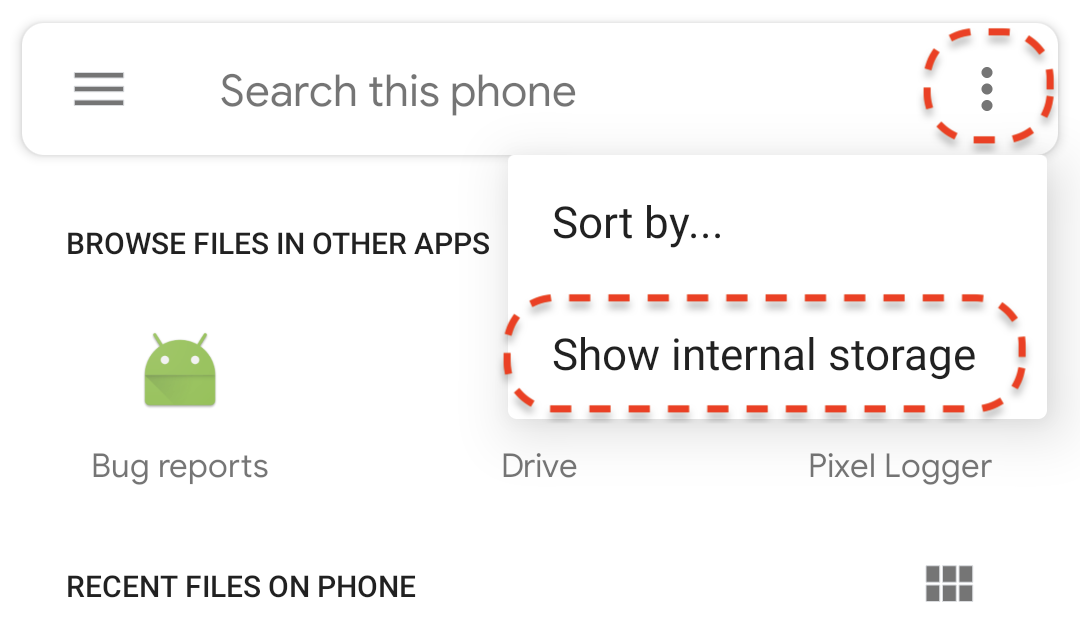
แตะปุ่มเล่น แล้วเลือกไฟล์ MP4 ไฟล์ใดไฟล์หนึ่งที่คุณเพิ่งบันทึก หากไม่เห็นชื่อไฟล์ที่ขึ้นต้นด้วย arcore- แสดงว่าอุปกรณ์อาจไม่แสดงโฟลเดอร์ Movies ในกรณีนี้ ให้ไปที่โฟลเดอร์รุ่นโทรศัพท์ > ภาพยนตร์โดยใช้เมนูที่มุมซ้ายบน นอกจากนี้ คุณอาจต้องเปิดใช้ตัวเลือกแสดงพื้นที่เก็บข้อมูลภายในเพื่อแสดงโฟลเดอร์รุ่นโทรศัพท์
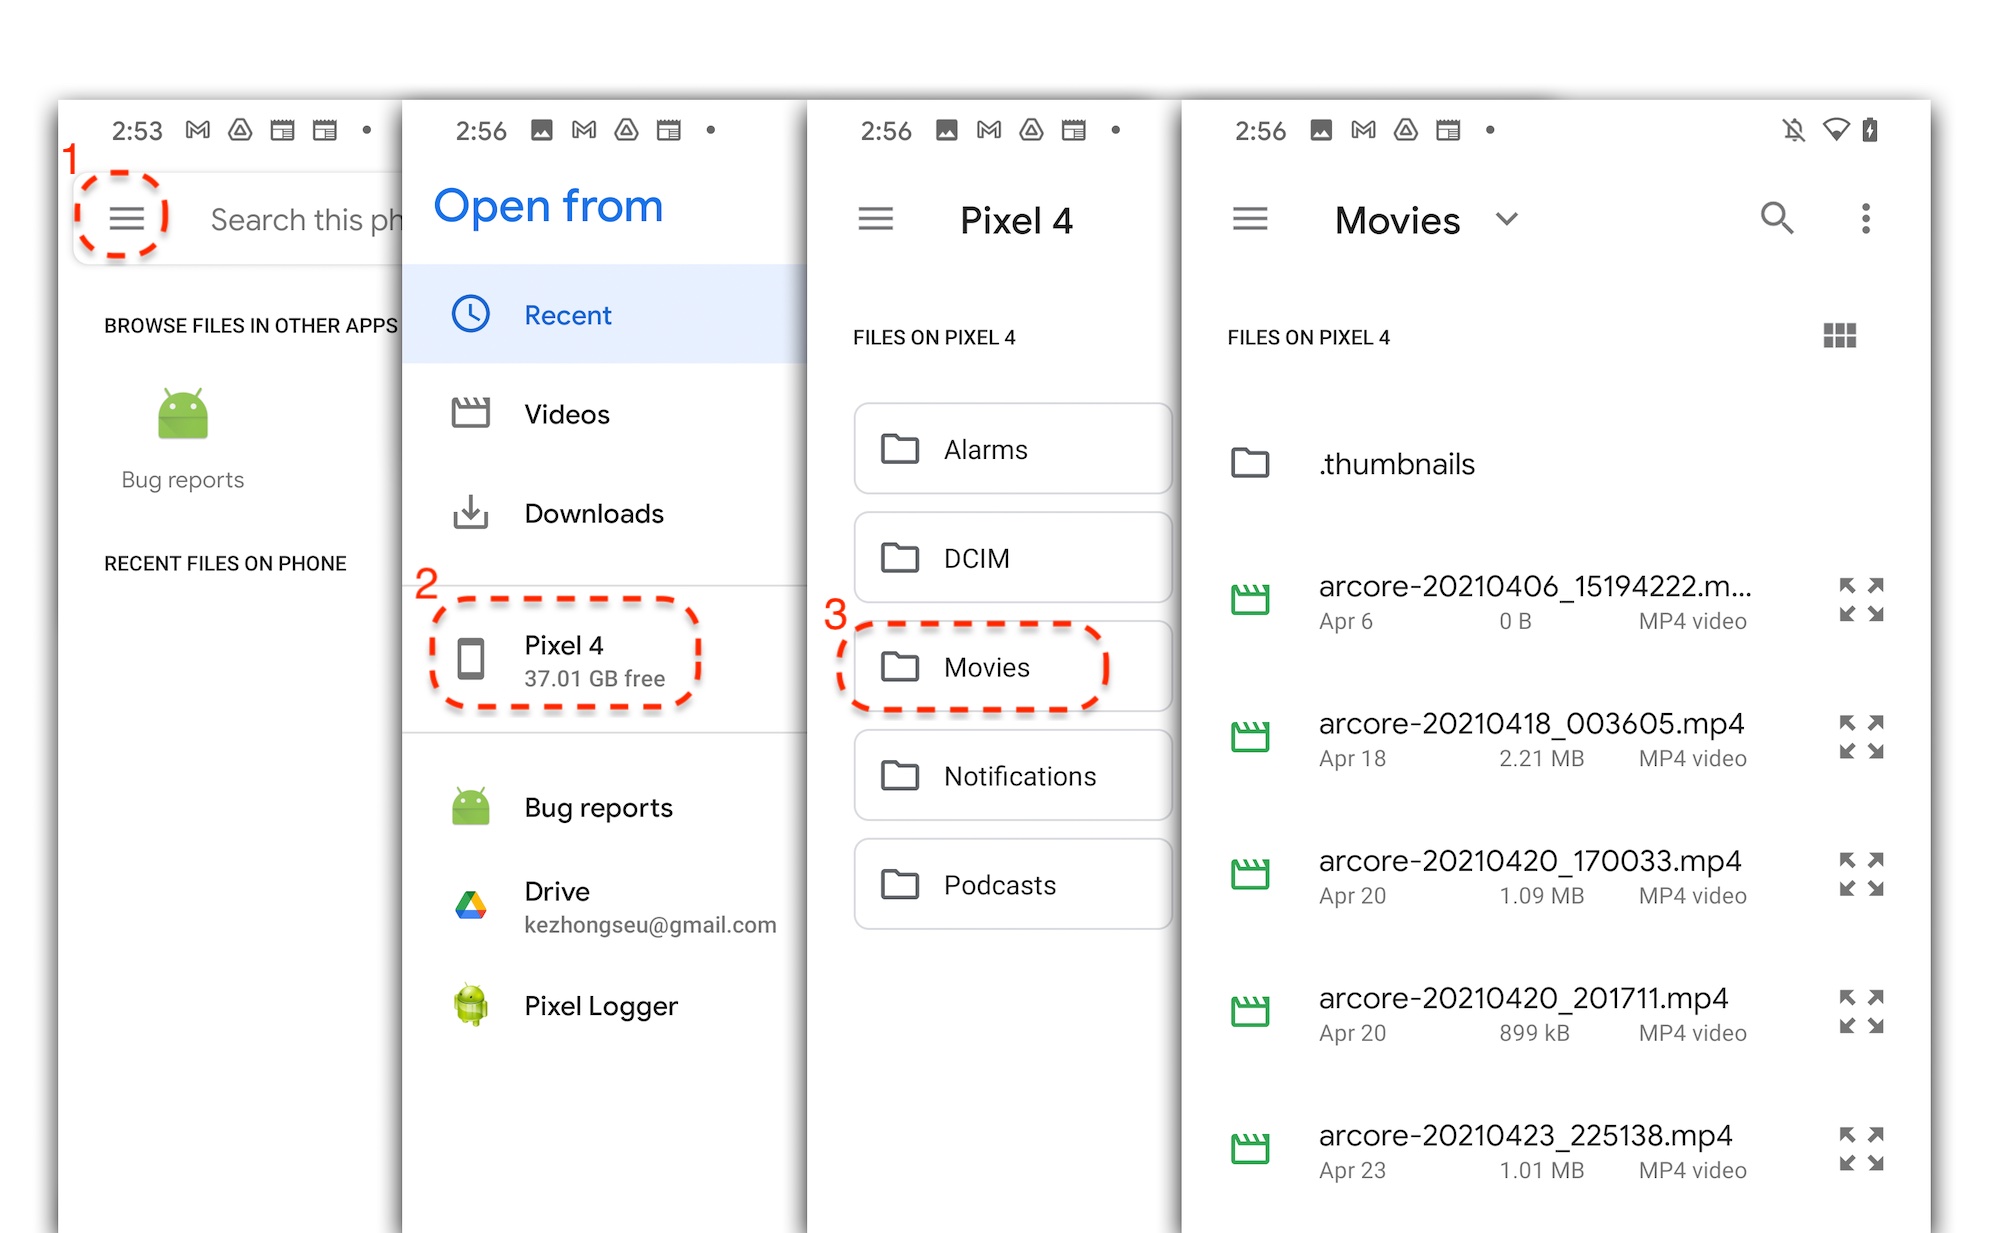
แตะชื่อไฟล์บนหน้าจอเพื่อเลือกไฟล์ MP4 แอปควรเล่นไฟล์ MP4
ความแตกต่างระหว่างการเล่นเซสชันย้อนหลังกับการเล่นวิดีโอทั่วไปคือคุณสามารถโต้ตอบกับเซสชันที่บันทึกไว้ได้ แตะระนาบที่ตรวจพบเพื่อวางเครื่องหมายบนหน้าจอ
สิ่งที่คุณทำในขั้นตอนนี้
- เพิ่มปุ่มเพื่อเริ่มและหยุดการเล่น
- ใช้ฟังก์ชันเพื่อให้แอปเริ่มและหยุดบันทึก
- เล่นเซสชัน ARCore ที่บันทึกไว้ก่อนหน้านี้บนอุปกรณ์
5. บันทึกข้อมูลเพิ่มเติมใน MP4
ARCore 1.24 ช่วยให้คุณบันทึกข้อมูลเพิ่มเติมในไฟล์ MP4 ได้ คุณสามารถบันทึกPoseตำแหน่งของออบเจ็กต์ AR แล้วสร้างออบเจ็กต์ AR ในตำแหน่งเดียวกันระหว่างการเล่น
กำหนดค่าแทร็กใหม่เพื่อบันทึก
กำหนดแทร็กใหม่ด้วย UUID และแท็ก MIME ใน HelloArActivity.java
// Add imports to the beginning of the file.
import java.util.UUID;
import com.google.ar.core.Track;

  // Inside the HelloArActiity class.
  private static final UUID ANCHOR_TRACK_ID = UUID.fromString("53069eb5-21ef-4946-b71c-6ac4979216a6");;
  private static final String ANCHOR_TRACK_MIME_TYPE = "application/recording-playback-anchor";

  private boolean startRecording() {
    // ... omitted code ...

    // Insert after line:
    //   pauseARCoreSession();

    // Create a new Track, with an ID and MIME tag.
    Track anchorTrack = new Track(session)
        .setId(ANCHOR_TRACK_ID).
        .setMimeType(ANCHOR_TRACK_MIME_TYPE);
    // ... omitted code ...
  }
อัปเดตรหัสที่มีอยู่เพื่อสร้างออบเจ็กต์ RecordingConfig ด้วยการเรียกใช้ addTrack()
  private boolean startRecording() {
    // ... omitted code ...

    // Update the lines below with a call to the addTrack() function:
    //   RecordingConfig recordingConfig = new RecordingConfig(session)
    //    .setMp4DatasetUri(mp4FileUri)
    //    .setAutoStopOnPause(true);

    RecordingConfig recordingConfig = new RecordingConfig(session)
        .setMp4DatasetUri(mp4FileUri)
        .setAutoStopOnPause(true)
        .addTrack(anchorTrack); // add the new track onto the recordingConfig

    // ... omitted code ...
  }
บันทึกท่าทางของจุดยึดระหว่างการบันทึก
ทุกครั้งที่ผู้ใช้แตะระนาบที่ตรวจพบ ระบบจะวางเครื่องหมาย AR บน Anchor ซึ่ง ARCore จะอัปเดตท่าทางของเครื่องหมาย
บันทึกท่าทางของ Anchor ในเฟรมที่สร้างขึ้น หากคุณยังบันทึกเซสชัน ARCore อยู่
แก้ไขฟังก์ชัน handleTap() ใน HelloArActivity.java
// Add imports to the beginning of the file.
import com.google.ar.core.Pose;
import java.nio.FloatBuffer;

  private void handleTap(Frame frame, Camera camera) {
          // ... omitted code ...

          // Insert after line:
          // anchors.add(hit.createAnchor());

          // If the app is recording a session,
          // save the new Anchor pose (relative to the camera)
          // into the ANCHOR_TRACK_ID track.
          if (appState == AppState.Recording) {
            // Get the pose relative to the camera pose.
            Pose cameraRelativePose = camera.getPose().inverse().compose(hit.getHitPose());
            float[] translation = cameraRelativePose.getTranslation();
            float[] quaternion = cameraRelativePose.getRotationQuaternion();
            ByteBuffer payload = ByteBuffer.allocate(4 * (translation.length + quaternion.length));
            FloatBuffer floatBuffer = payload.asFloatBuffer();
            floatBuffer.put(translation);
            floatBuffer.put(quaternion);

            try {
              frame.recordTrackData(ANCHOR_TRACK_ID, payload);
            } catch (IllegalStateException e) {
              Log.e(TAG, "Error in recording anchor into external data track.", e);
            }
          }
          // ... omitted code ...
  }
สาเหตุที่เราเก็บ Pose ที่สัมพันธ์กับกล้องแทนที่จะเป็น Pose ที่สัมพันธ์กับโลกก็เนื่องจากจุดเริ่มต้นของโลกในเซสชันการบันทึกและจุดเริ่มต้นของโลกในเซสชันการเล่นไม่เหมือนกัน ต้นทางของเซสชันการบันทึกจะเริ่มขึ้นเมื่อมีการกลับมาใช้เซสชันอีกครั้งเป็นครั้งแรก เมื่อมีการเรียกใช้ Session.resume() เป็นครั้งแรก ต้นทางของเซสชันการเล่นจะเริ่มเมื่อบันทึกเฟรมแรก เมื่อมีการเรียกใช้ Session.resume() เป็นครั้งแรกหลังจาก Session.startRecording()
การสร้างจุดยึดการเล่น
การสร้าง Anchor ใหม่นั้นทำได้ง่ายๆ เพิ่มฟังก์ชันชื่อ createRecordedAnchors() ใน HelloArActivity.java
// Add imports to the beginning of the file.
import com.google.ar.core.TrackData;

  // Extract poses from the ANCHOR_TRACK_ID track, and create new anchors.
  private void createRecordedAnchors(Frame frame, Camera camera) {
    // Get all `ANCHOR_TRACK_ID` TrackData from the frame.
    for (TrackData trackData : frame.getUpdatedTrackData(ANCHOR_TRACK_ID)) {
      ByteBuffer payload = trackData.getData();
      FloatBuffer floatBuffer = payload.asFloatBuffer();

      // Extract translation and quaternion from TrackData payload.
      float[] translation = new float[3];
      float[] quaternion = new float[4];

      floatBuffer.get(translation);
      floatBuffer.get(quaternion);

      // Transform the recorded anchor pose
      // from the camera coordinate
      // into world coordinates.
      Pose worldPose = camera.getPose().compose(new Pose(translation, quaternion));

      // Re-create an anchor at the recorded pose.
      Anchor recordedAnchor = session.createAnchor(worldPose);

      // Add the new anchor into the list of anchors so that
      // the AR marker can be displayed on top.
      anchors.add(recordedAnchor);
    }
  }
เรียกใช้ฟังก์ชัน createRecordedAnchors() ในฟังก์ชัน onDrawFrame() ใน HelloArActivity.java
  public void onDrawFrame(SampleRender render) {
    // ... omitted code ...

    // Insert after this line:
    // handleTap(frame, camera);

    // If the app is currently playing back a session, create recorded anchors.
    if (appState == AppState.Playingback) {
      createRecordedAnchors(frame, camera);
    }
    // ... omitted code ...
  }
ทดสอบในอุปกรณ์เป้าหมาย
เชื่อมต่ออุปกรณ์เคลื่อนที่กับคอมพิวเตอร์สำหรับการพัฒนาซอฟต์แวร์ แล้วคลิกเรียกใช้ใน Android Studio
ก่อนอื่น ให้แตะปุ่มบันทึกเพื่อบันทึกเซสชัน ขณะบันทึก ให้แตะเครื่องบินที่ตรวจพบเพื่อวางเครื่องหมาย AR 2-3 อัน
หลังจากหยุดบันทึกแล้ว ให้แตะปุ่มเล่น แล้วเลือกไฟล์ที่เพิ่งบันทึก การเล่นควรจะเริ่มขึ้น สังเกตว่าตำแหน่งเครื่องหมาย AR ก่อนหน้าจะปรากฏขึ้นเหมือนกับที่คุณแตะในแอป
การเขียนโค้ดทั้งหมดที่คุณจะต้องทำสำหรับโค้ดแล็บนี้
6. ขอแสดงความยินดี
ขอแสดงความยินดี คุณทำ Codelab นี้เสร็จแล้ว มาดูสิ่งที่คุณได้ทำใน Codelab นี้กัน
- สร้างและเรียกใช้ตัวอย่าง Hello AR Java ของ ARCore
- เพิ่มปุ่มบันทึกลงในแอปเพื่อบันทึกเซสชัน AR เป็นไฟล์ MP4
- เพิ่มปุ่มเล่นลงในแอปเพื่อเล่นเซสชัน AR จากไฟล์ MP4
- เพิ่มฟีเจอร์ใหม่เพื่อบันทึก Anchor ที่ผู้ใช้สร้างไว้ใน MP4 สำหรับการเล่น