
1. 简介
能够将 AR 体验保存到 MP4 文件中并通过 MP4 文件进行播放,这对应用开发者和最终用户来说非常有用。
在桌面上调试和测试新功能
ARCore Recording API 和 Playback API 最直接的用法是供开发者使用。从今以后,您不必在测试设备上构建和运行应用、断开 USB 线,以及四处走动以测试小幅度代码更改。您只需在测试环境中通过预期的手机移动来录制 MP4 文件,并直接从您的桌面进行测试。
使用不同设备录制和播放
借助 Recording API 和 Playback API,某个用户可以使用某台设备录制现场录像,其他用户可以在其他设备上播放同一现场录像。您可以与其他用户分享 AR 体验。有很多可能性哦!
这是您第一次构建 ARCore 应用吗?
如何使用本 Codelab?
构建内容
在本 Codelab 中,您将使用 Recording API 和 Playback API 创建一个应用,该应用将 AR 体验录制到 MP4 文件中并通过同一文件播放体验。您会了解到以下内容:
- 如何使用 Recording API 将 AR 现场录像保存到 MP4 文件中。
- 如何使用 Playback API 重放 MP4 文件中的 AR 现场录像。
- 如何在某台设备上录制 AR 现场录像,然后在其他设备上重放。
所需条件
在本 Codelab 中,您将修改使用 ARCore Android SDK 构建的 Hello AR Java 应用。您需要有特定的软硬件才能完成本 Codelab。
硬件要求
- 一台 ARCore 支持的设备,该设备已启用开发者选项和“USB 调试”,并且通过 USB 线连接到您的开发机器。
- 一台运行 Android Studio 的开发机器。
- 能够访问互联网,方便在开发过程中下载各类库。
软件要求
- 您的开发 ARCore 设备上有面向 AR (ARCore) 1.24 或更高版本的 Google Play 服务。此服务通常通过 Play 商店自动安装到设备上。您也可以将其手动安装到 ARCore 支持的设备上。
- 开发机器上有 Android Studio(v3.1 或更高版本)。
为了获得最佳结果,您还应该对 ARCore 有基本的了解。
2. 设置您的开发环境
首先设置您的开发环境。
下载 ARCore Android SDK
解压缩 ARCore Android SDK
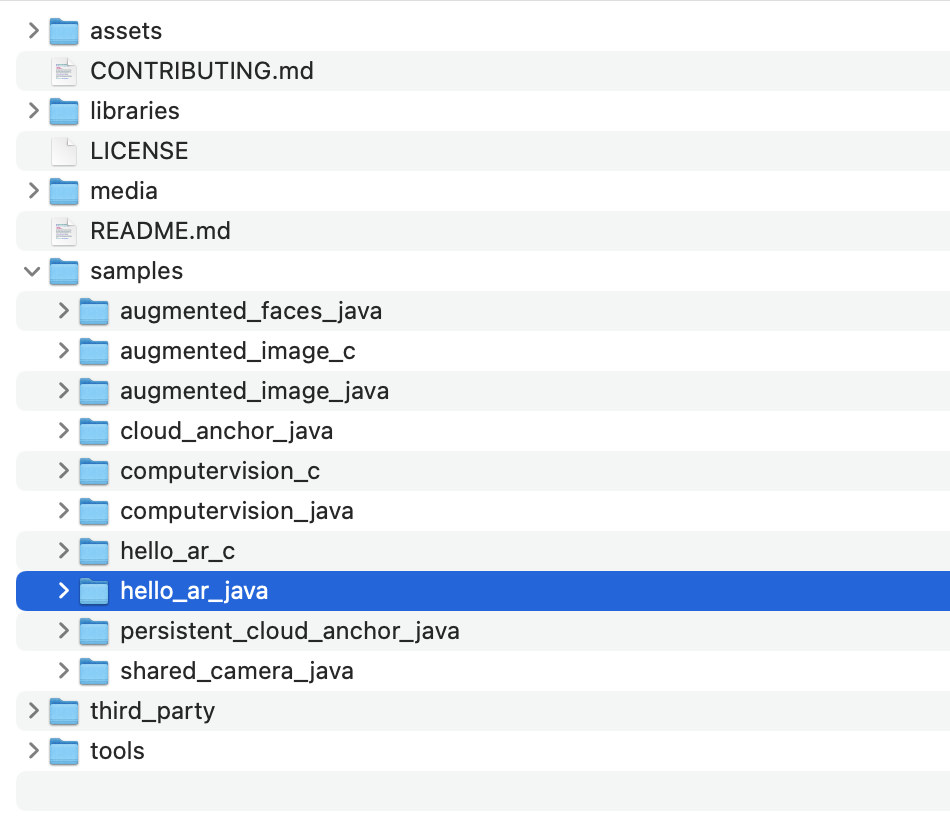
将 Android SDK 下载到您的机器上以后,解压缩文件并前往 arcore-android-sdk-1.24/samples/hello_ar_java 目录。这是您将要使用的应用的根目录。
将 Hello AR Java 加载到 Android Studio 中
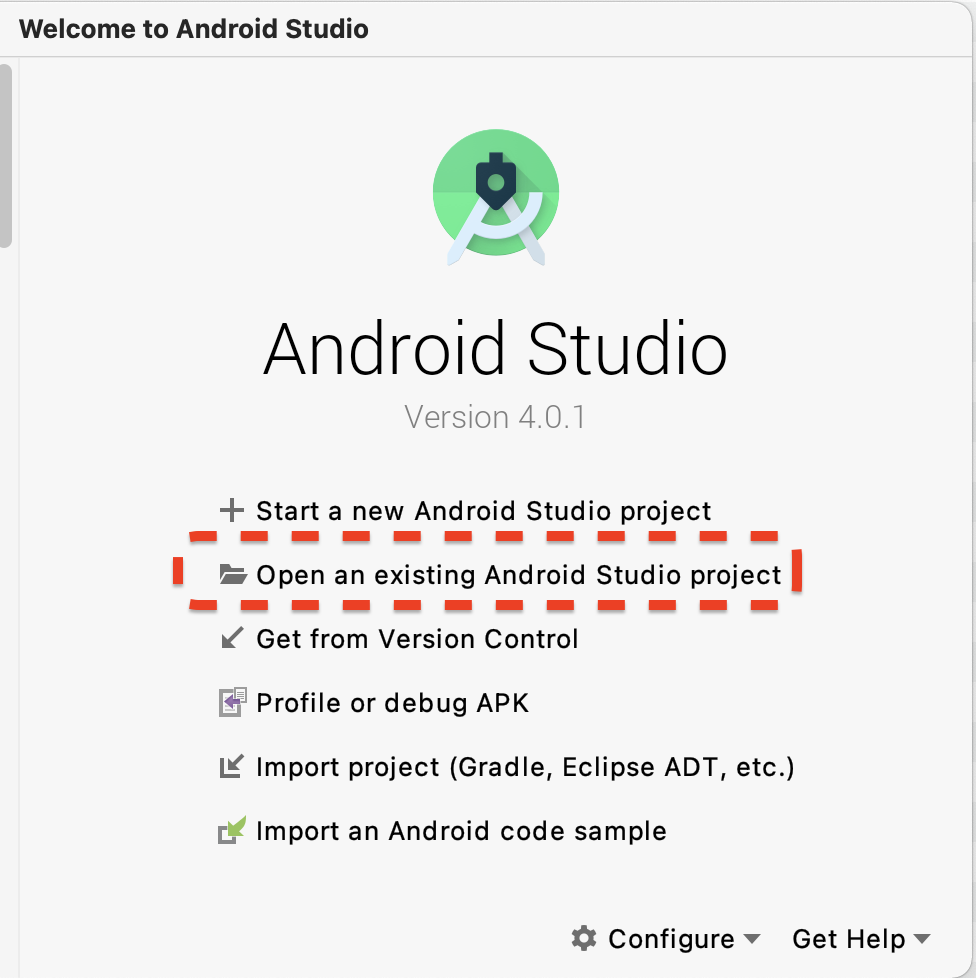
启动 Android Studio,然后点击 Open an existing Android Studio project(打开现有的 Android Studio 项目)。
在出现的对话框中,选择 arcore-android-sdk-1.24/samples/hello_ar_java,然后点击 Open(打开)。
等待 Android Studio 完成项目同步。如果缺少组件,则导入项目可能会失败并显示错误消息。请先解决这些问题,然后再继续。
运行示例应用
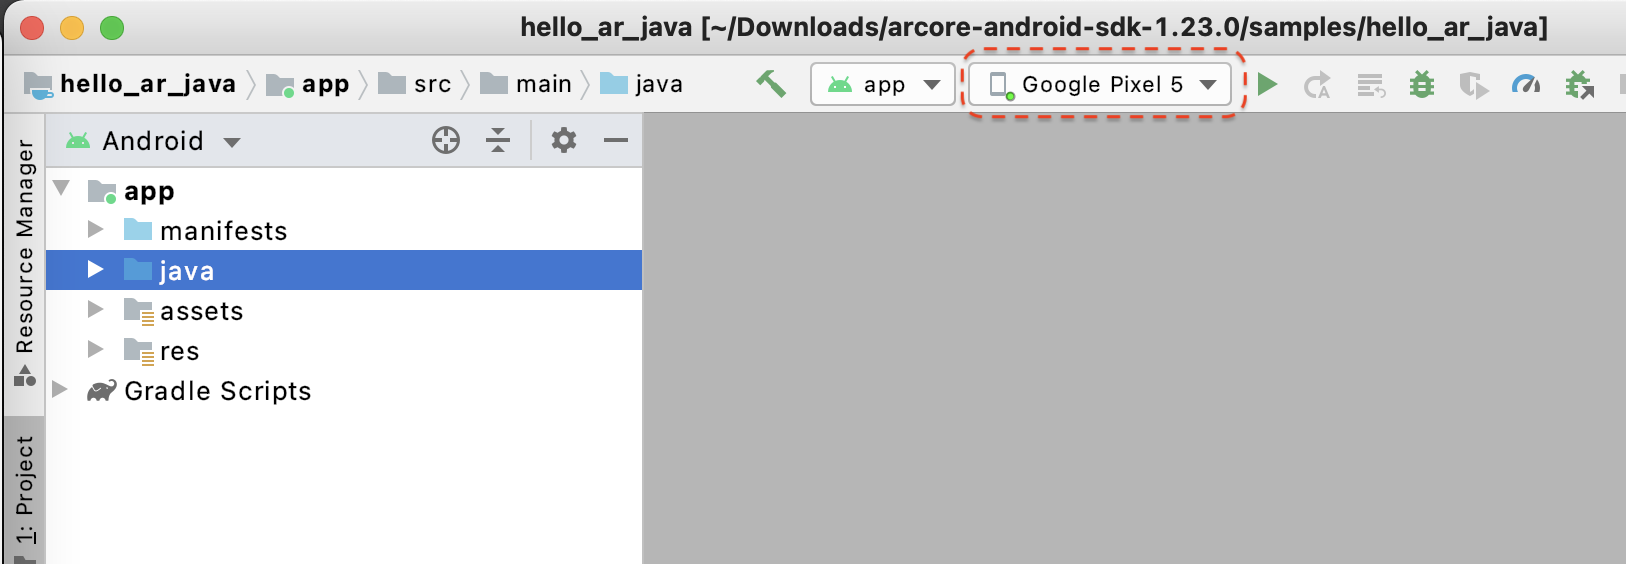
- 将 ARCore 支持的设备连接到您的开发机器。
- 如果系统正确识别了设备,则您应该会看到设备名称显示在 Android Studio 中。
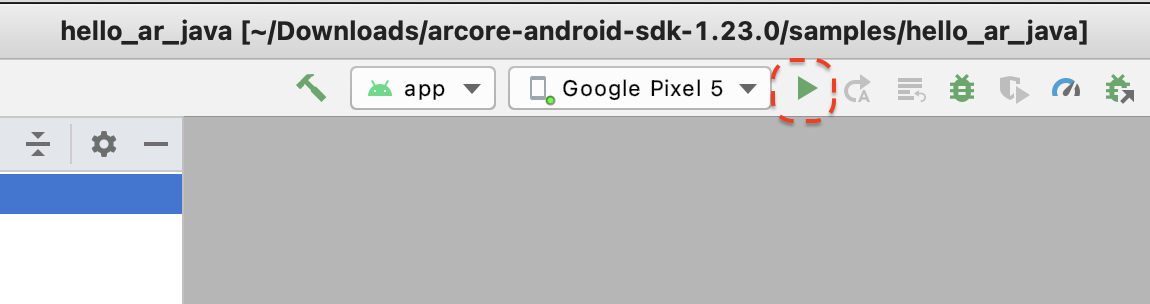
- 点击“Run”(运行)按钮或依次选择 Run(运行)> Run 'app'(运行“应用”),让 Android Studio 在设备上安装并启动应用。
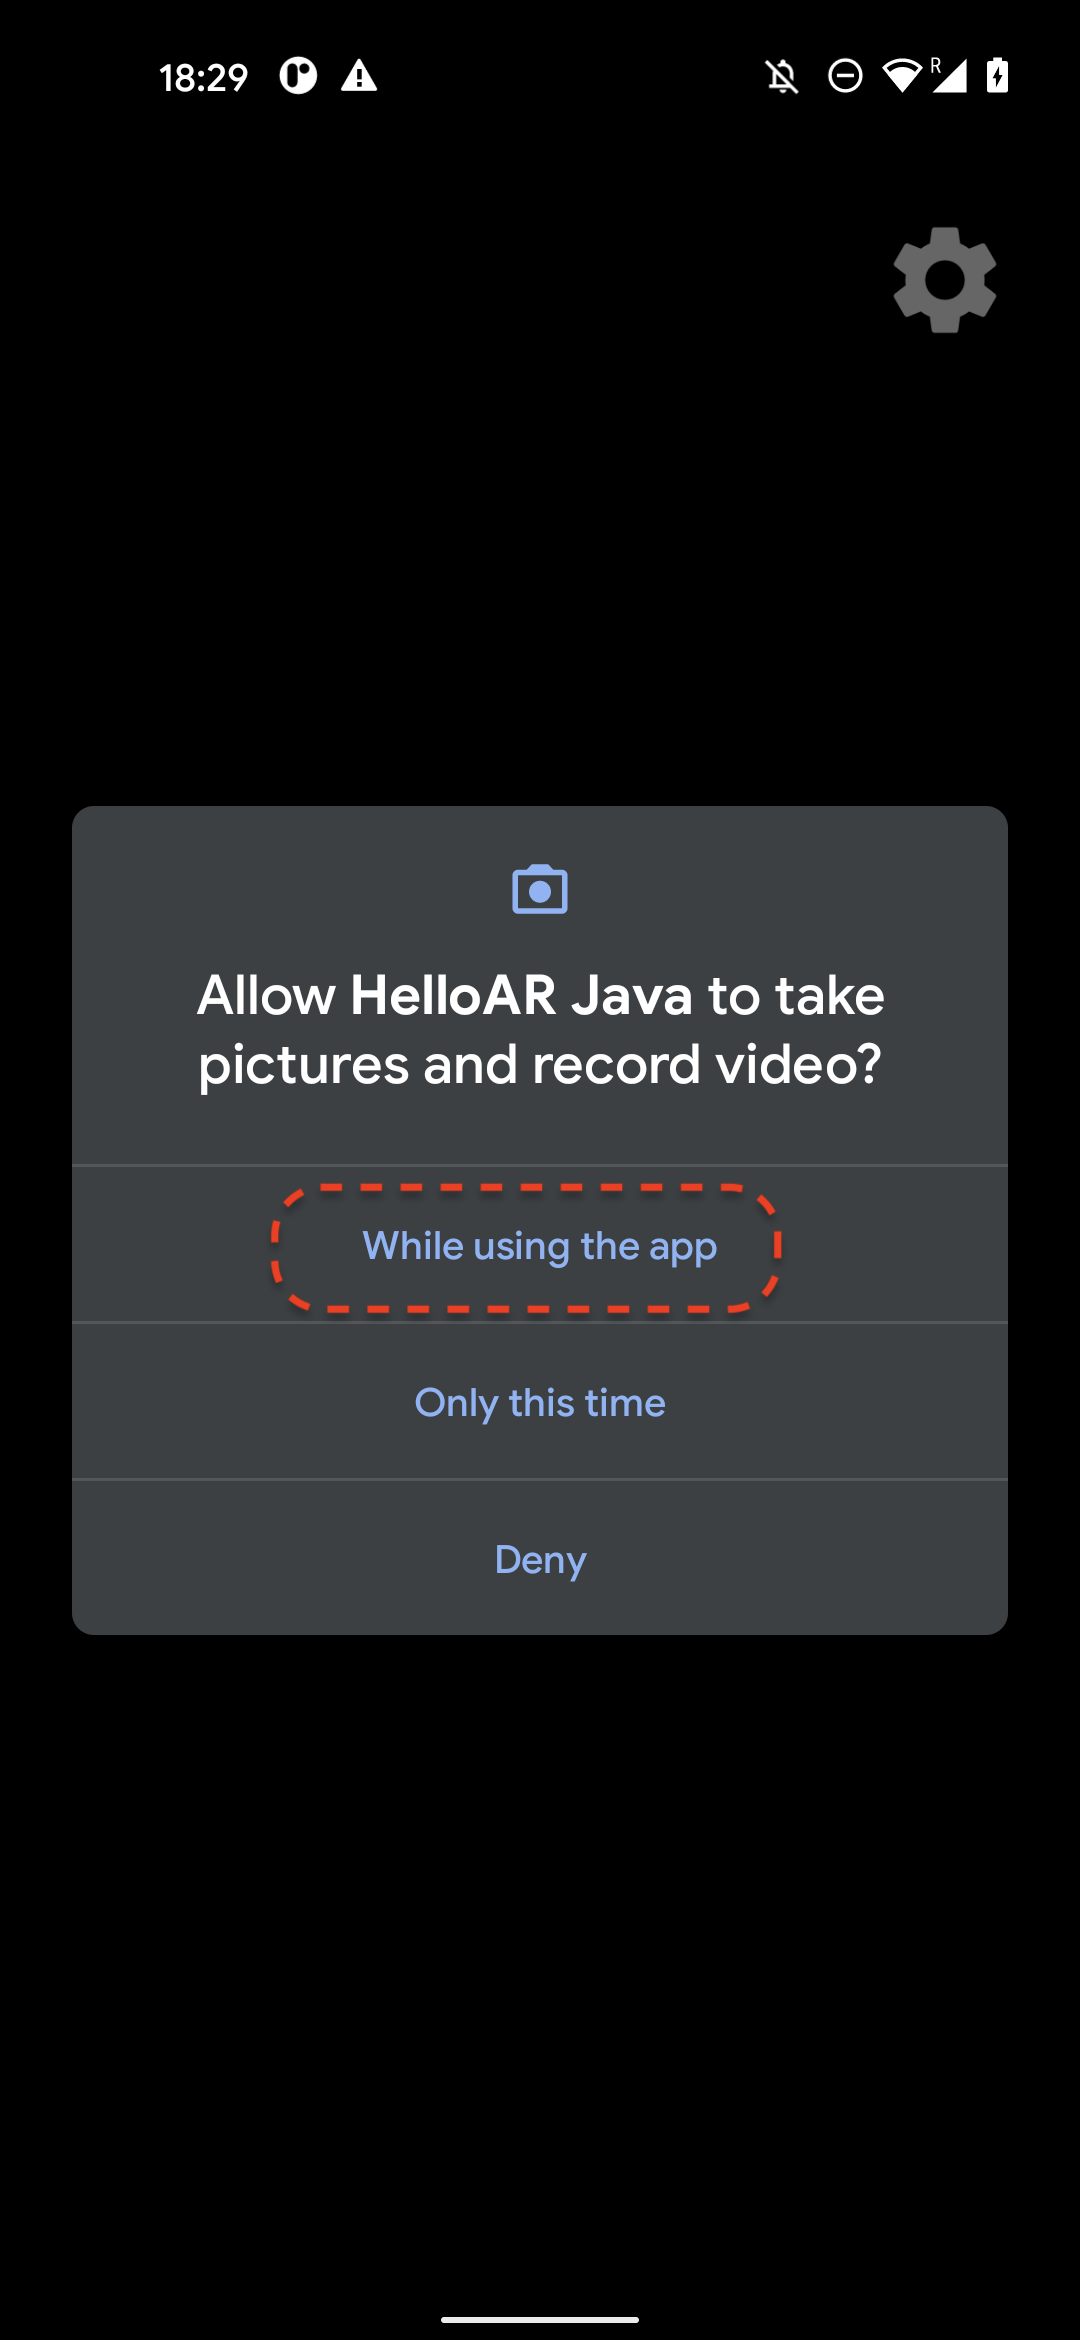
- 您会看到一条提示,要求您授予拍照和录制视频的权限。选择 While using this app(使用此应用时),向应用授予相机权限。然后,您就会在设备屏幕上看到自己的实际环境。
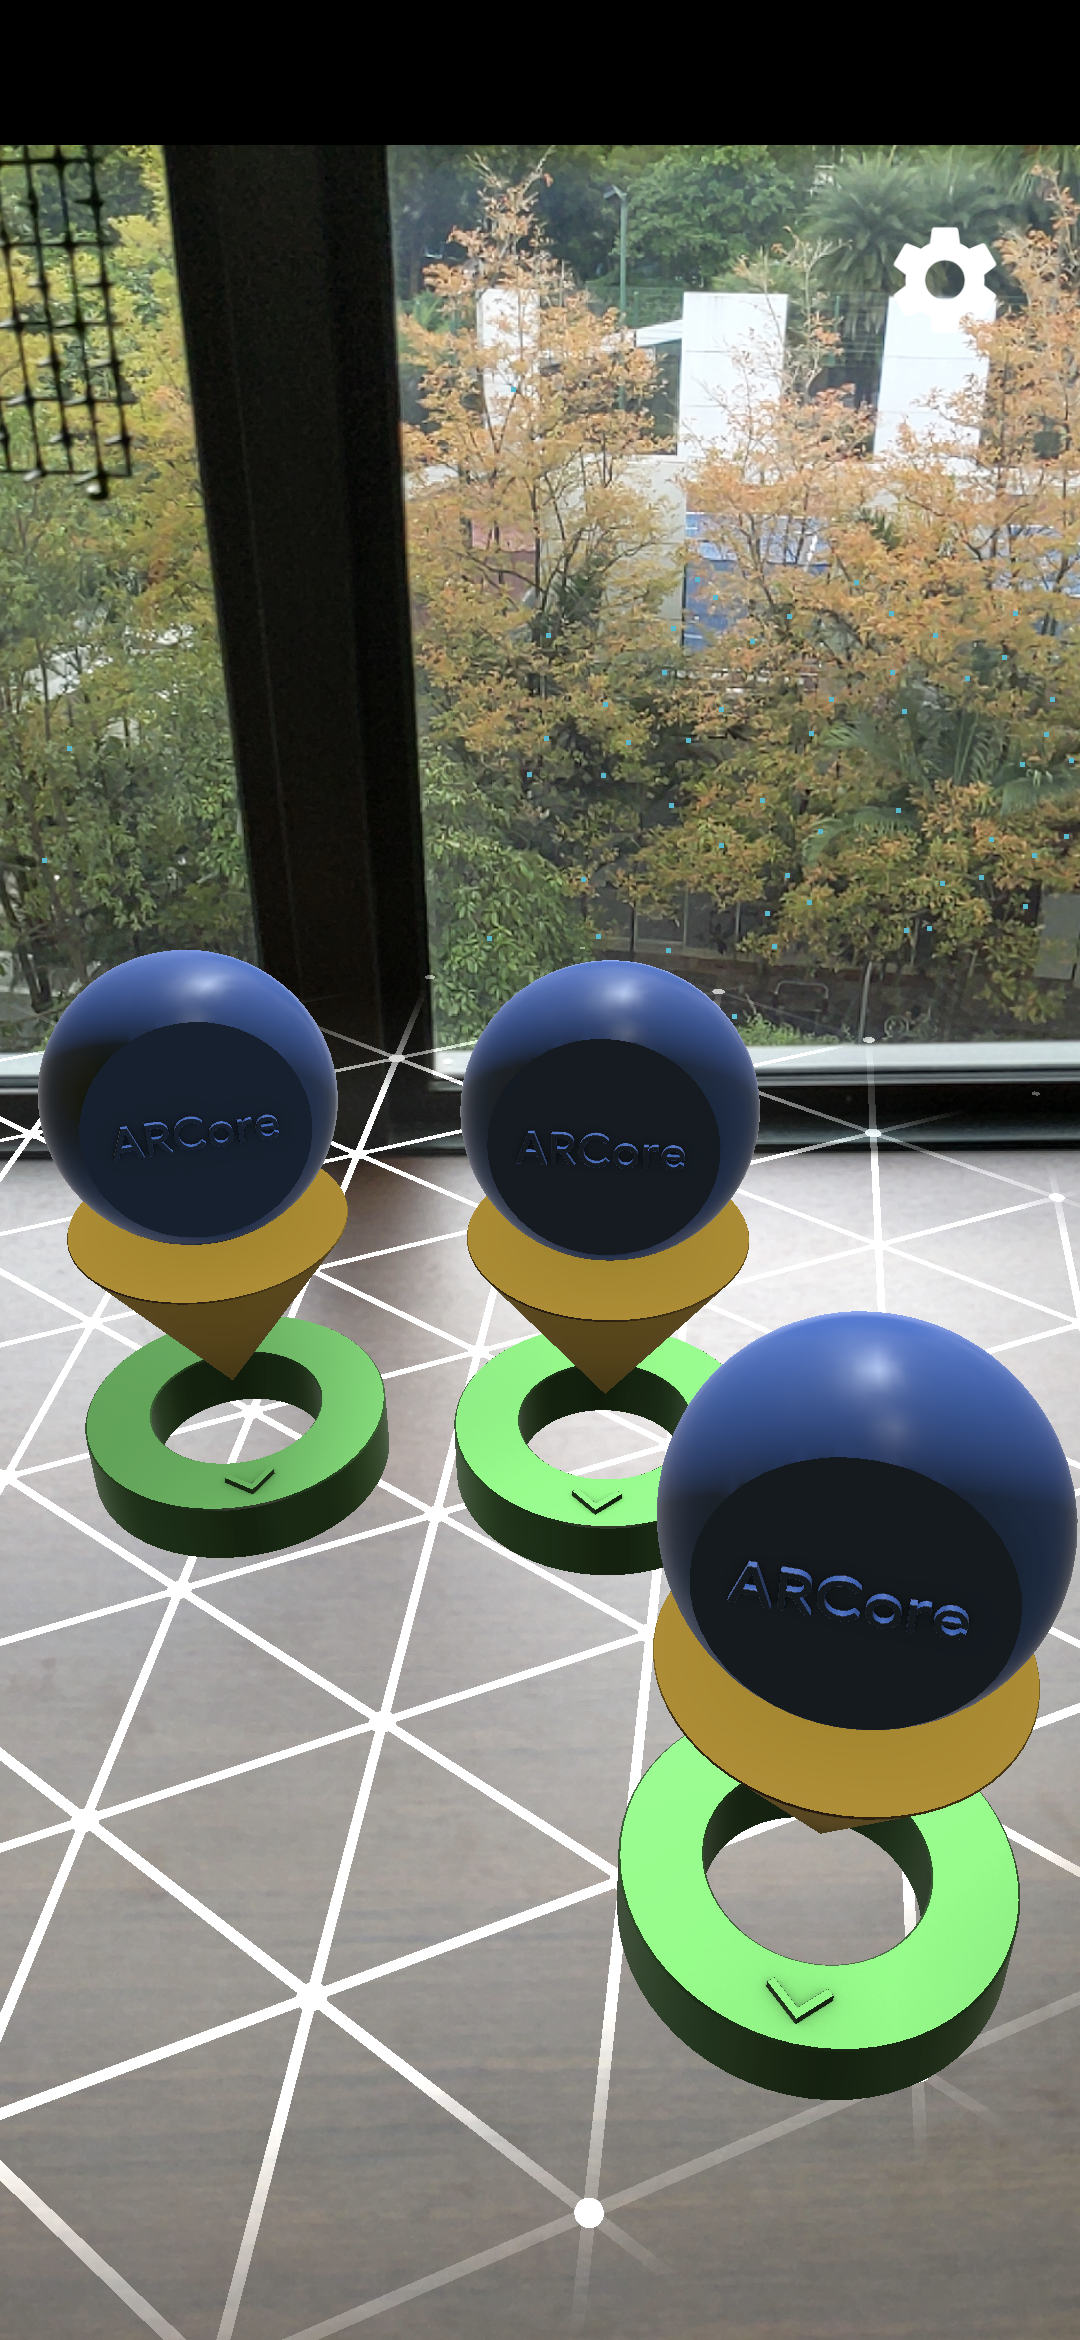
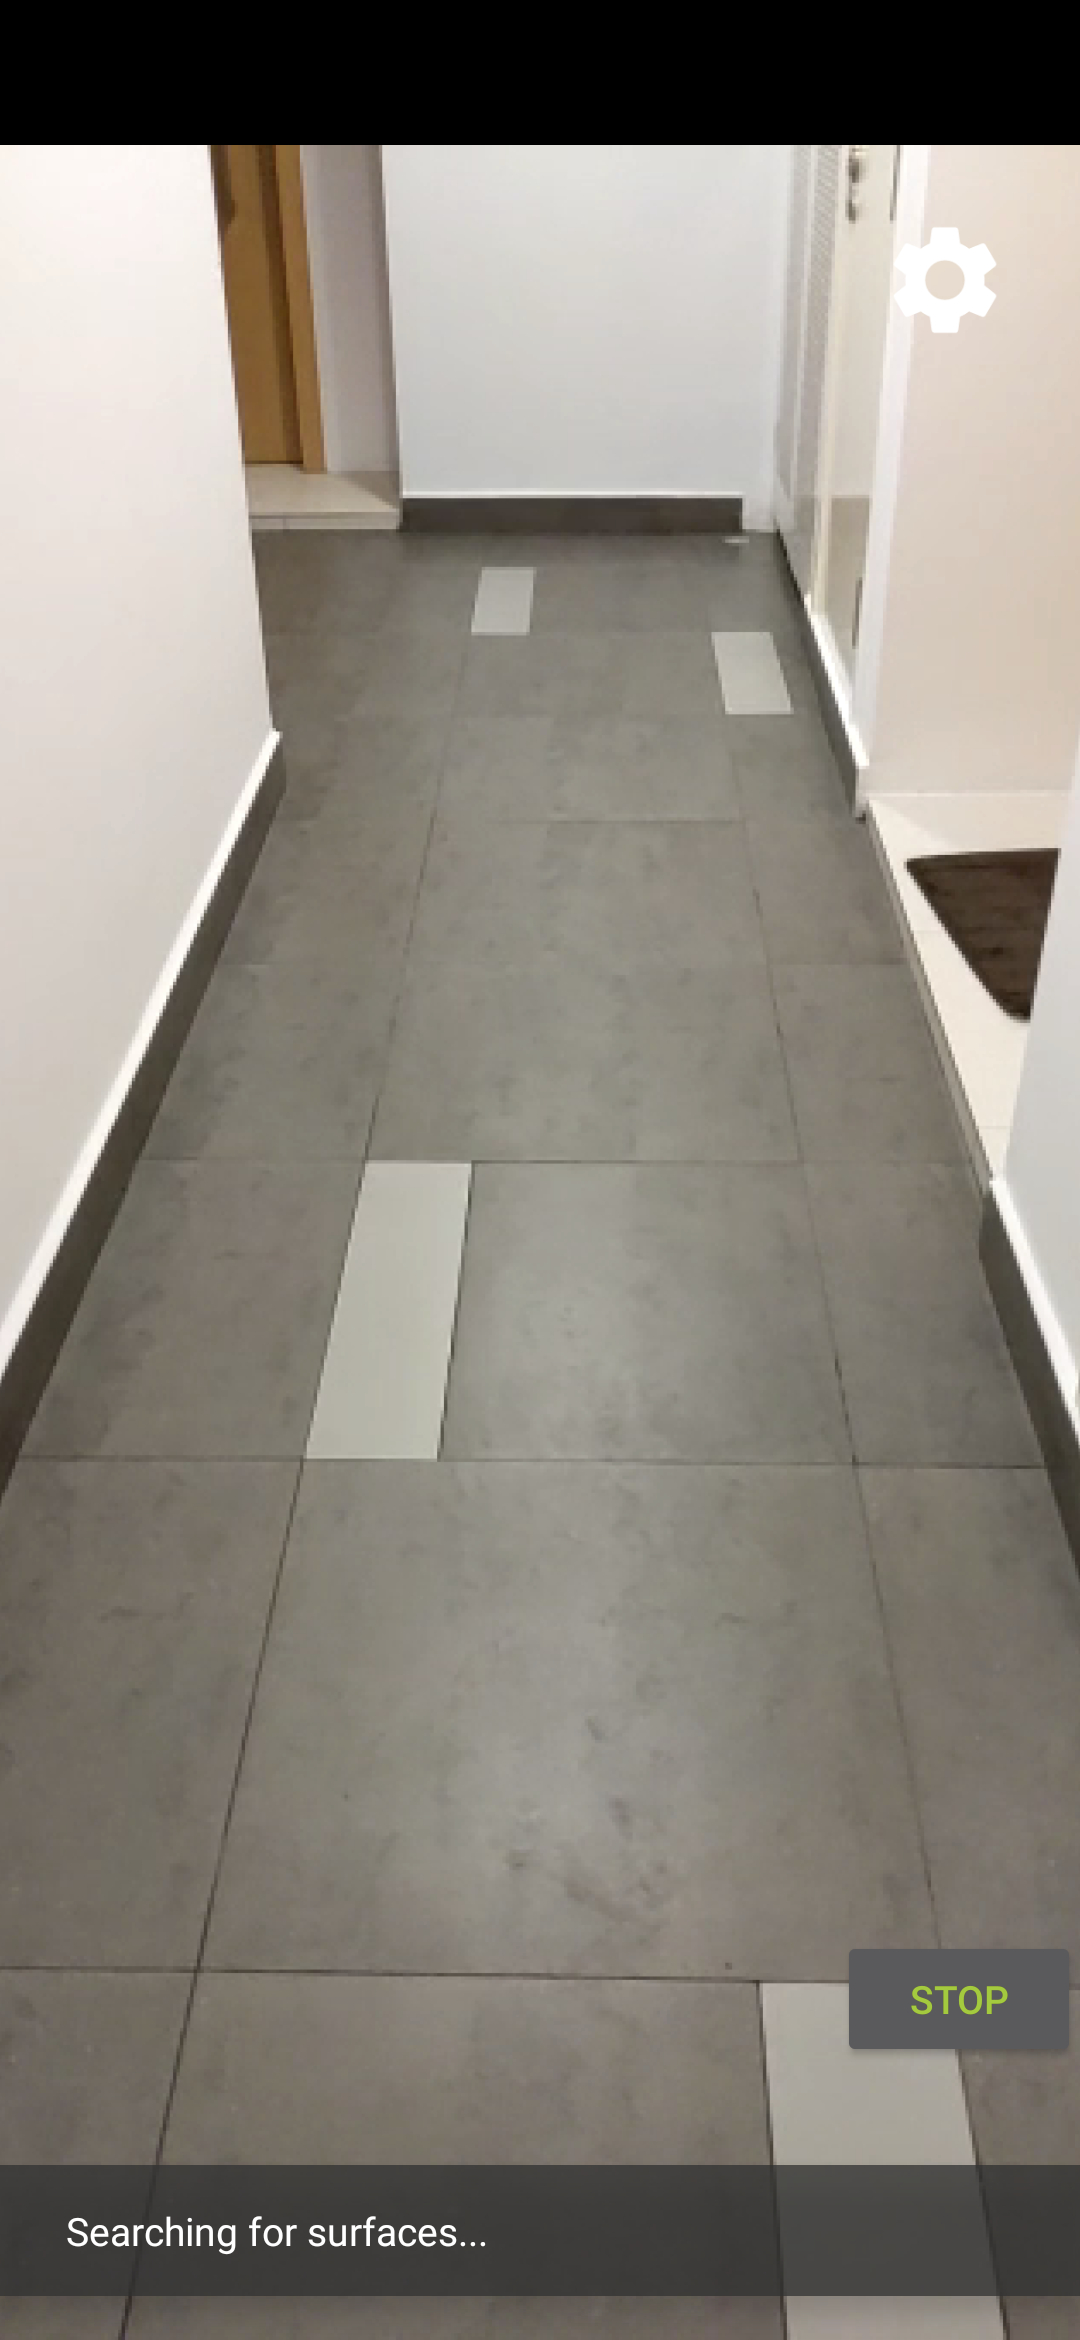
- 横向移动设备以扫描平面。
- 应用检测到平面时,会显示一个白色网格。点按该网格可在该平面上放置一个标记。
您在此步骤中执行的操作
- 设置 Hello AR Java 项目
- 在 ARCore 支持的设备上构建并运行示例应用
接下来,您会将 AR 现场录像录制到 MP4 文件中。
3. 将 ARCore 现场录像录制到 MP4 文件中
我们将在此步骤中添加录制功能。该功能包括以下方面:
- 一个用于开始或停止录制的按钮。
- 一些用于在设备上保存 MP4 文件的存储函数。
- 一些用于启动或停止 ARCore 现场录像录制的调用。
在界面上添加“录制”按钮
在实现录制之前,请在界面上添加一个按钮,以便用户告知 ARCore 何时开始或停止录制。
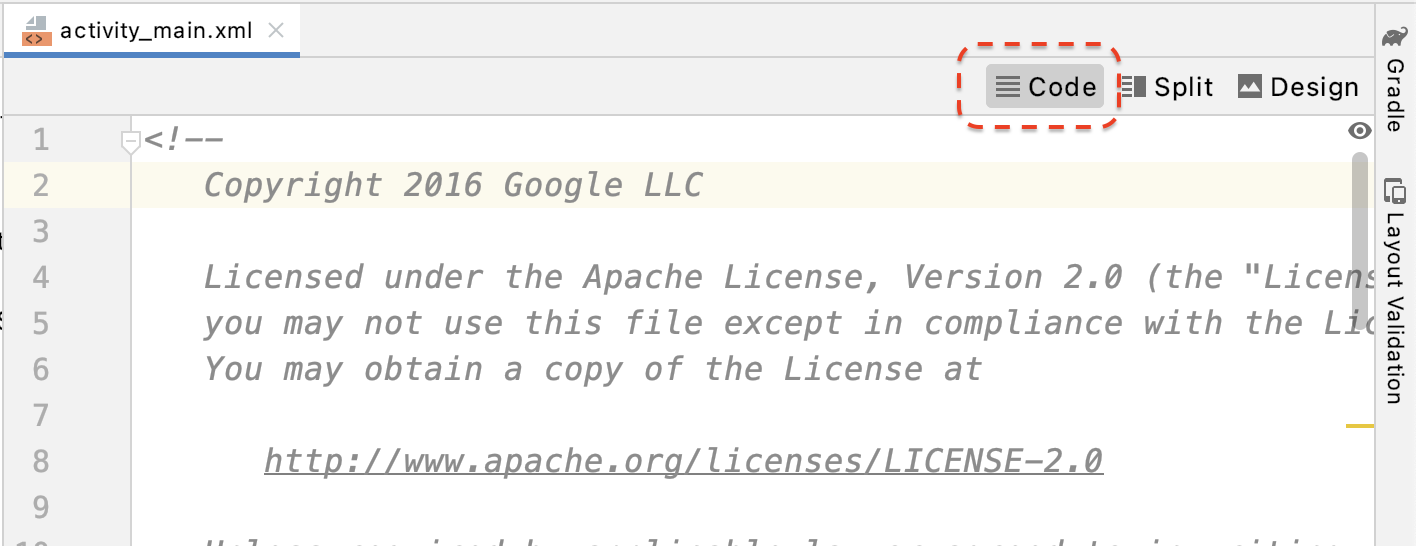
在“Project”(项目)面板中,打开 app/res/layout/activity_main.xml 文件。

默认情况下,在您打开 app/res/layout/activity_main.xml 文件后,Android Studio 将使用设计视图。点击标签页右上角的 Code(代码)按钮可切换到代码视图。
在 activity_main.xml 中,将以下代码添加到结束标记之前,以创建新的录制按钮并将其事件处理脚本设置为名为 onClickRecord() 的方法:
  <!--
    Add a new "Record" button with those attributes:
        text is "Record",
        onClick event handler is "onClickRecord",
        text color is "red".
  -->
  <Button
      android:id="@+id/record_button"
      android:layout_width="wrap_content"
      android:layout_height="wrap_content"
      android:layout_alignLeft="@id/surfaceview"
      android:layout_alignBottom="@id/surfaceview"
      android:layout_marginBottom="100dp"
      android:onClick="onClickRecord"
      android:text="Record"
      android:textColor="@android:color/holo_red_light" />
添加上述代码后,系统可能会暂时显示以下错误:Corresponding method handler 'public void onClickRecord(android.view.View)' not found"。这是正常现象。在接下来的几个步骤中,您将通过创建 onClickRecord() 函数来消除该错误。
根据状态更改按钮上的文本
录制按钮实际上会处理录制和停止这两项操作。当应用没有录制数据时,该按钮应显示“录制”一词。当应用正在录制数据时,该按钮应更改为显示“停止”一词。
为了向该按钮提供此功能,应用必须了解其当前状态。以下代码会创建一个名为 AppState 的新枚举以表示应用的工作状态,并通过一个名为 appState 的私有成员变量跟踪特定状态变化。将其添加到 HelloArActivity.java 中 HelloArActivity 类的开头。
  // Represents the app's working state.
  public enum AppState {
    Idle,
    Recording
  }

  // Tracks app's specific state changes.
  private AppState appState = AppState.Idle;
现在,您可以跟踪应用的内部状态,接下来请创建一个名为 updateRecordButton() 的函数,用于根据应用的当前状态更改按钮的文本。在 HelloArActivity.java 的 HelloArActivity 类中添加以下代码。
// Add imports to the beginning of the file.
import android.widget.Button;

  // Update the "Record" button based on app's internal state.
  private void updateRecordButton() {
    View buttonView = findViewById(R.id.record_button);
    Button button = (Button) buttonView;

    switch (appState) {
      case Idle:
        button.setText("Record");
        break;
      case Recording:
        button.setText("Stop");
        break;
    }
  }
接下来,创建 onClickRecord() 方法,用于检查应用的状态、将其更改为下一个状态,以及调用 updateRecordButton() 来更改按钮的界面。在 HelloArActivity.java 的 HelloArActivity 类中添加以下代码。
  // Handle the "Record" button click event.
  public void onClickRecord(View view) {
    Log.d(TAG, "onClickRecord");

    // Check the app's internal state and switch to the new state if needed.
    switch (appState) {
        // If the app is not recording, begin recording.
      case Idle: {
        boolean hasStarted = startRecording();
        Log.d(TAG, String.format("onClickRecord start: hasStarted %b", hasStarted));

        if (hasStarted)
          appState = AppState.Recording;

        break;
      }

      // If the app is recording, stop recording.
      case Recording: {
        boolean hasStopped = stopRecording();
        Log.d(TAG, String.format("onClickRecord stop: hasStopped %b", hasStopped));

        if (hasStopped)
          appState = AppState.Idle;

        break;
      }

      default:
        // Do nothing.
        break;
    }

    updateRecordButton();
  }
使应用开始录制
您只需执行两项操作即可在 ARCore 中开始录制:
- 在
RecordingConfig对象中指定录制文件 URI。 - 使用
RecordingConfig对象调用session.startRecording
其余代码只是样板代码:配置、日志记录以及检查正确性。
创建一个名为 startRecording() 的新函数,用于录制数据并将其保存到 MP4 文件 URI 中。在 HelloArActivity.java 的 HelloArActivity 类中添加以下代码。
// Add imports to the beginning of the file.
import android.net.Uri;
import com.google.ar.core.RecordingConfig;
import com.google.ar.core.RecordingStatus;
import com.google.ar.core.exceptions.RecordingFailedException;

  private boolean startRecording() {
    Uri mp4FileUri = createMp4File();
    if (mp4FileUri == null)
      return false;

    Log.d(TAG, "startRecording at: " + mp4FileUri);

    pauseARCoreSession();

    // Configure the ARCore session to start recording.
    RecordingConfig recordingConfig = new RecordingConfig(session)
        .setMp4DatasetUri(mp4FileUri)
        .setAutoStopOnPause(true);

    try {
      // Prepare the session for recording, but do not start recording yet.
      session.startRecording(recordingConfig);
    } catch (RecordingFailedException e) {
      Log.e(TAG, "startRecording - Failed to prepare to start recording", e);
      return false;
    }

    boolean canResume = resumeARCoreSession();
    if (!canResume)
      return false;

    // Correctness checking: check the ARCore session's RecordingState.
    RecordingStatus recordingStatus = session.getRecordingStatus();
    Log.d(TAG, String.format("startRecording - recordingStatus %s", recordingStatus));
    return recordingStatus == RecordingStatus.OK;
  }
如需安全地暂停和继续 ARCore 现场录像,请在 HelloArActivity.java 中创建 pauseARCoreSession() 和 resumeARCoreSession()。
  private void pauseARCoreSession() {
    // Pause the GLSurfaceView so that it doesn't update the ARCore session.
    // Pause the ARCore session so that we can update its configuration.
    // If the GLSurfaceView is not paused,
    //   onDrawFrame() will try to update the ARCore session
    //   while it's paused, resulting in a crash.
    surfaceView.onPause();
    session.pause();
  }

  private boolean resumeARCoreSession() {
    // We must resume the ARCore session before the GLSurfaceView.
    // Otherwise, the GLSurfaceView will try to update the ARCore session.
    try {
      session.resume();
    } catch (CameraNotAvailableException e) {
      Log.e(TAG, "CameraNotAvailableException in resumeARCoreSession", e);
      return false;
    }

    surfaceView.onResume();
    return true;
  }
使应用停止录制
在 HelloArActivity.java 中创建一个名为 stopRecording() 的函数,以阻止您的应用录制新数据。此函数会调用 session.stopRecording();如果应用无法停止录制,则此函数会向控制台日志发送一项错误。
  private boolean stopRecording() {
    try {
      session.stopRecording();
    } catch (RecordingFailedException e) {
      Log.e(TAG, "stopRecording - Failed to stop recording", e);
      return false;
    }

    // Correctness checking: check if the session stopped recording.
    return session.getRecordingStatus() == RecordingStatus.NONE;
  }
使用 Android 11 分区存储设计文件存储
本 Codelab 中的存储相关函数是按照新的 Android 11 分区存储要求设计的。
在 app/build.gradle 文件中,针对 Android 11 进行一些细微更改。在 Android Studio 的“Project”(项目)面板中,此文件位于与应用模块关联的 Gradle Scripts(Gradle 脚本)节点下。
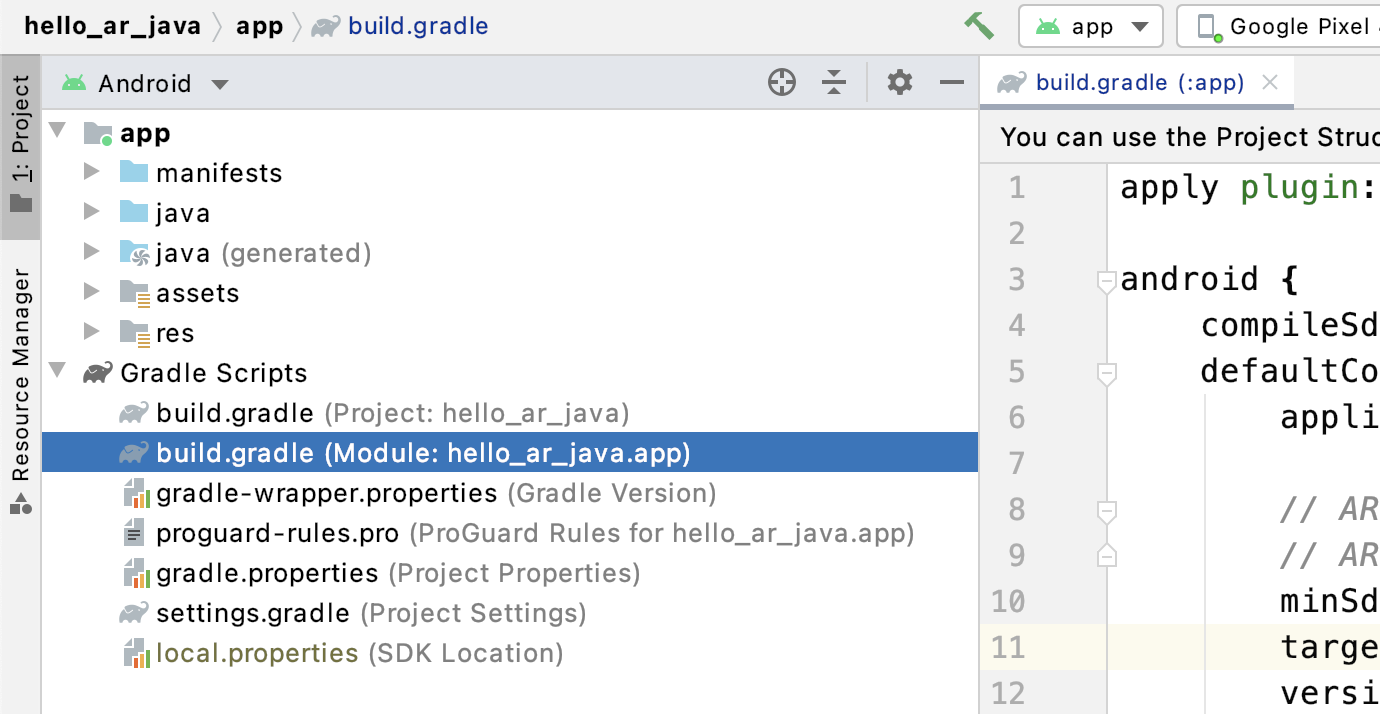
将 compileSdkVersion 和 targetSdkVersion 更改为 30。
    compileSdkVersion 30
    defaultConfig {
      targetSdkVersion 30
    }
如需录制,请使用 Android MediaStore API 在共享的 Movie 目录中创建 MP4 文件。
在 HelloArActivity.java 中创建一个名为 createMp4File() 的函数:
// Add imports to the beginning of the file.
import java.text.SimpleDateFormat;
import android.content.ContentResolver;
import android.net.Uri;
import android.os.Build;
import android.os.Environment;
import android.provider.MediaStore;
import android.content.ContentValues;
import java.io.File;
import android.content.CursorLoader;
import android.database.Cursor;
import java.util.Date;

  private final String MP4_VIDEO_MIME_TYPE = "video/mp4";

  private Uri createMp4File() {
    SimpleDateFormat dateFormat = new SimpleDateFormat("yyyyMMdd_HHmmss");
    String mp4FileName = "arcore-" + dateFormat.format(new Date()) + ".mp4";

    ContentResolver resolver = this.getContentResolver();

    Uri videoCollection = null;
    if (Build.VERSION.SDK_INT >= Build.VERSION_CODES.Q) {
      videoCollection = MediaStore.Video.Media.getContentUri(
          MediaStore.VOLUME_EXTERNAL_PRIMARY);
    } else {
      videoCollection = MediaStore.Video.Media.EXTERNAL_CONTENT_URI;
    }

    // Create a new Media file record.
    ContentValues newMp4FileDetails = new ContentValues();
    newMp4FileDetails.put(MediaStore.Video.Media.DISPLAY_NAME, mp4FileName);
    newMp4FileDetails.put(MediaStore.Video.Media.MIME_TYPE, MP4_VIDEO_MIME_TYPE);

    if (Build.VERSION.SDK_INT >= Build.VERSION_CODES.Q) {
      // The Relative_Path column is only available since API Level 29.
      newMp4FileDetails.put(MediaStore.Video.Media.RELATIVE_PATH, Environment.DIRECTORY_MOVIES);
    } else {
      // Use the Data column to set path for API Level <= 28.
      File mp4FileDir = Environment.getExternalStoragePublicDirectory(Environment.DIRECTORY_MOVIES);
      String absoluteMp4FilePath = new File(mp4FileDir, mp4FileName).getAbsolutePath();
      newMp4FileDetails.put(MediaStore.Video.Media.DATA, absoluteMp4FilePath);
    }

    Uri newMp4FileUri = resolver.insert(videoCollection, newMp4FileDetails);

    // Ensure that this file exists and can be written.
    if (newMp4FileUri == null) {
      Log.e(TAG, String.format("Failed to insert Video entity in MediaStore. API Level = %d", Build.VERSION.SDK_INT));
      return null;
    }

    // This call ensures the file exist before we pass it to the ARCore API.
    if (!testFileWriteAccess(newMp4FileUri)) {
      return null;
    }

    Log.d(TAG, String.format("createMp4File = %s, API Level = %d", newMp4FileUri, Build.VERSION.SDK_INT));

    return newMp4FileUri;
  }

  // Test if the file represented by the content Uri can be open with write access.
  private boolean testFileWriteAccess(Uri contentUri) {
    try (java.io.OutputStream mp4File = this.getContentResolver().openOutputStream(contentUri)) {
      Log.d(TAG, String.format("Success in testFileWriteAccess %s", contentUri.toString()));
      return true;
    } catch (java.io.FileNotFoundException e) {
      Log.e(TAG, String.format("FileNotFoundException in testFileWriteAccess %s", contentUri.toString()), e);
    } catch (java.io.IOException e) {
      Log.e(TAG, String.format("IOException in testFileWriteAccess %s", contentUri.toString()), e);
    }

    return false;
  }
处理存储权限
如果您使用的是 Android 11 设备,则可以开始测试代码。如需支持 Android 10 或更低版本的设备,您需要向应用授予将数据保存到目标设备文件系统的存储权限。
在 AndroidManifest.xml 中,声明应用需要 Android 11(API 级别 30)之前的存储空间读写权限。
  <!-- Inside the <manifest> tag, below the existing Camera permission -->
  <uses-permission android:name="android.permission.WRITE_EXTERNAL_STORAGE"
      android:maxSdkVersion="29" />

  <uses-permission android:name="android.permission.READ_EXTERNAL_STORAGE"
      android:maxSdkVersion="29" />
在 HelloArActivity.java 中添加一个名为 checkAndRequestStoragePermission() 的辅助函数,以在运行时请求 WRITE_EXTERNAL_STORAGE 权限。
// Add imports to the beginning of the file.
import android.Manifest;
import android.content.pm.PackageManager;
import androidx.core.app.ActivityCompat;
import androidx.core.content.ContextCompat;

  private final int REQUEST_WRITE_EXTERNAL_STORAGE = 1;
  public boolean checkAndRequestStoragePermission() {
    if (ContextCompat.checkSelfPermission(this, Manifest.permission.WRITE_EXTERNAL_STORAGE)
        != PackageManager.PERMISSION_GRANTED) {
      ActivityCompat.requestPermissions(this,
          new String[]{Manifest.permission.WRITE_EXTERNAL_STORAGE},
          REQUEST_WRITE_EXTERNAL_STORAGE);
      return false;
    }

    return true;
  }
如果您使用的是 API 级别 29 或更低级别,请在 createMp4File() 顶部添加一项存储权限检查;如果应用没有正确的权限,请尽早退出该函数。API 级别 30 (Android 11) 不需要存储权限即可访问 MediaStore 中的文件。
  private Uri createMp4File() {
    // Since we use legacy external storage for Android 10,
    // we still need to request for storage permission on Android 10.
    if (Build.VERSION.SDK_INT <= Build.VERSION_CODES.Q) {
      if (!checkAndRequestStoragePermission()) {
        Log.i(TAG, String.format(
            "Didn't createMp4File. No storage permission, API Level = %d",
            Build.VERSION.SDK_INT));
        return null;
      }
    }
    // ... omitted code ...
  }
通过目标设备录制
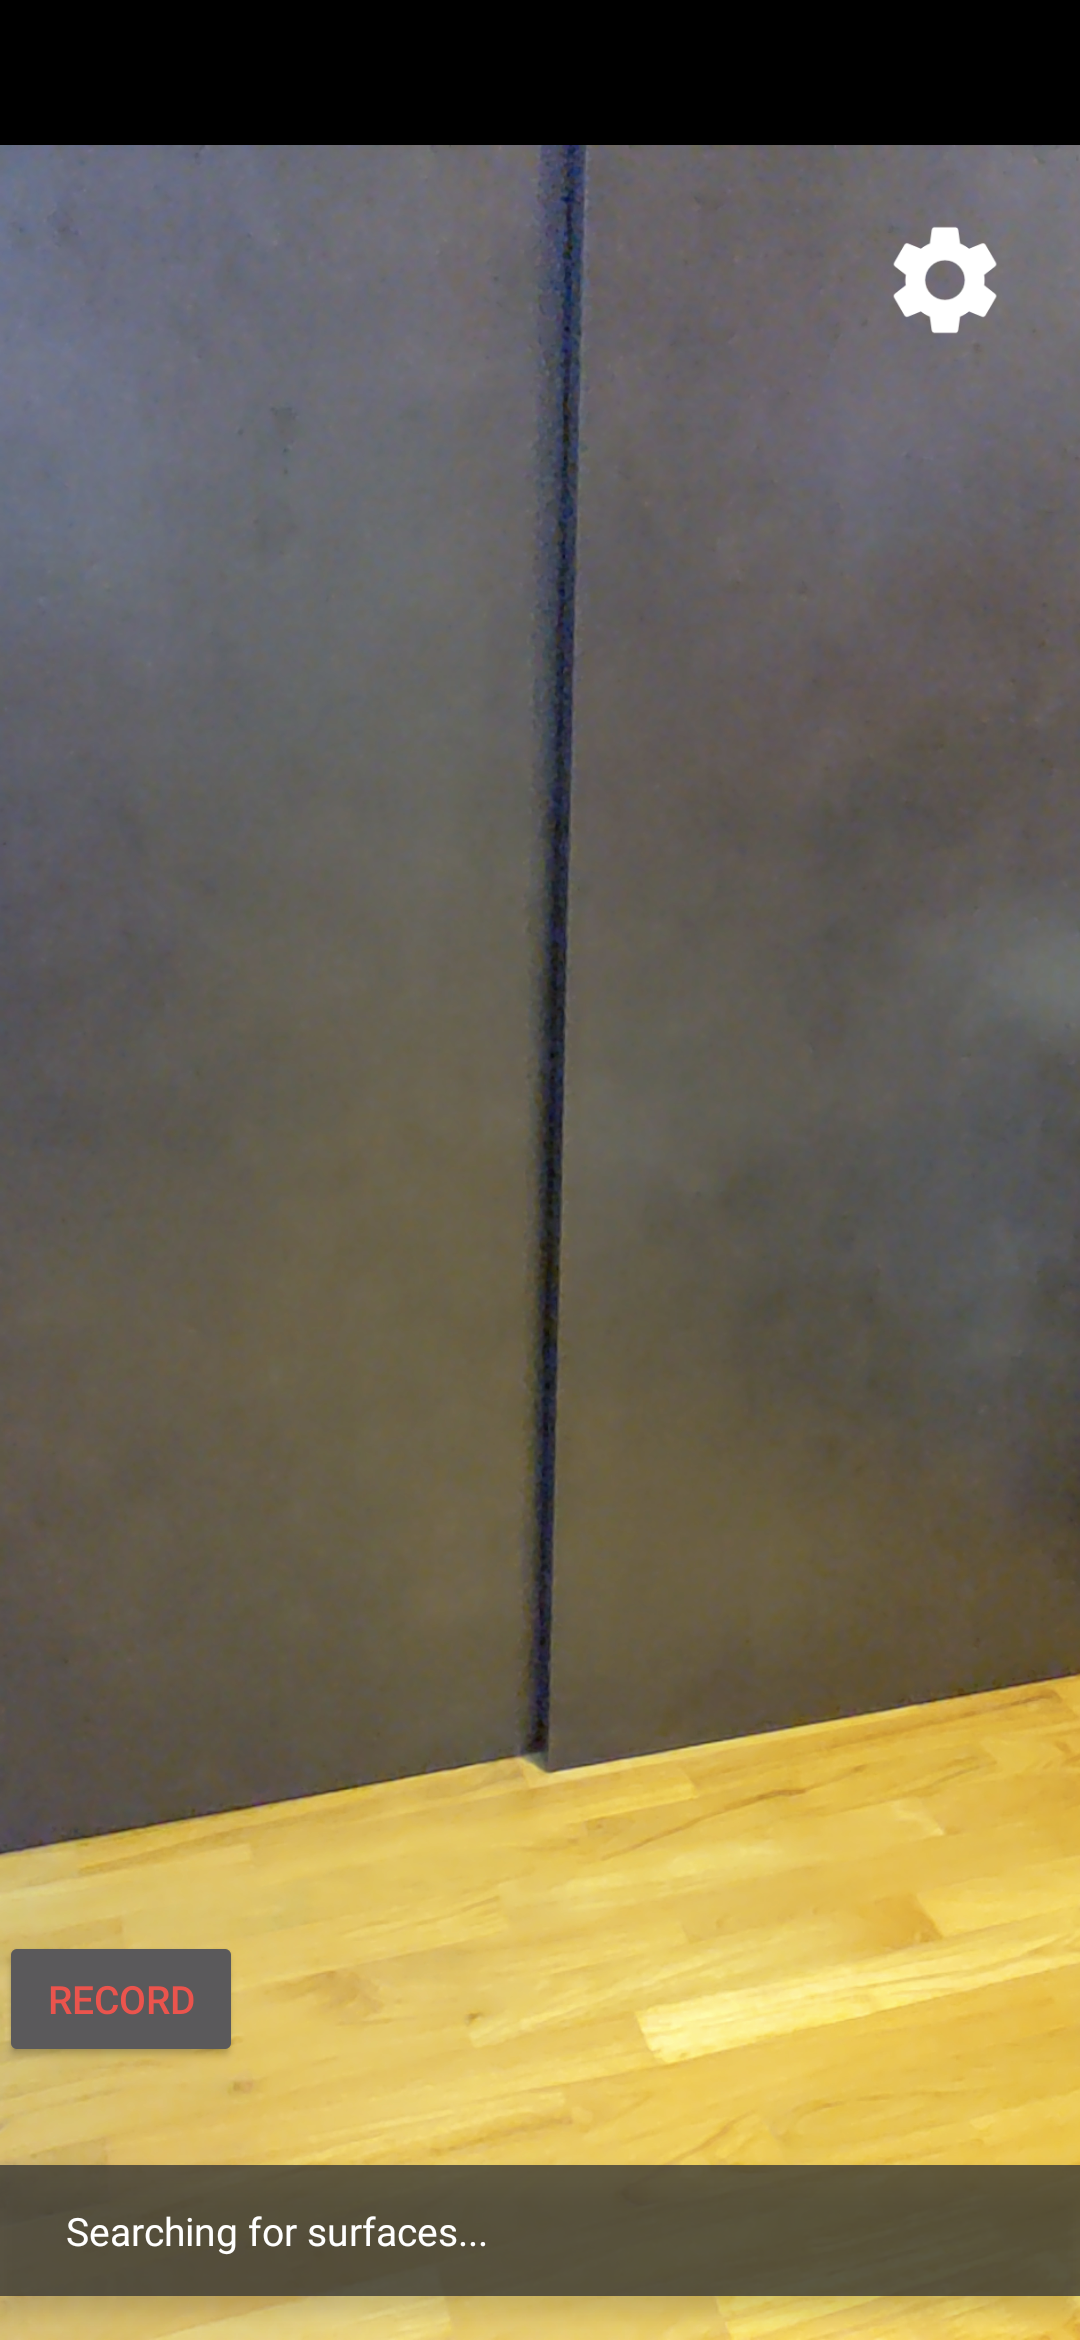
现在该查看您到目前为止所构建的内容了。将移动设备连接到开发机器,然后点击 Android Studio 中的 Run(运行)。
您应该会在屏幕左下角看到一个红色的录制按钮。点按该按钮后,该按钮上的文本会更改为停止。移动设备以录制现场录像,然后在您希望结束录制时点击停止按钮。此操作应该会在设备的外部存储空间中保存一个名为 arcore-xxxxxx_xxxxxx.mp4 的新文件。
现在,设备的外部存储空间中应该会有一个新的 arcore-xxxxxx_xxxxxx.mp4 文件。在 Pixel 5 设备上,相应的路径为 /storage/emulated/0/Movies/。开始录制后,您可以在“Logcat”窗口中找到该路径。
com.google.ar.core.examples.java.helloar D/HelloArActivity: startRecording at:/storage/emulated/0/Movies/arcore-xxxxxxxx_xxxxxx.mp4
com.google.ar.core.examples.java.helloar D/HelloArActivity: startRecording - RecordingStatus OK
查看录制内容
您可以使用文件系统应用(例如 Google 文件极客)查看录制内容或将其复制到开发机器。以下是用于从 Android 设备列出和提取文件的两条 adb 命令:
adb shell ls '$EXTERNAL_STORAGE/Movies/*',用于显示设备外部存储空间的 Movies 目录中的文件adb pull /absolute_path_from_previous_adb_shell_ls/arcore-xxxxxxxx_xxxxxx.mp4,用于将文件从设备复制到开发机器
下面是(在 macOS 中)使用这两条命令后的输出示例:
$ adb shell ls '$EXTERNAL_STORAGE/Movies/*'
/sdcard/Movies/arcore-xxxxxxxx_xxxxxx.mp4

$ adb pull /sdcard/Movies/arcore-xxxxxxxx_xxxxxx.mp4
/sdcard/Movies/arcore-xxxxxxxx_xxxxxx.mp4: ... pulled
您在此步骤中执行的操作
- 添加了一个用于开始和停止录制的按钮
- 实现了一些用于开始和停止录制的函数
- 在设备上测试了应用
- 将录制的 MP4 文件复制到了您的机器并验证了该文件
接下来,您将播放 MP4 文件中的 AR 现场录像。
4. 播放 MP4 文件中的 ARCore 现场录像
现在,您有了一个录制按钮和一些包含现场录像的 MP4 文件。接下来,您将使用 ARCore Playback API 播放这些现场录像。
在界面上添加“播放”按钮
在实现播放之前,请在界面上添加一个按钮,以便用户告知 ARCore 何时应该开始和停止播放现场录像。
在 Project(项目)面板中,打开 app/res/layout/activity_main.xml 文件。
在 activity_main.xml 中,将以下代码添加到结束标记之前,以创建新的播放按钮并将其事件处理脚本设置为名为 onClickPlayback() 的方法。此按钮将与录制按钮类似并显示在屏幕右侧。
  <!--
    Add a new "Playback" button with those attributes:
        text is "Playback",
        onClick event handler is "onClickPlayback",
        text color is "green".
  -->
  <Button
      android:id="@+id/playback_button"
      android:layout_width="wrap_content"
      android:layout_height="wrap_content"
      android:layout_alignEnd="@id/surfaceview"
      android:layout_alignBottom="@id/surfaceview"
      android:layout_marginBottom="100dp"
      android:onClick="onClickPlayback"
      android:text="Playback"
      android:textColor="@android:color/holo_green_light" />
在播放过程中更新按钮
现在,应用有了一个名为 Playingback 的新状态。请更新 AppState 枚举以及所有将 appState 作为参数来处理此状态的现有函数。
在 HelloArActivity.java 中,将 Playingback 添加到 AppState 枚举:
  public enum AppState {
    Idle,
    Recording,
    Playingback // New enum value.
  }
在播放过程中,如果录制按钮仍显示在屏幕上,则用户可能会意外点击该按钮。为避免出现这种情况,请在播放过程中隐藏录制按钮。这样一来,您就无需在 onClickRecord() 中处理 Playingback 状态。
修改 HelloArActivity.java 中的 updateRecordButton() 函数,以便在应用处于 Playingback 状态时隐藏录制按钮。
  // Update the "Record" button based on app's internal state.
  private void updateRecordButton() {
    View buttonView = findViewById(R.id.record_button);
    Button button = (Button)buttonView;

    switch (appState) {

      // The app is neither recording nor playing back. The "Record" button is visible.
      case Idle:
        button.setText("Record");
        button.setVisibility(View.VISIBLE);
        break;

      // While recording, the "Record" button is visible and says "Stop".
      case Recording:
        button.setText("Stop");
        button.setVisibility(View.VISIBLE);
        break;

      // During playback, the "Record" button is not visible.
      case Playingback:
        button.setVisibility(View.INVISIBLE);
        break;
    }
  }
类似地,在用户录制现场录像时隐藏播放按钮,并在用户主动播放现场录像时将按钮的文本更改为“停止”。这样一来,用户不必等待播放过程全部结束即可停止播放。
在 HelloArActivity.java 中添加一个 updatePlaybackButton() 函数:
  // Update the "Playback" button based on app's internal state.
  private void updatePlaybackButton() {
    View buttonView = findViewById(R.id.playback_button);
    Button button = (Button)buttonView;

    switch (appState) {

      // The app is neither recording nor playing back. The "Playback" button is visible.
      case Idle:
        button.setText("Playback");
        button.setVisibility(View.VISIBLE);
        break;

      // While playing back, the "Playback" button is visible and says "Stop".
      case Playingback:
        button.setText("Stop");
        button.setVisibility(View.VISIBLE);
        break;

      // During recording, the "Playback" button is not visible.
      case Recording:
        button.setVisibility(View.INVISIBLE);
        break;
    }
  }
最后,更新 onClickRecord() 以调用 updatePlaybackButton()。将以下行添加到 HelloArActivity.java 中:
  public void onClickRecord(View view) {
    // ... omitted code ...
    updatePlaybackButton(); // Add this line to the end of the function.
  }
使用“播放”按钮选择文件
点按后,播放按钮应允许用户选择要播放的文件。在 Android 上,文件选择操作是在另一个 Activity 的系统文件选择器中处理的。这是通过存储访问框架 (SAF) 实现的。用户选择文件后,应用会收到一个名为 onActivityResult() 的回调。您将在此回调函数内开始实际播放。
在 HelloArActivity.java 中,创建一个 onClickPlayback() 函数以执行文件选择操作以及停止播放。
  // Handle the click event of the "Playback" button.
  public void onClickPlayback(View view) {
    Log.d(TAG, "onClickPlayback");

    switch (appState) {

      // If the app is not playing back, open the file picker.
      case Idle: {
        boolean hasStarted = selectFileToPlayback();
        Log.d(TAG, String.format("onClickPlayback start: selectFileToPlayback %b", hasStarted));
        break;
      }

      // If the app is playing back, stop playing back.
      case Playingback: {
        boolean hasStopped = stopPlayingback();
        Log.d(TAG, String.format("onClickPlayback stop: hasStopped %b", hasStopped));
        break;
      }

      default:
        // Recording - do nothing.
        break;
    }

    // Update the UI for the "Record" and "Playback" buttons.
    updateRecordButton();
    updatePlaybackButton();
  }
在 HelloArActivity.java 中,创建一个 selectFileToPlayback() 函数,用于从设备中选择文件。如需从 Android 文件系统中选择文件,请使用 ACTION_OPEN_DOCUMENT Intent。
// Add imports to the beginning of the file.
import android.content.Intent;
import android.provider.DocumentsContract;

  private boolean selectFileToPlayback() {
    // Start file selection from Movies directory.
    // Android 10 and above requires VOLUME_EXTERNAL_PRIMARY to write to MediaStore.
    Uri videoCollection;
    if (Build.VERSION.SDK_INT >= Build.VERSION_CODES.Q) {
      videoCollection = MediaStore.Video.Media.getContentUri(
          MediaStore.VOLUME_EXTERNAL_PRIMARY);
    } else {
      videoCollection = MediaStore.Video.Media.EXTERNAL_CONTENT_URI;
    }

    // Create an Intent to select a file.
    Intent intent = new Intent(Intent.ACTION_OPEN_DOCUMENT);

    // Add file filters such as the MIME type, the default directory and the file category.
    intent.setType(MP4_VIDEO_MIME_TYPE); // Only select *.mp4 files
    intent.putExtra(DocumentsContract.EXTRA_INITIAL_URI, videoCollection); // Set default directory
    intent.addCategory(Intent.CATEGORY_OPENABLE); // Must be files that can be opened

    this.startActivityForResult(intent, REQUEST_MP4_SELECTOR);

    return true;
  }
REQUEST_MP4_SELECTOR 是一个用于标识此请求的常量。您可以在 HelloArActivity.java 的 HelloArActivity 中使用任何占位值来定义它:
private int REQUEST_MP4_SELECTOR = 1;
替换 HelloArActivity.java 中的 onActivityResult() 函数,以处理来自文件选择器的回调。
  // Begin playback once the user has selected the file.
  @Override
  protected void onActivityResult(int requestCode, int resultCode, Intent data) {
    // Check request status. Log an error if the selection fails.
    if (resultCode != android.app.Activity.RESULT_OK || requestCode != REQUEST_MP4_SELECTOR) {
      Log.e(TAG, "onActivityResult select file failed");
      return;
    }

    Uri mp4FileUri = data.getData();
    Log.d(TAG, String.format("onActivityResult result is %s", mp4FileUri));

    // Begin playback.
    startPlayingback(mp4FileUri);
  }
使应用开始播放
ARCore 现场录像需要三个用于播放 MP4 文件的 API 调用:
session.pause()session.setPlaybackDataset()session.resume()
在 HelloArActivity.java 中,创建 startPlayingback() 函数。
// Add imports to the beginning of the file.
import com.google.ar.core.PlaybackStatus;
import com.google.ar.core.exceptions.PlaybackFailedException;

  private boolean startPlayingback(Uri mp4FileUri) {
    if (mp4FileUri == null)
      return false;

    Log.d(TAG, "startPlayingback at:" + mp4FileUri);

    pauseARCoreSession();

    try {
      session.setPlaybackDatasetUri(mp4FileUri);
    } catch (PlaybackFailedException e) {
      Log.e(TAG, "startPlayingback - setPlaybackDataset failed", e);
    }

    // The session's camera texture name becomes invalid when the
    // ARCore session is set to play back.
    // Workaround: Reset the Texture to start Playback
    // so it doesn't crashes with AR_ERROR_TEXTURE_NOT_SET.
    hasSetTextureNames = false;

    boolean canResume = resumeARCoreSession();
    if (!canResume)
      return false;

    PlaybackStatus playbackStatus = session.getPlaybackStatus();
    Log.d(TAG, String.format("startPlayingback - playbackStatus %s", playbackStatus));

    if (playbackStatus != PlaybackStatus.OK) { // Correctness check
      return false;
    }

    appState = AppState.Playingback;
    updateRecordButton();
    updatePlaybackButton();

    return true;
  }
使应用停止播放
在 HelloArActivity.java 中创建一个名为 stopPlayingback() 的函数,以便在以下操作以后处理应用状态变化:
- 用户停止播放 MP4 文件
- MP4 文件播放过程全部结束
如果用户停止播放,则应用应恢复到用户首次启动应用时所处的状态。
  // Stop the current playback, and restore app status to Idle.
  private boolean stopPlayingback() {
    // Correctness check, only stop playing back when the app is playing back.
    if (appState != AppState.Playingback)
      return false;

    pauseARCoreSession();

    // Close the current session and create a new session.
    session.close();
    try {
      session = new Session(this);
    } catch (UnavailableArcoreNotInstalledException
        |UnavailableApkTooOldException
        |UnavailableSdkTooOldException
        |UnavailableDeviceNotCompatibleException e) {
      Log.e(TAG, "Error in return to Idle state. Cannot create new ARCore session", e);
      return false;
    }
    configureSession();

    boolean canResume = resumeARCoreSession();
    if (!canResume)
      return false;

    // A new session will not have a camera texture name.
    // Manually set hasSetTextureNames to false to trigger a reset.
    hasSetTextureNames = false;

    // Reset appState to Idle, and update the "Record" and "Playback" buttons.
    appState = AppState.Idle;
    updateRecordButton();
    updatePlaybackButton();

    return true;
  }
播放过程还可以在播放器播放到 MP4 文件结尾后自然停止。出现这种情况时,stopPlayingback() 应将应用的状态切换回 Idle。在 onDrawFrame() 中,检查 PlaybackStatus。如果它是 FINISHED,请在界面线程上调用 stopPlayingback() 函数。
  public void onDrawFrame(SampleRender render) {
      // ... omitted code ...

      // Insert before this line:
      // frame = session.update();

      // Check the playback status and return early if playback reaches the end.
      if (appState == AppState.Playingback
          && session.getPlaybackStatus() == PlaybackStatus.FINISHED) {
        this.runOnUiThread(this::stopPlayingback);
        return;
      }

      // ... omitted code ...
  }
通过目标设备播放
现在该查看您到目前为止所构建的内容了。将移动设备连接到开发机器,然后点击 Android Studio 中的 Run(运行)。
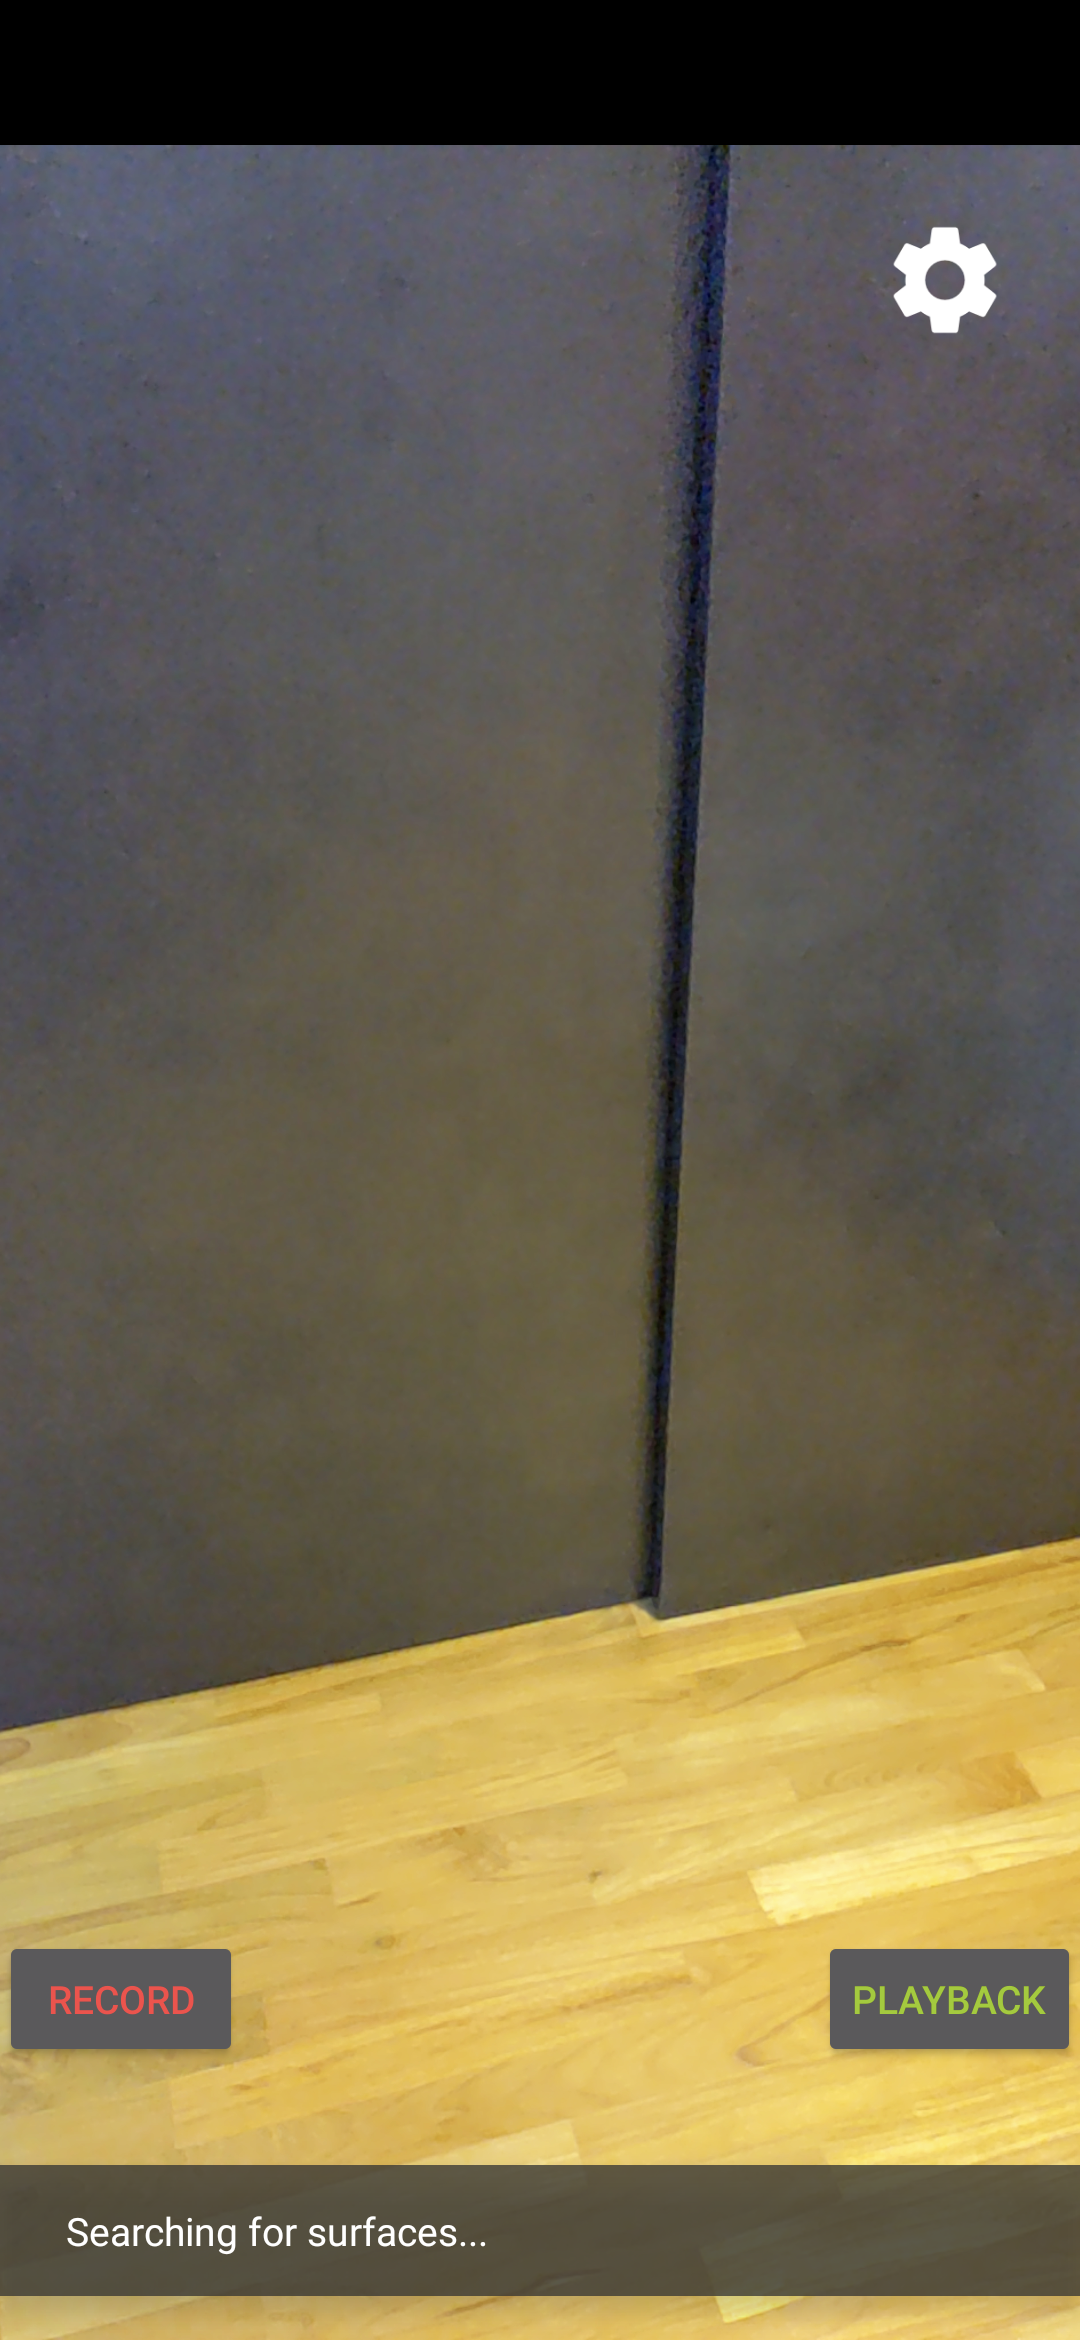
应用启动时,您应该会看到一个屏幕,其中左侧显示一个红色的录制按钮,右侧显示一个绿色的播放按钮。
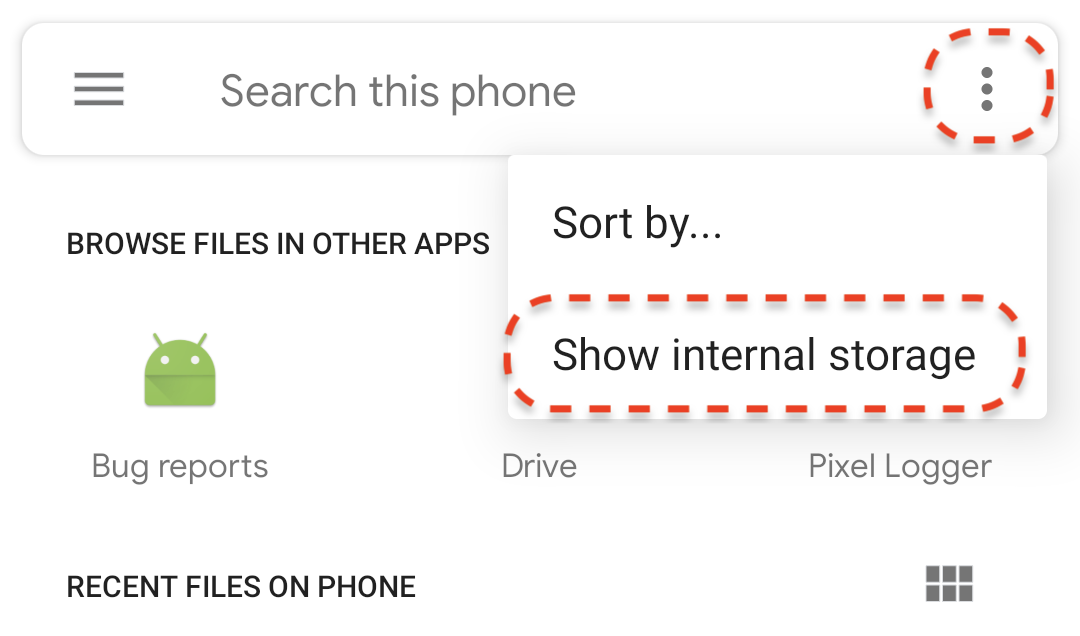
点按播放按钮,然后选择您刚刚录制的 MP4 文件之一。如果您没有看到任何以 arcore- 开头的文件名,可能是因为您的设备未显示 Movies(影片)文件夹。在这种情况下,请使用左上角的菜单前往 Phone model(手机型号)> Movies(影片)文件夹。您可能还需要启用 Show internal storage(显示内部存储设备)选项,以显示“Phone model”(手机型号)文件夹。
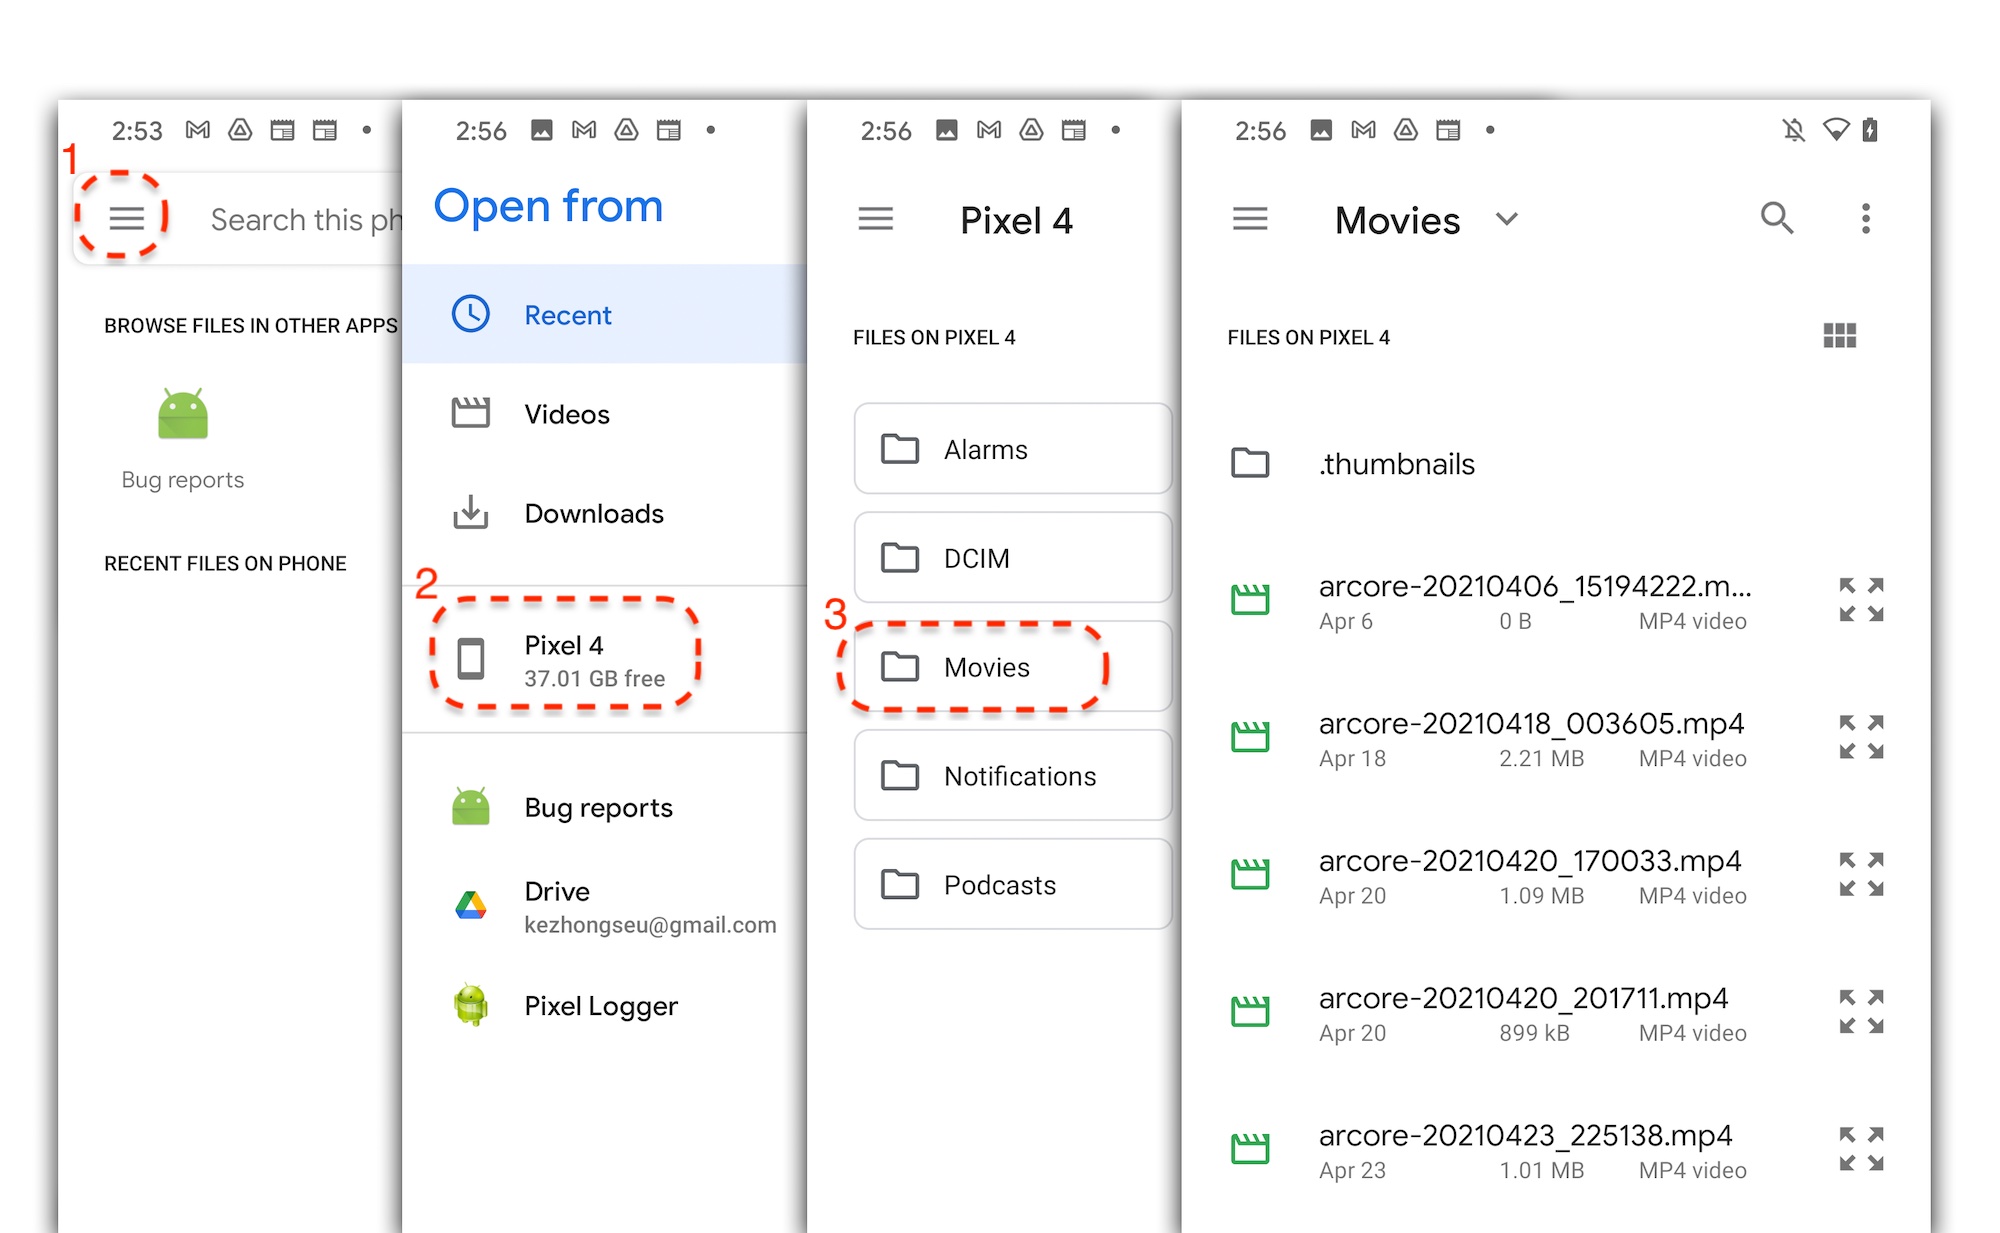
点按屏幕上的文件名以选择 MP4 文件。应用应该会播放 MP4 文件。
播放现场录像与播放普通视频之间的区别在于您可以与现场录像进行互动。点按检测到的平面可以在屏幕上放置标记。
您在此步骤中执行的操作
- 添加了一个用于开始和停止播放的按钮
- 实现了一个用于让应用开始和停止录制的函数
- 在设备上播放了之前录制的 ARCore 现场录像
5. 在 MP4 文件中录制额外的数据
借助 ARCore 1.24,您可以在 MP4 文件中录制额外的信息。您可以录制 AR 对象放置的 Pose,然后在播放过程中在同一位置创建 AR 对象。
配置要录制的新轨道
在 HelloArActivity.java 中使用 UUID 和 MIME 标记定义一个新轨道。
// Add imports to the beginning of the file.
import java.util.UUID;
import com.google.ar.core.Track;

  // Inside the HelloArActiity class.
  private static final UUID ANCHOR_TRACK_ID = UUID.fromString("53069eb5-21ef-4946-b71c-6ac4979216a6");;
  private static final String ANCHOR_TRACK_MIME_TYPE = "application/recording-playback-anchor";

  private boolean startRecording() {
    // ... omitted code ...

    // Insert after line:
    //   pauseARCoreSession();

    // Create a new Track, with an ID and MIME tag.
    Track anchorTrack = new Track(session)
        .setId(ANCHOR_TRACK_ID).
        .setMimeType(ANCHOR_TRACK_MIME_TYPE);
    // ... omitted code ...
  }
更新退出代码,以通过调用 addTrack() 来创建 RecordingConfig 对象。
  private boolean startRecording() {
    // ... omitted code ...

    // Update the lines below with a call to the addTrack() function:
    //   RecordingConfig recordingConfig = new RecordingConfig(session)
    //    .setMp4DatasetUri(mp4FileUri)
    //    .setAutoStopOnPause(true);

    RecordingConfig recordingConfig = new RecordingConfig(session)
        .setMp4DatasetUri(mp4FileUri)
        .setAutoStopOnPause(true)
        .addTrack(anchorTrack); // add the new track onto the recordingConfig

    // ... omitted code ...
  }
在录制过程中保存锚标记姿势
每次用户点按检测到的平面时,Anchor 上都会放置一个 AR 标记,其姿势会由 ARCore 更新。
如果您仍在录制 ARCore 现场录像,请在创建 Anchor 所在的帧录制其姿势。
修改 HelloArActivity.java 中的 handleTap() 函数。
// Add imports to the beginning of the file.
import com.google.ar.core.Pose;
import java.nio.FloatBuffer;

  private void handleTap(Frame frame, Camera camera) {
          // ... omitted code ...

          // Insert after line:
          // anchors.add(hit.createAnchor());

          // If the app is recording a session,
          // save the new Anchor pose (relative to the camera)
          // into the ANCHOR_TRACK_ID track.
          if (appState == AppState.Recording) {
            // Get the pose relative to the camera pose.
            Pose cameraRelativePose = camera.getPose().inverse().compose(hit.getHitPose());
            float[] translation = cameraRelativePose.getTranslation();
            float[] quaternion = cameraRelativePose.getRotationQuaternion();
            ByteBuffer payload = ByteBuffer.allocate(4 * (translation.length + quaternion.length));
            FloatBuffer floatBuffer = payload.asFloatBuffer();
            floatBuffer.put(translation);
            floatBuffer.put(quaternion);

            try {
              frame.recordTrackData(ANCHOR_TRACK_ID, payload);
            } catch (IllegalStateException e) {
              Log.e(TAG, "Error in recording anchor into external data track.", e);
            }
          }
          // ... omitted code ...
  }
我们坚持使用摄像头相对 Pose(而不是实际相对 Pose)的原因是因为现场录像的实际起点与播放现场录像的实际起点不同。现场录像的实际起点在现场录像首次继续时(即首次调用 Session.resume() 时)开始。播放现场录像的实际起点在系统录制第一帧时(即系统在 Session.startRecording() 之后首次调用 Session.resume() 时)开始。
创建播放锚标记
重新创建 Anchor 的过程非常简单。在 HelloArActivity.java 中添加一个名为 createRecordedAnchors() 的函数。
// Add imports to the beginning of the file.
import com.google.ar.core.TrackData;

  // Extract poses from the ANCHOR_TRACK_ID track, and create new anchors.
  private void createRecordedAnchors(Frame frame, Camera camera) {
    // Get all `ANCHOR_TRACK_ID` TrackData from the frame.
    for (TrackData trackData : frame.getUpdatedTrackData(ANCHOR_TRACK_ID)) {
      ByteBuffer payload = trackData.getData();
      FloatBuffer floatBuffer = payload.asFloatBuffer();

      // Extract translation and quaternion from TrackData payload.
      float[] translation = new float[3];
      float[] quaternion = new float[4];

      floatBuffer.get(translation);
      floatBuffer.get(quaternion);

      // Transform the recorded anchor pose
      // from the camera coordinate
      // into world coordinates.
      Pose worldPose = camera.getPose().compose(new Pose(translation, quaternion));

      // Re-create an anchor at the recorded pose.
      Anchor recordedAnchor = session.createAnchor(worldPose);

      // Add the new anchor into the list of anchors so that
      // the AR marker can be displayed on top.
      anchors.add(recordedAnchor);
    }
  }
在 HelloArActivity.java 的 onDrawFrame() 函数中调用 createRecordedAnchors()。
  public void onDrawFrame(SampleRender render) {
    // ... omitted code ...

    // Insert after this line:
    // handleTap(frame, camera);

    // If the app is currently playing back a session, create recorded anchors.
    if (appState == AppState.Playingback) {
      createRecordedAnchors(frame, camera);
    }
    // ... omitted code ...
  }
在目标设备上进行测试
将移动设备连接到开发机器,然后点击 Android Studio 中的 Run(运行)。
首先,点按录制按钮以录制现场录像。在录制过程中,点按检测到的平面可以放置一些 AR 标记。
停止录制后,点按播放按钮,然后选择您刚刚录制的文件。播放过程应该会开始。请注意您之前放置的 AR 标记在您点按应用时的显示方式。
以上便是您在本 Codelab 中必须完成的所有编码工作。
6. 恭喜
恭喜!您已完成了本 Codelab!我们来回顾一下您在本 Codelab 中完成的操作:
- 构建并运行了 ARCore Hello AR Java 示例。
- 向应用添加了一个“录制”按钮,以将 AR 现场录像保存到 MP4 文件中
- 向应用添加了一个“播放”按钮,以播放 MP4 文件中的 AR 现场录像
- 添加了一项新功能,以将用户创建的锚标记保存在 MP4 文件中以供播放之用