
1. 簡介
將 AR 體驗儲存為 MP4 檔案,並從 MP4 檔案播放,對應用程式開發人員和使用者都有幫助。
在辦公室偵錯及測試新功能
ARCore Record & Playback API 最直接的用途是供開發人員使用。您再也不必在測試裝置上建構及執行應用程式、拔除 USB 傳輸線,然後四處走動,只為了測試一小段程式碼變更。現在您只需要在測試環境中錄製 MP4 影片,並模擬手機移動,即可在辦公桌上進行測試。
在不同裝置上錄製及播放
透過錄製和播放 API,一位使用者可以在一部裝置上錄製工作階段,另一位使用者則可以在其他裝置上播放同一工作階段。你可以與其他使用者分享 AR 體驗。有許多可能性!
這是您第一次製作 ARCore 應用程式嗎?
您會如何使用這個程式碼研究室?
建構項目
在本程式碼研究室中,您將使用 Recording & Playback API 建立應用程式,將 AR 體驗錄製到 MP4 檔案中,並從同一個檔案播放體驗。您將學會:
- 如何使用 Recording API 將 AR 會話儲存為 MP4 檔案。
- 如何使用 Playback API 從 MP4 檔案重播 AR 工作階段。
- 瞭解如何在一部裝置上錄製 AR 畫面,然後在另一部裝置上重播。
軟硬體需求
在本程式碼研究室中,您將修改使用 ARCore Android SDK 建構的 Hello AR Java 應用程式。您需要特定硬體和軟體才能繼續操作。
硬體需求
- 支援 ARCore 的裝置,且開發人員選項已開啟,並啟用 USB 偵錯功能,透過 USB 傳輸線連接至開發機器。
- 執行 Android Studio 的開發電腦。
- 網際網路連線,可在開發期間下載程式庫。
軟體需求
- 開發 ARCore 裝置上安裝 Google Play 服務 - AR 適用 (ARCore) 1.24 以上版本。這項服務通常會透過 Play 商店自動安裝在裝置上。你也可以在支援 ARCore 的裝置上,手動安裝這項服務。
- 開發電腦上的 Android Studio (3.1 以上版本)。
此外,如要獲得最佳成效,也應對 ARCore 有基本瞭解。
2. 設定開發環境
首先,請設定開發環境。
下載 ARCore Android SDK
解壓縮 ARCore Android SDK
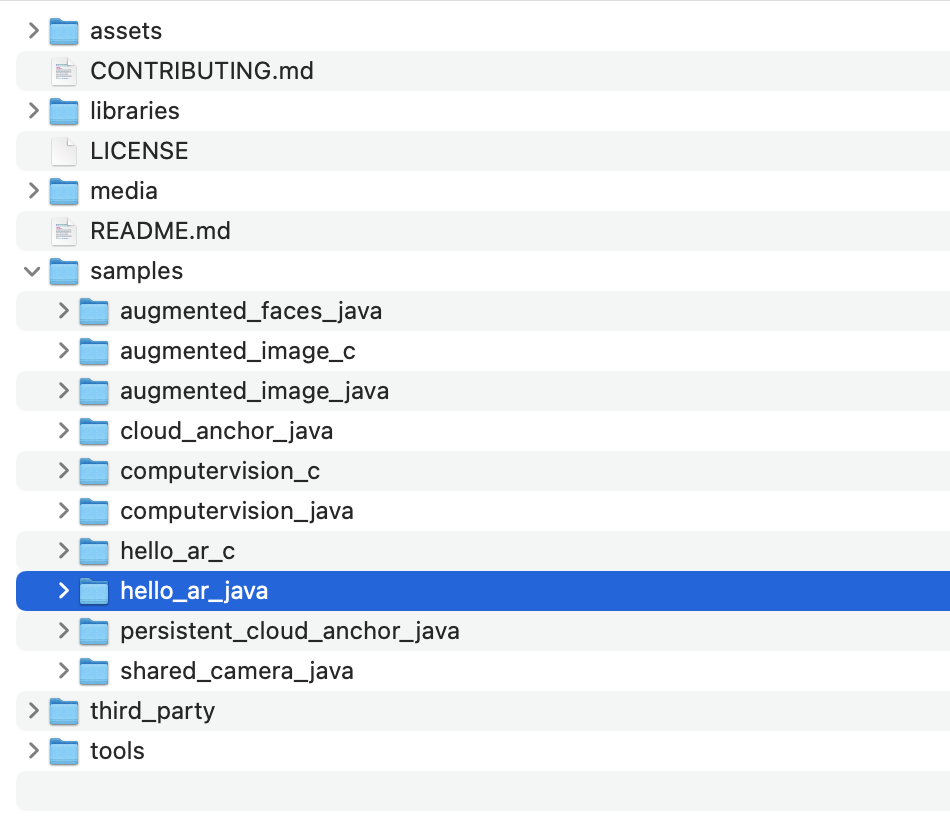
將 Android SDK 下載到電腦後,請解壓縮檔案並前往 arcore-android-sdk-1.24/samples/hello_ar_java 目錄。這是您要使用的應用程式根目錄。
將 Hello AR Java 載入 Android Studio
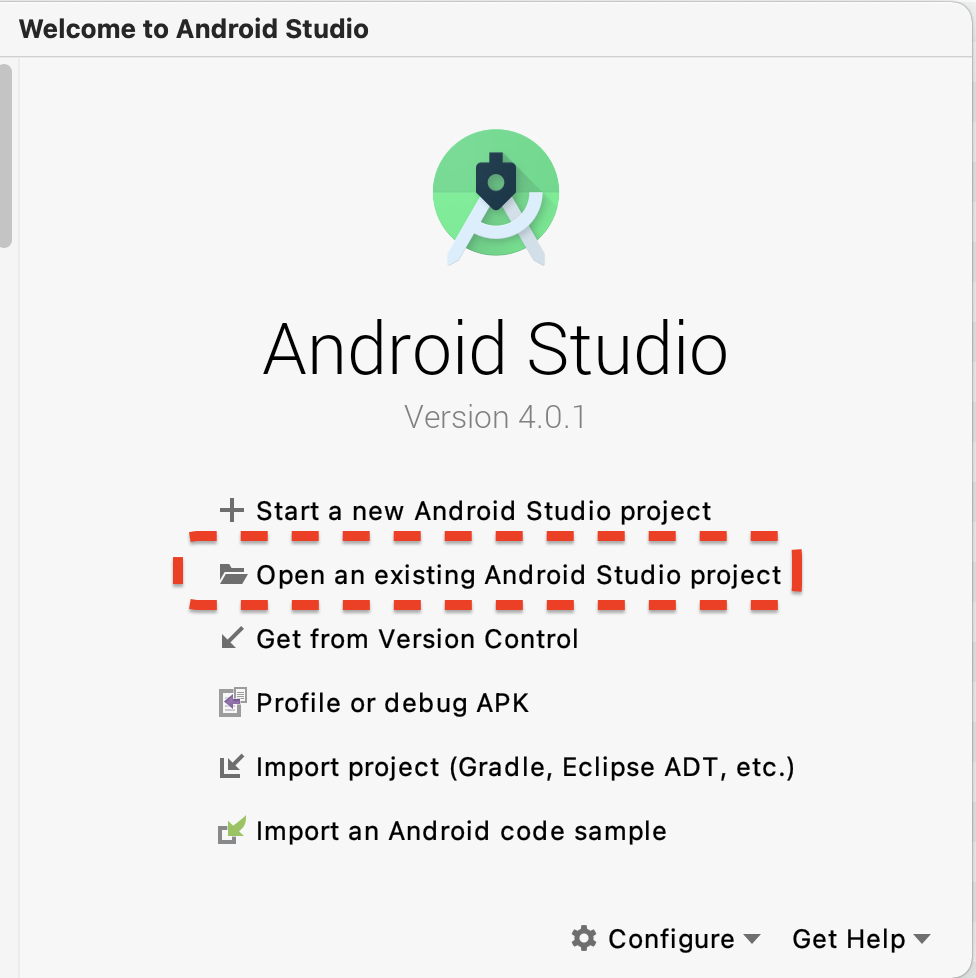
啟動 Android Studio,然後按一下「Open an existing Android Studio project」。
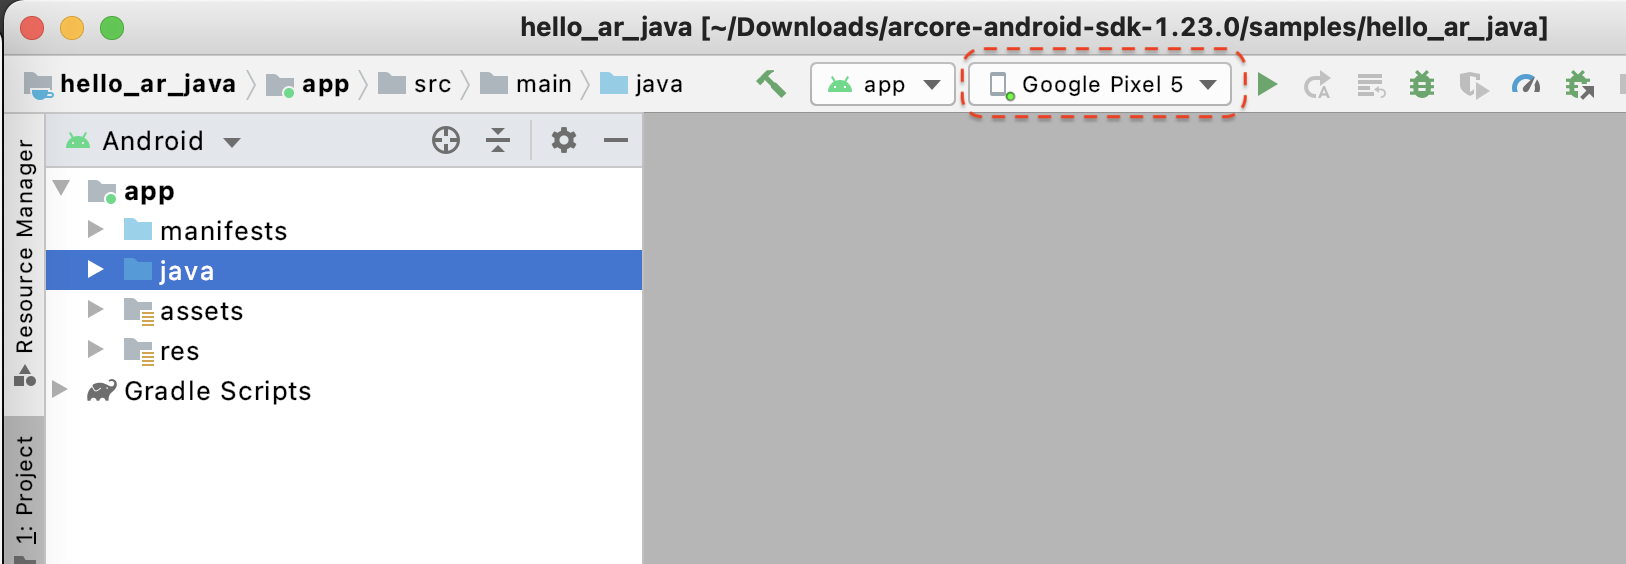
在隨即開啟的對話方塊視窗中,選取 arcore-android-sdk-1.24/samples/hello_ar_java 並按一下「開啟」。
等待 Android Studio 完成專案同步處理。如果缺少元件,匯入專案可能會失敗,並顯示錯誤訊息。請先修正這些問題再繼續。
執行範例應用程式
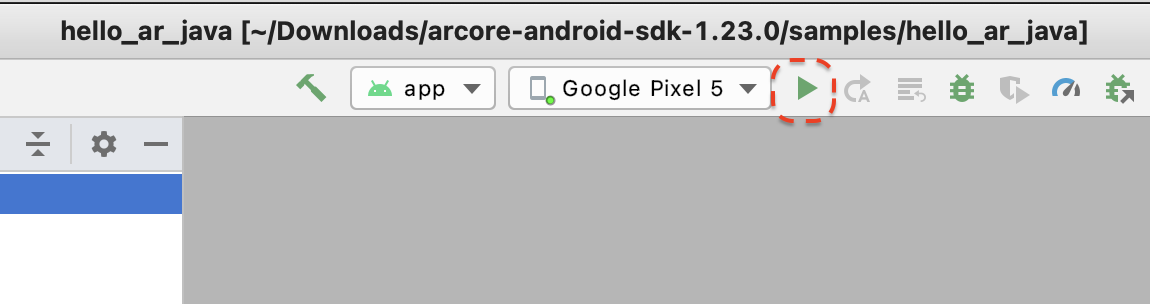
- 將支援 ARCore 的裝置連線至開發機器。
- 如果裝置已正確辨識,Android Studio 應會顯示裝置名稱。
- 按一下「Run」按鈕或選取「Run」>「Run ‘app'」,讓 Android Studio 在裝置上安裝並啟動應用程式。
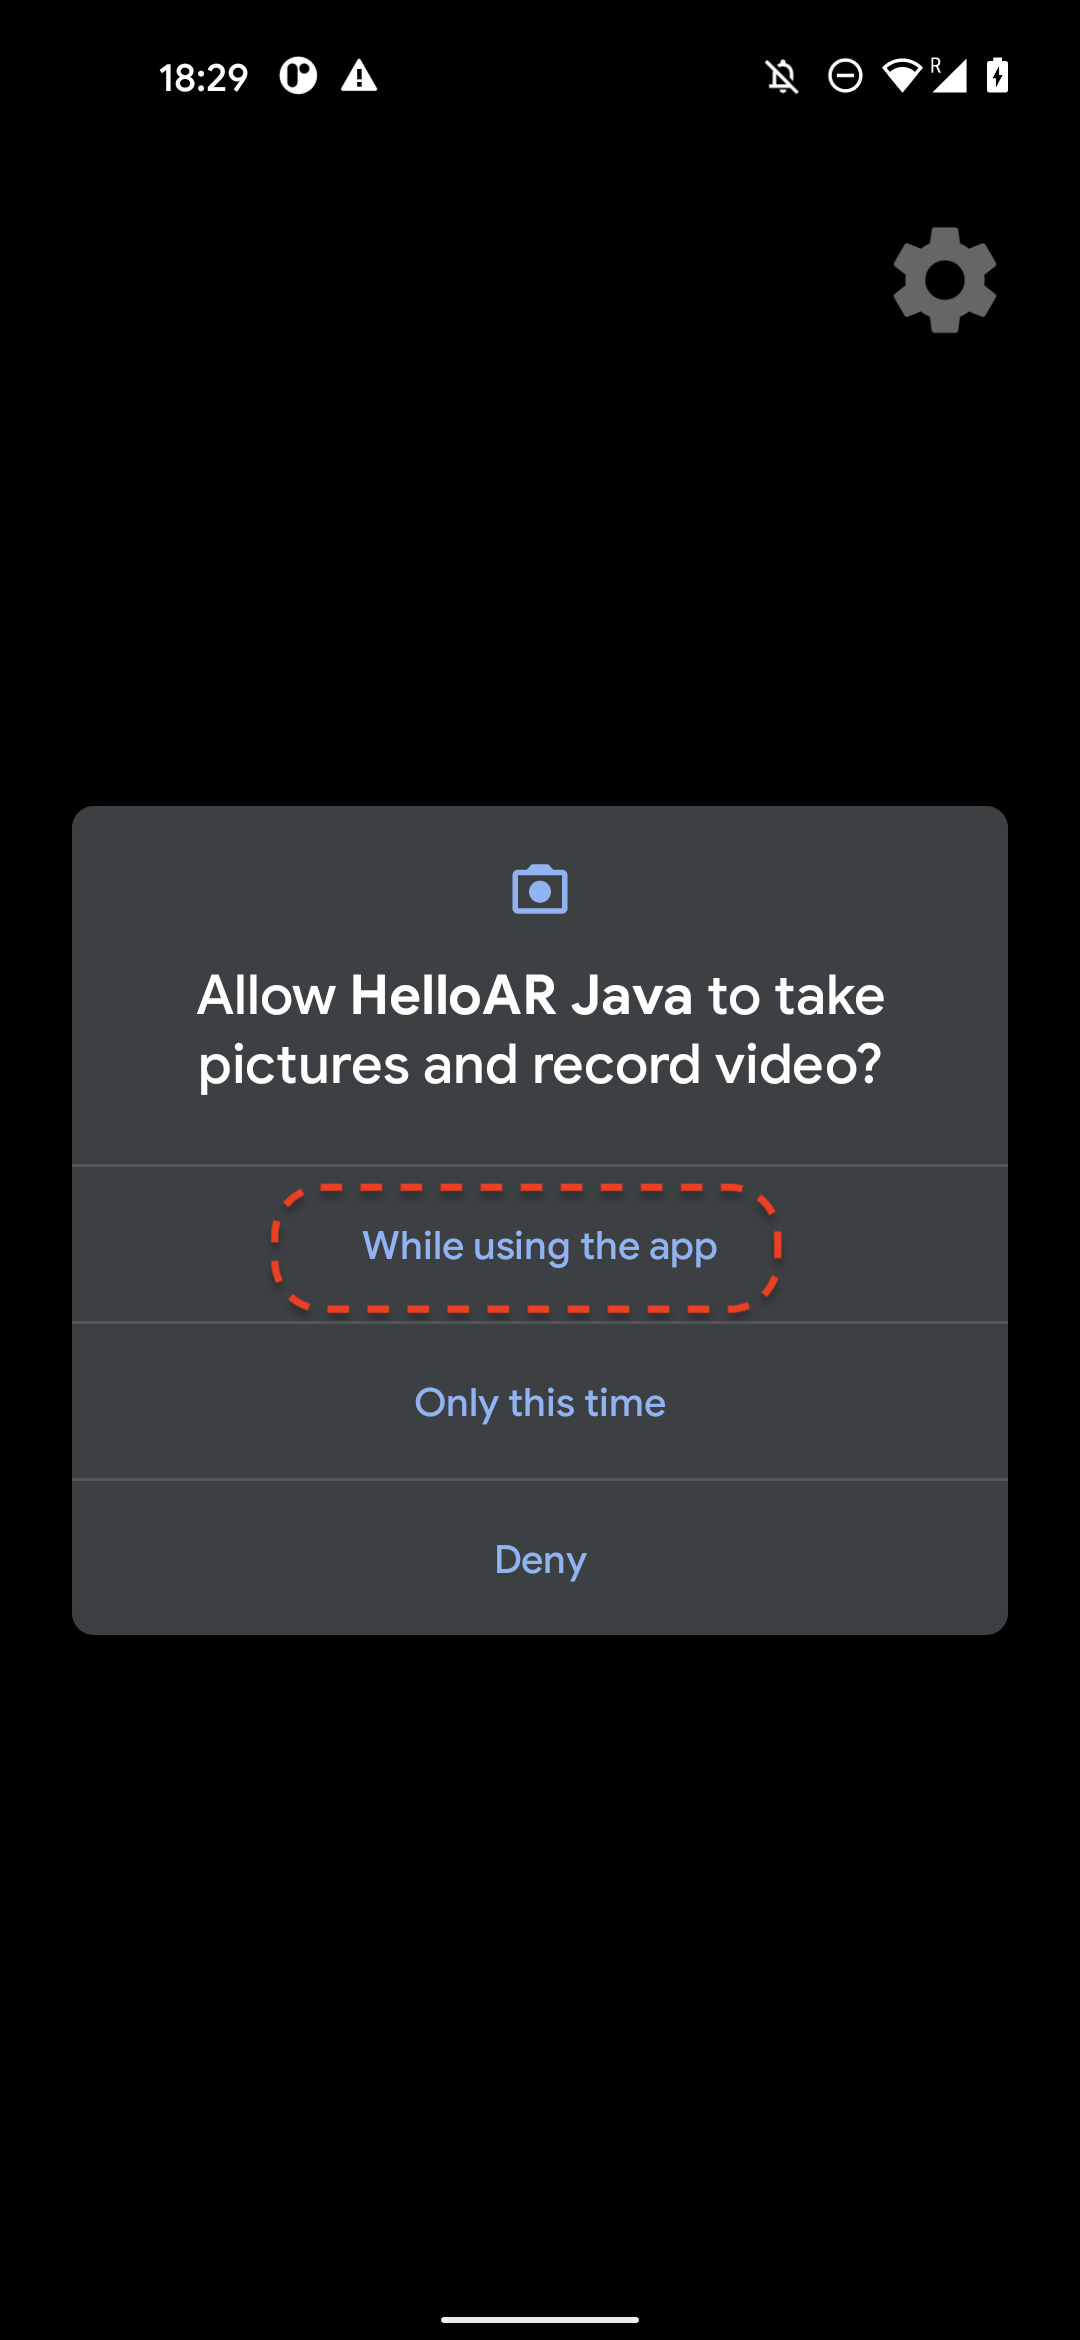
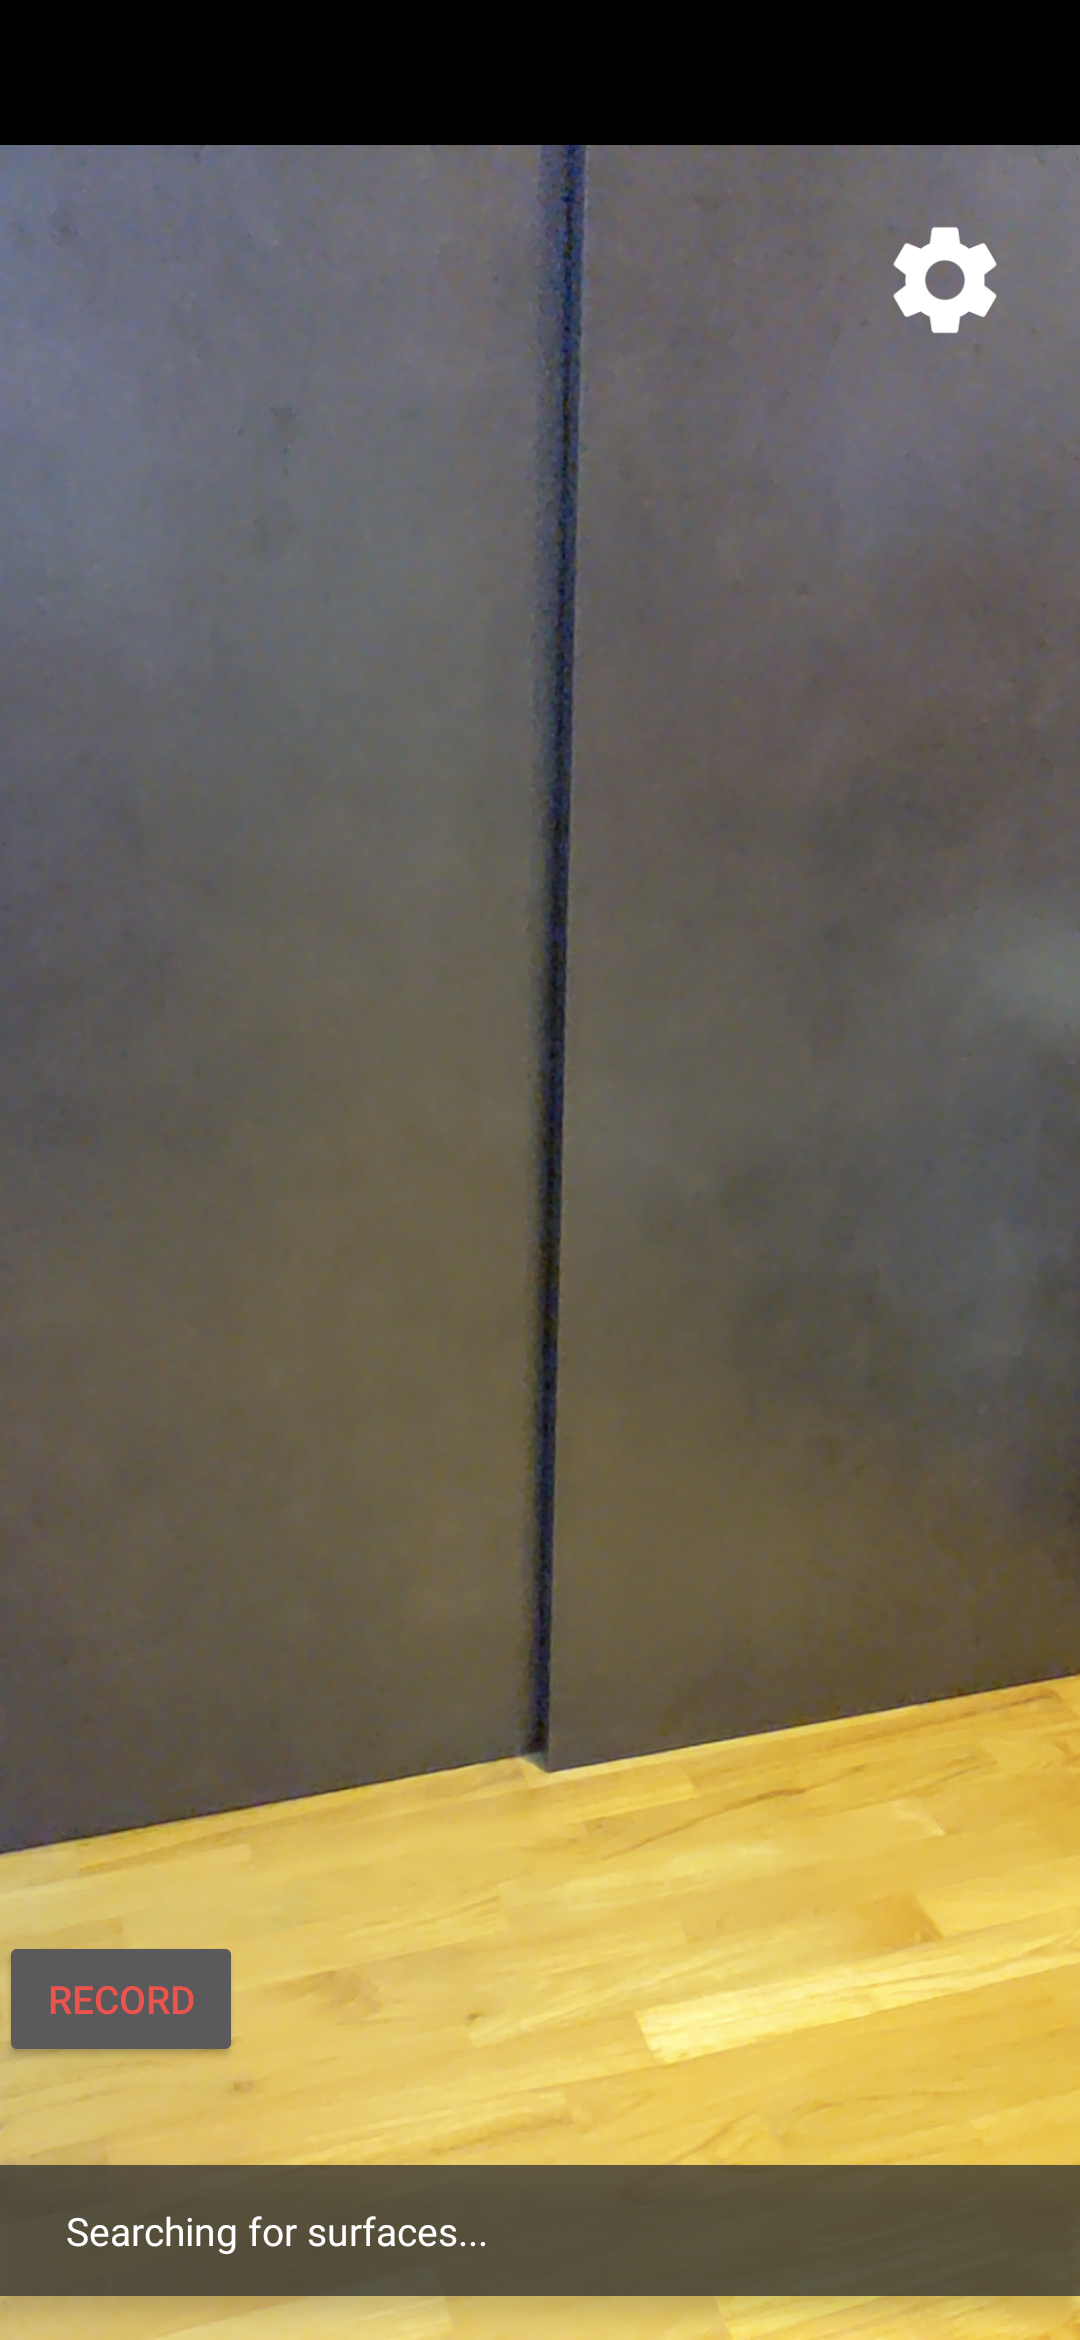
- 系統會提示你授予拍照及錄影權限,選取「僅在使用這個應用程式時」,授予應用程式相機權限。裝置螢幕上隨即會顯示實景環境。
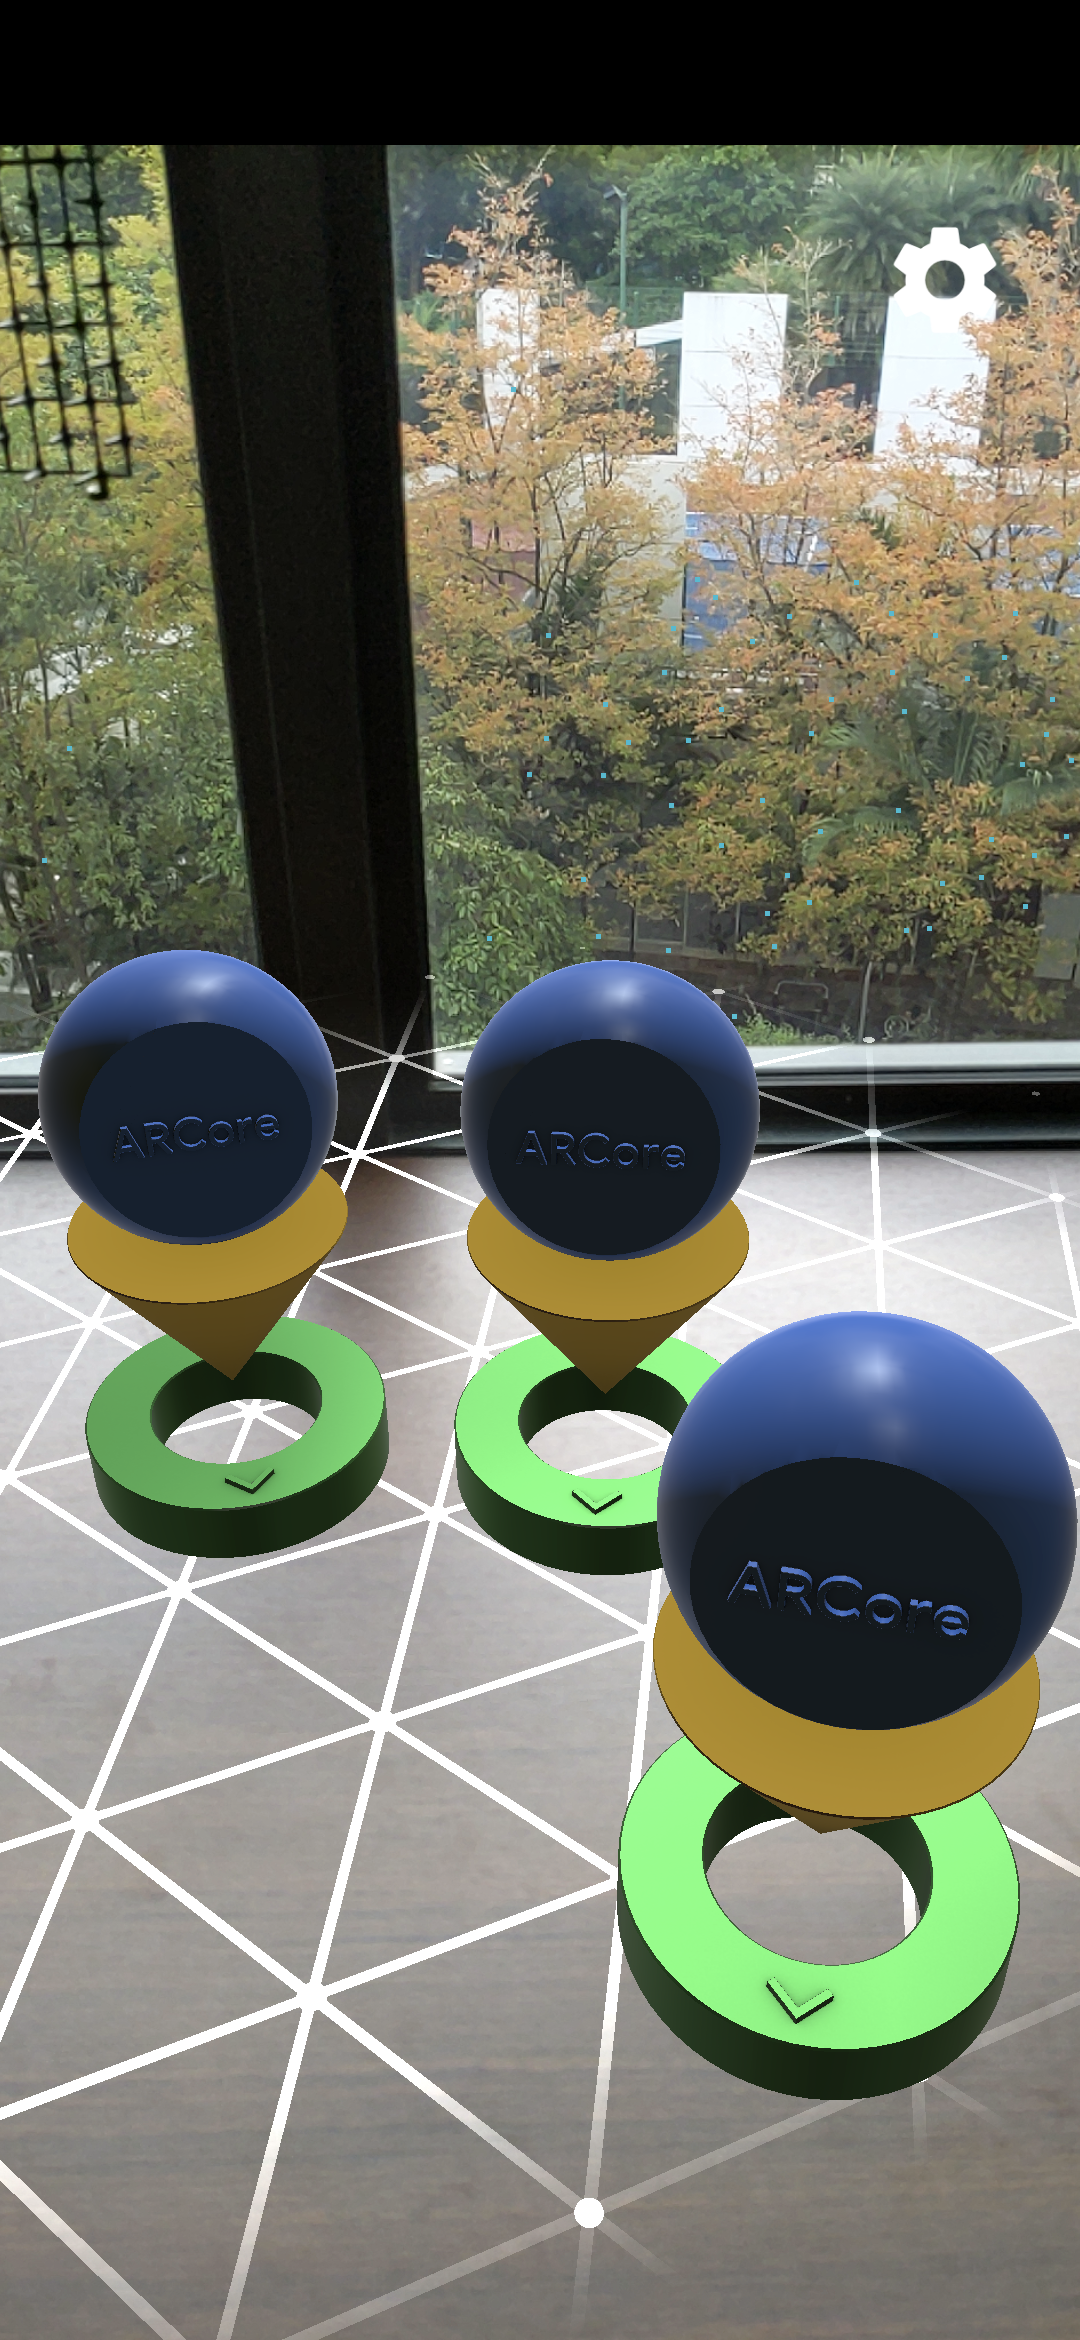
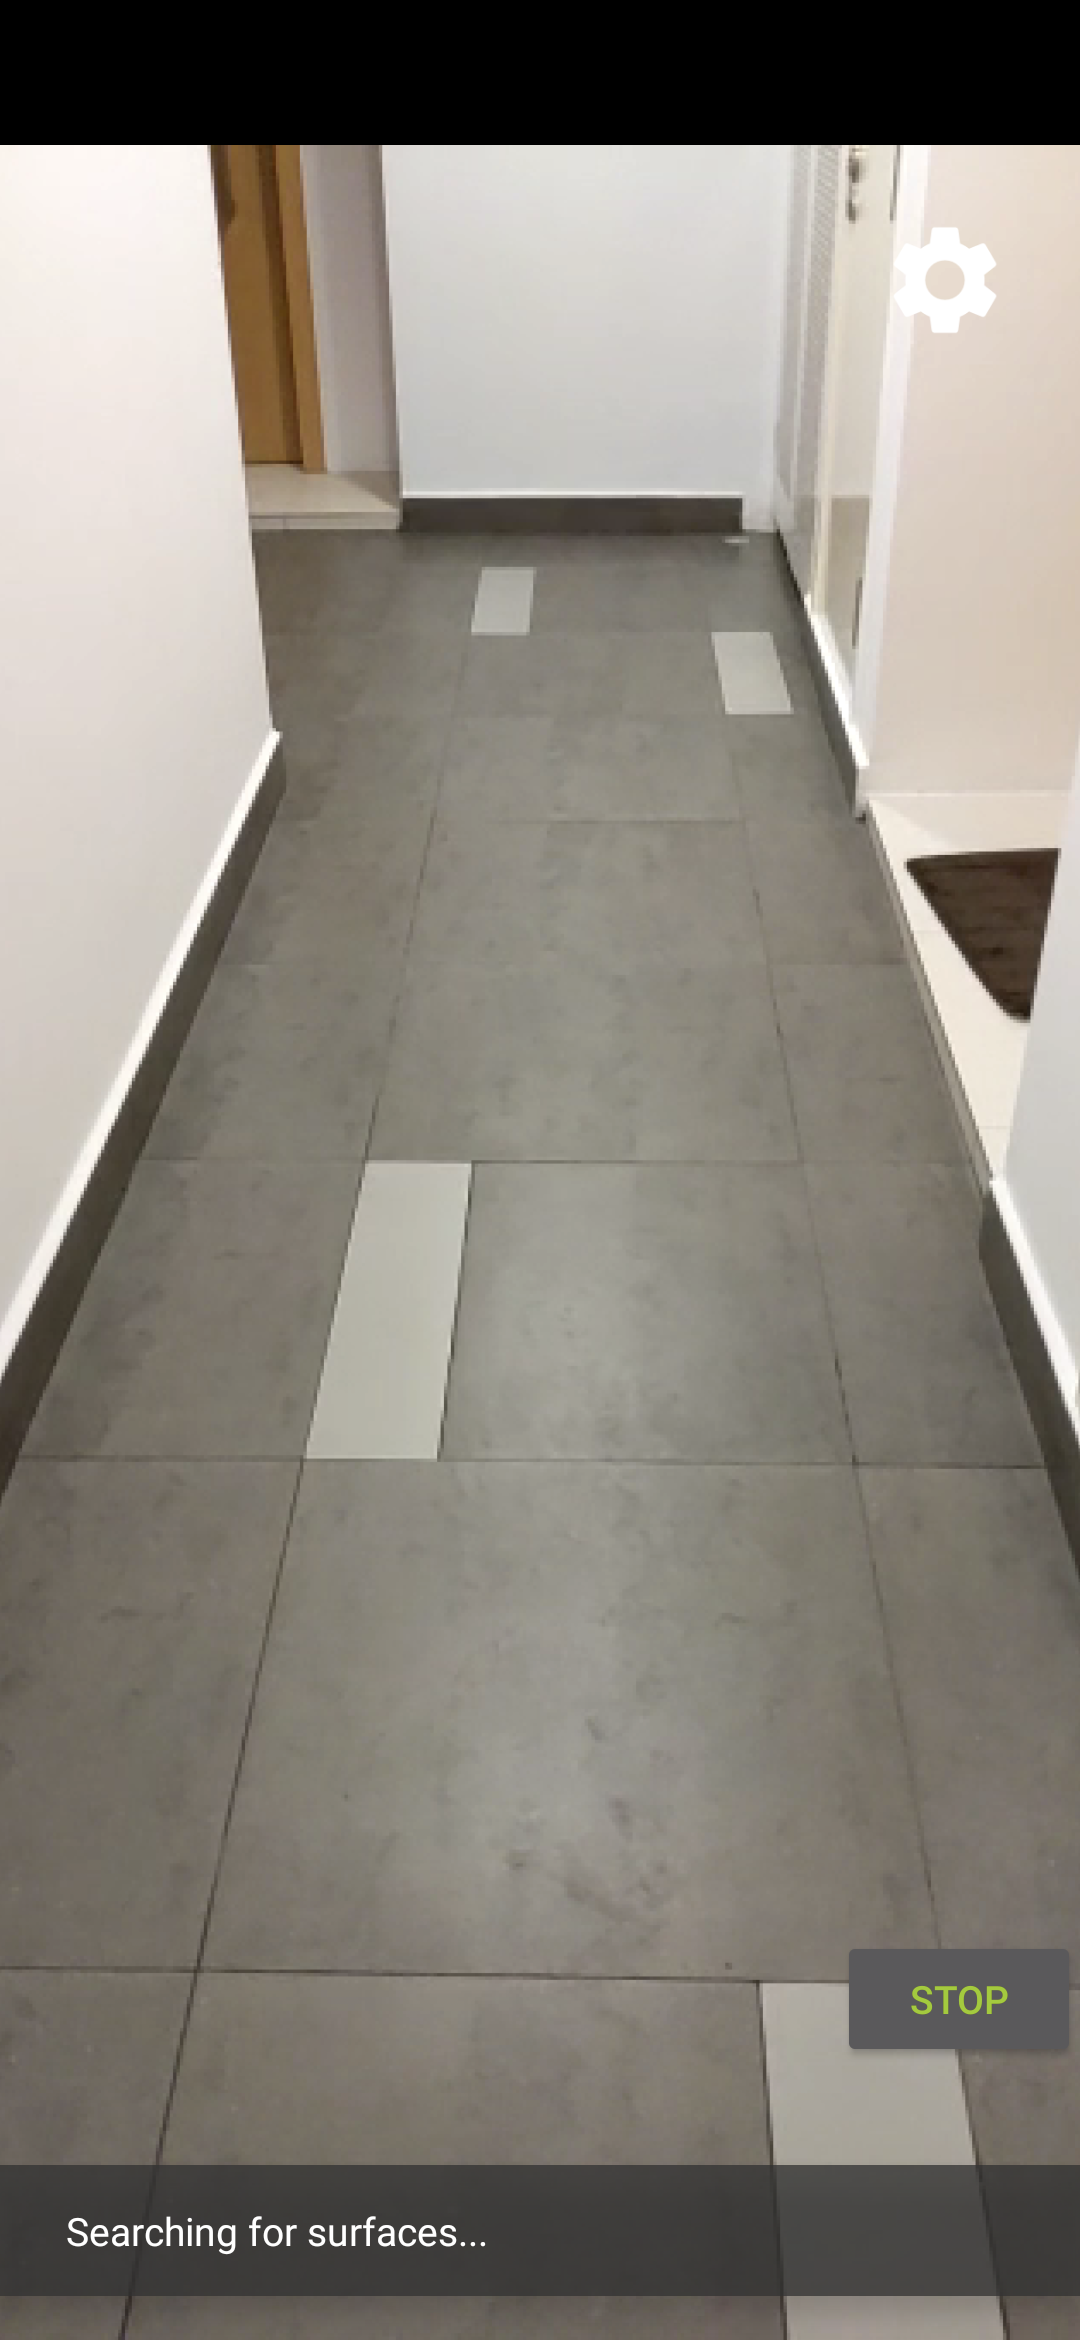
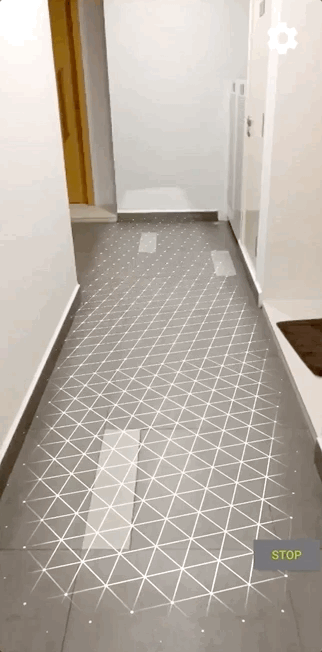
- 水平移動裝置,掃描飛機。
- 應用程式偵測到平面時,會顯示白色格線。輕觸即可在該平面上放置標記。
您在這個步驟中完成的作業
- 設定 Hello AR Java 專案
- 在支援 ARCore 的裝置上建構並執行範例應用程式
接著,您要將 AR 工作階段錄製成 MP4 檔案。
3. 將 ARCore 工作階段錄製成 MP4 檔案
我們會在這個步驟中新增錄音功能。這項費用包含:
- 開始或停止錄音的按鈕。
- 儲存函式,可將 MP4 檔案儲存至裝置。
- 用於開始或停止錄製 ARCore 工作階段的呼叫。
新增「錄製」按鈕的 UI
實作錄製功能前,請先在 UI 上新增按鈕,讓使用者通知 ARCore 何時開始或停止錄製。
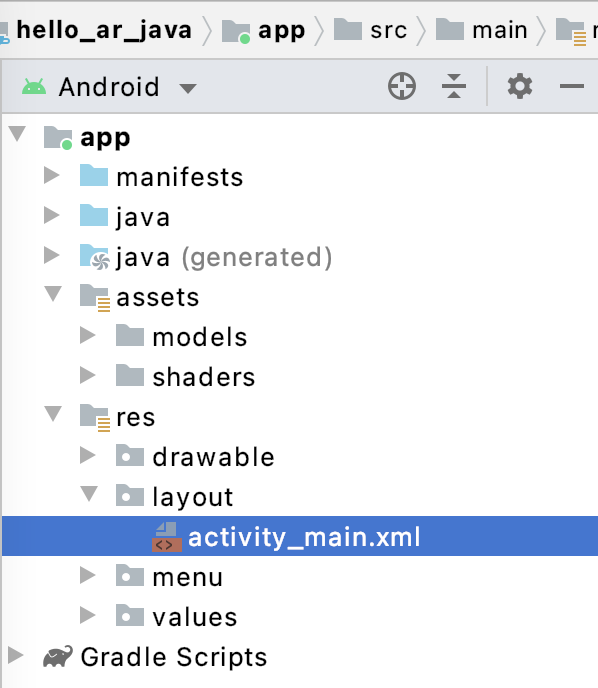
在「專案」面板中開啟 app/res/layout/activity_main.xml 檔案。
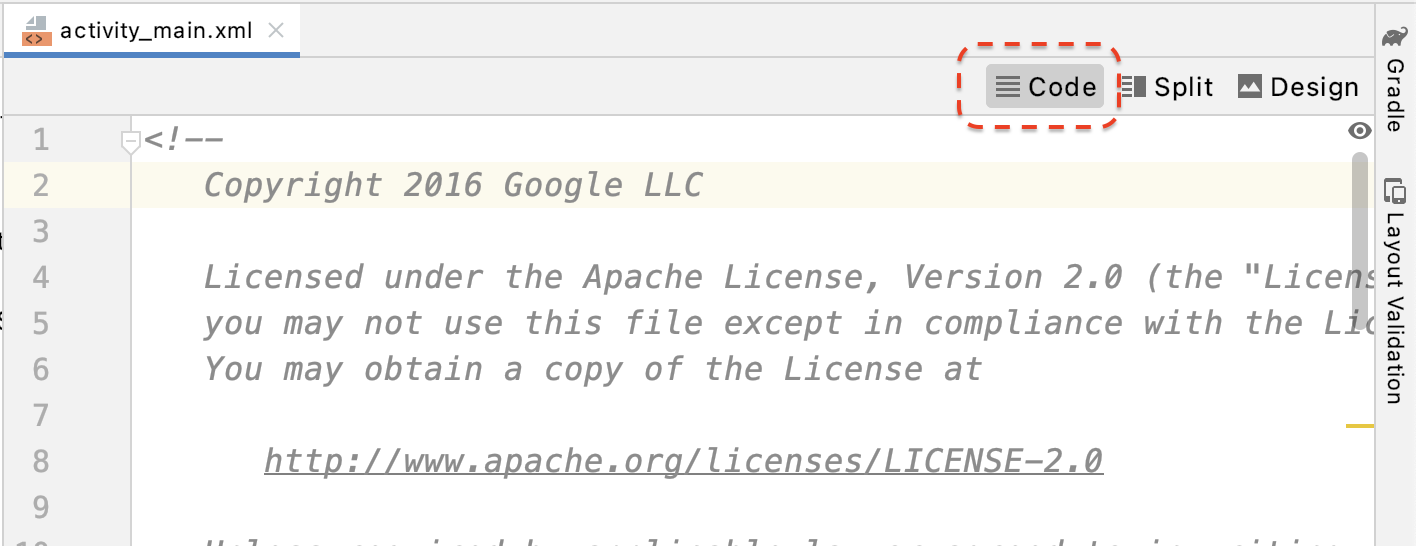
根據預設,開啟 app/res/layout/activity_main.xml 檔案後,Android Studio 會使用設計檢視畫面。按一下分頁右上角的「程式碼」按鈕,切換至程式碼檢視畫面。
在 activity_main.xml 中,於結尾標記前加入下列程式碼,建立新的「記錄」按鈕,並將其事件處理常式設為名為 onClickRecord() 的方法:
  <!--
    Add a new "Record" button with those attributes:
        text is "Record",
        onClick event handler is "onClickRecord",
        text color is "red".
  -->
  <Button
      android:id="@+id/record_button"
      android:layout_width="wrap_content"
      android:layout_height="wrap_content"
      android:layout_alignLeft="@id/surfaceview"
      android:layout_alignBottom="@id/surfaceview"
      android:layout_marginBottom="100dp"
      android:onClick="onClickRecord"
      android:text="Record"
      android:textColor="@android:color/holo_red_light" />
加入上述程式碼後,系統可能會暫時顯示錯誤:Corresponding method handler 'public void onClickRecord(android.view.View)' not found"。這個狀況有可能發生:您將在接下來的幾個步驟中建立 onClickRecord() 函式,解決這個錯誤。
根據狀態變更按鈕上的文字
「錄製」按鈕實際上會處理錄製和停止作業。應用程式未記錄資料時,應顯示「記錄」一詞。應用程式錄製資料時,按鈕應會變更為顯示「停止」一詞。
如要為按鈕提供這項功能,應用程式必須知道按鈕的目前狀態。下列程式碼會建立名為 AppState 的新列舉,代表應用程式的工作狀態,並透過名為 appState 的私有成員變數追蹤特定狀態變化。將程式碼片段新增至 HelloArActivity.java,位於 HelloArActivity 類別開頭。
  // Represents the app's working state.
  public enum AppState {
    Idle,
    Recording
  }

  // Tracks app's specific state changes.
  private AppState appState = AppState.Idle;
現在您可以追蹤應用程式的內部狀態,請建立名為 updateRecordButton() 的函式,根據應用程式的目前狀態變更按鈕的文字。在 HelloArActivity.java 的 HelloArActivity 類別中加入下列程式碼。
// Add imports to the beginning of the file.
import android.widget.Button;

  // Update the "Record" button based on app's internal state.
  private void updateRecordButton() {
    View buttonView = findViewById(R.id.record_button);
    Button button = (Button) buttonView;

    switch (appState) {
      case Idle:
        button.setText("Record");
        break;
      case Recording:
        button.setText("Stop");
        break;
    }
  }
接著,請建立 onClickRecord() 方法,檢查應用程式的狀態、將狀態變更為下一個,並呼叫 updateRecordButton() 來變更按鈕的 UI。在 HelloArActivity.java 的 HelloArActivity 類別中加入下列程式碼。
  // Handle the "Record" button click event.
  public void onClickRecord(View view) {
    Log.d(TAG, "onClickRecord");

    // Check the app's internal state and switch to the new state if needed.
    switch (appState) {
        // If the app is not recording, begin recording.
      case Idle: {
        boolean hasStarted = startRecording();
        Log.d(TAG, String.format("onClickRecord start: hasStarted %b", hasStarted));

        if (hasStarted)
          appState = AppState.Recording;

        break;
      }

      // If the app is recording, stop recording.
      case Recording: {
        boolean hasStopped = stopRecording();
        Log.d(TAG, String.format("onClickRecord stop: hasStopped %b", hasStopped));

        if (hasStopped)
          appState = AppState.Idle;

        break;
      }

      default:
        // Do nothing.
        break;
    }

    updateRecordButton();
  }
啟用應用程式以開始錄製
如要在 ARCore 中開始錄製,只需要完成兩件事:
- 在
RecordingConfig物件中指定錄製檔案 URI。 - 使用
RecordingConfig物件呼叫session.startRecording
其餘部分只是樣板程式碼:設定、記錄及檢查正確性。
建立名為 startRecording() 的新函式,用於記錄資料並儲存至 MP4 URI。在 HelloArActivity.java 的 HelloArActivity 類別中加入下列程式碼。
// Add imports to the beginning of the file.
import android.net.Uri;
import com.google.ar.core.RecordingConfig;
import com.google.ar.core.RecordingStatus;
import com.google.ar.core.exceptions.RecordingFailedException;

  private boolean startRecording() {
    Uri mp4FileUri = createMp4File();
    if (mp4FileUri == null)
      return false;

    Log.d(TAG, "startRecording at: " + mp4FileUri);

    pauseARCoreSession();

    // Configure the ARCore session to start recording.
    RecordingConfig recordingConfig = new RecordingConfig(session)
        .setMp4DatasetUri(mp4FileUri)
        .setAutoStopOnPause(true);

    try {
      // Prepare the session for recording, but do not start recording yet.
      session.startRecording(recordingConfig);
    } catch (RecordingFailedException e) {
      Log.e(TAG, "startRecording - Failed to prepare to start recording", e);
      return false;
    }

    boolean canResume = resumeARCoreSession();
    if (!canResume)
      return false;

    // Correctness checking: check the ARCore session's RecordingState.
    RecordingStatus recordingStatus = session.getRecordingStatus();
    Log.d(TAG, String.format("startRecording - recordingStatus %s", recordingStatus));
    return recordingStatus == RecordingStatus.OK;
  }
如要安全地暫停及繼續 ARCore 工作階段,請在 HelloArActivity.java 中建立 pauseARCoreSession() 和 resumeARCoreSession()。
  private void pauseARCoreSession() {
    // Pause the GLSurfaceView so that it doesn't update the ARCore session.
    // Pause the ARCore session so that we can update its configuration.
    // If the GLSurfaceView is not paused,
    //   onDrawFrame() will try to update the ARCore session
    //   while it's paused, resulting in a crash.
    surfaceView.onPause();
    session.pause();
  }

  private boolean resumeARCoreSession() {
    // We must resume the ARCore session before the GLSurfaceView.
    // Otherwise, the GLSurfaceView will try to update the ARCore session.
    try {
      session.resume();
    } catch (CameraNotAvailableException e) {
      Log.e(TAG, "CameraNotAvailableException in resumeARCoreSession", e);
      return false;
    }

    surfaceView.onResume();
    return true;
  }
允許應用程式停止錄音
在 HelloArActivity.java 中建立名為 stopRecording() 的函式,停止應用程式記錄新資料。如果應用程式無法停止錄製,這個函式會呼叫 session.stopRecording(),並將錯誤傳送至控制台記錄。
  private boolean stopRecording() {
    try {
      session.stopRecording();
    } catch (RecordingFailedException e) {
      Log.e(TAG, "stopRecording - Failed to stop recording", e);
      return false;
    }

    // Correctness checking: check if the session stopped recording.
    return session.getRecordingStatus() == RecordingStatus.NONE;
  }
使用 Android 11 限定範圍儲存空間設計檔案儲存空間
本程式碼研究室中的儲存空間相關函式,是依據Android 11 的新範圍儲存空間規定設計。
在 app/build.gradle 檔案中進行一些小幅變更,以指定 Android 11 為目標。在 Android Studio 的「Project」面板中,這個檔案位於「Gradle Scripts」節點下方,與「app」模組相關聯。
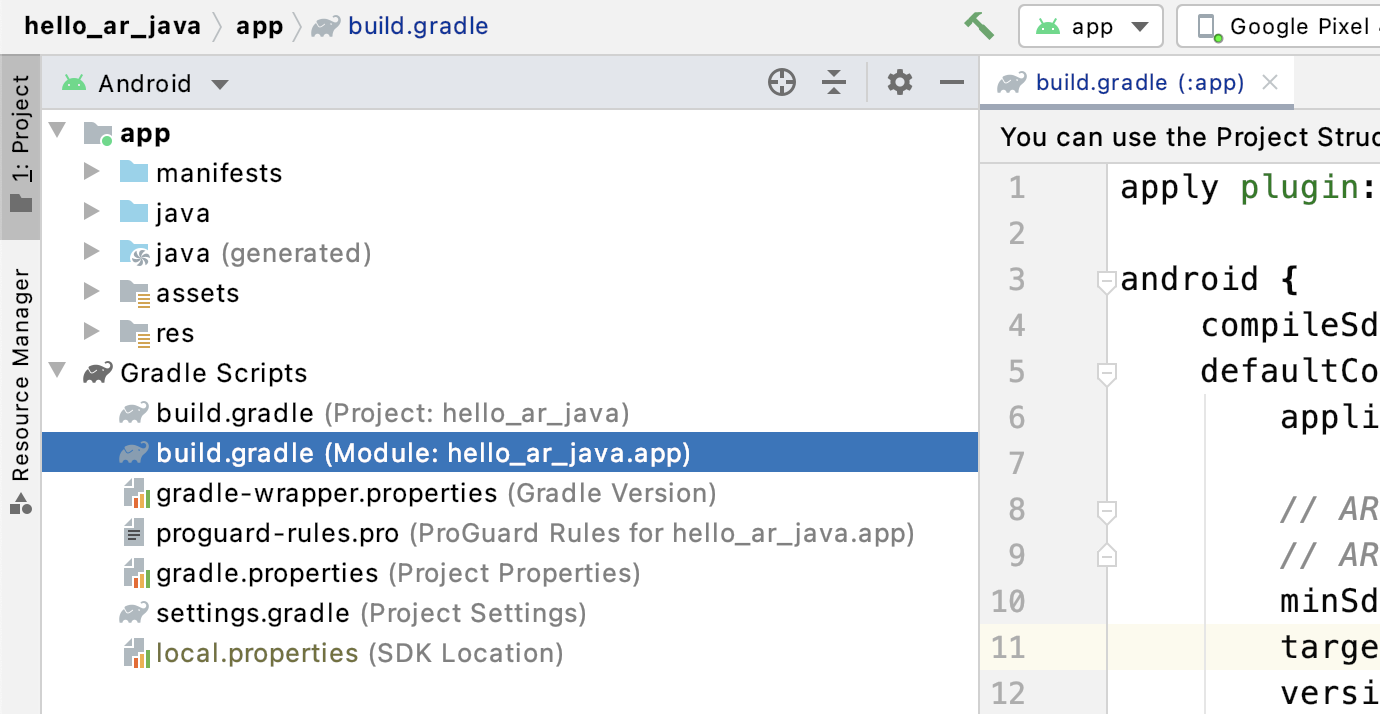
將 compileSdkVersion 和 targetSdkVersion 變更為 30。
    compileSdkVersion 30
    defaultConfig {
      targetSdkVersion 30
    }
如要錄製影片,請使用 Android MediaStore API 在共用電影目錄中建立 MP4 檔案。
在 HelloArActivity.java 中建立名為 createMp4File() 的函式:
// Add imports to the beginning of the file.
import java.text.SimpleDateFormat;
import android.content.ContentResolver;
import android.net.Uri;
import android.os.Build;
import android.os.Environment;
import android.provider.MediaStore;
import android.content.ContentValues;
import java.io.File;
import android.content.CursorLoader;
import android.database.Cursor;
import java.util.Date;


  private final String MP4_VIDEO_MIME_TYPE = "video/mp4";

  private Uri createMp4File() {
    SimpleDateFormat dateFormat = new SimpleDateFormat("yyyyMMdd_HHmmss");
    String mp4FileName = "arcore-" + dateFormat.format(new Date()) + ".mp4";

    ContentResolver resolver = this.getContentResolver();

    Uri videoCollection = null;
    if (Build.VERSION.SDK_INT >= Build.VERSION_CODES.Q) {
      videoCollection = MediaStore.Video.Media.getContentUri(
          MediaStore.VOLUME_EXTERNAL_PRIMARY);
    } else {
      videoCollection = MediaStore.Video.Media.EXTERNAL_CONTENT_URI;
    }

    // Create a new Media file record.
    ContentValues newMp4FileDetails = new ContentValues();
    newMp4FileDetails.put(MediaStore.Video.Media.DISPLAY_NAME, mp4FileName);
    newMp4FileDetails.put(MediaStore.Video.Media.MIME_TYPE, MP4_VIDEO_MIME_TYPE);

    if (Build.VERSION.SDK_INT >= Build.VERSION_CODES.Q) {
      // The Relative_Path column is only available since API Level 29.
      newMp4FileDetails.put(MediaStore.Video.Media.RELATIVE_PATH, Environment.DIRECTORY_MOVIES);
    } else {
      // Use the Data column to set path for API Level <= 28.
      File mp4FileDir = Environment.getExternalStoragePublicDirectory(Environment.DIRECTORY_MOVIES);
      String absoluteMp4FilePath = new File(mp4FileDir, mp4FileName).getAbsolutePath();
      newMp4FileDetails.put(MediaStore.Video.Media.DATA, absoluteMp4FilePath);
    }

    Uri newMp4FileUri = resolver.insert(videoCollection, newMp4FileDetails);

    // Ensure that this file exists and can be written.
    if (newMp4FileUri == null) {
      Log.e(TAG, String.format("Failed to insert Video entity in MediaStore. API Level = %d", Build.VERSION.SDK_INT));
      return null;
    }

    // This call ensures the file exist before we pass it to the ARCore API.
    if (!testFileWriteAccess(newMp4FileUri)) {
      return null;
    }

    Log.d(TAG, String.format("createMp4File = %s, API Level = %d", newMp4FileUri, Build.VERSION.SDK_INT));

    return newMp4FileUri;
  }

  // Test if the file represented by the content Uri can be open with write access.
  private boolean testFileWriteAccess(Uri contentUri) {
    try (java.io.OutputStream mp4File = this.getContentResolver().openOutputStream(contentUri)) {
      Log.d(TAG, String.format("Success in testFileWriteAccess %s", contentUri.toString()));
      return true;
    } catch (java.io.FileNotFoundException e) {
      Log.e(TAG, String.format("FileNotFoundException in testFileWriteAccess %s", contentUri.toString()), e);
    } catch (java.io.IOException e) {
      Log.e(TAG, String.format("IOException in testFileWriteAccess %s", contentUri.toString()), e);
    }

    return false;
  }
處理儲存空間權限
如果您使用 Android 11 裝置,可以開始測試程式碼。如要支援 Android 10 以下版本的裝置,您必須授予應用程式儲存空間權限,才能將資料儲存至目標裝置的檔案系統。
在 AndroidManifest.xml 中,聲明應用程式需要 Android 11 (API 級別 30) 之前的儲存空間讀取和寫入權限。
  <!-- Inside the <manifest> tag, below the existing Camera permission -->
  <uses-permission android:name="android.permission.WRITE_EXTERNAL_STORAGE"
      android:maxSdkVersion="29" />

  <uses-permission android:name="android.permission.READ_EXTERNAL_STORAGE"
      android:maxSdkVersion="29" />
在 HelloArActivity.java 中新增名為 checkAndRequestStoragePermission() 的輔助函式,在執行階段要求 WRITE_EXTERNAL_STORAGE 權限。
// Add imports to the beginning of the file.
import android.Manifest;
import android.content.pm.PackageManager;
import androidx.core.app.ActivityCompat;
import androidx.core.content.ContextCompat;

  private final int REQUEST_WRITE_EXTERNAL_STORAGE = 1;
  public boolean checkAndRequestStoragePermission() {
    if (ContextCompat.checkSelfPermission(this, Manifest.permission.WRITE_EXTERNAL_STORAGE)
        != PackageManager.PERMISSION_GRANTED) {
      ActivityCompat.requestPermissions(this,
          new String[]{Manifest.permission.WRITE_EXTERNAL_STORAGE},
          REQUEST_WRITE_EXTERNAL_STORAGE);
      return false;
    }

    return true;
  }
如果您使用 API 級別 29 以下版本,請在 createMp4File() 頂端新增儲存空間權限檢查,如果應用程式沒有正確權限,請提早結束函式。在 API 級別 30 (Android 11) 中,存取 MediaStore 中的檔案不需要儲存空間權限。
  private Uri createMp4File() {
    // Since we use legacy external storage for Android 10,
    // we still need to request for storage permission on Android 10.
    if (Build.VERSION.SDK_INT <= Build.VERSION_CODES.Q) {
      if (!checkAndRequestStoragePermission()) {
        Log.i(TAG, String.format(
            "Didn't createMp4File. No storage permission, API Level = %d",
            Build.VERSION.SDK_INT));
        return null;
      }
    }
    // ... omitted code ...
  }
從目標裝置錄製
現在來看看您目前建構的內容。將行動裝置連上開發機器,然後在 Android Studio 中按一下「Run」。
畫面左下方會顯示紅色「錄音」按鈕。輕觸後,文字應會變更為「停止」。移動裝置來錄製課程,並在想完成錄製時按一下「停止」按鈕。這項操作會在裝置的外部儲存空間中儲存名為 arcore-xxxxxx_xxxxxx.mp4 的新檔案。
現在,裝置的外部儲存空間中應該會有新的 arcore-xxxxxx_xxxxxx.mp4 檔案。在 Pixel 5 裝置上,路徑為 /storage/emulated/0/Movies/。開始錄影後,您可以在 Logcat 視窗中找到路徑。
com.google.ar.core.examples.java.helloar D/HelloArActivity: startRecording at:/storage/emulated/0/Movies/arcore-xxxxxxxx_xxxxxx.mp4
com.google.ar.core.examples.java.helloar D/HelloArActivity: startRecording - RecordingStatus OK
查看錄音內容
您可以使用檔案系統應用程式 (例如 Files by Google) 查看錄音內容,或將錄音內容複製到開發機器。以下是兩個 adb 指令,可列出及擷取 Android 裝置中的檔案:
adb shell ls '$EXTERNAL_STORAGE/Movies/*',顯示裝置外部儲存空間中「電影」目錄的檔案adb pull /absolute_path_from_previous_adb_shell_ls/arcore-xxxxxxxx_xxxxxx.mp4,將檔案從裝置複製到開發機器
以下是使用這兩項指令後 (在 macOS 中) 的輸出範例:
$ adb shell ls '$EXTERNAL_STORAGE/Movies/*'
/sdcard/Movies/arcore-xxxxxxxx_xxxxxx.mp4


$ adb pull /sdcard/Movies/arcore-xxxxxxxx_xxxxxx.mp4
/sdcard/Movies/arcore-xxxxxxxx_xxxxxx.mp4: ... pulled
您在這個步驟中完成的作業
- 新增開始及停止錄製的按鈕
- 實作開始和停止錄音的函式
- 在裝置上測試應用程式
- 已將錄製的 MP4 檔案複製到電腦並完成驗證
接著,您將從 MP4 檔案播放 AR 工作階段。
4. 從 MP4 檔案播放 ARCore 工作階段
現在您會看到「Record」(錄製) 按鈕,以及內含錄製工作階段的 MP4 檔案。現在,您將使用 ARCore Playback API 播放這些錄製內容。
新增「播放」按鈕的 UI
實作播放功能前,請先在 UI 中新增按鈕,讓使用者通知 ARCore 何時開始及停止播放工作階段。
在「Project」面板中,開啟 app/res/layout/activity_main.xml 檔案。
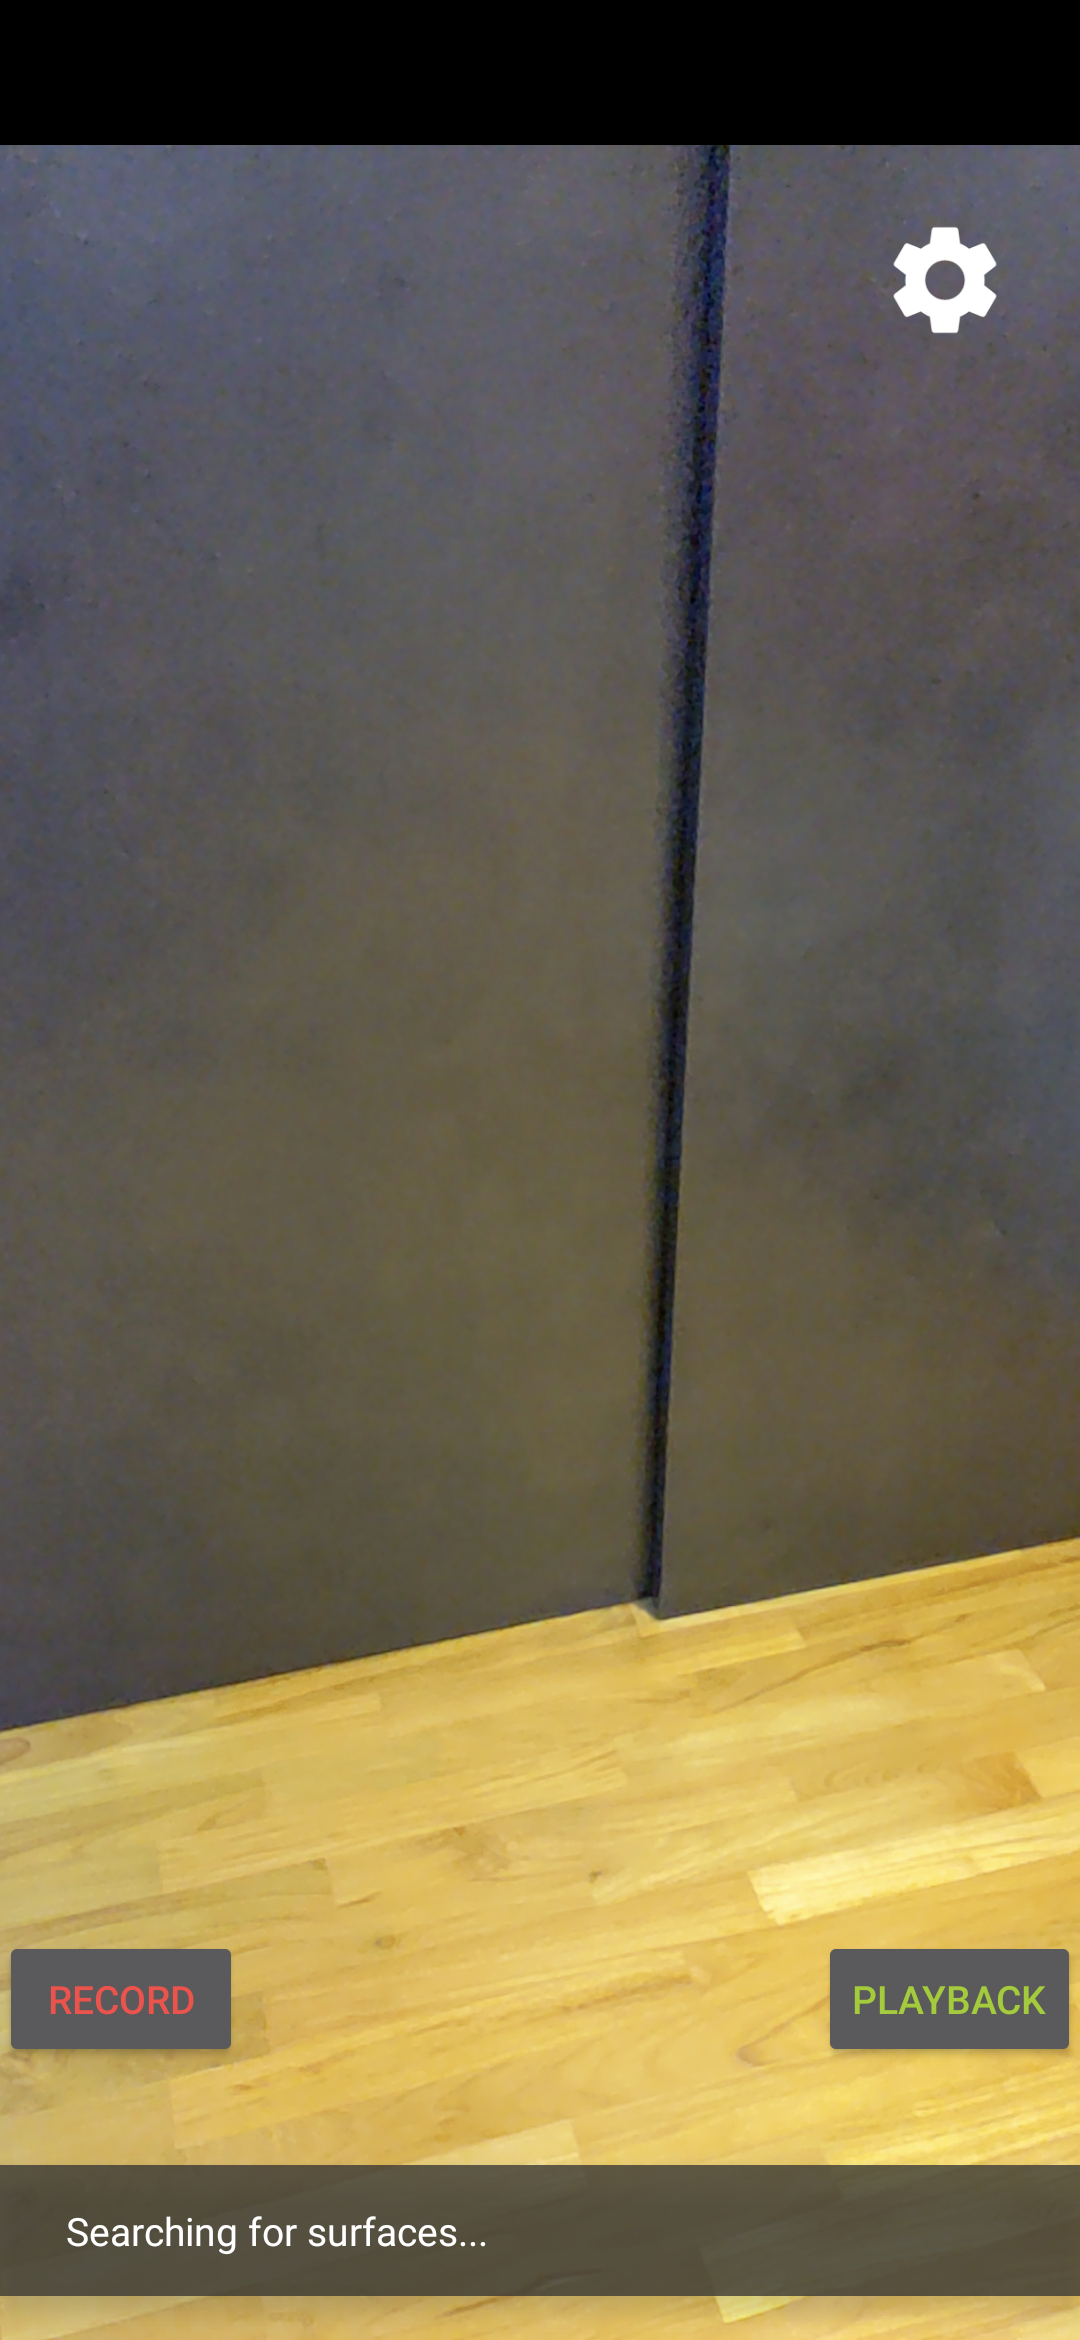
在 activity_main.xml 中,於結尾標記前加入下列程式碼,建立新的「Playback」按鈕,並將其事件處理常式設為名為 onClickPlayback() 的方法。這個按鈕與「錄製」按鈕類似,會顯示在畫面右側。
  <!--
    Add a new "Playback" button with those attributes:
        text is "Playback",
        onClick event handler is "onClickPlayback",
        text color is "green".
  -->
  <Button
      android:id="@+id/playback_button"
      android:layout_width="wrap_content"
      android:layout_height="wrap_content"
      android:layout_alignEnd="@id/surfaceview"
      android:layout_alignBottom="@id/surfaceview"
      android:layout_marginBottom="100dp"
      android:onClick="onClickPlayback"
      android:text="Playback"
      android:textColor="@android:color/holo_green_light" />
播放期間的更新按鈕
應用程式現在有新的狀態,稱為 Playingback。更新 AppState 列舉和所有以 appState 做為引數的現有函式,以處理這項作業。
在 HelloArActivity.java 中,將 Playingback 新增至 AppState 列舉:
  public enum AppState {
    Idle,
    Recording,
    Playingback // New enum value.
  }
如果「錄製」按鈕在播放期間仍顯示在畫面上,使用者可能會不小心點選該按鈕。為避免這種情況,請在播放期間隱藏「錄製」按鈕。這樣一來,您就不需要在 onClickRecord() 中處理 Playingback 狀態。
修改 HelloArActivity.java 中的 updateRecordButton() 函式,在應用程式處於 Playingback 狀態時隱藏「錄製」按鈕。
  // Update the "Record" button based on app's internal state.
  private void updateRecordButton() {
    View buttonView = findViewById(R.id.record_button);
    Button button = (Button)buttonView;

    switch (appState) {

      // The app is neither recording nor playing back. The "Record" button is visible.
      case Idle:
        button.setText("Record");
        button.setVisibility(View.VISIBLE);
        break;

      // While recording, the "Record" button is visible and says "Stop".
      case Recording:
        button.setText("Stop");
        button.setVisibility(View.VISIBLE);
        break;

      // During playback, the "Record" button is not visible.
      case Playingback:
        button.setVisibility(View.INVISIBLE);
        break;
    }
  }
同樣地,當使用者錄製工作階段時,請隱藏「播放」按鈕,並在使用者主動播放工作階段時,將按鈕文字變更為「停止」。這樣一來,他們不必等待播放完畢,就能停止播放。
在 HelloArActivity.java 中新增 updatePlaybackButton() 函式:
  // Update the "Playback" button based on app's internal state.
  private void updatePlaybackButton() {
    View buttonView = findViewById(R.id.playback_button);
    Button button = (Button)buttonView;

    switch (appState) {

      // The app is neither recording nor playing back. The "Playback" button is visible.
      case Idle:
        button.setText("Playback");
        button.setVisibility(View.VISIBLE);
        break;

      // While playing back, the "Playback" button is visible and says "Stop".
      case Playingback:
        button.setText("Stop");
        button.setVisibility(View.VISIBLE);
        break;

      // During recording, the "Playback" button is not visible.
      case Recording:
        button.setVisibility(View.INVISIBLE);
        break;
    }
  }
最後,更新 onClickRecord() 以呼叫 updatePlaybackButton()。在 HelloArActivity.java 中新增下列程式碼:
  public void onClickRecord(View view) {
    // ... omitted code ...
    updatePlaybackButton(); // Add this line to the end of the function.
  }
使用「播放」按鈕選取檔案
輕觸「播放」按鈕後,使用者應可選取要播放的檔案。在 Android 上,檔案選取作業會在另一個活動的系統檔案挑選器中處理。這是透過儲存空間存取架構 (SAF) 達成。使用者選取檔案後,應用程式會收到名為 onActivityResult() 的回呼。您會在回呼函式中啟動實際播放作業。
在 HelloArActivity.java 中,建立 onClickPlayback() 函式來選取檔案並停止播放。
  // Handle the click event of the "Playback" button.
  public void onClickPlayback(View view) {
    Log.d(TAG, "onClickPlayback");

    switch (appState) {

      // If the app is not playing back, open the file picker.
      case Idle: {
        boolean hasStarted = selectFileToPlayback();
        Log.d(TAG, String.format("onClickPlayback start: selectFileToPlayback %b", hasStarted));
        break;
      }

      // If the app is playing back, stop playing back.
      case Playingback: {
        boolean hasStopped = stopPlayingback();
        Log.d(TAG, String.format("onClickPlayback stop: hasStopped %b", hasStopped));
        break;
      }

      default:
        // Recording - do nothing.
        break;
    }

    // Update the UI for the "Record" and "Playback" buttons.
    updateRecordButton();
    updatePlaybackButton();
  }
在 HelloArActivity.java 中,建立可從裝置選取檔案的 selectFileToPlayback() 函式。如要從 Android 檔案系統選取檔案,請使用 ACTION_OPEN_DOCUMENT Intent。
// Add imports to the beginning of the file.
import android.content.Intent;
import android.provider.DocumentsContract;

  private boolean selectFileToPlayback() {
    // Start file selection from Movies directory.
    // Android 10 and above requires VOLUME_EXTERNAL_PRIMARY to write to MediaStore.
    Uri videoCollection;
    if (Build.VERSION.SDK_INT >= Build.VERSION_CODES.Q) {
      videoCollection = MediaStore.Video.Media.getContentUri(
          MediaStore.VOLUME_EXTERNAL_PRIMARY);
    } else {
      videoCollection = MediaStore.Video.Media.EXTERNAL_CONTENT_URI;
    }

    // Create an Intent to select a file.
    Intent intent = new Intent(Intent.ACTION_OPEN_DOCUMENT);

    // Add file filters such as the MIME type, the default directory and the file category.
    intent.setType(MP4_VIDEO_MIME_TYPE); // Only select *.mp4 files
    intent.putExtra(DocumentsContract.EXTRA_INITIAL_URI, videoCollection); // Set default directory
    intent.addCategory(Intent.CATEGORY_OPENABLE); // Must be files that can be opened

    this.startActivityForResult(intent, REQUEST_MP4_SELECTOR);

    return true;
  }
REQUEST_MP4_SELECTOR 是用於識別這項要求的常數。您可以在 HelloArActivity.java 中使用 HelloArActivity 內的任何預留位置值來定義:
private int REQUEST_MP4_SELECTOR = 1;
在 HelloArActivity.java 中覆寫 onActivityResult() 函式,處理檔案挑選器的回呼。
  // Begin playback once the user has selected the file.
  @Override
  protected void onActivityResult(int requestCode, int resultCode, Intent data) {
    // Check request status. Log an error if the selection fails.
    if (resultCode != android.app.Activity.RESULT_OK || requestCode != REQUEST_MP4_SELECTOR) {
      Log.e(TAG, "onActivityResult select file failed");
      return;
    }

    Uri mp4FileUri = data.getData();
    Log.d(TAG, String.format("onActivityResult result is %s", mp4FileUri));

    // Begin playback.
    startPlayingback(mp4FileUri);
  }
允許應用程式開始播放
如要播放 MP4 檔案,ARCore 工作階段需要進行三項 API 呼叫:
session.pause()session.setPlaybackDataset()session.resume()
在 HelloArActivity.java 中建立 startPlayingback() 函式。
// Add imports to the beginning of the file.
import com.google.ar.core.PlaybackStatus;
import com.google.ar.core.exceptions.PlaybackFailedException;

  private boolean startPlayingback(Uri mp4FileUri) {
    if (mp4FileUri == null)
      return false;

    Log.d(TAG, "startPlayingback at:" + mp4FileUri);

    pauseARCoreSession();

    try {
      session.setPlaybackDatasetUri(mp4FileUri);
    } catch (PlaybackFailedException e) {
      Log.e(TAG, "startPlayingback - setPlaybackDataset failed", e);
    }

    // The session's camera texture name becomes invalid when the
    // ARCore session is set to play back.
    // Workaround: Reset the Texture to start Playback
    // so it doesn't crashes with AR_ERROR_TEXTURE_NOT_SET.
    hasSetTextureNames = false;

    boolean canResume = resumeARCoreSession();
    if (!canResume)
      return false;

    PlaybackStatus playbackStatus = session.getPlaybackStatus();
    Log.d(TAG, String.format("startPlayingback - playbackStatus %s", playbackStatus));


    if (playbackStatus != PlaybackStatus.OK) { // Correctness check
      return false;
    }

    appState = AppState.Playingback;
    updateRecordButton();
    updatePlaybackButton();

    return true;
  }
允許應用程式停止播放
在 HelloArActivity.java 中建立名為 stopPlayingback() 的函式,以處理應用程式狀態變更,方法如下:
- 使用者已停止播放 MP4 影片
- MP4 影片自行播放完畢
如果使用者停止播放,應用程式應返回使用者首次啟動時的狀態。
  // Stop the current playback, and restore app status to Idle.
  private boolean stopPlayingback() {
    // Correctness check, only stop playing back when the app is playing back.
    if (appState != AppState.Playingback)
      return false;

    pauseARCoreSession();

    // Close the current session and create a new session.
    session.close();
    try {
      session = new Session(this);
    } catch (UnavailableArcoreNotInstalledException
        |UnavailableApkTooOldException
        |UnavailableSdkTooOldException
        |UnavailableDeviceNotCompatibleException e) {
      Log.e(TAG, "Error in return to Idle state. Cannot create new ARCore session", e);
      return false;
    }
    configureSession();

    boolean canResume = resumeARCoreSession();
    if (!canResume)
      return false;

    // A new session will not have a camera texture name.
    // Manually set hasSetTextureNames to false to trigger a reset.
    hasSetTextureNames = false;

    // Reset appState to Idle, and update the "Record" and "Playback" buttons.
    appState = AppState.Idle;
    updateRecordButton();
    updatePlaybackButton();

    return true;
  }
播放器到達 MP4 檔案結尾時,播放作業也會自然停止。這時 stopPlayingback() 應將應用程式的狀態切換回 Idle。在 onDrawFrame() 中,檢查 PlaybackStatus。如果是 FINISHED,請在 UI 執行緒上呼叫 stopPlayingback() 函式。
  public void onDrawFrame(SampleRender render) {
      // ... omitted code ...

      // Insert before this line:
      // frame = session.update();

      // Check the playback status and return early if playback reaches the end.
      if (appState == AppState.Playingback
          && session.getPlaybackStatus() == PlaybackStatus.FINISHED) {
        this.runOnUiThread(this::stopPlayingback);
        return;
      }

      // ... omitted code ...
  }
從目標裝置播放
現在來看看您目前建構的內容。將行動裝置連上開發機器,然後在 Android Studio 中按一下「Run」。
應用程式啟動後,畫面上會顯示紅色「錄製」按鈕 (位於左側) 和綠色「播放」按鈕 (位於右側)。
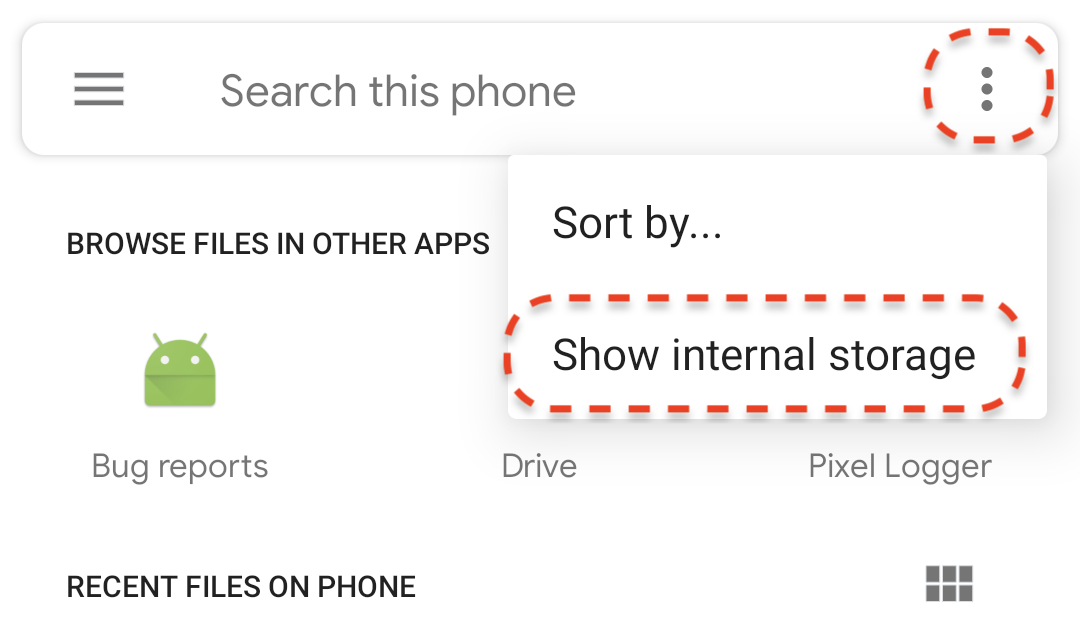
輕觸「播放」按鈕,然後選取剛錄製的其中一個 MP4 檔案。如果沒有看到任何以 arcore- 開頭的檔案名稱,可能是裝置未顯示「電影」資料夾。在這種情況下,請使用左上角的選單,依序前往「手機型號」>「電影」資料夾。您可能也需要啟用「顯示內部儲存空間」選項,才能顯示手機型號資料夾。
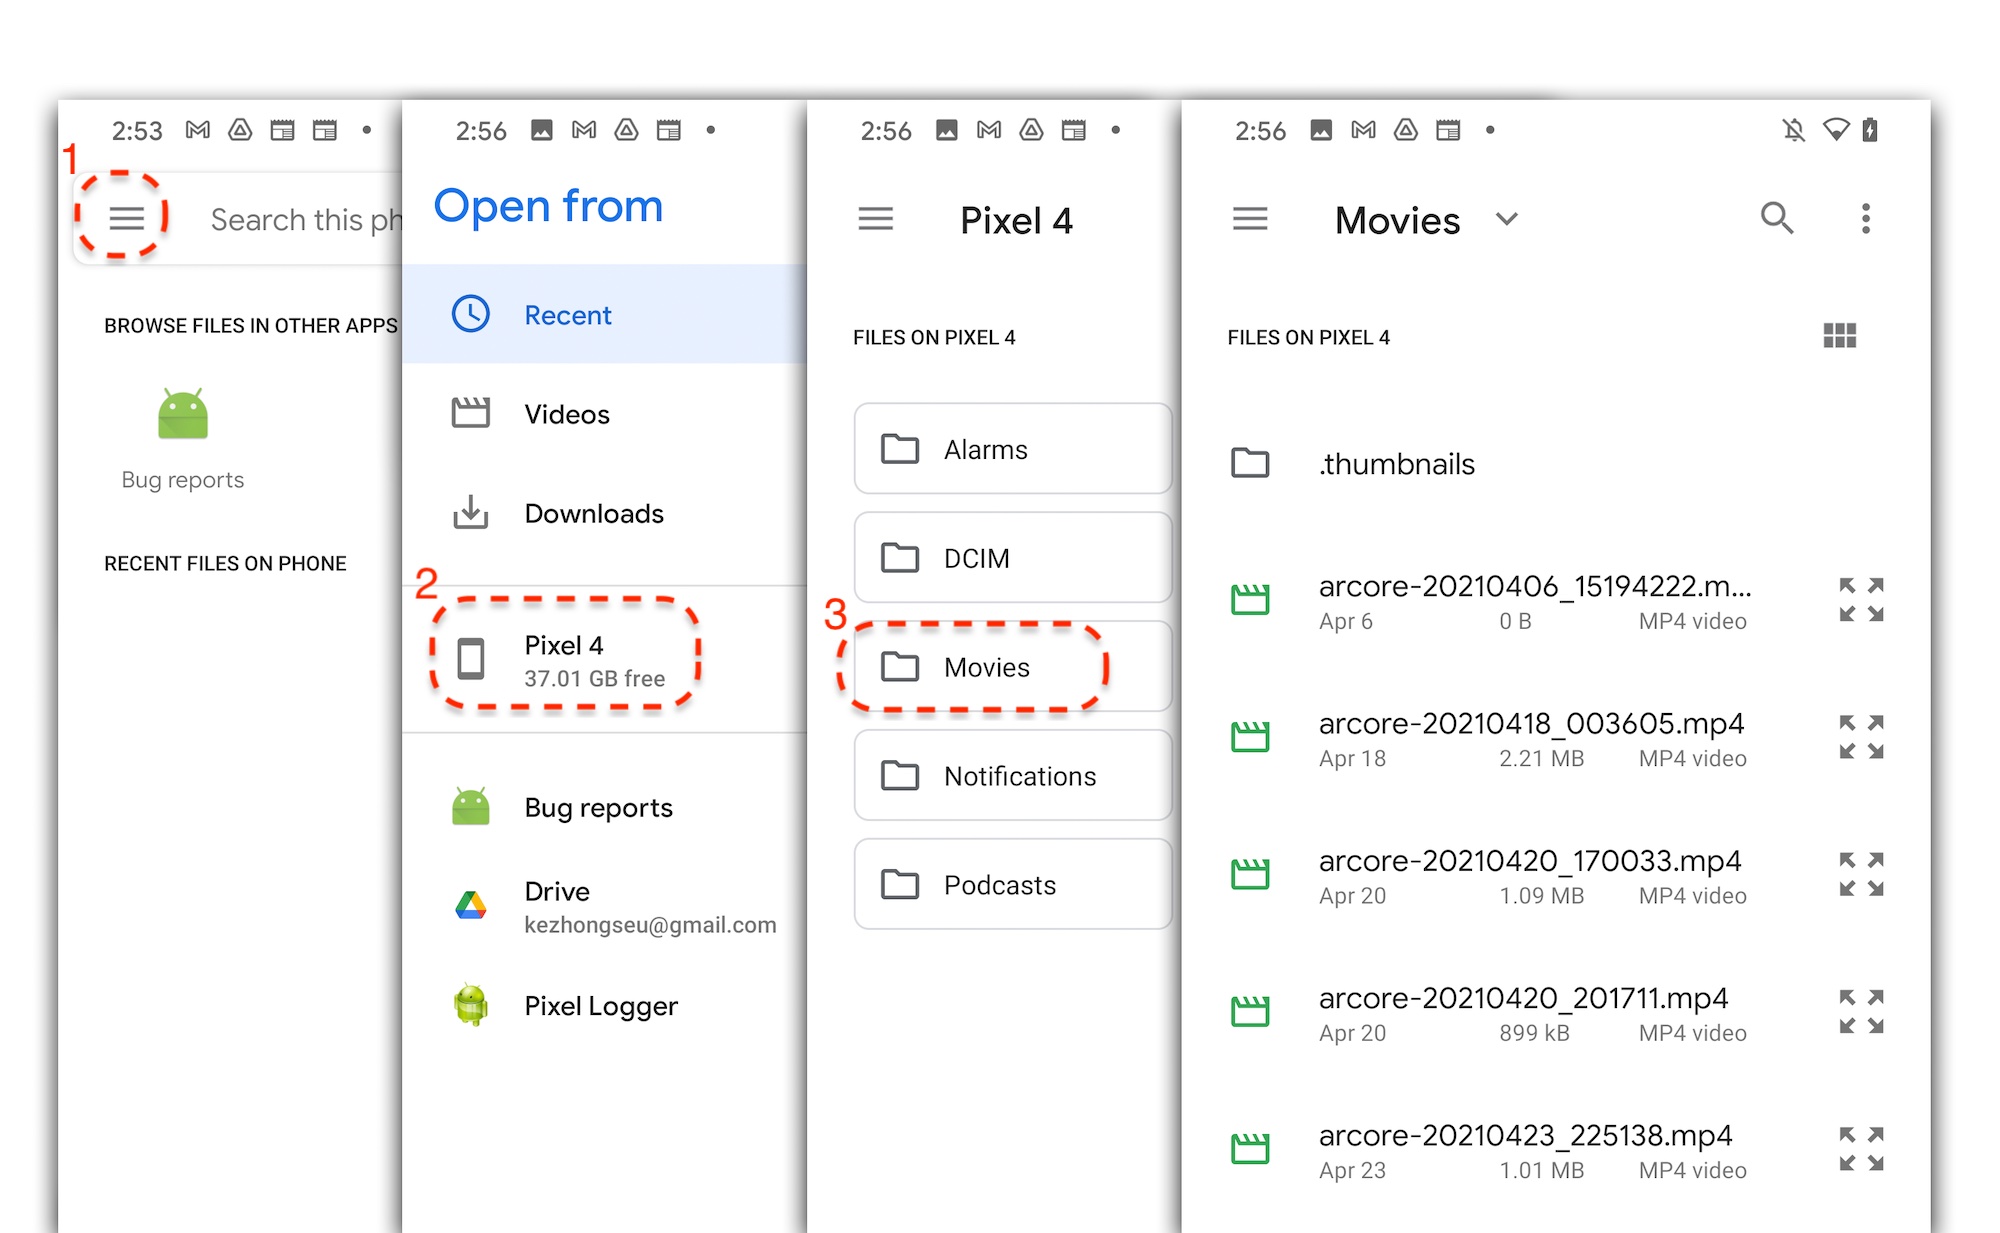
輕觸畫面上的檔案名稱,選取 MP4 檔案。應用程式應會播放 MP4 檔案。
播放工作階段與播放一般影片的差異在於,您可以與錄製的工作階段互動。輕觸偵測到的平面,在畫面上放置標記。
您在這個步驟中完成的作業
- 新增開始及停止播放的按鈕
- 實作函式,讓應用程式開始及停止錄音
- 在裝置上播放先前錄製的 ARCore 工作階段
5. 在 MP4 中記錄其他資料
使用 ARCore 1.24 時,可以在 MP4 檔案中記錄額外資訊。您可以記錄 AR 物件放置位置的 Pose,然後在播放期間於相同位置建立 AR 物件。
設定要錄製的新音軌
在 HelloArActivity.java 中使用 UUID 和 MIME 標記定義新軌。
// Add imports to the beginning of the file.
import java.util.UUID;
import com.google.ar.core.Track;

  // Inside the HelloArActiity class.
  private static final UUID ANCHOR_TRACK_ID = UUID.fromString("53069eb5-21ef-4946-b71c-6ac4979216a6");;
  private static final String ANCHOR_TRACK_MIME_TYPE = "application/recording-playback-anchor";

  private boolean startRecording() {
    // ... omitted code ...

    // Insert after line:
    //   pauseARCoreSession();

    // Create a new Track, with an ID and MIME tag.
    Track anchorTrack = new Track(session)
        .setId(ANCHOR_TRACK_ID).
        .setMimeType(ANCHOR_TRACK_MIME_TYPE);
    // ... omitted code ...
  }
更新現有程式碼,透過呼叫 addTrack() 建立 RecordingConfig 物件。
  private boolean startRecording() {
    // ... omitted code ...

    // Update the lines below with a call to the addTrack() function:
    //   RecordingConfig recordingConfig = new RecordingConfig(session)
    //    .setMp4DatasetUri(mp4FileUri)
    //    .setAutoStopOnPause(true);

    RecordingConfig recordingConfig = new RecordingConfig(session)
        .setMp4DatasetUri(mp4FileUri)
        .setAutoStopOnPause(true)
        .addTrack(anchorTrack); // add the new track onto the recordingConfig

    // ... omitted code ...
  }
在錄製期間儲存錨定姿勢
每當使用者輕觸偵測到的平面,系統就會在 Anchor 上放置 AR 標記,而 ARCore 會更新標記的姿態。
如果仍在錄製 ARCore 工作階段,請在建立影格時記錄 Anchor 的姿勢。
修改 HelloArActivity.java 中的 handleTap() 函式。
// Add imports to the beginning of the file.
import com.google.ar.core.Pose;
import java.nio.FloatBuffer;

  private void handleTap(Frame frame, Camera camera) {
          // ... omitted code ...

          // Insert after line:
          // anchors.add(hit.createAnchor());

          // If the app is recording a session,
          // save the new Anchor pose (relative to the camera)
          // into the ANCHOR_TRACK_ID track.
          if (appState == AppState.Recording) {
            // Get the pose relative to the camera pose.
            Pose cameraRelativePose = camera.getPose().inverse().compose(hit.getHitPose());
            float[] translation = cameraRelativePose.getTranslation();
            float[] quaternion = cameraRelativePose.getRotationQuaternion();
            ByteBuffer payload = ByteBuffer.allocate(4 * (translation.length + quaternion.length));
            FloatBuffer floatBuffer = payload.asFloatBuffer();
            floatBuffer.put(translation);
            floatBuffer.put(quaternion);

            try {
              frame.recordTrackData(ANCHOR_TRACK_ID, payload);
            } catch (IllegalStateException e) {
              Log.e(TAG, "Error in recording anchor into external data track.", e);
            }
          }
          // ... omitted code ...
  }
我們之所以保留攝影機相對 Pose,而非世界相對 Pose,是因為錄製工作階段的世界原點與播放工作階段的世界原點不同。錄製工作階段的世界原點會在工作階段首次恢復時啟動,也就是首次呼叫 Session.resume() 時。播放工作階段的世界原點會在錄製第一個影格時啟動,也就是在 Session.resume() 首次呼叫 Session.startRecording() 後。
建立播放錨點
重新建立 Anchor 的過程很簡單,在 HelloArActivity.java 中新增名為 createRecordedAnchors() 的函式。
// Add imports to the beginning of the file.
import com.google.ar.core.TrackData;

  // Extract poses from the ANCHOR_TRACK_ID track, and create new anchors.
  private void createRecordedAnchors(Frame frame, Camera camera) {
    // Get all `ANCHOR_TRACK_ID` TrackData from the frame.
    for (TrackData trackData : frame.getUpdatedTrackData(ANCHOR_TRACK_ID)) {
      ByteBuffer payload = trackData.getData();
      FloatBuffer floatBuffer = payload.asFloatBuffer();

      // Extract translation and quaternion from TrackData payload.
      float[] translation = new float[3];
      float[] quaternion = new float[4];

      floatBuffer.get(translation);
      floatBuffer.get(quaternion);

      // Transform the recorded anchor pose
      // from the camera coordinate
      // into world coordinates.
      Pose worldPose = camera.getPose().compose(new Pose(translation, quaternion));

      // Re-create an anchor at the recorded pose.
      Anchor recordedAnchor = session.createAnchor(worldPose);

      // Add the new anchor into the list of anchors so that
      // the AR marker can be displayed on top.
      anchors.add(recordedAnchor);
    }
  }
在 HelloArActivity.java 的 onDrawFrame() 函式中呼叫 createRecordedAnchors()。
  public void onDrawFrame(SampleRender render) {
    // ... omitted code ...

    // Insert after this line:
    // handleTap(frame, camera);

    // If the app is currently playing back a session, create recorded anchors.
    if (appState == AppState.Playingback) {
      createRecordedAnchors(frame, camera);
    }
    // ... omitted code ...
  }
在目標裝置上測試
將行動裝置連上開發機器,然後在 Android Studio 中按一下「Run」。
首先,輕觸「錄製」按鈕即可錄製課程。錄製影片時,輕觸偵測到的飛機,放置幾個 AR 標記。
停止錄製後,輕觸「播放」按鈕,然後選取剛錄製的檔案。系統應會開始播放內容。請注意,您先前放置的 AR 標記會顯示在您輕觸應用程式的位置。
這就是您在本程式碼研究室中需要完成的所有程式碼。
6. 恭喜
恭喜,您已完成本程式碼研究室!回顧一下您在本程式碼研究室中完成的工作:
- 建構並執行 ARCore Hello AR Java 範例。
- 在應用程式中新增「錄製」按鈕,可將 AR 工作階段儲存為 MP4 檔案
- 在應用程式中新增「播放」按鈕,可從 MP4 檔案播放 AR 工作階段
- 新增功能:儲存使用者在 MP4 中建立的錨點,以便播放