1. Overview
ARCore is a platform for building augmented reality apps on Android. Augmented Images gives you the ability to create AR apps that can recognize pre-registered 2D images in the real world and anchor virtual content on top of them.
This codelab guides you through modifying an existing ARCore sample app to incorporate Augmented Images that are moving or fixed in place.
What you'll build
In this codelab, you're going to build upon a pre-existing ARCore sample app. By the end of the codelab, your app will be able to:
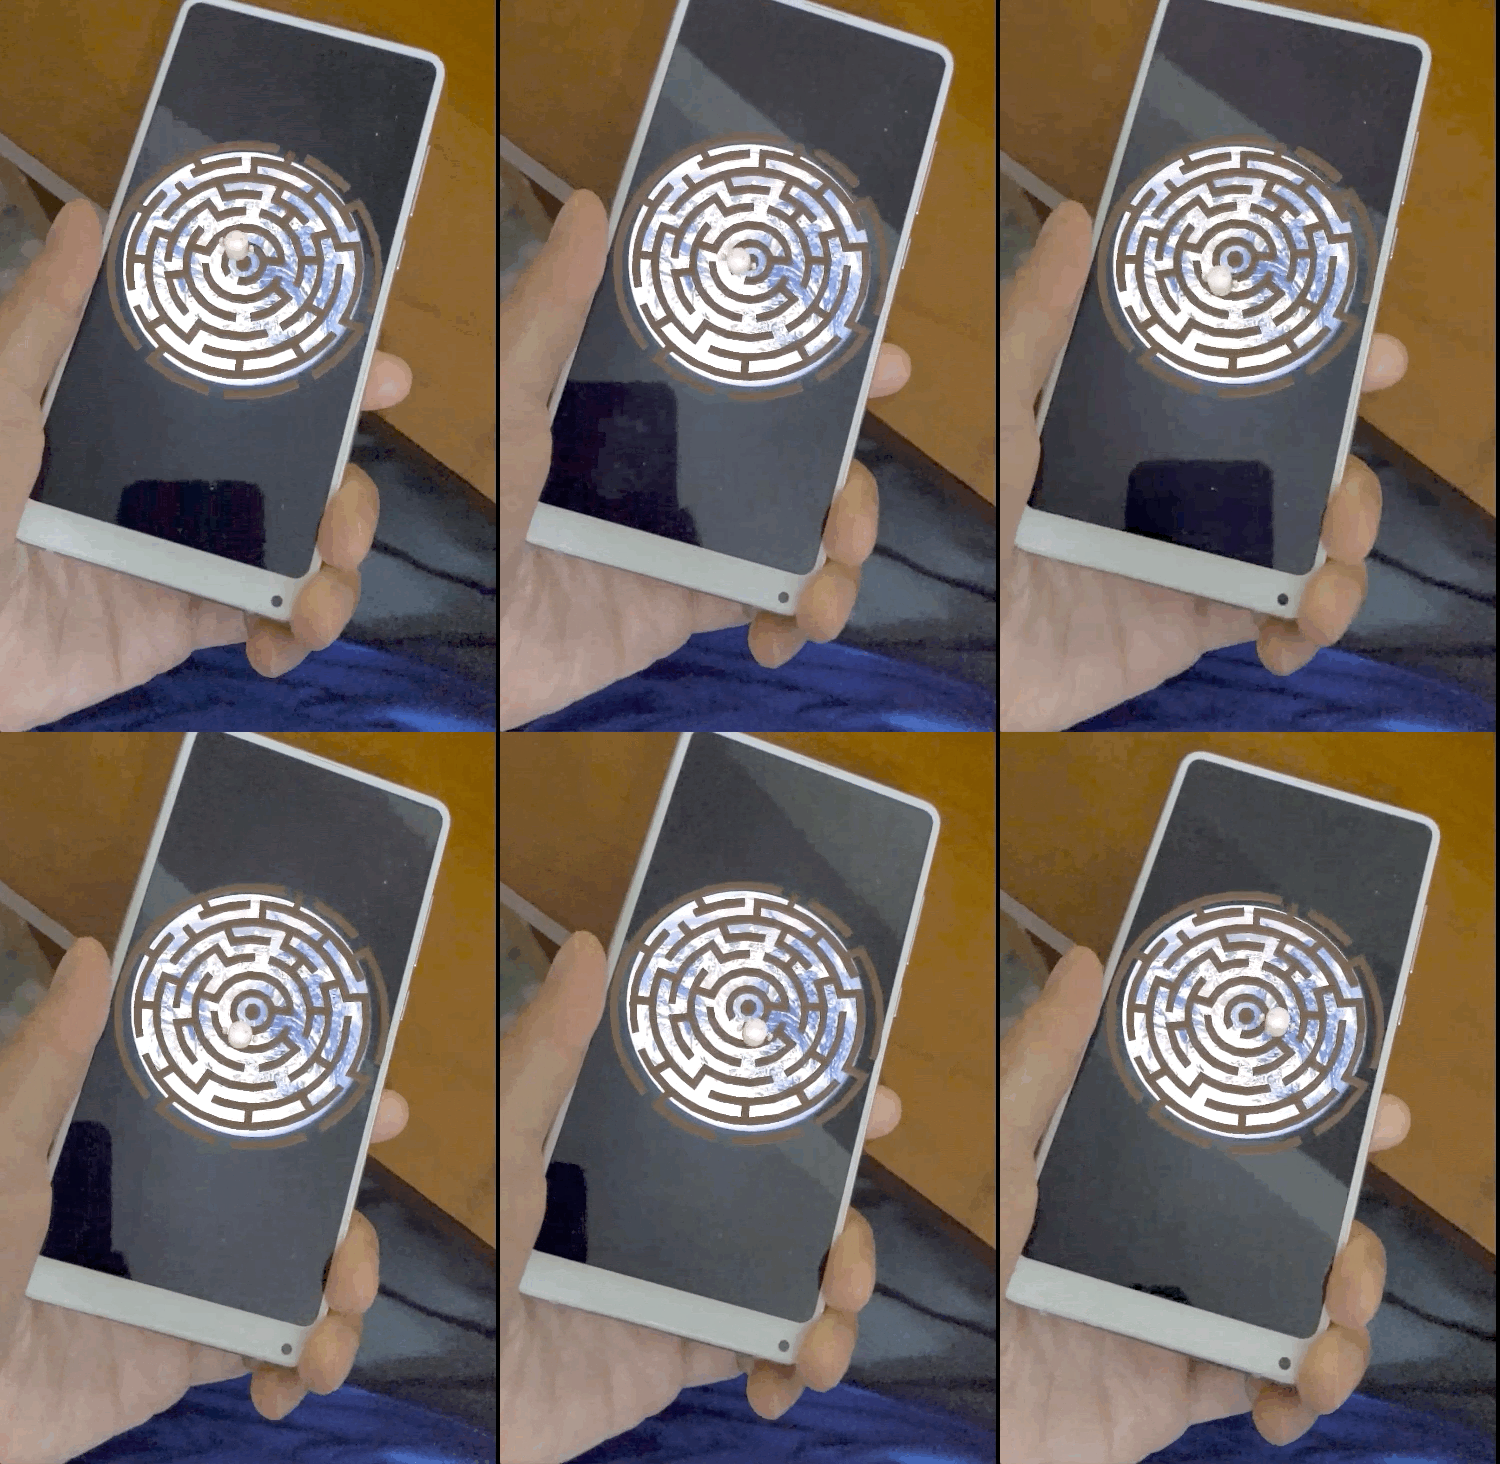
- Detect an image target and attach a virtual maze on the target
- Track the moving target as long as it is in the camera's view
Is this your first time making an ARCore app?
Do you plan to write sample code in this codelab or just want to read these pages?
What you'll learn
- How to use Augmented Images in ARCore in Java
- How to gauge the ability of an image to be recognized by ARCore
- How to attach a virtual content on an image and track its movement
Prerequisites
You'll need specific hardware and software to complete this codelab.
Hardware requirements
- An ARCore supported device connected via a USB cable to your development machine
Software requirements
- ARCore APK 1.9.0 or later. This APK is normally automatically installed on the device via the Play Store
- A development machine with Android Studio (v3.1 or later)
- Access to the Internet, as you will need to download libraries during development
Now that you've got everything ready, let's start!
2. Set up the development environment
Download the SDK
We'll start by downloading the latest ARCore Android SDK from GitHub. Unzip it to your preferred location. For this codelab, the earliest SDK version is 1.18.1. The folder will be referred as arcore-android-sdk-x.xx.x, the exact value will be the version of SDK that you use.
Launch Android Studio, and click Open an existing Android Studio project.
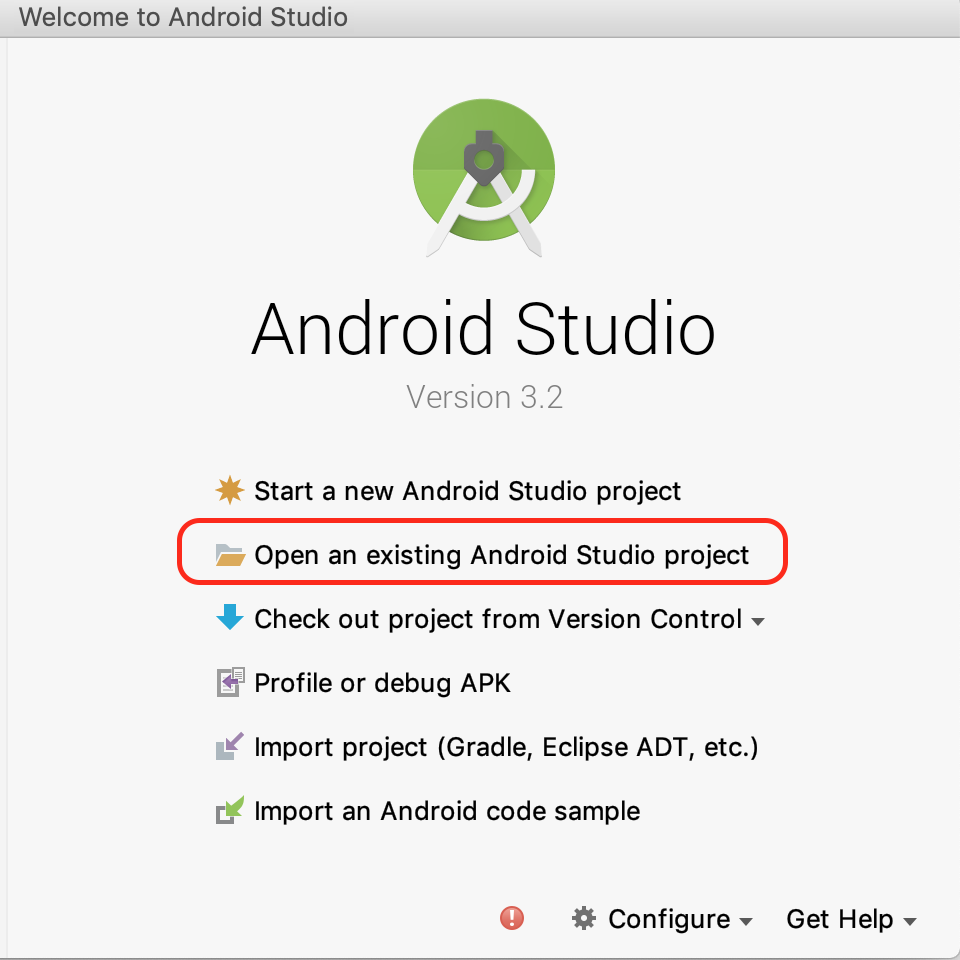
Navigate to this unzipped folder:
arcore-android-sdk-x.xx.x/samples/augmented_image_java
Click Open.
Wait for Android studio to finish syncing the project. If your Android Studio doesn't have the required components, it may fail with the message Install missing platform and sync project. Follow the instructions to fix the problem.
Run the sample app
Now that you have a working ARCore app project, let's give it a test run.
Connect your ARCore device to the development machine, and use menu Run > Run ‘app' to run the debug version on the device. In the dialog prompting you to choose which device to run from, choose the connected device and click OK.

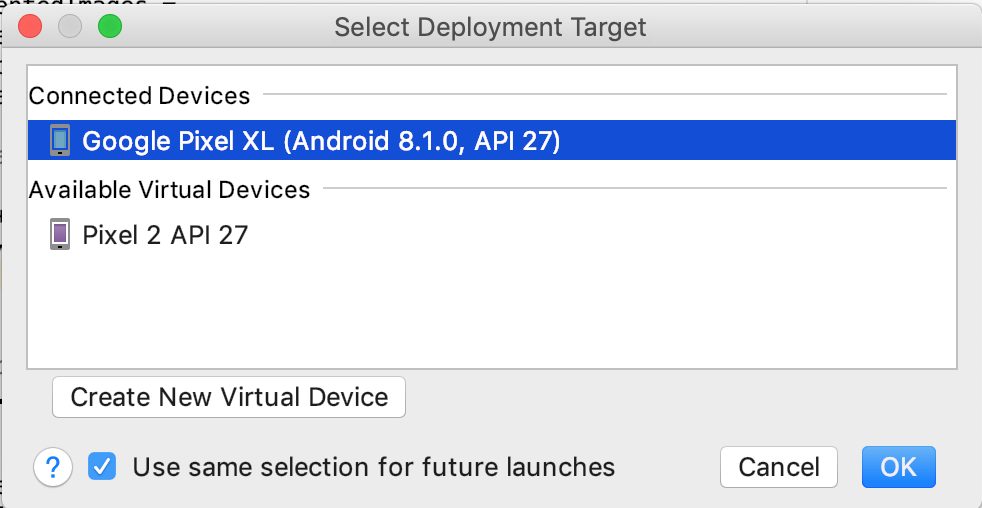
This sample project uses targetSdkVersion 28. If you have a build error such as Failed to find Build Tools revision 28.0.3, follow the instructions described in Android Studio to download and install the required Android Build Tools version.
If everything is successful, the sample app will launch on the device and prompt you for permission to allow Augmented Image to take pictures and videos. Tap ALLOW to grant permission.
Test with a sample image
Now that you've set up your development environment, you can test the app by giving it an image to look at.
Back in Android Studio, in the Project window, navigate to app > assets, and double-click the file default.jpg to open it.
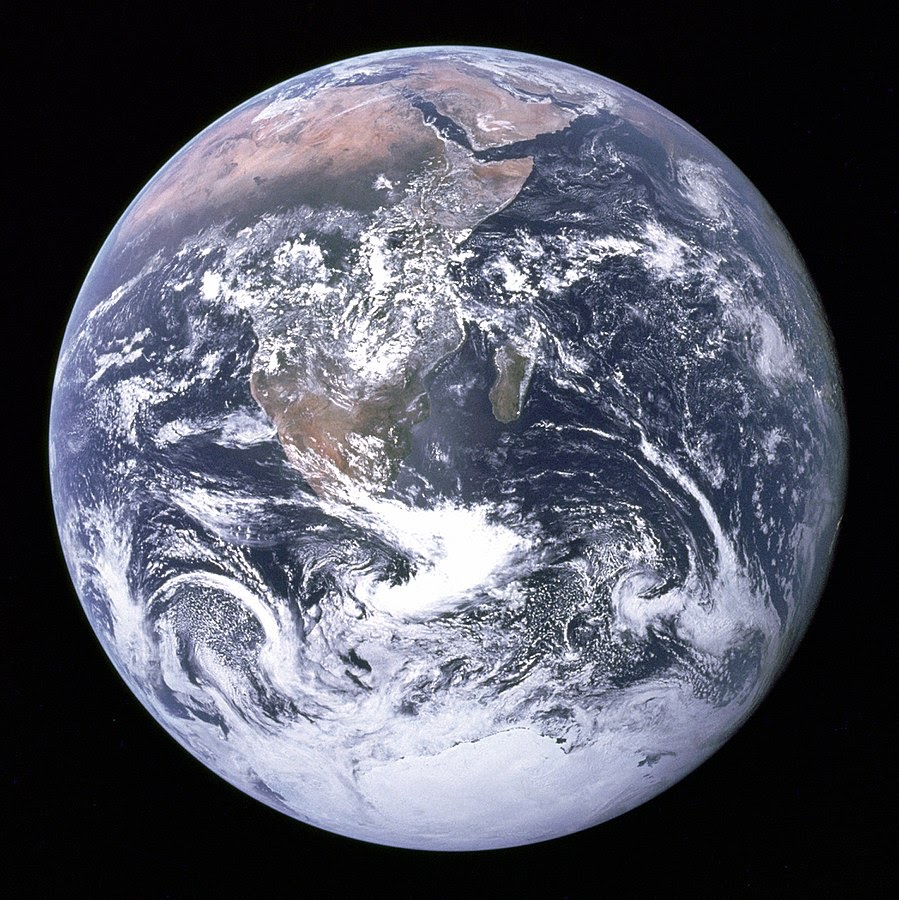
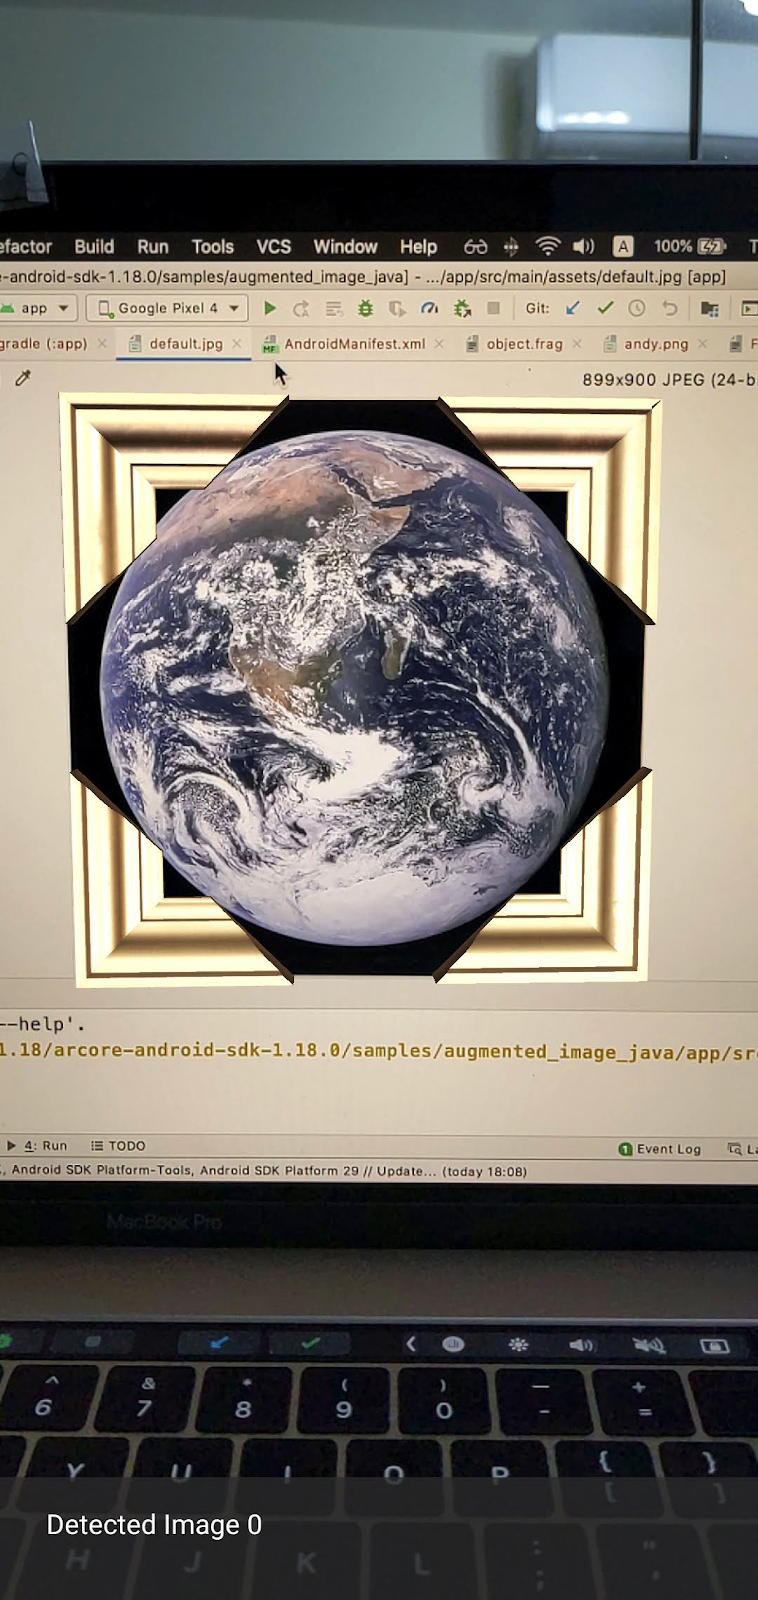
Point your device camera at the image of the Earth on screen, and follow the instructions to fit the image you're scanning into the crosshairs.
An image frame will overlay on top of the image, like this:
Next, we'll make small improvements to the sample app.
3. Display a maze model on the 2D Image
You can start playing with Augmented Images by displaying a 3D model on top of it.
Download a 3D model
For this codelab we're going to use "Circle Maze - Green" by Evol, and licensed under CC-BY 3.0. I stored a copy of this 3D model in the github repository of this codelab, which you can find here.
Follow these steps to download the model and include it into Android Studio.
- Navigate to the GitHub repository of this codelab, third_party directory.
- Click GreenMaze_obj.zip, and click the Download button.
This downloads a file called GreenMaze_obj.zip.
- In Android studio, create
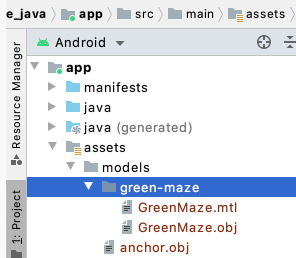
green-mazedirectory under app > assets > models - Unzip
GreenMaze_obj.zipand copy the content to this location:arcore-android-sdk-x.xx.x/samples/augmented_image_java/app/src/main/assets/models/green-maze - In Android Studio, navigate to app > assets > models > green-maze.
There should be two files in this folder: GreenMaze.obj and GreenMaze.mtl.
Render the maze model
Follow these steps to display the GreenMaze.obj 3D model on top of the existing 2D image.
In AugmentedImageRenderer.java, add a member variable called mazeRenderer to render the maze model. Because the maze should attach to the image, it makes sense to put the mazeRenderer inside the AugmentedImageRenderer class.
AugmentedImageRenderer.java
  // Add a member variable to hold the maze model.
  private final ObjectRenderer mazeRenderer = new ObjectRenderer();
In the createOnGlThread() function, load the GreenMaze.obj. For simplicity, use the same frame texture as its texture.
AugmentedImageRenderer.java
  // Replace the definition of the createOnGlThread() function with the
  // following code, which loads GreenMaze.obj.
  public void createOnGlThread(Context context) throws IOException {

    mazeRenderer.createOnGlThread(
        context, "models/green-maze/GreenMaze.obj", "models/frame_base.png");
    mazeRenderer.setMaterialProperties(0.0f, 3.5f, 1.0f, 6.0f);

  }
Replace the definition of the draw() function with the following. This adjusts the size of the maze to the size of the detected image, and renders it on-screen.
AugmentedImageRenderer.java
  // Adjust size of detected image and render it on-screen
  public void draw(
      float[] viewMatrix,
      float[] projectionMatrix,
      AugmentedImage augmentedImage,
      Anchor centerAnchor,
      float[] colorCorrectionRgba) {
    float[] tintColor =
        convertHexToColor(TINT_COLORS_HEX[augmentedImage.getIndex() % TINT_COLORS_HEX.length]);

    final float mazeEdgeSize = 492.65f; // Magic number of maze size
    final float maxImageEdgeSize = Math.max(augmentedImage.getExtentX(), augmentedImage.getExtentZ()); // Get largest detected image edge size

    Pose anchorPose = centerAnchor.getPose();

    float mazeScaleFactor = maxImageEdgeSize / mazeEdgeSize; // scale to set Maze to image size
    float[] modelMatrix = new float[16];

    // OpenGL Matrix operation is in the order: Scale, rotation and Translation
    // So the manual adjustment is after scale
    // The 251.3f and 129.0f is magic number from the maze obj file
    // You mustWe need to do this adjustment because the maze obj file
    // is not centered around origin. Normally when you
    // work with your own model, you don't have this problem.
    Pose mazeModelLocalOffset = Pose.makeTranslation(
                                -251.3f * mazeScaleFactor,
                                0.0f,
                                129.0f * mazeScaleFactor);
    anchorPose.compose(mazeModelLocalOffset).toMatrix(modelMatrix, 0);
    mazeRenderer.updateModelMatrix(modelMatrix, mazeScaleFactor, mazeScaleFactor/10.0f, mazeScaleFactor); // This line relies on a change in ObjectRenderer.updateModelMatrix later in this codelab.
    mazeRenderer.draw(viewMatrix, projectionMatrix, colorCorrectionRgba, tintColor);
  }
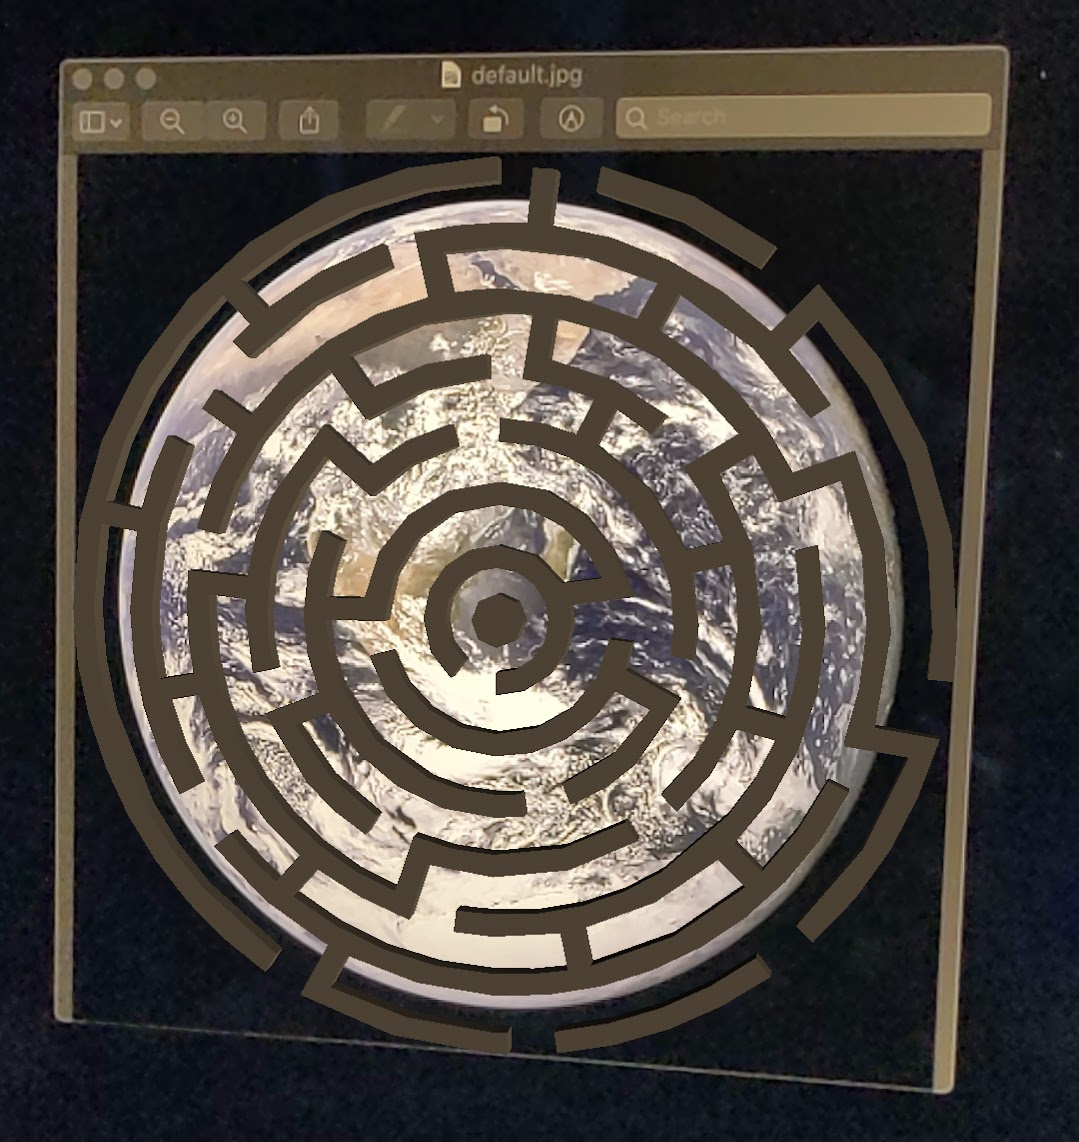
Now, the maze should display on top of the default.jpg picture of the Earth.
Note: Because you don't have full control over this sample 3D model, the above code uses a few "magic" numbers. The dimension of the maze model is 492.65 x 120 x 492.65, with the center at (251.3, 60, -129.0). The range of its vertices' X, Y, and Z coordinates values are [5.02, 497.67], [0, 120], and [-375.17, 117.25] respectively. Thus, the maze model's scale needs to be image_size / 492.65. The mazeModelLocalOffset is introduced because the maze's 3D model is not centered around origin (0, 0, 0).
The maze's wall is still a bit too high to fit on top of the picture. Create a helper function updateModelMatrix() that can scale X, Y, Z unevenly to scale the Maze's height by 0.1. Note, you shall keep the existing updateModelMatrix(float[] modelMatrix, float scaleFactor) and add the function overload updateModelMatrix(float[] modelMatrix, float scaleFactorX, float scaleFactorY, float scaleFactorZ) as a new function.
common/rendering/ObjectRenderer.java
// Scale X, Y, Z coordinates unevenly
public void updateModelMatrix(float[] modelMatrix, float scaleFactorX, float scaleFactorY, float scaleFactorZ) {
    float[] scaleMatrix = new float[16];
    Matrix.setIdentityM(scaleMatrix, 0);
    scaleMatrix[0] = scaleFactorX;
    scaleMatrix[5] = scaleFactorY;
    scaleMatrix[10] = scaleFactorZ;
    Matrix.multiplyMM(this.modelMatrix, 0, modelMatrix, 0, scaleMatrix, 0);
}
Run the code. The maze should now fit perfectly above the image.
4. Add Andy to the maze
Now that you have a maze, add a character to move around inside of it. Use the andy.obj file included in ARCore Android SDK. Keep the image frame texture as its texture, because it looks different from the green maze rendered on top of the image.
In AugmentedImageRenderer.java, add a private ObjectRenderer to render Andy.
AugmentedImageRenderer.java
// Render for Andy
  private final ObjectRenderer andyRenderer = new ObjectRenderer();
Next, initialize andyRenderer at the end of createOnGlThread().
AugmentedImageRenderer.java
public void createOnGlThread(Context context) throws IOException {

    // Initialize andyRenderer
    andyRenderer.createOnGlThread(
        context, "models/andy.obj", "models/andy.png");
    andyRenderer.setMaterialProperties(0.0f, 3.5f, 1.0f, 6.0f);
  }
Finally, render Andy standing on top of the maze at the end of the draw() function.
AugmentedImageRenderer.java
public void draw(
      float[] viewMatrix,
      float[] projectionMatrix,
      AugmentedImage augmentedImage,
      Anchor centerAnchor,
      float[] colorCorrectionRgba) {


    // Render Andy, standing on top of the maze
    Pose andyModelLocalOffset = Pose.makeTranslation(
        0.0f,
        0.1f,
        0.0f);
    anchorPose.compose(andyModelLocalOffset).toMatrix(modelMatrix, 0);
    andyRenderer.updateModelMatrix(modelMatrix, 0.05f); // 0.05f is a Magic number to scale
    andyRenderer.draw(viewMatrix, projectionMatrix, colorCorrectionRgba, tintColor);

  }
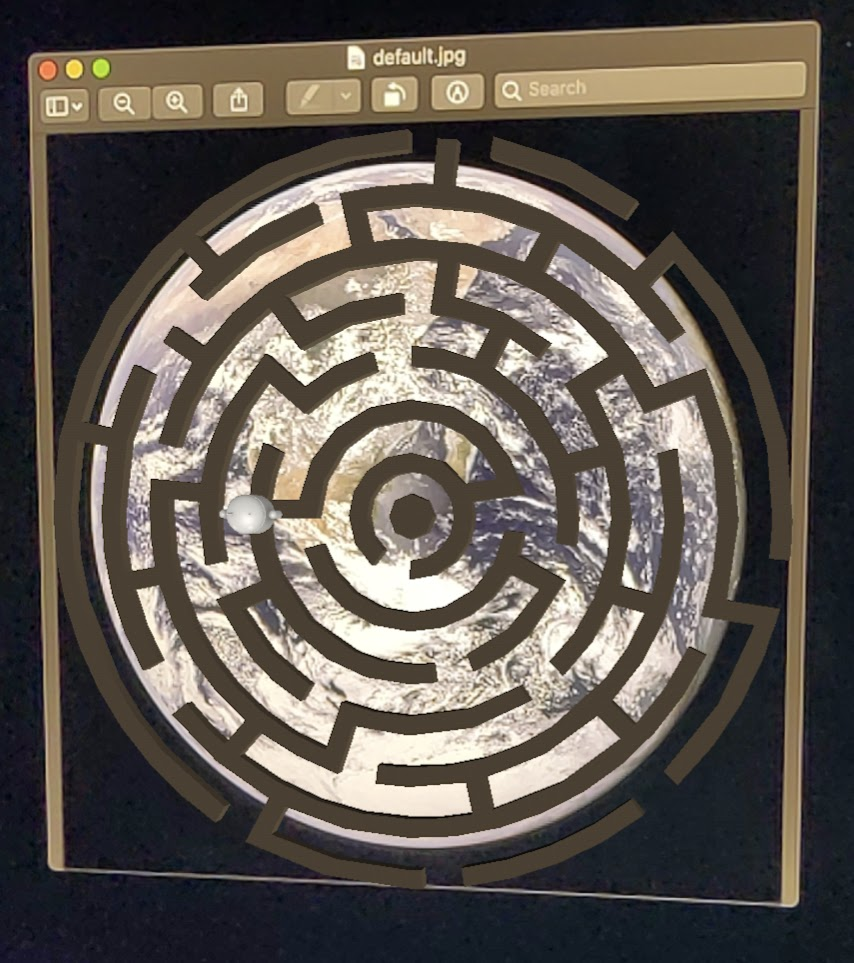
Run your code. You should see the Andy standing on top of the maze.
Determine target image quality
ARCore relies on visual features to recognize images. Due to differences in quality, not all images can be easily recognized.
arcoreimg is a command-line tool that allows you to determine how recognizable an image will be to ARCore. It outputs a number between 0 to 100, with 100 being the easiest to recognize.
. Here's an example:
arcore-android-sdk-x.xx.x/tools/arcoreimg/macos$
$ ./arcoreimg  eval-img --input_image_path=/Users/username/maze.jpg
100
maze.jpg has a value of 100, so it is easily recognized by ARCore.
5. Optional: Make the Andy move in the maze
Finally, you can add some code to make the andy move in the maze. For example, use the open source Physics engine, jBullet to handle the physics simulation. It is totally fine if you skip this part.
Download PhysicsController.java and add it to your project in directory
arcore-android-sdk-x.xx.x/samples/augmented_image_java/app/src/main/java/com/google/ar/core/examples/java/augmentedimage/
In Android Studio, Add GreenMaze.obj to the project assets directory, so that it can be loaded at runtime. Copy GreenMaze.obj from app > assets > models > green-maze to app > assets.
Add the following dependencies to the app's build.gradle file.
app/build.gradle
    // jbullet library
    implementation 'cz.advel.jbullet:jbullet:20101010-1'
Define a variable andyPose to store the position of Andy's current pose.
AugmentedImageRenderer.java
  // Create a new pose for the Andy
  private Pose andyPose = Pose.IDENTITY;
Modify AugmentedImageRenderer.java to render the Andy using the new andyPose variable.
AugmentedImageRenderer.java
public void draw(
      float[] viewMatrix,
      float[] projectionMatrix,
      AugmentedImage augmentedImage,
      Anchor centerAnchor,
      float[] colorCorrectionRgba) {

    // Use these code to replace previous code for rendering the Andy object
    //
    // Adjust the Andy's rendering position
    // The Andy's pose is at the maze's vertex's coordinate
    Pose andyPoseInImageSpace = Pose.makeTranslation(
        andyPose.tx() * mazeScaleFactor,
        andyPose.ty() * mazeScaleFactor,
        andyPose.tz() * mazeScaleFactor);

    anchorPose.compose(andyPoseInImageSpace).toMatrix(modelMatrix, 0);
    andyRenderer.updateModelMatrix(modelMatrix, 0.05f);
    andyRenderer.draw(viewMatrix, projectionMatrix, colorCorrectionRgba, tintColor);
  }
Add a new utility function, updateAndyPose(), to receive Andy pose updates.
AugmentedImageRenderer.java
  // Receive Andy pose updates
  public void updateAndyPose(Pose pose) {
    andyPose = pose;
  }
In AugmentedImageActivity.java, create a PhysicsController object that uses the JBullet physics engine to manage all physics-related functions.
AugmentedImageActivity.java
import com.google.ar.core.Pose;

  // Declare the PhysicsController object
  private PhysicsController physicsController;
In the Physics engine, we actually use a rigid ball to represent Andy and update Andy's pose using the ball's pose. Call PhysicsController to update the physics whenever the app recognizes an image. To move the ball as if in the real world, apply real-world gravity to move the ball in the maze.
AugmentedImageActivity.java
// Update the case clause for TRACKING to call PhysicsController
// whenever the app recognizes an image
  private void drawAugmentedImages(

    ...

        case TRACKING:
          // Switch to UI Thread to update View
          this.runOnUiThread(
              new Runnable() {
                @Override
                public void run() {
                  fitToScanView.setVisibility(View.GONE);
                }
              });

          // Create a new anchor for newly found images
          if (!augmentedImageMap.containsKey(augmentedImage.getIndex())) {
            Anchor centerPoseAnchor = augmentedImage.createAnchor(augmentedImage.getCenterPose());
            augmentedImageMap.put(
                augmentedImage.getIndex(), Pair.create(augmentedImage, centerPoseAnchor));

            physicsController = new PhysicsController(this);
          } else {
            Pose ballPose = physicsController.getBallPose();
            augmentedImageRenderer.updateAndyPose(ballPose);


            // Use real world gravity, (0, -10, 0), as gravity
            // Convert to Physics world coordinate(maze mesh has to be static)
            // Use the converted coordinate as a force to move the ball
            Pose worldGravityPose = Pose.makeTranslation(0, -10f, 0);
            Pose mazeGravityPose = augmentedImage.getCenterPose().inverse().compose(worldGravityPose);
            float mazeGravity[] = mazeGravityPose.getTranslation();
            physicsController.applyGravityToBall(mazeGravity);

            physicsController.updatePhysics();
          }
          break;
Run the app. Andy should now realistically move around when you tilt the image.
The example below uses another phone to display the image, feel free to use anything that is convenient to you, such as a tablet, or the cover of a hardcopy book, or just a printed paper attached on a flat object.
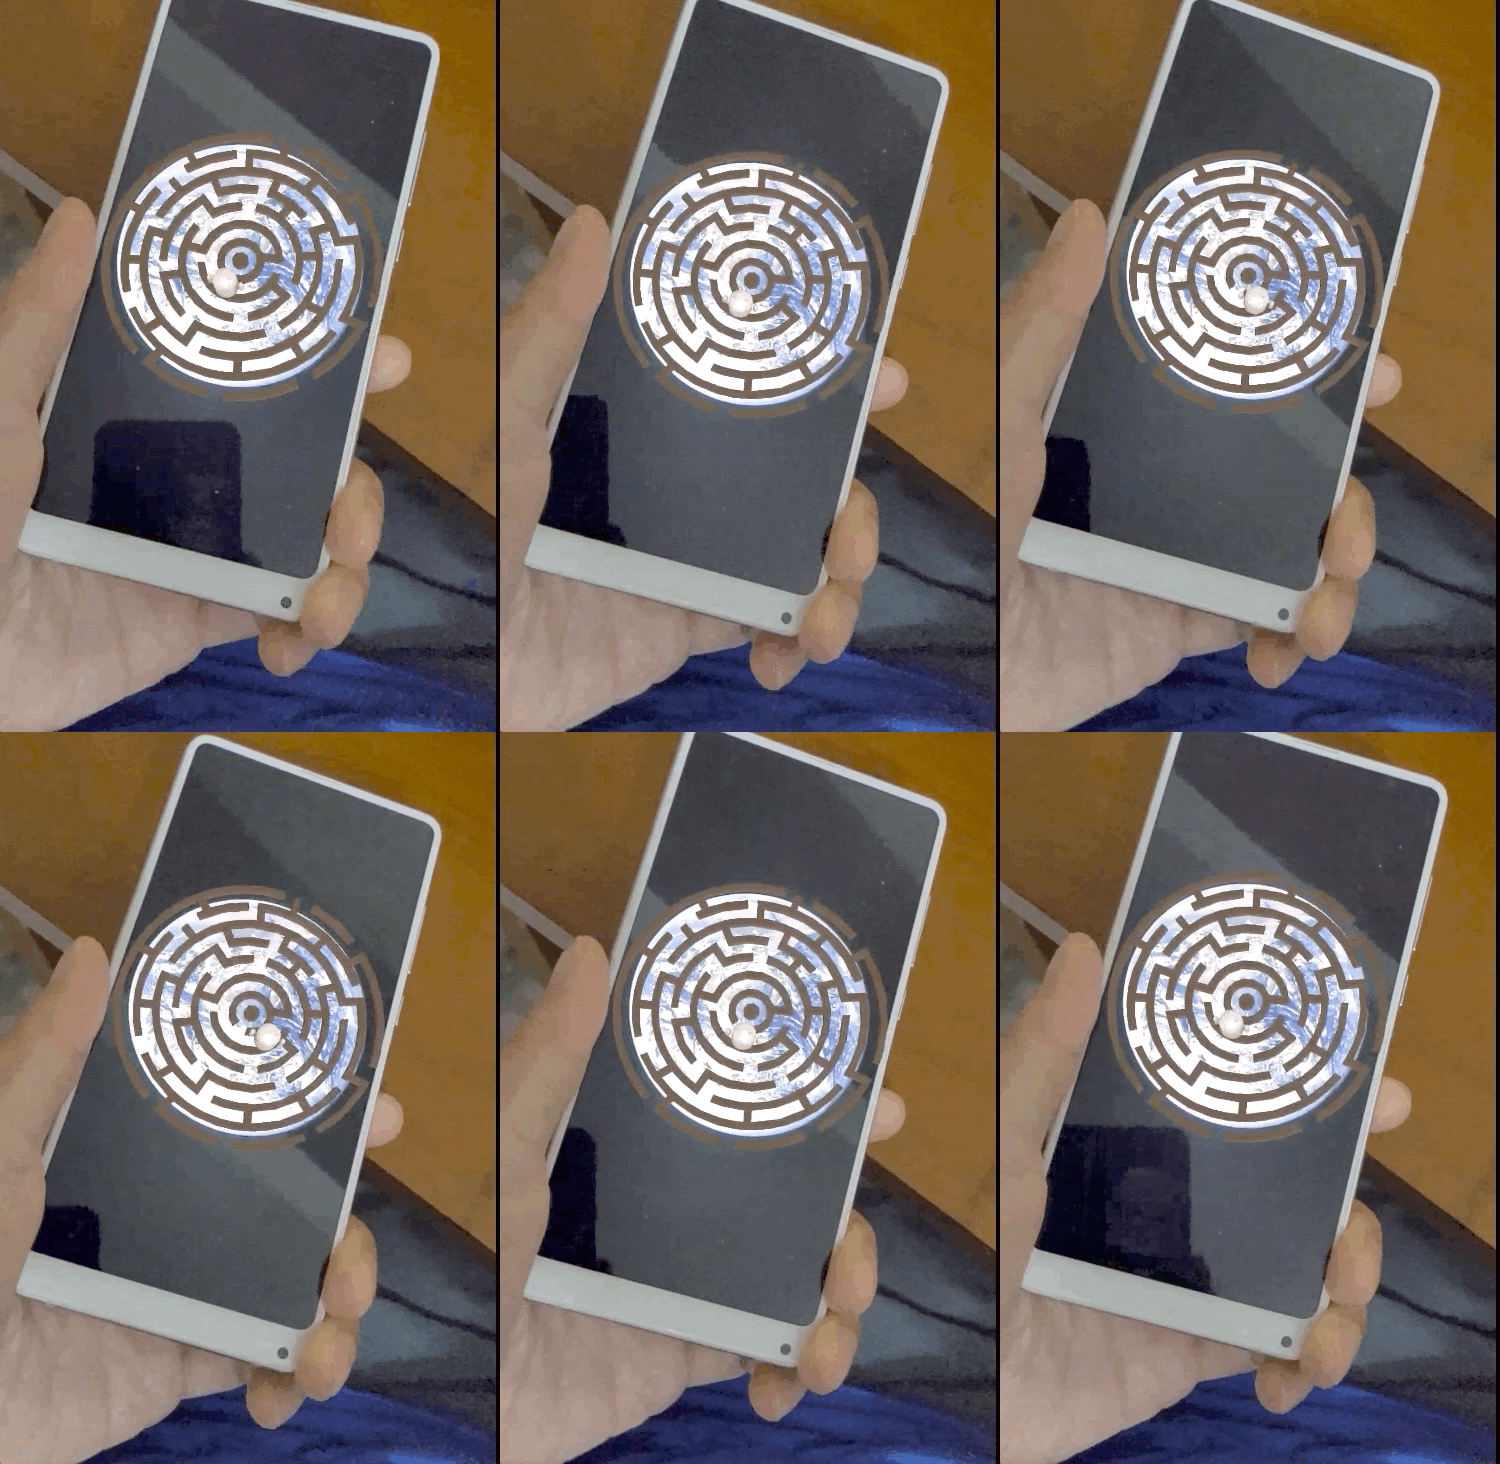
That's it! Have fun trying to get Andy through the maze. Hint: It's easier to find the exit when you hold the target image up-side down.
6. Congratulations
Congratulations, you have reached the end of this codelab, and have thus:
- Built and ran an ARCore AugmentedImage Java sample.
- Updated the sample to display a maze model on the image, at the proper scale.
- Utilized the pose of the image to do something fun.
If you would like to refer to the complete code, you can download it here.
