1. Antes de comenzar
Las entidades son un mecanismo de Dialogflow para identificar y extraer datos útiles de entradas de lenguaje natural. Mientras que los intents le permiten a tu agente entender la motivación detrás de una entrada de usuario determinada, las entidades se usan para seleccionar información específica que menciona tu usuario, desde direcciones a nombres de productos o cantidades con unidades. Cualquier dato importante que desees obtener de la solicitud de un usuario tendrá una entidad correspondiente.
En la siguiente lista, se explican los tres tipos de entidades:
- Las entidades de sistema, que se incluyen en Dialogflow, permiten a los agentes extraer información sobre una amplia gama de conceptos sin ninguna configuración adicional. Por ejemplo, las entidades de sistema están disponibles para extraer fechas, horas y ubicaciones de las entradas de lenguaje natural.
- Las entidades de desarrollador, que tú defines, extraen información sobre conceptos más allá de los que abarcan las entidades de sistema. Por ejemplo, una marca puede crear una entidad de desarrollador para reconocer su conjunto único de nombres de productos.
- Las entidades de sesión, que también defines, solo se aplican a una conversación específica. Por ejemplo, puedes crear una entidad de sesión para representar las opciones urgentes disponibles para un usuario determinado en el momento de hacer una reserva.
Requisitos previos
Antes de continuar, debes completar los siguientes codelabs:
- Cómo crear una agenda de citas con Dialogflow
- Integra un chatbot de Dialogflow con Actions on Google
También debes comprender los conceptos básicos y las construcciones de Dialogflow, que puedes obtener de los siguientes videos que se encuentran en la ruta de aprendizaje Crea un chatbot con Dialogflow:
Qué aprenderás
- Cómo crear y usar entidades del sistema en Dialogflow
- Cómo crear y usar entidades de desarrollador en Dialogflow
- Cómo probar el agente
Qué compilarás
- Una versión mejorada de un agente de Dialogflow ya creado
- Entidades del desarrollador en Dialogflow
- Entidades del sistema en Dialogflow
Requisitos
- Un navegador web y una dirección de correo electrónico para acceder a la consola de Dialogflow
2. Cómo habilitar y usar entidades del sistema en Dialogflow
- Navega a la consola de Dialogflow.
- Selecciona el agente de AppointmentScheduler que creaste anteriormente.

- Haz clic en Intents.
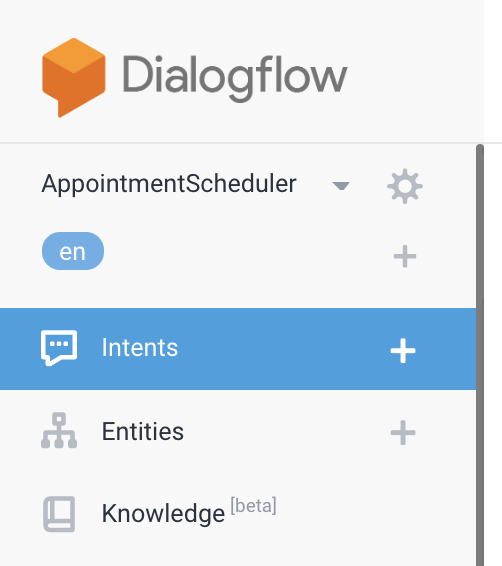
- Haz clic en Schedule Appointments para abrir la configuración del intent.
Verás frases de entrenamiento como "Programa una cita para mañana a las 4 p.m.", en la que Fecha y Hora se extraen automáticamente como @sys.date y @sys.time. Puedes agregar más frases de entrenamiento para ver cómo Dialogflow extrae automáticamente las entidades del sistema.
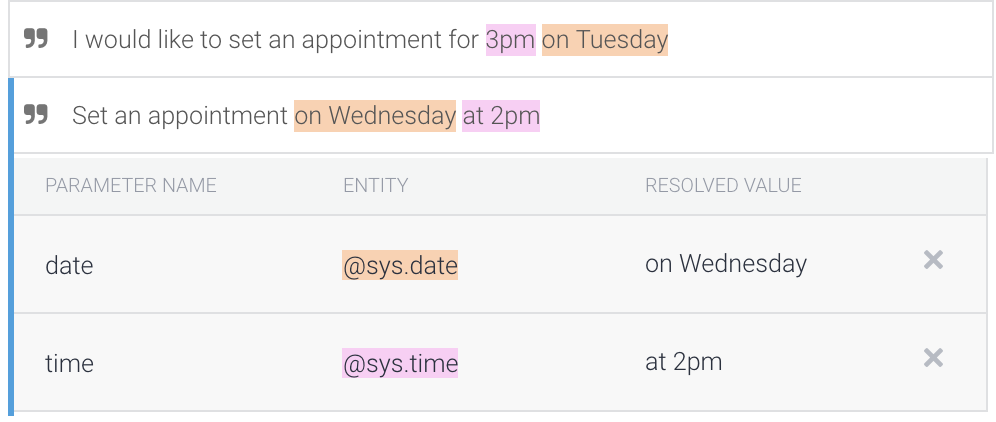
Como viste, las entidades de sistema permiten a los agentes extraer información sobre una amplia gama de conceptos sin ninguna configuración adicional. Los datos como la dirección, los correos electrónicos, la moneda y los números de teléfono son algunos de los ejemplos comunes de entidades del sistema. Para obtener más información, consulta Entidades del sistema.
3. Cómo habilitar y usar entidades de desarrollador en Dialogflow
Crear entidades del desarrollador
Hasta ahora, te dirigiste al programador de citas de forma genérica. Ahora supongamos que tu programador es para la oficina del departamento de vehículos motorizados de un estado, que principalmente ofrece licencias de conducir y servicios de registro. Crea esas entidades.
- Haz clic en Entities.
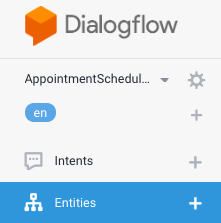
- Haz clic en Crear entidad.

- Ingresa "AppointmentType" como el nombre de la entidad y, luego, agrega "Registro del vehículo" y "Licencia de conducir" como los dos valores de referencia con algunos sinónimos, como se muestra en la siguiente imagen. Haz clic en Guardar.
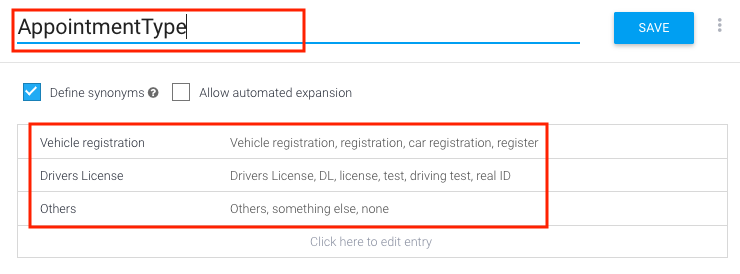
Puedes agregar más filas con más servicios como tipos de entidades.
- Haz clic en Guardar.
Edita la intención para incluir la entidad de desarrollador recién creada
- Haz clic en Intent.
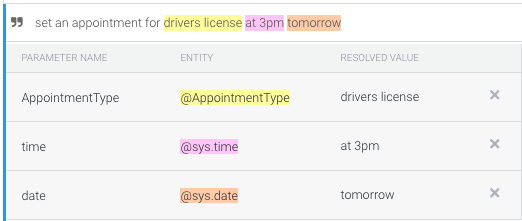
- Ingresa "Establece una cita para la licencia de conducir para mañana a las 3 p.m." en la intención de programar una cita.
Verás el reconocimiento automático de licencia de conducir, a las 3 p.m. y mañana como entidades del sistema y del desarrollador.
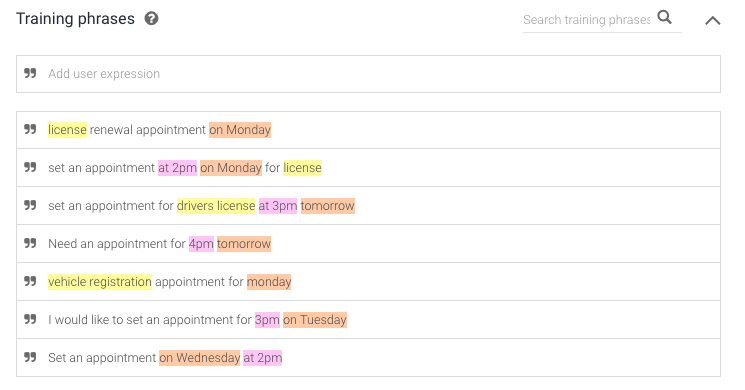
- Ingresa las siguientes frases de entrenamiento:
- Cita para renovar la licencia el lunes
- Establece una cita a las 2 p.m. del lunes para obtener la licencia.
- Cita de registro de vehículo para el lunes
- Debes hacer que AppointmentType sea un campo obligatorio, similar a la hora y la fecha. Para ello, ve a Acciones y parámetros y, luego, selecciona la casilla de verificación en la fila AppointmentType.

- Agrega una instrucción, como "¿Qué servicios buscas? El DMV ofrece servicios de licencias de conducir y registro de vehículos". Si el usuario no proporciona un tipo de cita, se usará la instrucción.
- Haz clic en Guardar.
4. Probar el chatbot
Puedes probar tu chatbot en el simulador de Actions o usar la integración web o de Google Home que aprendiste anteriormente.
Caso de prueba 1
En este caso, el usuario solo pide establecer una cita sin los tres datos, por lo que Dialogflow solicita la fecha, la hora y el tipo de cita con las instrucciones de completado de espacios que estableciste.
- Usuario: "Programa una cita".
- Chatbot: "¿Qué fecha?"
- Usuario: "23 de mayo".
- Chatbot: “¿A qué hora te gustaría venir?”.
- Usuario: "10 a.m."
- Chatbot: "¿Qué servicios quieres obtener? El DMV ofrece servicios de licencias de conducir y registro de vehículos".
- Usuario: "Licencia".
- Chatbot: "Todo está listo para tu cita de registro del vehículo el 23/05/2019 a las 10:00:00. ¡Nos vemos!"
Caso de prueba 2
En este caso, el usuario solicita establecer una cita con información parcial, por lo que Dialogflow pregunta la fecha, la hora y el tipo de cita con las instrucciones de completado de espacios que estableciste.
- Usuario: "Necesito una cita para mañana a las 4 p.m.".
- Chatbot: "¿Qué servicios quieres obtener? El DMV ofrece servicios de licencias de conducir y registro de vehículos".
- Usuario: "Licencia".
- Chatbot: "Ya tienes todo listo para tu cita de la licencia de conducir el 24/04/2019 a las 16:00:00. ¡Nos vemos!"
Caso de prueba 3
En este caso, el usuario proporciona toda la información. Dialogflow procesa la información y proporciona una respuesta con la confirmación de la cita.
- Usuario: "Programa una cita para el registro del vehículo mañana a las 2 p.m.".
- Chatbot: "Ya está todo listo para tu cita de registro del vehículo el 24/4/2019 a las 14:00:00. ¡Nos vemos!"
5. Limpia
Si planeas completar otros codelabs de Dialogflow, omite esta sección por ahora y vuelve a ella más adelante.
Borra el agente de Dialogflow
- Haz clic en
 junto a tu agente existente.
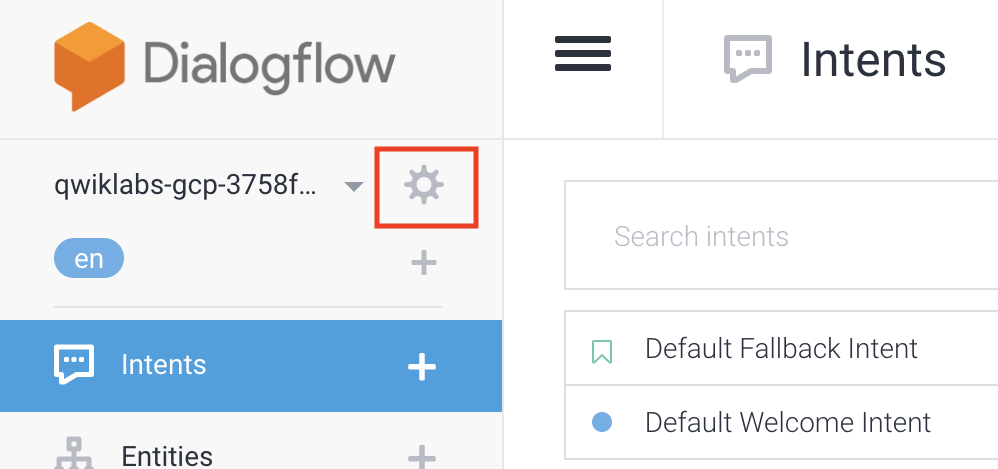
- En la pestaña General, desplázate hasta la parte inferior y haz clic en Borrar este agente.
- Escribe Borrar en el diálogo y haz clic en Borrar.
6. Felicitaciones
Creaste un chatbot que controla entradas personalizadas con entidades de desarrollador. Ya eres un desarrollador de chatbots.
Más información
Consulta los siguientes recursos para obtener más información:
- Acerca del cumplimiento: Cómo integrar Dialogflow con Calendario
- Muestras de código en la página Dialogflow de GitHub
