
1. 始める前に
この Codelab では、Dialogflow がバックエンド システムと連携して、ユーザーの質問に対してリッチで動的なレスポンスを提供する仕組みを学びます。
前提条件
続行する前に、次の Codelab を完了する必要があります。
また、Dialogflow の基本コンセプトと構成についても理解する必要があります。これについては、Dialogflow でチャットボットを構築するのパスにある次の動画で確認できます。
学習内容
- フルフィルメントとは
- カレンダーのサービス アカウントを設定する方法
- カレンダーを設定する方法
- Dialogflow でフルフィルメントを有効にする方法
- フルフィルメントをテストする方法
作成するアプリの概要
- Cloud Functions を使用したフルフィルメント
- Dialogflow とカレンダーの統合
必要なもの
- Dialogflow コンソールにログインするためのウェブブラウザとメールアドレス
- カレンダーにアクセスするための Google アカウント
2. フルフィルメントとは
フルフィルメントとは、Webhook としてデプロイされるコードのことです。Webhook により、Dialogflow エージェントはインテントごとにビジネス ロジックを呼び出すことができます。会話中にフルフィルメントを使用することで、Dialogflow の自然言語処理によって抽出された情報を使用して、動的なレスポンスを生成したり、バックエンドでアクションをトリガーしたりできます。ほとんどの Dialogflow エージェントはフルフィルメントを利用しています。
フルフィルメントを使用してエージェントを拡張できる場合の例を以下に示します。
- データベースから検索された情報に基づいて動的なレスポンスを生成する
- お客様が要求したプロダクトに応じて注文を行う
- ゲームのルールとゲームに勝つ条件を実装する
3. Calendar API を有効にする
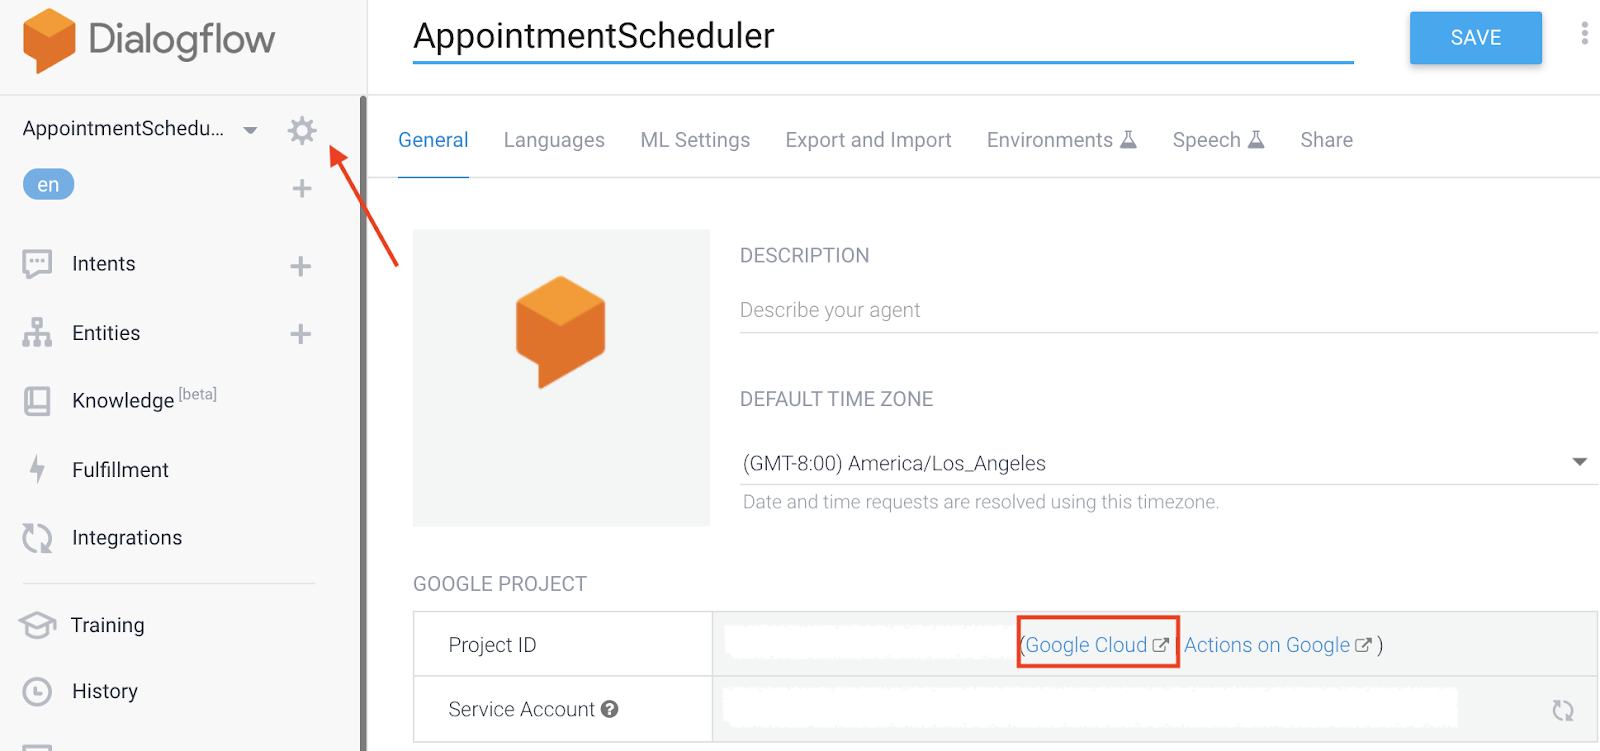
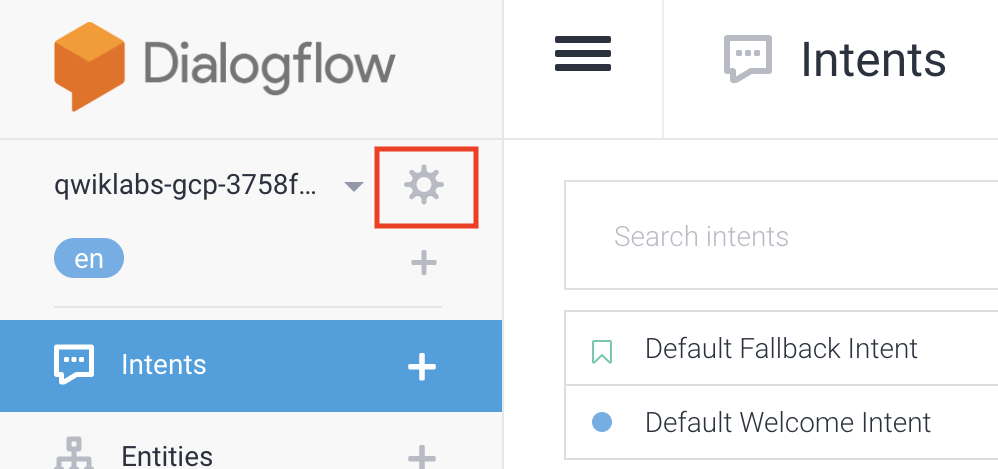
- Dialogflow コンソールで、
 をクリックします。
 - [全般] タブで [プロジェクト ID] までスクロールし、[Google Cloud]
 をクリックします。
- Google Cloud コンソールで、ナビゲーション メニュー ☰ > [API とサービス] > [ライブラリ] をクリックします。
- 「Google Calendar API」を検索し、[有効にする] をクリックして、Google Cloud プロジェクトで API を使用します。
4. サービス アカウントを設定する
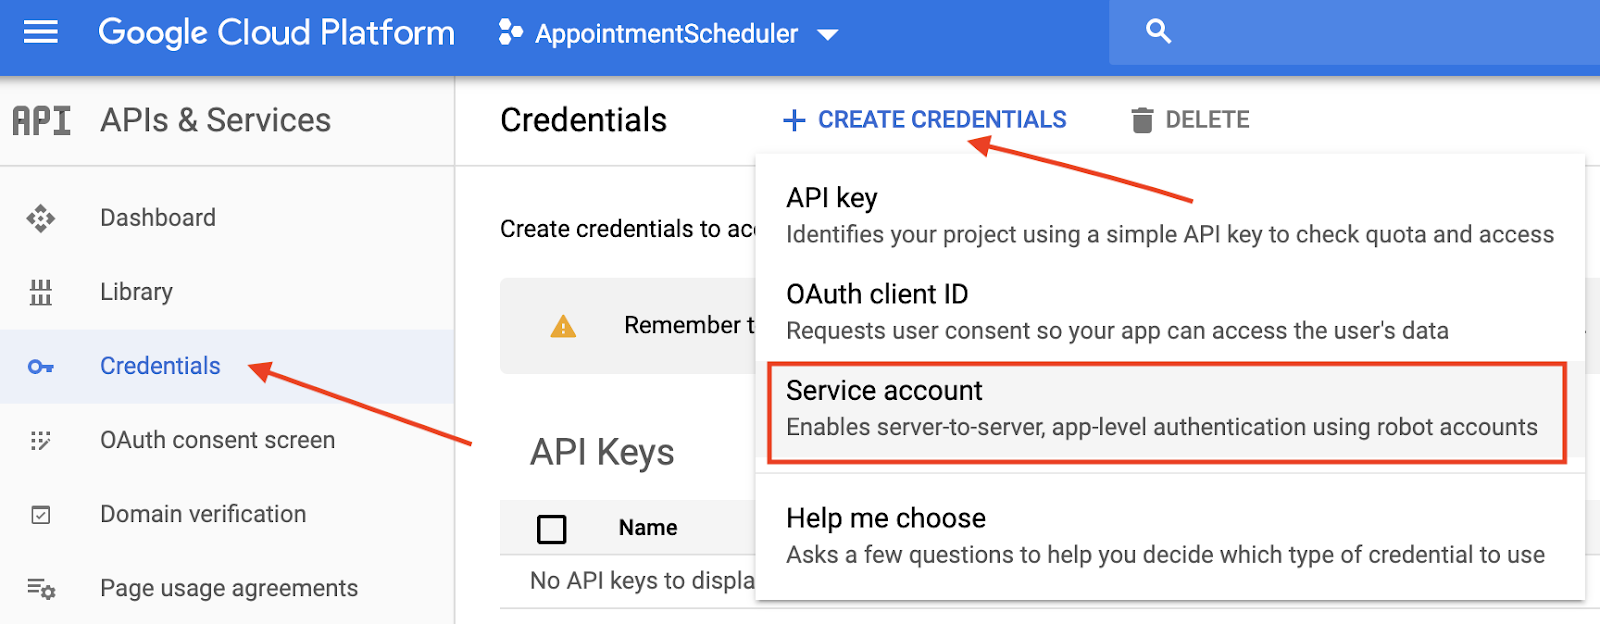
- ナビゲーション メニュー ☰ > [API とサービス] > [認証情報] をクリックします。
- [認証情報を作成] > [サービス アカウント] をクリックします。
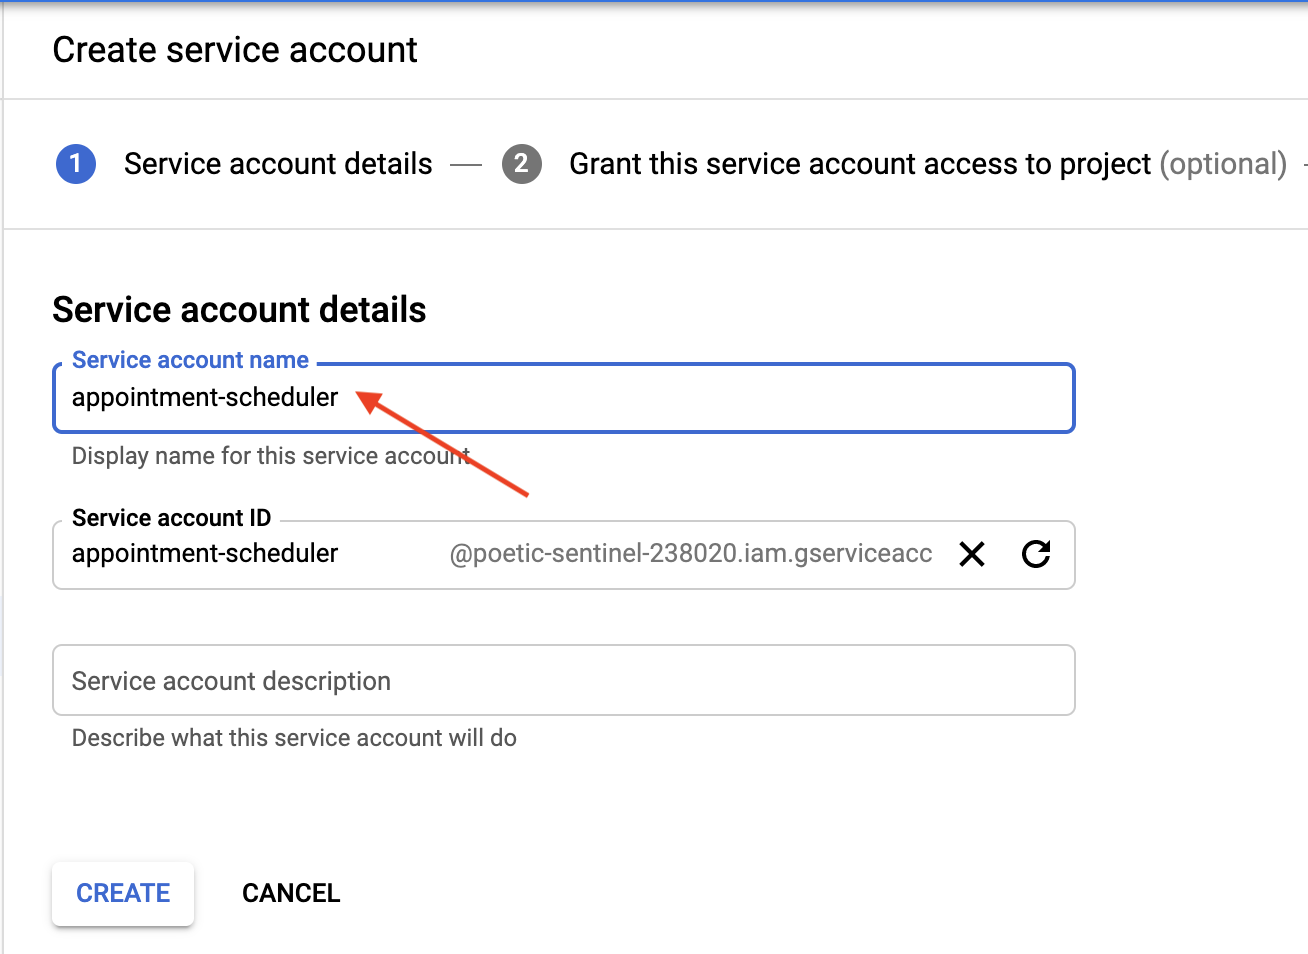
- [サービス アカウントの詳細] で、[サービス アカウント名] に「appointment-scheduler」と入力し、[作成] をクリックします。
- [このサービス アカウントにプロジェクトへのアクセスを許可する] で、[続行] をクリックしてスキップします。
- [ユーザーにこのサービス アカウントへのアクセス権を付与(オプション)] で、[鍵を作成] をクリックし、[JSON] を選択して [作成] をクリックします。
JSON ファイルがパソコンにダウンロードされます。このファイルは、次の設定セクションで必要になります。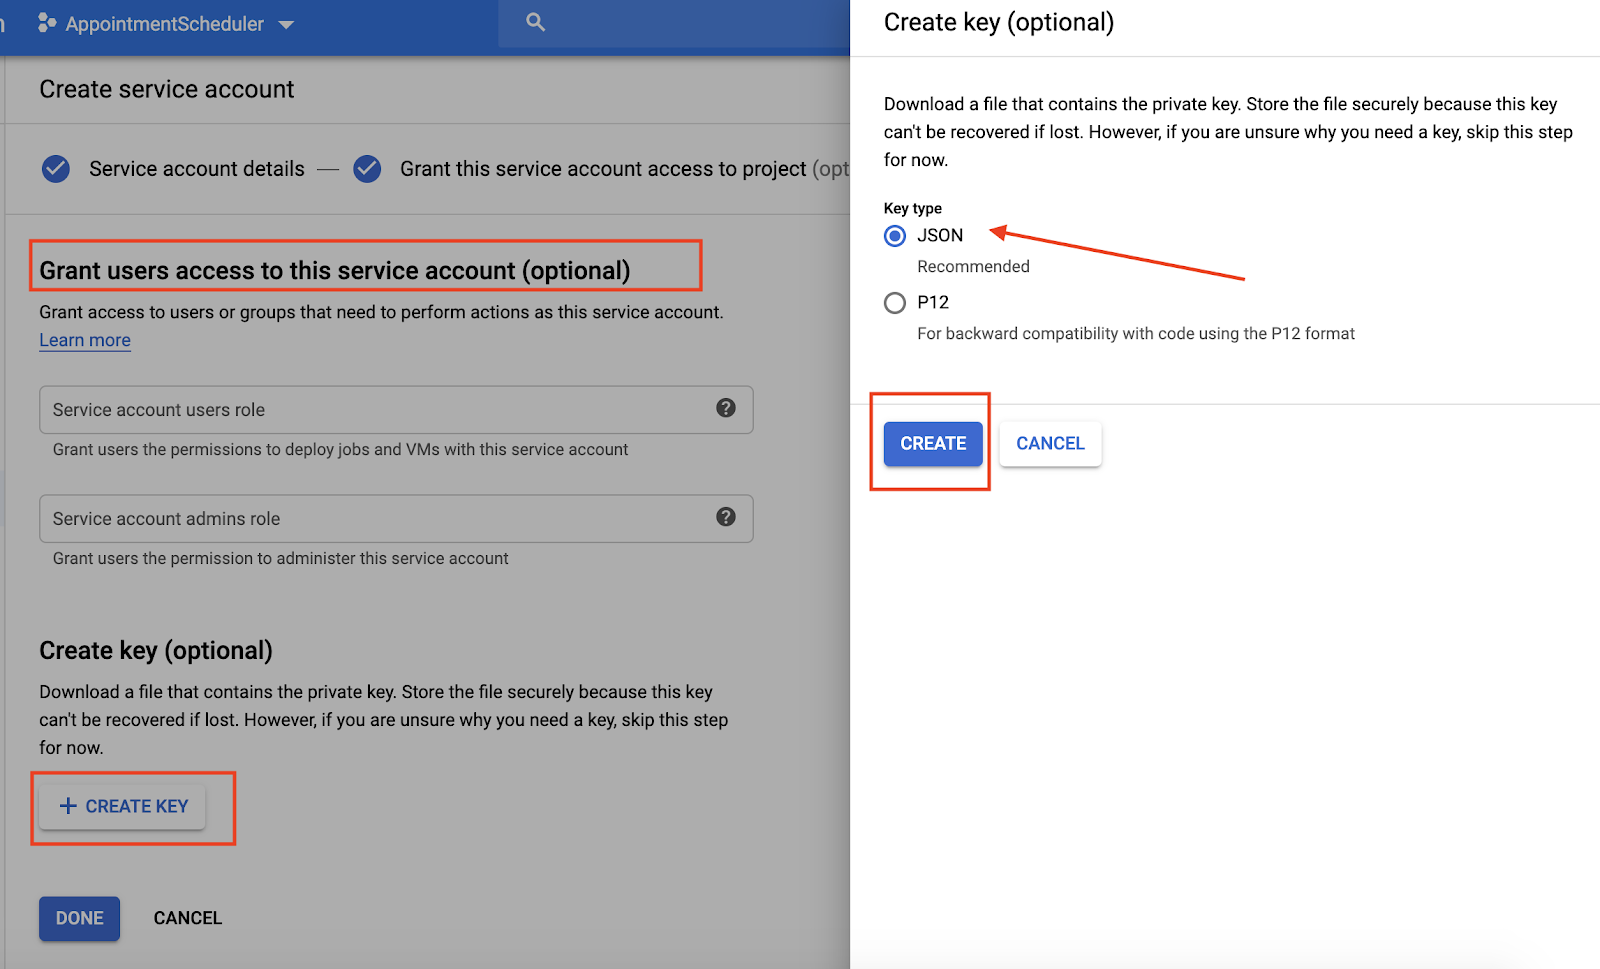
5. カレンダーの設定
- カレンダーに移動し、メインメニュー アイコン ☰ > [他のカレンダーを追加]
 > [新しいカレンダーを作成] をクリックします。
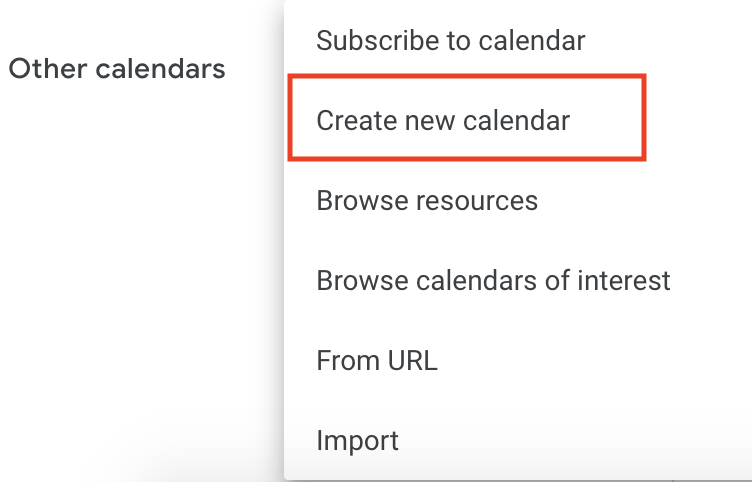
- カレンダー名として「Appointment Calendar」と入力し、[カレンダーを作成] をクリックします。
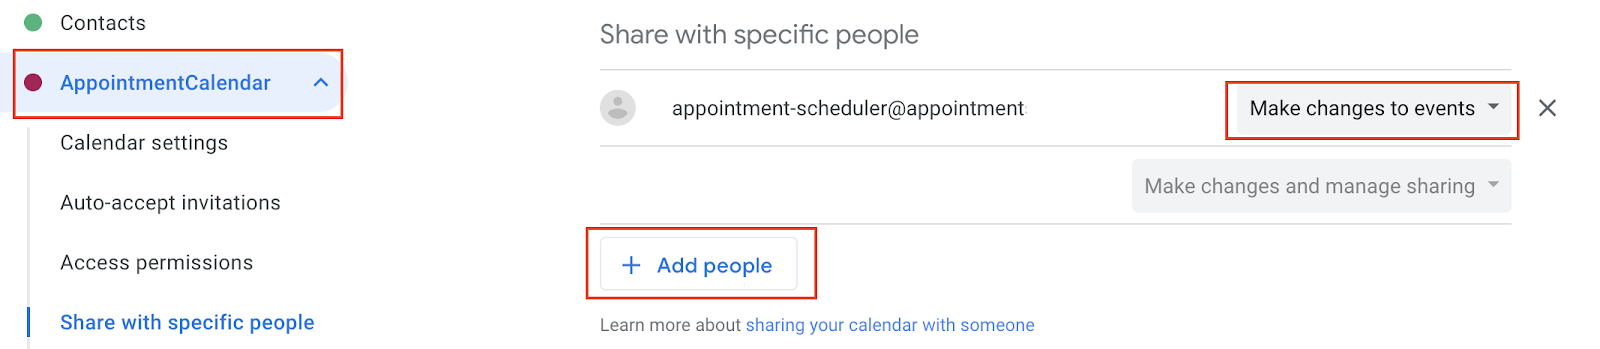
- ページを再読み込みし、[予約カレンダー] をクリックして、[特定のユーザーとの共有] までスクロールし、[ユーザーを追加] をクリックします。
- サービス アカウントの設定の一部としてダウンロードした JSON ファイルから
client_emailをコピーし、ダイアログに貼り付けます。

- [権限] プルダウン リストをクリックし、[イベントの変更] > [送信] をクリックします。
- [設定] で、[カレンダーの統合] までスクロールして、[カレンダー ID] をコピーします。

6. Dialogflow でフルフィルメントを設定する
フルフィルメントにサービス アカウントとカレンダー ID を追加する
- AppointmentScheduler Dialogflow エージェントに移動し、[Fulfillment] をクリックします。
- インライン エディタを有効にします。

- 次のコードで
index.jsファイルを更新します。
'use strict';

// Import the Dialogflow module from Google client libraries.
const functions = require('firebase-functions');
const {google} = require('googleapis');
const {WebhookClient} = require('dialogflow-fulfillment');

// Enter your calendar ID below and service account JSON below
const calendarId = "<INSERT YOUR CALENDAR ID>";
const serviceAccount = {<INSERT CONTENTS OF YOUr JSON FILE HERE>}; // Starts with {"type": "service_account",...

// Set up Google Calendar Service account credentials
const serviceAccountAuth = new google.auth.JWT({
 email: serviceAccount.client_email,
 key: serviceAccount.private_key,
 scopes: 'https://www.googleapis.com/auth/calendar'
});

const calendar = google.calendar('v3');
process.env.DEBUG = 'dialogflow:*'; // enables lib debugging statements

const timeZone = 'America/Los_Angeles';
const timeZoneOffset = '-07:00';

// Set the DialogflowApp object to handle the HTTPS POST request.
exports.dialogflowFirebaseFulfillment = functions.https.onRequest((request, response) => {
 const agent = new WebhookClient({ request, response });
 console.log("Parameters", agent.parameters);
 const appointment_type = agent.parameters.appointment_type;
 function makeAppointment (agent) {
   // Calculate appointment start and end datetimes (end = +1hr from start)
   const dateTimeStart = new Date(Date.parse(agent.parameters.date.split('T')[0] + 'T' + agent.parameters.time.split('T')[1].split('-')[0] + timeZoneOffset));
   const dateTimeEnd = new Date(new Date(dateTimeStart).setHours(dateTimeStart.getHours() + 1));
   const appointmentTimeString = dateTimeStart.toLocaleString(
     'en-US',
     { month: 'long', day: 'numeric', hour: 'numeric', timeZone: timeZone }
   );
    // Check the availability of the time, and make an appointment if there is time on the calendar
   return createCalendarEvent(dateTimeStart, dateTimeEnd, appointment_type).then(() => {
     agent.add(`Ok, let me see if we can fit you in. ${appointmentTimeString} is fine!.`);
   }).catch(() => {
     agent.add(`I'm sorry, there are no slots available for ${appointmentTimeString}.`);
   });
 }

// Handle the Dialogflow intent named 'Schedule Appointment'.
 let intentMap = new Map();
 intentMap.set('Schedule Appointment', makeAppointment);
 agent.handleRequest(intentMap);
});

//Creates calendar event in Google Calendar
function createCalendarEvent (dateTimeStart, dateTimeEnd, appointment_type) {
 return new Promise((resolve, reject) => {
   calendar.events.list({
     auth: serviceAccountAuth, // List events for time period
     calendarId: calendarId,
     timeMin: dateTimeStart.toISOString(),
     timeMax: dateTimeEnd.toISOString()
   }, (err, calendarResponse) => {
     // Check if there is a event already on the Calendar
     if (err || calendarResponse.data.items.length > 0) {
       reject(err || new Error('Requested time conflicts with another appointment'));
     } else {
       // Create event for the requested time period
       calendar.events.insert({ auth: serviceAccountAuth,
         calendarId: calendarId,
         resource: {summary: appointment_type +' Appointment', description: appointment_type,
           start: {dateTime: dateTimeStart},
           end: {dateTime: dateTimeEnd}}
       }, (err, event) => {
         err ? reject(err) : resolve(event);
       }
       );
     }
   });
 });
}
<INSERT YOUR CALENDAR ID>は、前のセクションでコピーしたカレンダー ID に置き換えます。<INSERT CONTENTS OF YOUR JSON FILE HERE>は、JSON ファイルの内容に置き換えます。- (省略可)Appointment Calendar のタイムゾーンに従って、const timeZone と const timeZoneOffset を変更します。
- [デプロイ] をクリックします。
フルフィルメント レスポンスを有効にする
- Dialogflow コンソールに移動し、[Intents] をクリックします。
- [Schedule Appointment Intent] をクリックします。
- [Fulfillment] まで下にスクロールし、[Enable webhook call for the intent] をオンにします。

- [保存] をクリックします。
- [デプロイ] をクリックします。
7. チャットボットをテストする
Actions シミュレータでチャットボットをテストするか、以前に学習したウェブまたは Google Home の統合を使用できます。
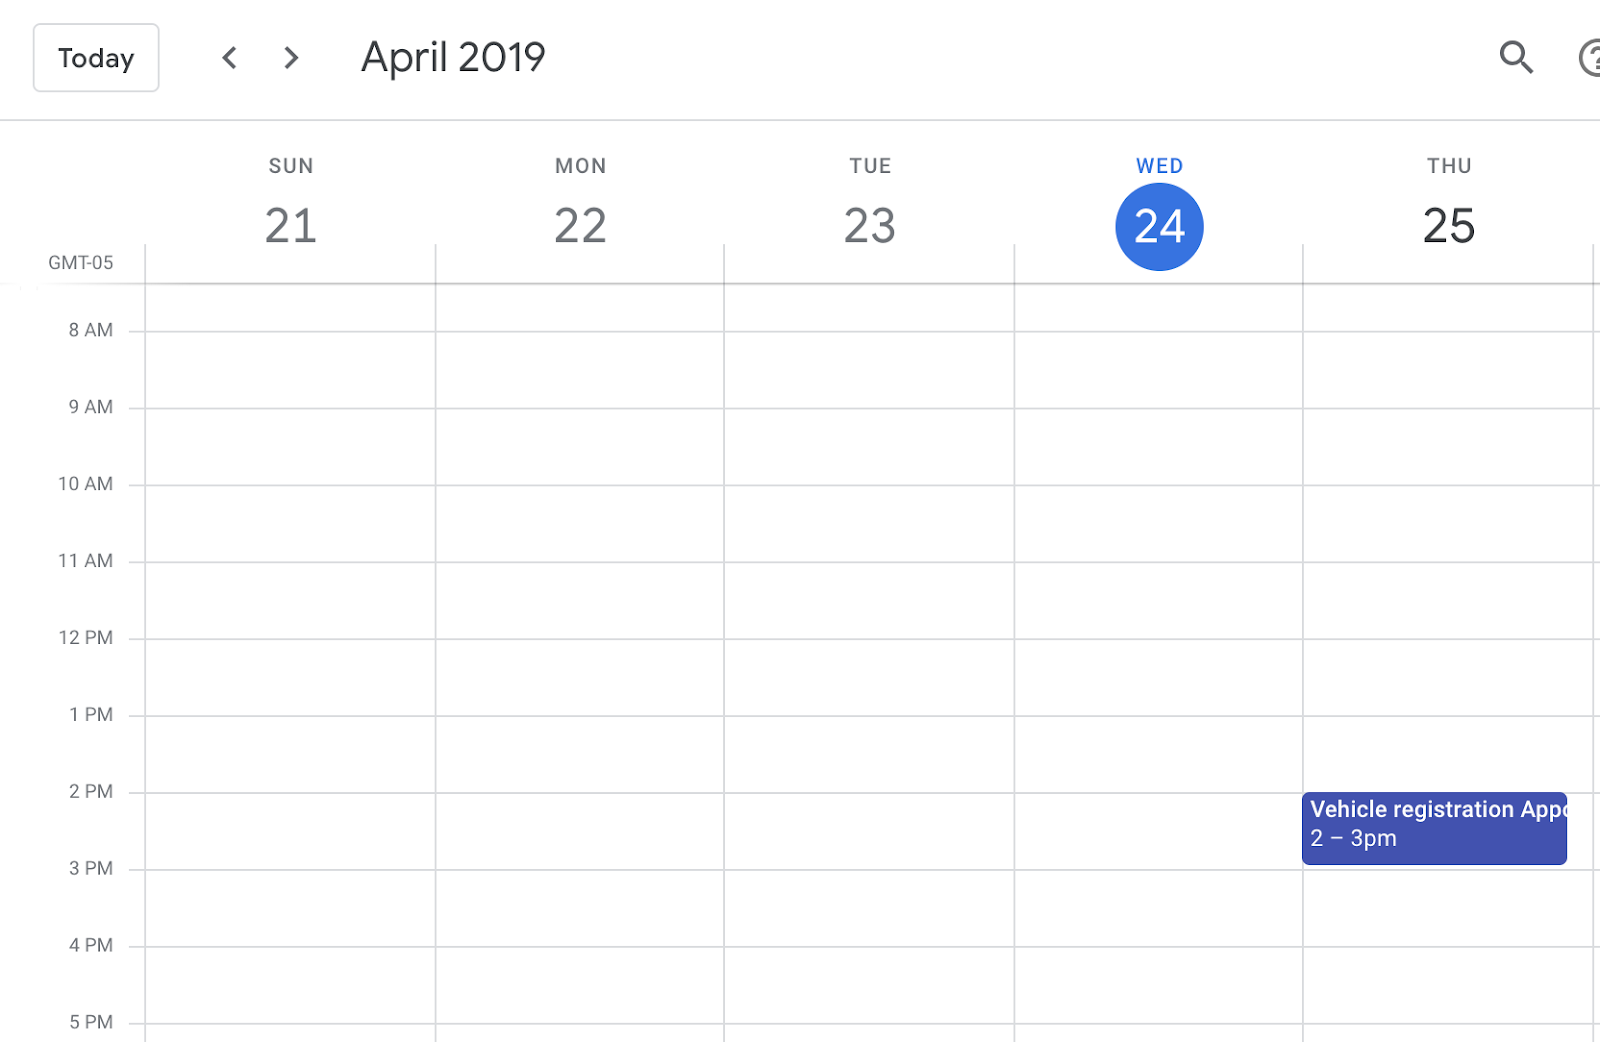
- ユーザー: 「明日の午後 2 時に車両登録の予約をして。」
- chatbot: 「わかりました。ご予約をお取りできるか確認いたします。4 月 24 日の午後 2 時で大丈夫です。」

- カレンダーに返信が登録されます。
8. クリーンアップ
他の Dialogflow Codelab を完了する予定がある場合は、このセクションはスキップして、後で戻ってください。
Dialogflow エージェントを削除する
- 既存のエージェントの横にある
 をクリックします。
- [全般] タブで一番下までスクロールし、[Delete This Agent] をクリックします。
- ダイアログに「削除」と入力し、[削除] をクリックします。
9. 完了
Dialogflow でチャットボットを作成し、カレンダーと統合しました。これで chatbot の開発が可能になりました。
その他の情報
詳細については、Dialogflow の GitHub ページのコードサンプルをご覧ください。