
1. Introduction
The goal of this codelab is for you to understand how to write a Cloud Function to react to a CSV file upload to Cloud Storage, to read its content and use it to update a Google Sheet using the Sheets API.

This can be seen as the automation of an otherwise manual "import as CSV" step. This would ensure that you can analyze data (maybe produced by another team) in a spreadsheet as soon as it's available.
This is what the implementation looks like :

2. Setup and Requirements
Self-paced environment setup
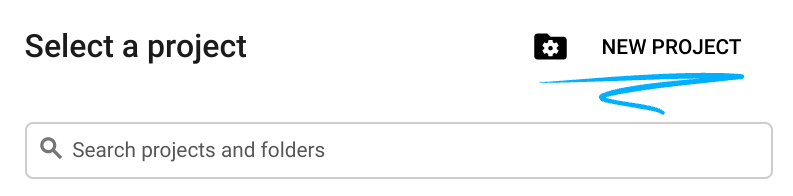
- Sign in to Cloud Console and create a new project or reuse an existing one. (If you don't already have a Gmail or G Suite account, you must create one.)

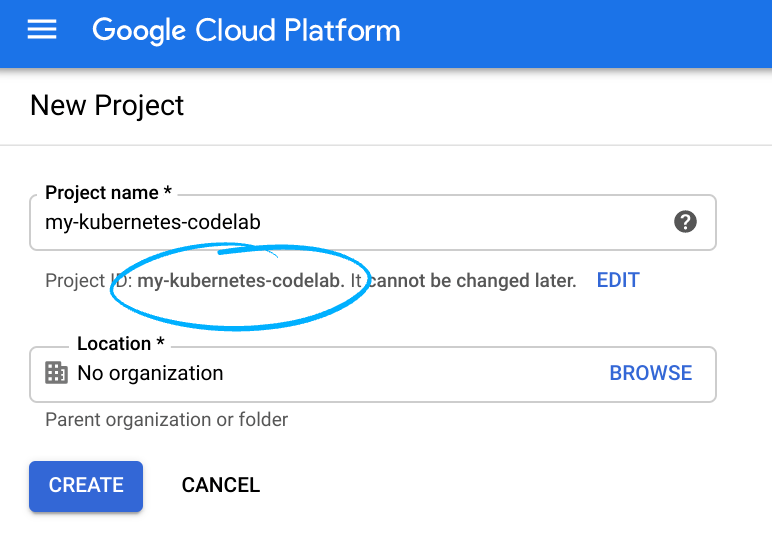
Remember the project ID, a unique name across all Google Cloud projects (the name above has already been taken and will not work for you, sorry!). It will be referred to later in this codelab as PROJECT_ID.
- Next, you'll need to enable billing in Cloud Console in order to use Google Cloud resources.
Running through this codelab shouldn't cost much, if anything at all. Be sure to to follow any instructions in the "Cleaning up" section which advises you how to shut down resources so you don't incur billing beyond this tutorial. New users of Google Cloud are eligible for the $300USD Free Trial program.
3. Create and configure a Google Sheet and enable the API
First, let's create a new Sheets document (this sheet can belong to any user). Once created, remember its identifier; it will be used as an environment variable for the function we'll write :

From the GCP console, enable the Google Sheets API on your newly-created project by navigating to the "APIs and Services" and then "API Library" section :

In the "IAM & admin" section, navigate to "Service accounts" and note the Email for the App Engine default service account. It should be of the form your-project-id@appspot.gserviceaccount.com. Of course you can also create your own service account dedicated to this action.

Finally, simply grant this service account edit privileges to your spreadsheet using the "Share" button :

With this setup we can now write our Cloud Function and have it configured to use this service account. It will be able to write to this spreadsheet document we've just created.
4. Create a storage bucket
Let's create the bucket which our cloud function will monitor for new CSV files.
In the console, use the left-hand menu to navigate to "Storage"... :

... and create a new bucket called csv2sheet-POSTFIX (replace the POSTFIX with something unique) with all other settings set to their default values :

5. Create the Cloud Function
We can now create a Cloud Function called csv2sheet that is triggered on file uploads to a specific Cloud Storage bucket. The code will be written in Node.js 8 with async functions using the inline editor straight in Cloud Console :

Make sure to set the Trigger to "Cloud Storage" and to adjust the bucket name to the one you've created in the previous step.
Also update the entrypoint for the function we're about to write to csv2sheet :

Now change the function body to :
- use the Cloud Storage and Sheets APIs
- mark the
csv2sheetfunction asasync - get a hold of the
fileNamefrom the Cloud Storage event metadata and derive a name for the new sheet that we'll create :
const {google} = require("googleapis");
const {Storage} = require("@google-cloud/storage")

exports.csv2sheet = async (data, context) => {
  var fileName = data.name;
  // basic check that this is a *.csv file, etc...
  if (!fileName.endsWith(".csv")) {
    console.log("Not a .csv file, ignoring.");
    return;
  }
  // define name of new sheet
  const sheetName = fileName.slice(0, -4);

  // TODO!
};
The use of async here is required to use await as we'll see in a moment.
A couple of important options while creating this function include (click the "More" link at the bottom of the screen) :
- Use the dropdown to select the service account discussed above
- Define an environment variable called
SPREADSHEET_IDthat should match the sheet document that you have created previously :

As a final setup step, here is the package.json content with the Cloud Storage and Google Sheet APIs as the two dependencies we'll use (use the console's inline editor PACKAGE.JSON tab) :
{
    "name": "csv2sheet",
    "version": "0.0.42",
    "dependencies": {
        "googleapis": "^51.0.0",
        "@google-cloud/storage": "^5.0.1"
    }
}
Once you've configured everything as described, go ahead, click "Create" ! After a short minute your function should be created and deployed.
6. Setup auth and Sheets API
Before we write any further code in our Cloud function using the inline editor, we need to block on the creation of a Google Client API with the proper Storage and Sheet scopes (remember, this is part of an async function).
In the console's function editor, click on "EDIT" and add the following code to the body of your csv2sheet function :
// block on auth + getting the sheets API object
const auth = await google.auth.getClient({
  scopes: [
    "https://www.googleapis.com/auth/spreadsheets",
    "https://www.googleapis.com/auth/devstorage.read_only"
  ]
});
From there we can create a Sheets API client :
const sheetsAPI = google.sheets({version: 'v4', auth});
7. Use the Sheets API to create an empty sheet
With a Sheets API client we can create a simple new sheet in our document but before we go any further, here's a quick note on vocabulary:
- a spreadsheet is the actual document and is referenced by its identifier (discussed above and visible in the document URL)
- a sheet is one of the tabs in the document and it can be referenced by its name (the tab name) or an identifier generated upon sheet creation
With this in mind, here's a function using the Sheets API client to create an empty sheet at position 2 (typically after the default "Sheet1"), with 26 columns, 2000 rows, with the first row frozen (add it to your function using the inline editor) :
function addEmptySheet(sheetsAPI, sheetName) {
  return new Promise((resolve, reject) => {
    const emptySheetParams = {
      spreadsheetId: process.env.SPREADSHEET_ID,
      resource: {
        requests: [
          {
            addSheet: {
              properties: {
                title: sheetName,
                index: 1,
                gridProperties: {
                  rowCount: 2000,
                  columnCount: 26,
                  frozenRowCount: 1
                }
              }
            }
          }
        ]
      }
    };
    sheetsAPI.spreadsheets.batchUpdate( emptySheetParams, function(err, response) {
        if (err) {
          reject("The Sheets API returned an error: " + err);
        } else {
          const sheetId = response.data.replies[0].addSheet.properties.sheetId;
          console.log("Created empty sheet: " + sheetId);
          resolve(sheetId);
        }
      }
    );
  });
}
Note how instead of hard-coding the reference to the spreadsheet we rely on the previously-created SPREADSHEET_ID environment variable.
We need to remember the sheetId for further requests made to this particular sheet. Also, the sheet name needs to be unique and the creation will fail if there is already a sheet called sheetName.
The batchUpdate function in the Sheets API is a common way to interact with documents and is described here.
8. Read data from a storage CSV file
Now that we have somewhere to dump our data, let's further develop our cloud function in the inline editor and use the Cloud Storage API to go and grab the actual data from the file that was just uploaded and store it in a string:
function readCSVContent(sheetsAPI, file, sheetName) {
  return new Promise((resolve, reject) => {
    const storage = new Storage();
    let fileContents = new Buffer('');
    storage.bucket(file.bucket).file(file.name).createReadStream()
    .on('error', function(err) {
      reject('The Storage API returned an error: ' + err);
    })
    .on('data', function(chunk) {
      fileContents = Buffer.concat([fileContents, chunk]);
    })
    .on('end', function() {
      let content = fileContents.toString('utf8');
      console.log("CSV content read as string : " + content );
      resolve(content);
    });
  });
}
9. Populate the newly created sheet
It's now time to populate the sheet we've created using the same Sheet client API and the data we've just collected. We'll take this opportunity to also add some styling to the sheet's columns (changing the font size of the top row and making it bold) :
function populateAndStyle(sheetsAPI, theData, sheetId) {
  return new Promise((resolve, reject) => {
    // Using 'batchUpdate' allows for multiple 'requests' to be sent in a single batch.
    // Populate the sheet referenced by its ID with the data received (a CSV string)
    // Style: set first row font size to 11 and to Bold. Exercise left for the reader: resize columns
    const dataAndStyle = {
      spreadsheetId: process.env.SPREADSHEET_ID,
      resource: {
        requests: [
          {
            pasteData: {
              coordinate: {
                sheetId: sheetId,
                rowIndex: 0,
                columnIndex: 0
              },
              data: theData,
              delimiter: ","
            }
          },
          {
            repeatCell: {
              range: {
                sheetId: sheetId,
                startRowIndex: 0,
                endRowIndex: 1
              },
              cell: {
                userEnteredFormat: {
                  textFormat: {
                    fontSize: 11,
                    bold: true
                  }
                }
              },
              fields: "userEnteredFormat(textFormat)"
            }
          }
        ]
      }
    };

    sheetsAPI.spreadsheets.batchUpdate(dataAndStyle, function(err, response) {
      if (err) {
        reject("The Sheets API returned an error: " + err);
      } else {
        console.log(sheetId + " sheet populated with " + theData.length + " rows and column style set.");
        resolve();
      }
    });
  });
}
This code should be added to our Cloud function which is now 99% complete!
Note how both data and styling are combined as multiple requests into a single Sheets API batchUpdate call. This makes for a more efficient and atomic update.
Note also that we define an edit range that matches the size of the sheet we've created. This means that content that exceeds 26 columns (the columnCount value used when creating the sheet) will fail with this particular code.
If all goes well, at this point you can:
- save the updated function
- drop a CSV file into the bucket
- see the corresponding data pop up in your spreadsheet!
10. Putting it all together and testing the flow
The calls to the functions we've just discussed can be made as successive blocking calls in the original csv2sheet function:
  const sheetId = await addEmptySheet(sheetsAPI, sheetName);
  const theData = await readCSVContent(sheetsAPI, data, sheetName);
  await populateAndStyle(sheetsAPI, theData, sheetId);
If you need the complete function source code it is available here (probably easier to get it all in one set).
Once everything is in place, simply upload a CSV file to the right bucket and watch your spreadsheet be updated with a new sheet with the file's content. Here's a sample CSV file if you don't have one handy.

Try uploading several files to the bucket to see what happens!
11. That's it! Time to tear down the infrastructure
Just kidding, there is no infrastructure to tear down, this was all done serverless-ly !
You can, if you'd like, delete the cloud function and the bucket that you've created, or even the entire project.
12. What's next?
This concludes this codelab walking you through steps to listen to uploads to a Cloud Storage bucket in a Cloud Function to update a Google Sheet using the appropriate API.
Here are some follow-up steps :
- Check out the Cloud Functions how-to guides (includes some best practices)
- Walk through one of the Cloud Functions tutorials
- Explore further the Google Sheets API
If you've faced issues with this codelab, feel free to report any issue using the link in the bottom left corner.
Your feedback is appreciated!