1. Introduction

Python is a popular open source programming language used by data scientists, web application developers, systems administrators, and more.
Cloud Functions is an event-driven serverless compute platform. Cloud Functions allows you to write your code without worrying about provisioning resources or scaling to handle changing requirements.
There are two types of Cloud Functions:
- HTTP functions respond to HTTP requests. You'll build a couple in this codelab.
- Background functions are triggered by events, like a message being published to Cloud Pub/Sub or a file being uploaded to Cloud Storage. We don't address this in this lab, but you can read more in the documentation.

This codelab will walk you through creating your own Cloud Functions in Python.
What you'll build
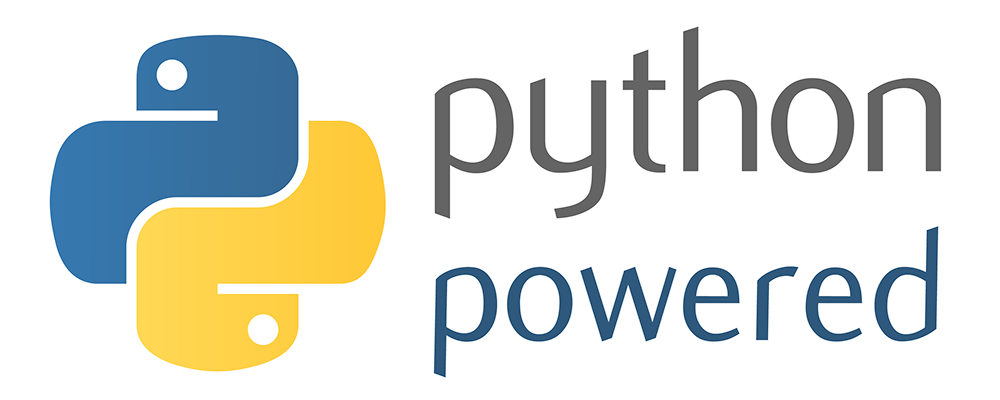
In this codelab, you will publish a Cloud Function that, when invoked via HTTP, displays the "Python Powered" logo:
What you'll learn
- How to write an HTTP Cloud Function.
- How to write an HTTP Cloud Function which takes arguments.
- How to test an HTTP Cloud Function.
- How to run a local Python HTTP server to try the function.
- How to write an HTTP Cloud Function which returns an image.
2. Setup and requirements
Self-paced environment setup
- Sign-in to the Google Cloud Console and create a new project or reuse an existing one. If you don't already have a Gmail or Google Workspace account, you must create one.


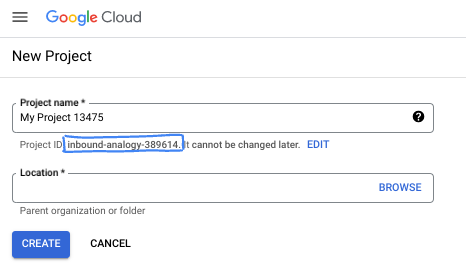
- The Project name is the display name for this project's participants. It is a character string not used by Google APIs. You can always update it.
- The Project ID is unique across all Google Cloud projects and is immutable (cannot be changed after it has been set). The Cloud Console auto-generates a unique string; usually you don't care what it is. In most codelabs, you'll need to reference your Project ID (typically identified as
PROJECT_ID). If you don't like the generated ID, you might generate another random one. Alternatively, you can try your own, and see if it's available. It can't be changed after this step and remains for the duration of the project. - For your information, there is a third value, a Project Number, which some APIs use. Learn more about all three of these values in the documentation.
- Next, you'll need to enable billing in the Cloud Console to use Cloud resources/APIs. Running through this codelab won't cost much, if anything at all. To shut down resources to avoid incurring billing beyond this tutorial, you can delete the resources you created or delete the project. New Google Cloud users are eligible for the $300 USD Free Trial program.
Start Cloud Shell
While Google Cloud can be operated remotely from your laptop, in this codelab you will be using Cloud Shell, a command line environment running in the Cloud.
Activate Cloud Shell
- From the Cloud Console, click Activate Cloud Shell
 .
.

If this is your first time starting Cloud Shell, you're presented with an intermediate screen describing what it is. If you were presented with an intermediate screen, click Continue.
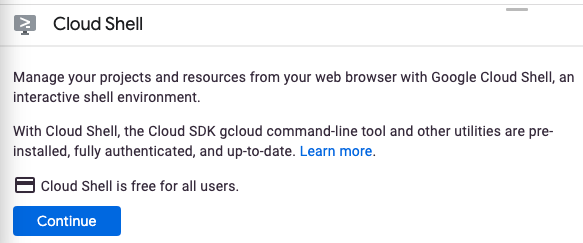
It should only take a few moments to provision and connect to Cloud Shell.

This virtual machine is loaded with all the development tools needed. It offers a persistent 5 GB home directory and runs in Google Cloud, greatly enhancing network performance and authentication. Much, if not all, of your work in this codelab can be done with a browser.
Once connected to Cloud Shell, you should see that you are authenticated and that the project is set to your project ID.
- Run the following command in Cloud Shell to confirm that you are authenticated:
gcloud auth list
Command output
 Credentialed Accounts
ACTIVE  ACCOUNT
*       <my_account>@<my_domain.com>

To set the active account, run:
    $ gcloud config set account `ACCOUNT`
- Run the following command in Cloud Shell to confirm that the gcloud command knows about your project:
gcloud config list project
Command output
[core]
project = <PROJECT_ID>
If it is not, you can set it with this command:
gcloud config set project <PROJECT_ID>
Command output
Updated property [core/project].
Ensure the Cloud Functions and Cloud Build APIs are enabled
Run the following command from Cloud Shell to make sure the Cloud Functions and Cloud Build APIs are enabled:
gcloud services enable \
  cloudfunctions.googleapis.com \
  cloudbuild.googleapis.com
Note: Cloud Build will be called by the gcloud functions deploy command and will automatically build your code into a container image.
Download the source code
From the Cloud Shell terminal, run the following commands:
REPO_NAME="codelabs"
REPO_URL="https://github.com/GoogleCloudPlatform/$REPO_NAME"
SOURCE_DIR="cloud-functions-python-http"

git clone --no-checkout --filter=blob:none --depth=1 $REPO_URL
cd $REPO_NAME
git sparse-checkout set $SOURCE_DIR
git checkout
cd $SOURCE_DIR
Check out the content of the source directory:
ls
You should have the following files:
main.py python-powered.png test_main.py web_app.py
3. Introducing HTTP Cloud Functions
HTTP Cloud Functions in Python are written as regular Python functions. The function must accept a single flask.Request argument, which is usually named request.
main.py
import flask


def hello_world(request: flask.Request) -> flask.Response:
    """HTTP Cloud Function.

    Returns:
    - "Hello World! 👋"
    """
    response = "Hello World! 👋"

    return flask.Response(response, mimetype="text/plain")

# ...
You can open the file with your preferred command line editor (nano, vim, or emacs). You can also open it in the Cloud Shell Editor after setting the source directory as a workspace:
cloudshell open-workspace .
Let's deploy this function as an HTTP Cloud Function using the gcloud functions deploy command:
FUNCTION_NAME="hello_world"

gcloud functions deploy $FUNCTION_NAME \
  --runtime python312 \
  --trigger-http \
  --allow-unauthenticated
Command output:
...
Deploying function (may take a while - up to 2 minutes)...done.
availableMemoryMb: 256
...
entryPoint: FUNCTION_NAME
httpsTrigger:
  url: https://REGION-PROJECT_ID.cloudfunctions.net/FUNCTION_NAME
...
Notes about the gcloud functions deploy options:
--runtime: This specifies the language runtime. For Python, this can currently bepython37,python38,python39,python310, orpython312. See Runtimes.--trigger-http: The function will be assigned an endpoint. HTTP requests (POST, PUT, GET, DELETE, and OPTIONS) to the endpoint will trigger function execution.--allow-unauthenticated: The function will be public, allowing all callers, without checking authentication.- To learn more, see gcloud functions deploy.
To test the function, you can click the httpsTrigger.url URL displayed in the command output above. You can also programmatically retrieve the URL and call the function with the following commands:
URL=$(gcloud functions describe $FUNCTION_NAME --format "value(httpsTrigger.url)")
curl -w "\n" $URL
You should get the following result:
Hello World! 👋
4. Writing an HTTP Cloud Function which takes arguments
Functions are more versatile when they accept arguments. Let's define a new function hello_name which supports a name parameter:
main.py
# ...

def hello_name(request: flask.Request) -> flask.Response:
    """HTTP Cloud Function.

    Returns:
    - "Hello {NAME}! 🚀" if "name=NAME" is defined in the GET request
    - "Hello World! 🚀" otherwise
    """
    name = request.args.get("name", "World")
    response = f"Hello {name}! 🚀"

    return flask.Response(response, mimetype="text/plain")

# ...
Let's deploy this new function:
FUNCTION_NAME="hello_name"

gcloud functions deploy $FUNCTION_NAME \
  --runtime python312 \
  --trigger-http \
  --allow-unauthenticated
Command output:
...
Deploying function (may take a while - up to 2 minutes)...done.
availableMemoryMb: 256
...
entryPoint: FUNCTION_NAME
httpsTrigger:
  url: https://REGION-PROJECT_ID.cloudfunctions.net/FUNCTION_NAME
...
To test the function, you can click the httpsTrigger.url URL displayed in the command output above. You can also programmatically retrieve the URL and call the function with the following commands:
URL=$(gcloud functions describe $FUNCTION_NAME --format "value(httpsTrigger.url)")
curl -w "\n" $URL
You should get the default result:
Hello World! 🚀
You're getting the default result because the name argument isn't set. Add a parameter to the URL:
curl -w "\n" $URL?name=YOUR%20NAME
This time, you'll get your custom response:
Hello YOUR NAME! 🚀
The next step is to add unit tests to ensure your functions keep working as intended when the source code gets updated.
5. Writing tests
HTTP Cloud Functions in Python are tested using the unittest module from the standard library. There is no need to run an emulator or other simulation to test your function—just normal Python code.
Here is what a test looks like for the hello_world and hello_name functions:
test_main.py
import unittest
import unittest.mock

import main


class TestHello(unittest.TestCase):
    def test_hello_world(self):
        request = unittest.mock.Mock()

        response = main.hello_world(request)
        assert response.status_code == 200
        assert response.get_data(as_text=True) == "Hello World! 👋"

    def test_hello_name_no_name(self):
        request = unittest.mock.Mock(args={})

        response = main.hello_name(request)
        assert response.status_code == 200
        assert response.get_data(as_text=True) == "Hello World! 🚀"

    def test_hello_name_with_name(self):
        name = "FirstName LastName"
        request = unittest.mock.Mock(args={"name": name})

        response = main.hello_name(request)
        assert response.status_code == 200
        assert response.get_data(as_text=True) == f"Hello {name}! 🚀"
- Python tests are written the same way as other Python files. They start with a set of imports, then define classes and functions.
- The test declaration is of the form
class TestHello(TestCase). It must be a class that inherits fromunittest.TestCase. - The test class has methods, each of which must start with
test_, which represent individual test cases. - Each test case tests one of our functions by mocking the
requestparameter (i.e. replacing it with a fake object with the specific data required for the test). - After invoking each function, the test checks the HTTP response to be sure it was what we were expecting.
As main.py depends on flask, make sure the Flask framework is installed in your test environment:
pip install flask
Installing Flask outputs a result similar to the following:
Collecting flask
...
Successfully installed ... flask-3.0.2 ...
Run these tests locally:
python -m unittest
The three unit tests should pass:
...
----------------------------------------------------------------------
Ran 3 tests in 0.001s

OK
Next, you'll create a new function which returns the "Python Powered" logo.
6. Writing the "Python Powered" HTTP Cloud Function
Let's make a new function a bit more entertaining by returning the "Python Powered" image for every request:

The following listing shows the code to make it happen:
main.py
# ...

def python_powered(request: flask.Request) -> flask.Response:
    """HTTP Cloud Function.

    Returns:
    - The official "Python Powered" logo
    """
    return flask.send_file("python-powered.png")
Deploy a new python_powered function:
FUNCTION_NAME="python_powered"

gcloud functions deploy $FUNCTION_NAME \
  --runtime python312 \
  --trigger-http \
  --allow-unauthenticated
Command output:
...
Deploying function (may take a while - up to 2 minutes)...done.
availableMemoryMb: 256
...
entryPoint: FUNCTION_NAME
httpsTrigger:
  url: https://REGION-PROJECT_ID.cloudfunctions.net/FUNCTION_NAME
...
To test the function, click the httpsTrigger.url URL displayed in the command output above. If everything is working correctly, you will see the "Python Powered" logo in a new browser tab!
Next, you'll create an app so that you can run and try your function locally before deployment.
7. Running the function locally
You can run an HTTP function locally by creating a web app and calling your function in a route. You can add it in the same directory as your function. The file named web_app.py has the following content:
web_app.py
import flask

import main

app = flask.Flask(__name__)


@app.get("/")
def index():
    return main.python_powered(flask.request)


if __name__ == "__main__":
    # Local development only
    # Run "python web_app.py" and open http://localhost:8080
    app.run(host="localhost", port=8080, debug=True)
- This file creates a Flask application.
- It registers a route at the base URL which is handled with a function named
index(). - The
index()function then calls ourpython_poweredfunction, passing it the current request.
Make sure the Flask framework is installed in your development environment:
pip install flask
Installing Flask outputs a result similar to the following:
Collecting flask
...
Successfully installed ... flask-3.0.2 ...
To run this application locally, run the following command:
python web_app.py
Now use the Cloud Shell Web Preview to test the web app in your browser. In Cloud Shell, click the "Web Preview" button and select "Preview on port 8080":
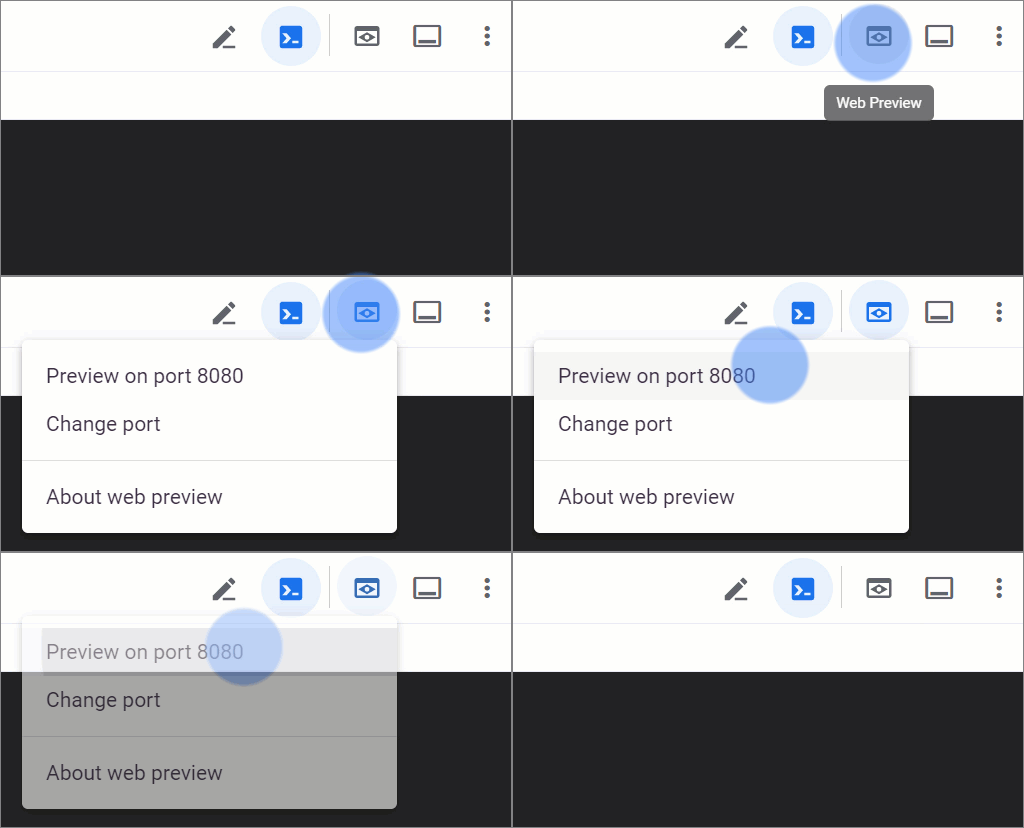
Cloud Shell opens the preview URL on its proxy service in a new browser window. The web preview restricts access over HTTPS to your user account only. If everything is working properly, you should see the "Python Powered" logo!
8. Congratulations!

You've deployed HTTP Cloud Functions, using idiomatic functions that handle web requests with the Flask framework.
Cloud Functions pricing is based on how often your function is invoked, including a free tier for functions that don't run often. Once you're done testing your Cloud Functions, you can delete them using gcloud:
gcloud functions delete hello_world --quiet
gcloud functions delete hello_name --quiet
gcloud functions delete python_powered --quiet
You can also delete the functions from the Google Cloud console.
We hope you enjoy using Cloud Functions in Python!
