
1. Overview
This series of codelabs (self-paced, hands-on tutorials) aims to help Google App Engine (Standard) developers modernize their apps by guiding them through a series of migrations. The most significant step is to move away from original runtime bundled services because the next generation runtimes are more flexible, giving users a greater variety of service options. Moving to the newer generation runtime enables you to integrate with Google Cloud products more easily, use a wider range of supported services, and support current language releases.
This initial tutorial shows the first migration steps for modernizing the web framework in App Engine apps: moving from webapp2 to Flask. In your app, you can use any web framework that handles routing, but for this tutorial, we use Flask as it's broadly used by the community.
You'll learn how to
- Use third-party libraries (built-in or otherwise)
- Update configuration files
- Migrate a simple app from
webapp2to Flask
What you'll need
- A Google Cloud Platform project with:
- Basic Python skills
- Working knowledge of basic Linux commands
- Basic knowledge of developing and deploying App Engine apps
Survey
How will you use this codelab?
2. Background
The webapp framework was bundled when App Engine first launched on Python 2.5 in 2008. Years later it was replaced by successor webapp2 when the 2.7 runtime deprecated 2.5 in 2013.
While webapp2 (see docs) still exists and can be used outside of App Engine as a WSGI-compliant web framework, it does not do its own routing of user requests to the appropriate code in the application. Instead, it relies on App Engine, configuration files, and the developer to perform that routing of web traffic to corresponding "handlers." Furthermore, webapp2's core benefits are inextricably tied to App Engine's bundled services, effectively deprecating it even though it works on Python 3 (also see related issue).
This module gives practioners hands-on experience for migrating a simple webapp2 app to Flask, a framework supported by App Engine and many more services outside of Google Cloud, making apps much more portable. If Flask is not a desired framework to move your application to, you may select another as long as it does its own routing. This codelab shows information technology decision-makers (ITDMs) and developers what the migration steps are, so you can familiarize yourself with this process regardless of which framework you actually migrate to.
These are the primary steps for this migration:
- Setup/Prework
- Add Flask 3rd-party library
- Update application files
- Update HTML template file
3. Setup/Prework
Before we get going with the main part of the tutorial, let's setup our project, get the code, then (re)familiarize you with the gcloud command and deploy the baseline app so we know we started with working code.
1. Setup project
As an existing developer, your App Engine dashboard likely already shows what services you've got running. For the purposes of this tutorial, we recommend you create a brand new project or reuse an existing one for this tutorial. Ensure the project has an active billing account and App Engine (app) is enabled.
2. Download baseline sample app
The GAE migration repo has all the code you need. Clone it or download its ZIP file. For this tutorial, you'll start with the code in Module 0 folder (START), and when you've completed the tutorial, your code should match the Module 1 folder (FINISH). If not, check out the differences so you can move onto the next lab.
- START: Module 0 code
- FINISH: Module 1 code
- Entire repo (to clone or download ZIP)
The Module 0 folder should have files that look like this, as illustrated with the POSIX ls command:
$ ls
app.yaml        index.html      main.py
3. (Re)Familiarize yourself w/gcloud commands
If you don't have the gcloud command on your machine yet, install the Google Cloud SDK and ensure gcloud is available as part of your execution path and familiarize yourself with the following gcloud commands:
gcloud components update— update Google Cloud SDKgcloud auth login— login to your credentialed accountgcloud config list— list GCP project configuration settingsgcloud config set project PROJECT_ID— set GCP project IDgcloud app deploy— deploy your App Engine application
If you haven't been doing App Engine development with gcloud recently, you should run the first four commands (#1-#4) to get set up before moving to the next steps. Let's do a quick overview of these commands.
Firstly, gcloud components update ensures you have the latest Cloud SDK version. Running this command should give an output like the following:
$ gcloud components update

Your current Cloud SDK version is: 317.0.0
You will be upgraded to version: 318.0.0

┌──────────────────────────────────────────────────┐
│        These components will be updated.         │
├──────────────────────────┬────────────┬──────────┤
│           Name           │  Version   │   Size   │
├──────────────────────────┼────────────┼──────────┤
│ Cloud SDK Core Libraries │ 2020.11.06 │ 15.5 MiB │
│ gcloud cli dependencies  │ 2020.11.06 │ 10.6 MiB │
└──────────────────────────┴────────────┴──────────┘

The following release notes are new in this upgrade.
Please read carefully for information about new features, breaking changes,
and bugs fixed.  The latest full release notes can be viewed at:
  https://cloud.google.com/sdk/release_notes

318.0.0 (2020-11-10)

      . . .
      (release notes)
      . . .

    Subscribe to these release notes at
    https://groups.google.com/forum/#!forum/google-cloud-sdk-announce.

Do you want to continue (Y/n)?

╔════════════════════════════════════════════════════════════╗
╠═ Creating update staging area                             ═╣
╠════════════════════════════════════════════════════════════╣
╠═ Uninstalling: Cloud SDK Core Libraries                   ═╣
╠════════════════════════════════════════════════════════════╣
╠═ Uninstalling: gcloud cli dependencies                    ═╣
╠════════════════════════════════════════════════════════════╣
╠═ Installing: Cloud SDK Core Libraries                     ═╣
╠════════════════════════════════════════════════════════════╣
╠═ Installing: gcloud cli dependencies                      ═╣
╠════════════════════════════════════════════════════════════╣
╠═ Creating backup and activating new installation          ═╣
╚════════════════════════════════════════════════════════════╝

Performing post processing steps...done.

Update done!

To revert your SDK to the previously installed version, you may run:
  $ gcloud components update --version 317.0.0
Next, use gcloud auth login to authenticate yourself for gcloud commands you'll issue moving forward:
$ gcloud auth login
Your browser has been opened to visit:

    https://accounts.google.com/o/oauth2/auth?response_type=code&client_id= . . .

You are now logged in as [YOUR_EMAIL].
Your current project is [PROJECT_ID].  You can change this setting by running:
  $ gcloud config set project PROJECT_ID
Use gcloud config list to see what your current project settings are:
$ gcloud config list
[core]
account = YOUR_EMAIL
disable_usage_reporting = False
project = PROJECT_ID

Your active configuration is: [default]
The command above should guide you in either creating a new project or selecting an existing one. If the output of gcloud config list doesn't match the selected project you intend to use for this tutorial, run gcloud config set project PROJECT_ID to set the project ID. Then, confirm the right project ID is set by running gcloud config list again.
$ gcloud config set project PROJECT_ID
Updated property [core/project].
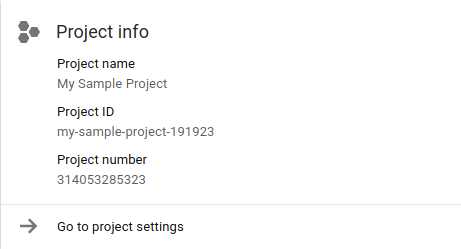
If you prefer to use the Cloud Console instead, you can follow the user interface to create a new project if desired or use any pre-existing project you already have. On your project's dashboard, you should see the project info card which shows its ID (along with the project name and number):
The last command (#5), gcloud app deploy, is for deploying your app to App Engine. Since we're just starting, running it now is optional, but we certainly don't discourage deploying the Module 0 code to confirm it works. Upon execution, select the geographic region you want the app to run in (typically where you're located). It can't be changed once set however. Then watch the rest of the deployment information. When it has completed, you'll be notified of the URL your app will be served at. Here's an abridged version of what you might see:
$ gcloud app deploy
Services to deploy:

descriptor:      [/private/tmp/mod0-baseline/app.yaml]
source:          [/private/tmp/mod0-baseline]
target project:  [PROJECT_ID]
target service:  [default]
target version:  [20201116t220827]
target url:      [https://PROJECT_ID.REG_ABBR.r.appspot.com]


Do you want to continue (Y/n)?

Beginning deployment of service [default]...
╔════════════════════════════════════════════════════════════╗
╠═ Uploading 1 file to Google Cloud Storage                 ═╣
╚════════════════════════════════════════════════════════════╝
File upload done.
Updating service [default]...done.
Setting traffic split for service [default]...done.
Deployed service [default] to [https://PROJECT_ID.REG_ABBR.r.appspot.com]

You can stream logs from the command line by running:
  $ gcloud app logs tail -s default

To view your application in the web browser run:
  $ gcloud app browse
If you haven't used App Engine in a while, you might notice that the original deployment appcfg.py update command has been replaced by gcloud app deploy. To learn more about gcloud app deploy, check out its documentation page.
Another recent change is the deployed apps' URL, tweaked from http://PROJECT_ID.appspot.com to http://PROJECT_ID.REG_ABBR.r.appspot.com. Most apps will eventually be converted to the new format. More info on the URL format in the requests and routing documentation.
After the app is deployed, refresh the browser (possibly a few times) to see the latest visits:

If your app is new, you'll see only one or a few visits.
4. Add Flask 3rd-party library
The Python 2 App Engine runtime provides a set of "built-in" third-party libraries where all you need to do is specify them in your app.yaml file to use. While this migration doesn't require their use, they will be in the next migration tutorial (for Module 2).
Third-party libraries which are not built-in must be specified in a file called requirements.txt and installed locally in the lib folder in the same directory as the application code where everything is uploaded to App Engine. The documentation for bundling 3rd-party libraries has more information.
Copied libraries like Flask require that you tell App Engine to look for them in the lib folder using the appengine_config.py configuration file. The appengine_config.py configuration file is placed in the same top-level application folder as requirements.txt and lib. In this part of the tutorial, you will:
- Create
requirements.txt(specify copied [non-built-in] 3rd-party libraries) - Create
appengine_config.py(recognize 3rd-party libraries) - Install (3rd-party) packages and dependencies
1. Create requirements.txt
Create a requirements.txt file to specify your packages. In our case, Flask is the third-party library that's needed. At the time of this writing, the latest version is 1.1.2, so create requirements.txt with this one line:
Flask==1.1.2
Refer to the requirements.txt documentation to learn more about accepted formats.
2. Create appengine_config.py
The next step is to have App Engine recognize external 3rd-party libraries. Create a file named appengine_config.py with the following contents:
from google.appengine.ext import vendor

# Set PATH to your libraries folder.
PATH = 'lib'
# Add libraries installed in the PATH folder.
vendor.add(PATH)
This code does exactly what we specified earlier, that is, point App Engine to the lib folder for copied libraries.
3. Install package(s) and dependencies
Now run the pip install command to create the lib folder and install Flask and its dependencies there:
$ pip install -t lib -r requirements.txt
Whether you used pip or pip2, after the package installation has completed, you should have a lib folder that will have contents similar to:
$ ls lib
bin/
click/
click-7.1.2.dist-info/
flask/
Flask-1.1.2.dist-info/
itsdangerous/
itsdangerous-1.1.0.dist-info/
jinja2/
Jinja2-2.11.2.dist-info/
markupsafe/
MarkupSafe-1.1.1.dist-info/
werkzeug/
Werkzeug-1.0.1.dist-info/
5. Update application files
Now let's update the application file, main.py.
1. Imports
The imports come first as in all Python files. The webapp2 framework import is followed by the ndb Datastore library, and finally, the App Engine extension that processes Django-flavored templates. You should see the following:
- BEFORE:
import webapp2
from google.appengine.ext import ndb
from google.appengine.ext.webapp import template
When moving to Flask, you import both Flask and the template renderer pieces at the same time. Delete the pair of webapp2-related imports and replace them as follows (leave the ndb import as-is):
- AFTER:
from flask import Flask, render_template, request
from google.appengine.ext import ndb
2. Startup
Apps using webapp2 require a single array (Python list) that lists all the routes and handlers in any Python file (there could be others):
- BEFORE:
app = webapp2.WSGIApplication([
    ('/', MainHandler),
], debug=True)
Bear in mind that app.yaml performs higher-level routing and may call different handlers. The sample app is simple enough that all routes come to the main.py handler.
Flask doesn't use routing tables like this, so delete these lines in main.py. Flask also requires initialization, so add the following line at the top of main.py just under the imports:
- AFTER:
app = Flask(__name__)
In Flask, you initialize the framework then use decorators to define the routes. Also, routes are paired with functions, not classes nor methods.
It is out-of-scope to include a Flask tutorial in this codelab, so spend some time working through the Flask tutorial and review the Flask documentation to get more comfortable with the framework.
3. Data model
There are no changes here. Datastore will be the focus of the next codelab.
4. Handlers
The application, regardless which framework you use (webapp2 or Flask), does 3 things:
- Handle root path (
/) GET requests - Register a web page "visit" (create/store
Visitobject) - Display the top 10 most recent visits (with a pre-defined template,
index.html)
The webapp2 framework uses a class-based execution model where handlers are created for each supported HTTP method. In our simple case, we only have GET, so a get() method is defined:
- BEFORE:
class MainHandler(webapp2.RequestHandler):
    def get(self):
        store_visit(self.request.remote_addr, self.request.user_agent)
        visits = fetch_visits(10) or ()  # empty sequence if None
        tmpl = os.path.join(os.path.dirname(__file__), 'index.html')
        self.response.out.write(template.render(tmpl, {'visits': visits}))
As mentioned above, Flask does its own routing. Instead of a handler class, you write functions and decorate them with the route they should be called for. Users can specify HTTP methods handled in the decorator call, i.e., @app.route('/app/', methods=['GET', 'POST']). Since the default is only GET (and implicitly HEAD), it can be left off.
In migrating to Flask, replace the MainHandler class and its get() method with the following Flask routing function:
- AFTER:
@app.route('/')
def root():
    store_visit(request.remote_addr, request.user_agent)
    visits = fetch_visits(10) or ()  # empty sequence if None
    return render_template('index.html', visits=visits)
Of course this isn't representative of your app which will certainly be more complex than this sample. One primary goal for these tutorials is to help you get started, build some of that "muscle memory," and understand where to make changes in App Engine-specific code. To confirm you've made this change correctly, compare yours to the Module 1 main.py.
5. Auxiliary files
There are no changes to the .gcloudignore file. Its purpose is to specify files to not deploy to App Engine that are unnecessary to deploy and execute the application, including but not limited to auxiliary Python, source control, repo boilerplate, and other files. Our .gcloudignore looks like this (with comments removed for brevity):
.gcloudignore
.git
.gitignore
.hgignore
.hg/
*.pyc
*.pyo
__pycache__/
/setup.cfg
README.md
6. Update HTML template file
1. Move template file
In the baseline repo folder (Module 0), the index.html template file is in the same folder as the application files. Since Flask requires HTML files placed in a templates folder, you must create that folder (mkdir templates) and move index.html in there. In a POSIX-compliant system like Linux or Mac OS X, the commands would be:
mkdir templates
mv index.html templates
2. Update template file
Once you've moved index.html into templates, it is time to make a small but required edit. Let's take a look at the original template file in its entirety:
<!doctype html>
<html>
<head>
<title>VisitMe Example</title>
<body>

<h1>VisitMe example</h1>
<h3>Last 10 visits</h3>
<ul>
{% for visit in visits %}
    <li>{{ visit.timestamp.ctime }} from {{ visit.visitor }}</li>
{% endfor %}
</ul>

</body>
</html>
Whereas webapp2 uses Django templates which execute callables like visit.timestamp.ctime without parentheses ( ), Jinja2 requires them explicitly. While this sounds like a minor tweak, Jinja templates are more powerful out-of-the-box because you can pass arguments in calls.
In Django, you either have to create a "template tag" or write a filter. With this understanding, update index.html by adding a pair of parentheses to the visit.timestamp.ctime call:
- BEFORE:
<li>{{ visit.timestamp.ctime }} from {{ visit.visitor }}</li>
- AFTER:
<li>{{ visit.timestamp.ctime() }} from {{ visit.visitor }}</li>
This is the only change required; no additional changes to index.html are required for all remaining migration codelabs.
7. Summary/Cleanup
Deploy application
When you've completed all the changes in this tutorial, the files in your application folder should be identical (or nearly so) to the file in the Module 1 repo folder. Now deploy and see that your Module 1 Flask application runs identically to the Module 0 webapp2 version.
Use the gcloud app deploy command as we did earlier when deploying the original Module 0 code. Accessing the app at PROJECT_ID.appspot.com, whether from a web browser or a curl or wget command to confirm it works as expected.
If you get some kind of server error, that typically means some sort of typo in your Python code. Take a look at your application logs to investigate. Also compare your files with those in the Module 1 repo (link just above).
Optional: Clean up
What about cleaning up to avoid being billed until you're ready to move onto the next migration codelab? As existing developers, you're likely already up-to-speed on App Engine's pricing information.
Optional: Disable app
If you're not ready to go to the next tutorial yet, disable your app to avoid incurring charges. When you're ready to move onto the next codelab, you can re-enable it. While your app is disabled, it won't get any traffic to incur charges, however another thing you can get billed for is your Datastore usage if it exceeds the free quota, so delete enough to fall under that limit.
On the other hand, if you're not going to continue with migrations and want to delete everything completely, you can shutdown your project.
Next steps
There are two migration modules that START with completed Module 1 code, Modules 2 and 7:
- Module 2 (required if you use Datastore)
- Migrate from App Engine
ndbto Cloud NDB - After switching to Cloud NDB, many other options become available
- Containerizing your app to run on Cloud Run
- Further migrating your app to Cloud Datastore client library
- Migrating your app to Cloud Firestore to access Firebase features
- Migrate from App Engine
- Module 7 (required if you use [push] Task Queues)
- Add App Engine (push)
taskqueueusage - Prepares Module 1 app for migration to Cloud Tasks in Module 8
- Add App Engine (push)
8. Additional resources
App Engine migration module codelabs issues/feedback
If you find any issues with this codelab, please search for your issue first before filing. Links to search and create new issues:
Migration resources
Links to the repo folders for Module 0 (START) and Module 1 (FINISH) can be found in the table below. They can also be accessed from the repo for all App Engine migrations which you can clone or download a ZIP file.
Codelab | Python 2 | Python 3 |
Module 0 | (n/a) | |
Module 1 | (n/a) |
App Engine resources
Below are additional resources regarding this specific migration:
- Python micro web frameworks
- (OLD) Migrating from Python 2.5 to 2.7 and
webapptowebapp2 - Migrating to Python 3 and GAE next-generation runtime
- General