
Esegui il deployment dell'app ASP.NET Core in Google Kubernetes Engine con Istio (parte 2)
Informazioni su questo codelab
1. Panoramica
Nella prima parte del lab, hai creato un'applicazione ASP.NET Core, containerizzata, ne hai eseguito il deployment su Google Kubernetes Engine (GKE) e configurato il traffico in modo che sia gestito da Istio.
Questa seconda parte del lab presuppone che siano già in esecuzione il cluster Kubernetes e l'applicazione del primo lab. Vedrai come Istio può aiutarti a gestire, monitorare e proteggere i tuoi servizi con modifiche minime al codice. In particolare, esplorerai le funzionalità di Istio, come metriche, tracciamento, visualizzazione dei servizi, gestione dinamica del traffico, fault injection e altro.
Obiettivi didattici
- Come eseguire query sulle metriche con Prometheus.
- Come visualizzare le metriche con Grafana.
- Come creare una nuova versione del servizio.
- Come bloccare un servizio a una versione specifica.
- Come suddividere il traffico tra versioni diverse.
- Come inserire gli errori nelle chiamate di assistenza.
Che cosa ti serve
Come utilizzerai questo tutorial?
Come valuteresti la tua esperienza con la piattaforma Google Cloud?
2. Configurazione e requisiti
Configurazione dell'ambiente da seguire in modo autonomo
- Accedi alla console Cloud e crea un nuovo progetto o riutilizzane uno esistente. Se non hai ancora un account Gmail o G Suite, devi crearne uno.


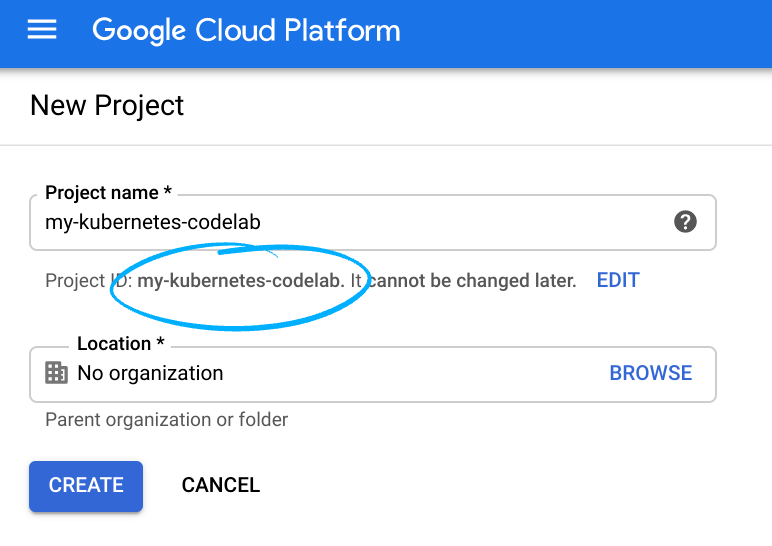
Ricorda l'ID progetto, un nome univoco in tutti i progetti Google Cloud (il nome precedente è già stato utilizzato e non funzionerà correttamente). Verrà indicato più avanti in questo codelab come PROJECT_ID.
- Successivamente, dovrai abilitare la fatturazione in Cloud Console per utilizzare le risorse Google Cloud.
Eseguire questo codelab non dovrebbe costare molto. Assicurati di seguire le istruzioni nella sezione "Pulizia" in cui viene spiegato come arrestare le risorse in modo da non incorrere in fatturazione oltre questo tutorial. I nuovi utenti di Google Cloud sono idonei al programma prova senza costi di 300$.
Avvia Cloud Shell
Sebbene Google Cloud possa essere utilizzato da remoto dal tuo laptop, in questo codelab utilizzerai Google Cloud Shell, un ambiente a riga di comando in esecuzione su Google Cloud.
Attiva Cloud Shell
- Dalla console Cloud, fai clic su Attiva Cloud Shell
.

Se non hai mai avviato Cloud Shell, verrà visualizzata una schermata intermedia (below the fold) in cui viene descritto di cosa si tratta. In tal caso, fai clic su Continua (e non la vedrai più). Ecco come appare quella singola schermata:

Il provisioning e la connessione a Cloud Shell dovrebbero richiedere solo qualche istante.

Questa macchina virtuale viene caricata con tutti gli strumenti di sviluppo necessari. Offre una home directory permanente da 5 GB e viene eseguita in Google Cloud, migliorando notevolmente le prestazioni di rete e l'autenticazione. Gran parte, se non tutto, del lavoro in questo codelab può essere svolto semplicemente con un browser o Chromebook.
Una volta eseguita la connessione a Cloud Shell, dovresti vedere che il tuo account è già autenticato e il progetto è già impostato sul tuo ID progetto.
- Esegui questo comando in Cloud Shell per verificare che l'account sia autenticato:
gcloud auth list
Output comando
 Credentialed Accounts
ACTIVE  ACCOUNT
*       <my_account>@<my_domain.com>

To set the active account, run:
    $ gcloud config set account `ACCOUNT`
gcloud config list project
Output comando
[core]
project = <PROJECT_ID>
In caso contrario, puoi impostarlo con questo comando:
gcloud config set project <PROJECT_ID>
Output comando
Updated property [core/project].
3. testa l'applicazione
Prima di iniziare il lab, assicurati che l'applicazione funzioni ancora nel lab precedente. Come promemoria, ecco come vengono visualizzati l'IP esterno e la porta del gateway, elencati sotto EXTERNAL-IP:
kubectl get svc istio-ingressgateway -n istio-system
Per visualizzare l'applicazione, puoi aprire il browser e andare a http://<gatewayurl>:

Se non vedi l'applicazione, torna al lab precedente per assicurarti di aver seguito tutti i passaggi e che l'applicazione e Istio siano installati e in esecuzione correttamente.
A questo punto ti starai chiedendo: "Qual è il vantaggio di Istio?". Se consenti a Istio di gestire il traffico della tua applicazione, puoi ottenere senza costi funzionalità come metriche, tracciamento, gestione dinamica del traffico, visualizzazione dei servizi, fault injection e altro ancora.
Nel passaggio successivo inizierai con l'esplorazione delle metriche.
4. Metriche con Grafana e Prometheus
Per impostazione predefinita, Istio genera alcune metriche. Puoi utilizzare i componenti aggiuntivi per eseguire query e visualizzare queste metriche predefinite.
Prometheus
Prometheus è una soluzione di monitoraggio open source. Puoi utilizzare Prometheus per eseguire query sulle metriche generate da Istio, ma devi prima installare il componente aggiuntivo Prometheus.
kubectl apply -f https://raw.githubusercontent.com/istio/istio/release-1.8/samples/addons/prometheus.yaml
Verifica che Prometheus sia in esecuzione:
kubectl get svc prometheus -n istio-system

NAME         TYPE        CLUSTER-IP     EXTERNAL-IP   PORT(S)    AGE
prometheus   ClusterIP   10.31.243.62   <none>        9090/TCP   1d
Invia del traffico all'applicazione visitando più volte http://<gatewayurl> o eseguendo il comando curl.
Configura il port forwarding per l'UI Prometheus:
kubectl -n istio-system port-forward $(kubectl -n istio-system get pod -l app=prometheus -o jsonpath='{.items[0].metadata.name}') 8080:9090
Ora puoi eseguire una query facendo clic sul pulsante Anteprima web nell'angolo in alto a destra di Cloud Shell e poi su Anteprima sulla porta 8080:

Vedrai la UI di Prometheus in una nuova scheda:

Per saperne di più su Prometheus, consulta Esecuzione di query sulle metriche con Prometheus.
Grafana
Grafana è un altro componente aggiuntivo per la visualizzazione delle metriche.
Installa Grafana. Sostituisci istio-version con la tua versione attuale di Istio, ad esempio 1.0.3-gke.3:
kubectl apply -f https://raw.githubusercontent.com/istio/istio/release-1.8/samples/addons/grafana.yaml
Verifica che Grafana sia in esecuzione:
kubectl get svc grafana -n istio-system

NAME      TYPE        CLUSTER-IP      EXTERNAL-IP   PORT(S)    AGE
grafana   ClusterIP   10.31.248.230   <none>        3000/TCP   1d
Invia del traffico all'applicazione visitando più volte http://<gatewayurl> o eseguendo il comando curl.
Configura il port forwarding per l'interfaccia utente Grafana:
kubectl -n istio-system port-forward $(kubectl -n istio-system get pod -l app=grafana -o jsonpath='{.items[0].metadata.name}') 8080:3000
Puoi visualizzare le dashboard di Grafana visitando l'anteprima web:


Per scoprire di più su Granfana, consulta Visualizzare le metriche con Grafana.
5. Crea una nuova versione dell'applicazione
A un certo punto, l'applicazione di cui hai eseguito il deployment in produzione richiederà correzioni di bug o funzionalità aggiuntive. Vediamo come funziona questo processo.
Innanzitutto, modifichiamo l'applicazione. Apri l'editor di codice da Cloud Shell.

Vai a Index.cshtml in HelloWorldAspNetCore > Views > Home e aggiorna uno dei messaggi del carosello.
Trova la seguente riga:
Learn about <a href="https://docs.microsoft.com/aspnet/core">building Web apps with ASP.NET Core
Modificalo con questo:
Learn about <a href="https://docs.microsoft.com/aspnet/core">building Web apps with ASP.NET Core on Google Cloud
Salva le modifiche e torna a Cloud Shell. All'interno HelloWorldAspNetCore,crea l'immagine Docker:
docker build -t gcr.io/${GOOGLE_CLOUD_PROJECT}/hello-dotnet:v2 .
Ed esegui il push in Container Registry:
docker push gcr.io/${GOOGLE_CLOUD_PROJECT}/hello-dotnet:v2
Dopo aver eseguito il push dell'immagine container, puoi eseguire il deployment della nuova versione nel passaggio successivo.
6. Crea il nuovo deployment
Per eseguire il deployment della nuova versione, devi prima creare un nuovo deployment in Kubernetes. Aggiungi quanto segue alla fine del file aspnetcore.yaml:
---
apiVersion: apps/v1
kind: Deployment
metadata:
  name: aspnetcore-v2
spec:
  replicas: 1
  selector:
    matchLabels:
      app: aspnetcore
      version: v2
  template:
    metadata:
      labels:
        app: aspnetcore
        version: v2
    spec:
      containers:
      - name: aspnetcore
        image: gcr.io/YOUR-PROJECT-ID/hello-dotnet:v2
        imagePullPolicy: IfNotPresent
        ports:
        - containerPort: 8080
Esegui il deployment della nuova versione nello spazio dei nomi predefinito con kubectl:
kubectl apply -f aspnetcore.yaml
service "aspnetcore" unchanged
deployment.extensions "aspnetcore-v1" unchanged
deployment.extensions "aspnetcore-v2" created
Verifica che i pod previsti siano in esecuzione:
kubectl get pods
NAME                          READY     STATUS    RESTARTS   AGE
aspnetcore-v1-6cf64748-mddb   2/2       Running   0          34s
aspnetcore-v2-5d765db-l9xmg   2/2       Running   0          1m
Ora prova di nuovo l'applicazione. Ottieni l'IP esterno del gateway:
kubectl get svc istio-ingressgateway -n istio-system
È elencato sotto EXTERNAL-IP. Apri un browser in modalità di navigazione in incognito e visita la pagina http://<replace-with-external-ip>.
Quando aggiorni la pagina, a volte viene visualizzato il messaggio "Scopri di più sulla creazione di app web con ASP.NET Core":

In altri casi, vedrai il messaggio "Scopri di più sulla creazione di app web con ASP.NET Core su Google Cloud":

Questo perché entrambi i deployment v1 e v2 sono esposti dietro lo stesso servizio Kubernetes (aspnetcore-service) e il servizio VirtualService che hai creato nel lab precedente (aspnetcore-virtualservice) utilizza questo servizio come host.
Nel passaggio successivo, blocchi il servizio sul deployment v2 utilizzando una regola DestinationRule.
7. Fissa il tuo servizio alla nuova versione
In questo passaggio, fisserai il servizio in modo che utilizzi il deployment v2, mediante una regola DestinationRule. Una regola di destinazione configura l'insieme di criteri da applicare a una richiesta dopo che si è verificata un'operazione di routing VirtualService.
Una destinationRule definisce anche i sottoinsiemi indirizzabili, ovvero le versioni denominate, dell'host di destinazione corrispondente. Questi sottoinsiemi vengono utilizzati nelle specifiche delle route VirtualService per inviare il traffico a versioni specifiche del servizio.
Crea un nuovo file denominato aspnetcore-destinationrule.yaml:
apiVersion: networking.istio.io/v1alpha3
kind: DestinationRule
metadata:
  name: aspnetcore-destinationrule
spec:
  host: aspnetcore-service
  trafficPolicy:
    tls:
      mode: ISTIO_MUTUAL
  subsets:
  - name: v1
    labels:
      version: v1
  - name: v2
    labels:
      version: v2
Quindi, crea la regola di destinazione. In questo modo vengono creati due sottoinsiemi (v1 e v2) che puoi utilizzare da VirtualService:
kubectl apply -f aspnetcore-destinationrule.yaml
destinationrule.networking.istio.io "aspnetcore-destionationrule" created
Ora torna al file aspnetcore-virtualservice.yaml per aggiornare VirtualService in modo che utilizzi il sottoinsieme v2:
apiVersion: networking.istio.io/v1alpha3
kind: VirtualService
metadata:
  name: aspnetcore-virtualservice
spec:
  hosts:
  - "*"
  gateways:
  - aspnetcore-gateway
  http:
  - route:
    - destination:
        host: aspnetcore-service
        subset: v2
Aggiorna VirtualService:
kubectl apply -f aspnetcore-virtualservice.yaml
Apri il browser e visita http://<replace-with-external-ip>. Anche dopo diversi aggiornamenti, dovresti visualizzare il messaggio "Scopri di più sulla creazione di app web con ASP.NET Core su Google Cloud":
8. Suddividi traffico tra versioni
A volte potresti voler suddividere il traffico tra le versioni per i test. Ad esempio, potresti voler inviare il 75% del traffico alla versione v1 e il 25% del traffico alla versione v2 del servizio. Puoi farlo facilmente con Istio. Crea un nuovo file aspnetcore-virtualservice-weights.yaml per fare riferimento ai due sottoinsiemi con pesi diversi:
apiVersion: networking.istio.io/v1alpha3
kind: VirtualService
metadata:
  name: aspnetcore-virtualservice
spec:
  hosts:
  - "*"
  gateways:
  - aspnetcore-gateway
  http:
  - route:
    - destination:
        host: aspnetcore-service
        subset: v1
      weight: 75
    - destination:
        host: aspnetcore-service
        subset: v2
      weight: 25
Aggiorna VirtualService:
kubectl apply -f aspnetcore-virtualservice-weights.yaml
Ora, quando aggiorni il browser, dovresti vedere le versioni v1 e v2 pubblicate con un rapporto circa di 3:1.
Per scoprire di più, consulta la sezione sulla suddivisione del traffico in Istio.
9. Inserisci errori
Un'altra attività di sviluppo utile da eseguire per i test è quella di inserire guasti o ritardi nel traffico e vedere il comportamento dei servizi di risposta.
Ad esempio, potresti voler restituire una risposta a una richiesta non valida (HTTP 400) per il 50% del traffico verso la versione v1. Crea il file aspnetcore-virtualservice-fault-abort.yaml affinché corrisponda a quanto segue:
apiVersion: networking.istio.io/v1alpha3
kind: VirtualService
metadata:
  name: aspnetcore-virtualservice
spec:
  hosts:
  - "*"
  gateways:
  - aspnetcore-gateway
  http:
  - fault:
      abort:
        percentage:
          value: 50
        httpStatus: 400
    route:
    - destination:
        host: aspnetcore-service
        subset: v1
Aggiorna VirtualService:
kubectl apply -f aspnetcore-virtualservice-fault-abort.yaml
Ora, quando aggiorni il browser, dovresti vedere che per metà delle volte il servizio v1 restituisce un codice di risposta HTTP 400s.
In alternativa, potresti voler aggiungere un ritardo di 5 secondi alle richieste. Crea il file aspnetcore-virtualservice-fault-delay.yaml affinché corrisponda a quanto segue:
apiVersion: networking.istio.io/v1alpha3
kind: VirtualService
metadata:
  name: aspnetcore-virtualservice
spec:
  hosts:
  - "*"
  gateways:
  - aspnetcore-gateway
  http:
  - fault:
      delay:
        fixedDelay: 5s
        percentage:
          value: 100
    route:
    - destination:
        host: aspnetcore-service
        subset: v1
Aggiorna VirtualService:
kubectl apply -f aspnetcore-virtualservice-fault-delay.yaml
Ora, quando aggiorni il browser, dovresti vedere che le richieste vengono ritardate di 5 secondi.
Per saperne di più sulle funzionalità di Istio, come timeout, nuovi tentativi, regole condizionali, interruttori di sicurezza e altro ancora, consulta la sezione sulle funzionalità di gestione del traffico.
10. Complimenti!
Speriamo che questo lab ti abbia offerto una panoramica immediata di ciò che Istio può fare per i tuoi servizi. Per saperne di più su Istio e GKE.
Passaggi successivi
- Scopri di più su Istio.
- Scopri di più su Kubernetes.
- Scopri di più su Google Kubernetes Engine.
- Scopri di più su .NET su Google Cloud.
Licenza
Questo lavoro è concesso in licenza ai sensi di una licenza Creative Commons Attribution 2.0 Generic.
11. Esegui la pulizia
Puoi eliminare l'app e disinstallare Istio oppure puoi semplicemente eliminare il cluster Kubernetes.
Eliminare l'applicazione
Per eliminare l'applicazione:
kubectl delete -f aspnetcore-gateway.yaml
kubectl delete -f aspnetcore-virtualservice.yaml
kubectl delete -f aspnetcore-destinationrule.yaml
kubectl delete -f aspnetcore.yaml
Per verificare che l'applicazione sia stata rimossa:
kubectl get gateway
kubectl get virtualservices
kubectl get destinationrule
kubectl get pods
Disinstallare Istio
Per eliminare Istio:
kubectl delete -f install/kubernetes/istio-demo-auth.yaml
Per verificare che Istio non sia più disponibile:
kubectl get pods -n istio-system
Elimina cluster Kubernetes
gcloud container clusters delete hello-dotnet-cluster