
1. Overview
Managed Active Directory is a highly available Microsoft Active Directory domain as a service, hosted on Google Cloud.
In this tutorial you will setup a new managed Active Directory, create a new Windows VM and join it into the new domain. You will see how to setup networking, security and manage your domain using the same management tools you are familiar with.
What you'll learn
- How to create Managed Active Directory on Google Cloud
- How to add a Windows VM to a domain
- How to manage users and computers in Managed Active Directory
What you'll need:
How will you use this tutorial?
How would rate your experience with Google Cloud Platform?
2. Setup and requirements
Self-paced environment setup
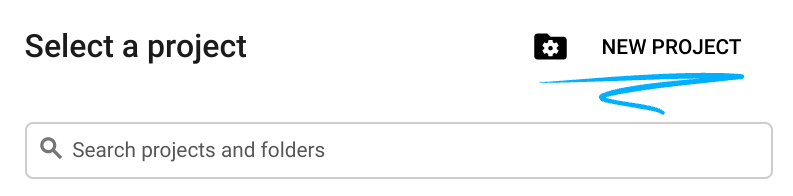
- Sign in to Cloud Console and create a new project or reuse an existing one. (If you don't already have a Gmail or G Suite account, you must create one.)

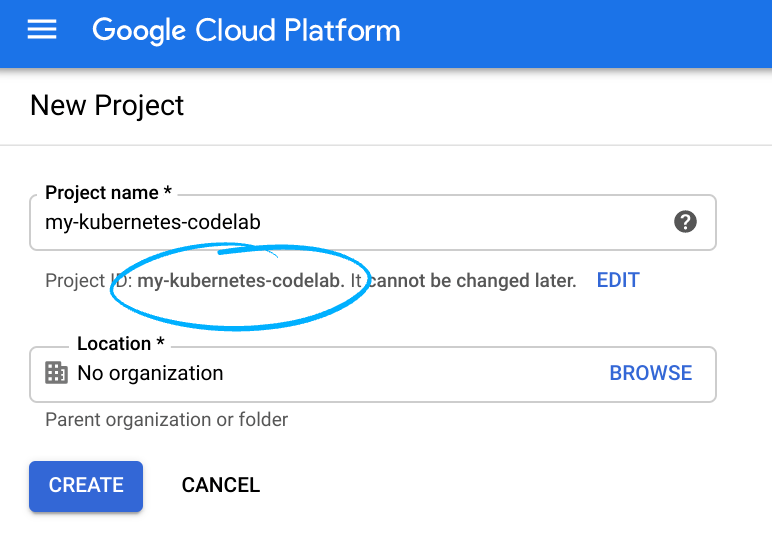
Remember the project ID, a unique name across all Google Cloud projects (the name above has already been taken and will not work for you, sorry!). It will be referred to later in this codelab as PROJECT_ID.
- Next, you'll need to enable billing in Cloud Console in order to use Google Cloud resources.
Running through this codelab shouldn't cost much, if anything at all. Be sure to to follow any instructions in the "Cleaning up" section which advises you how to shut down resources so you don't incur billing beyond this tutorial. New users of Google Cloud are eligible for the $300USD Free Trial program.
Start Cloud Shell
While Google Cloud can be operated remotely from your laptop, in this codelab you use Google Cloud Shell, a command line environment running in Google Cloud.
Activate Cloud Shell
- From the Cloud Console, click Activate Cloud Shell
.

If you've never started Cloud Shell before, you'll be presented with an intermediate screen (below the fold) describing what it is. If that's the case, click Continue (and you won't ever see it again). Here's what that one-time screen looks like:

It should only take a few moments to provision and connect to Cloud Shell.

This virtual machine is loaded with all the development tools you'll need. It offers a persistent 5GB home directory and runs in Google Cloud, greatly enhancing network performance and authentication. Much, if not all, of your work in this codelab can be done with simply a browser or your Chromebook.
Once connected to Cloud Shell, you should see that you are already authenticated and that the project is already set to your project ID.
- Run the following command in Cloud Shell to confirm that you are authenticated:
gcloud auth list
Command output
 Credentialed Accounts
ACTIVE  ACCOUNT
*       <my_account>@<my_domain.com>

To set the active account, run:
    $ gcloud config set account `ACCOUNT`
gcloud config list project
Command output
[core]
project = <PROJECT_ID>
If it is not, you can set it with this command:
gcloud config set project <PROJECT_ID>
Command output
Updated property [core/project].
3. Initialize
Initialized GCP Project will be used to host the VPC Network between all your domain-joined Windows VMs and Managed Active Directory.
We will set a few variables for easier scripting later on.
- Decide on a domain name (ex: ad.yourcompany.com)
- Decide in which region you want to create a Domain Controller for a managed domain
- Decide the VM name, firewall rule and network name.
Currently the following regions are supported:
- "us-west1"
- "us-west2"
- "us-central1"
- "us-east1"
- "us-east4"
- "europe-north1"
- "europe-west1"
- "europe-west4"
- "asia-east1"
- "asia-southeast1"
Set variables
If running on Linux, type:
$ PROJECT_ID="YOUR_PROJECT_ID"
$ VPC="adtutorialvpc"
$ FIREWALL_VPC_RULE="adtutorialvpcrule"
$ REGION="us-west1"
$ ZONE="us-west1-a"
$ DOMAIN_NAME="ad.tutorial"
$ VM_NAME="tutorial1"
If running on Windows, type in Powershell terminal:
PS> $PROJECT_ID=YOUR_PROJECT_ID
PS> $VPC=adtutorialvpc
PS> $FIREWALL_VPC_RULE=adtutorialvpcrule
PS> $REGION=us-west1
PS> $ZONE=us-west1-a
PS> $DOMAIN_NAME=ad.tutorial
PS> $VM_NAME=tutorial1
Set current project id, so all subsequent operations will happen in the context of right cloud project:
$ gcloud config set project $PROJECT_ID
Enable Cloud APIs
In order to enable Managed Active Directory, we need to enable two APIs: DNS and Managed Identities.
Enable DNS API:
$ gcloud services enable dns.googleapis.com
Enable Managed Identities API:
$ gcloud services enable managedidentities.googleapis.com
4. Create Virtual Private Cloud Network
In order to establish connectivity between the managed active directory domain controller and Windows VMs, we need to create a virtual private cloud network.
Create VPC network
$ gcloud compute networks create $VPC --subnet-mode=auto --bgp-routing-mode=global
Create a firewall rule to allow connectivity between Windows VMs and domain controllers
$ gcloud compute firewall-rules create $FIREWALL_VPC_RULE --network $VPC --allow tcp,udp,icmp --source-ranges=0.0.0.0/0
5. Create Domain Controllers
We setup the VPC that connects managed AD with resources in our project (VMs). Now it's time to setup a managed domain controller.
Create a Managed Active Directory
(This operation is expected to take about an hour)
$ gcloud active-directory domains create $DOMAIN_NAME --reserved-ip-range=10.0.1.0/24 --region=$REGION --authorized-networks=projects/$PROJECT_ID/global/networks/$VPC
While the deployment is happening or at any time, you can verify domain's provisioning status.
There are 3 supported states:
CREATING | AD Domain creation has been initiated, in progress. |
READY | AD Domain creation completed, domain ready for use. |
UNDER MAINTENANCE | AD Domain still available, but is undergoing updates, (upgrading Domain Controllers, adding regions etc.) |
Verify deployment status:
$ gcloud active-directory domains describe $DOMAIN_NAME
You should expect this command to report READY state when domain creation is completed.
6. Add Windows VMs to a managed domain
Create a new Windows VM on Google Compute Engine
$ gcloud beta compute instances create $VM_NAME --zone=$ZONE --machine-type=n1-standard-2 --subnet=$VPC --network-tier=PREMIUM --scopes=https://www.googleapis.com/auth/cloud-platform --image=windows-server-2016-dc-v20181009 --image-project=windows-cloud --boot-disk-size=50GB --boot-disk-type=pd-standard
Create a firewall rule to allow remote desktop connectivity to your Windows VMs:
$ gcloud compute firewall-rules create allow-rdp --allow tcp:3389
Before connecting to the VM and adding it to the domain, we need to determine two users and their credentials:
- A local admin on a VM - this is needed to be able to remotely connect to the VM before it's domain-joined
- Managed Domain Admin user - this is needed to join the VM to the domain as well as perform all domain management operations
7. Get Managed Domain Admin credentials
Determine managed domain admin user name:
$ gcloud active-directory domains describe $DOMAIN_NAME
This operation will output the administrator username. By default it's called miadmin.
Reset managed domain admin's password:
$ gcloud active-directory domains reset-managed-identities-admin-password $DOMAIN_NAME
You have to confirm (Y/N) the operation as it will reveal the password in the clear text. In the terminal.
Save the user and password - we will use it later on.
8. Join the domain
Generate Windows local user and password
Windows local user and password are required to remotely connect to the VM that you created. You can generate them using gcloud.
$ gcloud compute reset-windows-password --user=usr1 $VM_NAME
This will create a local user called "usr1" and generate its password
Connect to the Windows instance using Chrome RDP
Open a new browser window at: https://console.cloud.google.com/compute/instancesDetail/zones/your-zone/instances/your-vm-name?project=your-project-name
Open ChromeRDP by clicking on RDP:
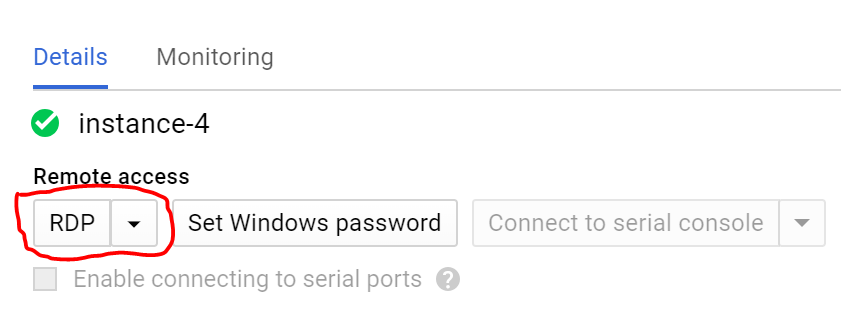
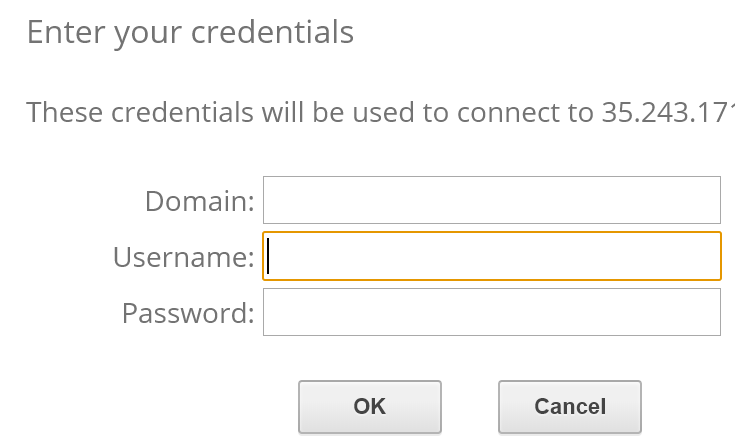
Enter local user and password. This will connect you to the Windows VM you created.
On a VM, open elevated command prompt with Powershell:
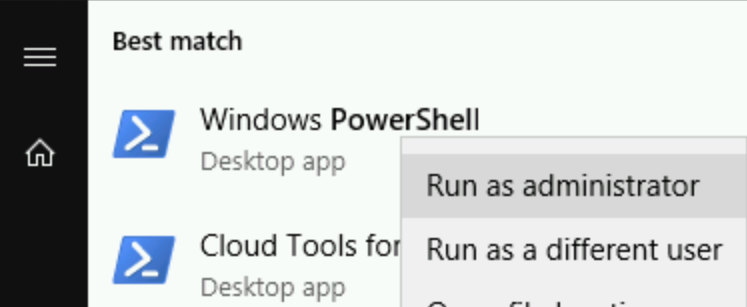
In elevated Powershell, type:
$ add-computer –domainname your-domain -Credential your-domain\miadmin -restart –force
You will be asked to provide managed administrator password and then the VM will join your managed domain and restart. Wait 2 minutes before moving to the next step.
At this point your VM is domain-joined but you don't have permissions to connect to it using managed domain admin user. You need to add managed domain admin user as local administrator of that VM.
Connect to the VM again using local admin user (same instructions as above).
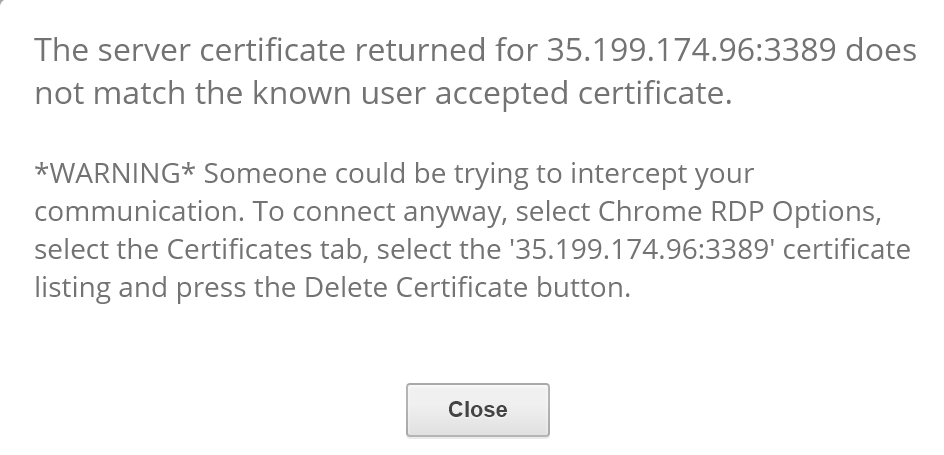
If so, follow warning instructions. This happened because we joined the VM to the domain.
Try to reconnect again using local admin user and open elevated Powershell Command Prompt.
Add Managed Domain Admin user to be a local admin on a VM
$ net localgroup administrators /add your-domain-name\miadmin
Now you can disconnect from the VM.
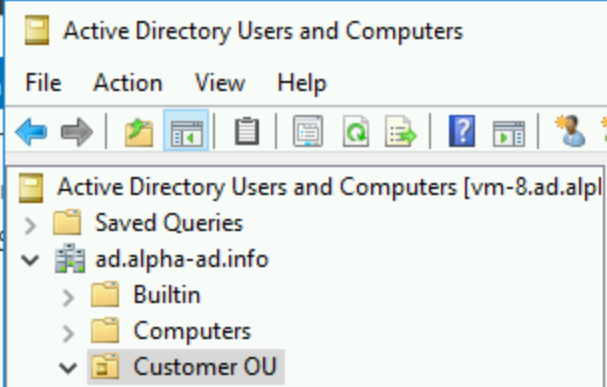
9. Active Directory Tools
Once a VM is domain-joined, you can use familiar Active Directory tools for managing users, groups, computers and group policy.
Connect to the VM (same method as described above) using credentials of the managed domain admin. Open elevated Powershell Command Prompt:
$ Install-WindowsFeature -Name "RSAT-AD-Tools" -IncludeAllSubFeature -IncludeManagementTools -Confirm
It will ask for confirmation and then install Active Directory Management Tools.
After the installation is complete, you can use dsa.msc (Active Directory Users and Computers) and other familiar Active Directory tools to manage the domain under "Customer OU"
10. Congratulations!
Congratulations, you've successfully created a new Managed Active Directory on Google Cloud Platform.
Next Steps
- Managed Active Directory documentation
- Learn more about using a Windows VM on GCP.
- Learn more about Connecting to Windows VM.
- Learn more about Deploying Fault Tolerant Active Directory on GCP
- Learn more about .NET on Google Cloud Platform.
.
11. Cleanup
You can delete Windows VMs and VPC network.
Delete Windows VMs
- In the GCP Console, go to the VM instances page.
- Click the checkbox next to the instance you want to delete
- Click the "Delete" button at the top of the page to delete the instance.
Delete VPC networks
- In the GCP Console, go to the VPC Networks Page
- Select the VPC network you created
- Click the "Delete" button at the top of the page.