
1. Introduction
Why migrate from a monolithic application to a microservices architecture? Breaking down an application into microservices has the following advantages; most of these stem from the fact that microservices are loosely coupled.
- The microservices can be independently tested and deployed. The smaller the unit of deployment, the easier the deployment.
- They can be implemented in different languages and frameworks. For each microservice, you're free to choose the best technology for its particular use case.
- They can be managed by different teams. The boundary between microservices makes it easier to dedicate a team to one or several microservices.
- By moving to microservices, you loosen the dependencies between the teams. Each team has to care only about the APIs of the microservices they are dependent on. The team doesn't need to think about how those microservices are implemented, about their release cycles, and so on.
- You can more easily design for failure. By having clear boundaries between services, it's easier to determine what to do if a service is down.
Some of the disadvantages when compared to monoliths are:
- Because a microservice-based app is a network of different services that often interact in ways that are not obvious, the overall complexity of the system tends to grow.
- Unlike the internals of a monolith, microservices communicate over a network. In some circumstances, this can be seen as a security concern. Istio solves this problem by automatically encrypting the traffic between microservices.
- It can be hard to achieve the same level of performance as with a monolithic approach because of latencies between services.
- The behavior of your system isn't caused by a single service, but by many of them and by their interactions. Because of this, understanding how your system behaves in production (its observability) is harder. Istio is a solution to this problem as well.
In this lab we will run microservices in Google Kubernetes Engine (GKE). Kubernetes is a platform to manage, host, scale, and deploy containers. Containers are a portable way of packaging and running code. They are well suited to the microservices pattern, where each microservice can run in its own container.
For this lab, we will deploy an existing monolithic application to a Google Kubernetes Engine cluster, then break it down into microservices!
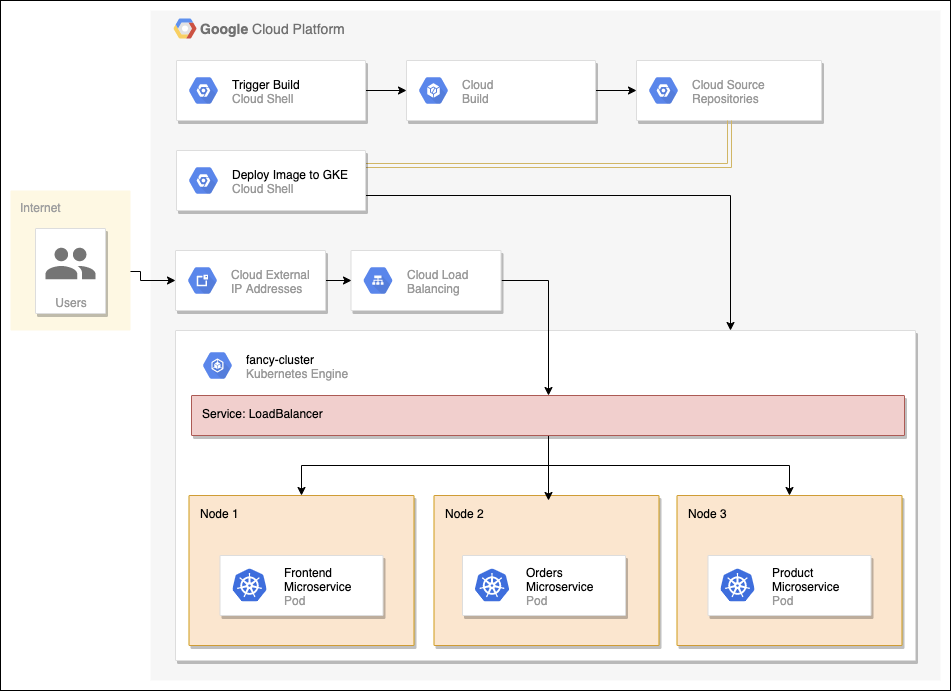
Architecture Diagram of Our Microservices
We will start by breaking our monolith into three microservices, one at a time. The microservices include, Orders, Products, and Frontend. We build a Docker image for each microservice using Cloud Build, which we trigger from within Cloud Shell. Then we will deploy and expose our microservices on Google Kubernetes Engine (GKE) with a Kubernetes service type LoadBalancer. We will do this for each service while simultaneously refactoring them out of our monolith. During the process we will have both our monolith and our microservices running until the very end when we are able to delete our monolith.
What you'll learn
- How to break down a Monolith to Microservices
- How to create a Google Kubernetes Engine cluster
- How to create a Docker image
- How to deploy Docker images to Kubernetes
Prerequisites
- A Google Cloud Platform account with administrative access to create projects or a project with Project Owner role
- A basic understanding of Docker and Kubernetes
2. Environment Setup
Self-paced environment setup
If you don't already have a Google Account (Gmail or Google Apps), you must create one. Sign-in to Google Cloud Platform console ( console.cloud.google.com) and create a new project:

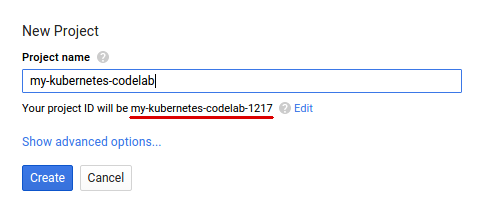
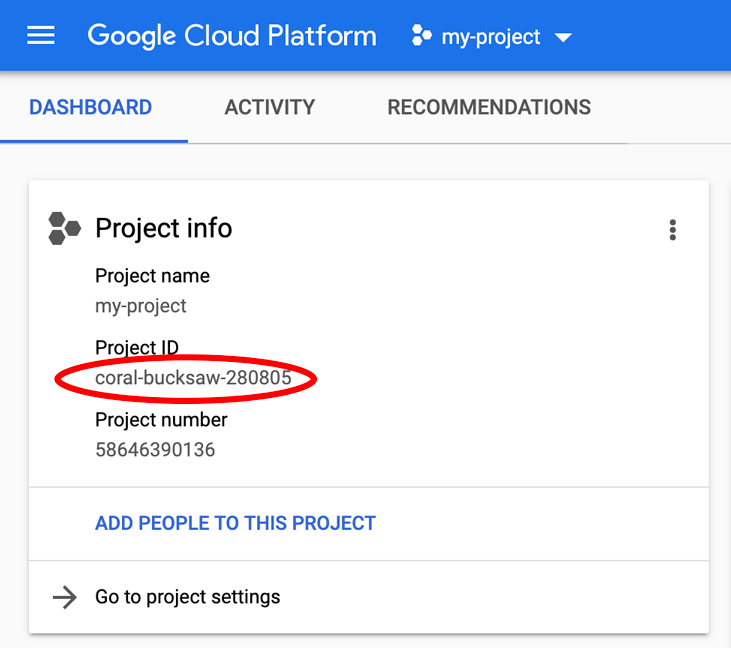
Remember the project ID, a unique name across all Google Cloud projects (the name above has already been taken and will not work for you, sorry!). It will be referred to later in this codelab as PROJECT_ID.
Next, you'll need to enable billing in the Developers Console in order to use Google Cloud resources and enable the Container Engine API.
Running through this codelab shouldn't cost you more than a few dollars, but it could be more if you decide to use more resources or if you leave them running (see "cleanup" section at the end of this document). Google Kubernetes Engine pricing is documented here.
New users of Google Cloud Platform are eligible for a $300 free trial.
Google Cloud Shell
While Google Cloud and Kubernetes can be operated remotely from your laptop, in this codelab we will be using Google Cloud Shell, a command line environment running in the Cloud.
This Debian-based virtual machine is loaded with all the development tools you'll need. It offers a persistent 5GB home directory and runs in Google Cloud, greatly enhancing network performance and authentication. This means that all you will need for this codelab is a browser (yes, it works on a Chromebook).
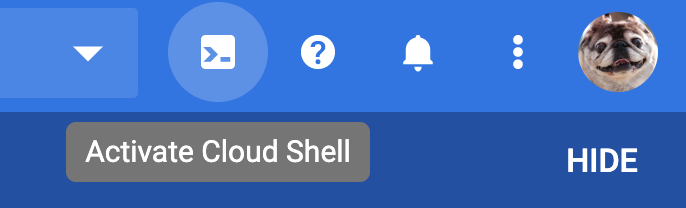
- To activate Cloud Shell from the Cloud Console, simply click Activate Cloud Shell
(it should only take a few moments to provision and connect to the environment).
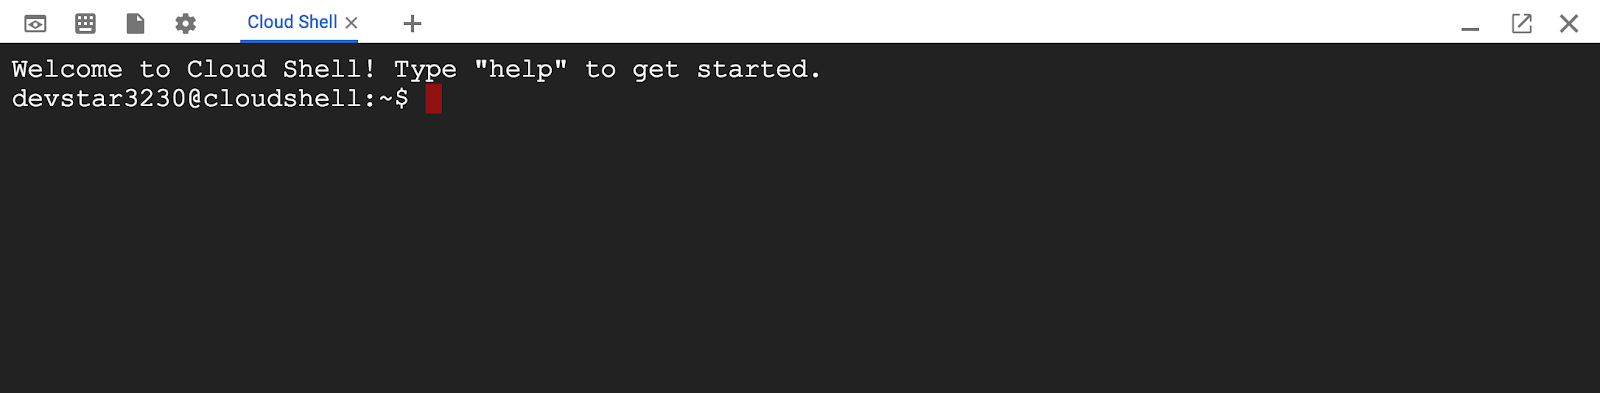
Once connected to Cloud Shell, you should see that you are already authenticated and that the project is already set to your PROJECT_ID.
gcloud auth list
Command output
Credentialed accounts:
 - <myaccount>@<mydomain>.com (active)
gcloud config list project
Command output
[core]
project = <PROJECT_ID>
If, for some reason, the project is not set, simply issue the following command:
gcloud config set project <PROJECT_ID>
Looking for your PROJECT_ID? Check out what ID you used in the setup steps or look it up in the Cloud Console dashboard:
Cloud Shell also sets some environment variables by default, which may be useful as you run future commands.
echo $GOOGLE_CLOUD_PROJECT
Command output
<PROJECT_ID>
- Finally, set the default zone and project configuration.
gcloud config set compute/zone us-central1-f
You can choose a variety of different zones. For more information, see Regions & Zones.
3. Clone Source Repository
We use an existing monolithic application of an imaginary ecommerce website, with a simple welcome page, a products page and an order history page. We will just need to clone the source from our git repo, so we can focus on breaking it down into microservices and deploying to Google Kubernetes Engine (GKE).
Run the following commands to clone the git repo to your Cloud Shell instance and change to the appropriate directory. We will also install the NodeJS dependencies so we can test our monolith before deploying. It may take a few minutes for this script to run.
cd ~
git clone https://github.com/googlecodelabs/monolith-to-microservices.git
cd ~/monolith-to-microservices
./setup.sh
This will clone our Github repo, change to the directory and install the dependencies needed to run our application locally. It may take a few minutes for this script to run.
4. Create a GKE Cluster
Now that you have your working developer environment, we need a Kubernetes cluster to deploy our monolith and eventually our microservices to! Before we can create a cluster, we need to make sure the proper API's are enabled. Run the following command to enable the containers api so we can use Google Kubernetes Engine:
gcloud services enable container.googleapis.com
Now we are ready to create our cluster! Run the command below to create a GKE cluster named fancy-cluster with 3 nodes.
gcloud container clusters create fancy-cluster --num-nodes 3
It may take several minutes for the cluster to be created. Once the command has completed, run the following command and see the cluster's three worker VM instances:
gcloud compute instances list
Output:
NAME                                          ZONE        MACHINE_TYPE   PREEMPTIBLE  INTERNAL_IP  EXTERNAL_IP    STATUS
gke-fancy-cluster-default-pool-ad92506d-1ng3  us-east4-a  n1-standard-1               10.150.0.7   XX.XX.XX.XX    RUNNING
gke-fancy-cluster-default-pool-ad92506d-4fvq  us-east4-a  n1-standard-1               10.150.0.5   XX.XX.XX.XX    RUNNING
gke-fancy-cluster-default-pool-ad92506d-4zs3  us-east4-a  n1-standard-1               10.150.0.6   XX.XX.XX.XX    RUNNING
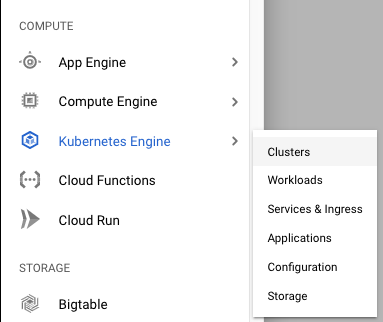
You can also view your Kubernetes cluster and related information in the Google Cloud console. Click the menu button in the top left, scroll down to Kubernetes Engine and click Clusters. You should see your cluster named fancy-cluster.
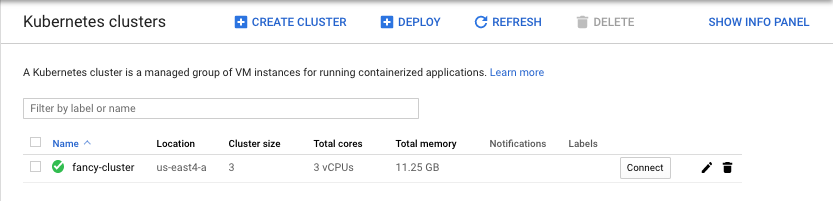
Congratulations! You have just created your first Kubernetes cluster!
5. Deploy Existing Monolith
Since the focus of this lab is to walk through breaking down a monolith into microservices, we need to get a monolith application up and running. Run the following script to deploy a monolith application to our GKE cluster for the purposes of this lab:
cd ~/monolith-to-microservices
./deploy-monolith.sh
Accessing The Monolith
To find the external IP address for our monolith application, run the following command.
kubectl get service monolith
You should see output similar to the following:
NAME         CLUSTER-IP      EXTERNAL-IP     PORT(S)          AGE
monolith     10.3.251.122    203.0.113.0     80:30877/TCP     3d
NOTE: An external load balancer and IP need to be provisioned for this so it will take some time for this to happen. If your output lists the external IP as
<pending> give it a few minutes and try again.
Once you've determined the external IP address for your monolith, copy the IP address. Point your browser to this URL (such as http://203.0.113.0) to check if your monolith is accessible.
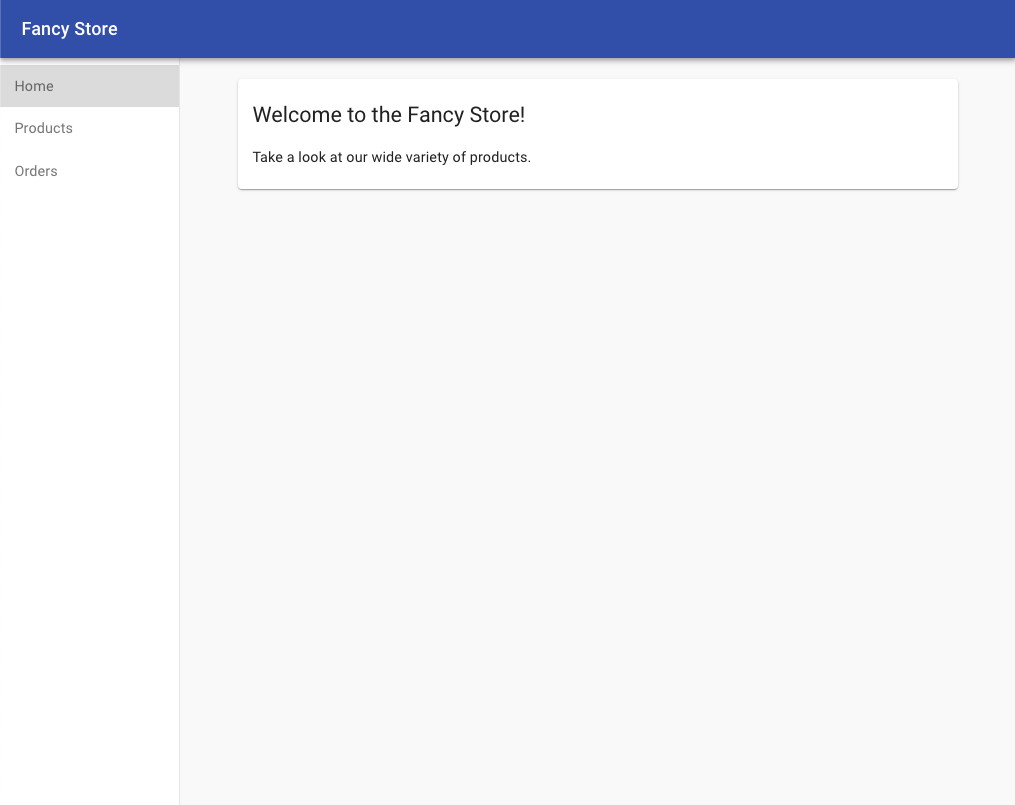
You should see the welcome page for the monolithic website just like the picture above. The welcome page is a static page that will be served up by the Frontend microservice later on. You now have your monolith fully running on Kubernetes!
6. Migrate Orders to Microservice
Now that we have our existing monolith website running on GKE, we can start breaking each service into a microservice. Typically, a planning effort should take place on which services to break into smaller chunks, typically around specific parts of the application like business domain. For demonstration purposes, we have created a trivial example and broken out each service around the business domain, Orders, Products and Frontend. The code has already been migrated and we will focus on building and deploying the services on Google Kubernetes Engine (GKE).
Create New Orders Microservice
The first service we will break out is the Orders service. We will make use of the separate codebase provided and create a separate Docker container for this service.
Create Docker Container with Google Cloud Build
Since we have already migrated the codebase for you, our first step will be to create a Docker container of our Order service using Google Cloud Build.
Normally you would have to take a two step approach that entails building a docker container and pushing it to a registry to store the image for GKE to pull from. But we can make life easier, we can use Google Cloud Build to build the Docker container and put the image in the Google Cloud Container Registry with a single command! This allows us to issue a single command to build and move our image to the container registry. To view the manual process of creating a docker file and pushing it you can go here.
Google Cloud Build will compress the files from the directory and move them to a Google Cloud Storage bucket. The build process will then take all the files from the bucket and use the Dockerfile to run the Docker build process. Since we specified the --tag flag with the host as gcr.io for the Docker image, the resulting Docker image will be pushed to the Google Cloud Container Registry.
Run the following commands to build your Docker container and push it to the Google Container Registry:
cd ~/monolith-to-microservices/microservices/src/orders
gcloud builds submit --tag gcr.io/${GOOGLE_CLOUD_PROJECT}/orders:1.0.0 .
This process will take a few minutes, but after it is completed, there will be output in the terminal similar to the following:
-----------------------------------------------------------------------------------------------------------------------------------------------------------------------------------------------------------
ID                                    CREATE_TIME                DURATION  SOURCE                                                                                  IMAGES                              STATUS
1ae295d9-63cb-482c-959b-bc52e9644d53  2019-08-29T01:56:35+00:00  33S       gs://<PROJECT_ID>_cloudbuild/source/1567043793.94-abfd382011724422bf49af1558b894aa.tgz  gcr.io/<PROJECT_ID>/orders:1.0.0  SUCCESS
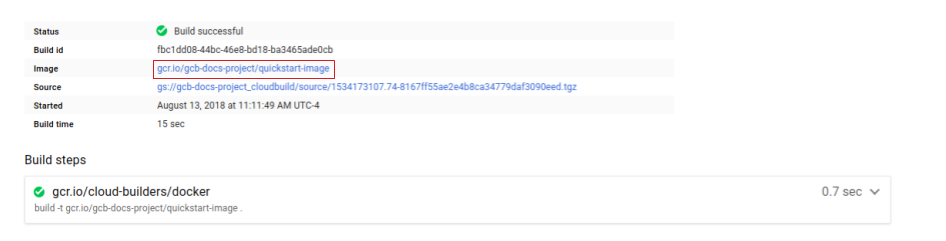
To view your build history or watch the process in real time, you can go to the Google Cloud console. Click the menu button on the top left and scroll down to Tools → Cloud Build and click History. Here you can see a list of all your previous builds, there should only be 1 that you just created.

If you click on the build id, you can see all the details for that build including the log output.
From the build details page you can view the container image that was created by clicking on the image name in the build information section.
Deploy Container to GKE
Now that we have containerized our website and pushed our container to the Google Container Registry, it is time to deploy to Kubernetes!
Kubernetes represents applications as Pods, which are units that represent a container (or group of tightly-coupled containers). The Pod is the smallest deployable unit in Kubernetes. In this tutorial, each Pod contains only your microservices container.
To deploy and manage applications on a GKE cluster, you must communicate with the Kubernetes cluster management system. You typically do this by using the kubectl command-line tool from within Cloud Shell.
First we will create a Deployment resource. The Deployment manages multiple copies of your application, called replicas, and schedules them to run on the individual nodes in your cluster. In this case, the Deployment will be running only one Pod of your application. Deployments ensure this by creating a ReplicaSet. The ReplicaSet is responsible for making sure the number of replicas specified are always running.
The kubectl create deployment command below causes Kubernetes to create a Deployment named orders on your cluster with 1 replica.
Run the following command to deploy your application:
kubectl create deployment orders --image=gcr.io/${GOOGLE_CLOUD_PROJECT}/orders:1.0.0
Verify Deployment
To verify the Deployment was created successfully, run the following command, it may take a few moments for the pod status to be Running:
kubectl get all
Output:
NAME                            READY   STATUS    RESTARTS   AGE
pod/monolith-779c8d95f5-dxnzl   1/1     Running   0          15h
pod/orders-5bc6969d76-kdxkk     1/1     Running   0          21s
NAME                 TYPE           CLUSTER-IP      EXTERNAL-IP    PORT(S)        AGE
service/kubernetes   ClusterIP      10.39.240.1     <none>         443/TCP        19d
service/monolith     LoadBalancer   10.39.241.130   34.74.209.57   80:30412/TCP   15h
NAME                       READY   UP-TO-DATE   AVAILABLE   AGE
deployment.apps/monolith   1/1     1            1           15h
deployment.apps/orders     1/1     1            1           21s
NAME                                  DESIRED   CURRENT   READY   AGE
replicaset.apps/monolith-779c8d95f5   1         1         1       15h
replicaset.apps/orders-5bc6969d76     1         1         1       21s
This output shows us several things. We can see our Deployment which is current, our ReplicaSet with desired pod count of 1, and our Pod which is running. Looks like everything was created successfully!
Expose GKE Container
We have deployed our application on GKE, but we don't have a way of accessing it outside of the cluster. By default, the containers you run on GKE are not accessible from the Internet, because they do not have external IP addresses. You must explicitly expose your application to traffic from the Internet via a Service resource. A Service provides networking and IP support to your application's Pods. GKE creates an external IP and a Load Balancer ( subject to billing) for your application.
When we deployed our Orders service, we exposed it on port 8081 internally via a Kubernetes deployment. In order to expose this service externally, we need to create a Kubernetes service of type LoadBalancer to route traffic from port 80 externally to internal port 8081 for the Orders service. Run the following command to expose your website to the Internet:
kubectl expose deployment orders --type=LoadBalancer --port 80 --target-port 8081
Accessing The Service
GKE assigns the external IP address to the Service resource—not the Deployment. If you want to find out the external IP that GKE provisioned for your application, you can inspect the Service with the kubectl get service command:
kubectl get service orders
Output:
NAME         CLUSTER-IP      EXTERNAL-IP     PORT(S)          AGE
orders       10.3.251.122    203.0.113.0     80:30877/TCP     3d
Once you've determined the external IP address for your application, copy the IP address. Save it for the next step when we change our monolith to point to our new Orders service!
Reconfigure Monolith
Since we removed the Orders service from the monolith, we will have to modify the monolith to point to the new external Orders microservice.
When breaking down a monolith, we are removing pieces of code from a single codebase to multiple and deploying them separately. Since the microservice is running on a different server, we can no longer reference our service URLs as absolute paths, we need route to the new server address of our Order microservice. Note that this will require some downtime to the monolith service to update the URL for each service that has been broken out. This should be accounted for when planning on moving your microservices and monolith to production during the microservices migration process.
We need to update our config file in our monolith to point to the new Orders microservices IP address. Use the nano editor to replace the local URL with the IP address of our new Orders microservice. Run the following command to edit the
cd ~/monolith-to-microservices/react-app
nano .env.monolith
When the editor opens, your file should look like this:
REACT_APP_ORDERS_URL=/service/orders
REACT_APP_PRODUCTS_URL=/service/products
Replace the REACT_APP_ORDERS_URL to the new format while replacing with your Orders microservice IP address so it matches below:
REACT_APP_ORDERS_URL=http://<ORDERS_IP_ADDRESS>/api/orders
REACT_APP_PRODUCTS_URL=/service/products
Press CTRL+O, press ENTER, then CTRL+X to save the file in the nano editor.
You can test your new microservice by navigating the URL you just set in this file. The webpage should return a JSON response from our Orders microservice.
Next, we will need to rebuild our monolith frontend and repeat the build process to build the container for the monolith and redeploy to our GKE cluster. Run the following commands complete these steps:
Rebuild Monolith Config Files
npm run build:monolith
Create Docker Container with Google Cloud Build
cd ~/monolith-to-microservices/monolith
gcloud builds submit --tag gcr.io/${GOOGLE_CLOUD_PROJECT}/monolith:2.0.0 .
Deploy Container to GKE
kubectl set image deployment/monolith monolith=gcr.io/${GOOGLE_CLOUD_PROJECT}/monolith:2.0.0
You can verify your application is now hitting the new Orders microservice by going to the monolith application in your browser and navigating to the Orders page. All the order ID's should end in a suffix -MICROSERVICE as shown below:

7. Migrate Products to Microservice
Create New Products Microservice
We can continue breaking out our services by migrating the Products service next. We will follow the same process as the previous step. Run the following commands to build a Docker container, deploy your container and expose it to via a Kubernetes service.
Create Docker Container with Google Cloud Build
cd ~/monolith-to-microservices/microservices/src/products
gcloud builds submit --tag gcr.io/${GOOGLE_CLOUD_PROJECT}/products:1.0.0 .
Deploy Container to GKE
kubectl create deployment products --image=gcr.io/${GOOGLE_CLOUD_PROJECT}/products:1.0.0
Expose GKE Container
kubectl expose deployment products --type=LoadBalancer --port 80 --target-port 8082
Find the public IP of our Products services the same way we did for our Orders service with the following command:
kubectl get service products
Output:
NAME         CLUSTER-IP      EXTERNAL-IP     PORT(S)          AGE
products     10.3.251.122    203.0.113.0     80:30877/TCP     3d
Save the IP address for the next step when we reconfigure our monolith to point to our new Products microservice.
Reconfigure Monolith
Use the nano editor to replace the local URL with the IP address of our new Products microservices:
cd ~/monolith-to-microservices/react-app
nano .env.monolith
When the editor opens, your file should look like this:
REACT_APP_ORDERS_URL=http://<ORDERS_IP_ADDRESS>/api/orders
REACT_APP_PRODUCTS_URL=/service/products
Replace the REACT_APP_PRODUCTS_URL to the new format while replacing with your Product microservice IP address so it matches below:
REACT_APP_ORDERS_URL=http://<ORDERS_IP_ADDRESS>/api/orders
REACT_APP_PRODUCTS_URL=http://<PRODUCTS_IP_ADDRESS>/api/products
Press CTRL+O, press ENTER, then CTRL+X to save the file in the nano editor.
You can test your new microservice by navigating the URL you just set in this file. The webpage should return a JSON response from our Products microservice.
Next, we will need to rebuild our monolith frontend and repeat the build process to build the container for the monolith and redeploy to our GKE cluster. Run the following commands complete these steps:
Rebuild Monolith Config Files
npm run build:monolith
Create Docker Container with Google Cloud Build
cd ~/monolith-to-microservices/monolith
gcloud builds submit --tag gcr.io/${GOOGLE_CLOUD_PROJECT}/monolith:3.0.0 .
Deploy Container to GKE
kubectl set image deployment/monolith monolith=gcr.io/${GOOGLE_CLOUD_PROJECT}/monolith:3.0.0
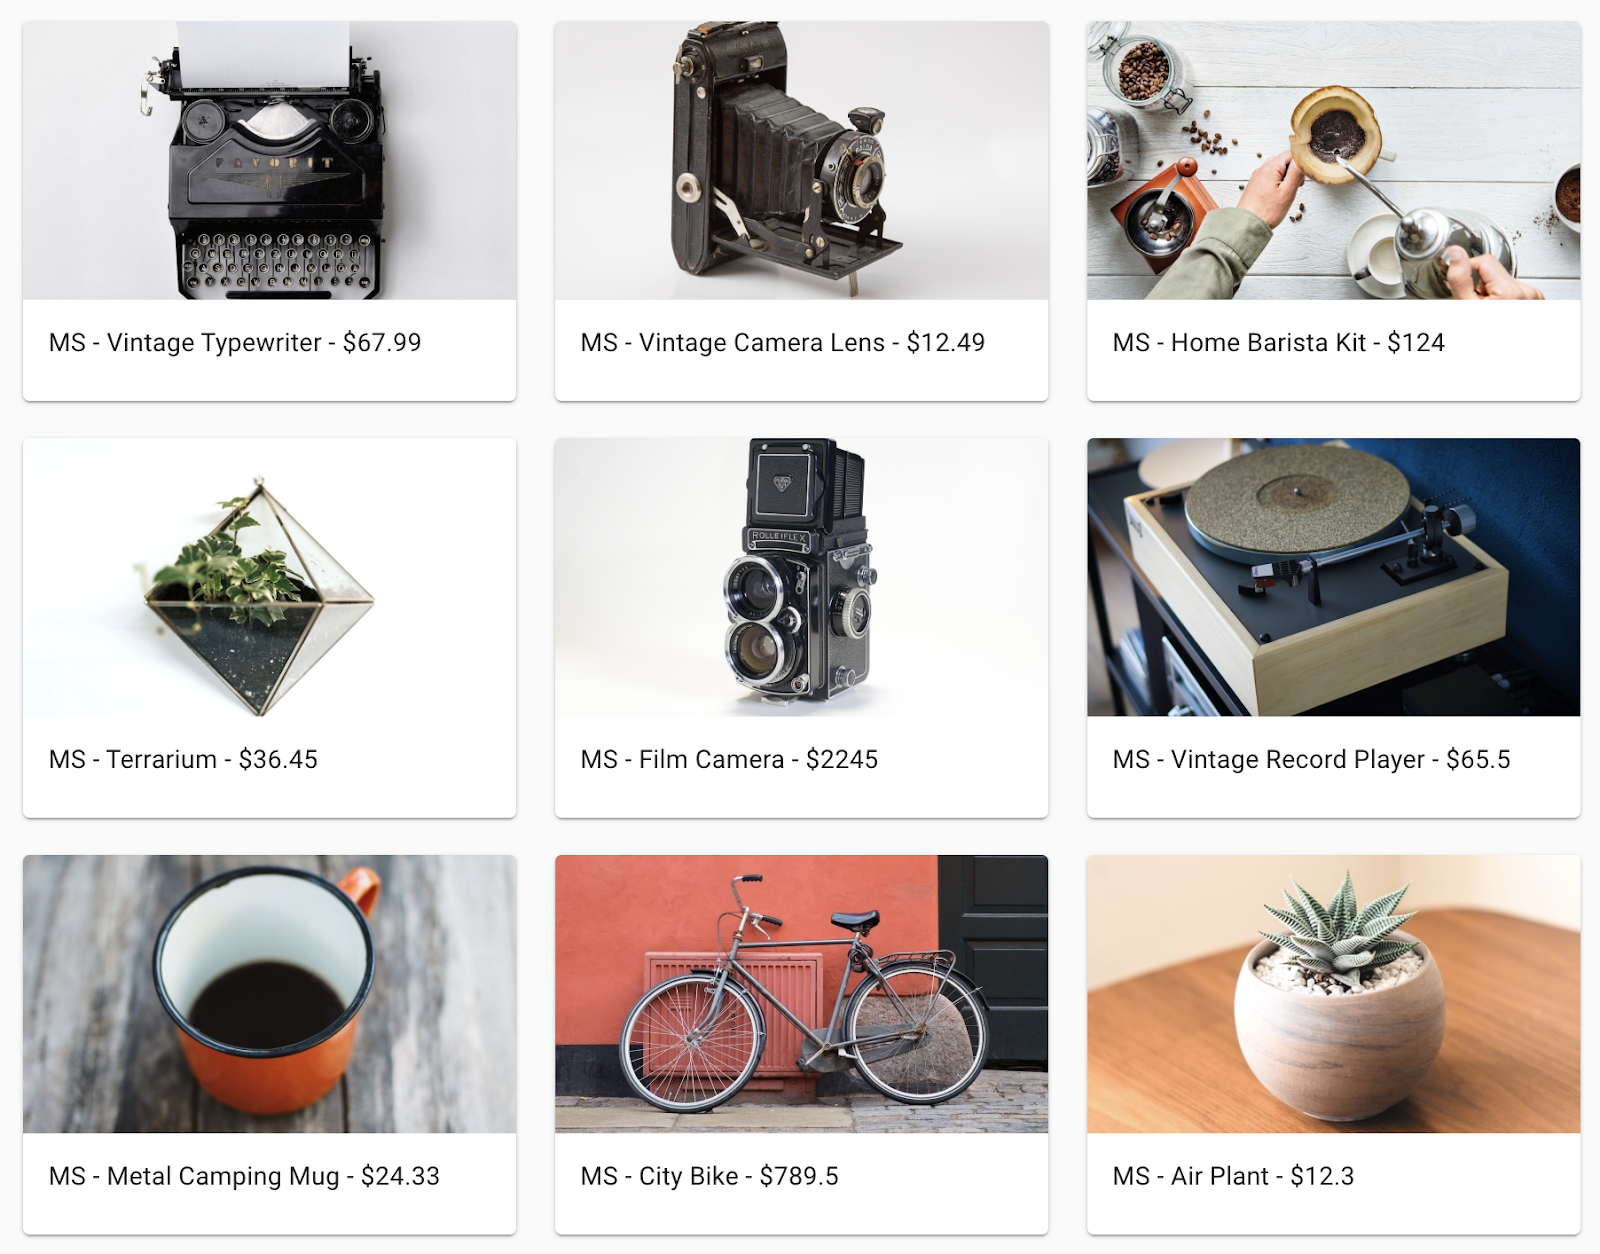
You can verify your application is now hitting the new Products microservice by going to the monolith application in your browser and navigating to the Products page. All the product names should be prefixed by MS- as shown below:
8. Migrate Frontend to Microservice
The last step in the migration process is to move the Frontend code to a microservice and shut down the monolith! After this step is completed, we will have successfully migrated our monolith to a microservices architecture!
Create New Frontend Microservice
Let's follow the same procedure as the last two steps to create a new frontend microservice.
Previously when we rebuilt our monolith we updated our config to point to our monolith, but now we need to use the same config for our Frontend microservice. Run the following commands to copy our microservices URL config files to the Frontend microservice codebase:
cd ~/monolith-to-microservices/react-app
cp .env.monolith .env
npm run build
Once that is completed, we will follow the same process as the previous steps. Run the following commands to build a Docker container, deploy your container and expose it to via a Kubernetes service.
Create Docker Container with Google Cloud Build
cd ~/monolith-to-microservices/microservices/src/frontend
gcloud builds submit --tag gcr.io/${GOOGLE_CLOUD_PROJECT}/frontend:1.0.0 .
Deploy Container to GKE
kubectl create deployment frontend --image=gcr.io/${GOOGLE_CLOUD_PROJECT}/frontend:1.0.0
Expose GKE Container
kubectl expose deployment frontend --type=LoadBalancer --port 80 --target-port 8080
Delete The Monolith
Now that all our services are running as microservices, we can delete our monolith application! Note, in an actual migration, this would also entail DNS changes, etc to get our existing domain names to point to the new frontend microservices for our application. Run the following commands to delete our monolith:
kubectl delete deployment monolith
kubectl delete service monolith
Test Your Work
To verify everything is working, your old IP address from your monolith service should not work and your new IP address from your frontend service should host the new application. To see a list of all the services and IP addresses, use the following command:
kubectl get services
Your output should look similar to the following:
NAME         TYPE           CLUSTER-IP      EXTERNAL-IP      PORT(S)        AGE
frontend     LoadBalancer   10.39.246.135   35.227.21.154    80:32663/TCP   12m
kubernetes   ClusterIP      10.39.240.1     <none>           443/TCP        18d
orders       LoadBalancer   10.39.243.42    35.243.173.255   80:32714/TCP   31m
products     LoadBalancer   10.39.250.16    35.243.180.23    80:32335/TCP   21m
Once you've determined the external IP address for your Frontend microservice, copy the IP address. Point your browser to this URL (such as http://203.0.113.0) to check if your frontend is accessible. Your website should be the same as it was before we broke down the monolith into microservices!
9. Cleanup
Once ready, the easiest way to cleanup all activities performed is to delete the Project. Deleting the project deletes all resources that were created within this Codelab to ensure no unexpected recurring charges occur. Execute the following within Cloud Shell, where PROJECT_ID is the full Project ID and not just the Project Name.
gcloud projects delete [PROJECT_ID]
Confirm deletion by entering "Y" when prompted.
10. Congratulations!
You successfully broke down your monolithic application into microservices and deployed them on Google Kubernetes Engine!
Next Steps
Checkout the following codelabs to learn more about Kubernetes:
- Deploy, Scale and Update Your Website on Google Kubernetes Engine
- Build a Slack Bot with Node.js on Kubernetes
- Continuous Delivery to Kubernetes Using Spinnaker
- Deploy a Java application to Kubernetes on Google Kubernetes Engine
Additional Resources
- Docker - https://docs.docker.com/
- Kubernetes - https://kubernetes.io/docs/home/
- Google Kubernetes Engine (GKE) - https://cloud.google.com/kubernetes-engine/docs/
- Google Cloud Build - https://cloud.google.com/cloud-build/docs/
- Google Container Registry - https://cloud.google.com/container-registry/docs/
- Migrating Monoliths to Microservices - https://cloud.google.com/solutions/migrating-a-monolithic-app-to-microservices-gke