
1. Overview
This series of codelabs (self-paced, hands-on tutorials) aims to help developers understand the various options they have when deploying their applications. You will learn how to use the Google Cloud Translation API in a simple web application. This app can be run locally or deployed to a Cloud serverless compute platform (App Engine, Cloud Functions, or Cloud Run).
You will do this JavaScript tutorial with Node.js using the Express.js web framework. You'll also learn how to access Google Cloud APIs from our serverless platforms. All versions of this app are from the "nebulous serverless" open source repo, which includes a Python version of this app and independent codelabs. The repo also hosts similar apps that show developers how to access non-Cloud Google APIs from our serverless platforms.
This codelab focuses on deploying this app to the bolded platform(s) above.
You'll learn how to
- Use Google Cloud APIs, specifically the Cloud Translation API (advanced/v3)
- Run a basic web application locally or deploy to a Cloud severless compute platform
What you'll need
- A Google Cloud project with an active Cloud Billing account
- A web framework installed for running locally ( Flask for those doing the Python tutorial or Express for those doing the JavaScript/Node.js tutorial)
- At least one severless compute platform enabled for Google Cloud deployments
- Basic programming skills (Python or JavaScript/Node.js)
- Working knowledge of basic operating system commands
Survey
How will you use this tutorial?
How would you rate your experience developing in Python or Node.js?
How would you rate your experience with using Google Cloud services?
2. Setup and requirements
Self-paced environment setup
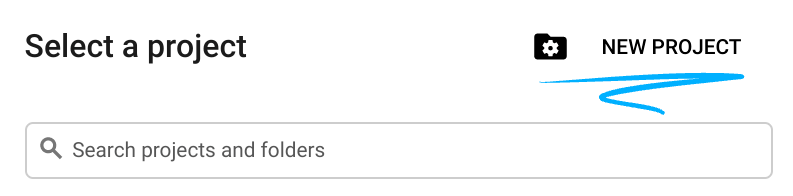
- Sign-in to the Google Cloud Console and create a new project or reuse an existing one. If you don't already have a Gmail or Google Workspace account, you must create one.

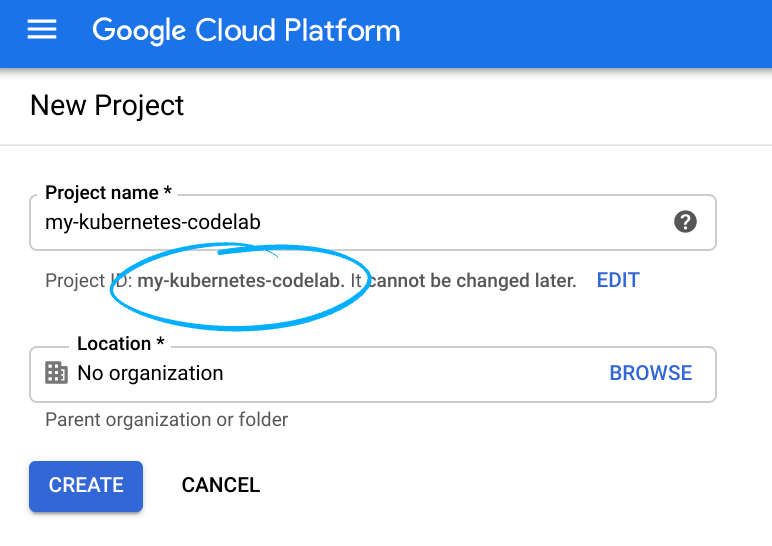
- The Project name is the display name for this project's participants. It is a character string not used by Google APIs, and you can update it at any time.
- The Project ID must be unique across all Google Cloud projects and is immutable (cannot be changed after it has been set). The Cloud Console auto-generates a unique string; usually you don't care what it is. In most codelabs, you'll need to reference the Project ID (and it is typically identified as
PROJECT_ID), so if you don't like it, generate another random one, or, you can try your own and see if it's available. Then it's "frozen" after the project is created. - There is a third value, a Project Number which some APIs use. Learn more about all three of these values in the documentation.
- Next, you'll need to enable billing in the Cloud Console in order to use Cloud resources/APIs. Running through this codelab shouldn't cost much, if anything at all. To shut down resources so you don't incur billing beyond this tutorial, follow any "clean-up" instructions found at the end of the codelab. New users of Google Cloud are eligible for the $300 USD Free Trial program.
3. Enable Translation API
In this section, you'll learn how to enable Google APIs in general. For our sample app, you'll enable the Cloud Translation API. You will also enable App Engine, Cloud Functions, and/or Cloud Run (plus Cloud Artifact Registry), depending on which platform(s) you wish to deploy the sample app to.
Enabling Google APIs
Introduction
Regardless of which Google API you want to use in your application, they must be enabled. APIs can be enabled from the command-line or from the Cloud console. The process of enabling APIs is identical, so once you enable one API, you can do another in the same way.
Option 1: gcloud command-line interface (Cloud Shell or local environment)
While enabling APIs from the Cloud Console is more common, some developers prefer doing everything from the command line. To do so, you need to look up an API's "service name." It looks like a URL: SERVICE_NAME.googleapis.com. You can find these in the Supported products chart, or you can programmatically query for them with the Google Discovery API.
Armed with this information, using Cloud Shell (or your local development environment with the gcloud command-line tool installed), you can enable an API, as follows:
gcloud services enable SERVICE_NAME.googleapis.com
Example 1: Enable the Cloud Vision API
gcloud services enable vision.googleapis.com
Example 2: Enable Google App Engine
gcloud services enable appengine.googleapis.com
Example 3: Enable multiple APIs with one request. For example, if this codelab has viewers deploying an app using the Cloud Translation API to App Engine, Cloud Functions, and Cloud Run, the command line would be:
gcloud services enable appengine.googleapis.com cloudfunctions.googleapis.com artifactregistry.googleapis.com run.googleapis.com translate.googleapis.com
This command enables App Engine, Cloud Functions, Cloud Run, and the Cloud Translation API. Furthermore, it enables the Cloud Artifact Registry because that's where container images must be registered by the Cloud Build system in order to deploy to Cloud Run.
Option 2: Cloud Console
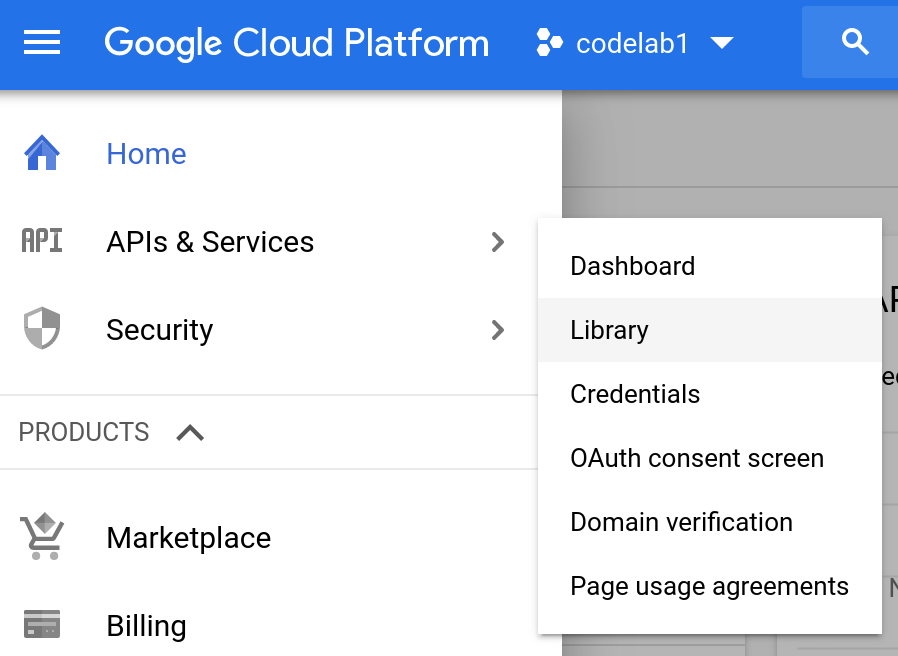
You can also enable the Google APIs in the API Manager. From the Cloud Console, go to API Manager and select Library.
Start to enter the name of an API into the search bar to see the matching results:
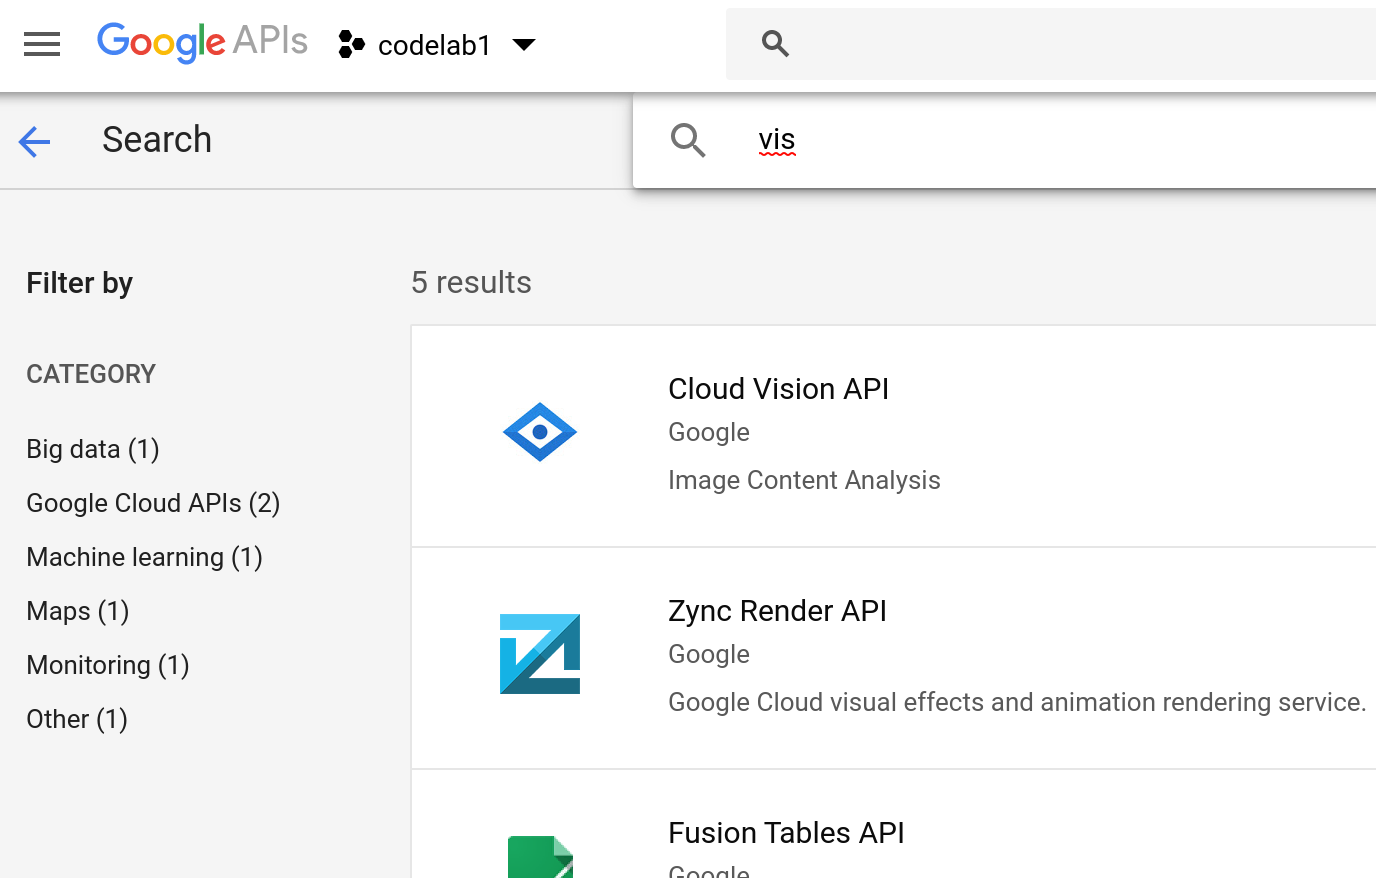
Select the API you're seeking to enable and click the Enable button:
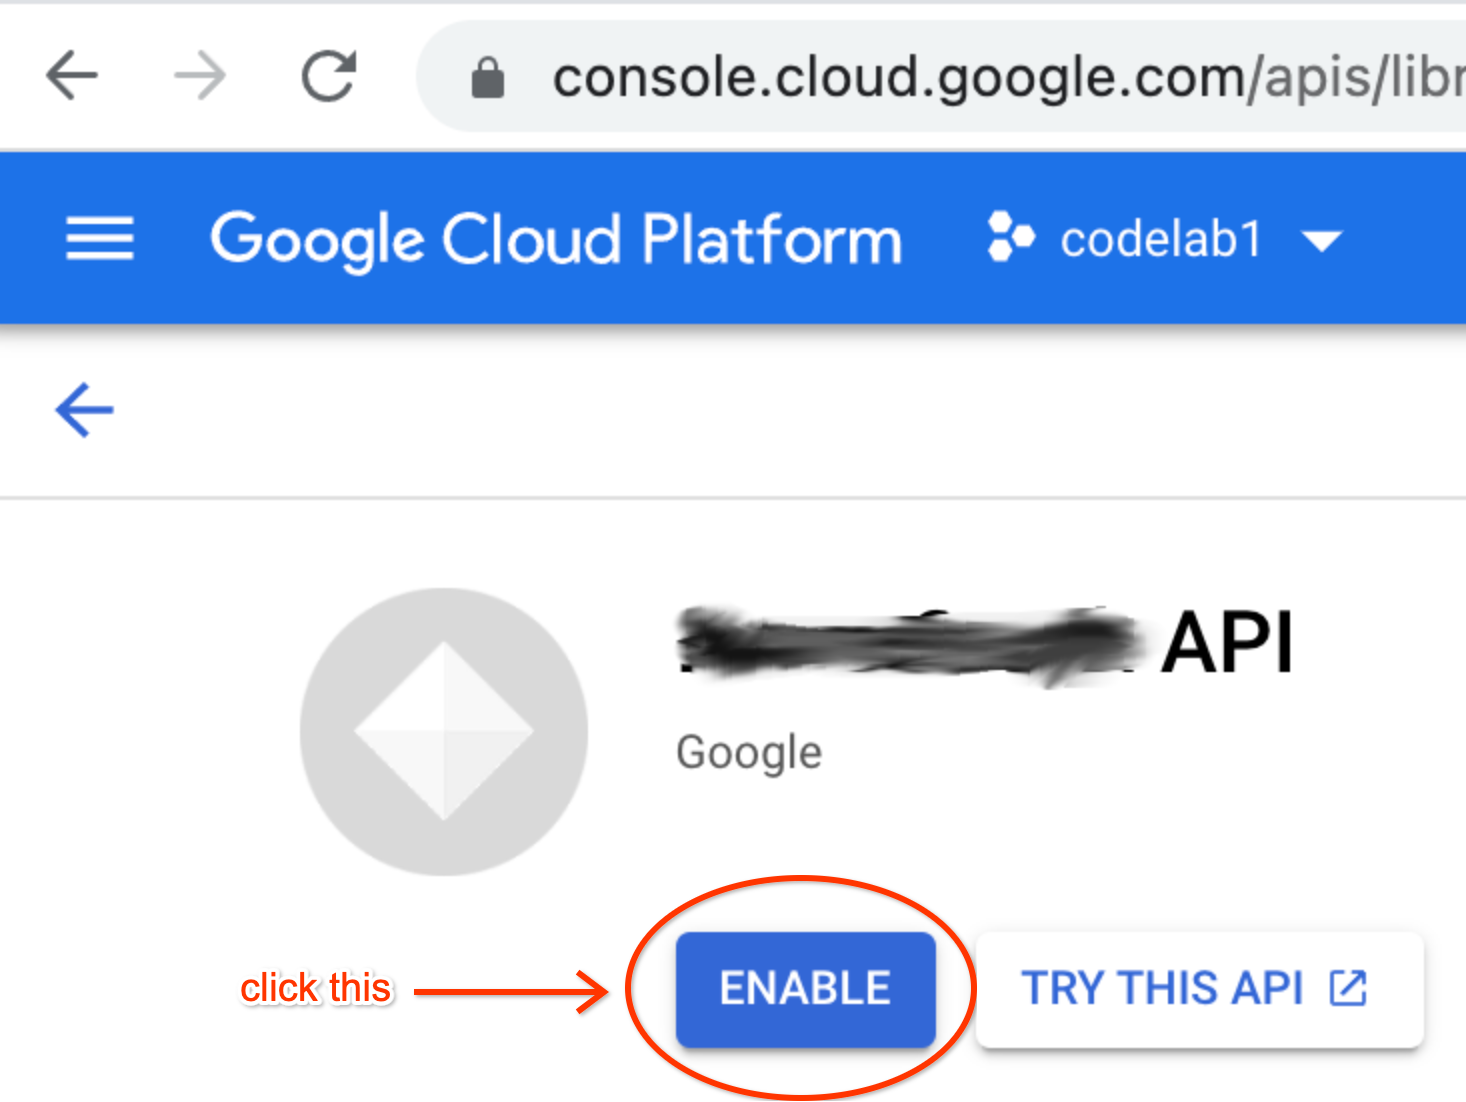
The process of enabling all APIs is similar, regardless of which Google API you wish to use.
Cost
Many Google APIs can be used without fees, however, there are costs when using most Google Cloud products and APIs. When enabling Cloud APIs, you may be asked for an active billing account. However, some Google Cloud products feature an "Always Free" tier, which you have to exceed in order to incur billing charges.
New GCP users qualify for the Free Trial, currently $300USD good for the first 90 days. Codelabs generally don't incur much or any billing, so we suggest you hold off on the Free Trial until you're really ready to give it a test drive, especially since it's a one-time offer. The Free Tier quotas don't expire and apply regardless of whether you use the Free Trial or not.
Users should reference the pricing information for any API before enabling (example: Cloud Vision API pricing page), especially noting whether it has a free tier, and if so, what it is. So long as you stay within specified daily or monthly limits in aggregate, you should not incur any charges. Pricing and free tiers vary between Google product group APIs. Examples:
- Google Cloud/GCP — each product is billed differently and generally pay-per-use; see free tier information above.
- Google Maps — features a suite of APIs and offers users an overall $200USD free monthly credit.
- Google Workspace (formerly G Suite) APIs — provides usage (up to certain limits) covered by a Workspace monthly subscription fee, so there's no direct billing for use of APIs for applications like Gmail, Google Drive, Calendar, Docs, Sheets, or Slides.
Different Google products are billed differently, so be sure to reference the appropriate documentation for that information.
Ensure desired services enabled
Ensure the Cloud Translation API in the API Manager as directed above. If you didn't enable the serverless platforms from the command-line, you can do so from each of their respective dashboards in the Cloud Console: App Engine, Cloud Functions, Cloud Run.
While it is visually informative to enable APIs from the Cloud Console, it's faster to use the gcloud tool, which takes seconds to enable all services:
$ gcloud services enable appengine.googleapis.com \
cloudfunctions.googleapis.com artifactregistry.googleapis.com \
run.googleapis.com translate.googleapis.com
Operation "operations/acf.p2-xxxxxx035451-704918f2-5470-4436-9bdd-c3b204yyyyyy" finished successfully.
More on costs
The section above on costs is general across Google APIs. Let's cover more specifics for this tutorial. While its monthly quota isn't listed in the overall "Always Free" tier summary page, the Translation API's pricing page states all users get a fixed amount of translated characters monthly. You shouldn't incur any charges from the API if you stay below that threshold. For more on costs using Google Cloud serverless platforms, see the Costs section of the repository. The "Clean up" section at the end will discuss how to stop incurring billing after the completion of this codelab.
4. Get the sample app code
Download ZIP or clone repo
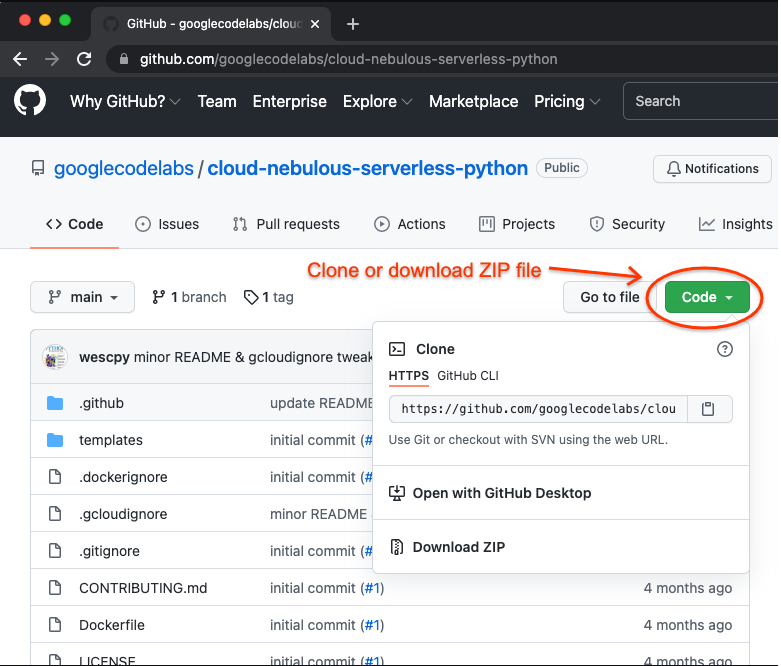
- Download the ZIP file or clone the repo with
git clone https://github.com/googlecodelabs/cloud-nebulous-serverless.git - If you don't have a local dev environment and wish to do this tutorial in Cloud Shell, you can clone the repo with the same
git clonecommand there. - You can also access the ZIP file from its green Code button as shown in the following screenshot:
Now that you have everything, create a full copy of the folder to do this specific tutorial, because it will likely involve deleting or changing the files. If you want to do a different deployment, you can start over by copying the original so you don't have to clone or download it again.
5. Confirm Node.js environment
To set up your Node.js environment, do the following:
- Ensure you've got the contemporary versions of Node (>=10) and NPM (>=6) installed
- Go to where you cloned the repo (or unzipped the ZIP file) then head to the
cloud/nodejsfolder - Confirm
package.jsonis present then runnpm install
For #1 above, you can verify what versions you have on the command-line:
$ node -v
v17.0.1
$ npm -v
8.1.0
6. Tour of the sample app
The sample app is a simple Google Translate derivative that prompts users to enter text in English and receive the equivalent translation of that text in Spanish.
The package.json configuration file signifies which third-party packages are required for the application (note that package versions may be updated beyond what's listed here):
{
  "name": "cloud-nebulous-serverless-nodejs",
  "version": "0.0.1",
  "description": "Nebulous Serverless sample app",
  "main": "index.js",
  "scripts": {
    "start": "node index.js",
    "test": "mocha test/test_neb.js"
  },
  "author": "Google LLC",
  "license": "Apache-2.0",
  "dependencies": {
    "@google-cloud/translate": "^6.3.1",
    "express": "^4.17.1",
    "nunjucks": "^3.2.3"
  },
  "devDependencies": {
    "mocha": "^9.1.3",
    "supertest": "^6.1.6"
  }
}
Now open the index.js file so we can see how it works. Omitting the commented lines about licensing, it looks like this at the top and bottom:
const express = require('express');
const nunjucks = require('nunjucks');
const {TranslationServiceClient} = require('@google-cloud/translate');

const app = express();
app.use(express.urlencoded({extended: true}));
nunjucks.configure('templates', {autoescape: true, express: app});
const TRANSLATE = new TranslationServiceClient();

const PORT = process.env.PORT || 8080;
const SOURCE = ['en', 'English'];
const TARGET = ['es', 'Spanish'];
let parent;
TRANSLATE.getProjectId().then(result => {
    parent = `projects/${result}`;
});


if (!process.env.FUNCTION_TARGET) {
    app.listen(PORT, () =>
        console.log(`Listening on port ${PORT}`)
    );
}

# . . . [translate() function definition] . . .

app.all('/', translate);
module.exports = {
    app
};
- The
requires bring in framework and templating functionality, and the Cloud Translation API client library. - The global variables represent the web app, the Cloud project ID, the Translation API client, the parent "location path" for Translation API calls, and the
SOURCEandTARGETlanguages. In this case, it's English (en) and Spanish (es), but feel free to change these values to other language codes supported by the Cloud Translation API. - The first element of each pair (
SOURCEandTARGET) is the language code while the second is the language name (and used for display purposes only as it's irrelevant for the API). - The few lines at the bottom are to send all HTTP requests to
translate()then export theappapplication object.
Finally, in the middle of index.js is the heart of the application, the translate() function:
async function translate(req, rsp) {
    let text = null;
    let translated = null;
    if (req.method === 'POST') {
        text = req.body.text.trim();
        if (text) {
            const data = {
                contents: [text],
                parent: parent,
                targetLanguageCode: TARGET[0]
            };
            const [response] = await TRANSLATE.translateText(data);
            translated = response.translations[0].translatedText;
        }
    }
    const context = {
        orig:  {text: text, lc: SOURCE},
        trans: {text: translated, lc: TARGET}
    };
    rsp.render('index.html', context);
}
The primary function does the work of taking the user input, and calling the Translation API to do the heavy-lifting. Let's break it down:
- Reset the basic variables for the form. This is primarily for GET requests as POST requests will have data that replace these.
- If it's a POST, grab the text to translate, and if non-empty, create a JSON structure representing the API metadata requirement. Then call the API for service.
- We did not pass in
SOURCE[0]to the API to a specific English source. When you leave out the source language, you're requesting the API to auto-detect the source language (seesourceLanguageCodein the docs). - Regardless, format the actual results (POST) or no data (GET) into the template context and render.
The visual part of the application is in the template index.html file. It shows any previously translated results (blank otherwise) followed by the form asking for something to translate:
<!doctype html>
<html><head><title>My Google Translate 1990s</title><body>
<style>
body {
  font-family: Verdana, Helvetica, sans-serif;
  background-color: #DDDDDD;
}
</style>
<h2>My Google Translate (1990s edition)</h2>

{% if trans['text'] %}
    <h4>Previous translation</h4>
    <li><b>Original</b>:   {{ orig['text'] }}  (<i>{{ orig['lc'][0] }}</i>)</li>
    <li><b>Translated</b>: {{ trans['text'] }} (<i>{{ trans['lc'][0] }}</i>)</li>
{% endif %}

<h4>Enter <i>{{ orig['lc'][1] }}</i> text to translate to <i>{{ trans['lc'][1] }}</i>:</h4>
<form method="POST"><input name="text"><input type="submit"></form>
</body></html>
For the remainder of the tutorial, you can pick any or all of the four options for deploying and running this app. All of the deployments are optional, meaning you can do any or all of them.
- Run the service locally
- Deploy to App Engine (standard environment)
- Deploy to Cloud Functions
- Deploy to Cloud Run
7. OPTION 1: Run the service locally
This section of the codelab is only for running locally. If you're only deploying to the cloud, move on to the next section.
To run the sample app locally, there are three distinct steps that must be taken:
- Create a service account
- Create a service account public/private key pair
- Download credentials file and bundle with application code
- Start the service
Learn about service accounts
Service accounts are the security mechanism to access Google APIs for cloud-based applications when accessing data that doesn't belong to human users. When deploying to the Cloud, to reduce the ramp-up time of onboarding users to the Cloud, all Google Cloud compute platforms (serverless and otherwise) provide default service accounts.
Default service accounts come with a broad set of permissions to "cut through the red tape," but when getting ready to launching a production service, we strongly recommend users follow the best practice of "least privileges," but creating user-managed service accounts with only enough permissions for your app to function properly. Regardless, there are no default service accounts for local deployments, so you must create a service account plus a service account key (a public/private key pair actually) and make those credentials available to the application code.
Create service account key-pair and download credentials file
Follow the instructions on this page to create a service account and public/private key pair for running locally. When creating the service account key, you'll be prompted to provide the desired permissions. Be sure to select roles/cloudtranslate.user so you can successfully access the API.
Once your key pair has been successfully created, you'll be prompted to download the service account key file. Call it credentials.json and move it into the application top-level folder. Now you have to tell the Cloud SDK to use those credentials: set the GOOGLE_APPLICATION_CREDENTIALS environment variable to point to that file. More on this process can also be found on this page covering service accounts usage.
Start the service
When you're ready to move ahead, launch the Express server locally with the following command:
$ npm start

> cloud-nebulous-serverless-nodejs@0.0.1 start
> node index.js

Listening on port 8080
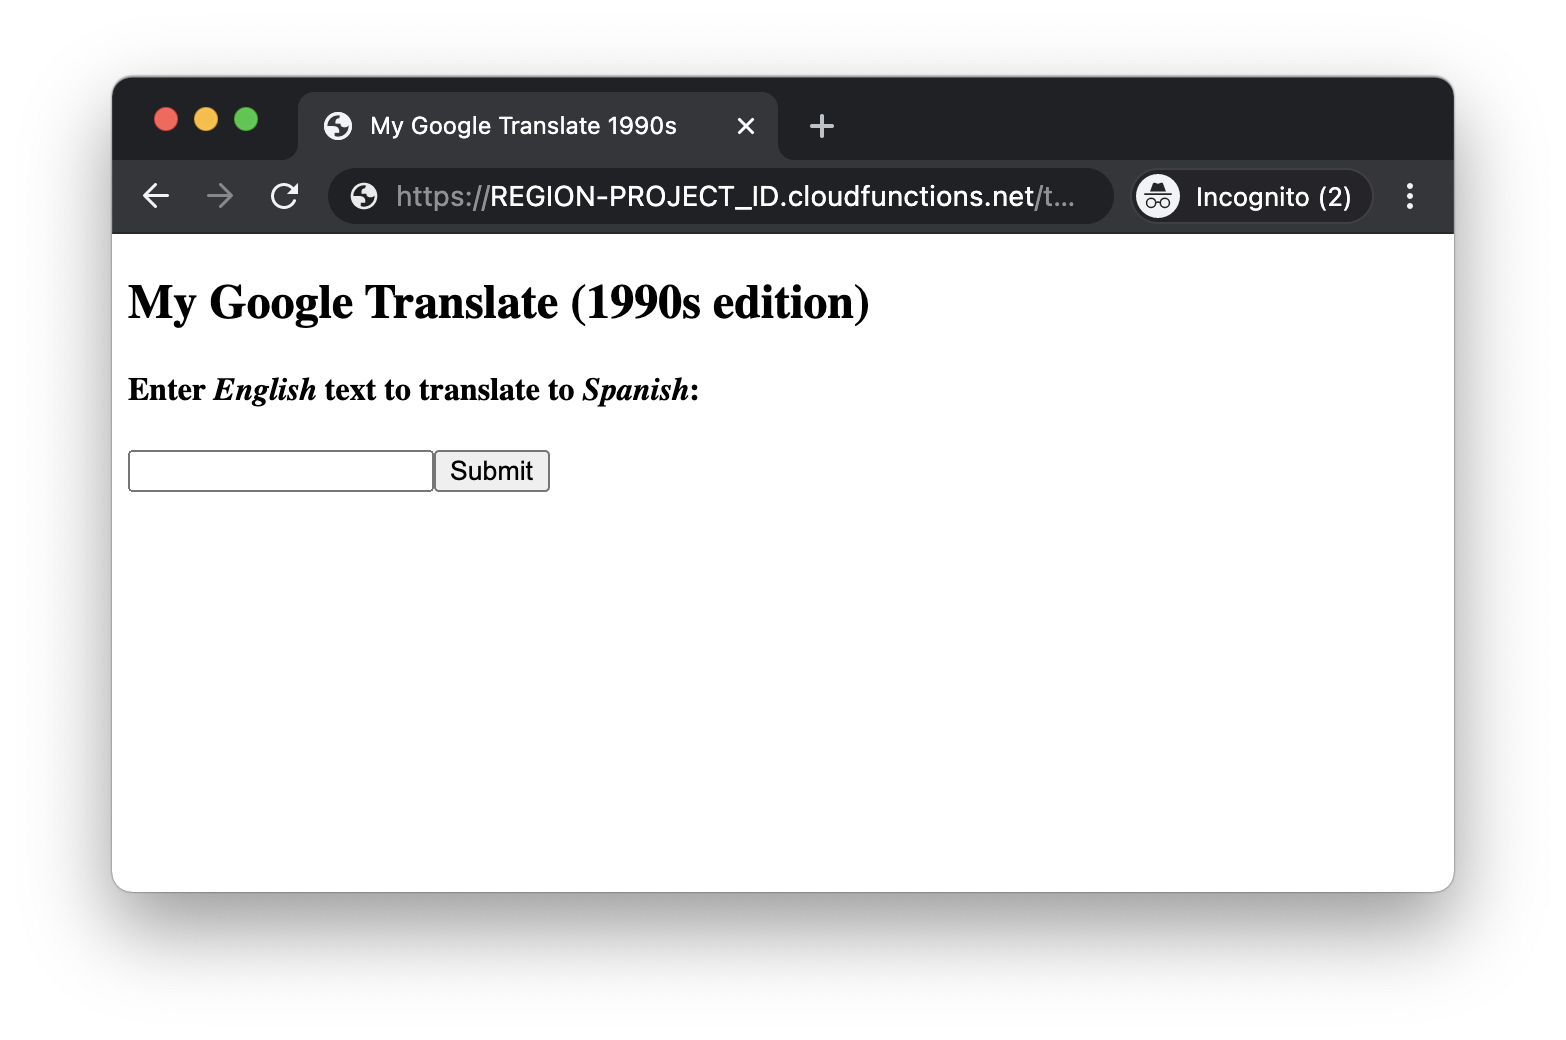
Go to your web browser to connect with it at localhost:8080, and you should see something like the following:
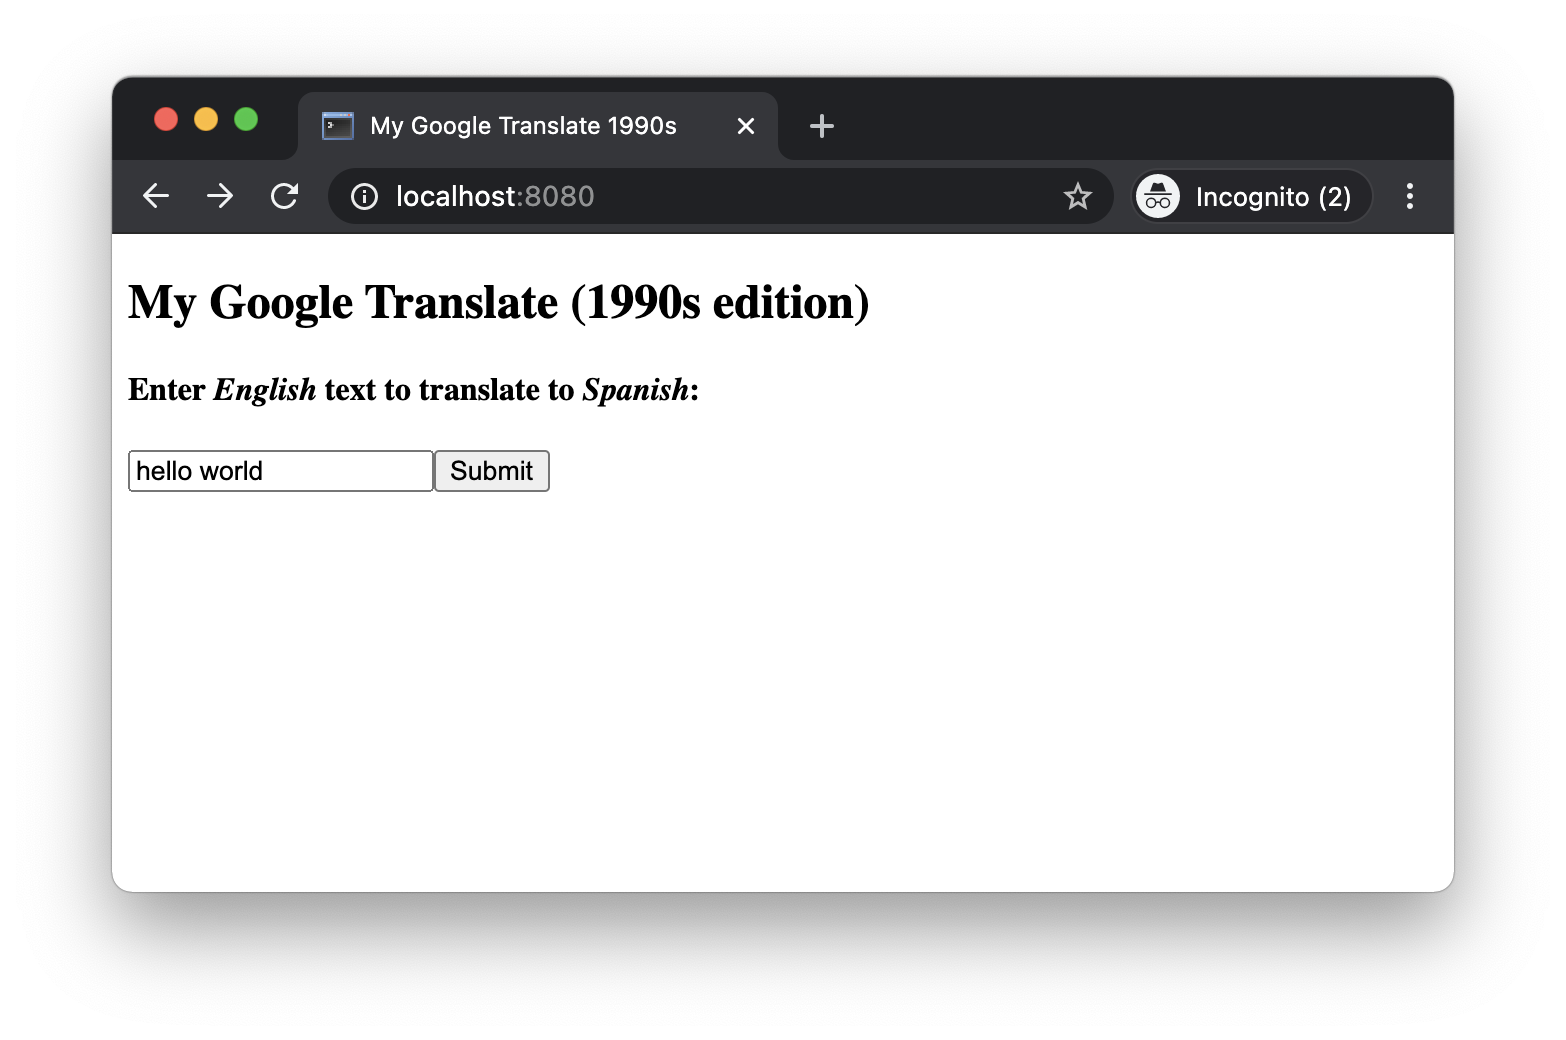
Translate something to see it work!
When you're satisfied with it, quit the server with ^C (control-C) and exit. Congratulations for getting a local deployment running. There's good news: deploying to the cloud is much easier.
Troubleshooting
Are you getting an error like this when requesting a translation?
node:fs:2486
      handleErrorFromBinding(ctx);
      ^

Error: The file at credentials.json does not exist, or it is not a file. ENOENT: no such file or directory, lstat '/tmp/nodejs/credentials.json'
    . . .
SOLUTION: This error means you did not complete creating a service account and downloading the public/private key pair file credentials.json. Please go back to " OPTION 1: Run the service locally" and complete this process and install creds in the main folder before proceeding.
8. OPTION 2: Deploy to the App Engine (standard environment)
This section of the codelab is only for deploying to Node App Engine. If you're not interested, move on to the next section.
This deployment uses the app.yaml configuration file which tells App Engine which runtime to use with a single line:
runtime: nodejs16
The app.yaml file is not used by either Cloud Functions nor Cloud Run. If you don't plan on using App Engine, this file may be safely deleted. When you're ready to deploy to App Engine, run this command:
$ gcloud app deploy
Once a region is selected, the gcloud app deploy output will be much less verbose and should look as follows:
Services to deploy:

descriptor:                  [/private/tmp/nodejs/app.yaml]
source:                      [/private/tmp/nodejs]
target project:              [PROJECT_ID]
target service:              [default]
target version:              [2021...]
target url:                  [https://PROJECT_ID.REG_ABBR.appspot.com]
target service account:      [App Engine default service account]


Do you want to continue (Y/n)?

Beginning deployment of service [default]...
╔════════════════════════════════════════════════════════════╗
╠═ Uploading 2 files to Google Cloud Storage                          ═╣
╚════════════════════════════════════════════════════════════╝
File upload done.
Updating service [default]...⠏WARNING: *** Improve build performance by generating and committing package-lock.json.

Updating service [default]...done.
Setting traffic split for service [default]...done.
Deployed service [default] to [https://PROJECT_ID.REG_ABBR.appspot.com]

You can stream logs from the command line by running:
  $ gcloud app logs tail -s default

To view your application in the web browser run:
  $ gcloud app browse

To take a quick anonymous survey, run:
  $ gcloud survey
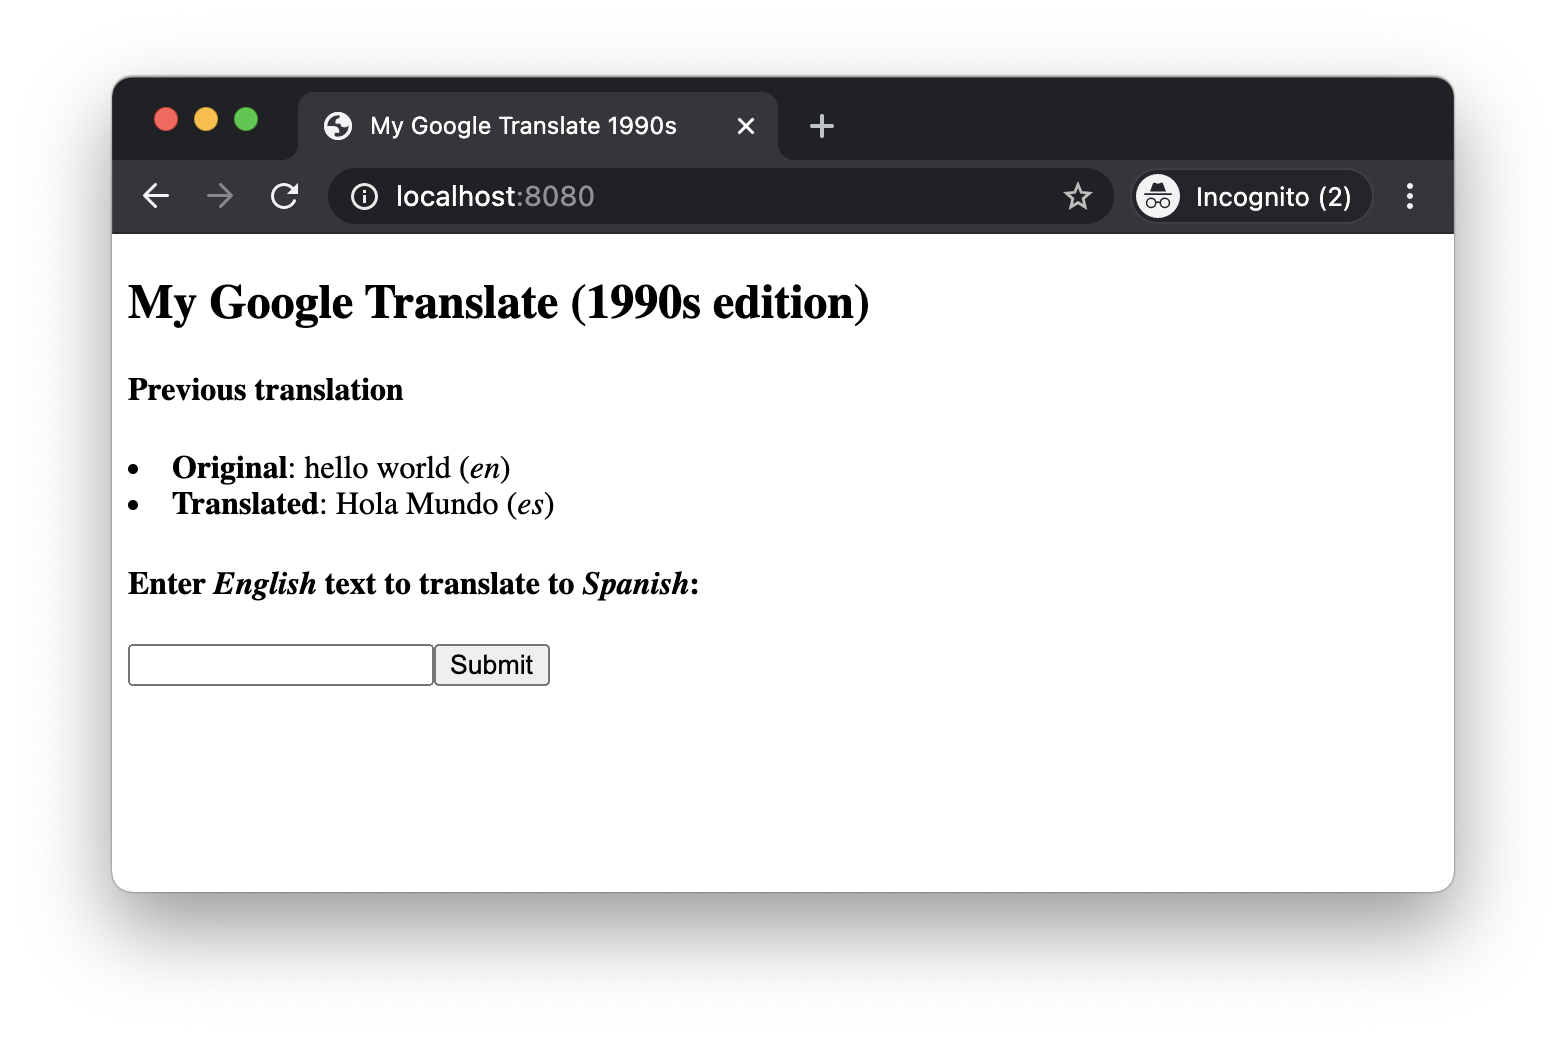
Now that your app is available globally around the world, you should be able to reach it at the URL containing your project ID, and you should see an output similar to the local Express version but know that it's running in the cloud and available around the world:

If you submit a request, you'll find it works the same as all the other deployments.
9. OPTION 3: Deploy to the Cloud Functions
This section of the codelab is only for deploying to Node Cloud Functions. If you're not interested, move on to the next section.
There are no configuration files with Cloud Functions, so when you're ready to deploy to Cloud Functions, run this command:
$ gcloud functions deploy translate \
  --runtime nodejs16 \
  --entry-point app \
  --trigger-http \
  --region REGION \
  --allow-unauthenticated
Your GCP project may have a default REGION, but you can use the --region flag to deploy your function to a specific region. Cloud Functions doesn't prompt you like other Cloud products. Regardless of which region you choose, the gcloud functions deploy output should look as follows:
Deploying function (may take a while - up to 2 minutes)...⠛
For Cloud Build Logs, visit: https://console.cloud.google.com/cloud-build/builds;region=REGION/15ac7fc1-731d-4f3b-bc15-8f2614xxxxxx?project=062269xxxxxx
Deploying function (may take a while - up to 2 minutes)...done.
availableMemoryMb: 256
buildId: aaf7e0cd-fbbd-4624-abeb-3e7437xxxxxx
buildName: projects/062269xxxxxx/locations/REGION/builds/aaf7e0cd-fbbd-4624-abeb-3e7437xxxxxx
entryPoint: app
httpsTrigger:
  securityLevel: SECURE_OPTIONAL
  url: https://REGION-PROJECT_ID.cloudfunctions.net/translate
ingressSettings: ALLOW_ALL
labels:
  deployment-tool: cli-gcloud
name: projects/PROJECT_ID/locations/REGION/functions/translate
runtime: nodejs16
serviceAccountEmail: PROJECT_ID@appspot.gserviceaccount.com
sourceUploadUrl: https://storage.googleapis.com/gcf-upload-REGION-01de94c2-6eb4-4c49-aaff-09276cdb7ae9/a1db9f2d-3511-414b-aeeb-de6042xxxxxx.zip
status: ACTIVE
timeout: 60s
updateTime: '2021...'
versionId: '...'
Now that your app is available globally around the world, you should be able to reach it at the URL containing your project ID as shown in the deployment output (under "httpsTrigger/url"). The URL should look something like: https://REGION-PROJECT_ID.cloudfunctions.net/translate which varies based on which region you selected as well as your Cloud project ID.
10. OPTION 4: Deploy to Cloud Run
This section of the codelab is only for deploying to Cloud Run. If you're not interested, move on to the next section.
There are no configuration files with Cloud Run, so when you're ready to deploy to Cloud Run, follow the instructions below.
Now you're ready to deploy your translation service to Cloud Run by running this command:
$ gcloud run deploy translate --source . --allow-unauthenticated --platform managed
The output should look as follows, and provide some prompts for next steps:
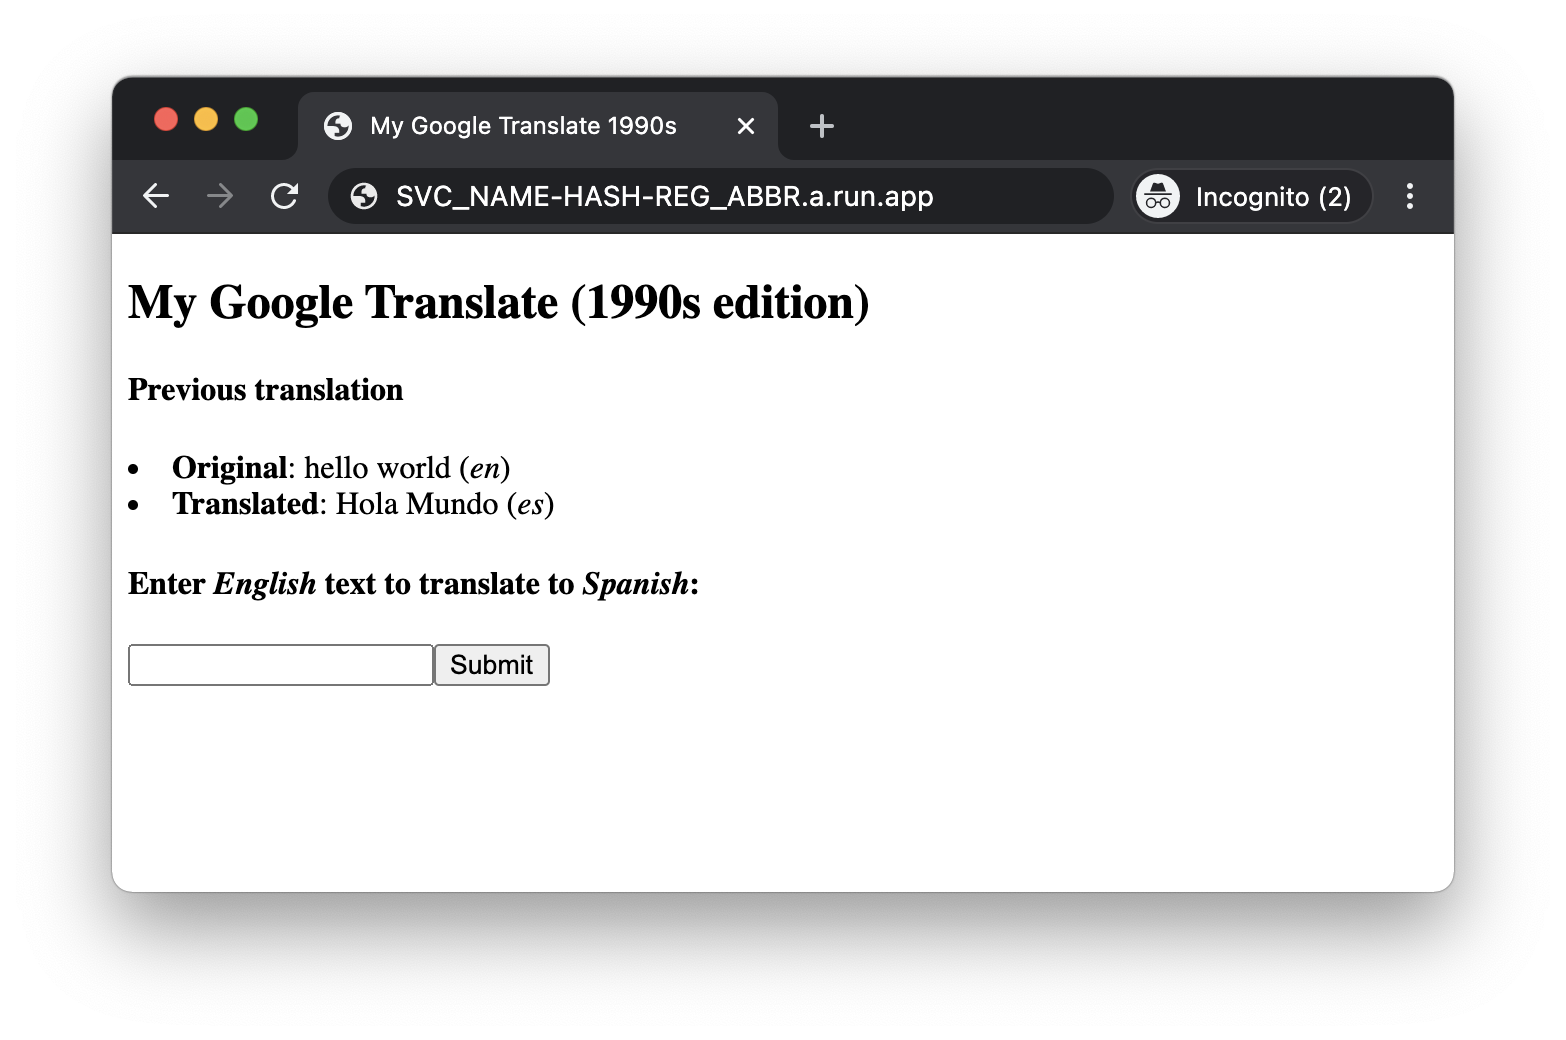
Please specify a region:
 [1] asia-east1
 [2] asia-east2
. . . (other regions) . . .
 [28] us-west4
 [29] cancel
Please enter your numeric choice:  REGION_CHOICE

To make this the default region, run `gcloud config set run/region REGION`.

Deploying from source requires an Artifact Registry repository to
store build artifacts. A repository named [cloud-run-source-deploy] in
 region [REGION] will be created.

Do you want to continue (Y/n)?

This command is equivalent to running "gcloud builds submit --pack image=[IMAGE] ." and "gcloud run deploy translate --image [IMAGE]"

Building . . . and deploying container to Cloud Run service [translate] in project [PROJECT_ID] region [REGION]
✓ Building and deploying... Done.
  ✓ Creating Container Repository...
  ✓ Uploading sources...
  ✓ Building Container... Logs are available at [https://console.cloud.google.com/cloud-build/builds/60e1b
  9bb-b991-4b4e-8d8a-HASH?project=PROJECT_NUMBER].
  ✓ Creating Revision...
  ✓ Routing traffic...
  ✓ Setting IAM Policy...
Done.
Service [translate] revision [translate-00001-xyz] has been deployed and is serving 100 percent of traffic.
Service URL: https://SVC_NAME-HASH-REG_ABBR.a.run.app
Cloud Buildpacks your apps to Cloud Run much like how you would if you ran your app locally. For Node.js users, it runs npm install and npm start. For Python, it runs pip install -r requirements.txt and starts up the app from the instructions in your Procfile. (The same applies for all other languages supported by Cloud Buildpacks.) Your app will be ready to go once the build process is complete.
Your app is then (deployed regionally but) available globally, and it can be reached at the URL containing your project ID as shown in the deployment output (under "Service URL:"

Translate something to see it work!
11. Conclusion
Congratulations! You learned how to enable and use the Cloud Translation API, get the necessary credentials, and deploy a simple web app to Express locally, to App Engine, Cloud Functions, and/or Cloud Run. Please check out the repo folder to learn more or to access other versions of this app as well as other codelabs.
Clean up
The Cloud Translation API lets you perform a fixed amount of translated characters per month for free. App Engine also has a free quota, and the same goes for Cloud Functions and Cloud Run. You'll incur charges if either are exceeded. If you plan to continue to the next codelab, you don't have to shut down your app.
However, if you're not ready to go to the next tutorial yet or are concerned that the internet discovers the app that you've just deployed, disable your App Engine app, delete your Cloud Function, or disable your Cloud Run service to avoid incurring charges. When you're ready to move onto the next codelab, you can re-enable it. On the other hand, if you're not going to continue with this application or other codelabs and want to delete everything completely, you can shut down your project.
Also, deploying to a Google Cloud serverless compute platform incurs minor build and storage costs. Cloud Build has its own free quota as does Cloud Storage. For greater transparency, Cloud Build builds your application image, which is then stored in either the Cloud Container Registry or Artifact Registry, its successor. Storage of that image uses up some of that quota as does network egress when transferring that image to the service. However, you might live in a region that does not have such a free tier, so be aware of your storage usage to minimize potential costs.
12. Additional resources
In the following sections, you can find additional reading material as well as recommended exercises to augment your knowledge gained from completing this tutorial.
Additional study
Now that you have some experience with the Translation API under your belt, let's do some additional exercises to further develop your skills. To continue your learning path, modify our sample app to do the following:
- Complete all the other editions of this codelab for running locally or deploying to Google Cloud serverless compute platforms (see repo README).
- Complete this tutorial using another programming language.
- Change this application to support different source or target languages.
- Upgrade this application to be able to translate text into more than one language; change the template file to have a pulldown of supported target languages.
Learn more
Google App Engine
Google Cloud Functions
- Cloud Functions home page
- Cloud Functions documentation
- Default service accounts for Cloud Functions
Google Cloud Run
Google Cloud Buildpacks, Container Registry, Artifact Registry
- Cloud Buildpacks announcement
- Cloud Buildpacks repo
- Cloud Artifact Registry home page
- Cloud Artifact Registry documentation
- Cloud Container Registry home page
- Cloud Container Registry documentation
Google Cloud Translation and Google ML Kit
- Cloud Translation home page
- Cloud Translation documentation
- Cloud Translation API client libraries (all development languages)
- Cloud Translation API supported (spoken/written) languages
- Translation API pricing page
- All Cloud AI/ML "building block" APIs
- Google ML Kit (Cloud AI/ML APIs subset for mobile)
- Google ML Kit Translation API
Other Google Cloud products/pages
Python links
- Python 3 App Engine quickstart
- Python 2 App Engine (Standard) runtime
- Python 3 App Engine (Standard) runtime
- Differences between Python 2 & 3 App Engine (Standard) runtimes
- Python 2 to 3 App Engine (Standard) migration guide
- Python Cloud Functions quickstart
- Python Cloud Run quickstart
- Google Cloud Python support
- Flask
Node.js links
- Node.js App Engine quickstart
- Node.js App Engine (Standard) runtime
- Node.js Cloud Functions quickstart
- Node.js Cloud Run quickstart
- Google Cloud Node.js support
- Express
License
This tutorial is licensed under a Creative Commons Attribution 2.0 Generic License while the source code in the repo is licensed under Apache 2.