
1. 簡介

Cloud Run 是代管運算平台,能讓您執行可透過 HTTP 要求叫用的無狀態容器。此平台建構於 Knative 開放原始碼專案,可讓您將工作負載遷移至不同的平台。Cloud Run 採用無伺服器技術,為您省去所有基礎架構管理工作,讓您專心處理最重要的事:建構出色應用程式。
本教學課程的目標是建立「Hello World」Streamlit 網頁應用程式,並部署至 Cloud Run。
課程內容
- 如何建立 Streamlit「Hello World」應用程式。
- 在部署前執行 Streamlit 應用程式,測試應用程式。
- Cloud Buildpacks,以及
requirements.txt中存在streamlit時,如何不需要 Dockerfile。 - 如何將 Streamlit 應用程式部署至 Cloud Run。
2. 設定和需求條件
自修實驗室環境設定
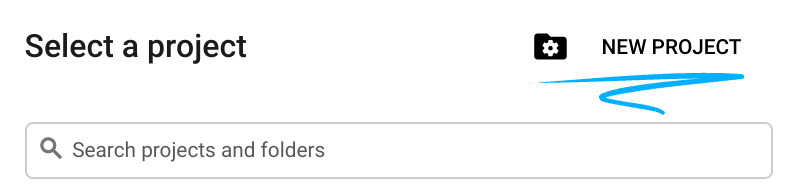
- 登入 Google Cloud 控制台,然後建立新專案或重複使用現有專案。如果沒有 Gmail 或 Google Workspace 帳戶,請先建立帳戶。


- 專案名稱是這個專案參與者的顯示名稱。這是 Google API 未使用的字元字串。你隨時可以更新。
- 專案 ID 在所有 Google Cloud 專案中都是不重複的,而且設定後即無法變更。Cloud 控制台會自動產生專屬字串,通常您不需要在意該字串為何。在大多數程式碼研究室中,您需要參照專案 ID (通常標示為
PROJECT_ID)。如果您不喜歡產生的 ID,可以產生另一個隨機 ID。你也可以嘗試使用自己的名稱,看看是否可用。完成這個步驟後就無法變更,且專案期間會維持不變。 - 請注意,有些 API 會使用第三個值,也就是「專案編號」。如要進一步瞭解這三種值,請參閱說明文件。
- 接著,您需要在 Cloud 控制台中啟用帳單,才能使用 Cloud 資源/API。完成本程式碼研究室的費用不高,甚至可能完全免費。如要關閉資源,避免在本教學課程結束後繼續產生費用,請刪除您建立的資源或專案。Google Cloud 新使用者可參加價值$300 美元的免費試用計畫。
啟動 Cloud Shell
雖然您可以透過筆電遠端操作 Google Cloud,但在本教學課程中,您將使用 Cloud Shell,這是 Cloud 中執行的指令列環境。
啟用 Cloud Shell
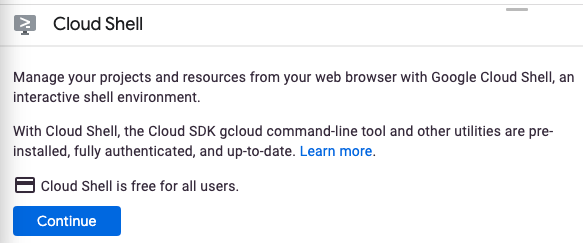
- 在 Cloud 控制台,點選「啟用 Cloud Shell」圖示。

如果您是首次啟動 Cloud Shell,系統會顯示中繼畫面,說明這個指令列環境。如果出現中繼畫面,請按一下「繼續」。
佈建並連至 Cloud Shell 預計只需要幾分鐘。

這部虛擬機器已載入所有必要的開發工具,並提供永久的 5 GB 主目錄,而且可在 Google Cloud 運作,大幅提升網路效能並強化驗證功能。本程式碼研究室幾乎所有工作都可在瀏覽器上完成。
連至 Cloud Shell 後,您應該會看到驗證已完成,專案也已設為獲派的專案 ID。
- 在 Cloud Shell 中執行下列指令,確認您已通過驗證:
gcloud auth list
指令輸出
 Credentialed Accounts
ACTIVE  ACCOUNT
*       <my_account>@<my_domain.com>

To set the active account, run:
    $ gcloud config set account `ACCOUNT`
- 在 Cloud Shell 中執行下列指令,確認 gcloud 指令知道您的專案:
gcloud config list project
指令輸出
[core]
project = <PROJECT_ID>
如未設定,請輸入下列指令手動設定專案:
gcloud config set project <PROJECT_ID>
指令輸出
Updated property [core/project].
3. 啟用 API
在 Cloud Shell 中啟用 Artifact Registry、Cloud Build 和 Cloud Run API:
gcloud services enable \
  artifactregistry.googleapis.com \
  cloudbuild.googleapis.com \
  run.googleapis.com
這會輸出類似以下的成功訊息:
Operation "operations/..." finished successfully.
現在,您已準備好開始工作及撰寫應用程式...
4. 編寫應用程式
在本步驟中,您將建構「Hello World」Streamlit Python 應用程式,用於回應 HTTP 要求。
工作目錄
使用 Cloud Shell 建立名為 helloworld-streamlit 的工作目錄,然後切換至該目錄:
mkdir ~/helloworld-streamlit && cd ~/helloworld-streamlit
main.py
建立名為 main.py 的檔案:
touch main.py
使用偏好的指令列編輯器 (nano、vim 或 emacs) 編輯檔案,或點按 Cloud Shell 編輯器按鈕:

如要使用 Cloud Shell 編輯器直接編輯檔案,請使用下列指令:
cloudshell edit main.py
main.py
import streamlit as st

st.title("Hello World! 👋🌎")
st.markdown(
    """
    This is a demo Streamlit app.

    Enter your name in the text box below and press a button to see some fun features in Streamlit.
    """
)

name = st.text_input("Enter your name:")

# Use columns to create buttons side by side
col1, col2 = st.columns(2)

with col1:
    if st.button("Send balloons! 🎈"):
        st.balloons()
        st.write(f"Time to celebrate {name}! 🥳")
        st.write("You deployed a Streamlit app! 👏")

with col2:
    if st.button("Send snow! ❄️"):
        st.snow()
        st.write(f"Let it snow {name}! 🌨️")
        st.write("You deployed a Streamlit app! 👏")
這段程式碼會建立基本網路服務,以友善訊息回應 HTTP GET 要求。
requirements.txt
重新開啟終端機,並新增名為 requirements.txt 的檔案來定義依附元件:
touch requirements.txt
如要使用 Cloud Shell 編輯器直接編輯檔案,請使用下列指令:
cloudshell edit requirements.txt
requirements.txt
# https://pypi.org/project/streamlit
streamlit==1.47.0
Streamlit 應用程式已可部署,但我們先來測試一下...
5. 測試應用程式
如要測試應用程式,請使用 Cloud Shell 預先安裝的 uv (Python 的極速套件和專案管理工具)。
如要測試應用程式,請建立虛擬環境:
uv venv
安裝依附元件:
uv pip install -r requirements.txt
使用 streamlit run 啟動應用程式 (停用 --server.enableCORS 以進行測試,因為這會干擾 Cloud Shell):
uv run streamlit run main.py --server.port=8080 --server.enableCORS=false
記錄會顯示 Streamlit 應用程式正在執行:
You can now view your Streamlit app in your browser.

  Local URL: http://localhost:8080
  Network URL: http://10.1.0.1:8080
  External URL: http://34.37.7.94:8080
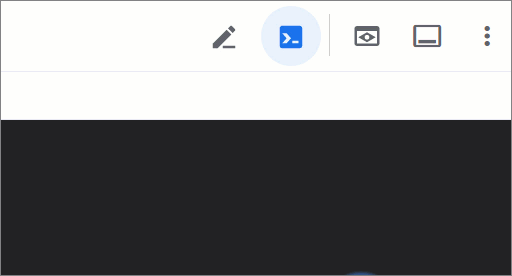
在 Cloud Shell 視窗中,按一下 Web Preview 圖示,然後選取 Preview on port 8080:
系統應該會開啟一個顯示「Hello World! 👋🌎」標題的瀏覽器視窗。
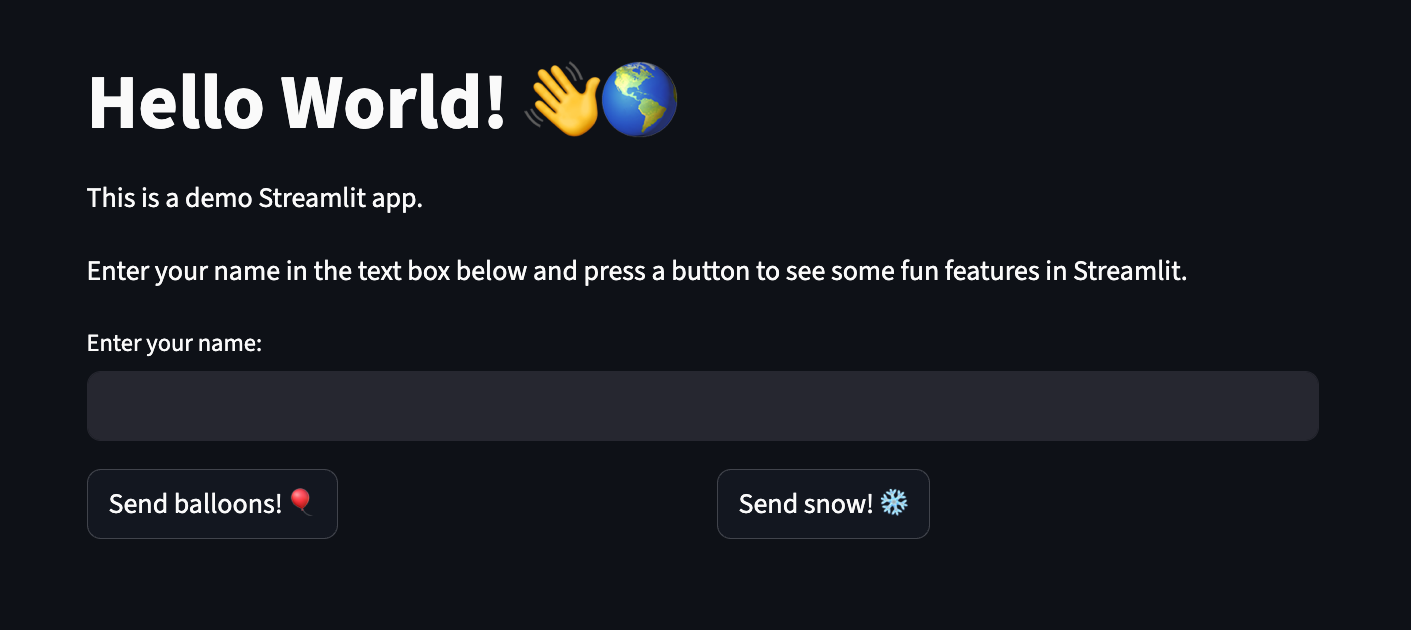
請嘗試填入您的姓名,並測試畫面上的兩個按鈕!
完成後,請返回主要的 Cloud Shell 工作階段,然後使用 CTRL+C 停止 Streamlit 應用程式。
應用程式運作正常,可以部署了。
6. 部署至 Cloud Run
Cloud Run 具有「地區性」,這表示執行 Cloud Run 服務的基礎架構位於特定地區,並由 Google 代管,可為該地區內所有區域提供備援功能。定義要用於部署作業的區域,例如:
REGION=europe-west4
確認您仍位於工作目錄:
ls
這應該會列出下列檔案:
main.py requirements.txt
部署前,請先建立含有 .venv/ 的 .gcloudignore 檔案。這樣一來,Cloud Run 部署作業就不會納入本機測試期間從 uv 建立的虛擬環境。
使用下列指令建立 .gcloudignore:
echo ".venv/" > .gcloudignore
將應用程式部署至 Cloud Run:
gcloud run deploy helloworld-streamlit \
  --source . \
  --region $REGION \
  --allow-unauthenticated
--allow-unauthenticated選項會將服務設為公開。如要避免未經驗證的要求,請改用--no-allow-unauthenticated。
第一次執行這項操作時,系統會提示您建立 Artifact Registry 存放區。輕觸 Enter 進行驗證:
Deploying from source requires an Artifact Registry Docker repository to store
built containers. A repository named [cloud-run-source-deploy] in region [REGION]
will be created.

Do you want to continue (Y/n)?
這會啟動來源程式碼的上傳作業,將程式碼上傳至 Artifact Registry 存放區,並建構容器映像檔:
Building using Buildpacks and deploying container ...
* Building and deploying new service... Building Container.
  OK Creating Container Repository...
  OK Uploading sources...
  * Building Container... Logs are available at ...
然後稍等片刻,等待部署成功。部署成功之後,指令列會顯示服務網址:
...
OK Building and deploying new service... Done.
  OK Creating Container Repository...
  OK Uploading sources...
  OK Building Container... Logs are available at ...
  OK Creating Revision... Creating Service.
  OK Routing traffic...
  OK Setting IAM Policy...
Done.
Service [SERVICE]... has been deployed and is serving 100 percent of traffic.
Service URL: https://SERVICE-PROJECTHASH-REGIONID.a.run.app
您可以使用下列指令取得服務網址:
SERVICE_URL=$( \
  gcloud run services describe helloworld-streamlit \
  --region $REGION \
  --format "value(status.address.url)" \
)
echo $SERVICE_URL
畫面應如下所示:
https://helloworld-streamlit-PROJECTHASH-REGIONID.a.run.app
您現在可以在網路瀏覽器中開啟服務網址,使用應用程式:
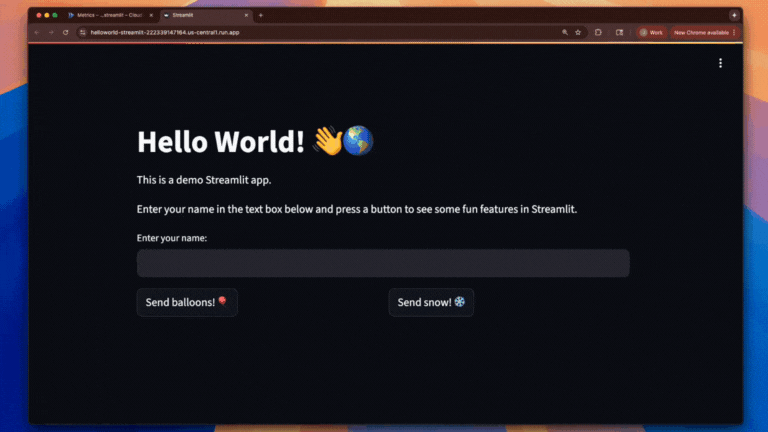
恭喜!您已將應用程式部署到 Cloud Run。Cloud Run 會自動水平擴充容器映像檔以處理收到的要求,並在需求減少時縮減規模。您只需要支付處理要求期間使用的 CPU、記憶體和網路費用。
7. 清理
不使用服務時,Cloud Run 不會收費,但您可能仍須支付容器映像檔在 Artifact Registry 的儲存費用。您可以刪除存放區或雲端專案,以免產生費用。刪除雲端專案後,系統就會停止對專案使用的所有資源收取費用。
如要刪除容器映像檔存放區,請按照下列步驟操作:
gcloud artifacts repositories delete cloud-run-source-deploy \
  --location $REGION
如要刪除 Cloud Run 服務,請按照下列步驟操作:
gcloud run services delete helloworld-streamlit \
  --region $REGION
如要刪除 Google Cloud 專案,請按照下列步驟操作:
- 擷取目前的專案 ID:
PROJECT_ID=$(gcloud config get-value core/project)
- 確認這是要刪除的專案:
echo $PROJECT_ID
- 刪除專案:
gcloud projects delete $PROJECT_ID
8. 恭喜!
您已建立「Hello World」Streamlit 網頁應用程式,並部署至 Cloud Run!
涵蓋內容
- 如何建立 Streamlit「Hello World」應用程式。
- 在部署前執行 Streamlit 應用程式,測試應用程式。
- Cloud Buildpacks,以及
requirements.txt中存在streamlit時,如何不需要 Dockerfile。 - 將 Streamlit 應用程式部署至 Cloud Run。
瞭解詳情
- 請參閱 Cloud Run 說明文件
- 完成「透過 Cloud Run,輕鬆三步驟從開發環境轉移至正式環境」,探索更多選項
- 完成「在 Cloud Run 上部署 Django」教學課程,建立 Cloud SQL 資料庫、使用 Secret Manager 管理憑證,以及部署 Django
- 查看更多 Cloud Run 程式碼研究室...