

1. 简介
概览
在本实验中,您将构建和部署 Model Context Protocol (MCP) 服务器。MCP 服务器有助于为 LLM 提供对外部工具和服务的访问权限。您将 MCP 服务器配置为 Cloud Run 上安全且可用于生产用途的服务,该服务可供多个客户端访问。然后,您将从 Gemini CLI 连接到远程 MCP 服务器。
您将执行的操作
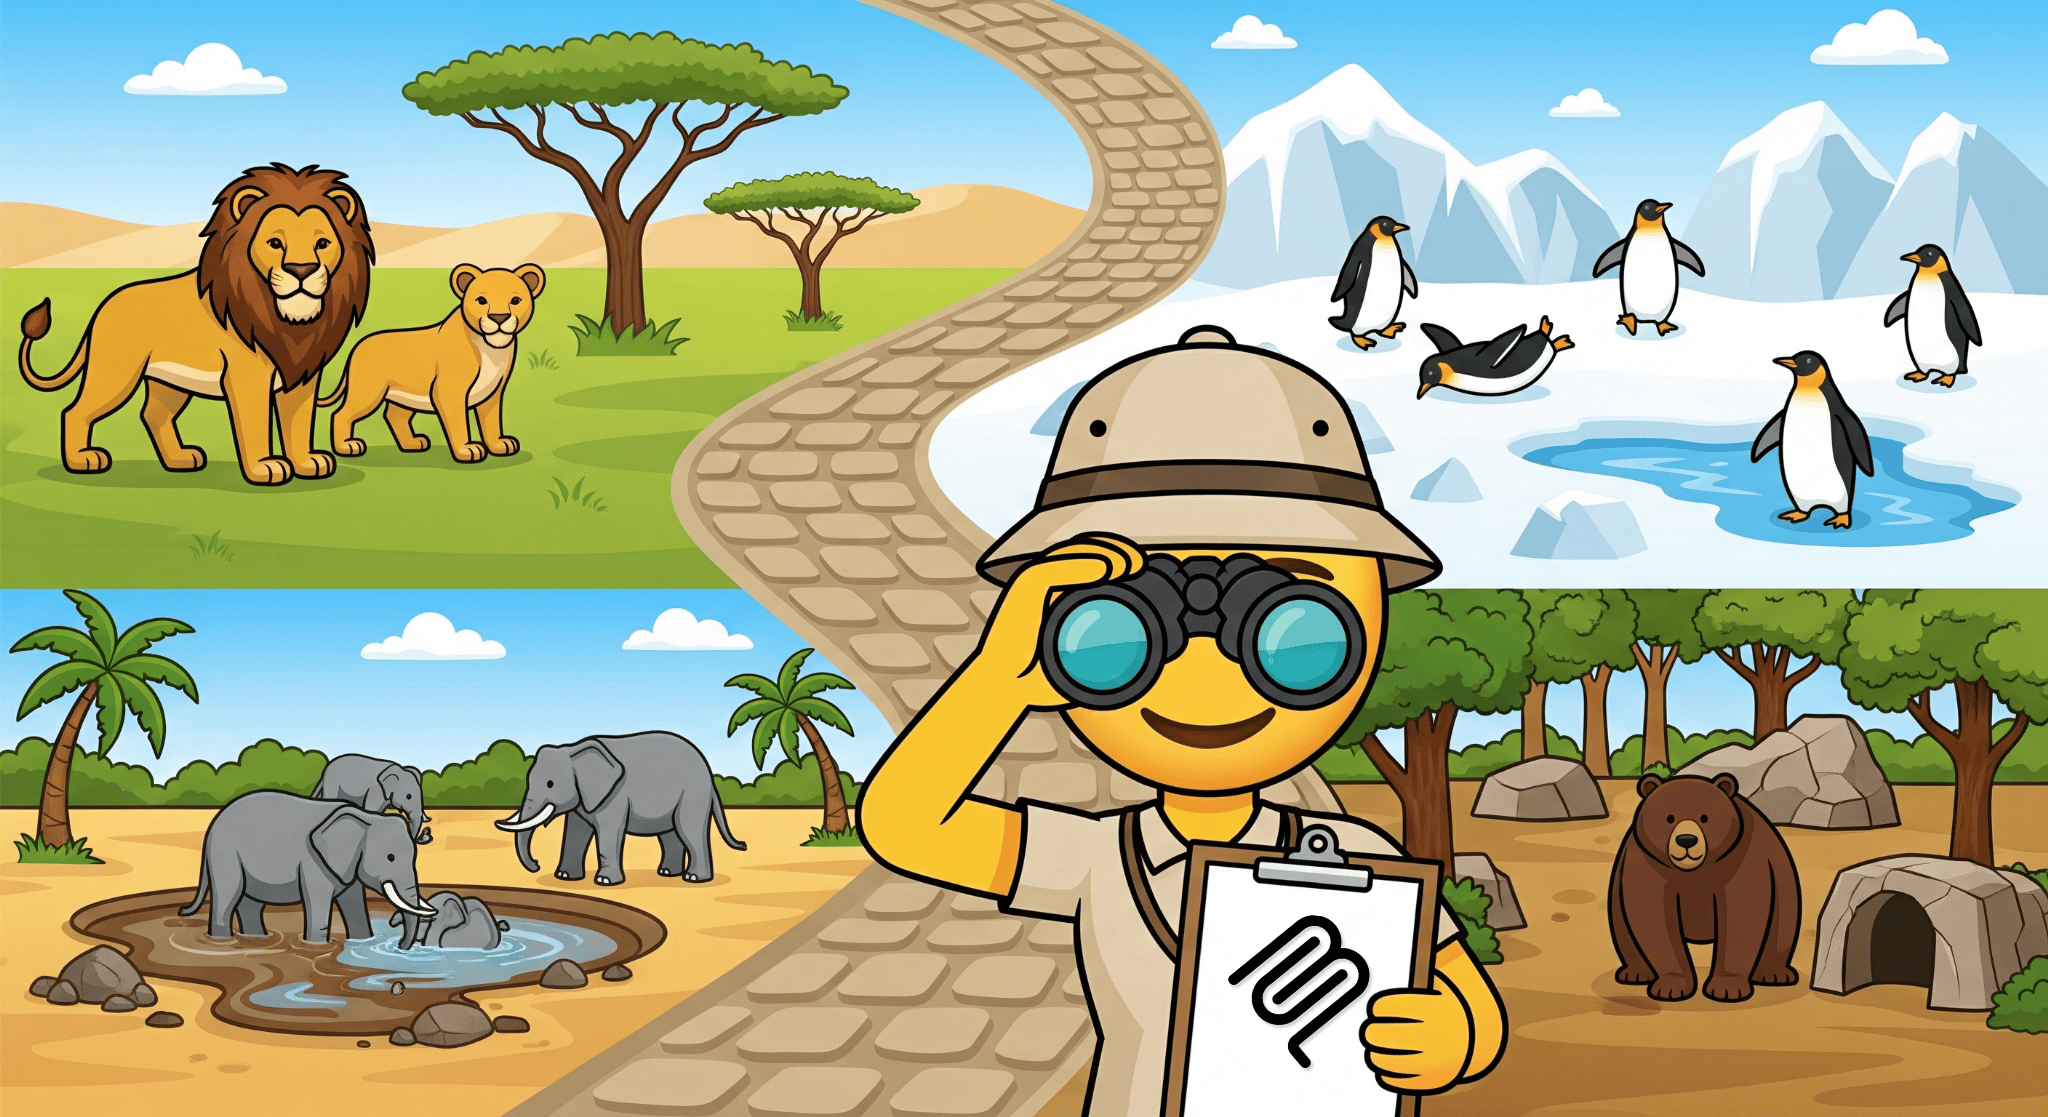
我们将使用 Genkit 创建一个具有两个工具的 zoo MCP 服务器 :get_animals_by_species 和 get_animal_details。Genkit 提供了一种使用 Node.js 快速构建 MCP 服务器和客户端的方法。
学习内容
- 将 MCP 服务器部署到 Cloud Run。
- 通过要求对所有请求进行身份验证来保护服务器的端点,确保只有经过授权的客户端和智能体才能与服务器通信。
- 从 Gemini CLI 连接到安全的 MCP 服务器端点
2. 项目设置
- 如果您还没有 Google 账号,则必须创建一个 Google 账号。
- 请使用个人账号,而不是工作或学校账号。工作和学校账号可能会受到限制,导致您无法启用本实验所需的 API。
- 登录 Google Cloud 控制台。
- 在 Cloud 控制台中启用结算功能。
- 完成本实验的 Cloud 资源费用应低于 1 美元。
- 您可以按照本实验末尾的步骤删除资源,以避免产生进一步的费用。
- 新用户有资格享受 300 美元的免费试用额度。
- 创建新项目,或选择重复使用现有项目。
- 如果您看到有关项目配额的错误,请重复使用现有项目或删除现有项目以创建新项目。
3. 打开 Cloud Shell Editor
- 点击此链接可直接前往 Cloud Shell Editor
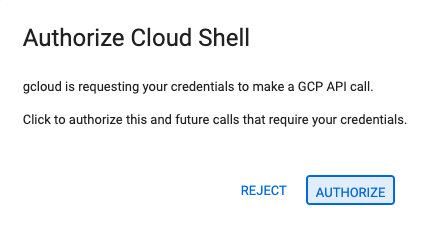
- 如果系统在今天的任何时间提示您进行授权,请点击授权以继续。
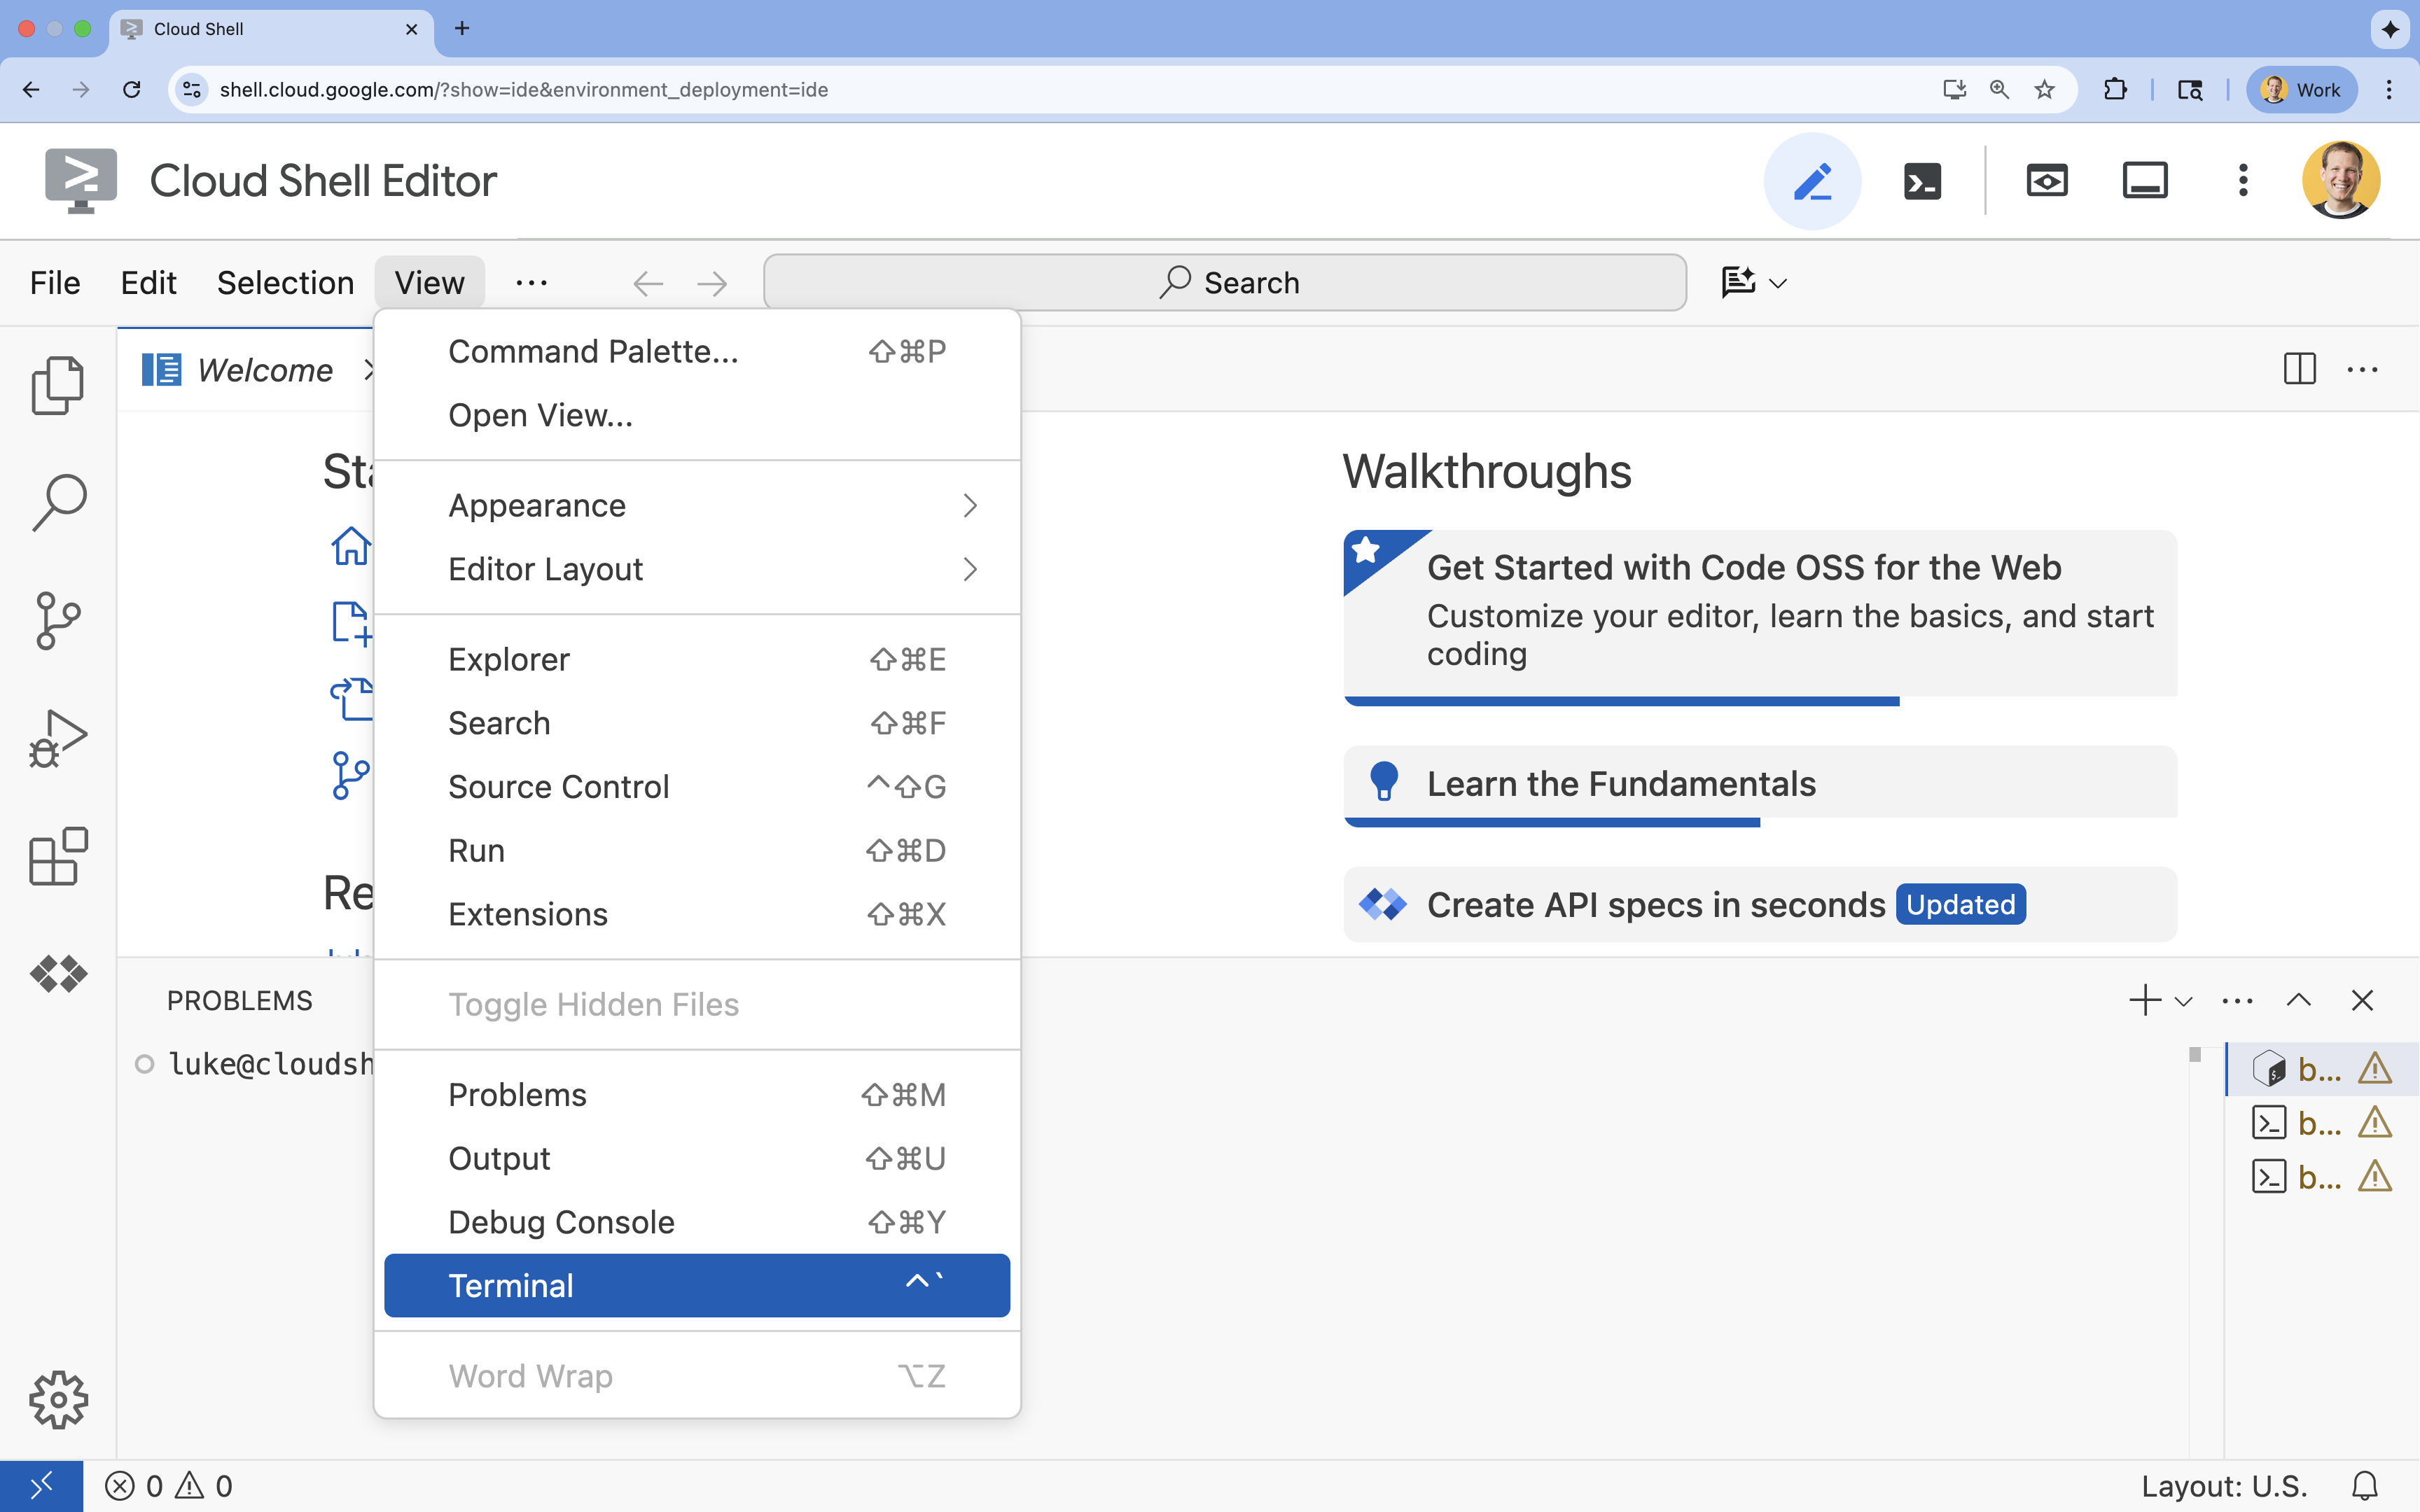
- 如果终端未显示在屏幕底部,请打开它:
- 点击查看
- 点击终端
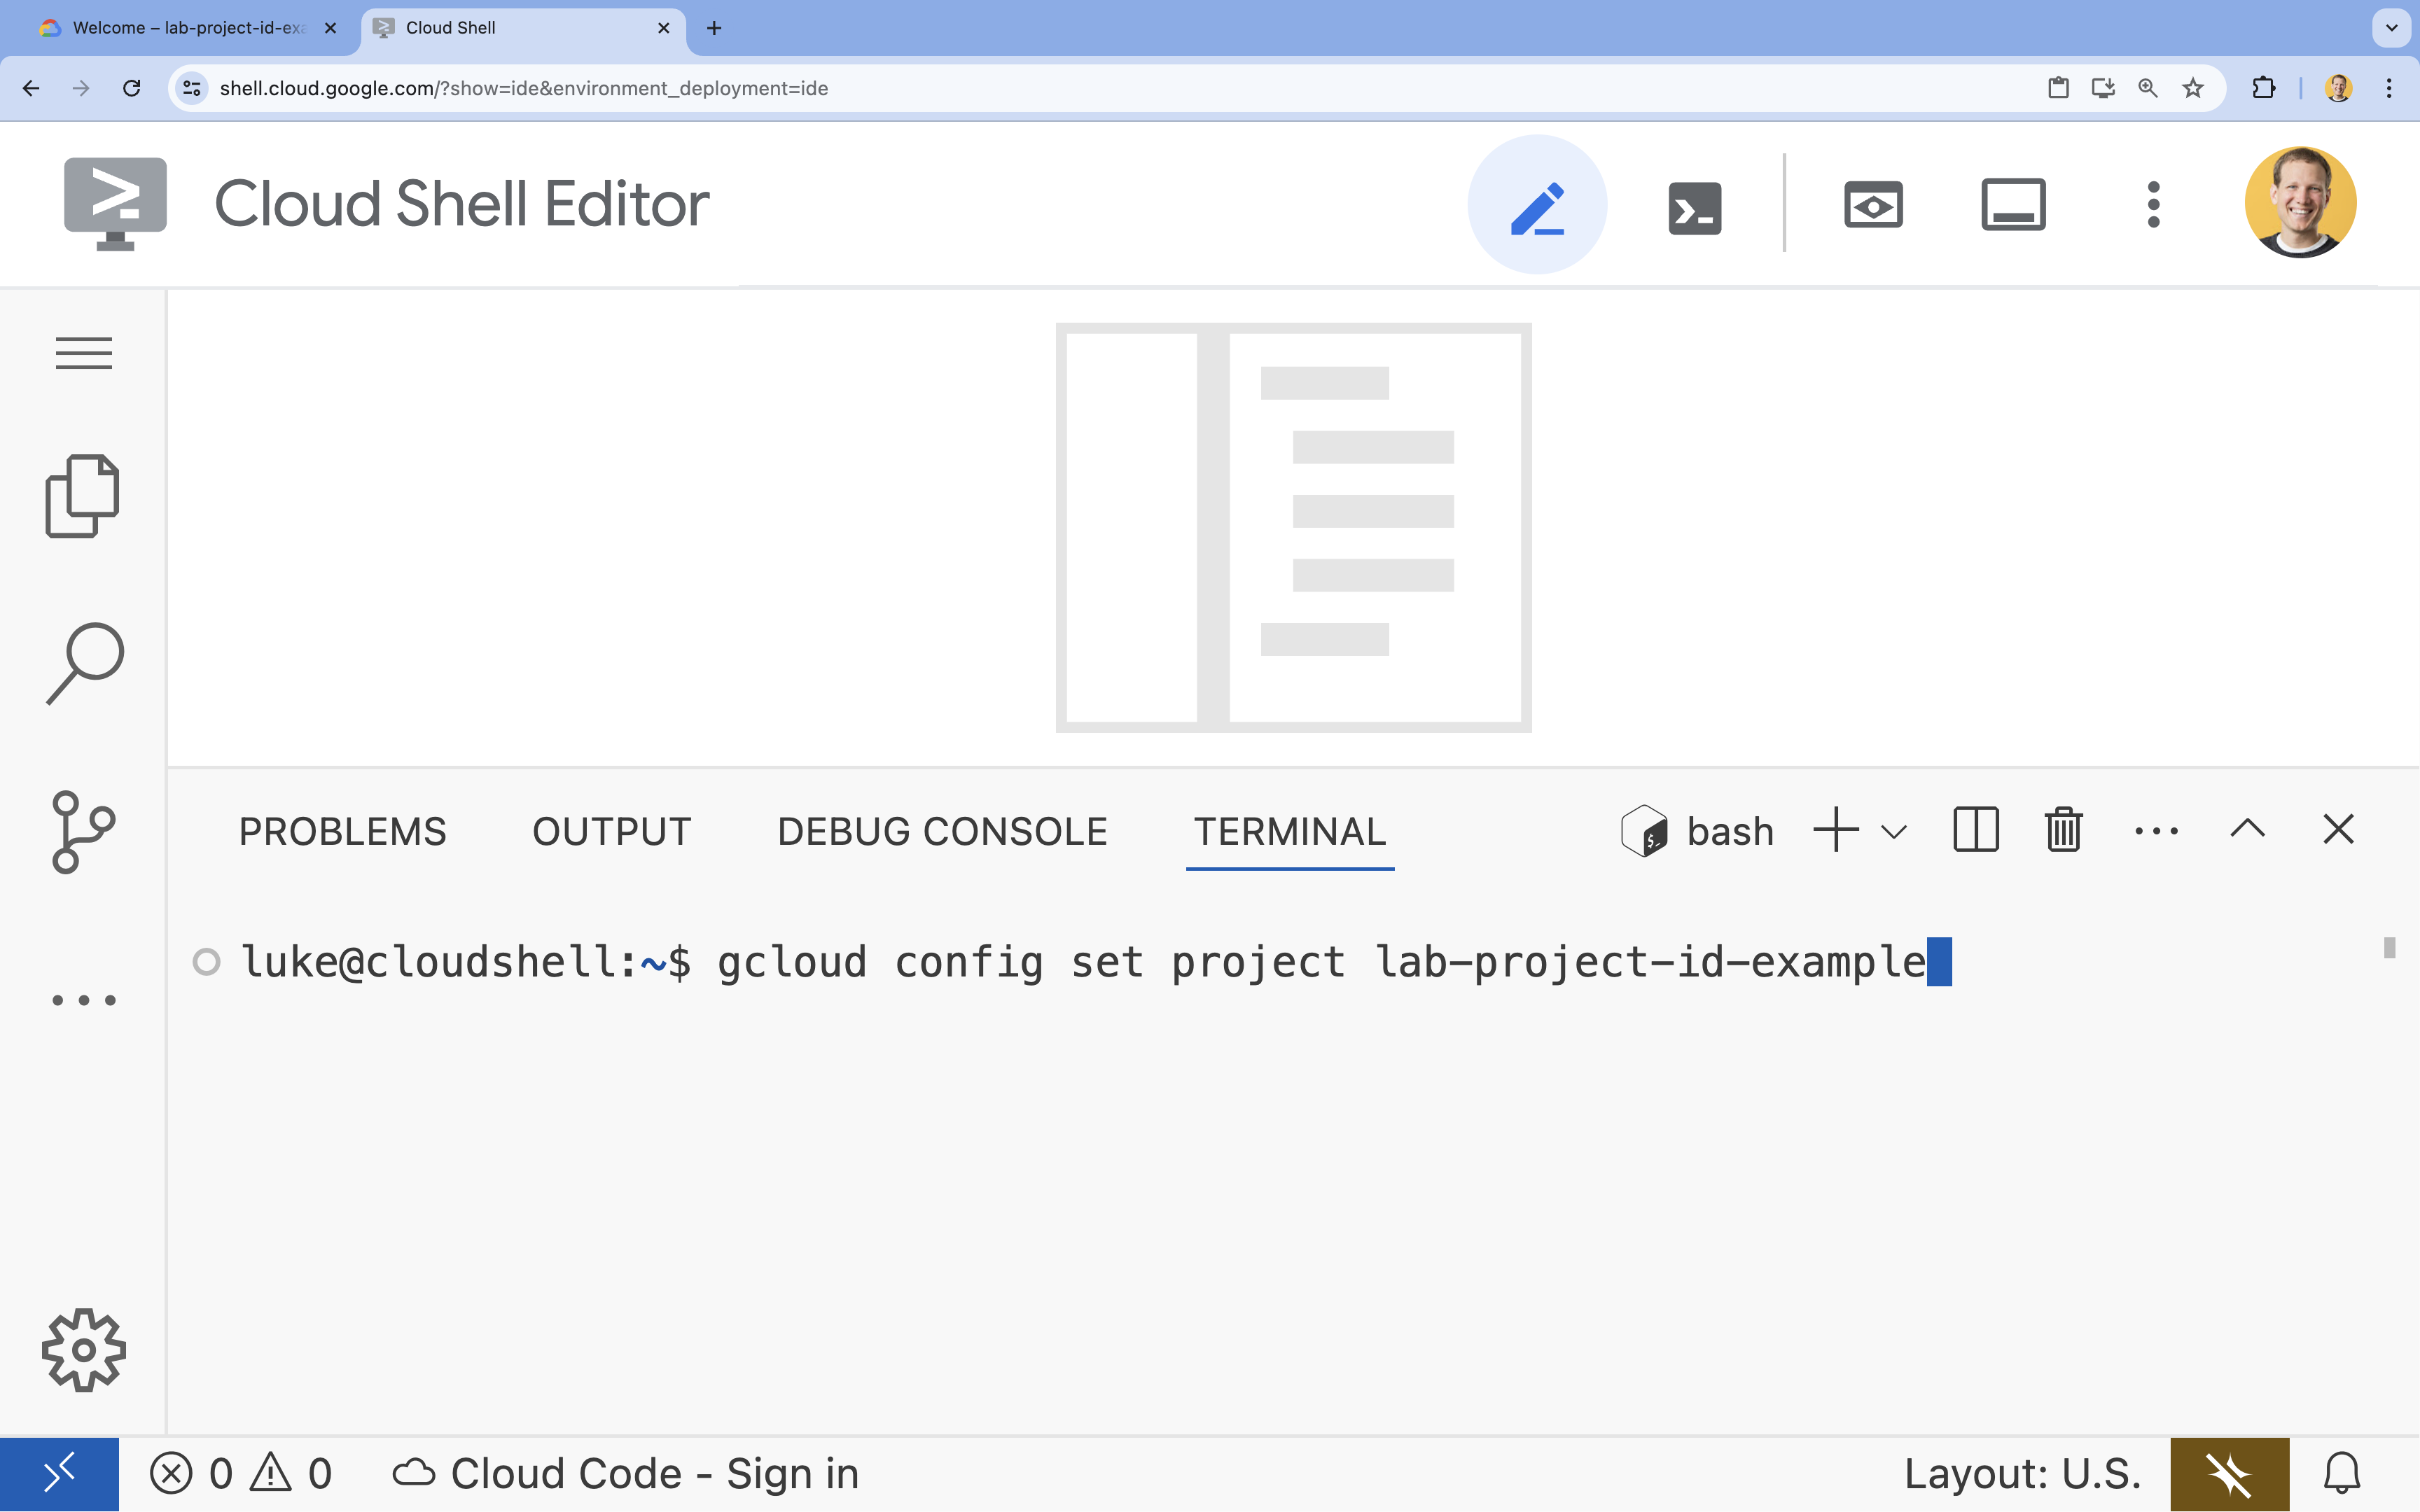
- 在终端中,使用以下命令设置您的项目:
- 格式:
gcloud config set project [PROJECT_ID] - 示例:
gcloud config set project lab-project-id-example - 如果您不记得项目 ID,可以执行以下操作:
- 您可以使用以下命令列出所有项目 ID:
gcloud projects list | awk '/PROJECT_ID/{print $2}'
- 您可以使用以下命令列出所有项目 ID:
- 格式:
- 您应会看到以下消息:
Updated property [core/project].
WARNING并被问到Do you want to continue (Y/n)?,则可能是输入的项目 ID 不正确。按n,按Enter,然后尝试再次运行gcloud config set project命令。
4. 启用 API
在终端中,启用 API:
gcloud services enable \
  run.googleapis.com \
  artifactregistry.googleapis.com \
  cloudbuild.googleapis.com
如果系统提示您进行授权,请点击授权以继续。
此命令可能需要几分钟才能完成,但最终应生成类似于以下内容的成功消息:
Operation "operations/acf.p2-73d90d00-47ee-447a-b600" finished successfully.
5. 准备 JavaScript 项目
- 创建一个名为
mcp-on-cloudrun的文件夹,用于存储要部署的源代码:mkdir mcp-on-cloudrun && cd mcp-on-cloudrun - 使用
npm工具创建一个 Node.js 项目,以生成package.json文件:npm init es6 -ynpm init命令会为您的项目创建一个package.json文件。 - 安装
@modelcontextprotocol/sdk、express和zod依赖项:npm install @modelcontextprotocol/sdk express zod
6. 创建 zoo MCP 服务器
为了提供有价值的背景信息,以便改进 LLM 与 MCP 的搭配使用,请使用 Genkit(一种用于处理 Model Context Protocol 的标准框架)设置 zoo MCP 服务器。Genkit 提供了一种使用 Node.js 快速构建 MCP 服务器和客户端的方法。此 MCP 服务器提供有关虚构动物园中动物的数据。为简单起见,我们将数据存储在内存中。对于生产 MCP 服务器,您可能需要提供来自数据库或 API 等来源的数据。
- 运行以下命令,将 Genkit 添加为
package.json文件中的依赖项:npm install genkitpackage-lock.json文件添加到您的项目。 - 运行以下命令,将 Genkit AI MCP 库添加到
package.json文件中:npm install @genkit-ai/mcp - 创建并打开一个新的
index.js文件,用于存放 MCP 服务器源代码:cloudshell edit index.jscloudshell edit命令会在终端上方的编辑器中打开index.js文件。 - 在
index.js文件中添加以下 zoo MCP 服务器源代码:import express from 'express'; import { genkit, z } from 'genkit'; import { createMcpServer } from '@genkit-ai/mcp'; import { StreamableHTTPServerTransport } from '@modelcontextprotocol/sdk/server/streamableHttp.js'; // Dictionary of animals at the zoo const ZOO_ANIMALS = [ { "species": "lion", "name": "Leo", "age": 7, "enclosure": "The Big Cat Plains", "trail": "Savannah Heights" }, { "species": "lion", "name": "Nala", "age": 6, "enclosure": "The Big Cat Plains", "trail": "Savannah Heights" }, { "species": "lion", "name": "Simba", "age": 3, "enclosure": "The Big Cat Plains", "trail": "Savannah Heights" }, { "species": "lion", "name": "King", "age": 8, "enclosure": "The Big Cat Plains", "trail": "Savannah Heights" }, { "species": "penguin", "name": "Waddles", "age": 2, "enclosure": "The Arctic Exhibit", "trail": "Polar Path" }, { "species": "penguin", "name": "Pip", "age": 4, "enclosure": "The Arctic Exhibit", "trail": "Polar Path" }, { "species": "penguin", "name": "Skipper", "age": 5, "enclosure": "The Arctic Exhibit", "trail": "Polar Path" }, { "species": "penguin", "name": "Chilly", "age": 3, "enclosure": "The Arctic Exhibit", "trail": "Polar Path" }, { "species": "penguin", "name": "Pingu", "age": 6, "enclosure": "The Arctic Exhibit", "trail": "Polar Path" }, { "species": "penguin", "name": "Noot", "age": 1, "enclosure": "The Arctic Exhibit", "trail": "Polar Path" }, { "species": "elephant", "name": "Ellie", "age": 15, "enclosure": "The Pachyderm Sanctuary", "trail": "Savannah Heights" }, { "species": "elephant", "name": "Peanut", "age": 12, "enclosure": "The Pachyderm Sanctuary", "trail": "Savannah Heights" }, { "species": "elephant", "name": "Dumbo", "age": 5, "enclosure": "The Pachyderm Sanctuary", "trail": "Savannah Heights" }, { "species": "elephant", "name": "Trunkers", "age": 10, "enclosure": "The Pachyderm Sanctuary", "trail": "Savannah Heights" }, { "species": "bear", "name": "Smokey", "age": 10, "enclosure": "The Grizzly Gulch", "trail": "Polar Path" }, { "species": "bear", "name": "Grizzly", "age": 8, "enclosure": "The Grizzly Gulch", "trail": "Polar Path" }, { "species": "bear", "name": "Barnaby", "age": 6, "enclosure": "The Grizzly Gulch", "trail": "Polar Path" }, { "species": "bear", "name": "Bruin", "age": 12, "enclosure": "The Grizzly Gulch", "trail": "Polar Path" }, { "species": "giraffe", "name": "Gerald", "age": 4, "enclosure": "The Tall Grass Plains", "trail": "Savannah Heights" }, { "species": "giraffe", "name": "Longneck", "age": 5, "enclosure": "The Tall Grass Plains", "trail": "Savannah Heights" }, { "species": "giraffe", "name": "Patches", "age": 3, "enclosure": "The Tall Grass Plains", "trail": "Savannah Heights" }, { "species": "giraffe", "name": "Stretch", "age": 6, "enclosure": "The Tall Grass Plains", "trail": "Savannah Heights" }, { "species": "antelope", "name": "Speedy", "age": 2, "enclosure": "The Tall Grass Plains", "trail": "Savannah Heights" }, { "species": "antelope", "name": "Dash", "age": 3, "enclosure": "The Tall Grass Plains", "trail": "Savannah Heights" }, { "species": "antelope", "name": "Gazelle", "age": 4, "enclosure": "The Tall Grass Plains", "trail": "Savannah Heights" }, { "species": "antelope", "name": "Swift", "age": 5, "enclosure": "The Tall Grass Plains", "trail": "Savannah Heights" }, { "species": "polar bear", "name": "Snowflake", "age": 7, "enclosure": "The Arctic Exhibit", "trail": "Polar Path" }, { "species": "polar bear", "name": "Blizzard", "age": 5, "enclosure": "The Arctic Exhibit", "trail": "Polar Path" }, { "species": "polar bear", "name": "Iceberg", "age": 9, "enclosure": "The Arctic Exhibit", "trail": "Polar Path" }, { "species": "walrus", "name": "Wally", "age": 10, "enclosure": "The Walrus Cove", "trail": "Polar Path" }, { "species": "walrus", "name": "Tusker", "age": 12, "enclosure": "The Walrus Cove", "trail": "Polar Path" }, { "species": "walrus", "name": "Moby", "age": 8, "enclosure": "The Walrus Cove", "trail": "Polar Path" }, { "species": "walrus", "name": "Flippers", "age": 9, "enclosure": "The Walrus Cove", "trail": "Polar Path" } ]; // Initialize Genkit const ai = genkit({}); // Define tools using Genkit ai.defineTool( { name: 'get_animals_by_species', description: "Retrieves all animals of a specific species from the zoo. Can also be used to collect the base data for aggregate queries of animals of a specific species - like counting the number of penguins or finding the oldest lion.", inputSchema: z.object({ species: z.string() }), }, async ({ species }) => { console.log(`>>> 🛠️ Tool: 'get_animals_by_species' called for '${species}'`); const animals = ZOO_ANIMALS.filter(animal => animal.species.toLowerCase() === species.toLowerCase()); return animals; } ); ai.defineTool( { name: 'get_animal_details', description: "Retrieves the details of a specific animal by its name.", inputSchema: z.object({ name: z.string() }), }, async ({ name }) => { console.log(`>>> 🛠️ Tool: 'get_animal_details' called for '${name}'`); const animal = ZOO_ANIMALS.find(a => a.name.toLowerCase() === name.toLowerCase()); return animal; } ); // Create Genkit MCP server wrapper const mcpWrapper = createMcpServer(ai, { name: 'zoo-animal-server', version: '1.0.0', }); // HTTP server mode const app = express(); app.use(express.json()); // Initialize Genkit MCP server once const mcpServerPromise = mcpWrapper.setup().then(() => mcpWrapper.server); app.post('/mcp', async (req, res) => { console.log('/mcp Received:', req.body); console.log('Using HTTP transport mode.'); const server = await mcpServerPromise; const transport = new StreamableHTTPServerTransport({ sessionIdGenerator: undefined, }); if (!server) { console.error('MCP Server not initialized correctly.'); res.sendStatus(500); return; } await server.connect(transport); await transport.handleRequest(req, res, req.body); res.on('close', () => { console.log('Request closed'); transport.close(); }); }); app.get('/mcp', async (req, res) => { console.log('Received GET MCP request'); res.sendStatus(405); }); app.delete('/mcp', async (req, res) => { console.log('Received DELETE MCP request'); res.sendStatus(405); }); // Start the server const PORT = process.env.PORT || 8080; app.listen(PORT, () => { console.log(`Zoo Animal MCP server listening on port ${PORT}`); });
您的代码已完成!现在可以将 MCP 服务器部署到 Cloud Run。
7. 正在部署到 Cloud Run
现在,直接从源代码将 MCP 服务器部署到 Cloud Run。
- 创建名为
mcp-server-sa的服务账号:gcloud iam service-accounts create mcp-server-sa --display-name="MCP Server Service Account" - 运行
gcloud命令,将应用部署到 Cloud Rungcloud run deploy zoo-mcp-server \ --service-account=mcp-server-sa@$GOOGLE_CLOUD_PROJECT.iam.gserviceaccount.com \ --no-allow-unauthenticated \ --region=europe-west4 \ --source=. \ --labels=dev-tutorial=codelab-mcp--no-allow-unauthenticated标志来要求进行身份验证。这对于安全至关重要。如果您不要求进行身份验证,任何人都可以调用您的 MCP 服务器,并可能对您的系统造成损害。 - 确认创建新的 Artifact Registry 代码库。由于您是首次从源代码部署到 Cloud Run,因此您会看到:
Deploying from source requires an Artifact Registry Docker repository to store built containers. A repository named [cloud-run-source-deploy] in region [europe-west4] will be created. Do you want to continue (Y/n)?
Y并按Enter,系统会为您的部署创建一个 Artifact Registry 代码库。这是存储 Cloud Run 服务的 MCP 服务器 Docker 容器所必需的。 - 几分钟后,您会看到类似以下内容的消息:
Service [zoo-mcp-server] revision [zoo-mcp-server-12345-abc] has been deployed and is serving 100 percent of traffic.
您已部署 MCP 服务器。现在可以使用它了。
8. 将远程 MCP 服务器添加到 Gemini CLI
现在,您已成功部署远程 MCP 服务器,可以使用各种应用(例如 Google Code Assist 或 Gemini CLI)连接到该服务器。在本部分中,我们将使用 Gemini CLI 与新的远程 MCP 服务器建立连接。
- 为您的用户账号授予调用远程 MCP 服务器的权限
gcloud projects add-iam-policy-binding $GOOGLE_CLOUD_PROJECT \ --member=user:$(gcloud config get-value account) \ --role='roles/run.invoker' - 将 Google Cloud 凭据和项目编号保存在环境变量中,以便在 Gemini 设置文件中使用:
export PROJECT_NUMBER=$(gcloud projects describe $GOOGLE_CLOUD_PROJECT --format="value(projectNumber)") export ID_TOKEN=$(gcloud auth print-identity-token) - 打开 Gemini CLI 设置文件
cloudshell edit ~/.gemini/settings.json - 替换 Gemini CLI 设置文件以添加 Cloud Run MCP 服务器
{ "ide": { "hasSeenNudge": true }, "mcpServers": { "zoo-remote": { "httpUrl": "https://zoo-mcp-server-$PROJECT_NUMBER.europe-west4.run.app/mcp", "headers": { "Authorization": "Bearer $ID_TOKEN" } } }, "security": { "auth": { "selectedType": "cloud-shell" } } }
- 在 Cloud Shell 中启动 Gemini CLI
geminiEnter接受一些默认设置。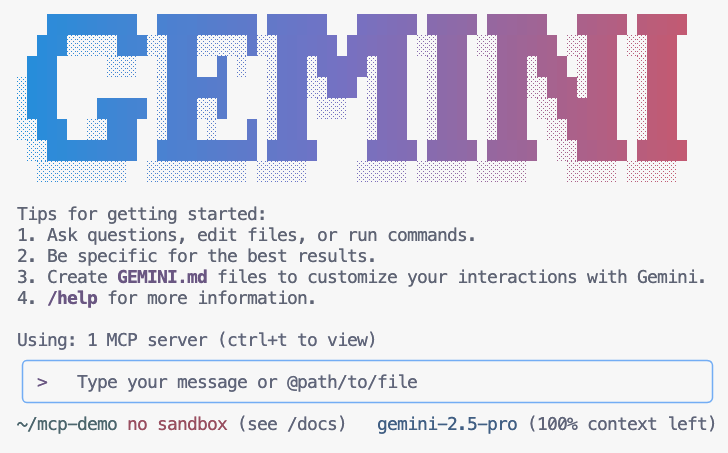
- 让 Gemini 列出其上下文中可用的 MCP 工具
/mcp - 让 Gemini 在动物园中查找内容
Where can I find penguins?zoo-remoteMCP 服务器,并询问您是否允许执行 MCP。 - 使用向下箭头,然后按
Enter进行选择Yes, always allow all tools from server "zoo-remote"
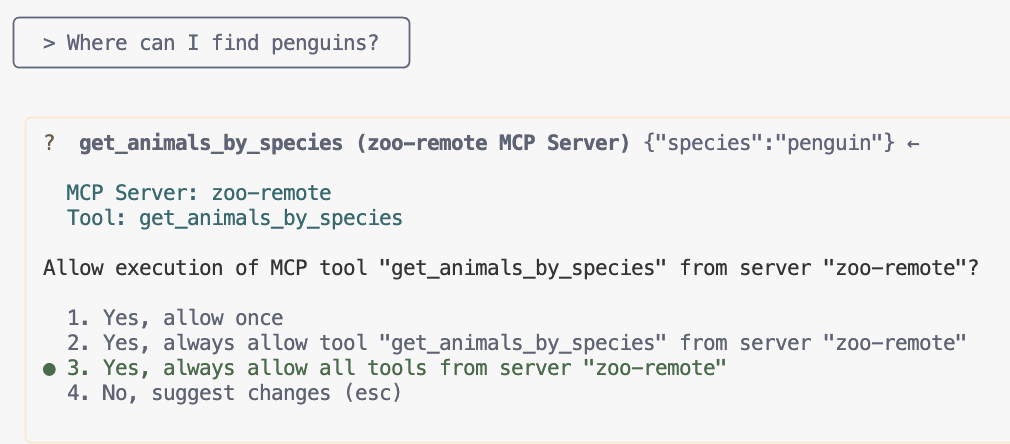
输出应显示正确答案,并显示一个框,表明使用了 MCP 服务器。
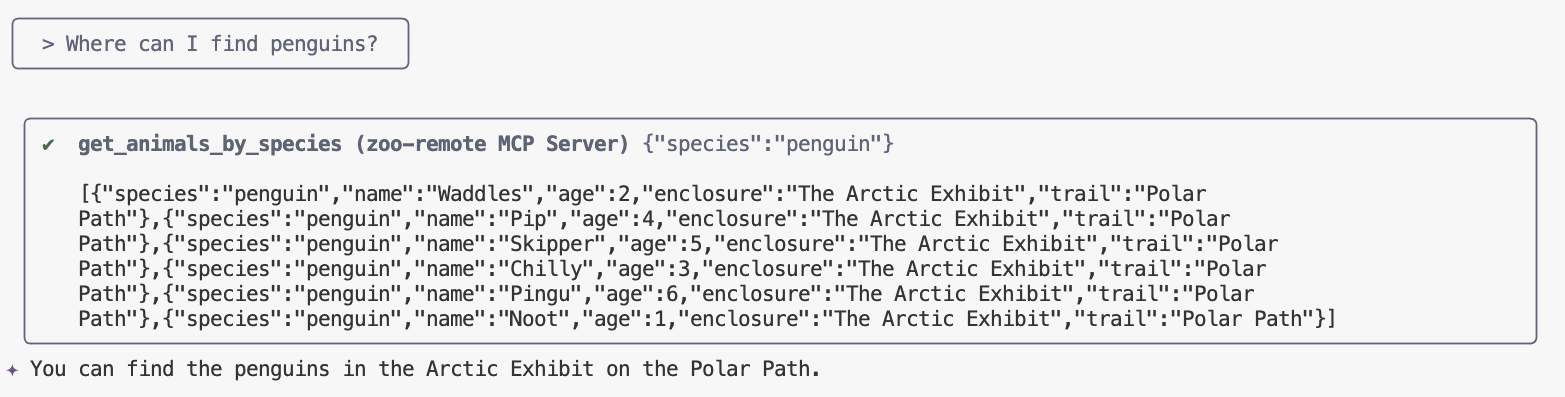
您已完成!您已成功将远程 MCP 服务器部署到 Cloud Run,并使用 Gemini CLI 对其进行了测试。
准备好结束会话时,请输入 /quit,然后按 Enter 退出 Gemini CLI。
调试
如果您看到类似这样的错误:
🔍 Attempting OAuth discovery for 'zoo-remote'... ❌ 'zoo-remote' requires authentication but no OAuth configuration found Error connecting to MCP server 'zoo-remote': MCP server 'zoo-remote' requires authentication. Please configure OAuth or check server settings.
可能是 ID 令牌已过期,需要重新设置 ID_TOKEN。
- 输入
/quit,然后按Enter退出 Gemini CLI。 - 在终端中设置您的项目
gcloud config set project [PROJECT_ID] - 重新运行 Google Cloud 凭据命令以获取新的
ID_TOKEN,因为您的凭据可能已过期。export PROJECT_NUMBER=$(gcloud projects describe $GOOGLE_CLOUD_PROJECT --format="value(projectNumber)") export ID_TOKEN=$(gcloud auth print-identity-token)
9. (可选)验证服务器日志中的工具调用
如需验证 Cloud Run MCP 服务器是否被调用,请检查服务日志。
gcloud run services logs read zoo-mcp-server --region europe-west4 --limit=5
您应该会看到一个输出日志,确认已进行工具调用。🛠️
2025-08-05 19:50:31 INFO: 169.254.169.126:39444 - "POST /mcp/ HTTP/1.1" 200 OK 2025-08-05 19:50:31 [INFO]: Processing request of type CallToolRequest 2025-08-05 19:50:31 [INFO]: >>> 🛠️ Tool: 'get_animals_by_species' called for 'penguin'
10. (可选)向服务器添加 MCP 提示
MCP 提示可以为经常运行的提示创建简写,从而加快工作流程。
Gemini CLI 会自动将 MCP 提示转换为 自定义斜杠命令,以便您可以通过输入 /prompt_name(其中 prompt_name 是 MCP 提示的名称)来调用 MCP 提示。
创建一个 MCP 提示,以便您可以通过在 Gemini CLI 中输入 /find animal 快速找到动物园中的动物。
- 将此代码添加到
index.js文件中的// Create Genkit MCP server wrapper行上方:ai.definePrompt( { name: 'find', description: 'Find which exhibit and trail a specific animal is located.', inputSchema: z.object({ animal: z.string() }), }, async ({ animal }) => { console.log(`>>> 💬 Prompt: 'find' called'`); return { messages: [ { role: 'user', content: [ { text: `Please find the exhibit and trail information for ${animal} in the zoo. Respond with '[animal] can be found in the [exhibit] on the [trail].' Example: Penguins can be found in The Arctic Exhibit on the Polar Path.` } ] } ] }; } ); - 将应用重新部署到 Cloud Run
gcloud run deploy zoo-mcp-server \ --service-account=mcp-server-sa@$GOOGLE_CLOUD_PROJECT.iam.gserviceaccount.com \ --no-allow-unauthenticated \ --region=europe-west4 \ --source=. \ --labels=dev-tutorial=codelab-mcp - 刷新远程 MCP 服务器的 ID_TOKEN
export ID_TOKEN=$(gcloud auth print-identity-token) - 部署新版应用后,启动 Gemini CLI。
gemini - 在提示中使用您创建的新自定义命令:
/find --animal="lions"
您应该会看到 Gemini CLI 调用 get_animals_by_species 工具,并按照 MCP 提示的指示设置回答格式!
╭───────────────────────────╮
│ > /find --animal="lion" │
╰───────────────────────────╯
╭───────────────────────────────────────────────────────────────────────────────────────────────────╮
│ ✔ get_animals_by_species (zoo-remote MCP Server) get_animals_by_species (zoo-remote MCP Server) │
│ │
│ [{"species":"lion","name":"Leo","age":7,"enclosure":"The Big Cat │
│ Plains","trail":"Savannah │
│ Heights"},{"species":"lion","name":"Nala","age":6,"enclosure":"The Big Cat │
│ Plains","trail":"Savannah │
│ Heights"},{"species":"lion","name":"Simba","age":3,"enclosure":"The Big Cat │
│ Plains","trail":"Savannah │
│ Heights"},{"species":"lion","name":"King","age":8,"enclosure":"The Big Cat │
│ Plains","trail":"Savannah Heights"}] │
╰───────────────────────────────────────────────────────────────────────────────────────────────────╯
✦ Lions can be found in The Big Cat Plains on the Savannah Heights.
11. (可选)使用 Gemini Flash Lite 以获得更快的响应
Gemini CLI 可让您选择要使用的模型。
- Gemini 2.5 Pro 是 Google 的先进思考模型,能够推理代码、数学和 STEM 中的复杂问题,以及使用长上下文分析大型数据集、代码库和文档。
- Gemini 2.5 Flash 是 Google 在性价比方面表现出色的模型,可提供全面的功能。2.5 Flash 非常适合需要思考的大规模处理、低延迟、高容量任务以及智能体用例。
- Gemini 2.5 Flash Lite 是 Google 速度最快的 Flash 模型,针对成本效益和高吞吐量进行了优化。
由于与查找动物园动物相关的请求不需要思考或推理,因此请尝试使用更快的模型来加快速度。
创建一个 MCP 提示,以便您可以通过在 Gemini CLI 中输入 /find animal 快速找到动物园中的动物。
- 部署新版应用后,启动 Gemini CLI。
gemini --model=gemini-2.5-flash-lite - 在提示中使用您创建的新自定义命令:
/find --animal="lions"
您仍然会看到 Gemini CLI 调用 get_animals_by_species 工具,并按照 MCP 提示的指示设置回答格式,但答案应该会更快显示!
╭───────────────────────────╮
│ > /find --animal="lion" │
╰───────────────────────────╯
╭───────────────────────────────────────────────────────────────────────────────────────────────────╮
│ ✔ get_animals_by_species (zoo-remote MCP Server) get_animals_by_species (zoo-remote MCP Server) │
│ │
│ [{"species":"lion","name":"Leo","age":7,"enclosure":"The Big Cat │
│ Plains","trail":"Savannah │
│ Heights"},{"species":"lion","name":"Nala","age":6,"enclosure":"The Big Cat │
│ Plains","trail":"Savannah │
│ Heights"},{"species":"lion","name":"Simba","age":3,"enclosure":"The Big Cat │
│ Plains","trail":"Savannah │
│ Heights"},{"species":"lion","name":"King","age":8,"enclosure":"The Big Cat │
│ Plains","trail":"Savannah Heights"}] │
╰───────────────────────────────────────────────────────────────────────────────────────────────────╯
✦ Lions can be found in The Big Cat Plains on the Savannah Heights.
测试自己的扩展目标
如需接受额外的挑战,请查看您是否可以按照相同的步骤创建提示,以返回有关动物园中特定动物物种的趣闻。
或者,为了进一步测试您所学的内容,请想出一个您经常使用的工具,并部署第二个远程 MCP 服务器。然后将其添加到 Gemini CLI 设置中,看看它是否有效。
调试
如果您看到类似这样的错误:
✕ Unknown command: /find --animal="lions"
尝试运行 /mcp,如果输出 zoo-remote - Disconnected,您可能需要重新部署,或再次运行以下命令:
gcloud projects add-iam-policy-binding $GOOGLE_CLOUD_PROJECT \
    --member=user:$(gcloud config get-value account) \
    --role='roles/run.invoker'
export PROJECT_NUMBER=$(gcloud projects describe $GOOGLE_CLOUD_PROJECT --format="value(projectNumber)")
export ID_TOKEN=$(gcloud auth print-identity-token)
12. 总结
恭喜!您已成功部署并连接到安全的远程 MCP 服务器。
继续学习下一个实验
本实验是三部分系列实验中的第一个实验。在第二个实验中,您将使用您创建的 MCP 服务器和 ADK 智能体。
将 Cloud Run 上的 MCP 服务器与 ADK 智能体结合使用
(可选)清理
如果您不打算继续学习下一个实验,并且想要清理您创建的内容,可以删除 Cloud 项目,以避免产生额外费用。
虽然 Cloud Run 不会对未在使用中的服务计费,但您可能仍然需要支付将容器映像存储在 Artifact Registry 中而产生的相关费用。删除 Cloud 项目会停止对该项目内使用的所有资源计费。
如果您愿意,可以删除该项目:
gcloud projects delete $GOOGLE_CLOUD_PROJECT
您可能还需要从 Cloud Shell 磁盘中删除不必要的资源。您可以:
- 删除 Codelab 项目目录:
rm -rf ~/mcp-on-cloudrun - 警告!此操作无法撤消!如果您想删除 Cloud Shell 中的所有内容以释放空间,可以删除整个主目录。请注意,您想要保留的所有内容都已保存在其他位置。
sudo rm -rf $HOME