
1. Introduction
Overview
In this lab, you will deploy a production-ready Agent Development Kit (ADK) agent with GPU-accelerated Gemma backend. The focus is on critical deployment patterns: setting up GPU-enabled Cloud Run services, integrating model backends with ADK agents, and observing autoscaling behavior under load.
What you'll do
In this lab, you'll focus on the critical production deployment aspects:
- Deploy Gemma to Cloud Run with GPU - Set up a high-performance Gemma model backend
- Integrate the Gemma deployment with an ADK agent - Connect your agent to the GPU-accelerated model
- Test with ADK Web interface - Validate your conversational agent works correctly
- Perform elasticity testing - Observe how both Cloud Run instances handle load
The emphasis is on production deployment patterns rather than extensive agent development.
What you'll learn
- Deploy GPU-accelerated Gemma models to Cloud Run for production use
- Integrate external model deployments with ADK agents
- Configure and test production-ready AI agent deployments
- Understand Cloud Run behavior under load
- Observe how multiple Cloud Run instances coordinate during traffic spikes
- Apply elasticity testing to validate performance
2. Project Setup
- If you don't already have a Google Account, you must create a Google Account.
- Use a personal account instead of a work or school account. Work and school accounts may have restrictions that prevent you from enabling the APIs needed for this lab.
- Sign-in to the Google Cloud Console.
- Enable billing in the Cloud Console.
- Completing this lab should cost less than $1 USD in Cloud resources.
- You can follow the steps at the end of this lab to delete resources to avoid further charges.
- New users are eligible for the $300 USD Free Trial.
- Create a new project or choose to reuse an existing project.
- If you see an error about project quota, reuse an existing project or delete an existing project to create a new project.
3. Open Cloud Shell Editor
- Click this link to navigate directly to Cloud Shell Editor
- If prompted to authorize at any point today, click Authorize to continue.
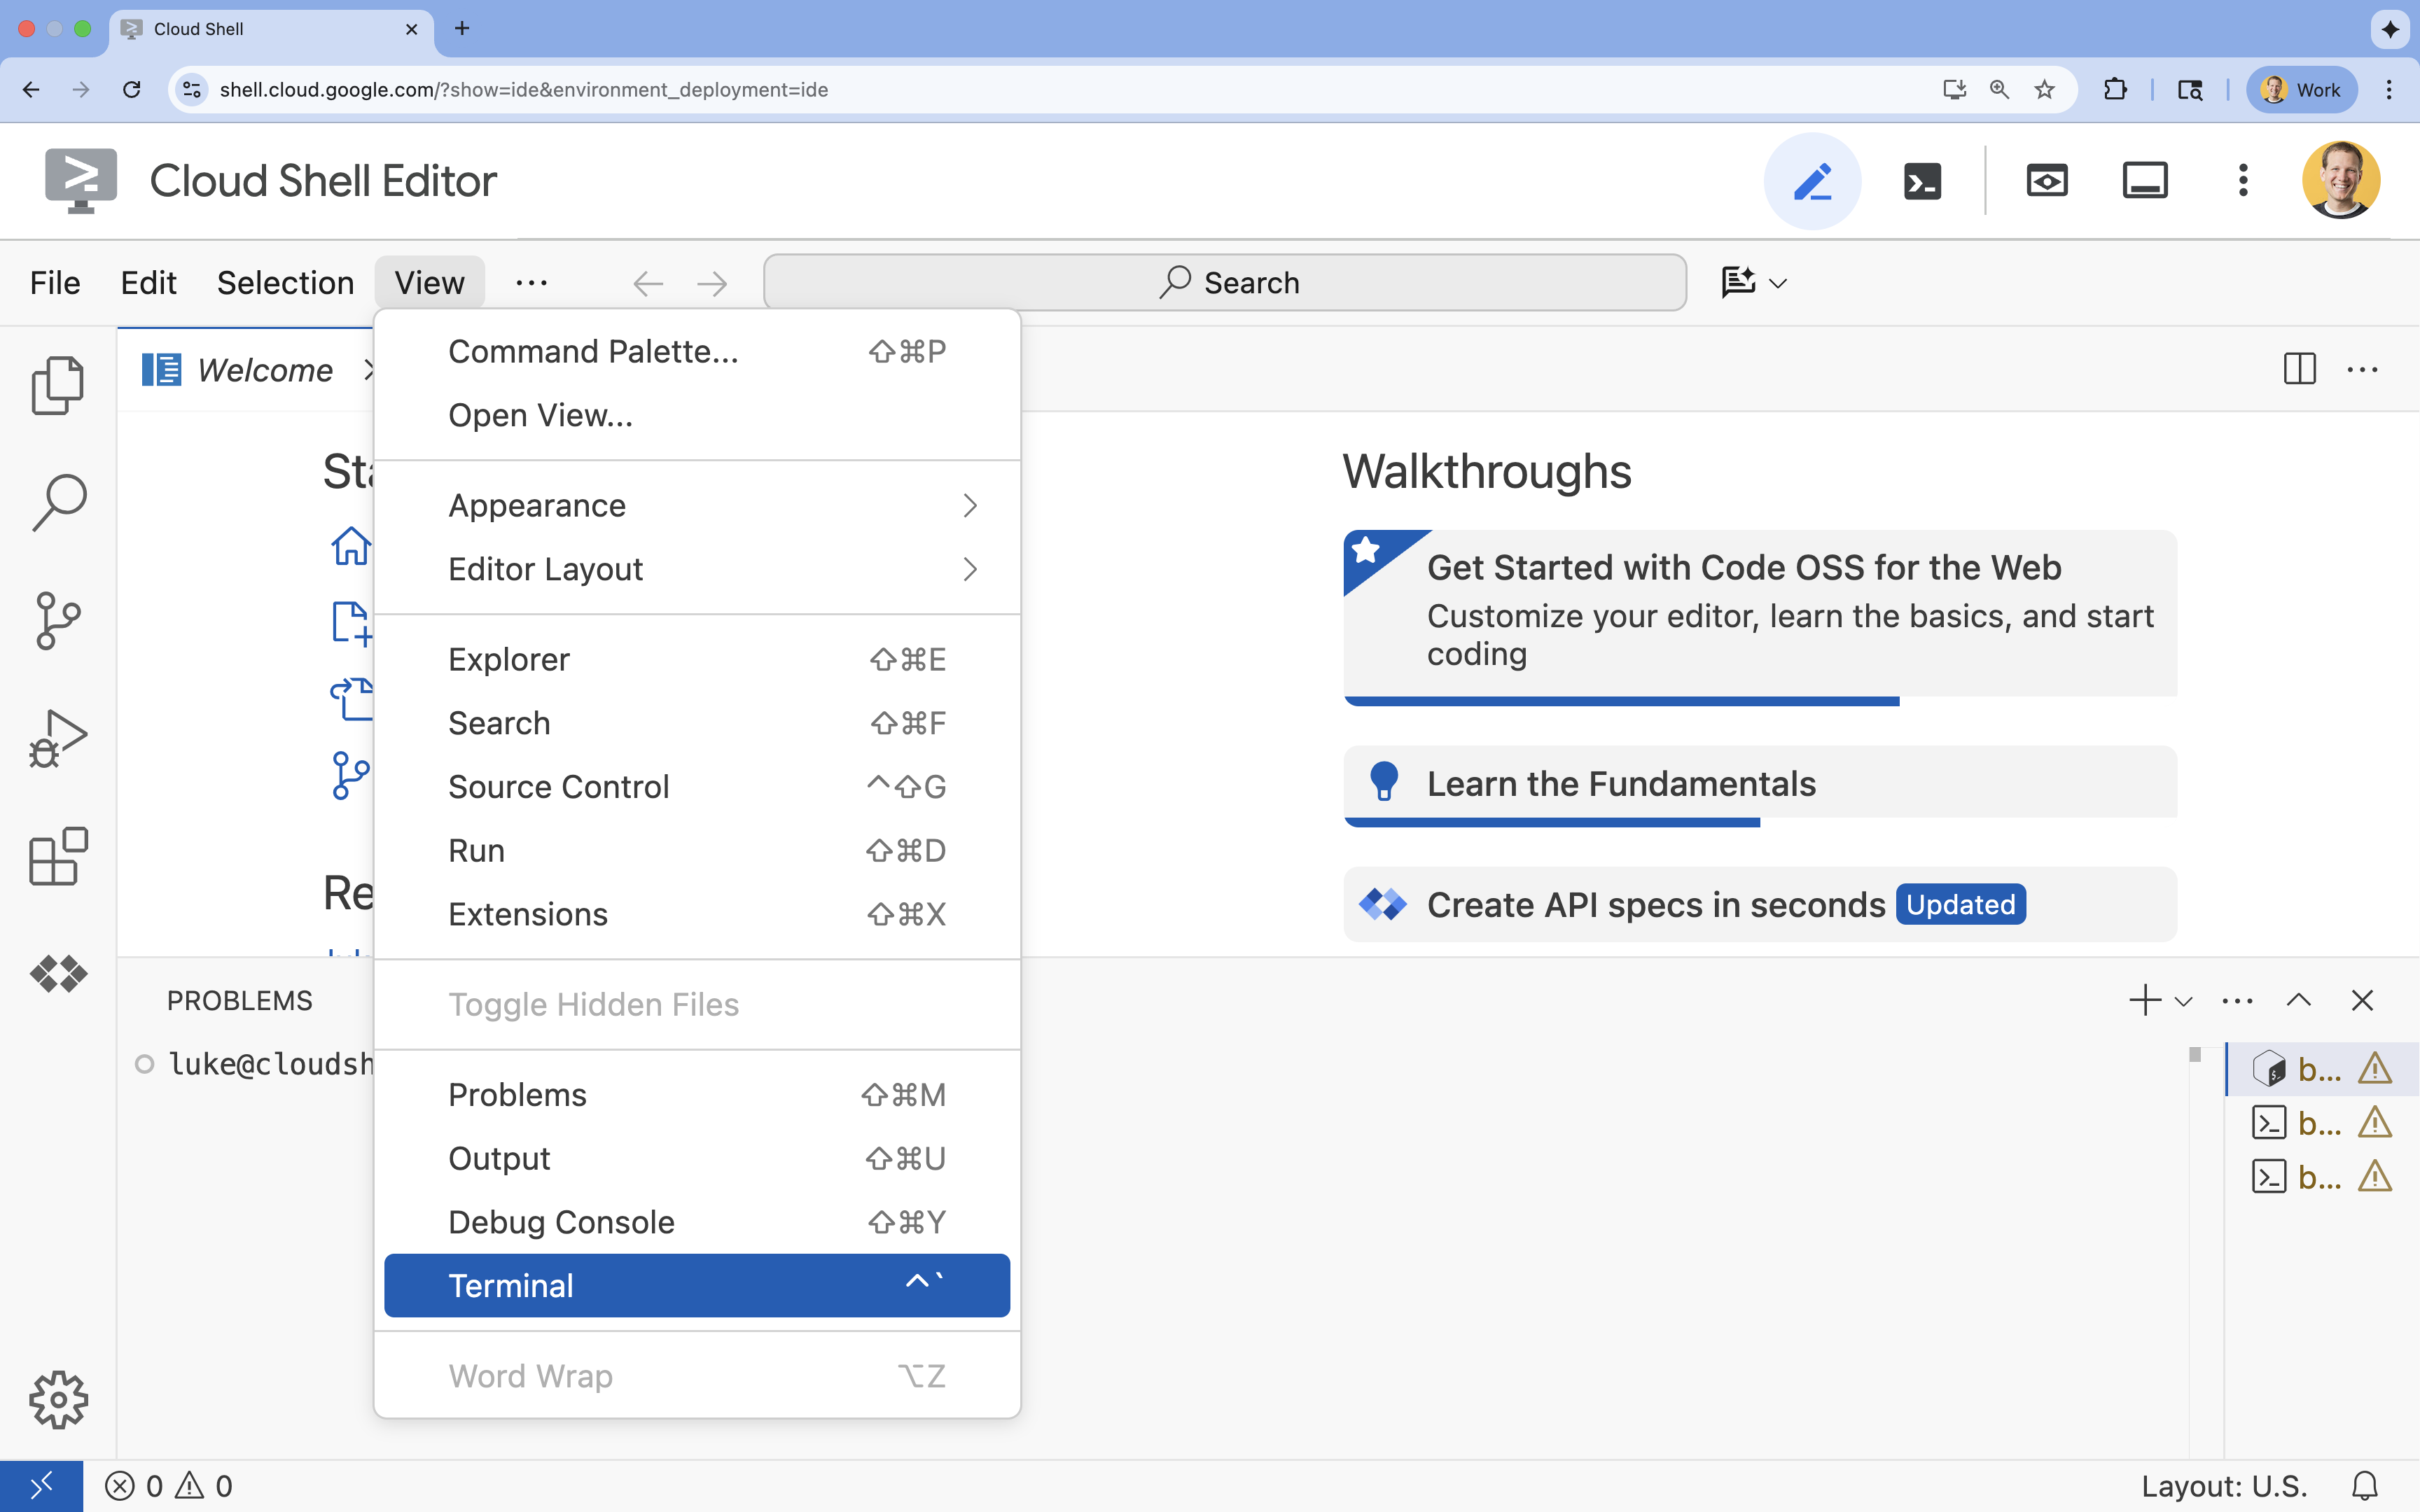
- If the terminal doesn't appear at the bottom of the screen, open it:
- Click View
- Click Terminal
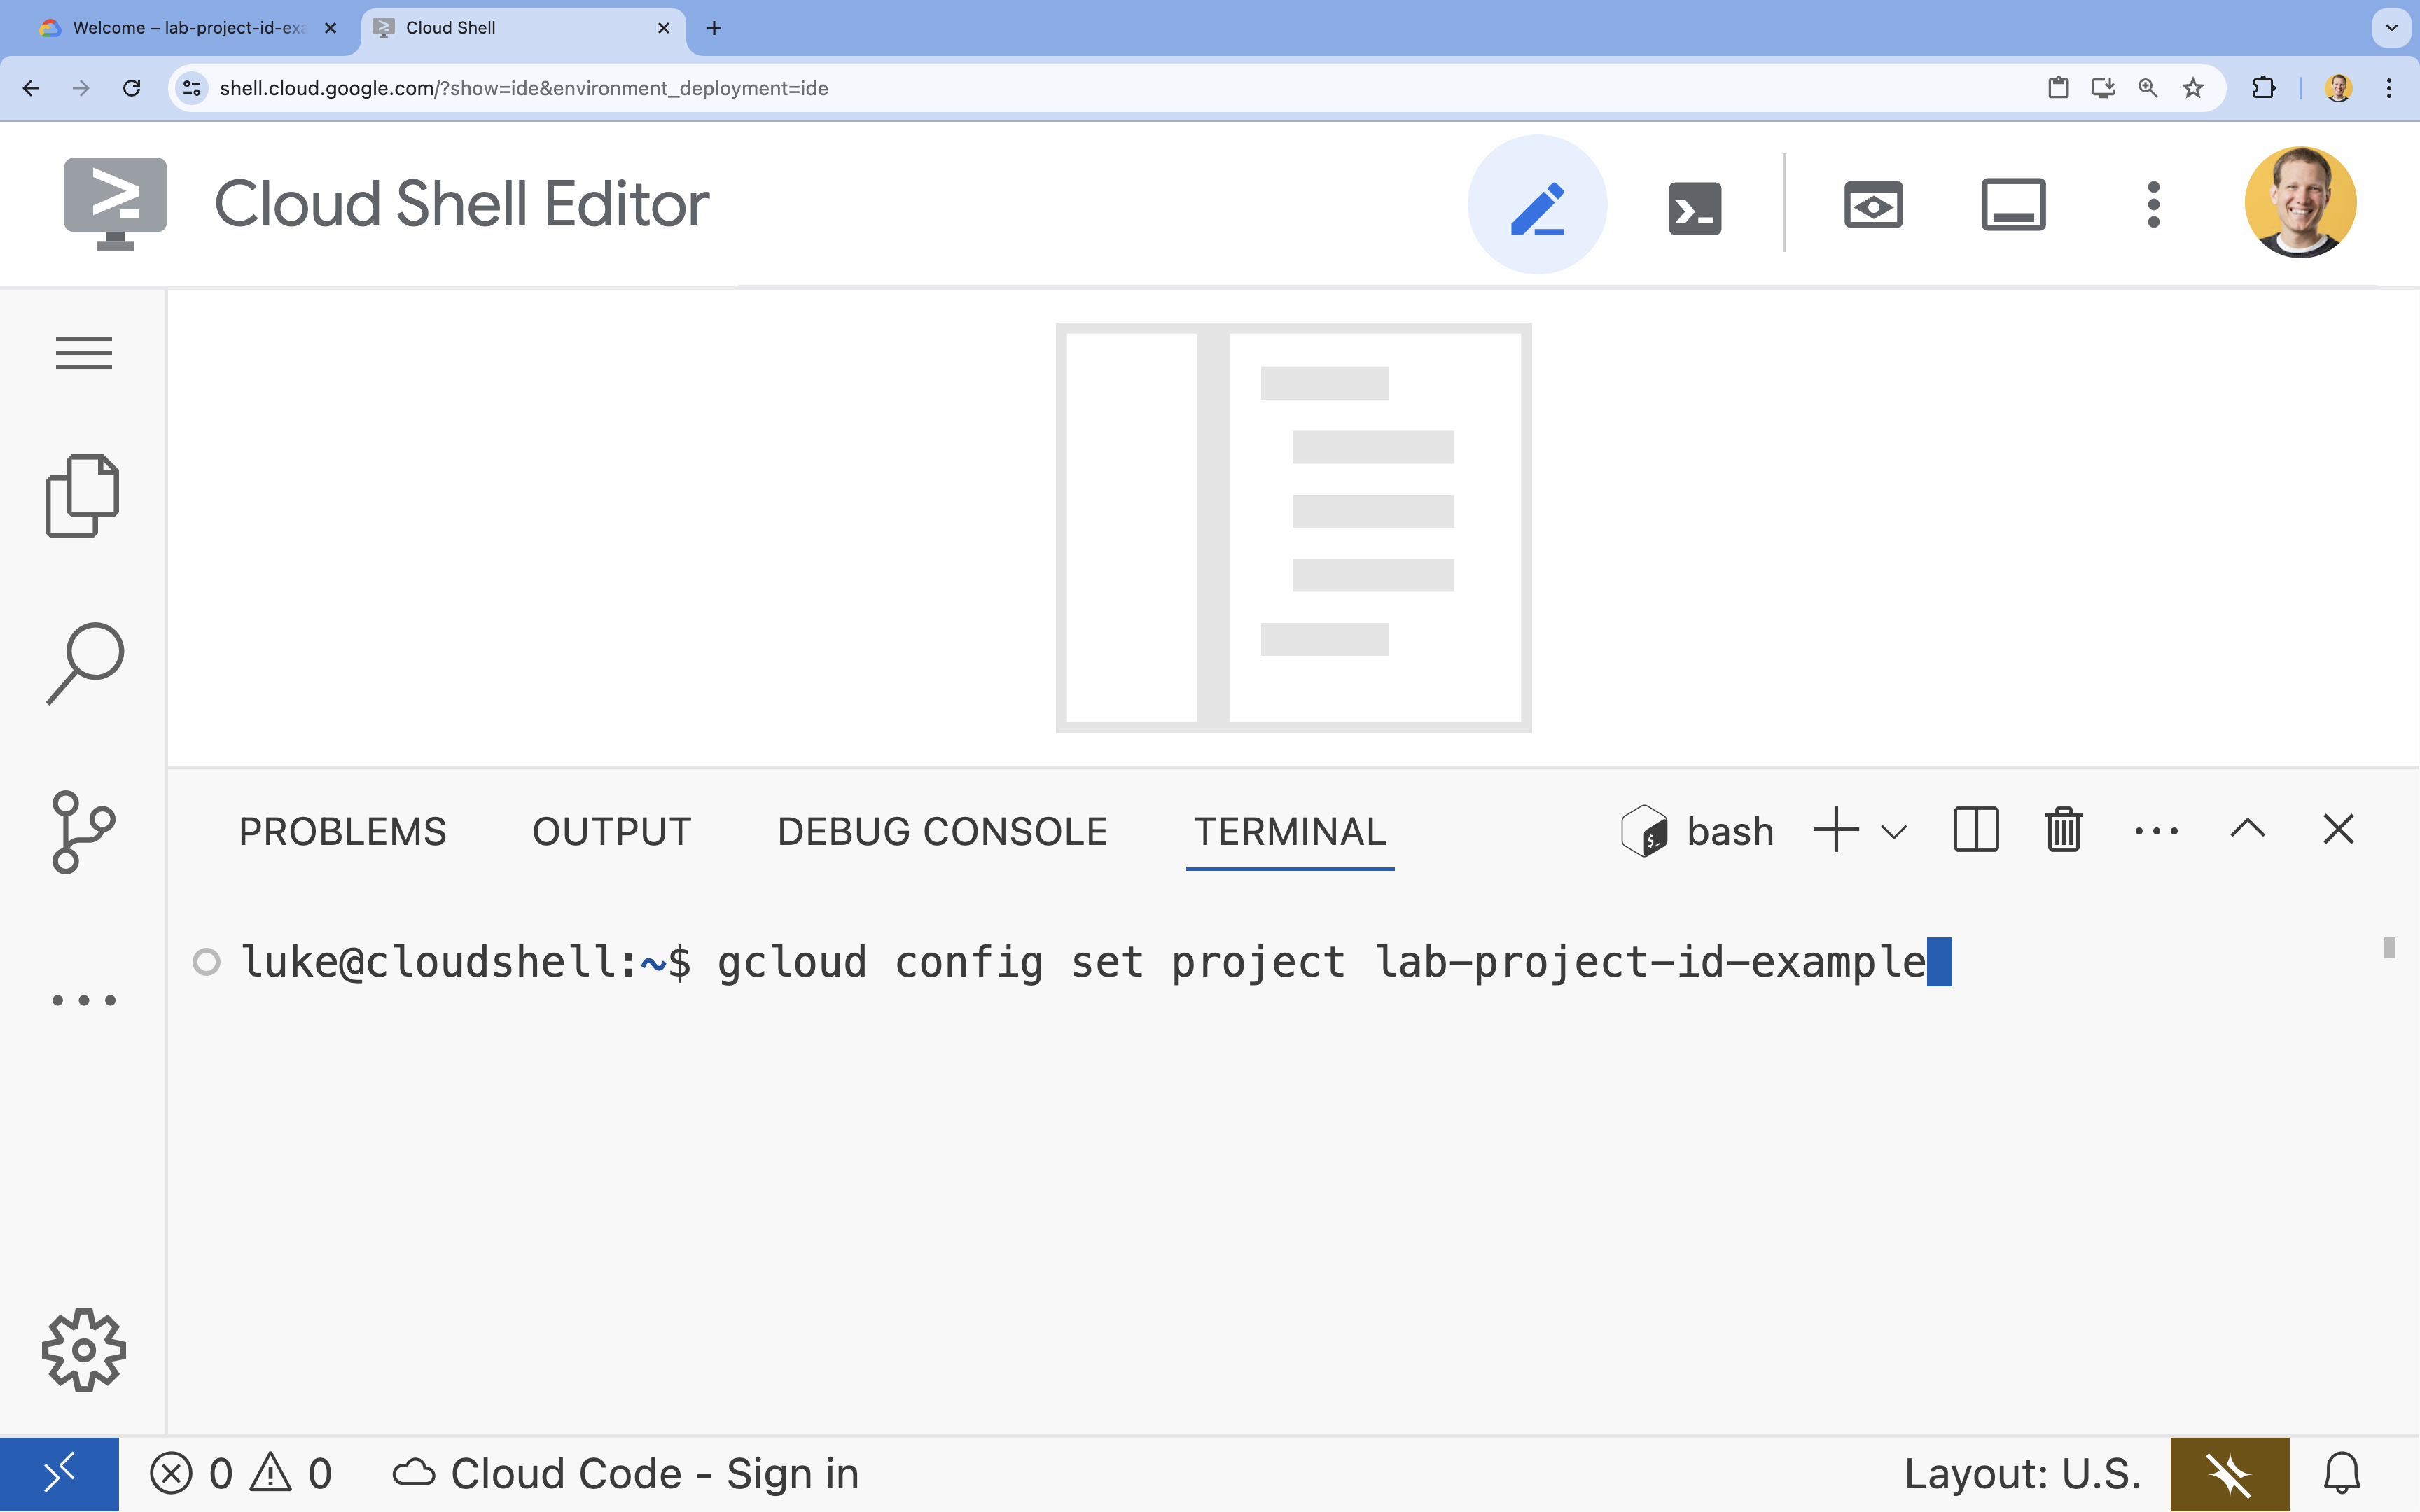
- In the terminal, set your project with this command:
- Format:
gcloud config set project [PROJECT_ID] - Example:
gcloud config set project lab-project-id-example - If you can't remember your project id:
- You can list all your project ids with:
gcloud projects list | awk '/PROJECT_ID/{print $2}'
- You can list all your project ids with:
- Format:
- You should see this message:
Updated property [core/project].
WARNINGand are askedDo you want to continue (Y/n)?, then you have likely entered the project ID incorrectly. Pressn, pressEnter, and try to run thegcloud config set projectcommand again.
4. Enable APIs and Set Default Region
Before we can deploy Cloud Run services with GPU support, we need to enable the required Google Cloud APIs and configure your project settings.
- In the terminal, enable the APIs:
gcloud services enable \
  run.googleapis.com \
  artifactregistry.googleapis.com \
  cloudbuild.googleapis.com \
  aiplatform.googleapis.com
If prompted to authorize, click Authorize to continue.
This command may take a few minutes to complete, but it should eventually produce a successful message similar to this one:
Operation "operations/acf.p2-73d90d00-47ee-447a-b600" finished successfully.
- Set your default Cloud Run region.
gcloud config set run/region europe-west4
5. Prepare your Python project
Let's set up the starter code that contains the basic structure for both our Gemma backend and ADK agent services.
- Clone the starter repository:
cd ~ npx -y giget@latest gh+git:GoogleCloudPlatform/devrel-demos/agents/accelerate-ai-with-cloud-run/accelerate-ai-lab3-starter accelerate-ai-lab3-starter cd accelerate-ai-lab3-starter - Examine the project structure:
ls -Raccelerate-ai-lab3-starter/ ├── README.md # Project overview ├── ollama-backend/ # Ollama backend (separate deployment) │ └── Dockerfile # Backend container (🚧 to implement) └── adk-agent/ # ADK agent (separate deployment) ├── pyproject.toml # Python dependencies (✅ completed) ├── server.py # FastAPI server (🚧 to implement) ├── Dockerfile # Container config (🚧 to implement) ├── elasticity_test.py # Elasticity testing (🚧 to implement) └── production_agent/ # Agent implementation ├── __init__.py # Package init (✅ completed) └── agent.py # Agent logic (🚧 to implement)
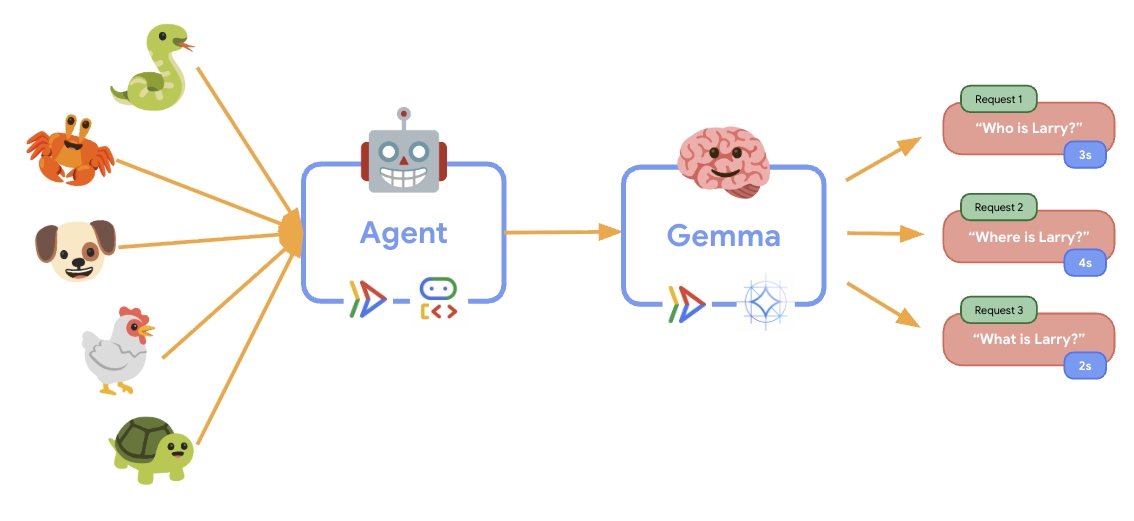
6. Architecture Overview
Before implementing, let's understand the two-service architecture:

Key insight: During elasticity testing, you'll observe both services handling the workload independently - the GPU backend (bottleneck service) uses its GPU to handle the load, while the ADK agent relies on its CPU to handle the non resource-intensive requests.
7. Deploy Gemma Backend to Cloud Run with GPU

The first critical step is deploying a GPU-accelerated Gemma model, which will serve as the brain for your ADK agent. Having a decoupled, deployed LLM may be favorable in architectures where you need a separate fine-tuned model, or require isolated scaling.
- Navigate to the Ollama backend directory:
cd ollama-backend - Open and implement the Ollama Dockerfile:
cloudshell edit DockerfileFROM ollama/ollama:latest # Listen on all interfaces, port 8080 ENV OLLAMA_HOST 0.0.0.0:8080 # Store model weight files in /models ENV OLLAMA_MODELS /models # Reduce logging verbosity ENV OLLAMA_DEBUG false # Never unload model weights from the GPU ENV OLLAMA_KEEP_ALIVE -1 # Store the model weights in the container image ENV MODEL gemma3:270m RUN ollama serve & sleep 5 && ollama pull $MODEL # Start Ollama ENTRYPOINT ["ollama", "serve"]- Uses the official Ollama image as the foundation
- Sets
OLLAMA_HOSTto accept connections from any IP address - Exposes port 8080
- Deploy the Gemma backend with GPU support:
gcloud run deploy ollama-gemma3-270m-gpu \
  --source . \
  --region europe-west4 \
  --concurrency 7 \
  --cpu 8 \
  --set-env-vars OLLAMA_NUM_PARALLEL=4 \
  --gpu 1 \
  --gpu-type nvidia-l4 \
  --max-instances 1 \
  --memory 16Gi \
  --allow-unauthenticated \
  --no-cpu-throttling \
  --no-gpu-zonal-redundancy \
  --timeout 600 \
  --labels dev-tutorial=codelab-agent-gpu
If you receive a "Deploying from source requires an Artifact Registry Docker repository to store built containers. A repository named [cloud-run-source-deploy] in region [europe-west4] will be created." message, continue.
⚙️ Key configuration explained:
- GPU: NVIDIA L4 chosen for its excellent price-performance ratio for inference workloads. The L4 provides 24GB GPU memory and optimized tensor operations, making it ideal for 270M parameter models like Gemma
- Memory: 16GB system memory to handle model loading, CUDA operations, and Ollama's memory management
- CPU: 8 cores for optimal I/O handling and preprocessing tasks
- Concurrency: 7 requests per instance balances throughput with GPU memory usage
- Timeout: 600 seconds accommodates initial model loading and container startup
💰 Cost Consideration: GPU instances are significantly more expensive than CPU-only instances (~$2-4/hour vs ~$0.10/hour). The --max-instances 1 setting helps control costs by preventing unnecessary GPU instance scaling.
- Wait for deployment to complete and note the service URL:
export OLLAMA_URL=$(gcloud run services describe ollama-gemma3-270m-gpu \
    --region=europe-west4 \
    --format='value(status.url)')

echo "🎉 Gemma backend deployed at: $OLLAMA_URL"
8. Implement the ADK Agent Integration
Now let's create a minimal ADK agent that connects to your deployed Gemma backend.
- Navigate to the ADK agent directory:
cd ../adk-agent - Open and implement the agent configuration:
cloudshell edit production_agent/agent.pyimport os from pathlib import Path from dotenv import load_dotenv from google.adk.agents import Agent from google.adk.models.lite_llm import LiteLlm import google.auth # Load environment variables root_dir = Path(__file__).parent.parent dotenv_path = root_dir / ".env" load_dotenv(dotenv_path=dotenv_path) # Configure Google Cloud try: _, project_id = google.auth.default() os.environ.setdefault("GOOGLE_CLOUD_PROJECT", project_id) except Exception: pass os.environ.setdefault("GOOGLE_CLOUD_LOCATION", "europe-west4") # Configure model connection gemma_model_name = os.getenv("GEMMA_MODEL_NAME", "gemma3:270m") api_base = os.getenv("OLLAMA_API_BASE", "localhost:10010") # Location of Ollama server # Production Gemma Agent - GPU-accelerated conversational assistant production_agent = Agent( model=LiteLlm(model=f"ollama_chat/{gemma_model_name}", api_base=api_base), name="production_agent", description="A production-ready conversational assistant powered by GPU-accelerated Gemma.", instruction="""You are 'Gem', a friendly, knowledgeable, and enthusiastic zoo tour guide. Your main goal is to make a zoo visit more fun and educational for guests by answering their questions. You can provide general information and interesting facts about different animal species, such as: - Their natural habitats and diet. 🌲🍓 - Typical lifespan and behaviors. - Conservation status and unique characteristics. IMPORTANT: You do NOT have access to any tools. This means you cannot look up real-time, specific information about THIS zoo. You cannot provide: - The names or ages of specific animals currently at the zoo. - The exact location or enclosure for an animal. - The daily schedule for feedings or shows. Always answer based on your general knowledge about the animal kingdom. Keep your tone cheerful, engaging, and welcoming for visitors of all ages. 🦁✨""", tools=[], # Gemma focuses on conversational capabilities ) # Set as root agent root_agent = production_agent- Connects to your deployed Gemma backend via LiteLlm
- Creates a simple conversational agent
- Configures Google Cloud integration
- Open and implement the FastAPI server:
cloudshell edit server.pyimport os from dotenv import load_dotenv from fastapi import FastAPI from google.adk.cli.fast_api import get_fast_api_app # Load environment variables load_dotenv() AGENT_DIR = os.path.dirname(os.path.abspath(__file__)) app_args = {"agents_dir": AGENT_DIR, "web": True} # Create FastAPI app with ADK integration app: FastAPI = get_fast_api_app(**app_args) # Update app metadata app.title = "Production ADK Agent - Lab 3" app.description = "Gemma agent with GPU-accelerated backend" app.version = "1.0.0" @app.get("/health") def health_check(): return {"status": "healthy", "service": "production-adk-agent"} @app.get("/") def root(): return { "service": "Production ADK Agent - Lab 3", "description": "GPU-accelerated Gemma agent", "docs": "/docs", "health": "/health" } if __name__ == "__main__": import uvicorn uvicorn.run(app, host="0.0.0.0", port=8080, log_level="info")- Creates a FastAPI server with ADK integration
- Enables the web interface for testing
- Provides health check endpoints
- Open and implement the Dockerfile:
cloudshell edit DockerfileFROM python:3.13-slim # Copy uv from the official image COPY --from=ghcr.io/astral-sh/uv:latest /uv /usr/local/bin/uv # Install system dependencies RUN apt-get update && apt-get install -y curl && rm -rf /var/lib/apt/lists/* # Set working directory WORKDIR /app # Copy all files COPY . . # Install Python dependencies RUN uv sync # Expose port EXPOSE 8080 # Run the application CMD ["uv", "run", "uvicorn", "server:app", "--host", "0.0.0.0", "--port", "8080"]- uv: Modern Python package manager that's 10-100x faster than pip. It uses a global cache and parallel downloads, significantly reducing container build times
- Python 3.13-slim: Latest Python version with minimal system dependencies, reducing container size and attack surface
- Multi-stage build: Copying uv from its official image ensures we get the latest optimized binary
9. Configure Environment and Deploy Agent
Now we'll configure the ADK agent to connect to your deployed Gemma backend and deploy it as a Cloud Run service. This involves setting up environment variables and deploying the agent with the right configuration.
- Set up your environment configuration:
cat << EOF > .env
GOOGLE_CLOUD_PROJECT=$(gcloud config get-value project)
GOOGLE_CLOUD_LOCATION=europe-west4
GEMMA_MODEL_NAME=gemma3:270m
OLLAMA_API_BASE=$OLLAMA_URL
EOF
Understanding Environment Variables in Cloud Run
Environment variables are key-value pairs that configure your application at runtime. They're particularly useful for:
- API endpoints and service URLs (like our Ollama backend)
- Configuration that changes between environments (dev, staging, prod)
- Sensitive data that shouldn't be hardcoded
Deploy the ADK agent:
export PROJECT_ID=$(gcloud config get-value project)

gcloud run deploy production-adk-agent \
   --source . \
   --region europe-west4 \
   --allow-unauthenticated \
   --memory 4Gi \
   --cpu 2 \
   --max-instances 1 \
   --concurrency 50 \
   --timeout 300 \
   --set-env-vars GOOGLE_CLOUD_PROJECT=$PROJECT_ID \
   --set-env-vars GOOGLE_CLOUD_LOCATION=europe-west4 \
   --set-env-vars GEMMA_MODEL_NAME=gemma3:270m \
   --set-env-vars OLLAMA_API_BASE=$OLLAMA_URL \
   --labels dev-tutorial=codelab-agent-gpu
⚙️ Key configuration:
- Autoscaling: Fixed at 1 instance (lightweight request handling)
- Concurrency: 50 requests per instance
- Memory: 4GB for the ADK agent
- Environment: Connects to your Gemma backend
🔒 Security Note: This lab uses --allow-unauthenticated for simplicity. In production, implement proper authentication using:
- Cloud Run service-to-service authentication with service accounts
- Identity and Access Management (IAM) policies
- API keys or OAuth for external access
- Consider using
gcloud run services add-iam-policy-bindingto control access
Get your agent service URL:
export AGENT_URL=$(gcloud run services describe production-adk-agent \
    --region=europe-west4 \
    --format='value(status.url)')

echo "🎉 ADK Agent deployed at: $AGENT_URL"
✅ Environment variables best practices based on Cloud Run environment variables documentation:
- Avoid reserved variables: Don't set
PORT(if you need to change the env var, use –port flag instead) or variables starting withX_GOOGLE_ - Use descriptive names: Prefix your variables to avoid conflicts (e.g.,
GEMMA_MODEL_NAMEinstead ofMODEL) - Escape commas: If your values contain commas, use a different delimiter:
--set-env-vars "^@^KEY1=value1,value2@KEY2=..." - Update vs Replace: Use
--update-env-varsto add/change specific variables without affecting others
How to set variables in Cloud Run:
- From file:
gcloud run deploy SERVICE_NAME --env-vars-file .env --labels dev-tutorial codelab-adk(loads multiple variables from a file) - Multiple flags: Repeat
--set-env-varsfor complex values that can't be comma-separated
10. Test with ADK Web Interface
With both services deployed, it's time to validate that your ADK agent can successfully communicate with the GPU-accelerated Gemma backend and respond to user queries.
- Test the health endpoint:
curl $AGENT_URL/health{ "status": "healthy", "service": "production-adk-agent" } - Interact with your agent by entering the URL for your
production-adk-agentinto a new browser tab. You should see the ADK web interface. - Test your agent with these sample conversations:
- "What do red pandas typically eat in the wild?"
- "Can you tell me an interesting fact about snow leopards?"
- "Why are poison dart frogs so brightly colored?"
- "Where can I find the new baby kangaroo in the zoo?"
- The agent responds using your deployed Gemma model. You can verify this by observing the logs for your deployed Gemma service. We will do this in the next section
- Responses are generated by the GPU-accelerated backend
- The web interface provides a clean chat experience

11. Implement and Run an Elasticity Test
To understand how your production deployment handles real-world traffic, we'll implement an elasticity test that will test the system's ability to adapt to a higher "simulated" production workload.
- Open and implement the elasticity testing script:
cloudshell edit elasticity_test.pyimport random import uuid from locust import HttpUser, task, between class ProductionAgentUser(HttpUser): """Elasticity test user for the Production ADK Agent.""" wait_time = between(1, 3) # Faster requests to trigger scaling def on_start(self): """Set up user session when starting.""" self.user_id = f"user_{uuid.uuid4()}" self.session_id = f"session_{uuid.uuid4()}" # Create session for the Gemma agent using proper ADK API format session_data = {"state": {"user_type": "elasticity_test_user"}} self.client.post( f"/apps/production_agent/users/{self.user_id}/sessions/{self.session_id}", headers={"Content-Type": "application/json"}, json=session_data, ) @task(4) def test_conversations(self): """Test conversational capabilities - high frequency.""" topics = [ "What do red pandas typically eat in the wild?", "Can you tell me an interesting fact about snow leopards?", "Why are poison dart frogs so brightly colored?", "Where can I find the new baby kangaroo in the zoo?", "What is the name of your oldest gorilla?", "What time is the penguin feeding today?" ] # Use proper ADK API format for sending messages message_data = { "app_name": "production_agent", "user_id": self.user_id, "session_id": self.session_id, "new_message": { "role": "user", "parts": [{ "text": random.choice(topics) }] } } self.client.post( "/run", headers={"Content-Type": "application/json"}, json=message_data, ) @task(1) def health_check(self): """Test the health endpoint.""" self.client.get("/health")- Session Creation: Uses proper ADK API format with POST to
/apps/production_agent/users/{user_id}/sessions/{session_id}. After creating asession_idanduser_id, a request can be made to the agent. - Message Format: Follows ADK specification with
app_name,user_id,session_id, and structurednew_messageobject - Conversation Endpoint: Uses
/runendpoint for collecting all events at once (recommended for load testing) - Realistic Load: Creates conversational load with shorter wait times
- Session Creation: Uses proper ADK API format with POST to
- Install dependencies:
uv sync - Locust is an open-source, Python-based load testing tool designed for performance and load testing of web applications and other systems. Its key characteristic is that test scenarios and user behavior are defined using standard Python code, offering high flexibility and expressiveness compared to tools that rely on graphical user interfaces or domain-specific languages. We will be using Locust to simulate user traffic to our services.Run the test.
uv run locust -f elasticity_test.py \ -H $AGENT_URL \ --headless \ -t 60s \ -u 20 \ -r 5- Duration: 60 seconds
- Users: 20 concurrent users
- Spawn rate: 5 users per second
- Target: Trigger autoscaling on both services
12. Observe AutoScaling Behavior
As the elasticity test runs, you'll be able to observe Cloud Run's support for higher workloads in action. This is where you'll see the key architectural benefits of separating the ADK agent from the GPU backend.
During the elasticity test, monitor how both Cloud Run services handle the traffic in your console.
- In the Cloud Console, navigate to:
- Cloud Run → production-adk-agent → Metrics
- Cloud Run → ollama-gemma3-270m-gpu → Metrics
👀 What you should observe:
🤖 ADK Agent Service:
- Should stay steady at 1 instance while traffic increases
- CPU and memory usage spike during high traffic
- Handles session management and request routing efficiently
🎮 Gemma Backend Service (Bottleneck):
- Should stay steady at 1 instance while traffic increases
- GPU utilization increases significantly under load
- This service becomes the bottleneck due to GPU-intensive model inference
- Model inference times remain consistent due to GPU acceleration
💡 Key Insights:
- Both services stay consistent and don't scale up, since we set our max instances to
1 - Both services scale independently based on their individual load characteristics
- The GPU helps maintain performance under varying load conditions
13. Conclusion
Congratulations! You have successfully deployed a production-ready ADK agent with GPU-accelerated Gemma backend, while testing a simulated production workload.
✅ What you accomplished
- ✅ Deployed a GPU-accelerated Gemma model backend on Cloud Run
- ✅ Created and deployed an ADK agent that integrates with the Gemma backend
- ✅ Tested the agent using the ADK web interface
- ✅ Observed autoscaling behavior across two coordinated Cloud Run services
💡 Key insights from this lab
- 🎮 GPU Acceleration: The NVIDIA L4 GPU significantly improves model inference performance
- 🔗 Service Coordination: Two Cloud Run services can work together seamlessly
- 📈 Independent Scaling: Each service scales based on its individual load characteristics
- 🚀 Production Readiness: The architecture handles real-world traffic patterns effectively
🔄 Next steps
- Experiment with different load patterns and observe scaling behavior
- Try different Gemma model sizes (adjust memory and GPU accordingly)
- Implement monitoring and alerting for production deployments
- Explore multi-region deployments for global availability
🧹 Clean up
To avoid incurring charges, delete the resources when you're done:
gcloud run services delete production-adk-agent --region=europe-west4
gcloud run services delete ollama-gemma3-270m-gpu --region=europe-west4
📖 Resources
- Starter Repository
- Complete Solution
- Google ADK Documentation
- ADK Testing Guide - Complete reference for ADK API endpoints and testing patterns
- Load Testing on Cloud Run
- Agent Development Kit (ADK) Documentation
- Cloud Run GPU Documentation
- Ollama Model Library
- Google Cloud Trace Documentation
- Cloud Run Security Best Practices
- UV Python Package Manager
- Locust Load Testing Framework