

1. はじめに
概要
このラボでは、Model Context Protocol(MCP)サーバーを構築してデプロイします。MCP サーバーは、LLM に外部ツールやサービスへのアクセスを提供する場合に便利です。複数のクライアントからアクセスできる、安全でプロダクション レディなサービスとして Cloud Run に構成します。次に、Antigravity CLI からリモート MCP サーバーに接続します。
演習内容
ここでは、FastMCP を使用して、get_animals_by_species と get_animal_details という 2 つのツールを持つ動物園 MCP サーバー を作成します。FastMCP は、MCP サーバーとクライアントを Python で迅速に構築するためのツールです。
学習内容
- MCP サーバーを Cloud Run にデプロイする。
- すべてのリクエストに認証を必須にすることで、サーバーのエンドポイントを保護し、承認されたクライアントとエージェントのみが通信できるようにする。
- Antigravity CLI からセキュアな MCP サーバーのエンドポイントに接続する
2. プロジェクトの設定
- Google アカウントをお持ちでない場合は、Google アカウントを作成する必要があります。
- 職場または学校用アカウントではなく、個人用アカウントを使用してください。職場または学校のアカウントには、このラボに必要な API を有効にできない制限がある場合があります。
- Google Cloud コンソールにログインします。
- 新しいプロジェクトを作成するか、既存のプロジェクトを再利用します。
- プロジェクトの割り当てに関するエラーが表示された場合は、既存のプロジェクトを再利用するか、既存のプロジェクトを削除して新しいプロジェクトを作成します。
3. Cloud Shell エディタを開く
- このリンクをクリックして、Cloud Shell エディタに直接移動します。
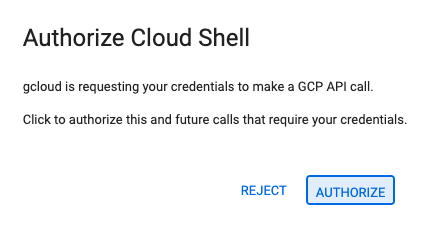
- 今日、承認を求められた場合は、[承認] をクリックして続行します。
- 画面の下部にターミナルが表示されない場合は、次の手順で開きます。
- [表示] をクリックします。
- [Terminal]
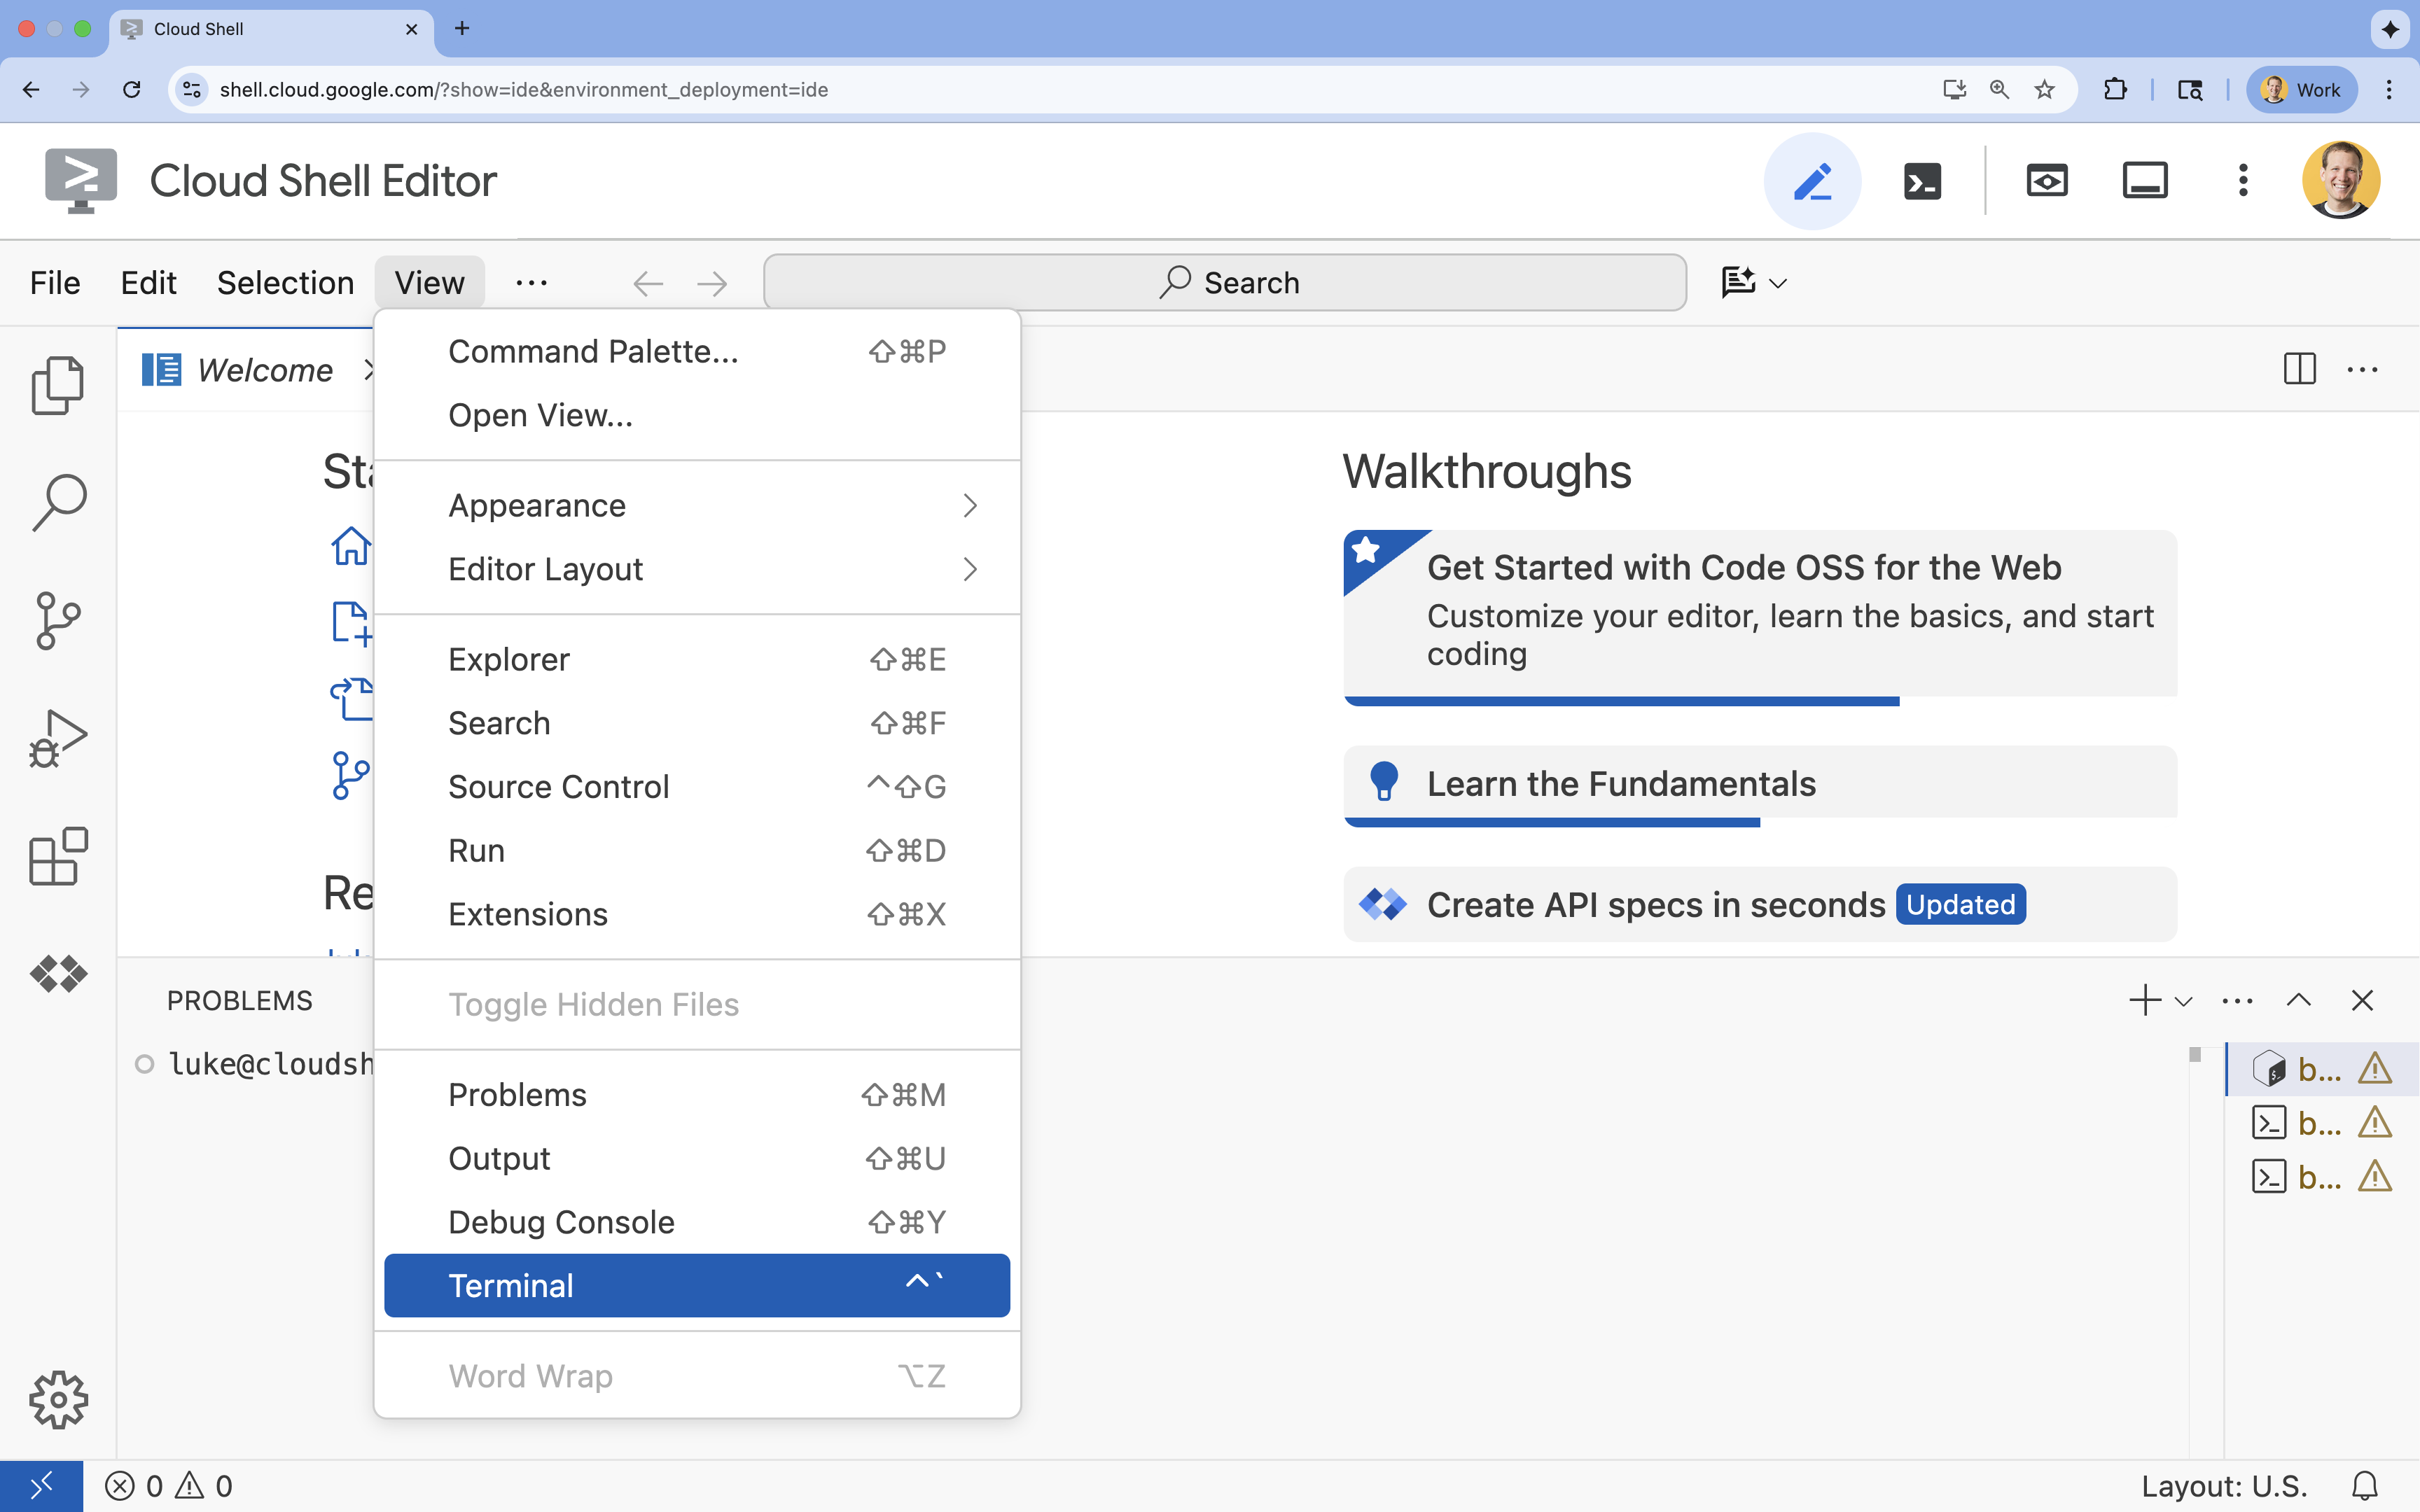 をクリックします。
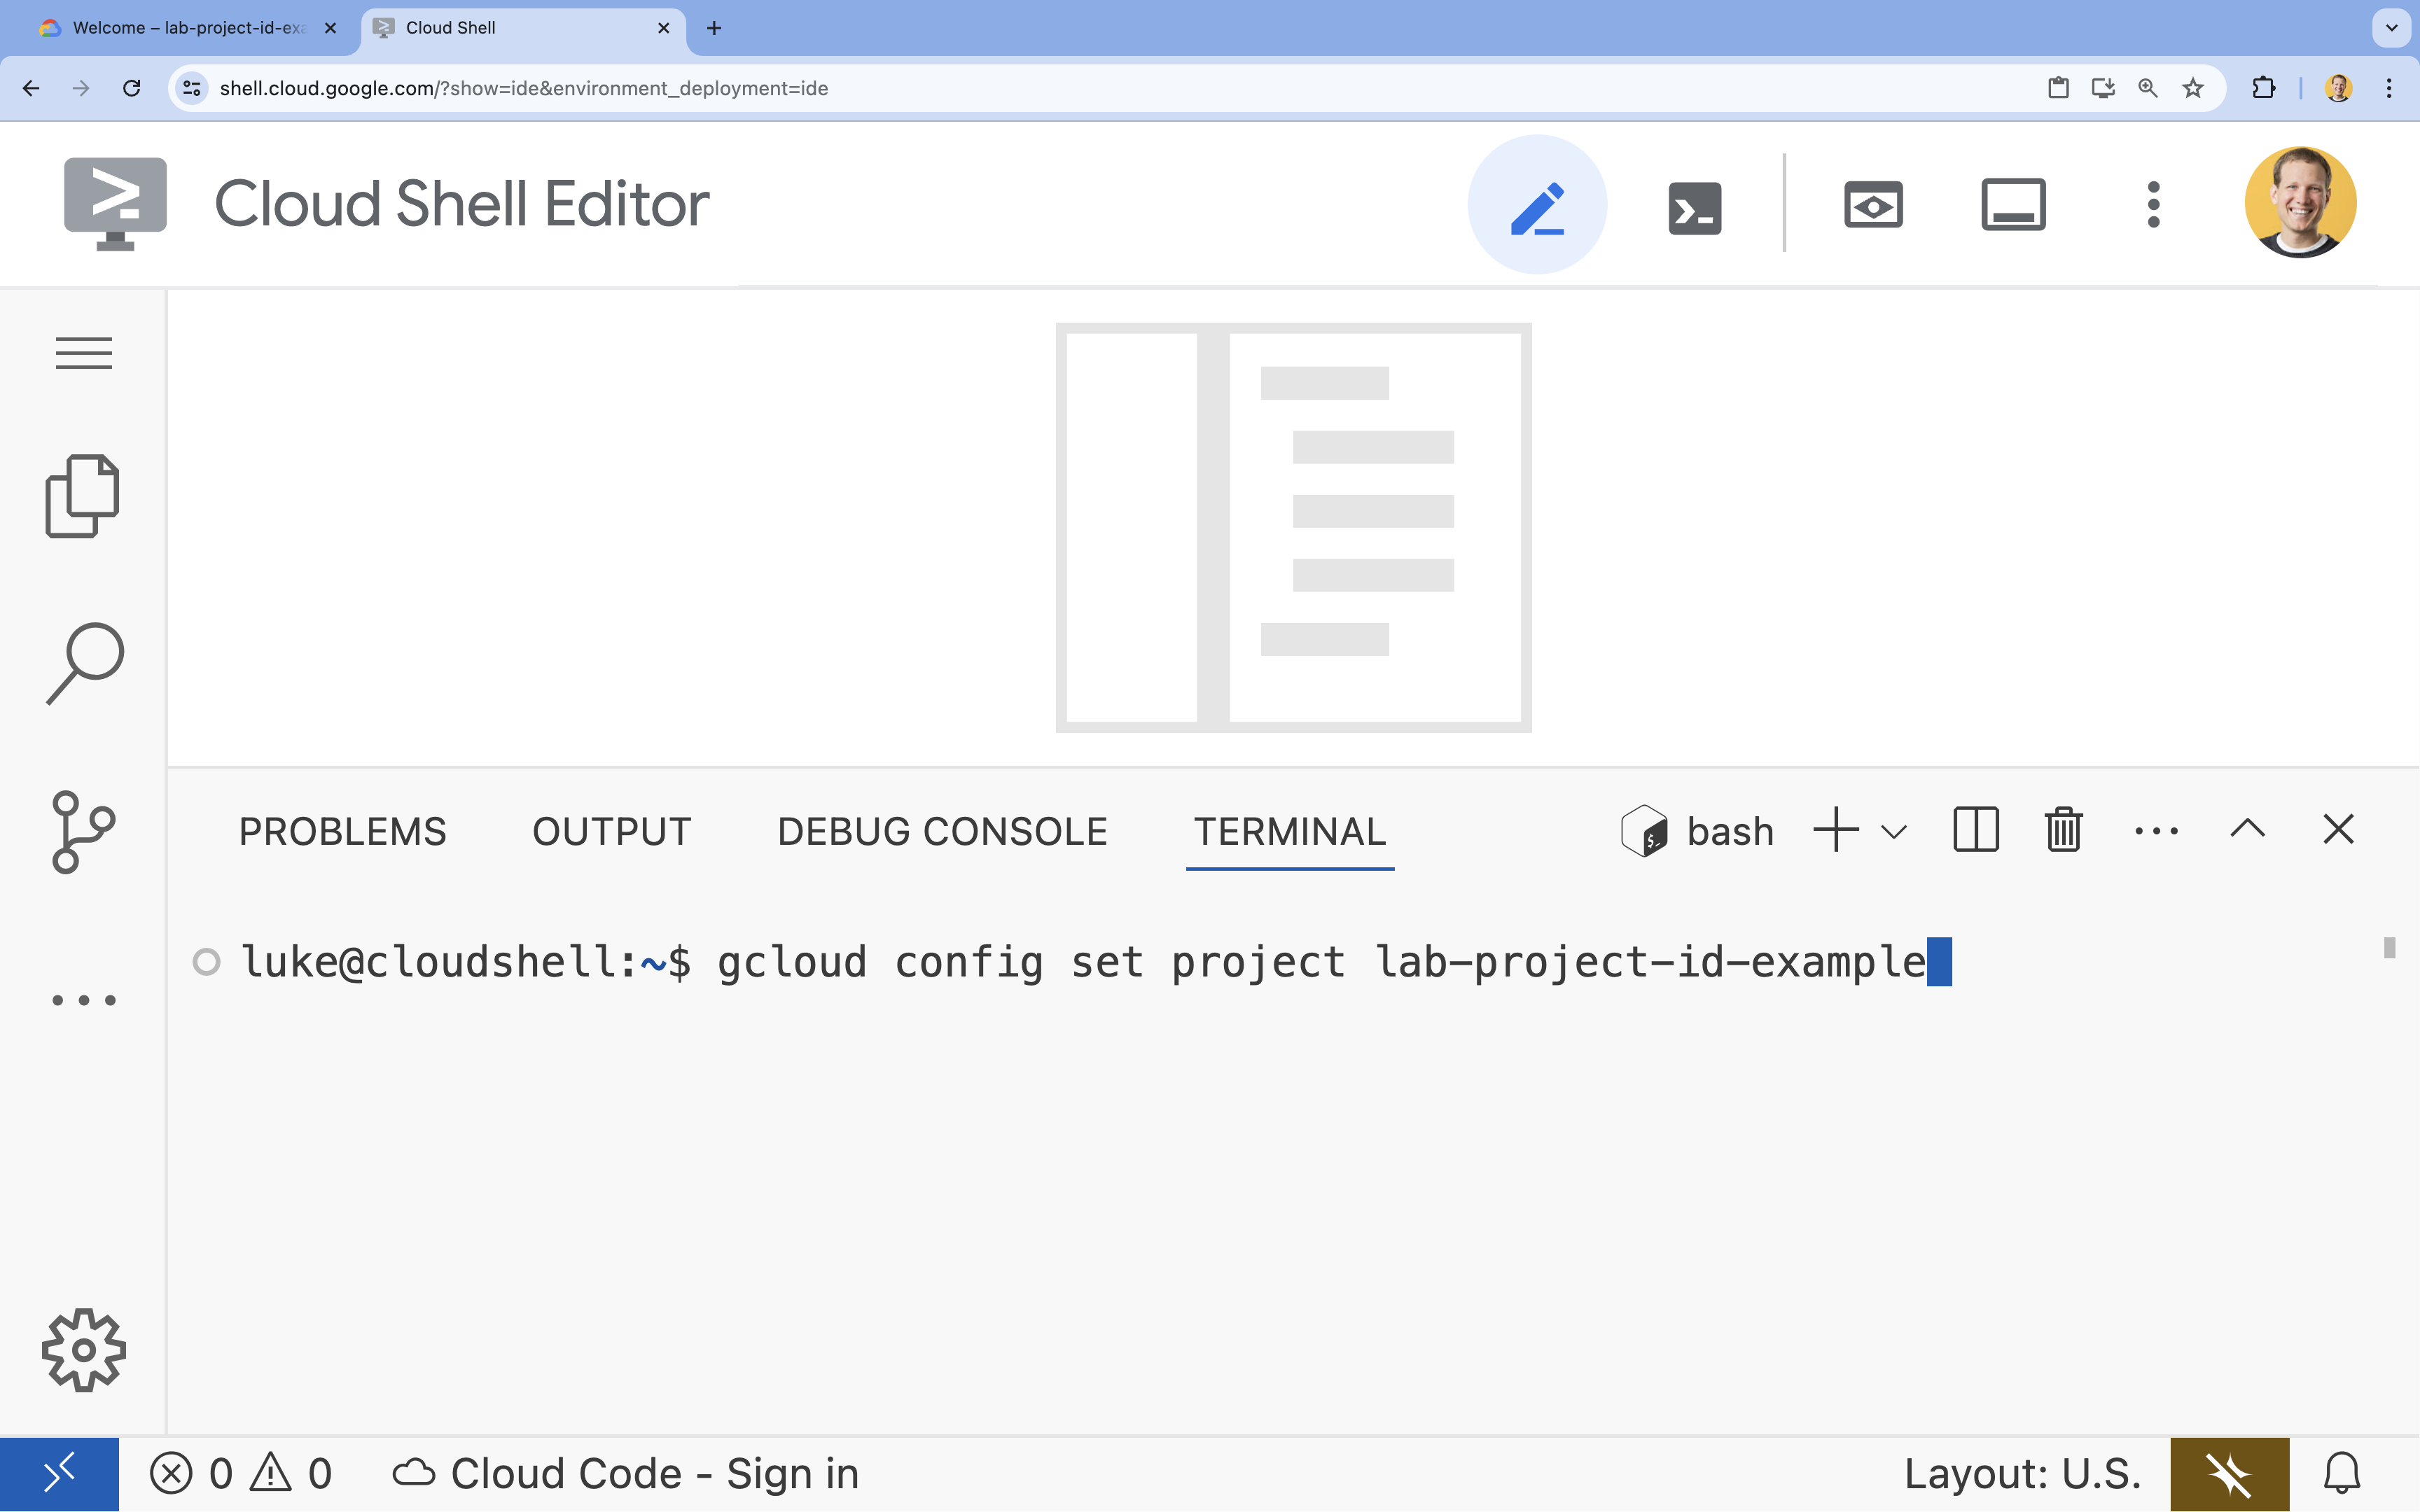
- ターミナルで、次のコマンドを使用してプロジェクトを設定します。
- 形式:
gcloud config set project [PROJECT_ID] - 例:
gcloud config set project lab-project-id-example - プロジェクト ID がわからない場合は、
- 次のコマンドでプロジェクト ID の一覧を表示できます。
gcloud projects list | awk '/PROJECT_ID/{print $2}'
- 次のコマンドでプロジェクト ID の一覧を表示できます。
- 形式:
- 次のようなメッセージが表示されます。
Updated property [core/project].
WARNINGが表示され、Do you want to continue (Y/n)?と尋ねられた場合は、プロジェクト ID が正しく入力されていない可能性があります。nを押してEnterを押し、gcloud config set projectコマンドをもう一度実行してください。
4. API を有効にする
ターミナルで、API を有効にします。
gcloud services enable \
  run.googleapis.com \
  artifactregistry.googleapis.com \
  cloudbuild.googleapis.com
承認を求められたら、[承認] をクリックして続行します。
このコマンドの完了には数分かかる場合がありますが、最終的には次のような成功メッセージが表示されます。
Operation "operations/acf.p2-73d90d00-47ee-447a-b600" finished successfully.
5. Python プロジェクトを準備する
mcp-on-cloudrunという名前のフォルダを作成して、デプロイ用のソースコードを保存します。mkdir mcp-on-cloudrun && cd mcp-on-cloudrunuvツールを使用して Python プロジェクトを作成し、pyproject.tomlファイルを生成します。uv init --description "Example of deploying an MCP server on Cloud Run" --bare --python 3.13uv initコマンドは、プロジェクトのpyproject.tomlファイルを作成します。ファイルの内容を表示するには、次のコマンドを実行します。cat pyproject.toml[project] name = "mcp-on-cloudrun" version = "0.1.0" description = "Example of deploying an MCP server on Cloud Run" requires-python = ">=3.13" dependencies = []
6. 動物園 MCP サーバーを作成する
LLM の使用を改善するための重要なコンテキストを MCP によって提供するには、FastMCP(Model Context Protocol を操作するための標準フレームワーク)を使用して動物園 MCP サーバーを設定します。FastMCP は、Python で MCP のサーバーとクライアントを迅速に構築するためのツールです。この MCP サーバーは、架空の動物園の動物に関するデータを提供します。簡単にするため、データはメモリに保存します。本番環境の MCP サーバーの場合は、データベースや API などのソースからデータを提供することをおすすめします。
- 次のコマンドを実行して、
pyproject.tomlファイルに FastMCP を依存関係として追加します。uv add fastmcp==2.12.4 --no-syncuv.lockファイルがプロジェクトに追加されます。 - MCP サーバーのソースコード用に新しい
server.pyファイルを作成して開きます。cloudshell edit ~/mcp-on-cloudrun/server.pycloudshell editコマンドを実行すると、ターミナルの上のエディタでserver.pyファイルが開きます。 server.pyファイルに次の動物園 MCP サーバーのソースコードを追加します。import asyncio import logging import os from typing import List, Dict, Any from fastmcp import FastMCP logger = logging.getLogger(__name__) logging.basicConfig(format="[%(levelname)s]: %(message)s", level=logging.INFO) mcp = FastMCP("Zoo Animal MCP Server 🦁🐧🐻") # Dictionary of animals at the zoo ZOO_ANIMALS = [ { "species": "lion", "name": "Leo", "age": 7, "enclosure": "The Big Cat Plains", "trail": "Savannah Heights" }, { "species": "lion", "name": "Nala", "age": 6, "enclosure": "The Big Cat Plains", "trail": "Savannah Heights" }, { "species": "lion", "name": "Simba", "age": 3, "enclosure": "The Big Cat Plains", "trail": "Savannah Heights" }, { "species": "lion", "name": "King", "age": 8, "enclosure": "The Big Cat Plains", "trail": "Savannah Heights" }, { "species": "penguin", "name": "Waddles", "age": 2, "enclosure": "The Arctic Exhibit", "trail": "Polar Path" }, { "species": "penguin", "name": "Pip", "age": 4, "enclosure": "The Arctic Exhibit", "trail": "Polar Path" }, { "species": "penguin", "name": "Skipper", "age": 5, "enclosure": "The Arctic Exhibit", "trail": "Polar Path" }, { "species": "penguin", "name": "Chilly", "age": 3, "enclosure": "The Arctic Exhibit", "trail": "Polar Path" }, { "species": "penguin", "name": "Pingu", "age": 6, "enclosure": "The Arctic Exhibit", "trail": "Polar Path" }, { "species": "penguin", "name": "Noot", "age": 1, "enclosure": "The Arctic Exhibit", "trail": "Polar Path" }, { "species": "elephant", "name": "Ellie", "age": 15, "enclosure": "The Pachyderm Sanctuary", "trail": "Savannah Heights" }, { "species": "elephant", "name": "Peanut", "age": 12, "enclosure": "The Pachyderm Sanctuary", "trail": "Savannah Heights" }, { "species": "elephant", "name": "Dumbo", "age": 5, "enclosure": "The Pachyderm Sanctuary", "trail": "Savannah Heights" }, { "species": "elephant", "name": "Trunkers", "age": 10, "enclosure": "The Pachyderm Sanctuary", "trail": "Savannah Heights" }, { "species": "bear", "name": "Smokey", "age": 10, "enclosure": "The Grizzly Gulch", "trail": "Polar Path" }, { "species": "bear", "name": "Grizzly", "age": 8, "enclosure": "The Grizzly Gulch", "trail": "Polar Path" }, { "species": "bear", "name": "Barnaby", "age": 6, "enclosure": "The Grizzly Gulch", "trail": "Polar Path" }, { "species": "bear", "name": "Bruin", "age": 12, "enclosure": "The Grizzly Gulch", "trail": "Polar Path" }, { "species": "giraffe", "name": "Gerald", "age": 4, "enclosure": "The Tall Grass Plains", "trail": "Savannah Heights" }, { "species": "giraffe", "name": "Longneck", "age": 5, "enclosure": "The Tall Grass Plains", "trail": "Savannah Heights" }, { "species": "giraffe", "name": "Patches", "age": 3, "enclosure": "The Tall Grass Plains", "trail": "Savannah Heights" }, { "species": "giraffe", "name": "Stretch", "age": 6, "enclosure": "The Tall Grass Plains", "trail": "Savannah Heights" }, { "species": "antelope", "name": "Speedy", "age": 2, "enclosure": "The Tall Grass Plains", "trail": "Savannah Heights" }, { "species": "antelope", "name": "Dash", "age": 3, "enclosure": "The Tall Grass Plains", "trail": "Savannah Heights" }, { "species": "antelope", "name": "Gazelle", "age": 4, "enclosure": "The Tall Grass Plains", "trail": "Savannah Heights" }, { "species": "antelope", "name": "Swift", "age": 5, "enclosure": "The Tall Grass Plains", "trail": "Savannah Heights" }, { "species": "polar bear", "name": "Snowflake", "age": 7, "enclosure": "The Arctic Exhibit", "trail": "Polar Path" }, { "species": "polar bear", "name": "Blizzard", "age": 5, "enclosure": "The Arctic Exhibit", "trail": "Polar Path" }, { "species": "polar bear", "name": "Iceberg", "age": 9, "enclosure": "The Arctic Exhibit", "trail": "Polar Path" }, { "species": "walrus", "name": "Wally", "age": 10, "enclosure": "The Walrus Cove", "trail": "Polar Path" }, { "species": "walrus", "name": "Tusker", "age": 12, "enclosure": "The Walrus Cove", "trail": "Polar Path" }, { "species": "walrus", "name": "Moby", "age": 8, "enclosure": "The Walrus Cove", "trail": "Polar Path" }, { "species": "walrus", "name": "Flippers", "age": 9, "enclosure": "The Walrus Cove", "trail": "Polar Path" } ] @mcp.tool() def get_animals_by_species(species: str) -> List[Dict[str, Any]]: """ Retrieves all animals of a specific species from the zoo. Can also be used to collect the base data for aggregate queries of animals of a specific species - like counting the number of penguins or finding the oldest lion. Args: species: The species of the animal (e.g., 'lion', 'penguin'). Returns: A list of dictionaries, where each dictionary represents an animal and contains details like name, age, enclosure, and trail. """ logger.info(f">>> 🛠️ Tool: 'get_animals_by_species' called for '{species}'") return [animal for animal in ZOO_ANIMALS if animal["species"].lower() == species.lower()] @mcp.tool() def get_animal_details(name: str) -> Dict[str, Any]: """ Retrieves the details of a specific animal by its name. Args: name: The name of the animal. Returns: A dictionary with the animal's details (species, name, age, enclosure, trail) or an empty dictionary if the animal is not found. """ logger.info(f">>> 🛠️ Tool: 'get_animal_details' called for '{name}'") for animal in ZOO_ANIMALS: if animal["name"].lower() == name.lower(): return animal return {} if __name__ == "__main__": port = int(os.getenv("PORT", 8080)) logger.info(f"🚀 MCP server started on port {port}") asyncio.run( mcp.run_async( transport="http", host="0.0.0.0", port=port, ) )
コードが完成しました。MCP サーバーを Cloud Run にデプロイします。
7. Cloud Run へのデプロイ
ソースコードから直接、MCP サーバーを Cloud Run にデプロイします。
- Cloud Run にデプロイするための新しい
Dockerfileを作成して開きます。cloudshell edit ~/mcp-on-cloudrun/Dockerfile uvツールを使用してserver.pyファイルを実行するため、Dockerfile に次のコードを追加します。# Use the official Python image FROM python:3.13-slim # Install uv COPY --from=ghcr.io/astral-sh/uv:latest /uv /uvx /bin/ # Install the project into /app COPY . /app WORKDIR /app # Allow statements and log messages to immediately appear in the logs ENV PYTHONUNBUFFERED=1 # Install dependencies RUN uv sync EXPOSE $PORT # Run the FastMCP server CMD ["uv", "run", "server.py"]mcp-server-saという名前のサービス アカウントを作成します。gcloud iam service-accounts create mcp-server-sa --display-name="MCP Server Service Account"gcloudコマンドを実行して、アプリケーションを Cloud Run にデプロイします。cd ~/mcp-on-cloudrun gcloud run deploy zoo-mcp-server \ --service-account=mcp-server-sa@$GOOGLE_CLOUD_PROJECT.iam.gserviceaccount.com \ --no-allow-unauthenticated \ --region=us-west1 \ --source=. \ --labels=dev-tutorial=codelab-mcp--no-allow-unauthenticatedフラグを使用して、認証を必須にします。これはセキュリティ上の理由から重要です。認証を必須にしない場合、誰でも MCP サーバーを呼び出すことができ、システムに損害を与える可能性があります。- 新しい Artifact Registry リポジトリの作成を確認します。ソースコードから Cloud Run にデプロイするのは初めてなので、次のように表示されます。
Deploying from source requires an Artifact Registry Docker repository to store built containers. A repository named
[cloud-run-source-deploy] in region [us-west1] will be created.

Do you want to continue (Y/n)?
Yと入力してEnterを押すと、デプロイ用の Artifact Registry リポジトリが作成されます。これは、Cloud Run サービスの MCP サーバー Docker コンテナを保存するために必要です。 - 数分後に、次のようなメッセージが表示されます。
Service [zoo-mcp-server] revision [zoo-mcp-server-12345-abc] has been deployed and is serving 100 percent of traffic.
MCP サーバーがデプロイされました。これで使用できます。
8. リモート MCP サーバーを Antigravity CLI に追加する
リモート MCP サーバーが正常にデプロイされたので、Google Code Assist や Antigravity CLI などのさまざまなアプリケーションを使用して接続できます。このセクションでは、Antigravity CLI を使用して、新しいリモート MCP サーバーへの接続を確立します。
- リモート MCP サーバーを呼び出す権限をユーザー アカウントに付与します。
gcloud projects add-iam-policy-binding $GOOGLE_CLOUD_PROJECT \ --member=user:$(gcloud config get-value account) \ --role='roles/run.invoker' - Antigravity 設定ファイルで使用するために、Google Cloud 認証情報とプロジェクト番号を、次のように環境変数に保存します。
export PROJECT_NUMBER=$(gcloud projects describe $GOOGLE_CLOUD_PROJECT --format="value(projectNumber)") export ID_TOKEN=$(gcloud auth print-identity-token) .gemini/antigravity-cliフォルダがまだ作成されていない場合は作成します。mkdir -p ~/.gemini/antigravity-cli- リモート MCP サーバーを Antigravity CLI MCP 構成ファイルに書き込みます。
cat > ~/.gemini/antigravity-cli/mcp_config.json << EOF { "mcpServers": { "zoo-remote": { "serverUrl": "https://zoo-mcp-server-${PROJECT_NUMBER}.us-west1.run.app/mcp", "headers": { "Authorization": "Bearer ${ID_TOKEN}" } } } } EOF - Antigravity CLI を起動します。
agy
- Antigravity CLI で認証します。最初の起動時に認証が必要です。OAuth を選択します(
Enterを押します)。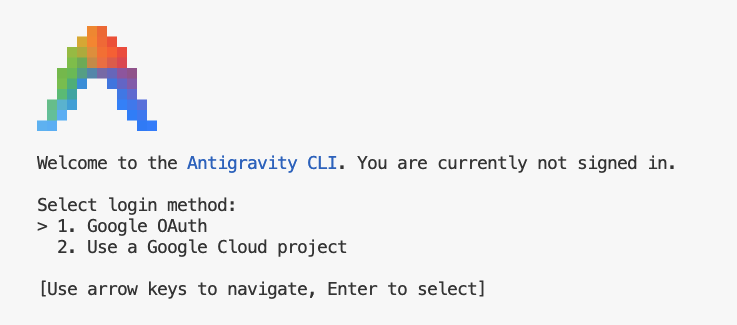
- リンクをクリックします(クリックできない場合は、Cloud Shell で URL をハイライトしてコピーし、ブラウザに貼り付けます)。
- Google アカウントにログインする
- コードをコピーする
- コードを Cloud Shell エディタのターミナルに貼り付けます。
- [Press].
Enter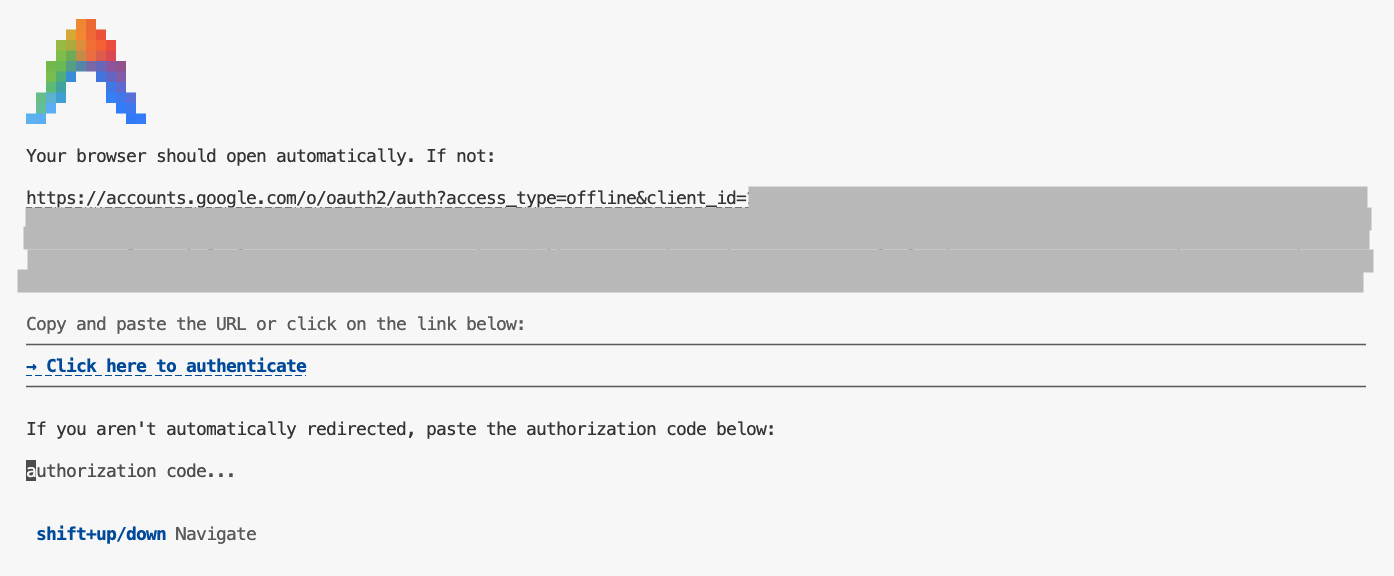
Enterを押して、デフォルト設定を適用します。- Antigravity CLI に、コンテキスト内で使用可能な MCP ツールのリストを表示させます。
/mcpESCを押してプロンプト ボックスに戻ります。 - 動物園で何かを探すよう、Antigravity CLI に次のように依頼します。
Where can I find penguins?zoo-remoteMCP サーバーを使用することを認識し、MCP の実行を許可するかどうかを尋ねます。 - 下矢印キーを押して
Enterを押して選択します。Yes, always allow all tools from server "zoo-remote"
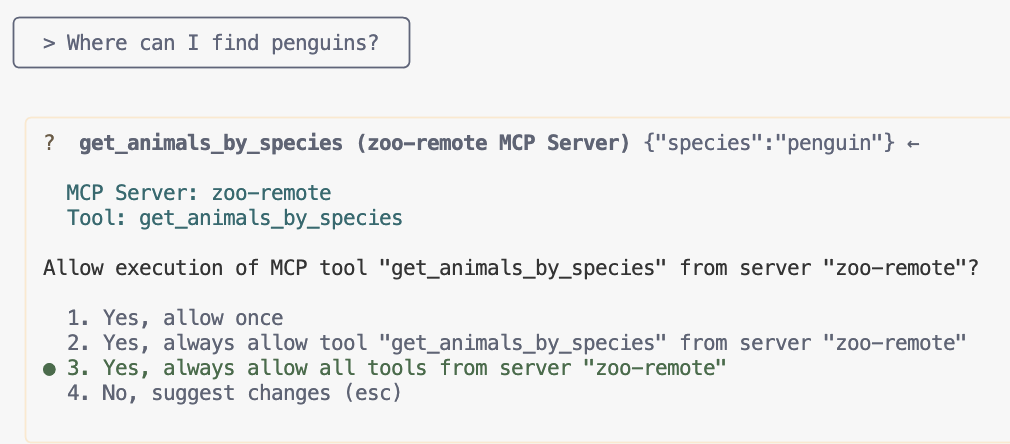
出力には正しい回答と、MCP サーバーが使用されたことを示すディスプレイ ボックスが表示されます。
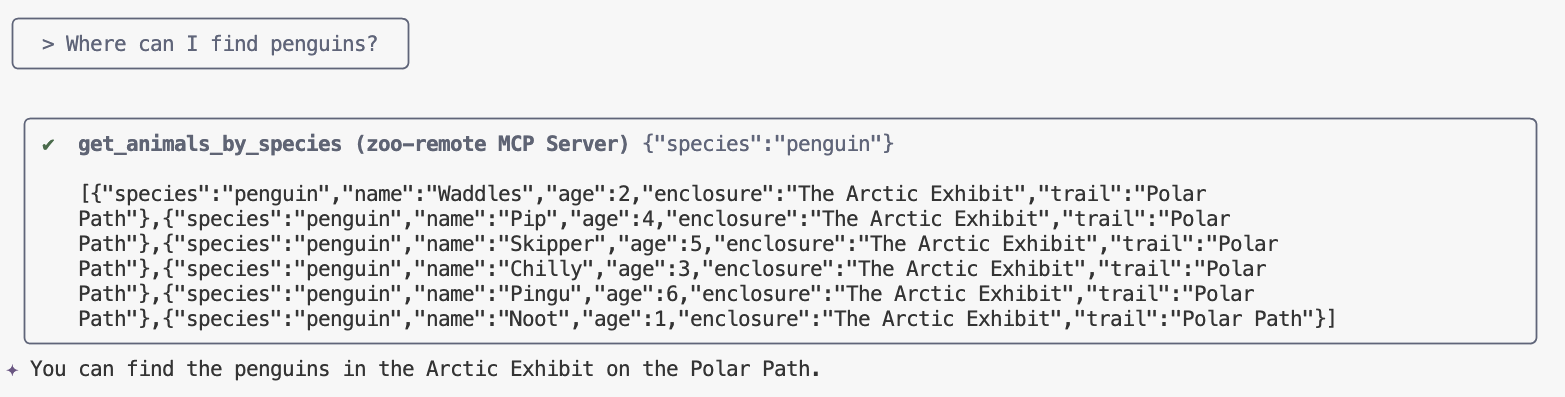
これで完了です。リモート MCP サーバーを Cloud Run にデプロイし、Antigravity CLI を使用してテストしました。
セッションを終了する準備ができたら、/exit と入力して Enter を押して Antigravity CLI を終了します。
デバッグ
次のようなエラーが表示された場合:
🔍 Attempting OAuth discovery for 'zoo-remote'...
❌ 'zoo-remote' requires authentication but no OAuth configuration found
Error connecting to MCP server 'zoo-remote': MCP server 'zoo-remote' requires authentication. Please configure OAuth or check server settings.
ID トークンがタイムアウトし、ID_TOKEN を再度設定する必要がある可能性があります。
/exitと入力してEnterを押して Antigravity CLI を終了します。- ターミナルでプロジェクトを設定します。
gcloud config set project [PROJECT_ID] - Google Cloud 認証情報コマンドを再実行して、期限切れになっている可能性がある新しい
ID_TOKENを取得し、構成ファイルを書き換えます。export PROJECT_NUMBER=$(gcloud projects describe $GOOGLE_CLOUD_PROJECT --format="value(projectNumber)") export ID_TOKEN=$(gcloud auth print-identity-token) cat > ~/.gemini/antigravity-cli/mcp_config.json << EOF
{ "mcpServers": { "zoo-remote": { "serverUrl": "https://zoo-mcp-server-${PROJECT_NUMBER}.us-west1.run.app/mcp", "headers": { "Authorization": "Bearer ${ID_TOKEN}" } } } } EOF ```
9. (省略可)サーバーログでツール呼び出しを確認する
Cloud Run MCP サーバーが呼び出されたことを確認するには、サービスログを確認します。
gcloud run services logs read zoo-mcp-server --region us-west1 --limit=5
ツール呼び出しが行われたことを示す出力ログが表示されます。🛠️
2025-08-05 19:50:31 INFO: 169.254.169.126:39444 - "POST /mcp HTTP/1.1" 200 OK 2025-08-05 19:50:31 [INFO]: Processing request of type CallToolRequest 2025-08-05 19:50:31 [INFO]: >>> 🛠️ Tool: 'get_animals_by_species' called for 'penguin'
10. (省略可)MCP プロンプトをサーバーに追加する
MCP プロンプトを使用すると、長いプロンプトの短縮形を作成することで、頻繁に実行するプロンプトのワークフローを高速化できます。
Antigravity CLI は、MCP プロンプトを カスタム スラッシュ コマンド に自動的に変換します。これにより、/prompt_name と入力して MCP プロンプトを呼び出すことができます。ここで、prompt_name は MCP プロンプトの名前です。
MCP プロンプトを作成して、Antigravity CLI に /find animal と入力することで、動物園の動物をすばやく見つけられるようにします。
- メインガード(
if __name__ == "__main__":)の上のserver.pyファイルに次のコードを追加します。@mcp.prompt() def find(animal: str) -> str: """ Find which exhibit and trail a specific animal might be located. """ return ( f"Please find the exhibit and trail information for {animal} in the zoo. " f"Respond with '[animal] can be found in the [exhibit] on the [trail].'" f"Example: Penguins can be found in The Arctic Exhibit on the Polar Path." ) - アプリケーションを Cloud Run に再デプロイします。
gcloud run deploy zoo-mcp-server \ --region=us-west1 \ --source=. \ --labels=dev-tutorial=codelab-mcp - ID_TOKEN を更新して、構成ファイルを再作成します。
export ID_TOKEN=$(gcloud auth print-identity-token) export PROJECT_NUMBER=$(gcloud projects describe $GOOGLE_CLOUD_PROJECT --format="value(projectNumber)") cat > ~/.gemini/antigravity-cli/mcp_config.json << EOF
{ "mcpServers": { "zoo-remote": { "serverUrl": "https://zoo-mcp-server-${PROJECT_NUMBER}.us-west1.run.app/mcp", "headers": { "Authorization": "Bearer ${ID_TOKEN}" } } } } EOF ```
- アプリケーションの新しいバージョンがデプロイされたら、Antigravity CLI を起動します。
agy - プロンプトで、作成した新しいカスタム コマンドを使用します。
/find lions
Antigravity CLI が get_animals_by_species ツールを呼び出し、MCP プロンプトの指示に従ってレスポンスをフォーマットしていることがわかります。
╭───────────────────────────╮
│ > /find lions │
╰───────────────────────────╯
╭───────────────────────────────────────────────────────────────────────────────────────────────────╮
│ ✔ get_animals_by_species (zoo-remote MCP Server) get_animals_by_species (zoo-remote MCP Server) │
│ │
│ [{"species":"lion","name":"Leo","age":7,"enclosure":"The Big Cat │
│ Plains","trail":"Savannah │
│ Heights"},{"species":"lion","name":"Nala","age":6,"enclosure":"The Big Cat │
│ Plains","trail":"Savannah │
│ Heights"},{"species":"lion","name":"Simba","age":3,"enclosure":"The Big Cat │
│ Plains","trail":"Savannah │
│ Heights"},{"species":"lion","name":"King","age":8,"enclosure":"The Big Cat │
│ Plains","trail":"Savannah Heights"}] │
╰───────────────────────────────────────────────────────────────────────────────────────────────────╯
✦ Lions can be found in The Big Cat Plains on the Savannah Heights.
11. (省略可)Gemini Flash Lite を使用してレスポンスを高速化する
Antigravity CLI では、使用するモデルと労力を選択できます。
動物園の動物の検索に関連するリクエストでは思考や推論が必要ないため、より高速なモデルを使用して処理を高速化します。
前のセクションでは、MCP プロンプトを作成して、Antigravity CLI に /find animal と入力することで、動物園の動物をすばやく見つけられるようにしました。
- アプリケーションの新しいバージョンがデプロイされたら、Antigravity CLI を起動します。
agy --model=gemini-3.6-flash --effort=low - プロンプトで、作成した新しいカスタム コマンドを使用します。
/find lions
Antigravity CLI が get_animals_by_species ツールを呼び出し、MCP プロンプトの指示に従ってレスポンスをフォーマットしていることがわかりますが、回答がはるかに速く表示されます。
╭───────────────────────────╮
│ > /find lions │
╰───────────────────────────╯
╭───────────────────────────────────────────────────────────────────────────────────────────────────╮
│ ✔ get_animals_by_species (zoo-remote MCP Server) get_animals_by_species (zoo-remote MCP Server) │
│ │
│ [{"species":"lion","name":"Leo","age":7,"enclosure":"The Big Cat │
│ Plains","trail":"Savannah │
│ Heights"},{"species":"lion","name":"Nala","age":6,"enclosure":"The Big Cat │
│ Plains","trail":"Savannah │
│ Heights"},{"species":"lion","name":"Simba","age":3,"enclosure":"The Big Cat │
│ Plains","trail":"Savannah │
│ Heights"},{"species":"lion","name":"King","age":8,"enclosure":"The Big Cat │
│ Plains","trail":"Savannah Heights"}] │
╰───────────────────────────────────────────────────────────────────────────────────────────────────╯
✦ Lions can be found in The Big Cat Plains on the Savannah Heights.
デバッグ
次のようなエラーが表示された場合:
✕ Unknown command: /find lions
/mcp を実行して zoo-remote - Disconnected が出力された場合は、再デプロイするか、次のコマンドをもう一度実行する必要があります。
gcloud projects add-iam-policy-binding $GOOGLE_CLOUD_PROJECT \
--member=user:$(gcloud config get-value account) \
--role='roles/run.invoker'
export PROJECT_NUMBER=$(gcloud projects describe $GOOGLE_CLOUD_PROJECT --format="value(projectNumber)")
export ID_TOKEN=$(gcloud auth print-identity-token)

cat > ~/.gemini/antigravity-cli/mcp_config.json << EOF
{
"mcpServers": {
"zoo-remote": {
"serverUrl": "https://zoo-mcp-server-${PROJECT_NUMBER}.us-west1.run.app/mcp",
"headers": {
"Authorization": "Bearer ${ID_TOKEN}"
}
}
}
}
EOF
12. おわりに
おめでとうございます!セキュアなリモート MCP サーバーをデプロイして接続できました。
次のラボに進む
このラボは、3 部構成のシリーズの最初のラボです。2 つ目のラボでは、作成した MCP サーバーを ADK エージェントで使用します。
ADK エージェントで Cloud Run の MCP サーバーを使用する
(省略可)クリーンアップ
次のラボに進まず、作成したものをクリーンアップする場合は、Cloud プロジェクトを削除して追加料金が発生しないようにします。
サービスが使用されていない場合、Cloud Run の料金は発生しませんが、コンテナ イメージを Artifact Registry に保存すると課金される場合があります。Cloud プロジェクトを削除すると、そのプロジェクト内で使用されているすべてのリソースの課金が停止します。
必要に応じて、プロジェクトを削除します。
gcloud projects delete $GOOGLE_CLOUD_PROJECT
不要なリソースを cloudshell ディスクから削除することもできます。次のことが可能です。
- Codelab プロジェクト ディレクトリを削除します。
rm -rf ~/mcp-on-cloudrun - 事前警告:次の操作は元に戻せません。Cloud Shell のすべてのデータを削除して容量を解放する場合は、ホーム ディレクトリ全体 を削除できます。保持するすべてのデータが別の場所に保存されていることを確認してください。
sudo rm -rf $HOME