

1. 簡介
總覽
在本實驗室中,您將建構及部署 Model Context Protocol (MCP) 伺服器。MCP 伺服器可讓 LLM 存取外部工具和服務。您會在 Cloud Run 上將其設定為安全且可供正式環境使用的服務,並可從多個用戶端存取。接著,您將透過 Antigravity CLI 連線至遠端 MCP 伺服器。
學習內容
我們將使用 FastMCP 建立 zoo MCP 伺服器,其中包含 get_animals_by_species 和 get_animal_details 這兩項工具。FastMCP 提供快速的 Pythonic 方式,可建構 MCP 伺服器和用戶端。
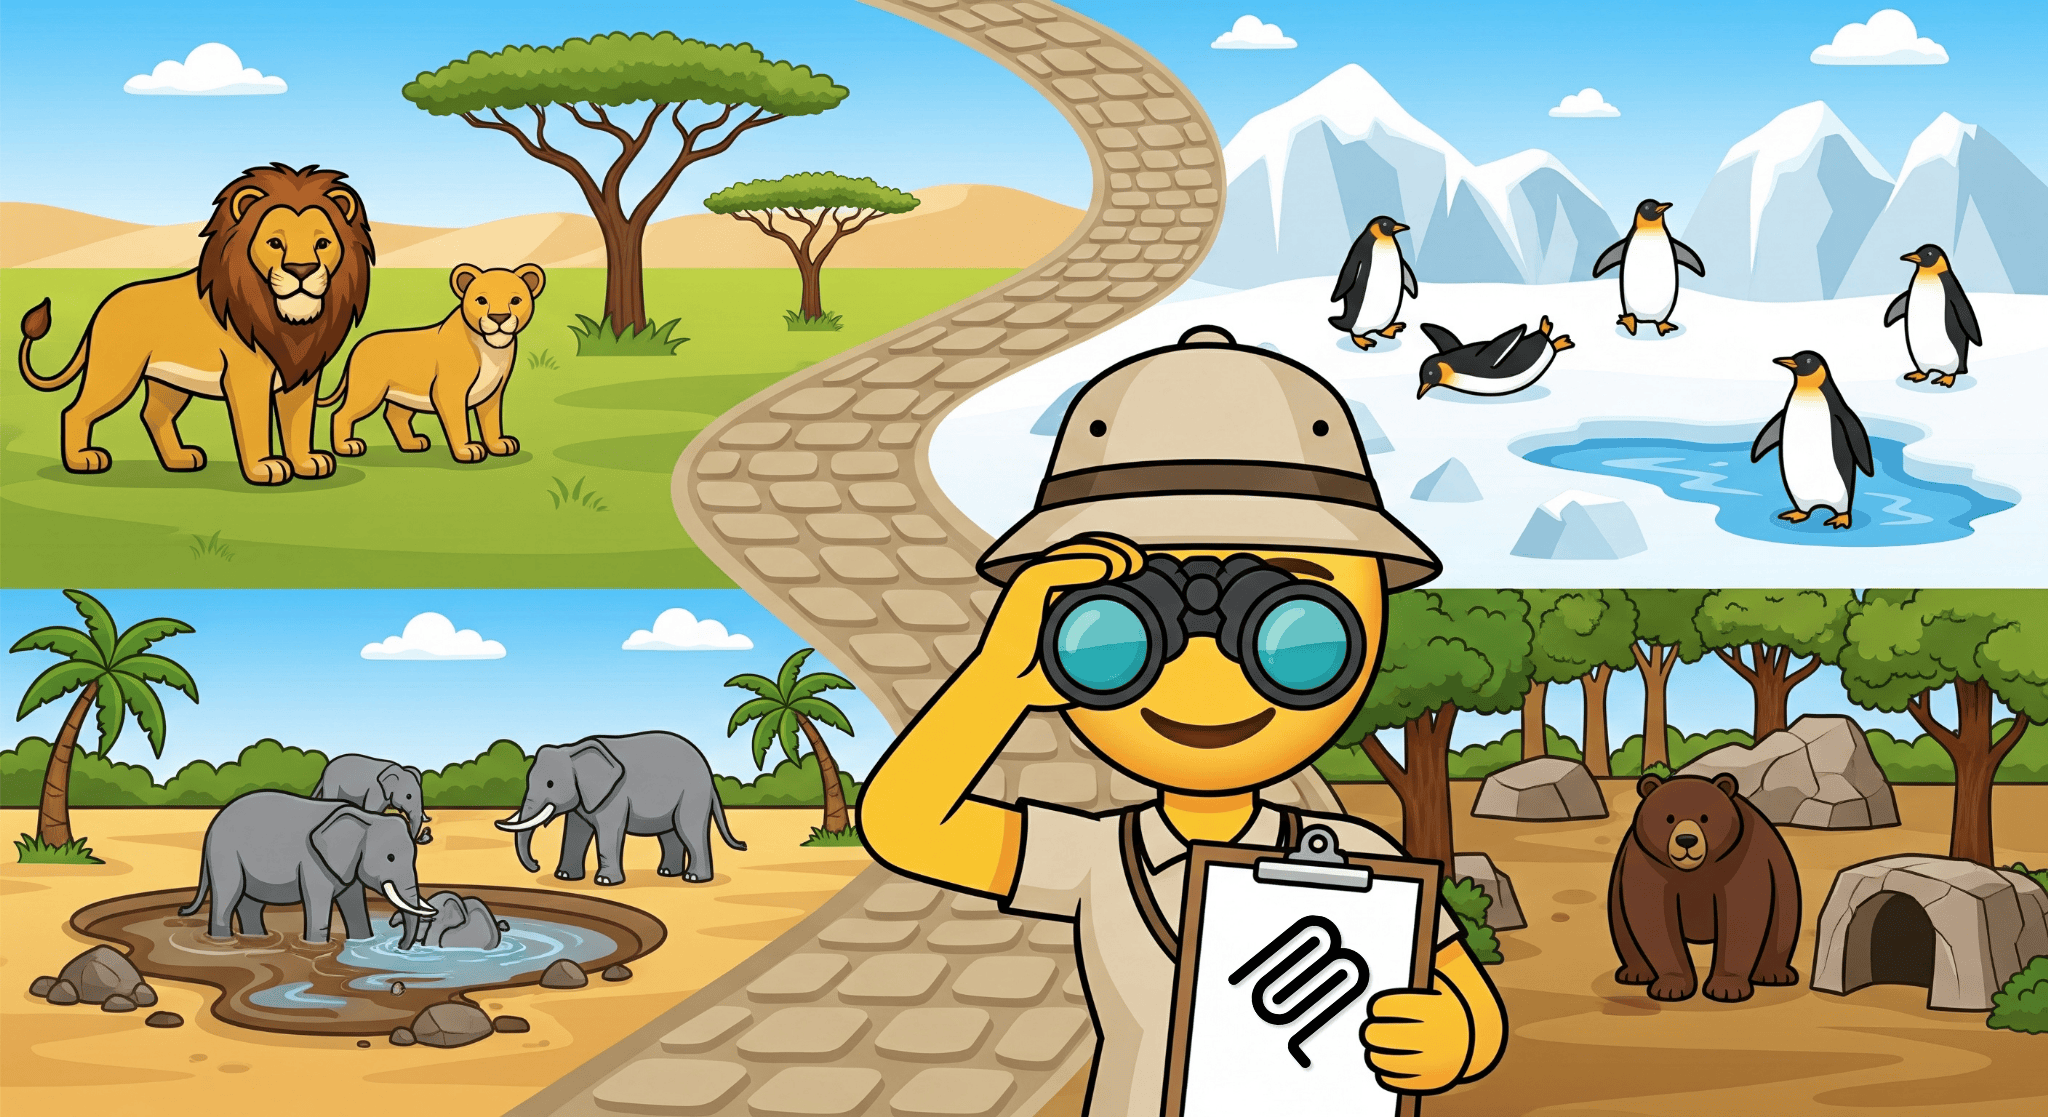
課程內容
- 將 MCP 伺服器部署至 Cloud Run。
- 為伺服器端點設定所有要求的驗證機制,確保只有授權的用戶端和代理程式可以與其通訊,藉此保護端點安全。
- 從 Antigravity CLI 連線至安全的 MCP 伺服器端點
2. 專案設定
- 如果沒有 Google 帳戶,請先建立帳戶。
- 請改用個人帳戶,而非公司或學校帳戶。公司和學校帳戶可能設有限制,導致您無法啟用本實驗室所需的 API。
- 登入 Google Cloud 控制台。
- 建立新專案,或選擇重複使用現有專案。
- 如果看到專案配額相關錯誤,請重複使用現有專案,或刪除現有專案來建立新專案。
3. 開啟 Cloud Shell 編輯器
- 按一下這個連結,直接前往 Cloud Shell 編輯器
- 如果系統在今天任何時間提示您授權,請點選「授權」繼續操作。
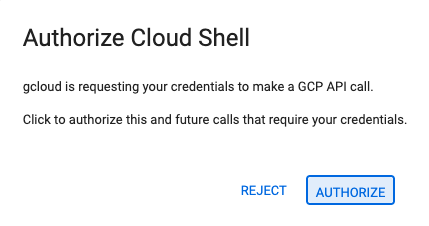
- 如果畫面底部未顯示終端機,請開啟終端機:
- 按一下「查看」
- 按一下「終端機」
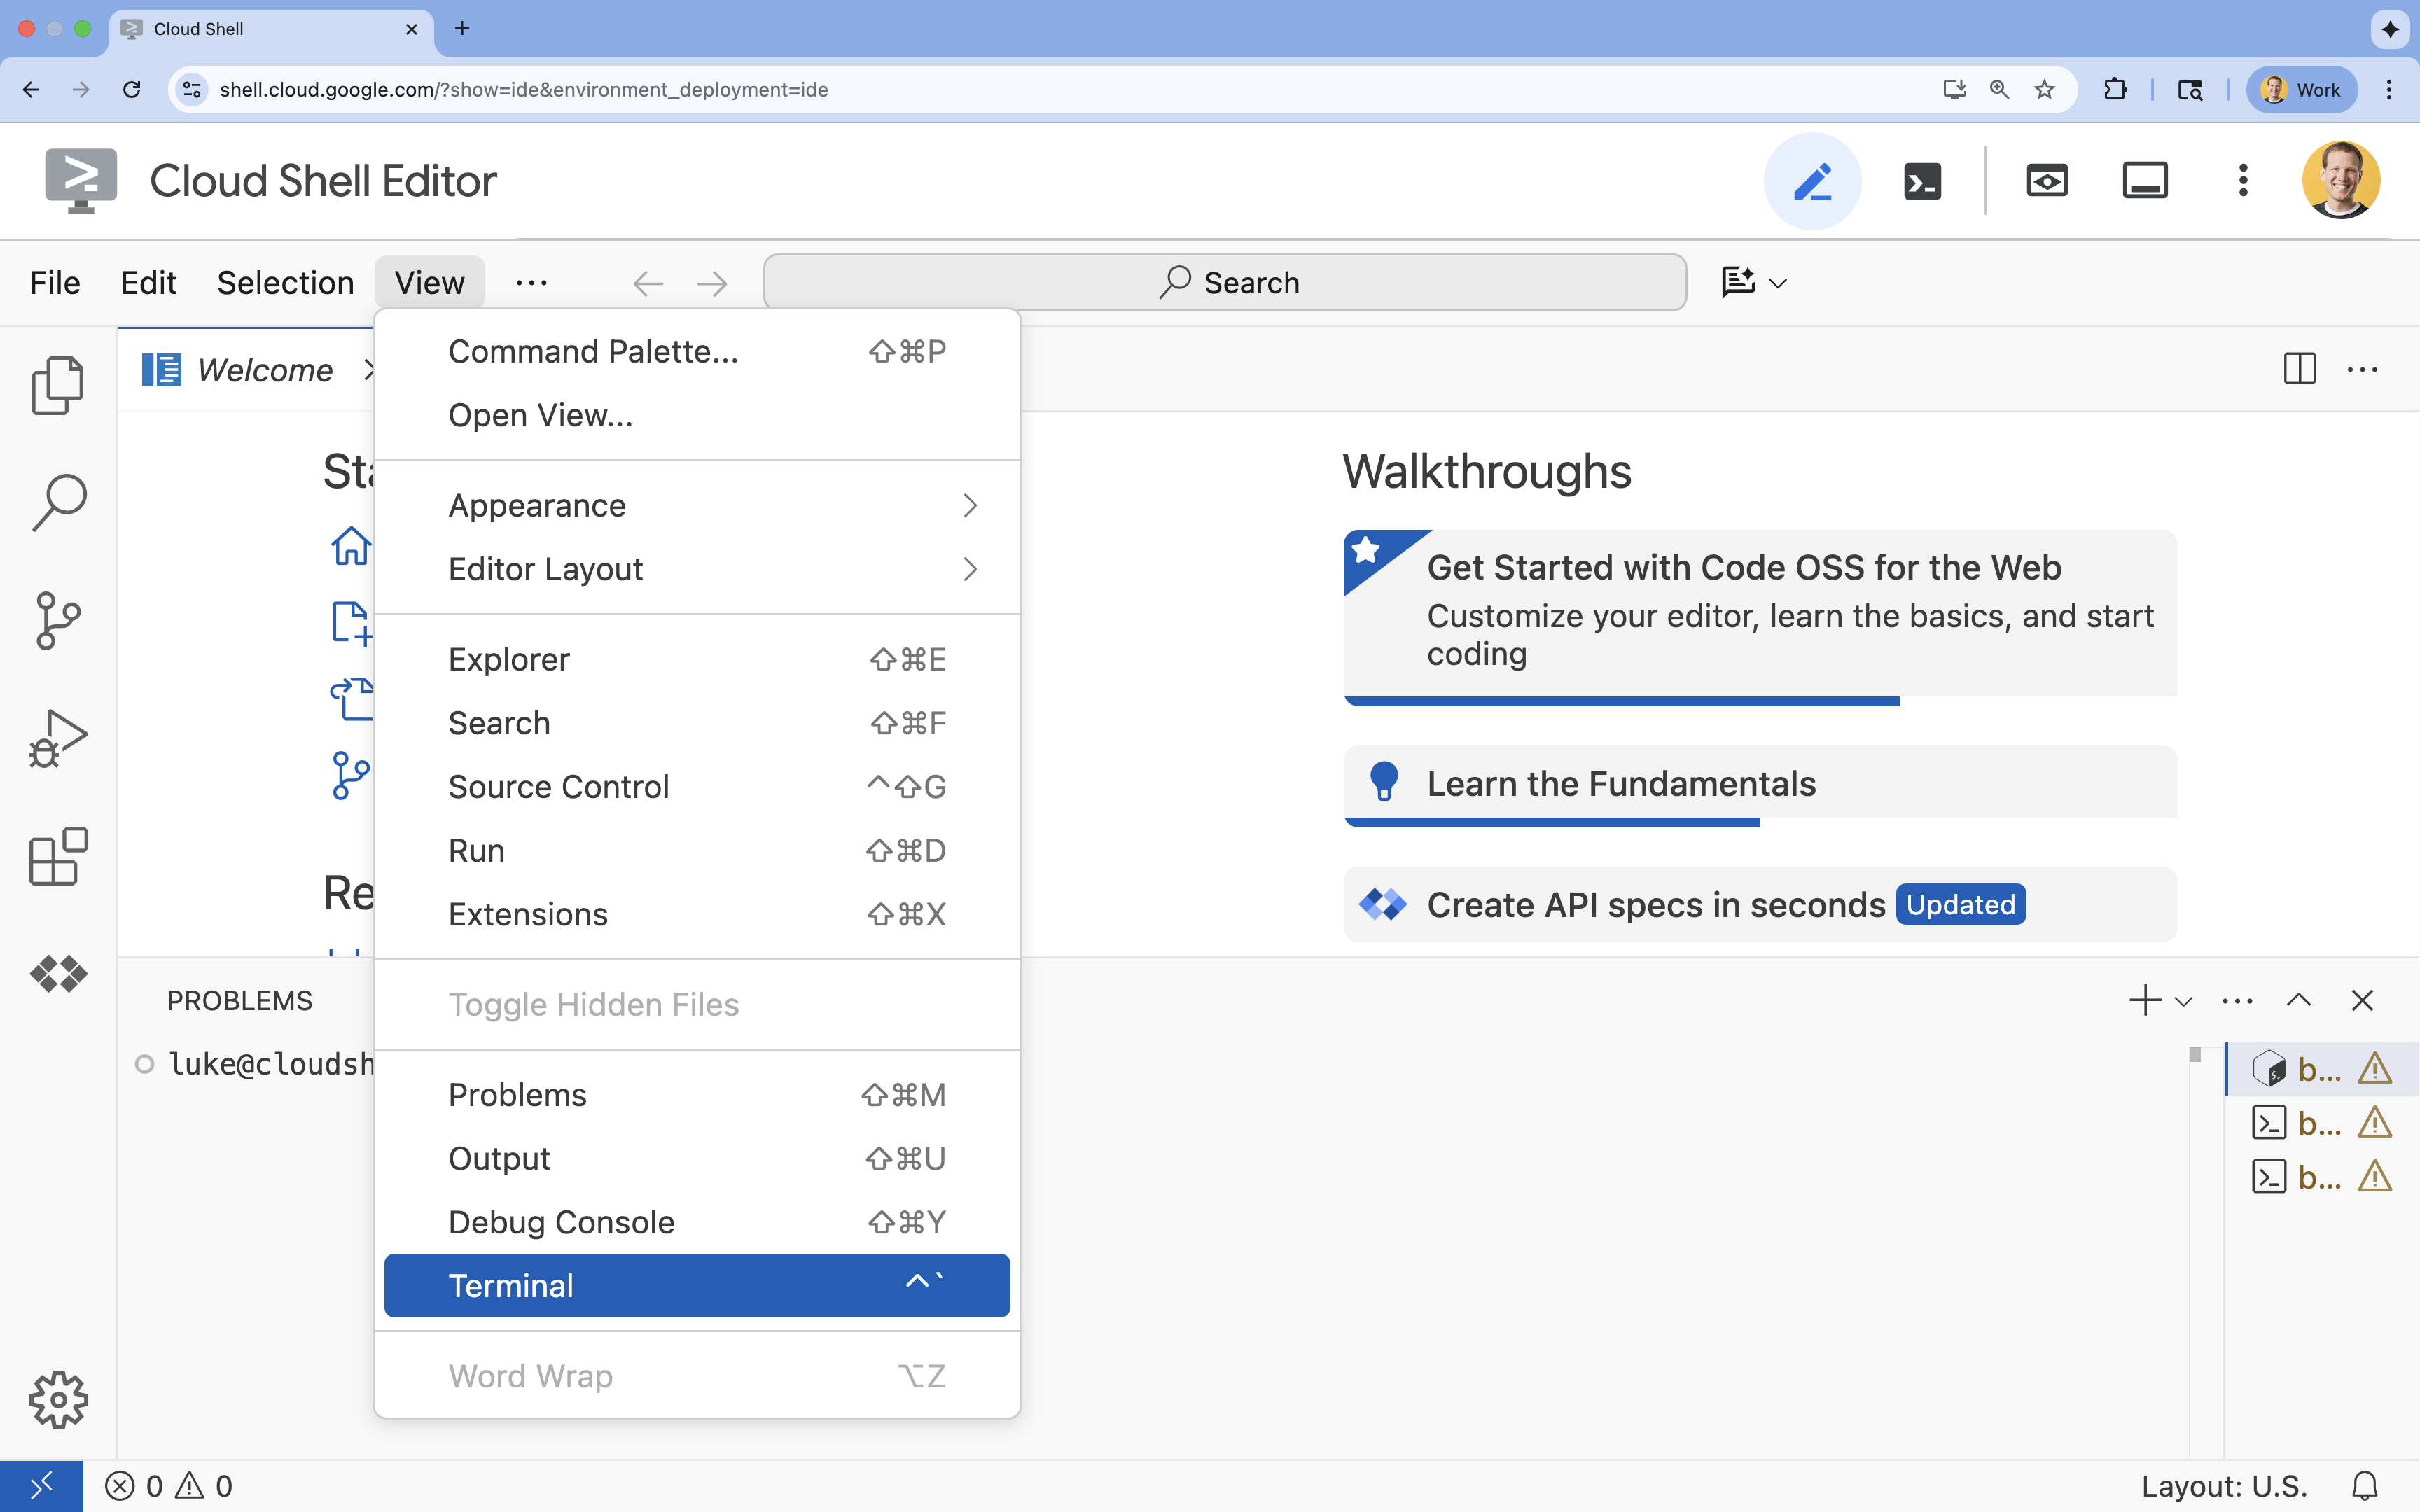
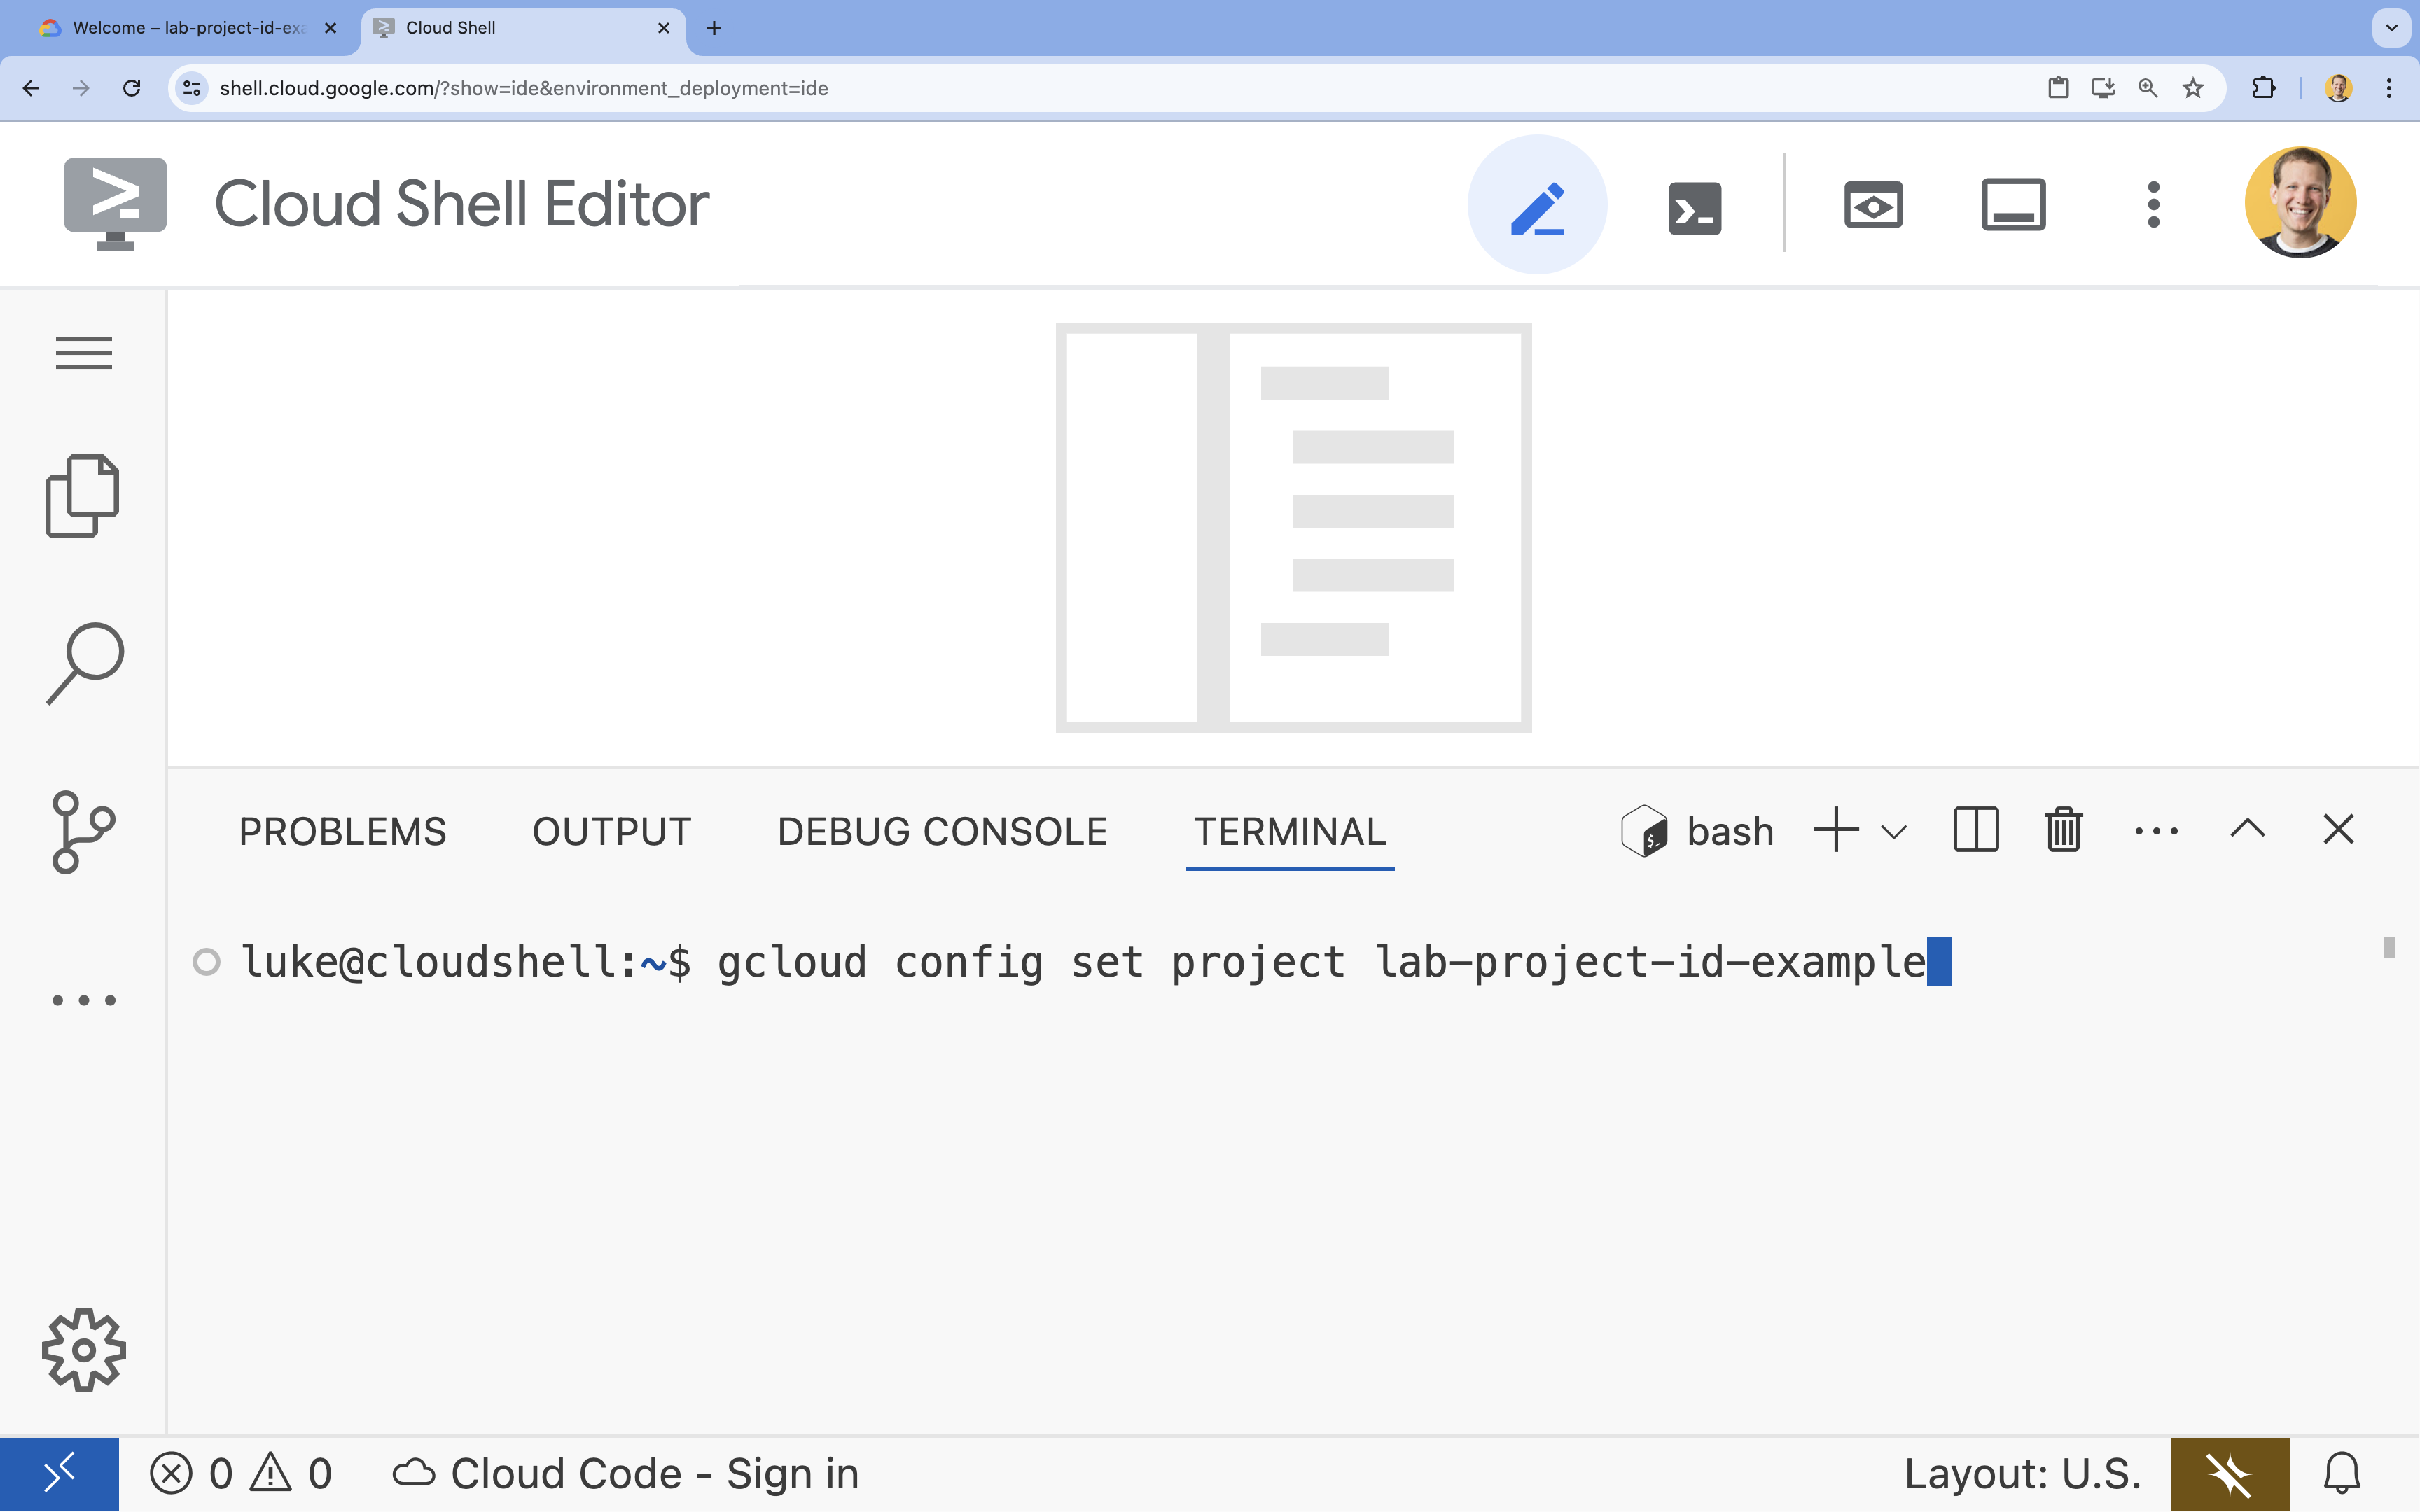
- 在終端機中,使用下列指令設定專案:
- 格式:
gcloud config set project [PROJECT_ID] - 範例:
gcloud config set project lab-project-id-example - 如果忘記專案 ID,請按照下列步驟操作:
- 您可以使用下列指令列出所有專案 ID:
gcloud projects list | awk '/PROJECT_ID/{print $2}'
- 您可以使用下列指令列出所有專案 ID:
- 格式:
- 您應會看到下列訊息:
Updated property [core/project].
WARNING並收到Do you want to continue (Y/n)?提示,表示您可能輸入了錯誤的專案 ID。按下n和Enter,然後再次嘗試執行gcloud config set project指令。
4. 啟用 API
在終端機中啟用 API:
gcloud services enable \
  run.googleapis.com \
  artifactregistry.googleapis.com \
  cloudbuild.googleapis.com
如果系統提示您授權,請點選「授權」繼續操作。
這個指令可能需要幾分鐘才能完成,但最終應該會產生類似以下的成功訊息:
Operation "operations/acf.p2-73d90d00-47ee-447a-b600" finished successfully.
5. 準備 Python 專案
- 建立名為
mcp-on-cloudrun的資料夾,用來儲存部署作業的原始碼:mkdir mcp-on-cloudrun && cd mcp-on-cloudrun - 使用
uv工具建立 Python 專案,產生pyproject.toml檔案:uv init --description "Example of deploying an MCP server on Cloud Run" --bare --python 3.13uv init指令會為專案建立pyproject.toml檔案。如要查看檔案內容,請執行下列指令:cat pyproject.toml[project] name = "mcp-on-cloudrun" version = "0.1.0" description = "Example of deploying an MCP server on Cloud Run" requires-python = ">=3.13" dependencies = []
6. 建立動物園 MCP 伺服器
如要提供有價值的脈絡,以利改善 MCP 大型語言模型的使用體驗,請使用 FastMCP 設定動物園 MCP 伺服器。FastMCP 是處理 Model Context Protocol 的標準架構。FastMCP 提供快速建構 MCP 伺服器和用戶端的方法 (使用 Python)。這個 MCP 伺服器提供虛構動物園的動物資料。為簡化操作,我們將資料儲存在記憶體中。如果是正式版 MCP 伺服器,您可能會想從資料庫或 API 等來源提供資料。
- 執行下列指令,在
pyproject.toml檔案中新增 FastMCP 做為依附元件:uv add fastmcp==2.12.4 --no-syncuv.lock檔案。 - 建立並開啟新的
server.py檔案,做為 MCP 伺服器原始碼:cloudshell edit ~/mcp-on-cloudrun/server.pycloudshell edit指令會在終端機上方的編輯器中開啟server.py檔案。 - 在
server.py檔案中新增下列 zoo MCP 伺服器原始碼:import asyncio import logging import os from typing import List, Dict, Any from fastmcp import FastMCP logger = logging.getLogger(__name__) logging.basicConfig(format="[%(levelname)s]: %(message)s", level=logging.INFO) mcp = FastMCP("Zoo Animal MCP Server 🦁🐧🐻") # Dictionary of animals at the zoo ZOO_ANIMALS = [ { "species": "lion", "name": "Leo", "age": 7, "enclosure": "The Big Cat Plains", "trail": "Savannah Heights" }, { "species": "lion", "name": "Nala", "age": 6, "enclosure": "The Big Cat Plains", "trail": "Savannah Heights" }, { "species": "lion", "name": "Simba", "age": 3, "enclosure": "The Big Cat Plains", "trail": "Savannah Heights" }, { "species": "lion", "name": "King", "age": 8, "enclosure": "The Big Cat Plains", "trail": "Savannah Heights" }, { "species": "penguin", "name": "Waddles", "age": 2, "enclosure": "The Arctic Exhibit", "trail": "Polar Path" }, { "species": "penguin", "name": "Pip", "age": 4, "enclosure": "The Arctic Exhibit", "trail": "Polar Path" }, { "species": "penguin", "name": "Skipper", "age": 5, "enclosure": "The Arctic Exhibit", "trail": "Polar Path" }, { "species": "penguin", "name": "Chilly", "age": 3, "enclosure": "The Arctic Exhibit", "trail": "Polar Path" }, { "species": "penguin", "name": "Pingu", "age": 6, "enclosure": "The Arctic Exhibit", "trail": "Polar Path" }, { "species": "penguin", "name": "Noot", "age": 1, "enclosure": "The Arctic Exhibit", "trail": "Polar Path" }, { "species": "elephant", "name": "Ellie", "age": 15, "enclosure": "The Pachyderm Sanctuary", "trail": "Savannah Heights" }, { "species": "elephant", "name": "Peanut", "age": 12, "enclosure": "The Pachyderm Sanctuary", "trail": "Savannah Heights" }, { "species": "elephant", "name": "Dumbo", "age": 5, "enclosure": "The Pachyderm Sanctuary", "trail": "Savannah Heights" }, { "species": "elephant", "name": "Trunkers", "age": 10, "enclosure": "The Pachyderm Sanctuary", "trail": "Savannah Heights" }, { "species": "bear", "name": "Smokey", "age": 10, "enclosure": "The Grizzly Gulch", "trail": "Polar Path" }, { "species": "bear", "name": "Grizzly", "age": 8, "enclosure": "The Grizzly Gulch", "trail": "Polar Path" }, { "species": "bear", "name": "Barnaby", "age": 6, "enclosure": "The Grizzly Gulch", "trail": "Polar Path" }, { "species": "bear", "name": "Bruin", "age": 12, "enclosure": "The Grizzly Gulch", "trail": "Polar Path" }, { "species": "giraffe", "name": "Gerald", "age": 4, "enclosure": "The Tall Grass Plains", "trail": "Savannah Heights" }, { "species": "giraffe", "name": "Longneck", "age": 5, "enclosure": "The Tall Grass Plains", "trail": "Savannah Heights" }, { "species": "giraffe", "name": "Patches", "age": 3, "enclosure": "The Tall Grass Plains", "trail": "Savannah Heights" }, { "species": "giraffe", "name": "Stretch", "age": 6, "enclosure": "The Tall Grass Plains", "trail": "Savannah Heights" }, { "species": "antelope", "name": "Speedy", "age": 2, "enclosure": "The Tall Grass Plains", "trail": "Savannah Heights" }, { "species": "antelope", "name": "Dash", "age": 3, "enclosure": "The Tall Grass Plains", "trail": "Savannah Heights" }, { "species": "antelope", "name": "Gazelle", "age": 4, "enclosure": "The Tall Grass Plains", "trail": "Savannah Heights" }, { "species": "antelope", "name": "Swift", "age": 5, "enclosure": "The Tall Grass Plains", "trail": "Savannah Heights" }, { "species": "polar bear", "name": "Snowflake", "age": 7, "enclosure": "The Arctic Exhibit", "trail": "Polar Path" }, { "species": "polar bear", "name": "Blizzard", "age": 5, "enclosure": "The Arctic Exhibit", "trail": "Polar Path" }, { "species": "polar bear", "name": "Iceberg", "age": 9, "enclosure": "The Arctic Exhibit", "trail": "Polar Path" }, { "species": "walrus", "name": "Wally", "age": 10, "enclosure": "The Walrus Cove", "trail": "Polar Path" }, { "species": "walrus", "name": "Tusker", "age": 12, "enclosure": "The Walrus Cove", "trail": "Polar Path" }, { "species": "walrus", "name": "Moby", "age": 8, "enclosure": "The Walrus Cove", "trail": "Polar Path" }, { "species": "walrus", "name": "Flippers", "age": 9, "enclosure": "The Walrus Cove", "trail": "Polar Path" } ] @mcp.tool() def get_animals_by_species(species: str) -> List[Dict[str, Any]]: """ Retrieves all animals of a specific species from the zoo. Can also be used to collect the base data for aggregate queries of animals of a specific species - like counting the number of penguins or finding the oldest lion. Args: species: The species of the animal (e.g., 'lion', 'penguin'). Returns: A list of dictionaries, where each dictionary represents an animal and contains details like name, age, enclosure, and trail. """ logger.info(f">>> 🛠️ Tool: 'get_animals_by_species' called for '{species}'") return [animal for animal in ZOO_ANIMALS if animal["species"].lower() == species.lower()] @mcp.tool() def get_animal_details(name: str) -> Dict[str, Any]: """ Retrieves the details of a specific animal by its name. Args: name: The name of the animal. Returns: A dictionary with the animal's details (species, name, age, enclosure, trail) or an empty dictionary if the animal is not found. """ logger.info(f">>> 🛠️ Tool: 'get_animal_details' called for '{name}'") for animal in ZOO_ANIMALS: if animal["name"].lower() == name.lower(): return animal return {} if __name__ == "__main__": port = int(os.getenv("PORT", 8080)) logger.info(f"🚀 MCP server started on port {port}") asyncio.run( mcp.run_async( transport="http", host="0.0.0.0", port=port, ) )
程式碼已完成!現在要將 MCP 伺服器部署至 Cloud Run。
7. 部署至 Cloud Run
現在直接從原始碼將 MCP 伺服器部署至 Cloud Run。
- 建立並開啟新的
Dockerfile,以便部署至 Cloud Run:cloudshell edit ~/mcp-on-cloudrun/Dockerfile - 在 Dockerfile 中加入下列程式碼,使用
uv工具執行server.py檔案:# Use the official Python image FROM python:3.13-slim # Install uv COPY --from=ghcr.io/astral-sh/uv:latest /uv /uvx /bin/ # Install the project into /app COPY . /app WORKDIR /app # Allow statements and log messages to immediately appear in the logs ENV PYTHONUNBUFFERED=1 # Install dependencies RUN uv sync EXPOSE $PORT # Run the FastMCP server CMD ["uv", "run", "server.py"] - 建立名為
mcp-server-sa的服務帳戶:gcloud iam service-accounts create mcp-server-sa --display-name="MCP Server Service Account" - 執行
gcloud指令,將應用程式部署至 Cloud Runcd ~/mcp-on-cloudrun gcloud run deploy zoo-mcp-server \ --service-account=mcp-server-sa@$GOOGLE_CLOUD_PROJECT.iam.gserviceaccount.com \ --no-allow-unauthenticated \ --region=us-west1 \ --source=. \ --labels=dev-tutorial=codelab-mcp--no-allow-unauthenticated標記來要求驗證。這是出於安全考量。如果不需要驗證,任何人都可以呼叫 MCP 伺服器,可能導致系統損壞。 - 確認已建立新的 Artifact Registry 存放區。由於您是第一次從原始碼部署至 Cloud Run,因此會看到:
Deploying from source requires an Artifact Registry Docker repository to store built containers. A repository named
[cloud-run-source-deploy] in region [us-west1] will be created.

Do you want to continue (Y/n)?
Y並按下Enter,系統會為部署作業建立 Artifact Registry 存放區。這是儲存 Cloud Run 服務的 MCP 伺服器 Docker 容器時的必要步驟。 - 幾分鐘後,您會看到類似下列的訊息:
Service [zoo-mcp-server] revision [zoo-mcp-server-12345-abc] has been deployed and is serving 100 percent of traffic.
您已部署 MCP 伺服器。現在可以使用了。
8. 將遠端 MCP 伺服器新增至 Antigravity CLI
您已成功部署遠端 MCP 伺服器,現在可以使用各種應用程式 (例如 Google Code Assist 或 Antigravity CLI) 連線至該伺服器。在本節中,我們將使用 Antigravity CLI 建立與新遠端 MCP 伺服器的連線。
- 授予使用者帳戶呼叫遠端 MCP 伺服器的權限
gcloud projects add-iam-policy-binding $GOOGLE_CLOUD_PROJECT \ --member=user:$(gcloud config get-value account) \ --role='roles/run.invoker' - 將 Google Cloud 憑證和專案編號儲存至環境變數,供 Antigravity 設定檔使用:
export PROJECT_NUMBER=$(gcloud projects describe $GOOGLE_CLOUD_PROJECT --format="value(projectNumber)") export ID_TOKEN=$(gcloud auth print-identity-token) - 如果尚未建立
.gemini/antigravity-cli資料夾,請建立該資料夾mkdir -p ~/.gemini/antigravity-cli - 將遠端 MCP 伺服器寫入 Antigravity CLI MCP 設定檔:
cat > ~/.gemini/antigravity-cli/mcp_config.json << EOF { "mcpServers": { "zoo-remote": { "serverUrl": "https://zoo-mcp-server-${PROJECT_NUMBER}.us-west1.run.app/mcp", "headers": { "Authorization": "Bearer ${ID_TOKEN}" } } } } EOF - 啟動 Antigravity CLI:
agy
- 使用 Antigravity CLI 進行驗證:首次啟動時,系統會要求驗證。選取 OAuth (按下
Enter)。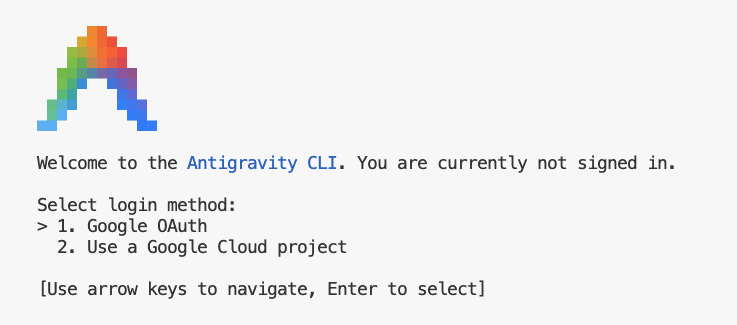
- 按一下連結 (如果無法點選,請在 Cloud Shell 中反白顯示網址並複製,然後貼到瀏覽器中)
- 登入 Google 帳戶
- 複製程式碼
- 將程式碼貼到 Cloud Shell 編輯器終端機
- 按下
Enter鍵。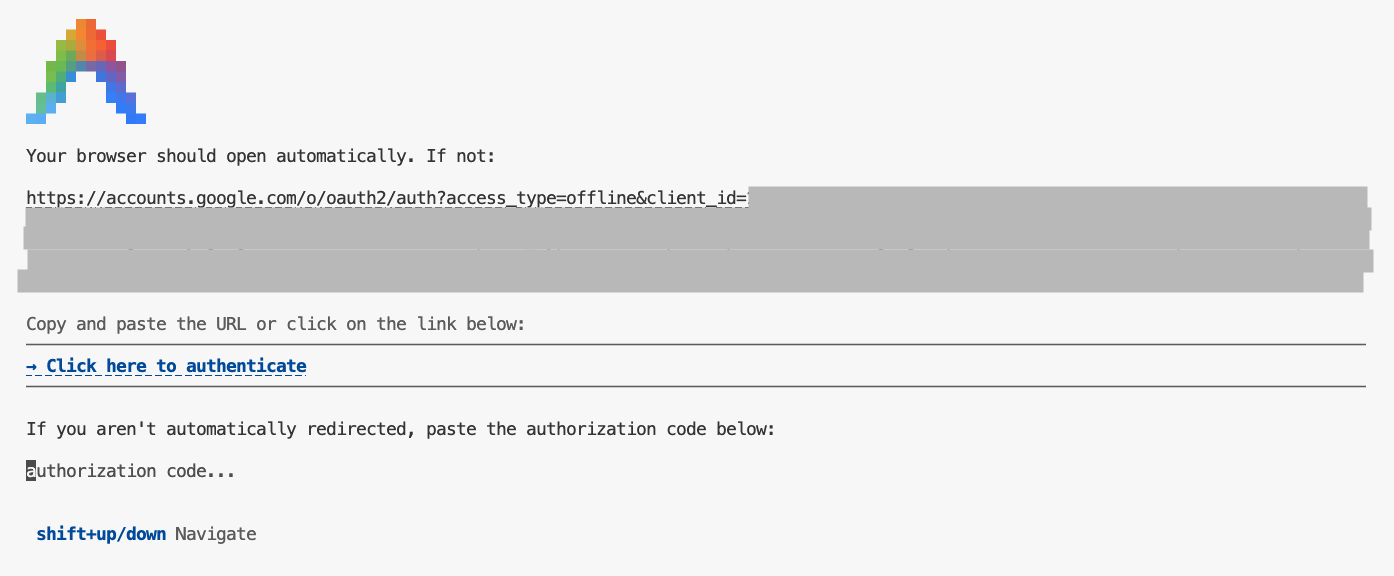
- 按下
Enter鍵接受部分預設設定。 - 讓 Antigravity CLI 列出在目前環境中可用的 MCP 工具
/mcpESC即可返回提示詞輸入框。 - 請 Antigravity CLI 找出動物園中的某種動物
Where can I find penguins?zoo-remoteMCP 伺服器,並詢問您是否允許執行 MCP。 - 使用向下鍵,然後按下
Enter即可選取Yes, always allow all tools from server "zoo-remote"
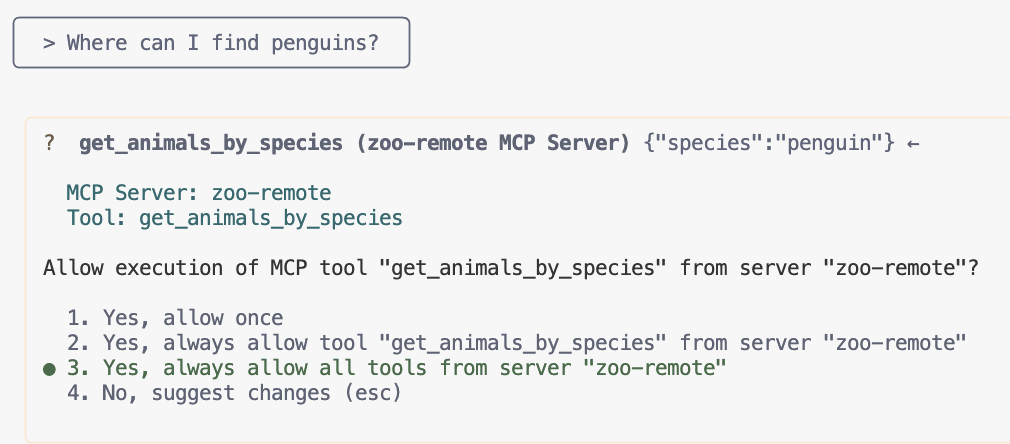
輸出內容應會顯示正確答案,以及表示已使用 MCP 伺服器的顯示框。
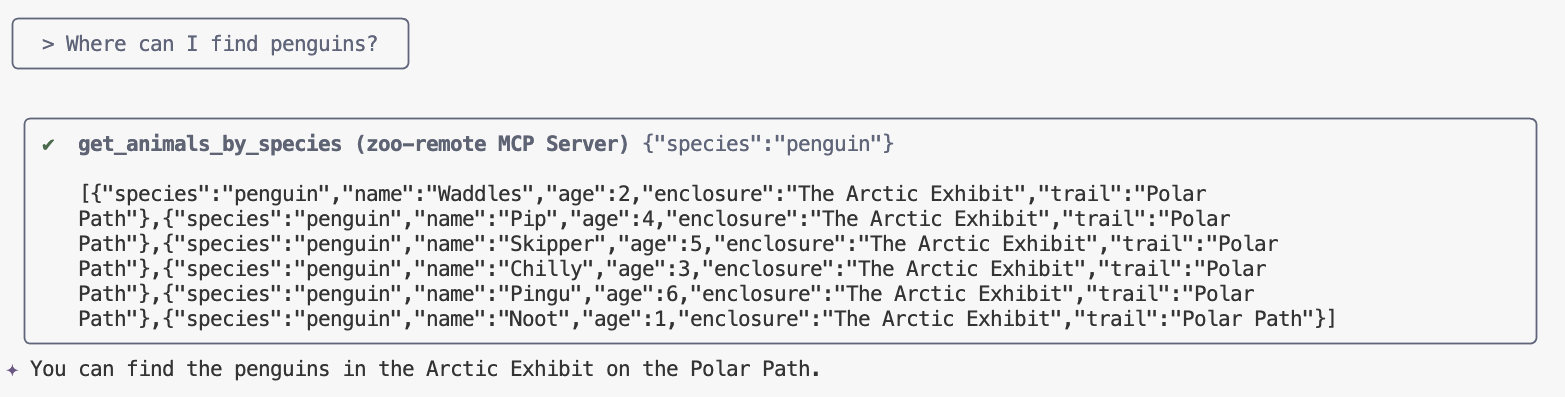
你做到了!您已成功將遠端 MCP 伺服器部署至 Cloud Run,並使用 Antigravity CLI 進行測試。
如要結束工作階段,請輸入 /exit,然後按下 Enter 鍵退出 Antigravity CLI。
偵錯
如果看到類似下方的錯誤訊息:
🔍 Attempting OAuth discovery for 'zoo-remote'...
❌ 'zoo-remote' requires authentication but no OAuth configuration found
Error connecting to MCP server 'zoo-remote': MCP server 'zoo-remote' requires authentication. Please configure OAuth or check server settings.
ID 權杖可能已逾時,需要再次設定 ID_TOKEN。
- 輸入
/exit,然後按下Enter鍵,即可退出 Antigravity CLI。 - 在終端機中設定專案
gcloud config set project [PROJECT_ID] - 重新執行 Google Cloud 憑證指令,取得新的
ID_TOKEN(您的憑證可能已過期),然後重新編寫設定檔:export PROJECT_NUMBER=$(gcloud projects describe $GOOGLE_CLOUD_PROJECT --format="value(projectNumber)") export ID_TOKEN=$(gcloud auth print-identity-token) cat > ~/.gemini/antigravity-cli/mcp_config.json << EOF
{ "mcpServers": { "zoo-remote": { "serverUrl": "https://zoo-mcp-server-${PROJECT_NUMBER}.us-west1.run.app/mcp", "headers": { "Authorization": "Bearer ${ID_TOKEN}" } } } } EOF ```
9. (選用) 驗證伺服器記錄中的工具呼叫
如要確認 Cloud Run MCP 伺服器是否已呼叫,請查看服務記錄。
gcloud run services logs read zoo-mcp-server --region us-west1 --limit=5
系統應會傳回確認已呼叫工具的輸出記錄。🛠️
2025-08-05 19:50:31 INFO: 169.254.169.126:39444 - "POST /mcp HTTP/1.1" 200 OK 2025-08-05 19:50:31 [INFO]: Processing request of type CallToolRequest 2025-08-05 19:50:31 [INFO]: >>> 🛠️ Tool: 'get_animals_by_species' called for 'penguin'
10. (選用) 將 MCP 提示新增至伺服器
對於經常執行的提示,您可以建立較短的提示,加快工作流程。
Antigravity CLI 會自動將 MCP 提示轉換為自訂斜線指令,因此只要輸入 /prompt_name,即可叫用 MCP 提示,其中 prompt_name 是 MCP 提示的名稱。
建立 MCP 提示,在 Antigravity CLI 中輸入 /find animal,即可快速找到動物園中的動物。
- 在主要防護措施 (
if __name__ == "__main__":) 上方的server.py檔案中新增這段程式碼。@mcp.prompt() def find(animal: str) -> str: """ Find which exhibit and trail a specific animal might be located. """ return ( f"Please find the exhibit and trail information for {animal} in the zoo. " f"Respond with '[animal] can be found in the [exhibit] on the [trail].'" f"Example: Penguins can be found in The Arctic Exhibit on the Polar Path." ) - 將應用程式重新部署至 Cloud Run
gcloud run deploy zoo-mcp-server \ --region=us-west1 \ --source=. \ --labels=dev-tutorial=codelab-mcp - 更新 ID_TOKEN 並重新建立設定檔:
export ID_TOKEN=$(gcloud auth print-identity-token) export PROJECT_NUMBER=$(gcloud projects describe $GOOGLE_CLOUD_PROJECT --format="value(projectNumber)") cat > ~/.gemini/antigravity-cli/mcp_config.json << EOF
{ "mcpServers": { "zoo-remote": { "serverUrl": "https://zoo-mcp-server-${PROJECT_NUMBER}.us-west1.run.app/mcp", "headers": { "Authorization": "Bearer ${ID_TOKEN}" } } } } EOF ```
- 部署新版應用程式後,請啟動 Antigravity CLI。
agy - 在提示中使用您建立的新自訂指令:
/find lions
您應該會看到 Antigravity CLI 呼叫 get_animals_by_species 工具,並按照 MCP 提示詞的指示設定回覆格式!
╭───────────────────────────╮
│ > /find lions │
╰───────────────────────────╯
╭───────────────────────────────────────────────────────────────────────────────────────────────────╮
│ ✔ get_animals_by_species (zoo-remote MCP Server) get_animals_by_species (zoo-remote MCP Server) │
│ │
│ [{"species":"lion","name":"Leo","age":7,"enclosure":"The Big Cat │
│ Plains","trail":"Savannah │
│ Heights"},{"species":"lion","name":"Nala","age":6,"enclosure":"The Big Cat │
│ Plains","trail":"Savannah │
│ Heights"},{"species":"lion","name":"Simba","age":3,"enclosure":"The Big Cat │
│ Plains","trail":"Savannah │
│ Heights"},{"species":"lion","name":"King","age":8,"enclosure":"The Big Cat │
│ Plains","trail":"Savannah Heights"}] │
╰───────────────────────────────────────────────────────────────────────────────────────────────────╯
✦ Lions can be found in The Big Cat Plains on the Savannah Heights.
11. (選用) 使用 Gemini Flash Lite 快速取得回覆
Antigravity CLI 可讓您選擇使用的模型和工作量。
由於尋找動物園動物的要求不需要思考或推理,因此請嘗試使用速度較快的模型,加快處理速度。
在上一節中,您建立了 MCP 提示,因此只要在 Antigravity CLI 中輸入 /find animal,就能快速找到動物園中的動物。
- 部署新版應用程式後,請啟動 Antigravity CLI。
agy --model=gemini-3.6-flash --effort=low - 在提示中使用您建立的新自訂指令:
/find lions
您應該還是會看到 Antigravity CLI 呼叫 get_animals_by_species 工具,並按照 MCP 提示詞的指示設定回覆格式,但答案應該會快很多!
╭───────────────────────────╮
│ > /find lions │
╰───────────────────────────╯
╭───────────────────────────────────────────────────────────────────────────────────────────────────╮
│ ✔ get_animals_by_species (zoo-remote MCP Server) get_animals_by_species (zoo-remote MCP Server) │
│ │
│ [{"species":"lion","name":"Leo","age":7,"enclosure":"The Big Cat │
│ Plains","trail":"Savannah │
│ Heights"},{"species":"lion","name":"Nala","age":6,"enclosure":"The Big Cat │
│ Plains","trail":"Savannah │
│ Heights"},{"species":"lion","name":"Simba","age":3,"enclosure":"The Big Cat │
│ Plains","trail":"Savannah │
│ Heights"},{"species":"lion","name":"King","age":8,"enclosure":"The Big Cat │
│ Plains","trail":"Savannah Heights"}] │
╰───────────────────────────────────────────────────────────────────────────────────────────────────╯
✦ Lions can be found in The Big Cat Plains on the Savannah Heights.
偵錯
如果看到類似下方的錯誤訊息:
✕ Unknown command: /find lions
請嘗試執行 /mcp,如果輸出 zoo-remote - Disconnected,您可能需要重新部署,或再次執行下列指令:
gcloud projects add-iam-policy-binding $GOOGLE_CLOUD_PROJECT \
--member=user:$(gcloud config get-value account) \
--role='roles/run.invoker'
export PROJECT_NUMBER=$(gcloud projects describe $GOOGLE_CLOUD_PROJECT --format="value(projectNumber)")
export ID_TOKEN=$(gcloud auth print-identity-token)

cat > ~/.gemini/antigravity-cli/mcp_config.json << EOF
{
"mcpServers": {
"zoo-remote": {
"serverUrl": "https://zoo-mcp-server-${PROJECT_NUMBER}.us-west1.run.app/mcp",
"headers": {
"Authorization": "Bearer ${ID_TOKEN}"
}
}
}
}
EOF
12. 結語
恭喜!您已成功部署並連線至安全的遠端 MCP 伺服器。
繼續下一個實驗室
本實驗室是三部曲的第一部。在第二個實驗室中,您將使用透過 ADK 代理建立的 MCP 伺服器。
搭配 ADK 代理使用 Cloud Run 上的 MCP 伺服器
(選用) 清理
如果您不會繼續進行下一個實驗室,且想清理已建立的項目,可以刪除雲端專案,以免產生額外費用。
不使用服務時,Cloud Run 不會收費,但您可能仍須支付容器映像檔在 Artifact Registry 的儲存費用。刪除雲端專案後,系統就會停止對專案使用的所有資源收取費用。
如要刪除專案,請按照下列步驟操作:
gcloud projects delete $GOOGLE_CLOUD_PROJECT
您也可以從 Cloud Shell 磁碟刪除不必要的資源。您可以:
- 刪除 Codelab 專案目錄:
rm -rf ~/mcp-on-cloudrun - 警告!這項操作無法復原,如要刪除 Cloud Shell 中的所有內容來釋出空間,可以刪除整個主目錄。請務必將要保留的內容另存他處。
sudo rm -rf $HOME