
1. 簡介
總覽
在本實驗室中,您將建構及部署模型內容通訊協定 (MCP) 伺服器。MCP 伺服器可讓 LLM 存取外部工具和服務。您會在 Cloud Run 上將其設定為安全且可供正式環境使用的服務,並可從多個用戶端存取。接著,您將透過 Gemini CLI 連線至遠端 MCP 伺服器。
學習內容
我們將使用 FastMCP 建立 zoo MCP 伺服器,其中包含 get_animals_by_species 和 get_animal_details 這兩項工具。FastMCP 提供快速的 Pythonic 方法,可建構 MCP 伺服器和用戶端。

課程內容
- 將 MCP 伺服器部署至 Cloud Run。
- 為伺服器端點設定所有要求的驗證機制,確保只有授權的用戶端和代理程式可以與其通訊,藉此保護端點安全。
- 透過 Gemini CLI 連線至安全 MCP 伺服器端點
2. 專案設定
- 如果沒有 Google 帳戶,請務必建立 Google 帳戶。
- 請改用個人帳戶,而非公司或學校帳戶。公司和學校帳戶可能設有限制,導致您無法啟用本實驗室所需的 API。
- 登入 Google Cloud 控制台。
- 在 Cloud 控制台中啟用帳單。
- 完成本實驗室的 Cloud 資源費用應不到 $1 美元。
- 您可以按照實驗室結尾的步驟刪除資源,避免產生額外費用。
- 新使用者可享有價值 $300 美元的免費試用期。
- 建立新專案,或選擇重複使用現有專案。
3. 開啟 Cloud Shell 編輯器
- 按一下這個連結,直接前往 Cloud Shell 編輯器
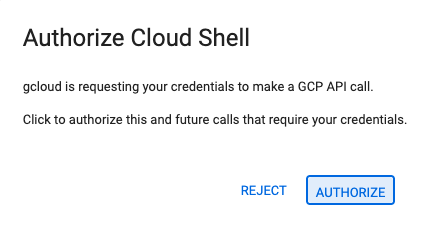
- 如果系統在今天任何時間提示您授權,請點選「授權」繼續操作。
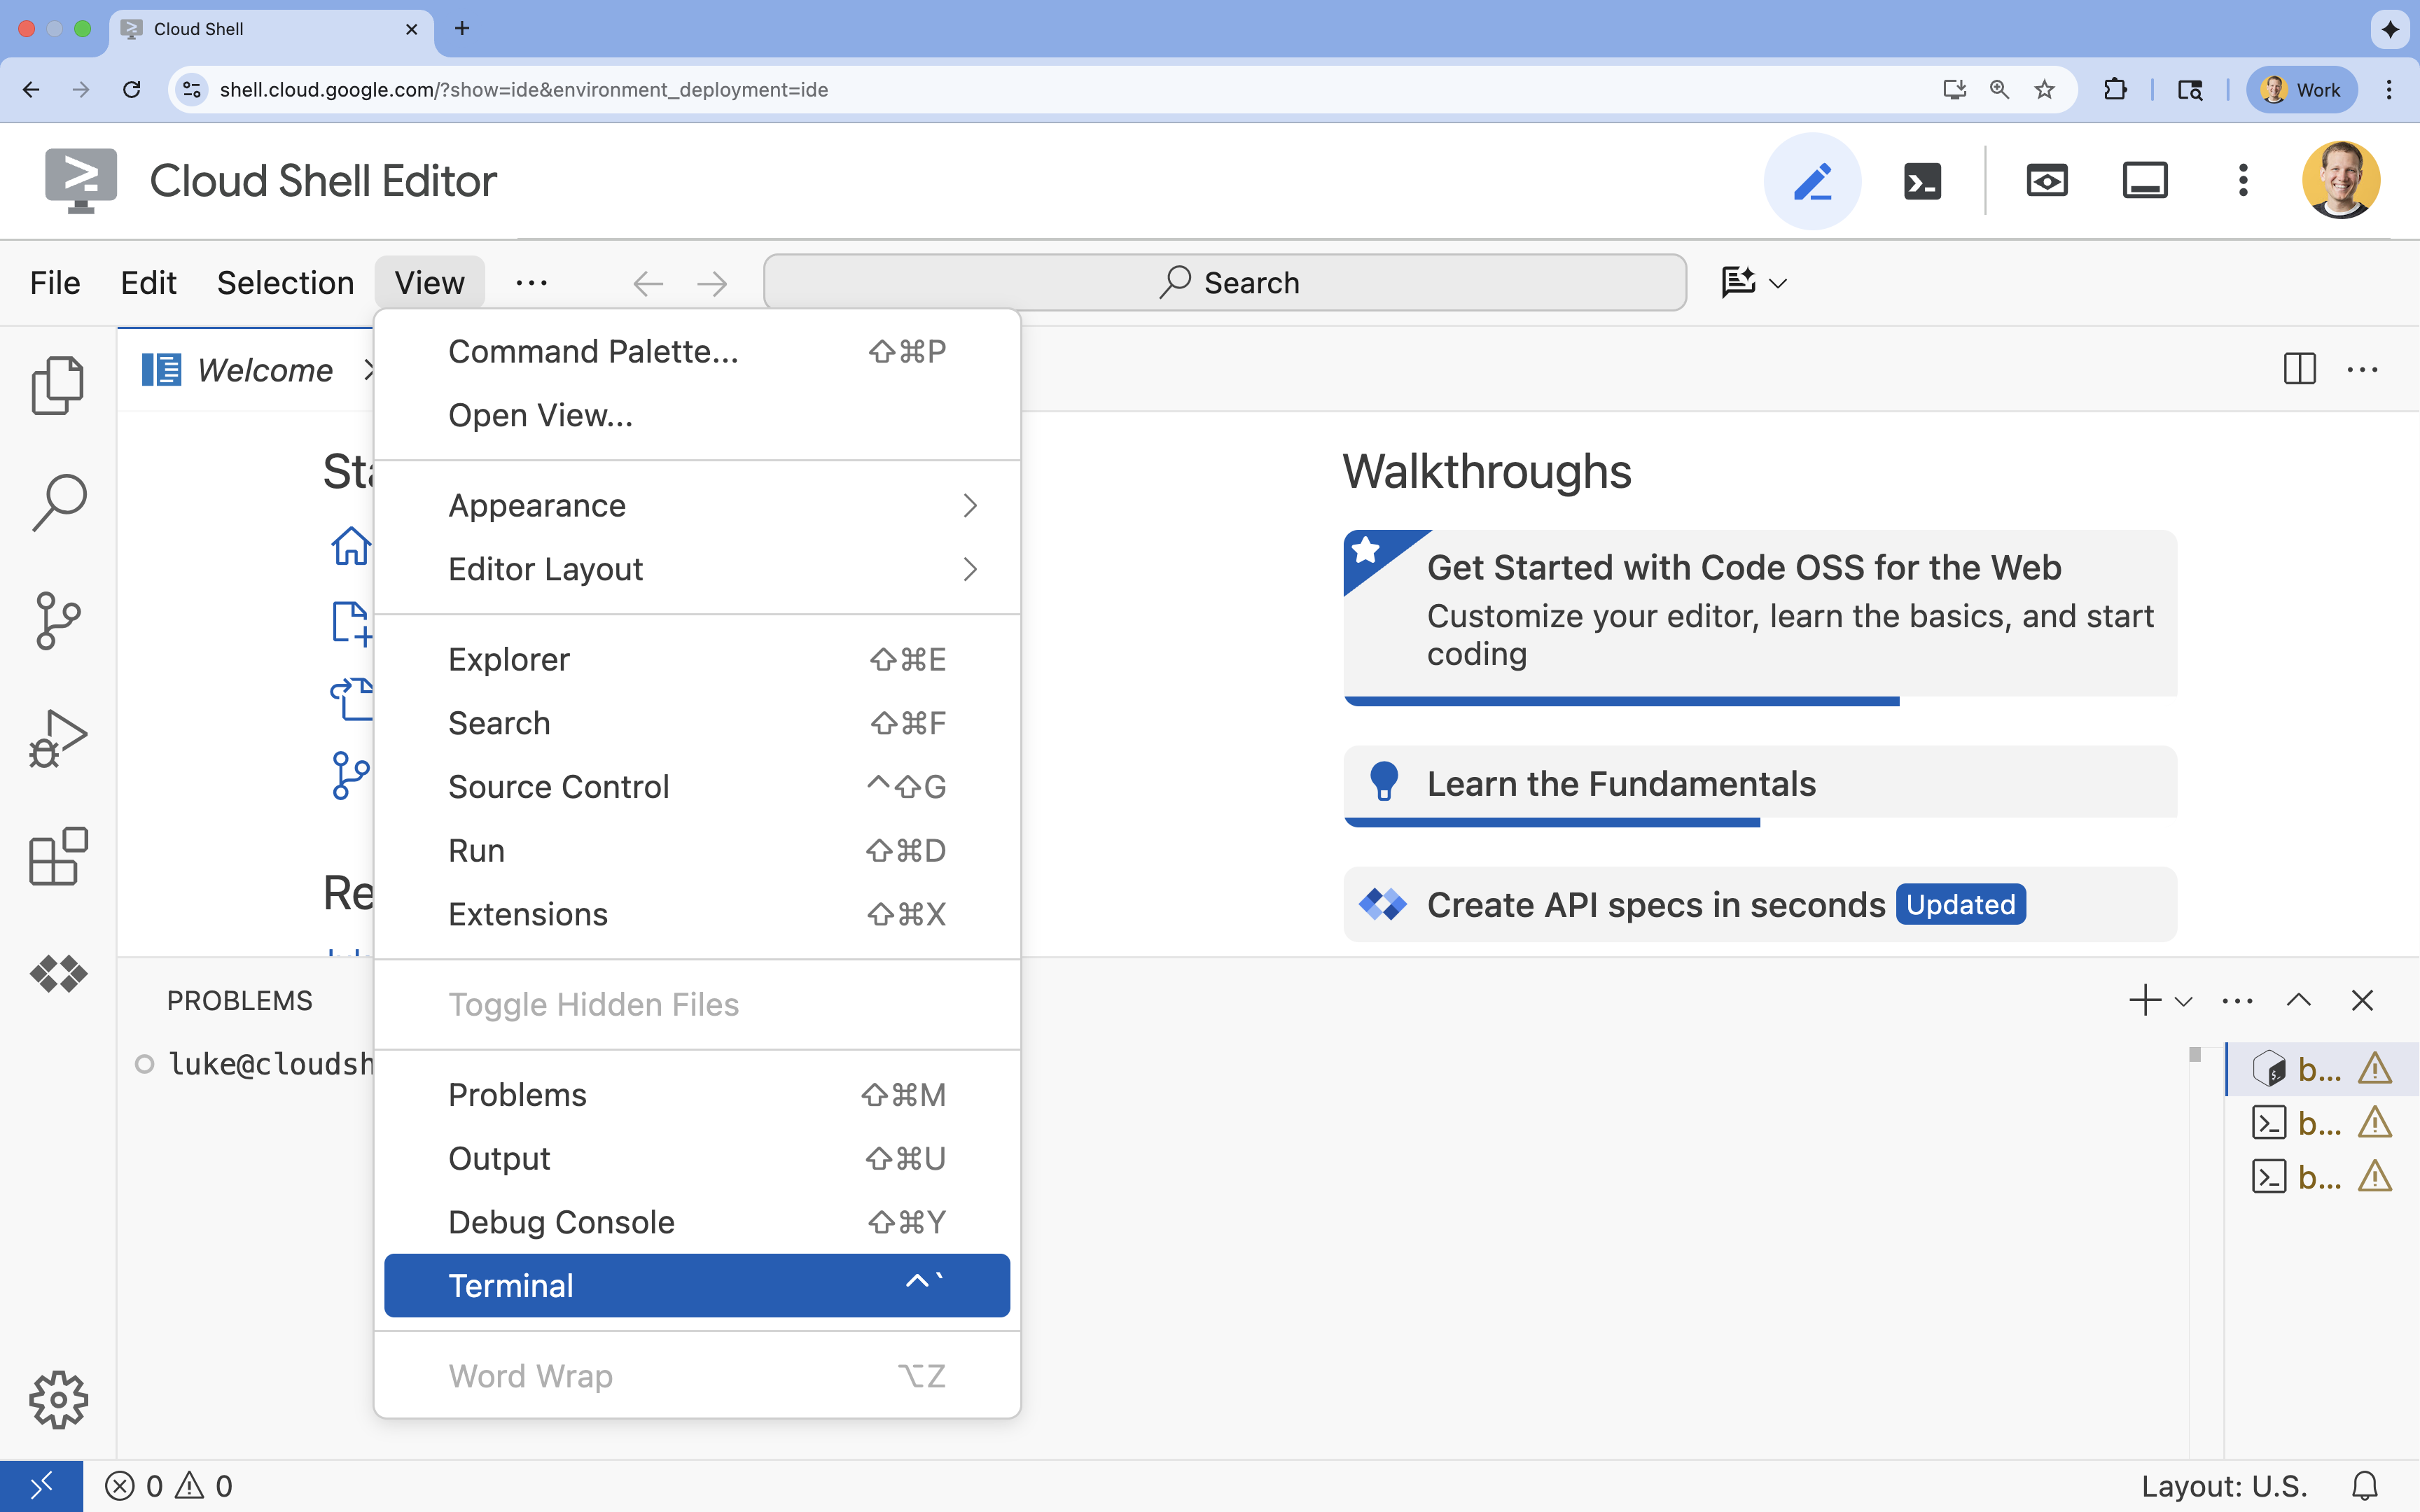
- 如果畫面底部未顯示終端機,請開啟終端機:
- 按一下「查看」
- 按一下「終端機」
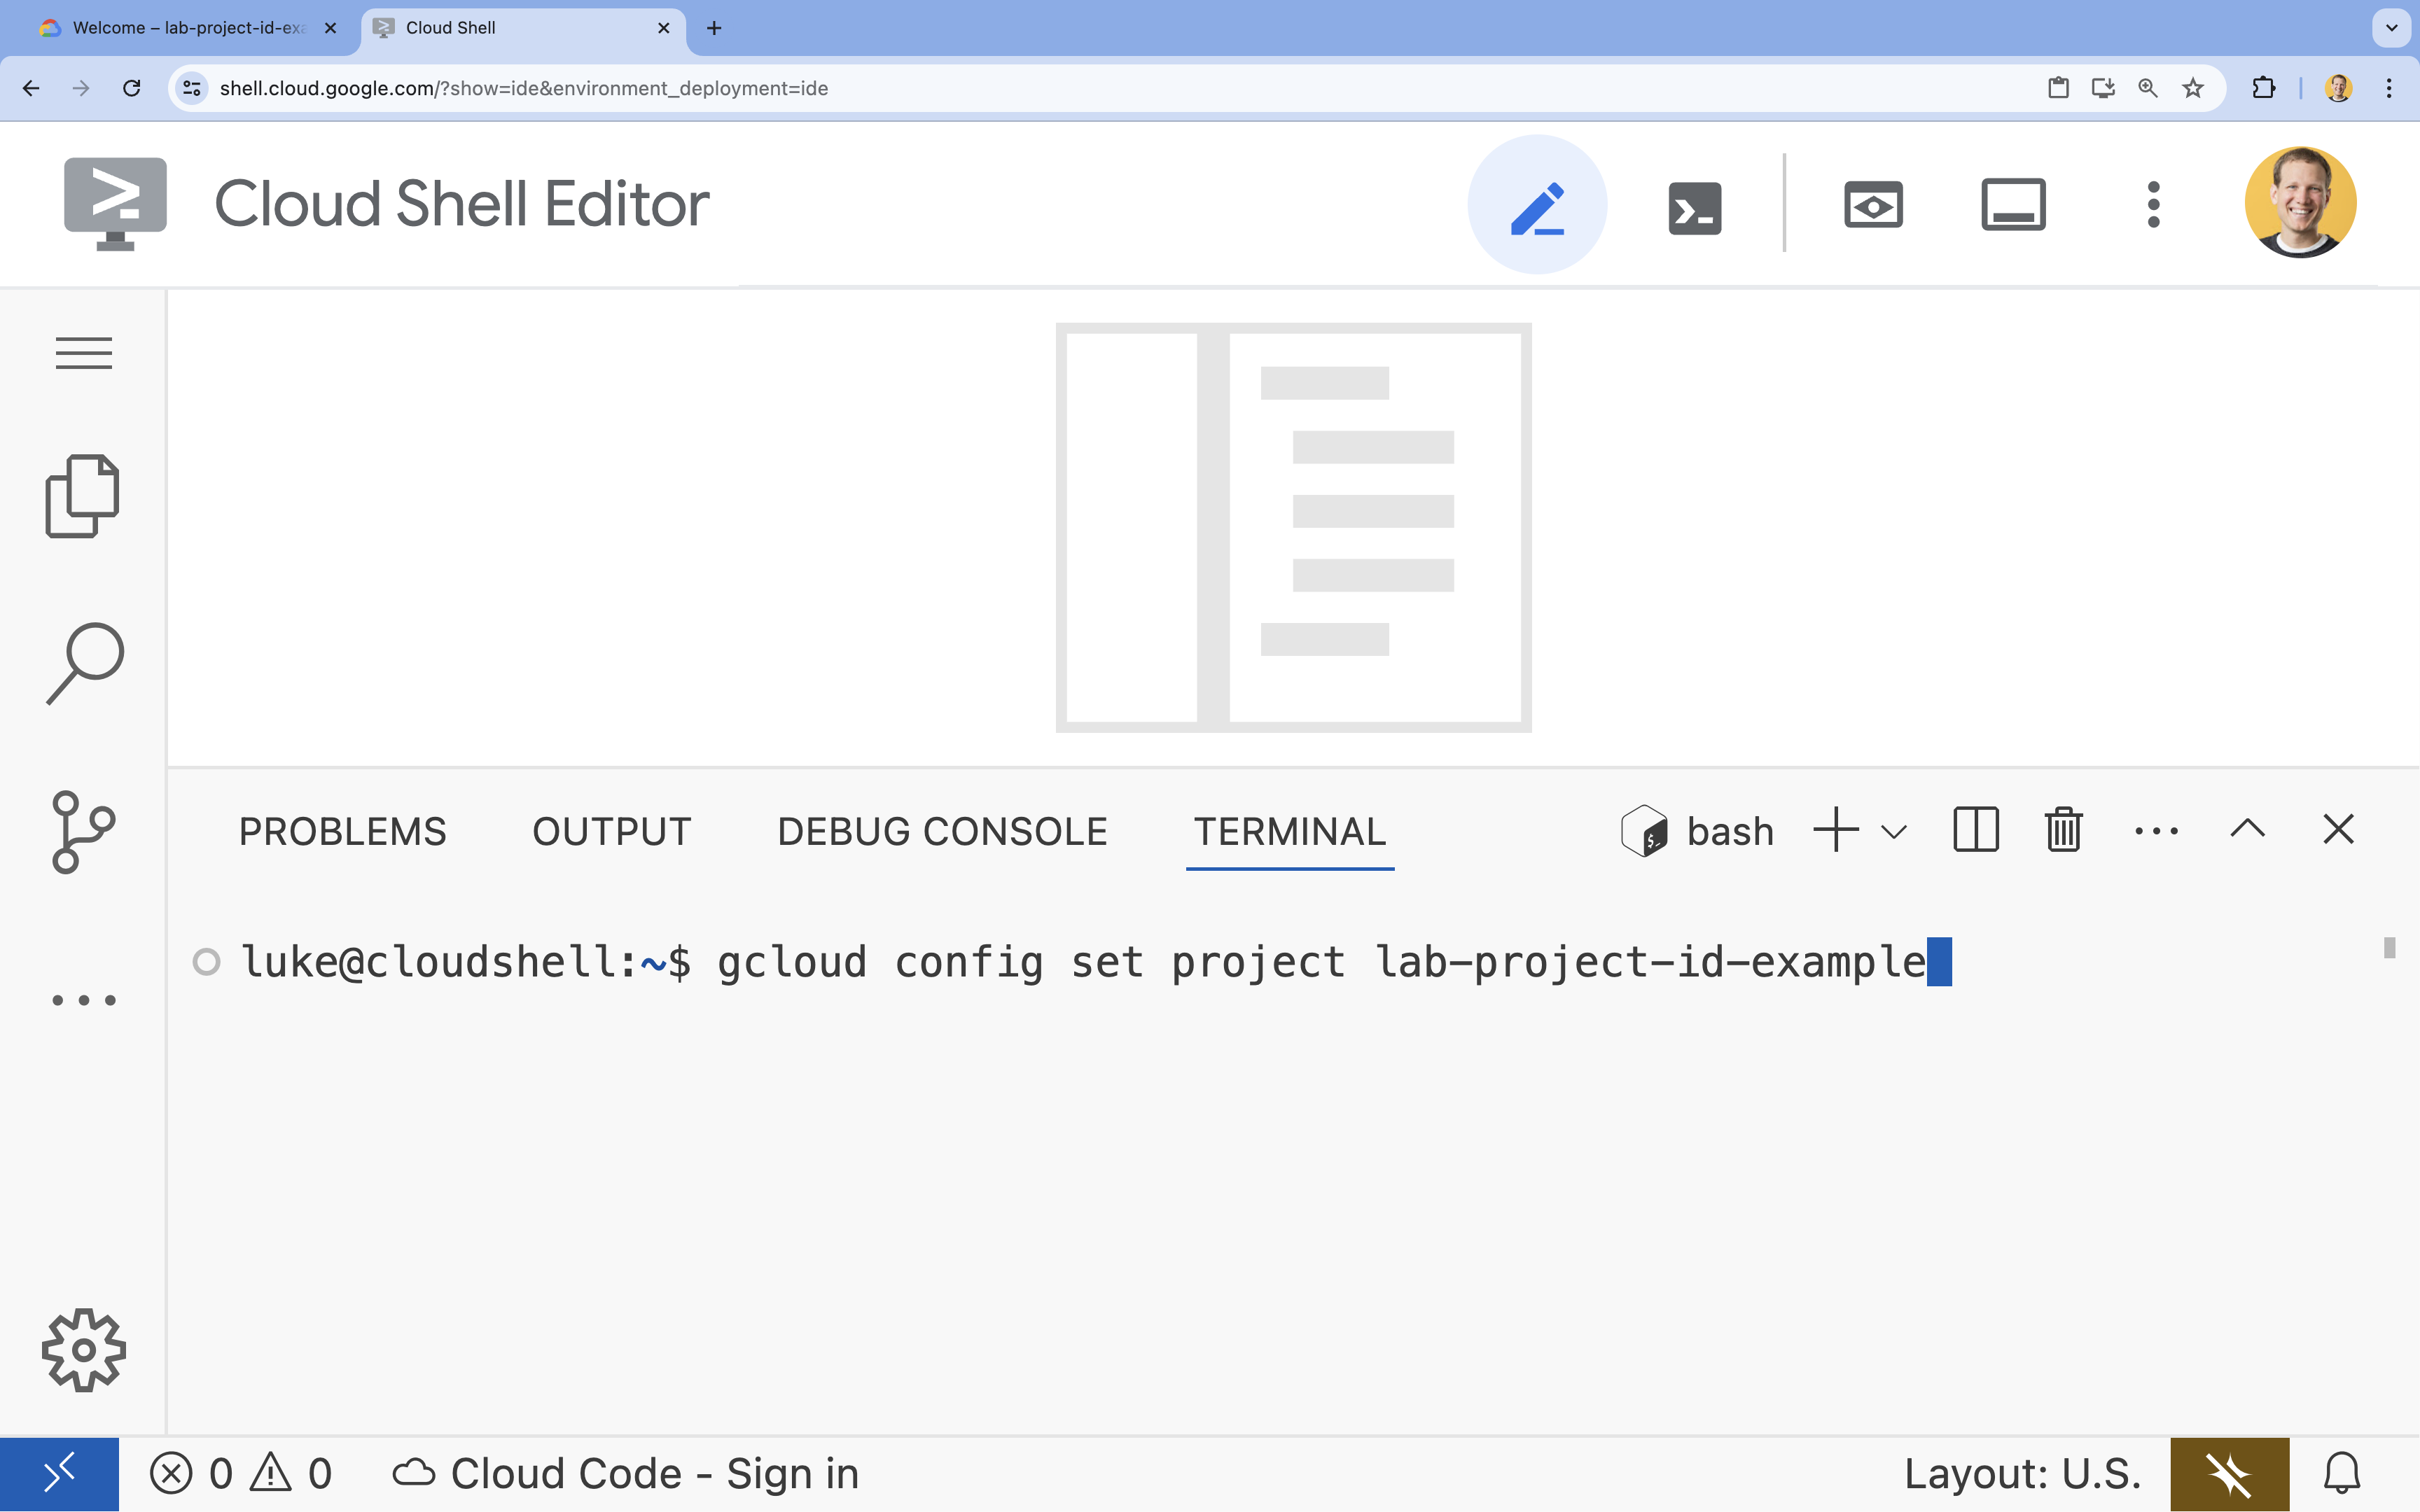
- 在終端機中,使用下列指令設定專案:
- 格式:
gcloud config set project [PROJECT_ID] - 範例:
gcloud config set project lab-project-id-example - 如果忘記專案 ID,請按照下列步驟操作:
- 您可以使用下列指令列出所有專案 ID:
gcloud projects list | awk '/PROJECT_ID/{print $2}'
- 您可以使用下列指令列出所有專案 ID:
- 格式:
- 您應該會看到下列訊息:
Updated property [core/project].
WARNING並收到Do you want to continue (Y/n)?提示,可能是專案 ID 輸入有誤。按下n鍵和Enter鍵,然後再次嘗試執行gcloud config set project指令。
4. 啟用 API
在終端機中啟用 API:
gcloud services enable \
  run.googleapis.com \
  artifactregistry.googleapis.com \
  cloudbuild.googleapis.com
如果系統要求您授權,請點按「授權」繼續操作。
這個指令可能需要幾分鐘才能完成,但最終應該會產生類似這樣的成功訊息:
Operation "operations/acf.p2-73d90d00-47ee-447a-b600" finished successfully.
5. 準備 Python 專案
- 建立名為
mcp-on-cloudrun的資料夾,用來儲存要部署的原始碼:mkdir mcp-on-cloudrun && cd mcp-on-cloudrun - 使用
uv工具建立 Python 專案,產生pyproject.toml檔案:uv init --description "Example of deploying an MCP server on Cloud Run" --bare --python 3.13uv init指令會為專案建立pyproject.toml檔案。如要查看檔案內容,請執行下列指令:cat pyproject.toml[project] name = "mcp-on-cloudrun" version = "0.1.0" description = "Example of deploying an MCP server on Cloud Run" requires-python = ">=3.13" dependencies = []
6. 建立動物園 MCP 伺服器
如要提供有價值的脈絡,以利透過 MCP 改善 LLM 的使用體驗,請使用 FastMCP 設定 zoo MCP 伺服器。FastMCP 是處理 Model Context Protocol 的標準架構。FastMCP 提供快速方法,可使用 Python 建構 MCP 伺服器和用戶端。這個 MCP 伺服器提供虛構動物園的動物資料。為簡化操作,我們將資料儲存在記憶體中。如果是正式版 MCP 伺服器,您可能會想從資料庫或 API 等來源提供資料。
- 執行下列指令,在
pyproject.toml檔案中新增 FastMCP 做為依附元件:uv add fastmcp==2.11.1 --no-syncuv.lock檔案。 - 建立並開啟新的
server.py檔案,用於 MCP 伺服器原始碼:cloudshell edit server.pycloudshell edit指令會在終端機上方的編輯器中開啟server.py檔案。 - 在
server.py檔案中新增下列 Zoo MCP 伺服器原始碼:import asyncio import logging import os from typing import List, Dict, Any from fastmcp import FastMCP logger = logging.getLogger(__name__) logging.basicConfig(format="[%(levelname)s]: %(message)s", level=logging.INFO) mcp = FastMCP("Zoo Animal MCP Server 🦁🐧🐻") # Dictionary of animals at the zoo ZOO_ANIMALS = [ { "species": "lion", "name": "Leo", "age": 7, "enclosure": "The Big Cat Plains", "trail": "Savannah Heights" }, { "species": "lion", "name": "Nala", "age": 6, "enclosure": "The Big Cat Plains", "trail": "Savannah Heights" }, { "species": "lion", "name": "Simba", "age": 3, "enclosure": "The Big Cat Plains", "trail": "Savannah Heights" }, { "species": "lion", "name": "King", "age": 8, "enclosure": "The Big Cat Plains", "trail": "Savannah Heights" }, { "species": "penguin", "name": "Waddles", "age": 2, "enclosure": "The Arctic Exhibit", "trail": "Polar Path" }, { "species": "penguin", "name": "Pip", "age": 4, "enclosure": "The Arctic Exhibit", "trail": "Polar Path" }, { "species": "penguin", "name": "Skipper", "age": 5, "enclosure": "The Arctic Exhibit", "trail": "Polar Path" }, { "species": "penguin", "name": "Chilly", "age": 3, "enclosure": "The Arctic Exhibit", "trail": "Polar Path" }, { "species": "penguin", "name": "Pingu", "age": 6, "enclosure": "The Arctic Exhibit", "trail": "Polar Path" }, { "species": "penguin", "name": "Noot", "age": 1, "enclosure": "The Arctic Exhibit", "trail": "Polar Path" }, { "species": "elephant", "name": "Ellie", "age": 15, "enclosure": "The Pachyderm Sanctuary", "trail": "Savannah Heights" }, { "species": "elephant", "name": "Peanut", "age": 12, "enclosure": "The Pachyderm Sanctuary", "trail": "Savannah Heights" }, { "species": "elephant", "name": "Dumbo", "age": 5, "enclosure": "The Pachyderm Sanctuary", "trail": "Savannah Heights" }, { "species": "elephant", "name": "Trunkers", "age": 10, "enclosure": "The Pachyderm Sanctuary", "trail": "Savannah Heights" }, { "species": "bear", "name": "Smokey", "age": 10, "enclosure": "The Grizzly Gulch", "trail": "Polar Path" }, { "species": "bear", "name": "Grizzly", "age": 8, "enclosure": "The Grizzly Gulch", "trail": "Polar Path" }, { "species": "bear", "name": "Barnaby", "age": 6, "enclosure": "The Grizzly Gulch", "trail": "Polar Path" }, { "species": "bear", "name": "Bruin", "age": 12, "enclosure": "The Grizzly Gulch", "trail": "Polar Path" }, { "species": "giraffe", "name": "Gerald", "age": 4, "enclosure": "The Tall Grass Plains", "trail": "Savannah Heights" }, { "species": "giraffe", "name": "Longneck", "age": 5, "enclosure": "The Tall Grass Plains", "trail": "Savannah Heights" }, { "species": "giraffe", "name": "Patches", "age": 3, "enclosure": "The Tall Grass Plains", "trail": "Savannah Heights" }, { "species": "giraffe", "name": "Stretch", "age": 6, "enclosure": "The Tall Grass Plains", "trail": "Savannah Heights" }, { "species": "antelope", "name": "Speedy", "age": 2, "enclosure": "The Tall Grass Plains", "trail": "Savannah Heights" }, { "species": "antelope", "name": "Dash", "age": 3, "enclosure": "The Tall Grass Plains", "trail": "Savannah Heights" }, { "species": "antelope", "name": "Gazelle", "age": 4, "enclosure": "The Tall Grass Plains", "trail": "Savannah Heights" }, { "species": "antelope", "name": "Swift", "age": 5, "enclosure": "The Tall Grass Plains", "trail": "Savannah Heights" }, { "species": "polar bear", "name": "Snowflake", "age": 7, "enclosure": "The Arctic Exhibit", "trail": "Polar Path" }, { "species": "polar bear", "name": "Blizzard", "age": 5, "enclosure": "The Arctic Exhibit", "trail": "Polar Path" }, { "species": "polar bear", "name": "Iceberg", "age": 9, "enclosure": "The Arctic Exhibit", "trail": "Polar Path" }, { "species": "walrus", "name": "Wally", "age": 10, "enclosure": "The Walrus Cove", "trail": "Polar Path" }, { "species": "walrus", "name": "Tusker", "age": 12, "enclosure": "The Walrus Cove", "trail": "Polar Path" }, { "species": "walrus", "name": "Moby", "age": 8, "enclosure": "The Walrus Cove", "trail": "Polar Path" }, { "species": "walrus", "name": "Flippers", "age": 9, "enclosure": "The Walrus Cove", "trail": "Polar Path" } ] @mcp.tool() def get_animals_by_species(species: str) -> List[Dict[str, Any]]: """ Retrieves all animals of a specific species from the zoo. Can also be used to collect the base data for aggregate queries of animals of a specific species - like counting the number of penguins or finding the oldest lion. Args: species: The species of the animal (e.g., 'lion', 'penguin'). Returns: A list of dictionaries, where each dictionary represents an animal and contains details like name, age, enclosure, and trail. """ logger.info(f">>> 🛠️ Tool: 'get_animals_by_species' called for '{species}'") return [animal for animal in ZOO_ANIMALS if animal["species"].lower() == species.lower()] @mcp.tool() def get_animal_details(name: str) -> Dict[str, Any]: """ Retrieves the details of a specific animal by its name. Args: name: The name of the animal. Returns: A dictionary with the animal's details (species, name, age, enclosure, trail) or an empty dictionary if the animal is not found. """ logger.info(f">>> 🛠️ Tool: 'get_animal_details' called for '{name}'") for animal in ZOO_ANIMALS: if animal["name"].lower() == name.lower(): return animal return {} if __name__ == "__main__": logger.info(f"🚀 MCP server started on port {os.getenv('PORT', 8080)}") asyncio.run( mcp.run_async( transport="http", host="0.0.0.0", port=os.getenv("PORT", 8080), ) )
程式碼已完成!現在要將 MCP 伺服器部署至 Cloud Run。
7. 部署至 Cloud Run
現在可以直接從原始碼將 MCP 伺服器部署至 Cloud Run。
- 建立並開啟新的
Dockerfile,以便部署至 Cloud Run:cloudshell edit Dockerfile - 在 Dockerfile 中加入下列程式碼,使用
uv工具執行server.py檔案:# Use the official Python image FROM python:3.13-slim # Install uv COPY --from=ghcr.io/astral-sh/uv:latest /uv /uvx /bin/ # Install the project into /app COPY . /app WORKDIR /app # Allow statements and log messages to immediately appear in the logs ENV PYTHONUNBUFFERED=1 # Install dependencies RUN uv sync EXPOSE $PORT # Run the FastMCP server CMD ["uv", "run", "server.py"] - 執行
gcloud指令,將應用程式部署至 Cloud Rungcloud run deploy zoo-mcp-server \ --no-allow-unauthenticated \ --region=europe-west1 \ --source=. \ --labels=dev-tutorial=codelab-mcp--no-allow-unauthenticated標記來要求驗證。這是出於安全考量。如果不需要驗證,任何人都可以呼叫 MCP 伺服器,可能導致系統損壞。 - 確認已建立新的 Artifact Registry 存放區。由於您是第一次從原始碼部署至 Cloud Run,因此會看到以下訊息:
Deploying from source requires an Artifact Registry Docker repository to store built containers. A repository named [cloud-run-source-deploy] in region [europe-west1] will be created. Do you want to continue (Y/n)?
Y並按下Enter,系統會為部署作業建立 Artifact Registry 存放區。這是儲存 Cloud Run 服務的 MCP 伺服器 Docker 容器時的必要條件。 - 幾分鐘後,您會看到類似以下的訊息:
Service [zoo-mcp-server] revision [zoo-mcp-server-12345-abc] has been deployed and is serving 100 percent of traffic.
您已部署 MCP 伺服器。現在可以使用了。
8. 將遠端 MCP 伺服器新增至 Gemini CLI
您已成功部署遠端 MCP 伺服器,現在可以使用 Google Code Assist 或 Gemini CLI 等各種應用程式連線至該伺服器。在本節中,我們將使用 Gemini CLI 建立與新遠端 MCP 伺服器的連線。
- 授予使用者帳戶呼叫遠端 MCP 伺服器的權限
gcloud projects add-iam-policy-binding $GOOGLE_CLOUD_PROJECT \ --member=user:$(gcloud config get-value account) \ --role='roles/run.invoker' - 將 Google Cloud 憑證和專案編號儲存於環境變數中,以供 Gemini 設定檔使用:
export PROJECT_NUMBER=$(gcloud projects describe $GOOGLE_CLOUD_PROJECT --format="value(projectNumber)") export ID_TOKEN=$(gcloud auth print-identity-token) - 開啟 Gemini CLI 設定檔
cloudshell edit ~/.gemini/settings.json - 取代 Gemini CLI 設定檔,新增 Cloud Run MCP 伺服器
{ "mcpServers": { "zoo-remote": { "httpUrl": "https://zoo-mcp-server-$PROJECT_NUMBER.europe-west1.run.app/mcp/", "headers": { "Authorization": "Bearer $ID_TOKEN" } } }, "selectedAuthType": "cloud-shell", "hasSeenIdeIntegrationNudge": true }
- 在 Cloud Shell 中啟動 Gemini CLI
geminiEnter鍵,接受部分預設設定。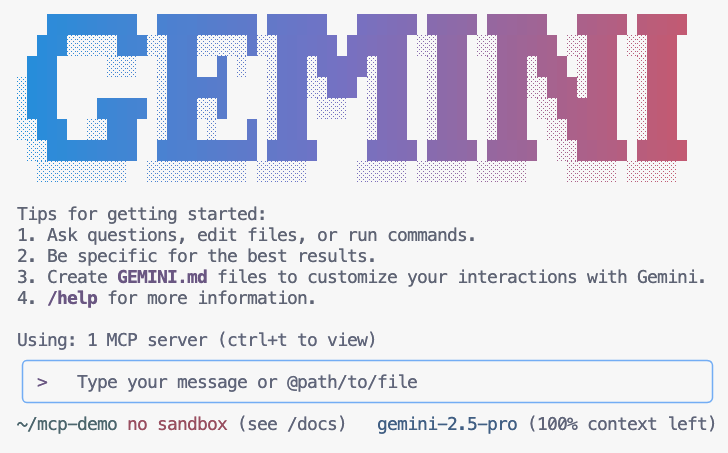
- 請 Gemini 列出其環境中可用的 MCP 工具
/mcp - 請 Gemini 在動物園中尋找特定物品
Where can I find penguins?zoo-remoteMCP 伺服器,並詢問您是否要允許執行 MCP。 - 使用向下鍵,然後按下
Enter鍵選取Yes, always allow all tools from server "zoo-remote"
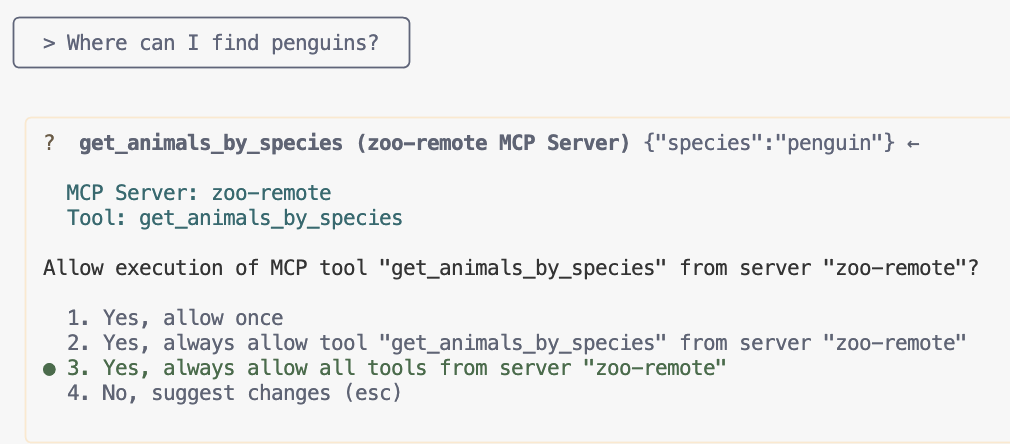
輸出內容應顯示正確答案,以及顯示 MCP 伺服器的方塊。

你辦到了!您已成功將遠端 MCP 伺服器部署至 Cloud Run,並使用 Gemini CLI 進行測試。
準備結束工作階段時,請輸入 /quit,然後按下 Enter 鍵,即可退出 Gemini CLI。
偵錯
如果看到類似下列內容的錯誤訊息:
🔍 Attempting OAuth discovery for 'zoo-remote'... ❌ 'zoo-remote' requires authentication but no OAuth configuration found Error connecting to MCP server 'zoo-remote': MCP server 'zoo-remote' requires authentication. Please configure OAuth or check server settings.
ID 權杖可能已逾時,需要再次設定 ID_TOKEN。
- 輸入
/quit,然後按下Enter鍵,即可退出 Gemini CLI。 - 在終端機中設定專案
gcloud config set project [PROJECT_ID] - 從上述步驟 2 重新開始
9. (選用) 在伺服器記錄中驗證工具呼叫
如要確認 Cloud Run MCP 伺服器是否已遭呼叫,請查看服務記錄。
gcloud run services logs read zoo-mcp-server --region europe-west1 --limit=5
您應該會看到輸出記錄,確認已進行工具呼叫。🛠️
2025-08-05 19:50:31 INFO: 169.254.169.126:39444 - "POST /mcp/ HTTP/1.1" 200 OK 2025-08-05 19:50:31 [INFO]: Processing request of type CallToolRequest 2025-08-05 19:50:31 [INFO]: >>> 🛠️ Tool: 'get_animals_by_species' called for 'penguin'
10. (選用) 將 MCP 提示新增至伺服器
對於經常執行的提示,MCP 提示可建立較長提示的簡寫,加快工作流程。
Gemini CLI 會自動將 MCP 提示轉換為自訂斜線指令,因此只要輸入 /prompt_name 即可叫用 MCP 提示,其中 prompt_name 是 MCP 提示的名稱。
建立 MCP 提示,在 Gemini CLI 中輸入 /find animal,即可快速找到動物園中的動物。
- 在
server.py檔案中,於主要防護措施 (if __name__ == "__main__":) 上方新增這段程式碼。@mcp.prompt() def find(animal: str) -> str: """ Find which exhibit and trail a specific animal might be located. """ return ( f"Please find the exhibit and trail information for {animal} in the zoo. " f"Respond with '[animal] can be found in the [exhibit] on the [trail].'" f"Example: Penguins can be found in The Arctic Exhibit on the Polar Path." ) - 將應用程式重新部署至 Cloud Run
gcloud run deploy zoo-mcp-server \ --no-allow-unauthenticated \ --region=europe-west1 \ --source=. \ --labels=dev-tutorial=codelab-mcp - 更新遠端 MCP 伺服器的 ID_TOKEN
export ID_TOKEN=$(gcloud auth print-identity-token) - 部署新版應用程式後,請啟動 Gemini CLI。
gemini - 在提示中,使用您建立的新自訂指令:
/find --animal="lions"
您應該會看到 Gemini CLI 呼叫 get_animals_by_species 工具,並按照 MCP 提示的指示格式化回應!
╭───────────────────────────╮
│  > /find --animal="lion"  │
╰───────────────────────────╯

 ╭───────────────────────────────────────────────────────────────────────────────────────────────────╮
 │ ✔  get_animals_by_species (zoo-remote MCP Server) get_animals_by_species (zoo-remote MCP Server)  │
 │                                                                                                   │
 │    [{"species":"lion","name":"Leo","age":7,"enclosure":"The Big Cat                               │
 │    Plains","trail":"Savannah                                                                      │
 │    Heights"},{"species":"lion","name":"Nala","age":6,"enclosure":"The Big Cat                     │
 │    Plains","trail":"Savannah                                                                      │
 │    Heights"},{"species":"lion","name":"Simba","age":3,"enclosure":"The Big Cat                    │
 │    Plains","trail":"Savannah                                                                      │
 │    Heights"},{"species":"lion","name":"King","age":8,"enclosure":"The Big Cat                     │
 │    Plains","trail":"Savannah Heights"}]                                                           │
 ╰───────────────────────────────────────────────────────────────────────────────────────────────────╯
✦ Lions can be found in The Big Cat Plains on the Savannah Heights.
挑戰目標,測試自己的實力
如要增加挑戰難度,請嘗試按照相同步驟建立提示,傳回動物園中特定動物物種的有趣事實。
或者,為了進一步測試所學內容,您可以構思自己經常使用的工具,並部署第二個遠端 MCP 伺服器。然後將其新增至 Gemini CLI 設定,確認是否正常運作。
11. 結語
恭喜!您已成功部署並連線至安全的遠端 MCP 伺服器。
繼續下一個實驗室
本實驗室是三部分系列的第一個實驗室。在第二個實驗室中,您將使用透過 ADK 代理建立的 MCP 伺服器。
搭配 ADK 代理程式使用 Cloud Run 上的 MCP 伺服器
(選用) 清除
如果您不會繼續進行下一個實驗室,且想清除已建立的內容,可以刪除 Cloud 專案,避免產生額外費用。
不使用服務時,Cloud Run 不會收費,但您可能仍須支付在 Artifact Registry 中儲存容器映像檔的費用。刪除 Cloud 專案後,系統就會停止對專案使用的所有資源收取費用。
如要刪除專案,請按照下列步驟操作:
gcloud projects delete $GOOGLE_CLOUD_PROJECT
您也可以從 Cloud Shell 磁碟刪除不必要的資源。您可以:
- 刪除 Codelab 專案目錄:
rm -rf ~/mcp-on-cloudrun - 警告!這項操作無法復原,如要刪除 Cloud Shell 中的所有內容來釋出空間,可以刪除整個主目錄。請務必將要保留的內容另存他處。
sudo rm -rf $HOME