
1. מבוא
סקירה כללית
בשיעור ה-Lab הזה תבנו ותפרסו שרת Model Context Protocol (MCP). שרתי MCP שימושיים למתן גישה למודלים מסוג LLM לכלים ולשירותים חיצוניים. תגדירו אותו כשירות מאובטח ומוכן לייצור ב-Cloud Run, שאפשר לגשת אליו מכמה לקוחות. לאחר מכן תתחברו לשרת ה-MCP המרוחק מ-Gemini CLI.
הפעולות שתבצעו:
נשתמש ב-FastMCP כדי ליצור שרת MCP של גן חיות עם שני כלים: get_animals_by_species ו-get_animal_details. FastMCP מספק דרך מהירה ונוחה ליצירת שרתי MCP ולקוחות.

מה תלמדו
- פורסים את שרת ה-MCP ב-Cloud Run.
- כדי להגן על נקודת הקצה של השרת, צריך לדרוש אימות לכל הבקשות, כדי שרק לקוחות ונציגים מורשים יוכלו לתקשר איתו.
- התחברות לנקודת הקצה המאובטחת של שרת ה-MCP מ-Gemini CLI
2. הגדרת הפרויקט
- אם עדיין אין לכם חשבון Google, אתם צריכים ליצור חשבון Google.
- משתמשים בחשבון לשימוש אישי במקום בחשבון לצורכי עבודה או בחשבון בית ספרי. יכול להיות שבחשבונות לצורכי עבודה או בחשבונות בית ספריים יש הגבלות שימנעו מכם להפעיל את ממשקי ה-API שנדרשים למעבדה הזו.
- נכנסים למסוף Google Cloud.
- יוצרים פרויקט חדש או בוחרים להשתמש מחדש בפרויקט קיים.
- אם מופיעה שגיאה לגבי מכסת הפרויקט, צריך לעשות שימוש חוזר בפרויקט קיים או למחוק פרויקט קיים כדי ליצור פרויקט חדש.
3. פתיחת Cloud Shell Editor
- כדי לעבור ישירות אל Cloud Shell Editor, לוחצים על הקישור הזה.
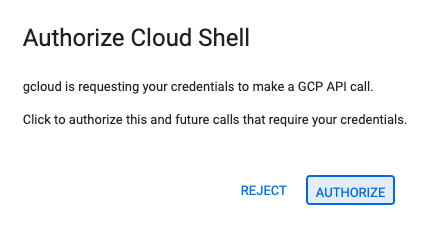
- אם תתבקשו לאשר בשלב כלשהו היום, תצטרכו ללחוץ על אישור כדי להמשיך.
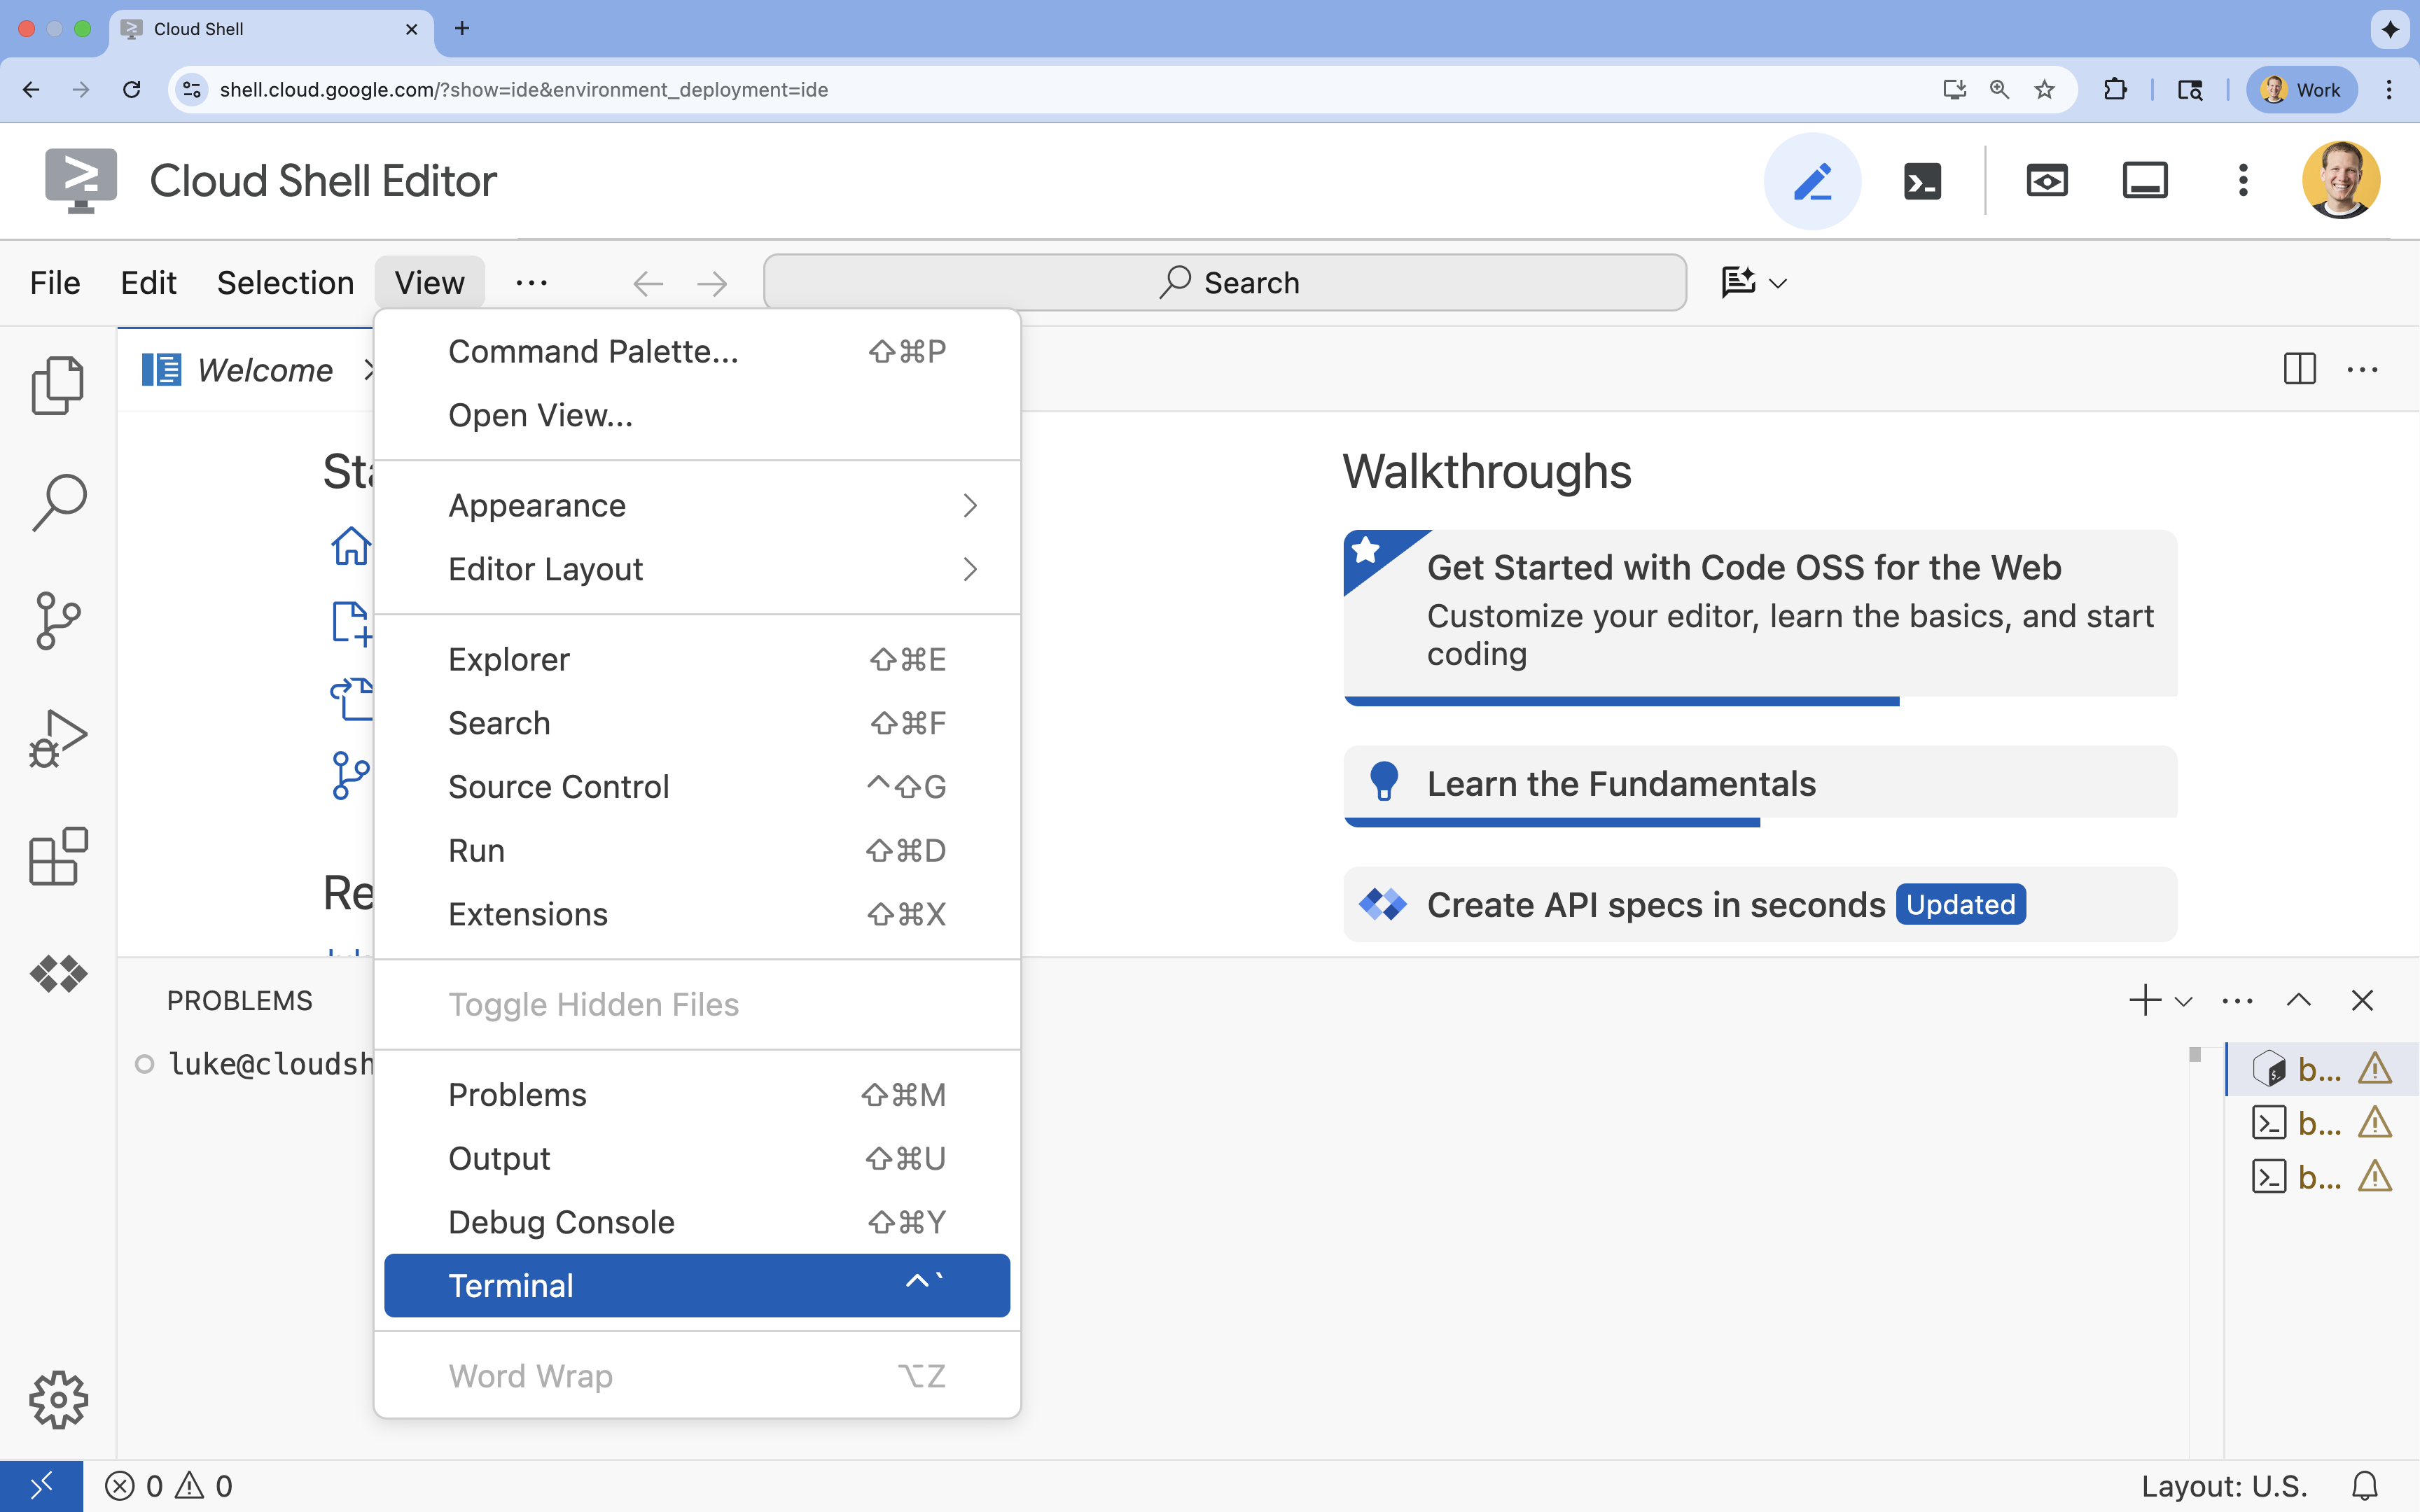
- אם הטרמינל לא מופיע בתחתית המסך, פותחים אותו:
- לוחצים על הצגה.
- לוחצים על Terminal (מסוף)
 .
.
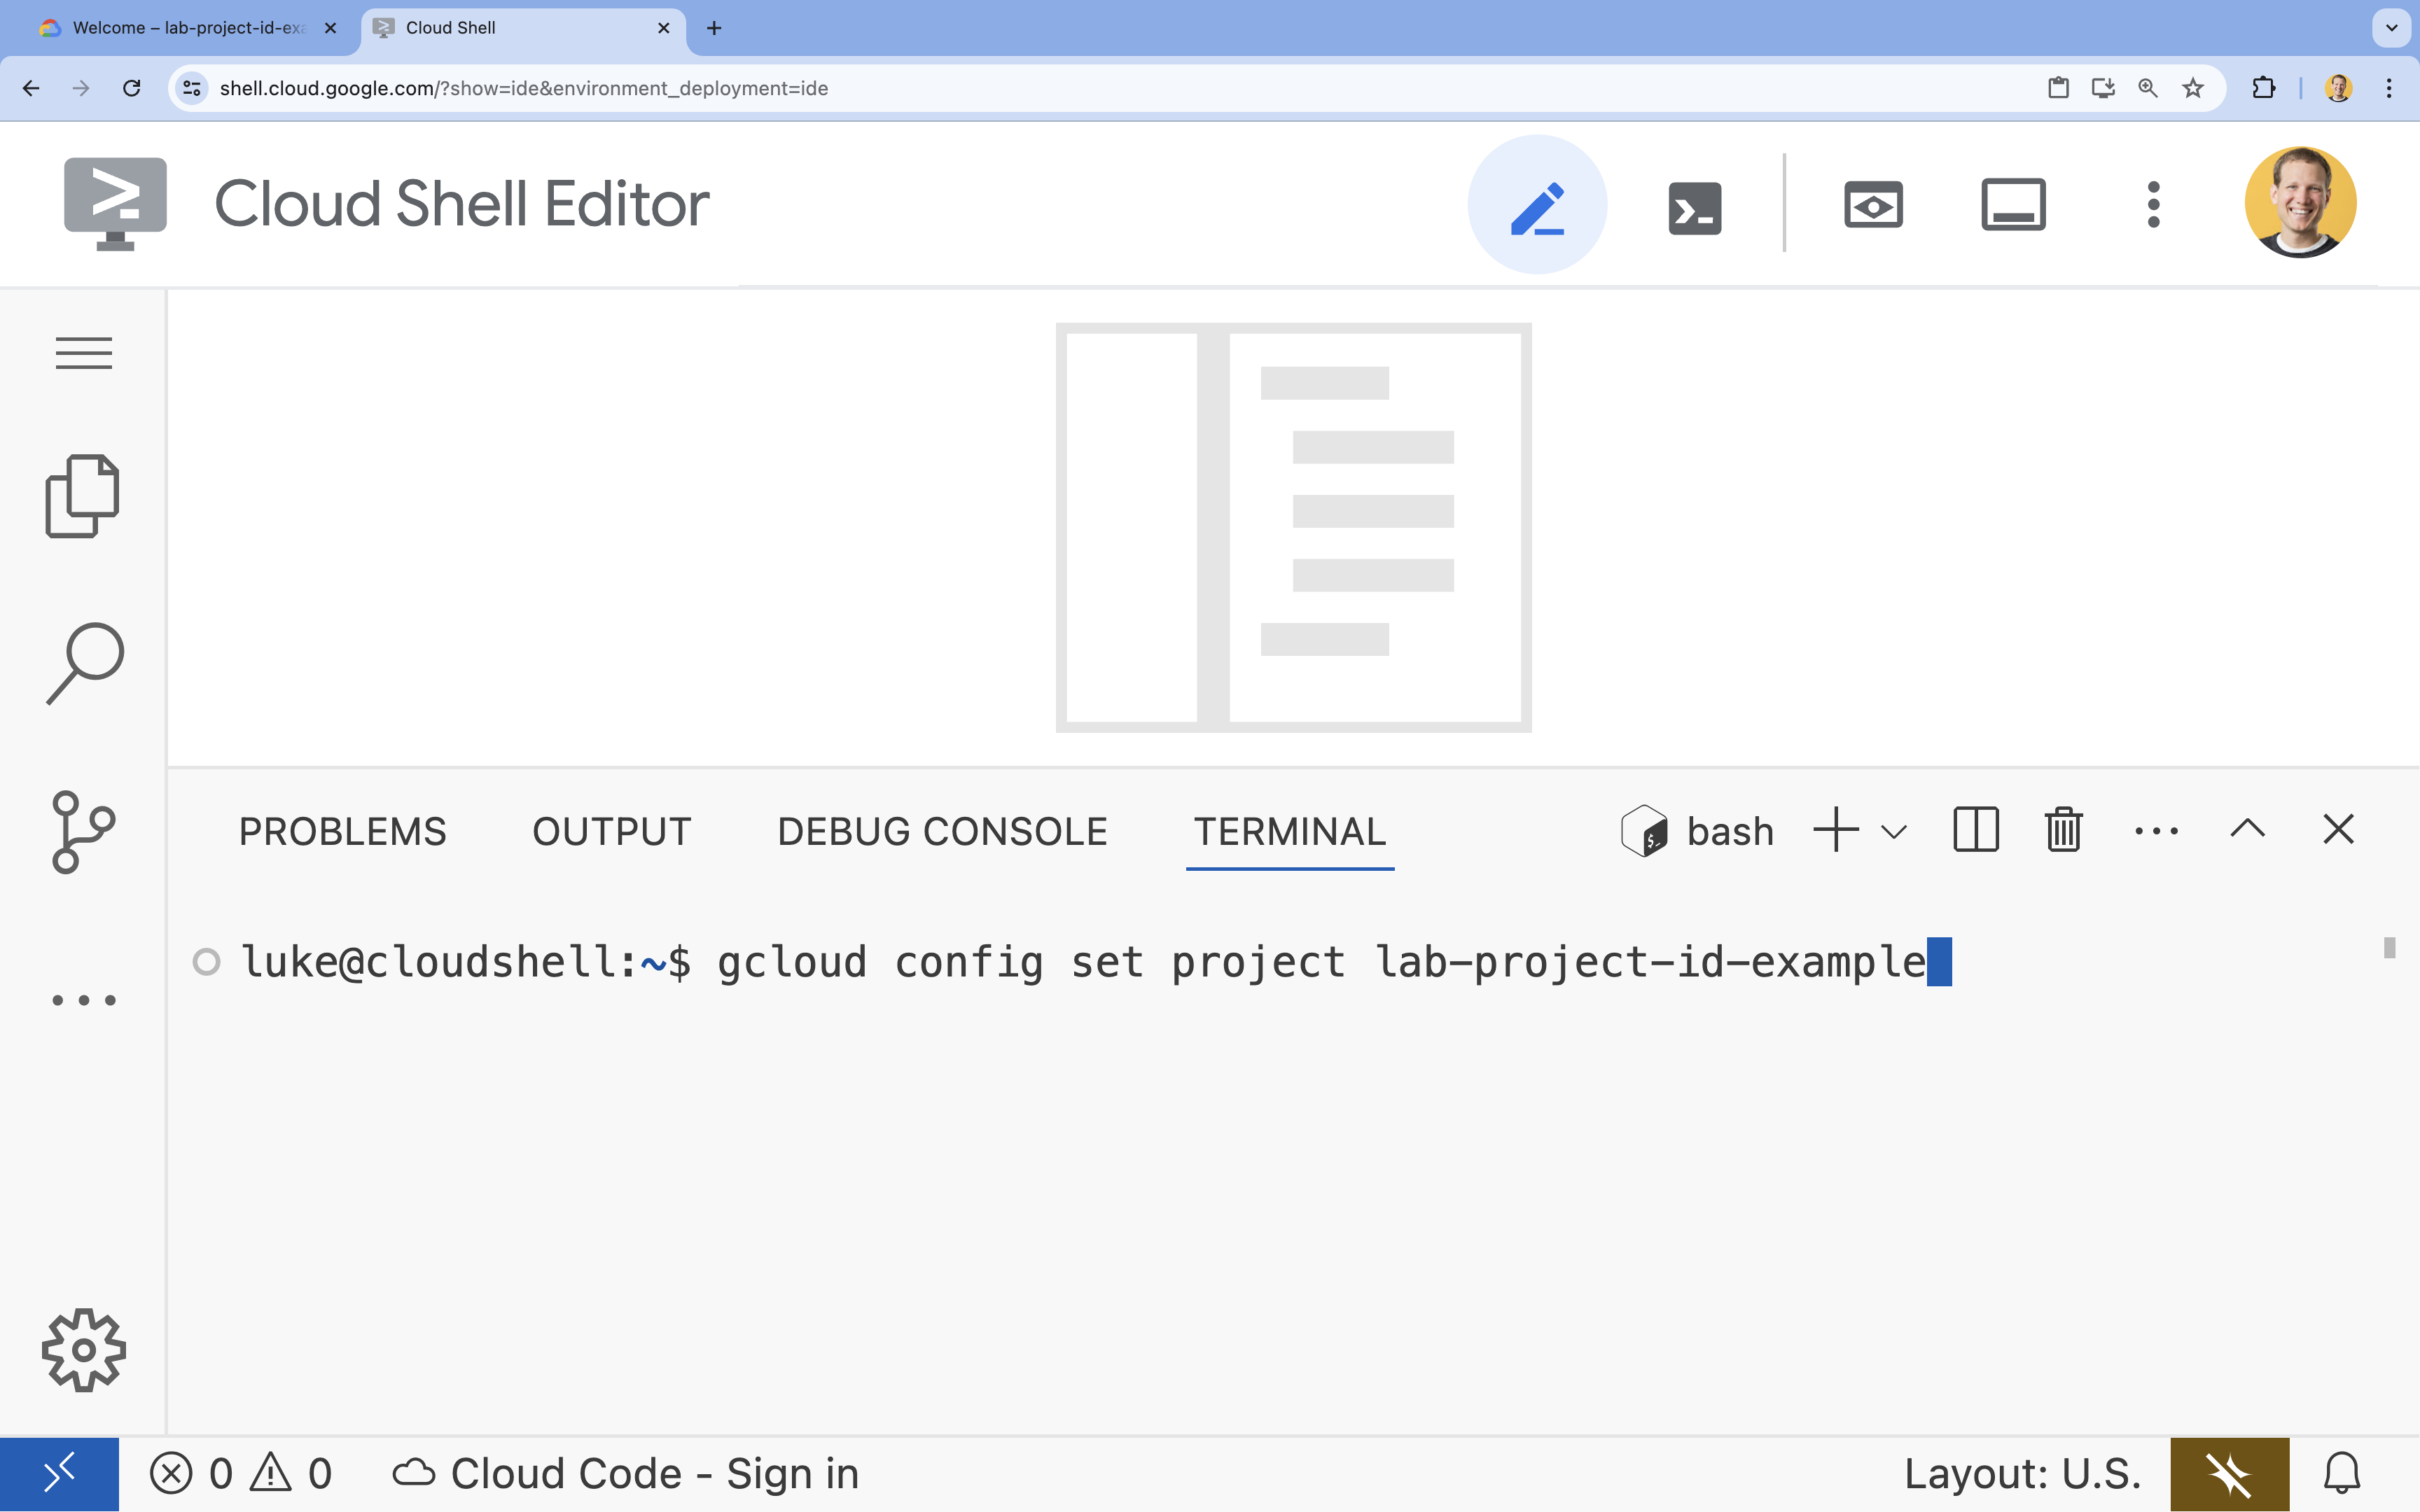
- בטרמינל, מגדירים את הפרויקט באמצעות הפקודה הבאה:
- פורמט:
gcloud config set project [PROJECT_ID] - דוגמה:
gcloud config set project lab-project-id-example - אם אתם לא זוכרים את מזהה הפרויקט:
- כדי לראות את כל מזהי הפרויקטים, מריצים את הפקודה:
gcloud projects list | awk '/PROJECT_ID/{print $2}'
- כדי לראות את כל מזהי הפרויקטים, מריצים את הפקודה:
- פורמט:
- תוצג ההודעה הבאה:
Updated property [core/project].
WARNINGומוצגת השאלהDo you want to continue (Y/n)?, סביר להניח שהזנתם את מזהה הפרויקט בצורה שגויה. לוחצים עלn, לוחצים עלEnterומנסים להריץ שוב את הפקודהgcloud config set project.
4. הפעלת ממשקי ה-API
בטרמינל, מפעילים את ממשקי ה-API:
gcloud services enable \
  run.googleapis.com \
  artifactregistry.googleapis.com \
  cloudbuild.googleapis.com
אם מתבקשים לאשר, לוחצים על אישור כדי להמשיך.
הפקודה הזו עשויה להימשך כמה דקות, אבל בסופו של דבר היא אמורה להציג הודעה על הצלחה שדומה להודעה הזו:
Operation "operations/acf.p2-73d90d00-47ee-447a-b600" finished successfully.
5. הכנת פרויקט Python
- יוצרים תיקייה בשם
mcp-on-cloudrunלאחסון קוד המקור לפריסה:mkdir mcp-on-cloudrun && cd mcp-on-cloudrun - יוצרים פרויקט Python באמצעות הכלי
uvכדי ליצור קובץpyproject.toml:uv init --description "Example of deploying an MCP server on Cloud Run" --bare --python 3.13uv initיוצרת קובץpyproject.tomlלפרויקט.כדי להציג את תוכן הקובץ, מריצים את הפקודה הבאה:cat pyproject.toml[project] name = "mcp-on-cloudrun" version = "0.1.0" description = "Example of deploying an MCP server on Cloud Run" requires-python = ">=3.13" dependencies = []
6. יצירת שרת MCP של גן החיות
כדי לספק הקשר חשוב לשיפור השימוש במודלים גדולים של שפה (LLM) עם MCP, צריך להגדיר שרת MCP של zoo עם FastMCP – מסגרת סטנדרטית לעבודה עם Model Context Protocol. FastMCP מאפשר ליצור במהירות שרתי MCP ולקוחות באמצעות Python. שרת ה-MCP הזה מספק נתונים על בעלי חיים בגן חיות דמיוני. לשם פשטות, אנחנו מאחסנים את הנתונים בזיכרון. בשרת MCP לייצור, כדאי לספק נתונים ממקורות כמו מסדי נתונים או ממשקי API.
- מריצים את הפקודה הבאה כדי להוסיף את FastMCP כתלות בקובץ
pyproject.toml:uv add fastmcp==2.12.4 --no-syncuv.lockלפרויקט. - יוצרים ופותחים קובץ
server.pyחדש בשביל קוד המקור של שרת ה-MCP:cloudshell edit ~/mcp-on-cloudrun/server.pycloudshell editתפתח את הקובץserver.pyבעורך שמעל הטרמינל. - מוסיפים את קוד המקור הבא של שרת ה-MCP של zoo לקובץ
server.py:import asyncio import logging import os from typing import List, Dict, Any from fastmcp import FastMCP logger = logging.getLogger(__name__) logging.basicConfig(format="[%(levelname)s]: %(message)s", level=logging.INFO) mcp = FastMCP("Zoo Animal MCP Server 🦁🐧🐻") # Dictionary of animals at the zoo ZOO_ANIMALS = [ { "species": "lion", "name": "Leo", "age": 7, "enclosure": "The Big Cat Plains", "trail": "Savannah Heights" }, { "species": "lion", "name": "Nala", "age": 6, "enclosure": "The Big Cat Plains", "trail": "Savannah Heights" }, { "species": "lion", "name": "Simba", "age": 3, "enclosure": "The Big Cat Plains", "trail": "Savannah Heights" }, { "species": "lion", "name": "King", "age": 8, "enclosure": "The Big Cat Plains", "trail": "Savannah Heights" }, { "species": "penguin", "name": "Waddles", "age": 2, "enclosure": "The Arctic Exhibit", "trail": "Polar Path" }, { "species": "penguin", "name": "Pip", "age": 4, "enclosure": "The Arctic Exhibit", "trail": "Polar Path" }, { "species": "penguin", "name": "Skipper", "age": 5, "enclosure": "The Arctic Exhibit", "trail": "Polar Path" }, { "species": "penguin", "name": "Chilly", "age": 3, "enclosure": "The Arctic Exhibit", "trail": "Polar Path" }, { "species": "penguin", "name": "Pingu", "age": 6, "enclosure": "The Arctic Exhibit", "trail": "Polar Path" }, { "species": "penguin", "name": "Noot", "age": 1, "enclosure": "The Arctic Exhibit", "trail": "Polar Path" }, { "species": "elephant", "name": "Ellie", "age": 15, "enclosure": "The Pachyderm Sanctuary", "trail": "Savannah Heights" }, { "species": "elephant", "name": "Peanut", "age": 12, "enclosure": "The Pachyderm Sanctuary", "trail": "Savannah Heights" }, { "species": "elephant", "name": "Dumbo", "age": 5, "enclosure": "The Pachyderm Sanctuary", "trail": "Savannah Heights" }, { "species": "elephant", "name": "Trunkers", "age": 10, "enclosure": "The Pachyderm Sanctuary", "trail": "Savannah Heights" }, { "species": "bear", "name": "Smokey", "age": 10, "enclosure": "The Grizzly Gulch", "trail": "Polar Path" }, { "species": "bear", "name": "Grizzly", "age": 8, "enclosure": "The Grizzly Gulch", "trail": "Polar Path" }, { "species": "bear", "name": "Barnaby", "age": 6, "enclosure": "The Grizzly Gulch", "trail": "Polar Path" }, { "species": "bear", "name": "Bruin", "age": 12, "enclosure": "The Grizzly Gulch", "trail": "Polar Path" }, { "species": "giraffe", "name": "Gerald", "age": 4, "enclosure": "The Tall Grass Plains", "trail": "Savannah Heights" }, { "species": "giraffe", "name": "Longneck", "age": 5, "enclosure": "The Tall Grass Plains", "trail": "Savannah Heights" }, { "species": "giraffe", "name": "Patches", "age": 3, "enclosure": "The Tall Grass Plains", "trail": "Savannah Heights" }, { "species": "giraffe", "name": "Stretch", "age": 6, "enclosure": "The Tall Grass Plains", "trail": "Savannah Heights" }, { "species": "antelope", "name": "Speedy", "age": 2, "enclosure": "The Tall Grass Plains", "trail": "Savannah Heights" }, { "species": "antelope", "name": "Dash", "age": 3, "enclosure": "The Tall Grass Plains", "trail": "Savannah Heights" }, { "species": "antelope", "name": "Gazelle", "age": 4, "enclosure": "The Tall Grass Plains", "trail": "Savannah Heights" }, { "species": "antelope", "name": "Swift", "age": 5, "enclosure": "The Tall Grass Plains", "trail": "Savannah Heights" }, { "species": "polar bear", "name": "Snowflake", "age": 7, "enclosure": "The Arctic Exhibit", "trail": "Polar Path" }, { "species": "polar bear", "name": "Blizzard", "age": 5, "enclosure": "The Arctic Exhibit", "trail": "Polar Path" }, { "species": "polar bear", "name": "Iceberg", "age": 9, "enclosure": "The Arctic Exhibit", "trail": "Polar Path" }, { "species": "walrus", "name": "Wally", "age": 10, "enclosure": "The Walrus Cove", "trail": "Polar Path" }, { "species": "walrus", "name": "Tusker", "age": 12, "enclosure": "The Walrus Cove", "trail": "Polar Path" }, { "species": "walrus", "name": "Moby", "age": 8, "enclosure": "The Walrus Cove", "trail": "Polar Path" }, { "species": "walrus", "name": "Flippers", "age": 9, "enclosure": "The Walrus Cove", "trail": "Polar Path" } ] @mcp.tool() def get_animals_by_species(species: str) -> List[Dict[str, Any]]: """ Retrieves all animals of a specific species from the zoo. Can also be used to collect the base data for aggregate queries of animals of a specific species - like counting the number of penguins or finding the oldest lion. Args: species: The species of the animal (e.g., 'lion', 'penguin'). Returns: A list of dictionaries, where each dictionary represents an animal and contains details like name, age, enclosure, and trail. """ logger.info(f">>> 🛠️ Tool: 'get_animals_by_species' called for '{species}'") return [animal for animal in ZOO_ANIMALS if animal["species"].lower() == species.lower()] @mcp.tool() def get_animal_details(name: str) -> Dict[str, Any]: """ Retrieves the details of a specific animal by its name. Args: name: The name of the animal. Returns: A dictionary with the animal's details (species, name, age, enclosure, trail) or an empty dictionary if the animal is not found. """ logger.info(f">>> 🛠️ Tool: 'get_animal_details' called for '{name}'") for animal in ZOO_ANIMALS: if animal["name"].lower() == name.lower(): return animal return {} if __name__ == "__main__": port = int(os.getenv("PORT", 8080)) logger.info(f"🚀 MCP server started on port {port}") asyncio.run( mcp.run_async( transport="http", host="0.0.0.0", port=port, ) )
הקוד שלך הושלם! הגיע הזמן לפרוס את שרת ה-MCP ב-Cloud Run.
7. פריסה ב-Cloud Run
עכשיו פורסים שרת MCP ל-Cloud Run ישירות מקוד המקור.
- יוצרים ופותחים קובץ
Dockerfileחדש לפריסה ב-Cloud Run:cloudshell edit ~/mcp-on-cloudrun/Dockerfile - כדי להשתמש בכלי
uvלהרצת הקובץserver.py, מוסיפים את הקוד הבא ל-Dockerfile:# Use the official Python image FROM python:3.13-slim # Install uv COPY --from=ghcr.io/astral-sh/uv:latest /uv /uvx /bin/ # Install the project into /app COPY . /app WORKDIR /app # Allow statements and log messages to immediately appear in the logs ENV PYTHONUNBUFFERED=1 # Install dependencies RUN uv sync EXPOSE $PORT # Run the FastMCP server CMD ["uv", "run", "server.py"] - יוצרים חשבון שירות בשם
mcp-server-sa:gcloud iam service-accounts create mcp-server-sa --display-name="MCP Server Service Account" - מריצים את הפקודה
gcloudכדי לפרוס את האפליקציה ב-Cloud Runcd ~/mcp-on-cloudrun gcloud run deploy zoo-mcp-server \ --service-account=mcp-server-sa@$GOOGLE_CLOUD_PROJECT.iam.gserviceaccount.com \ --no-allow-unauthenticated \ --region=us-west1 \ --source=. \ --labels=dev-tutorial=codelab-mcp--no-allow-unauthenticatedכדי לדרוש אימות. הדבר חשוב מטעמי אבטחה. אם לא נדרש אימות, כל אחד יכול להתקשר לשרת ה-MCP שלכם ולגרום נזק למערכת. - מאשרים את היצירה של מאגר חדש ב-Artifact Registry. זו הפעם הראשונה שאתם פורסים ל-Cloud Run מקוד מקור, ולכן תראו:
Deploying from source requires an Artifact Registry Docker repository to store built containers. A repository named
[cloud-run-source-deploy] in region [us-west1] will be created.

Do you want to continue (Y/n)?
Yולוחצים עלEnter. כך ייצור מאגר Artifact Registry לפריסה. ההרשאה הזו נדרשת כדי לאחסן את קונטיינר ה-Docker של שרת ה-MCP בשירות Cloud Run. - אחרי כמה דקות, תופיע הודעה כמו:
Service [zoo-mcp-server] revision [zoo-mcp-server-12345-abc] has been deployed and is serving 100 percent of traffic.
פרסתם את שרת ה-MCP. עכשיו אפשר להשתמש בו.
8. הוספת שרת MCP מרוחק ל-Gemini CLI
אחרי שפרסתם בהצלחה שרת MCP מרוחק, אתם יכולים להתחבר אליו באמצעות אפליקציות שונות כמו Google Code Assist או Gemini CLI. בקטע הזה נסביר איך ליצור חיבור לשרת ה-MCP המרוחק החדש באמצעות Gemini CLI.
- נותנים לחשבון המשתמש הרשאה להתקשר לשרת ה-MCP המרוחק
gcloud projects add-iam-policy-binding $GOOGLE_CLOUD_PROJECT \ --member=user:$(gcloud config get-value account) \ --role='roles/run.invoker' - שומרים את פרטי הכניסה ל-Google Cloud ואת מספר הפרויקט במשתני סביבה לשימוש בקובץ ההגדרות של Gemini:
export PROJECT_NUMBER=$(gcloud projects describe $GOOGLE_CLOUD_PROJECT --format="value(projectNumber)") export ID_TOKEN=$(gcloud auth print-identity-token) - יוצרים תיקייה בשם
.geminiאם היא עדיין לא נוצרהmkdir -p ~/.gemini - פותחים את קובץ ההגדרות של Gemini CLI
cloudshell edit ~/.gemini/settings.json - החלפת קובץ ההגדרות של Gemini CLI כדי להוסיף את שרת ה-MCP של Cloud Run
{ "ide": { "hasSeenNudge": true }, "mcpServers": { "zoo-remote": { "httpUrl": "https://zoo-mcp-server-$PROJECT_NUMBER.us-west1.run.app/mcp", "headers": { "Authorization": "Bearer $ID_TOKEN" } } }, "security": { "auth": { "selectedType": "cloud-shell" } } } - הפעלת Gemini CLI ב-Cloud Shell
geminiEnterכדי לאשר כמה הגדרות ברירת מחדל.
- מבקשים מ-Gemini לרשום את כלי ה-MCP שזמינים לו בהקשר שלו
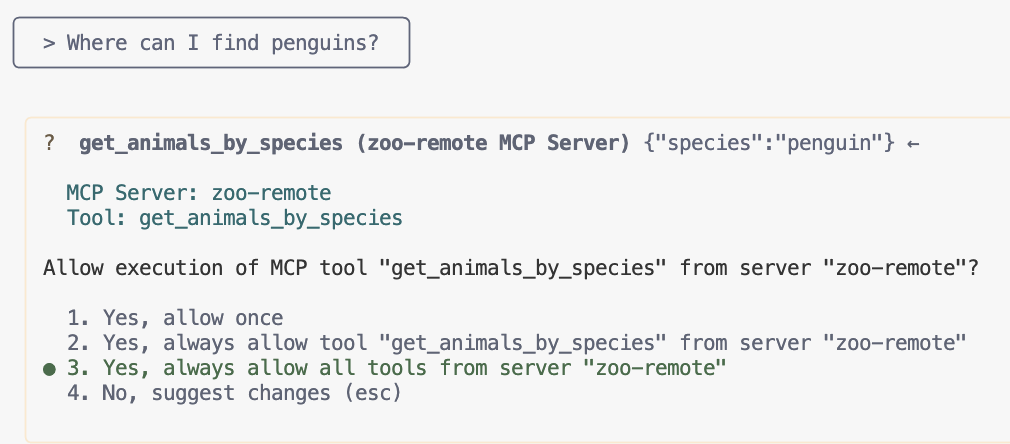
/mcp - מבקשים מ-Gemini למצוא משהו בגן החיות
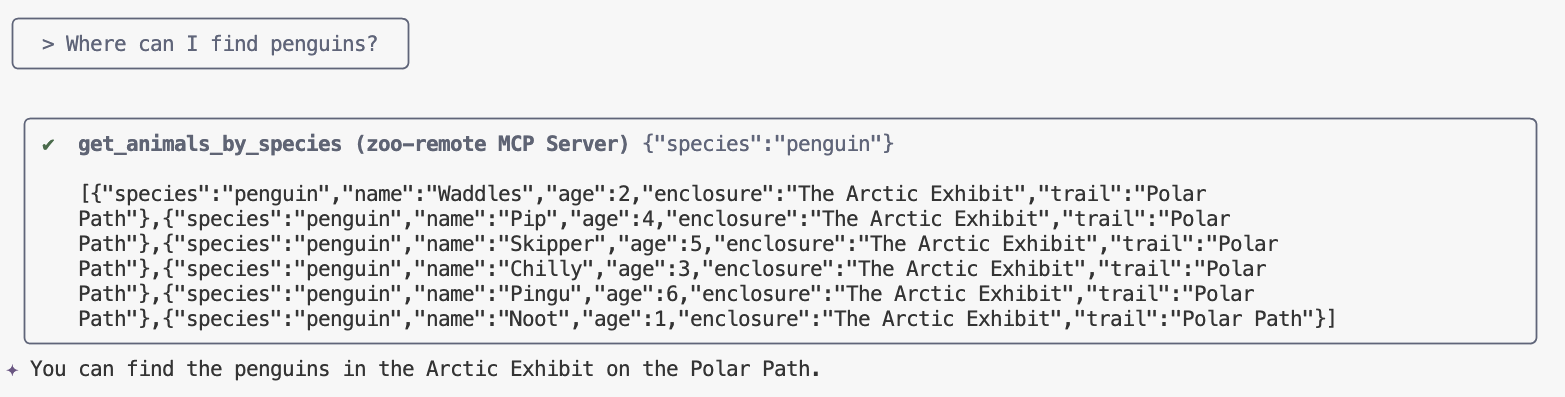
Where can I find penguins?zoo-remoteMCP וישאל אם רוצים לאפשר את ההפעלה של MCP. - משתמשים בחץ למטה ואז מקישים על
Enterכדי לבחורYes, always allow all tools from server "zoo-remote"
הפלט צריך להציג את התשובה הנכונה ותיבת תצוגה שמראה שהיה שימוש בשרת MCP.
הצלחתם! הצלחתם לפרוס שרת MCP מרחוק ב-Cloud Run ולבדוק אותו באמצעות Gemini CLI.
כשמוכנים לסיים את הסשן, מקלידים /quit ולוחצים על Enter כדי לצאת מ-Gemini CLI.
ניפוי באגים
אם מופיעה שגיאה כמו זו:
🔍 Attempting OAuth discovery for 'zoo-remote'...
❌ 'zoo-remote' requires authentication but no OAuth configuration found
Error connecting to MCP server 'zoo-remote': MCP server 'zoo-remote' requires authentication. Please configure OAuth or check server settings.
סביר להניח שפג התוקף של אסימון המזהה וצריך להגדיר שוב את ID_TOKEN.
- מקלידים
/quitואז מקישים עלEnterכדי לצאת מ-Gemini CLI. - הגדרת הפרויקט במסוף
gcloud config set project [PROJECT_ID] - מריצים מחדש את הפקודה של פרטי הכניסה ל-Google Cloud כדי לקבל
ID_TOKENחדש, כי יכול להיות שהתוקף שלכם פג.export PROJECT_NUMBER=$(gcloud projects describe $GOOGLE_CLOUD_PROJECT --format="value(projectNumber)") export ID_TOKEN=$(gcloud auth print-identity-token)
9. (אופציונלי) אימות של קריאות לכלים ביומני השרת
כדי לוודא שהתבצעה קריאה לשרת ה-MCP של Cloud Run, בודקים את יומני השירות.
gcloud run services logs read zoo-mcp-server --region us-west1 --limit=5
אמור להופיע יומן פלט שמאשר שהתבצעה קריאה לכלי. 🛠️
2025-08-05 19:50:31 INFO: 169.254.169.126:39444 - "POST /mcp HTTP/1.1" 200 OK 2025-08-05 19:50:31 [INFO]: Processing request of type CallToolRequest 2025-08-05 19:50:31 [INFO]: >>> 🛠️ Tool: 'get_animals_by_species' called for 'penguin'
10. (אופציונלי) הוספת הנחיה ל-MCP לשרת
הנחיה של MCP יכולה לייעל את תהליך העבודה שלכם בהנחיות שאתם מריצים לעיתים קרובות, על ידי יצירת קיצור להנחיה ארוכה יותר.
Gemini CLI ממיר באופן אוטומטי הנחיות MCP לפקודות סלאש מותאמות אישית, כך שאפשר להפעיל הנחיית MCP על ידי הקלדת /prompt_name, כאשר prompt_name הוא השם של הנחיית ה-MCP.
כדי למצוא במהירות חיה בגן החיות, אפשר ליצור הנחיה ל-MCP ולהקליד /find animal ב-Gemini CLI.
- מוסיפים את הקוד הזה לקובץ
server.pyמעל השומר הראשי (if __name__ == "__main__":)@mcp.prompt() def find(animal: str) -> str: """ Find which exhibit and trail a specific animal might be located. """ return ( f"Please find the exhibit and trail information for {animal} in the zoo. " f"Respond with '[animal] can be found in the [exhibit] on the [trail].'" f"Example: Penguins can be found in The Arctic Exhibit on the Polar Path." ) - פריסה מחדש של האפליקציה ב-Cloud Run
gcloud run deploy zoo-mcp-server \ --region=us-west1 \ --source=. \ --labels=dev-tutorial=codelab-mcp - רענון של ID_TOKEN עבור שרת MCP מרוחק
export ID_TOKEN=$(gcloud auth print-identity-token) - אחרי שפורסתם את הגרסה החדשה של האפליקציה, מפעילים את Gemini CLI.
gemini - בהנחיה, משתמשים בפקודה החדשה בהתאמה אישית שיצרתם:
/find lions
אפשר לראות ש-Gemini CLI קורא לכלי get_animals_by_species ומעצב את התשובה לפי ההוראות בהנחיה של MCP.
╭───────────────────────────╮
│ > /find lions │
╰───────────────────────────╯
╭───────────────────────────────────────────────────────────────────────────────────────────────────╮
│ ✔ get_animals_by_species (zoo-remote MCP Server) get_animals_by_species (zoo-remote MCP Server) │
│ │
│ [{"species":"lion","name":"Leo","age":7,"enclosure":"The Big Cat │
│ Plains","trail":"Savannah │
│ Heights"},{"species":"lion","name":"Nala","age":6,"enclosure":"The Big Cat │
│ Plains","trail":"Savannah │
│ Heights"},{"species":"lion","name":"Simba","age":3,"enclosure":"The Big Cat │
│ Plains","trail":"Savannah │
│ Heights"},{"species":"lion","name":"King","age":8,"enclosure":"The Big Cat │
│ Plains","trail":"Savannah Heights"}] │
╰───────────────────────────────────────────────────────────────────────────────────────────────────╯
✦ Lions can be found in The Big Cat Plains on the Savannah Heights.
11. (אופציונלי) שימוש ב-Gemini Flash Lite לקבלת תשובות מהירות יותר
Gemini CLI מאפשר לכם לבחור את המודל שבו אתם משתמשים.
- Gemini 2.5 Pro הוא מודל חשיבה מתקדם של Google, שיכול לחשוב על בעיות מורכבות בקוד, במתמטיקה ובמדעים, וגם לנתח מערכי נתונים גדולים, מאגרי קוד ומסמכים באמצעות הקשר ארוך.
- Gemini 2.5 Flash הוא המודל הכי טוב של Google מבחינת יחס מחיר-ביצועים, והוא מציע יכולות מגוונות. 2.5 Flash הוא המודל הכי טוב לעיבוד בקנה מידה גדול, לזמן אחזור נמוך, למשימות בהיקף גדול שדורשות חשיבה ולתרחישי שימוש ב-AI אקטיבי.
- Gemini 2.5 Flash Lite הוא מודל ה-Flash המהיר ביותר של Google, שעבר אופטימיזציה ליעילות בעלויות ולתפוקה גבוהה.
מכיוון שהבקשות שקשורות למציאת חיות בגן החיות לא דורשות חשיבה רציונלית, כדאי לנסות להשתמש במודל זריז יותר כדי לזרז את התהליך.
בקטע הקודם יצרתם הנחיית MCP כדי למצוא במהירות חיה בגן החיות על ידי הקלדת /find animal ב-Gemini CLI.
- אחרי שפורסתם את הגרסה החדשה של האפליקציה, מפעילים את Gemini CLI.
gemini --model=gemini-2.5-flash-lite - בהנחיה, משתמשים בפקודה החדשה בהתאמה אישית שיצרתם:
/find lions
עדיין תוכלו לראות ש-Gemini CLI קורא לכלי get_animals_by_species ומעצב את התשובה לפי ההוראות בהנחיה של MCP, אבל התשובה תופיע הרבה יותר מהר.
╭───────────────────────────╮
│ > /find lions │
╰───────────────────────────╯
╭───────────────────────────────────────────────────────────────────────────────────────────────────╮
│ ✔ get_animals_by_species (zoo-remote MCP Server) get_animals_by_species (zoo-remote MCP Server) │
│ │
│ [{"species":"lion","name":"Leo","age":7,"enclosure":"The Big Cat │
│ Plains","trail":"Savannah │
│ Heights"},{"species":"lion","name":"Nala","age":6,"enclosure":"The Big Cat │
│ Plains","trail":"Savannah │
│ Heights"},{"species":"lion","name":"Simba","age":3,"enclosure":"The Big Cat │
│ Plains","trail":"Savannah │
│ Heights"},{"species":"lion","name":"King","age":8,"enclosure":"The Big Cat │
│ Plains","trail":"Savannah Heights"}] │
╰───────────────────────────────────────────────────────────────────────────────────────────────────╯
✦ Lions can be found in The Big Cat Plains on the Savannah Heights.
ניפוי באגים
אם מופיעה שגיאה כמו זו:
✕ Unknown command: /find lions
מנסים להריץ את הפקודה /mcp. אם הפלט הוא zoo-remote - Disconnected, יכול להיות שתצטרכו לפרוס מחדש או להריץ שוב את הפקודות הבאות:
gcloud projects add-iam-policy-binding $GOOGLE_CLOUD_PROJECT \
--member=user:$(gcloud config get-value account) \
--role='roles/run.invoker'
export PROJECT_NUMBER=$(gcloud projects describe $GOOGLE_CLOUD_PROJECT --format="value(projectNumber)")
export ID_TOKEN=$(gcloud auth print-identity-token)
12. סיכום
מעולה! הצלחתם לפרוס ולהתחבר לשרת MCP מרוחק ומאובטח.
המשך לשיעור ה-Lab הבא
שיעור ה-Lab הזה הוא הראשון בסדרה של שלושה שיעורי Lab. בשיעור ה-Lab השני תשתמשו בשרת ה-MCP שיצרתם עם סוכן ADK.
שימוש בשרת MCP ב-Cloud Run עם סוכן ADK
(אופציונלי) ניקוי
אם אתם לא ממשיכים למעבדה הבאה ורוצים לנקות את מה שיצרתם, אתם יכולים למחוק את פרויקט בענן כדי להימנע מחיובים נוספים.
ב-Cloud Run לא מחויבים כשלא משתמשים בשירות, אבל יכול להיות שתחויבו על אחסון קובץ האימג' של הקונטיינר ב-Artifact Registry. כשמוחקים פרויקט בענן, החיוב על כל המשאבים שנעשה בהם שימוש באותו פרויקט נפסק.
אם רוצים, אפשר למחוק את הפרויקט:
gcloud projects delete $GOOGLE_CLOUD_PROJECT
מומלץ גם למחוק משאבים מיותרים מהדיסק של Cloud Shell. אפשר:
- מוחקים את ספריית הפרויקט של ה-codelab:
rm -rf ~/mcp-on-cloudrun - אזהרה! אי אפשר לבטל את הפעולה הבאה! אם רוצים למחוק את כל מה שיש ב-Cloud Shell כדי לפנות מקום, אפשר למחוק את כל ספריית הבית. חשוב לוודא שכל מה שרוצים לשמור נשמר במקום אחר.
sudo rm -rf $HOME