
1. 概览
借助 Google Cloud Speech-to-Text API,开发者可以通过在简单易用的 API 中应用强大的神经网络模型,将音频转换为 120 种语言和语言变体。
在此 Codelab 中,您将重点学习如何将 Speech-to-Text API 与 Node.js 搭配使用。您将学习如何将英语和其他语言的音频文件发送到 Cloud Speech-to-Text API 以进行转写。
学习内容
- 如何启用 Speech-to-Text API
- 如何对 API 请求进行身份验证
- 如何安装 Node.js 版 Google Cloud 客户端库
- 如何转写英语音频文件
- 如何转写带有字词时间戳的音频文件
- 如何转写不同语言的音频文件
所需条件
调查问卷
您将如何使用本教程?
您如何评价自己在 Node.js 方面的经验水平?
您如何评价自己在使用 Google Cloud Platform 服务方面的经验水平?
2. 设置和要求
自定进度的环境设置

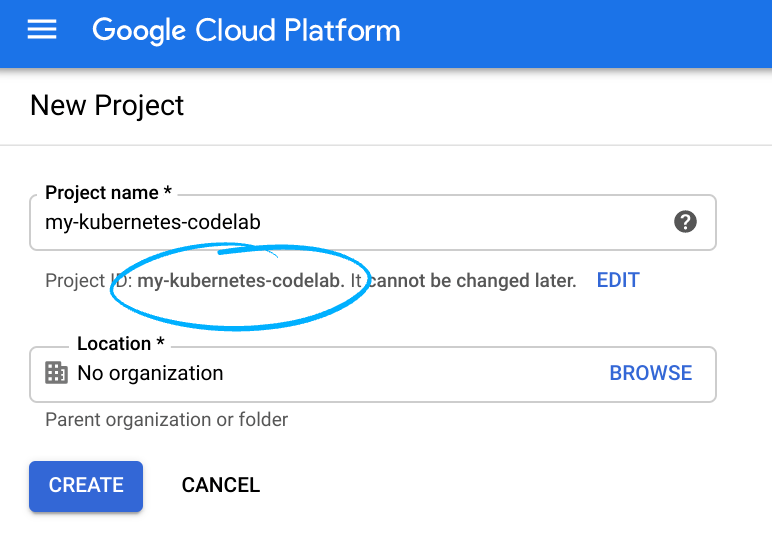
请记住项目 ID,它在所有 Google Cloud 项目中都是唯一的名称(上述名称已被占用,您无法使用,抱歉!)。它稍后将在此 Codelab 中被称为 PROJECT_ID。
- 接下来,您需要在 Cloud 控制台中启用结算功能,才能使用 Google Cloud 资源。
运行此 Codelab 应该不会产生太多的费用(如果有费用的话)。请务必按照“清理”部分中的所有说明操作,该部分介绍了如何关停资源,以免产生超出本教程范围的结算费用。Google Cloud 的新用户符合参与 $300 USD 免费试用计划的条件。
启动 Cloud Shell
虽然可以通过笔记本电脑对 Google Cloud 进行远程操作,但在此 Codelab 中,您将使用 Google Cloud Shell,这是一个在云端运行的命令行环境。
激活 Cloud Shell
- 在 Cloud Console 中,点击激活 Cloud Shell
。

如果您以前从未启动过 Cloud Shell,将看到一个中间屏幕(在折叠下面),描述它是什么。如果是这种情况,请点击继续(您将永远不会再看到它)。一次性屏幕如下所示:

预配和连接到 Cloud Shell 只需花几分钟时间。

这个虚拟机已加载了您需要的所有开发工具。它提供了一个持久的 5GB 主目录,并且在 Google Cloud 中运行,大大增强了网络性能和身份验证。只需使用一个浏览器或 Google Chromebook 即可完成本 Codelab 中的大部分(甚至全部)工作。
在连接到 Cloud Shell 后,您应该会看到自己已通过身份验证,并且相关项目已设置为您的项目 ID:
- 在 Cloud Shell 中运行以下命令以确认您已通过身份验证:
gcloud auth list
命令输出
 Credentialed Accounts
ACTIVE  ACCOUNT
*       <my_account>@<my_domain.com>

To set the active account, run:
    $ gcloud config set account `ACCOUNT`
gcloud config list project
命令输出
[core]
project = <PROJECT_ID>
如果不是上述结果,您可以使用以下命令进行设置:
gcloud config set project <PROJECT_ID>
命令输出
Updated property [core/project].
3. 启用 Speech-to-Text API
您必须先启用 Speech-to-Text API,然后才能开始使用该 API。您可以在 Cloud Shell 中使用以下命令启用该 API:
gcloud services enable speech.googleapis.com
4. 对 API 请求进行身份验证
如需向 Speech-to-Text API 发出请求,您需要使用服务账号。服务账号属于您的项目,Google 客户端 Node.js 库会使用它来发出 Speech-to-Text API 请求。与其他用户账号一样,服务账号也通过邮箱表示。在本部分中,您将使用 Cloud SDK 创建服务账号,然后创建该服务账号进行身份验证所需的凭证。
首先,您需要使用 PROJECT_ID 设置一个环境变量,以在此 Codelab 中全程使用。如果您使用的是 Cloud Shell,系统会为您设置此变量:
export GOOGLE_CLOUD_PROJECT=$(gcloud config get-value core/project)
接下来,使用以下命令创建一个新的服务账号来访问 Speech-to-Text API:
gcloud iam service-accounts create my-speech-to-text-sa \
  --display-name "my speech-to-text codelab service account"
接下来,创建 Node.js 代码以新服务账号身份登录所用的凭据。请使用以下命令创建这些凭证并将其保存为 JSON 文件 ~/key.json:
gcloud iam service-accounts keys create ~/key.json \
  --iam-account  my-speech-to-text-sa@${GOOGLE_CLOUD_PROJECT}.iam.gserviceaccount.com
最后,设置 GOOGLE_APPLICATION_CREDENTIALS 环境变量,供 Speech-to-Text API Node.js 库(将在下一步中介绍)用来查找您的凭据。该环境变量应设为您之前创建的 JSON 凭证文件的完整路径,具体命令如下:
export GOOGLE_APPLICATION_CREDENTIALS="/home/${USER}/key.json"
您可以详细了解如何对 Speech-to-Text API 进行身份验证。
5. 安装 Node.js 版 Google Cloud Speech-to-Text API 客户端库
首先,创建一个项目,用于运行此 Speech-to-Text API 实验,然后在您选择的文件夹中初始化一个新的 Node.js 软件包:
npm init
NPM 会询问有关项目配置的几个问题,例如名称和版本。对于每个问题,按 ENTER 接受默认值。默认入口点是名为 index.js 的文件。
接下来,将 Google Cloud Speech 库安装到项目中:
npm install --save @google-cloud/speech
如需详细了解如何为 Google Cloud 设置 Node.js 开发环境,请参阅设置指南。
现在,您可以使用 Speech-to-Text API 了!
6. 转写音频文件
在本部分中,您将转录预先录制的英语音频文件。音频文件位于 Google Cloud Storage 中。
前往 index.js 文件,然后将代码替换为以下内容:
// Imports the Google Cloud client library
const speech = require('@google-cloud/speech');

const client = new speech.SpeechClient();

/**
 * Calls the Speech-to-Text API on a demo audio file.
 */
async function quickstart() {
// The path to the remote LINEAR16 file stored in Google Cloud Storage
  const gcsUri = 'gs://cloud-samples-data/speech/brooklyn_bridge.raw';

  // The audio file's encoding, sample rate in hertz, and BCP-47 language code
  const audio = {
    uri: gcsUri,
  };
  const config = {
    encoding: 'LINEAR16',
    sampleRateHertz: 16000,
    languageCode: 'en-US',
  };
  const request = {
    audio: audio,
    config: config,
  };

  // Detects speech in the audio file
  const [response] = await client.recognize(request);
  const transcription = response.results
      .map(result => result.alternatives[0].transcript)
      .join('\n');
  console.log(`Transcription: ${transcription}`);
}

quickstart();
花一两分钟时间研究一下代码,看看它是如何用于转写音频文件的*。*
Encoding 参数的用途是告知 API 您要对音频文件使用哪种类型的音频编码。Flac 是 .raw 文件的编码类型(如需了解详情,请参阅有关编码类型的文档)。
在 RecognitionAudio 对象中,您可以向 API 传递 Cloud Storage 中的音频文件的 URI,也可以传递音频文件的本地文件路径。在此示例中,我们使用的是 Cloud Storage URI。
运行程序:
node .
您应该会看到以下输出内容:
how old is the Brooklyn Bridge
7. 转写并添加字词时间戳
Speech-to-Text 可以检测转写音频的时间偏移值(时间戳)。时间偏移值能显示所提供音频中每个语音内容的开始时间和结束时间。时间偏移值表示从音频开头起已经过的时间长度,以 100 毫秒为增量。
前往 index.js 文件,然后将代码替换为以下内容:
const speech = require('@google-cloud/speech');

const client = new speech.SpeechClient();

/**
 * Calls the Speech-to-Text API on a demo audio file.
 */
async function quickstart() {
// The path to the remote LINEAR16 file stored in Google Cloud Storage
  const gcsUri = 'gs://cloud-samples-data/speech/brooklyn_bridge.raw';

  // The audio file's encoding, sample rate in hertz, and BCP-47 language code
  const audio = {
    uri: gcsUri,
  };
  const config = {
    encoding: 'LINEAR16',
    sampleRateHertz: 16000,
    languageCode: 'en-US',
    enableWordTimeOffsets: true,
  };
  const request = {
    audio: audio,
    config: config,
  };

  // Detects speech in the audio file
  const [response] = await client.recognize(request);
  response.results.forEach((result) => {
    result.alternatives.forEach((alternative) => {
      console.log(`Transcript: ${alternative.transcript}`);
      console.log(`Word details:`);
      console.log(` Word count ${alternative.words.length}`);
      alternative.words.forEach((item) => {
        console.log(`  ${item.word}`);
        const s = parseInt(item.startTime.seconds) +
         item.startTime.nanos/1000000000;
        console.log(`   WordStartTime: ${s}s`);
        const e = parseInt(item.endTime.seconds) +
        item.endTime.nanos/1000000000;
        console.log(`   WordEndTime: ${e}s`);
      });
    });
  });
}

quickstart();
花一两分钟时间研究一下代码,看看它是如何用于转写带有字词时间戳的音频文件的。EnableWordTimeOffsets 参数用于告知 API 启用时间偏移(如需了解详情,请参阅文档)。
再次运行程序:
node .
您应该会看到以下输出内容:
Transcript: how old is the Brooklyn Bridge
Word details:
 Word count 6
  how
   WordStartTime: 0s
   WordEndTime: 0.3s
  old
   WordStartTime: 0.3s
   WordEndTime: 0.6s
  is
   WordStartTime: 0.6s
   WordEndTime: 0.8s
  the
   WordStartTime: 0.8s
   WordEndTime: 0.9s
  Brooklyn
   WordStartTime: 0.9s
   WordEndTime: 1.1s
  Bridge
   WordStartTime: 1.1s
   WordEndTime: 1.4s
8. 转写不同语言
Speech-to-Text API 支持 100 多种语言的转写!您可以点击此处查看支持的语言列表。
在本部分中,您将转录预先录制的法语音频文件。音频文件位于 Google Cloud Storage 中。
前往 index.js 文件,然后将代码替换为以下内容:
// Imports the Google Cloud client library
const speech = require('@google-cloud/speech');

const client = new speech.SpeechClient();

/**
 * Calls the Speech-to-Text API on a demo audio file.
 */
async function quickstart() {
// The path to the remote LINEAR16 file stored in Google Cloud Storage
  const gcsUri = 'gs://cloud-samples-data/speech/corbeau_renard.flac';

  // The audio file's encoding, sample rate in hertz, and BCP-47 language code
  const audio = {
    uri: gcsUri,
  };
  const config = {
    encoding: 'FLAC',
    languageCode: 'fr-FR',
  };
  const request = {
    audio: audio,
    config: config,
  };

  // Detects speech in the audio file
  const [response] = await client.recognize(request);
  const transcription = response.results
      .map((result) => result.alternatives[0].transcript)
      .join('\n');
  console.log(`Transcription: ${transcription}`);
}

quickstart();
再次运行程序,您应该会看到以下输出:
maître corbeau sur un arbre perché tenait en son bec un fromage
这句话出自一个广受欢迎的法国儿童故事。
如需查看支持的语言和语言代码的完整列表,请参阅此处的文档。
9. 恭喜!
您学习了如何使用 Node.js 中的 Speech-to-Text API 对音频文件执行不同类型的转写!
清理
为避免系统因本快速入门中使用的资源向您的 Google Cloud Platform 账号收取费用,请执行以下操作:
- 前往 Cloud Platform 控制台。
- 选择要关停的项目,然后点击顶部的“删除”:系统会安排删除该项目。
了解详情
- Google Cloud Speech-to-Text API:https://cloud.google.com/speech-to-text/docs
- Google Cloud Platform 上的 Node.js:https://cloud.google.com/nodejs/
- Google Cloud Node.js 客户端:https://googlecloudplatform.github.io/google-cloud-node/
许可
此作品已获得 Creative Commons Attribution 2.0 通用许可授权。