
1. บทนำ
Spring Framework 5.0 ได้เพิ่มการรองรับ Kotlin โดยเฉพาะ ซึ่งช่วยให้นักพัฒนาซอฟต์แวร์ Kotlin ใช้ Spring ได้อย่างง่ายดาย ดังนั้น การเปลี่ยนแปลงเหล่านี้จึงหมายความว่าการผสานรวม Google Cloud ที่ Spring Cloud GCP มีให้ก็ทำงานใน Kotlin ได้อย่างราบรื่นเช่นกัน ในโค้ดแล็บนี้ คุณจะได้เห็นว่าการเริ่มต้นใช้บริการของ Google Cloud ในแอปพลิเคชัน Kotlin นั้นง่ายเพียงใด
Codelab นี้จะแนะนำการตั้งค่าแอปพลิเคชันการลงทะเบียนอย่างง่ายใน Kotlin ซึ่งแสดงให้เห็นการใช้บริการของ GCP ได้แก่ Cloud Pub/Sub และ Cloud SQL
สิ่งที่คุณจะสร้าง
ในโค้ดแล็บนี้ คุณจะได้ตั้งค่าแอปพลิเคชัน Kotlin Spring Boot ซึ่งยอมรับข้อมูลผู้ลงทะเบียน เผยแพร่ข้อมูลนี้ไปยังหัวข้อ Cloud Pub/Sub และบันทึกข้อมูลนี้ลงในฐานข้อมูล Cloud MySQL
สิ่งที่คุณจะได้เรียนรู้
วิธีผสานรวมกับบริการ Google Cloud ในแอปพลิเคชัน Kotlin Spring
สิ่งที่คุณต้องมี
- โปรเจ็กต์ Google Cloud Platform
- เบราว์เซอร์ เช่น Chrome หรือ Firefox
คุณจะใช้บทแนะนำนี้อย่างไร
คุณจะให้คะแนนประสบการณ์ในการสร้างเว็บแอป HTML/CSS เท่าใด
คุณจะให้คะแนนประสบการณ์การใช้บริการ Google Cloud Platform เท่าใด
2. การตั้งค่าและข้อกำหนด
การตั้งค่าสภาพแวดล้อมแบบเรียนรู้ด้วยตนเอง
- ลงชื่อเข้าใช้ Cloud Console แล้วสร้างโปรเจ็กต์ใหม่หรือใช้โปรเจ็กต์ที่มีอยู่ซ้ำ (หากยังไม่มีบัญชี Gmail หรือ G Suite คุณต้องสร้างบัญชี)

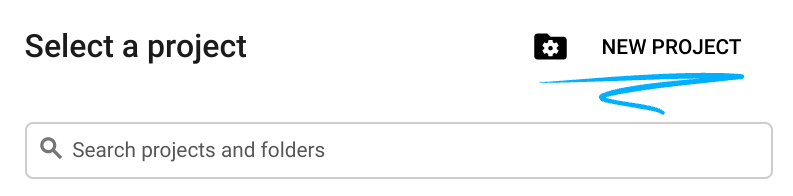
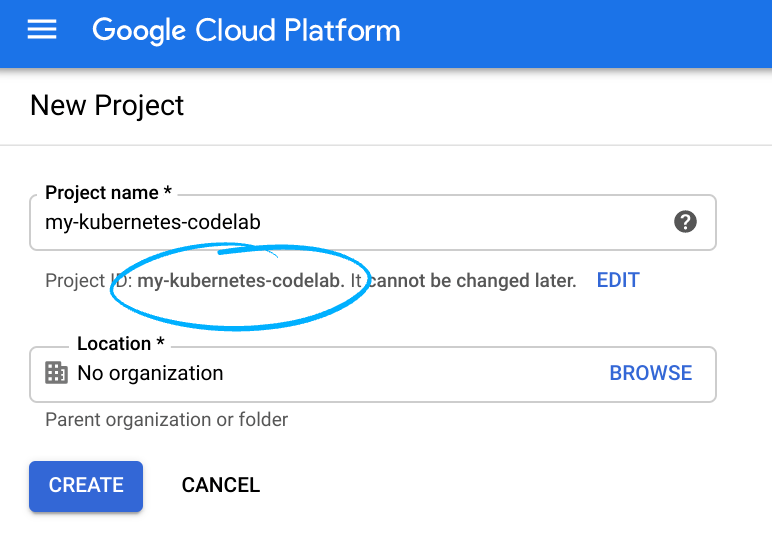
โปรดจดจำรหัสโปรเจ็กต์ ซึ่งเป็นชื่อที่ไม่ซ้ำกันในโปรเจ็กต์ Google Cloud ทั้งหมด (ชื่อด้านบนมีผู้ใช้แล้วและจะใช้ไม่ได้ ขออภัย) ซึ่งจะเรียกว่า PROJECT_ID ในภายหลังใน Codelab นี้
- จากนั้นคุณจะต้องเปิดใช้การเรียกเก็บเงินใน Cloud Console เพื่อใช้ทรัพยากร Google Cloud
การทำตาม Codelab นี้ไม่ควรมีค่าใช้จ่ายมากนัก หรืออาจไม่มีเลย โปรดทำตามวิธีการในส่วน "การล้างข้อมูล" ซึ่งจะแนะนำวิธีปิดทรัพยากรเพื่อไม่ให้มีการเรียกเก็บเงินนอกเหนือจากบทแนะนำนี้ ผู้ใช้ Google Cloud รายใหม่มีสิทธิ์เข้าร่วมโปรแกรมช่วงทดลองใช้ฟรีมูลค่า$300 USD
Google Cloud Shell
แม้ว่าคุณจะใช้งาน Google Cloud จากแล็ปท็อปได้จากระยะไกล แต่ใน Codelab นี้เราจะใช้ Google Cloud Shell ซึ่งเป็นสภาพแวดล้อมบรรทัดคำสั่งที่ทำงานในระบบคลาวด์
เปิดใช้งาน Cloud Shell
- จาก Cloud Console ให้คลิกเปิดใช้งาน Cloud Shell


หากไม่เคยเริ่มใช้ Cloud Shell มาก่อน คุณจะเห็นหน้าจอระดับกลาง (ด้านล่าง) ที่อธิบายว่า Cloud Shell คืออะไร ในกรณีนี้ ให้คลิกต่อไป (และคุณจะไม่เห็นหน้าจอนี้อีก) หน้าจอแบบครั้งเดียวจะมีลักษณะดังนี้

การจัดสรรและเชื่อมต่อกับ Cloud Shell จะใช้เวลาไม่นาน

เครื่องเสมือนนี้มาพร้อมเครื่องมือพัฒนาซอฟต์แวร์ทั้งหมดที่คุณต้องการ โดยมีไดเรกทอรีหลักแบบถาวรขนาด 5 GB และทำงานใน Google Cloud ซึ่งช่วยเพิ่มประสิทธิภาพเครือข่ายและการตรวจสอบสิทธิ์ได้อย่างมาก คุณสามารถทำงานในโค้ดแล็บนี้ได้โดยใช้เพียงเบราว์เซอร์หรือ Chromebook
เมื่อเชื่อมต่อกับ Cloud Shell แล้ว คุณควรเห็นว่าคุณได้รับการตรวจสอบสิทธิ์แล้วและโปรเจ็กต์ได้รับการตั้งค่าเป็นรหัสโปรเจ็กต์ของคุณแล้ว
- เรียกใช้คำสั่งต่อไปนี้ใน Cloud Shell เพื่อยืนยันว่าคุณได้รับการตรวจสอบสิทธิ์แล้ว
gcloud auth list
เอาต์พุตของคำสั่ง
 Credentialed Accounts
ACTIVE  ACCOUNT
*       <my_account>@<my_domain.com>

To set the active account, run:
    $ gcloud config set account `ACCOUNT`
gcloud config list project
เอาต์พุตของคำสั่ง
[core]
project = <PROJECT_ID>
หากไม่ได้ตั้งค่าไว้ คุณตั้งค่าได้ด้วยคำสั่งนี้
gcloud config set project <PROJECT_ID>
เอาต์พุตของคำสั่ง
Updated property [core/project].
3. จัดสรรทรัพยากร Pub/Sub
ก่อนอื่นเราต้องตั้งค่าหัวข้อและการสมัครใช้บริการ Cloud Pub/Sub ในแอปพลิเคชันนี้ เราจะเผยแพร่ข้อมูลการลงทะเบียนไปยังหัวข้อ Pub/Sub จากนั้นจะอ่านข้อมูลจากหัวข้อนี้และจัดเก็บไว้ในฐานข้อมูล
ในบทแนะนำนี้ เราจะใช้ Cloud Shell เพื่อจัดสรรทรัพยากร โปรดทราบว่าคุณยังกำหนดค่าทรัพยากร Pub/Sub ผ่านส่วน Cloud Pub/Sub ใน Google Cloud Console ได้ด้วย
ในเทอร์มินัล Cloud Shell ให้เปิดใช้ Pub/Sub API ก่อน
$ gcloud services enable pubsub.googleapis.com
จากนั้นเราจะสร้างหัวข้อ Pub/Sub ชื่อ registrations สำหรับแอปพลิเคชันนี้ ระบบจะเผยแพร่ข้อมูลการลงทะเบียนที่ส่งผ่านแอปพลิเคชันไปยังหัวข้อนี้
$ gcloud pubsub topics create registrations
สุดท้าย ให้สร้างการสมัครใช้บริการสำหรับหัวข้อ การสมัครใช้บริการ Pub/Sub ช่วยให้คุณรับข้อความจากหัวข้อได้
$ gcloud pubsub subscriptions create registrations-sub --topic=registrations
ตอนนี้คุณได้สร้างหัวข้อและการสมัครใช้บริการ Cloud Pub/Sub สำหรับแอปพลิเคชันของคุณเสร็จสมบูรณ์แล้ว
4. สร้างอินสแตนซ์และฐานข้อมูล Cloud SQL (MySQL)
สำหรับแอปพลิเคชันตัวอย่าง เรายังต้องตั้งค่าอินสแตนซ์ฐานข้อมูลเพื่อเก็บข้อมูลผู้ลงทะเบียนด้วย ขั้นตอนนี้จะใช้เทอร์มินัล Cloud Shell เพื่อจัดสรรทรัพยากร Cloud SQL ด้วย โปรดทราบว่าคุณสามารถดูและกำหนดค่าอินสแตนซ์ Cloud SQL ผ่าน Google Cloud Console ได้เช่นกัน
ก่อนอื่น ให้เปิดใช้ Cloud SQL Admin API
$ gcloud services enable sqladmin.googleapis.com
จากนั้นเราจะจัดสรรอินสแตนซ์ Cloud SQL (MySQL) คำสั่งนี้อาจใช้เวลาสักครู่
$ gcloud sql instances create codelab-instance --region=us-east1
หลังจากสร้างอินสแตนซ์ Cloud SQL เรียบร้อยแล้ว ให้สร้างฐานข้อมูลใหม่ในอินสแตนซ์ชื่อ registrants
$ gcloud sql databases create registrants --instance codelab-instance
ตอนนี้คุณได้ตั้งค่าอินสแตนซ์และฐานข้อมูล Cloud SQL สำหรับแอปพลิเคชันเสร็จสมบูรณ์แล้ว
5. เริ่มต้นแอปพลิเคชัน Spring Boot
ตอนนี้เราพร้อมที่จะเริ่มเขียนแอปพลิเคชันแล้ว ขั้นตอนถัดไปจะใช้ Cloud Shell ที่อธิบายไว้ในขั้นตอนการตั้งค่าต่อไป
ก่อนอื่น เราจะใช้ Initializr เพื่อสร้างโค้ดโครงร่างสำหรับโปรเจ็กต์ ในหน้าต่าง Cloud Shell ให้เรียกใช้คำสั่งต่อไปนี้
$ cd ~
$ curl https://start.spring.io/starter.tgz \
  -d language=kotlin \
  -d bootVersion=2.4.0 \
  -d dependencies=web,data-jpa,integration,cloud-gcp-pubsub,thymeleaf \
  -d baseDir=registrations-codelab | tar -xzvf -
$ cd registrations-codelab
คำสั่งนี้จะสร้างการตั้งค่าโปรเจ็กต์ Maven เริ่มต้น รวมถึงโค้ดโครงร่างสำหรับแอปพลิเคชันในไดเรกทอรี registrations-codelab/ ส่วนต่อไปนี้จะอธิบายการแก้ไขโค้ดที่จำเป็นต่อการสร้างแอปพลิเคชันที่ใช้งานได้
โปรแกรมแก้ไขโค้ดของ Cloud Shell
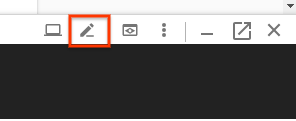
วิธีที่ง่ายที่สุดในการเริ่มแก้ไขและดูโค้ดในสภาพแวดล้อม Cloud Shell คือการใช้ตัวแก้ไขโค้ด Cloud Shell ในตัว
เมื่อเปิดอินสแตนซ์ Cloud Shell แล้ว ให้คลิกไอคอนดินสอเพื่อเปิดโปรแกรมแก้ไขโค้ด เอดิเตอร์ควรอนุญาตให้คุณแก้ไขไฟล์โปรเจ็กต์ที่สร้างโดย Initialzr ได้โดยตรง
6. การกำหนดค่าฐานข้อมูล
ก่อนอื่น ให้กำหนดค่าแอปพลิเคชันเพื่อให้เชื่อมต่อกับฐานข้อมูล Cloud MySQL ที่คุณตั้งค่าไว้ได้ ไลบรารี Spring Cloud GCP มี Cloud MySQL Starter ซึ่งมีทรัพยากร Dependency ที่จำเป็นสำหรับการเชื่อมต่อกับอินสแตนซ์ Cloud MySQL
เพิ่มทรัพยากร Dependency spring-cloud-gcp-starter-sql-mysql ลงใน pom.xml ของโปรเจ็กต์
registrations-codelab/pom.xml
...
<dependencies>

  ... Other dependencies above ...

  <!-- Add the MySQL starter to the list of dependencies -->
  <dependency>
    <groupId>com.google.cloud</groupId>
    <artifactId>spring-cloud-gcp-starter-sql-mysql</artifactId>
  </dependency>
</dependencies>
นอกจากนี้ คุณต้องแก้ไขapplication.propertiesไฟล์การกำหนดค่าเพื่ออธิบายการกำหนดค่าฐานข้อมูล คัดลอกพร็อพเพอร์ตี้ต่อไปนี้ลงในไฟล์ application.properties
ค้นหาชื่อการเชื่อมต่ออินสแตนซ์กับฐานข้อมูลโดยทำดังนี้
$ gcloud sql instances describe codelab-instance \
  --format 'value(connectionName)'
ระบบจะใช้เอาต์พุตนี้ในapplication.propertiesเพื่อกำหนดค่าข้อมูลการเชื่อมต่อ
src/main/resources/application.properties
# Modify this property using the output from the previous command line.
spring.cloud.gcp.sql.instance-connection-name=INSTANCE_CONNECTION_NAME

# Your database name
spring.cloud.gcp.sql.database-name=registrants

# So app starts despite "table already exists" errors.
spring.datasource.continue-on-error=true

# Enforces database initialization
spring.datasource.initialization-mode=always

# Cloud SQL (MySQL) only supports InnoDB, not MyISAM
spring.jpa.database-platform=org.hibernate.dialect.MySQL55Dialect
spring.jpa.hibernate.ddl-auto=create-drop

# This is used if you want to connect to a different database instance
# user other than root; not used in codelab.
# spring.datasource.username=root

# This is used to specify the password of the database user;
# not used in codelab.
# spring.datasource.password=password
พร็อพเพอร์ตี้เดียวที่คุณต้องแก้ไขคือชื่อการเชื่อมต่ออินสแตนซ์ ค่านี้ต้องจัดรูปแบบเป็นค่าที่คั่นด้วยโคลอนในรูปแบบ YOUR_GCP_PROJECT_ID:REGION:DATABASE_INSTANCE_NAME
7. การสร้างเนื้อหาคงที่
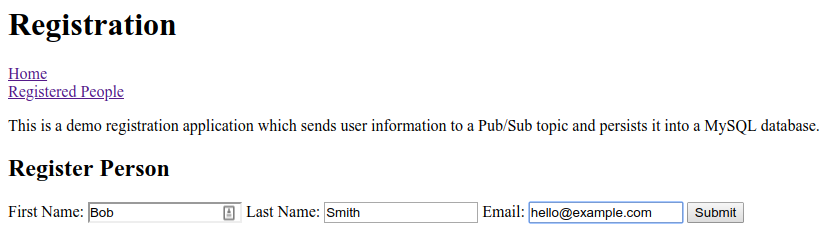
ก่อนอื่นเราจะสร้างส่วนหน้าของแอปพลิเคชัน แอปพลิเคชันควรมีแบบฟอร์มที่อนุญาตให้ผู้ใช้ลงทะเบียนบุคคล และมีมุมมองที่แสดงผู้ลงทะเบียนที่ลงทะเบียนสำเร็จทั้งหมด
สำหรับหน้าแรก ให้สร้าง index.html ที่มีแบบฟอร์มการลงทะเบียน
src/main/resources/static/index.html
<!DOCTYPE html>
<html lang="en">
<head>
  <meta charset="UTF-8">
  <title>Registration Sample Application</title>
</head>
<body>

<h1>Registration</h1>

<div>
  <nav>
    <a href="/">Home</a><br>
    <a href="/registrants">Registered People</a><br>
  </nav>

  <p>
    This is a demo registration application which sends user information to a Pub/Sub topic and
    persists it into a MySQL database.
  </p>

  <h2>Register Person</h2>
  <div>
    <form action="/registerPerson" method="post">
      First Name: <input type="text" name="firstName" />
      Last Name: <input type="text" name="lastName" />
      Email: <input type="text" name="email" />
      <input type="submit" value="Submit"/>
    </form>
  </div>
</div>

</body>
</html>
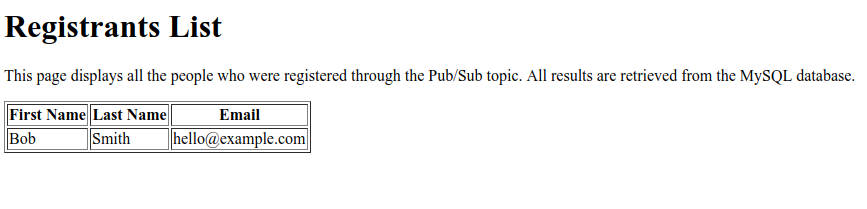
จากนั้นเราจะสร้างเทมเพลต Thymeleaf ชื่อ registrants.html เพื่อแสดงผู้ใช้ที่ลงทะเบียน Thymeleaf เป็นเฟรมเวิร์กการสร้างเทมเพลตที่เราใช้ในการสร้างและแสดง HTML ที่สร้างแบบไดนามิก คุณจะเห็นว่าเทมเพลตมีลักษณะคล้าย HTML แต่มีองค์ประกอบ Markdown เพิ่มเติมบางอย่างเพื่อจัดการเนื้อหาแบบไดนามิก เทมเพลตนี้ยอมรับพารามิเตอร์เดียวที่ชื่อ personsList ซึ่งมีผู้ลงทะเบียนทั้งหมดที่ลงทะเบียนผ่านแอปพลิเคชัน
src/main/resources/templates/registrants.html
<!DOCTYPE HTML>
<html xmlns:th="http://www.thymeleaf.org">
<head>
  <title>Registrants List</title>
  <meta http-equiv="Content-Type" content="text/html; charset=UTF-8"/>
</head>
<body>
<h1>Registrants List</h1>
<p>
  This page displays all the people who were registered through the Pub/Sub topic.
  All results are retrieved from the MySQL database.
</p>
<table border="1">
  <tr>
    <th>First Name</th>
    <th>Last Name</th>
    <th>Email</th>
  </tr>
  <tr th:each="person : ${personsList}">
    <td>[[${person.firstName}]]</td>
    <td>[[${person.lastName}]]</td>
    <td>[[${person.email}]]</td>
  </tr>
</table>

</body>
</html>
ตอนนี้คุณสามารถยืนยันได้ว่าระบบแสดงเนื้อหาแบบคงที่
สร้างและเรียกใช้แอปโดยใช้ Maven
$ ./mvnw spring-boot:run
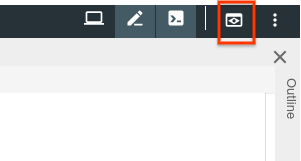
คลิกปุ่มแสดงตัวอย่างในหน้าต่าง Cloud Shell และตรวจสอบว่าคุณเห็นการแสดงผลหน้าแรก แต่ฟังก์ชันการทำงานใดๆ ใน UI จะใช้ไม่ได้เนื่องจากเราไม่มีตัวควบคุมเว็บ ซึ่งเราจะเพิ่มในขั้นตอนถัดไป
หลังจากดูตัวอย่างแอปพลิเคชันแล้ว ให้กด CTRL+C เพื่อสิ้นสุดแอปพลิเคชัน
8. การส่งผู้ลงทะเบียนไปยังหัวข้อ Pub/Sub
ในขั้นตอนนี้ เราจะใช้ฟีเจอร์ที่ระบบจะเผยแพร่ผู้ลงทะเบียนที่ส่งผ่านเว็บฟอร์มไปยังหัวข้อ Cloud Pub/Sub
เพิ่มคลาสข้อมูล
ก่อนอื่นเราจะสร้างคลาสข้อมูล Kotlin บางรายการ ซึ่งจะเป็นเอนทิตี JPA ของเรา และยังทำหน้าที่เป็นตัวแทนระดับกลางของผู้ลงทะเบียนที่ส่งผ่านแบบฟอร์มด้วย
ในแพ็กเกจเดโม ให้เพิ่มไฟล์ใหม่ 2 ไฟล์ ได้แก่ คลาส Person และ Spring Data PersonRepository คลาสทั้ง 2 คลาสนี้จะช่วยให้เราจัดเก็บและดึงข้อมูลการลงทะเบียนจากฐานข้อมูล MySQL ได้อย่างง่ายดายโดยใช้ Spring Data JPA
src/main/kotlin/com/example/demo/Person.kt
package com.example.demo

import javax.persistence.Entity
import javax.persistence.GeneratedValue
import javax.persistence.Id

@Entity
data class Person(
    val firstName: String,
    val lastName: String,
    val email: String,
    @Id @GeneratedValue
    var id: Long? = 0)
src/main/kotlin/com/example/demo/PersonRepository.kt
package com.example.demo

import org.springframework.data.repository.CrudRepository

interface PersonRepository : CrudRepository<Person, Long>
เพิ่มตัวควบคุมเว็บ
จากนั้นเราจะสร้างคลาส Controller ซึ่งประมวลผลผู้ลงทะเบียนจากแบบฟอร์มและส่งข้อมูลไปยังหัวข้อ Cloud Pub/Sub ที่คุณสร้างไว้ก่อนหน้านี้ คอนโทรลเลอร์นี้จะสร้างปลายทาง 2 รายการ ได้แก่
/registerPerson: ปลายทาง POST ที่ส่งข้อมูลผู้จดทะเบียน แล้วส่งไปยังหัวข้อ Pub/Sub ในฟังก์ชันregisterPerson(..)ระบบจะส่งข้อมูลผู้ลงทะเบียนไปยังหัวข้อ Pub/Sub โดยใช้PubSubTemplateซึ่งเป็นคลาสอำนวยความสะดวกจาก การผสานรวม Spring Cloud GCP Pub/Sub ซึ่งช่วยลดโค้ดบอยเลอร์เพลตที่จำเป็นในการเริ่มโต้ตอบกับ Cloud Pub/Sub/registrants: แสดงผู้ลงทะเบียนทั้งหมดที่ลงทะเบียนในฐานข้อมูลเรียบร้อยแล้ว ระบบจะดึงข้อมูลนี้จากอินสแตนซ์ MySQL โดยใช้ที่เก็บ Spring Data ที่เราสร้างไว้ในขั้นตอนก่อนหน้า
สร้างคลาส Controller ต่อไปนี้ในแพ็กเกจเดโม
src/main/kotlin/com/example/demo/Controller.kt
package com.example.demo

import com.google.cloud.spring.pubsub.core.PubSubTemplate
import org.springframework.web.bind.annotation.GetMapping
import org.springframework.web.bind.annotation.PostMapping
import org.springframework.web.bind.annotation.RequestParam
import org.springframework.web.bind.annotation.RestController
import org.springframework.web.servlet.ModelAndView
import org.springframework.web.servlet.view.RedirectView

@RestController
class Controller(val pubSubTemplate: PubSubTemplate, val personRepository: PersonRepository) {

  // The Pub/Sub topic name created earlier.
  val REGISTRATION_TOPIC = "registrations"

  @PostMapping("/registerPerson")
  fun registerPerson(
    @RequestParam("firstName") firstName: String,
    @RequestParam("lastName") lastName: String,
    @RequestParam("email") email: String): RedirectView {

    pubSubTemplate.publish(
        REGISTRATION_TOPIC,
        Person(firstName, lastName, email))
    return RedirectView("/")
  }

  @GetMapping("/registrants")
  fun getRegistrants(): ModelAndView {
    val personsList = personRepository.findAll().toList()
    return ModelAndView("registrants", mapOf("personsList" to personsList))
  }
}
โดยตัวควบคุมจะอ่านข้อมูลผู้จดทะเบียนที่ส่งผ่านแบบฟอร์มบนเว็บ แล้วเผยแพร่ข้อมูลไปยังหัวข้อ Pub/Sub
การเพิ่ม Bean ของ Object Mapper ของ JSON
คุณอาจสังเกตเห็นใน Controller ว่าเราเผยแพร่ออบเจ็กต์ Person ไปยังหัวข้อ Pub/Sub ไม่ใช่สตริง ซึ่งทำได้เนื่องจากเราใช้ประโยชน์จากการรองรับ Spring Cloud GCP สำหรับเพย์โหลด JSON ที่กำหนดเองเพื่อส่งไปยังหัวข้อต่างๆ โดยไลบรารีจะช่วยให้คุณซีเรียลไลซ์ออบเจ็กต์เป็น JSON ส่งเพย์โหลด JSON ไปยังหัวข้อ และดีซีเรียลไลซ์เพย์โหลดเมื่อได้รับ
หากต้องการใช้ประโยชน์จากฟีเจอร์นี้ เราต้องเพิ่ม ObjectMapper bean ลงในบริบทของแอปพลิเคชัน ระบบจะใช้ Bean ObjectMapper นี้เพื่อทำการซีเรียลไลซ์ออบเจ็กต์เป็น JSON และจาก JSON เมื่อแอปพลิเคชันส่งและรับข้อความ ในDemoApplication.ktคลาส ให้เพิ่มJacksonPubSubMessageConverterถั่วสปริง:
src/main/kotlin/com/example/demo/DemoApplication.kt
package com.example.demo

import org.springframework.boot.autoconfigure.SpringBootApplication
import org.springframework.boot.runApplication

// new imports to add
import org.springframework.context.annotation.Bean
import com.fasterxml.jackson.databind.ObjectMapper
import com.google.cloud.spring.pubsub.support.converter.JacksonPubSubMessageConverter

@SpringBootApplication
class DemoApplication {
  // This bean enables serialization/deserialization of
  // Java objects to JSON for Pub/Sub payloads
  @Bean
  fun jacksonPubSubMessageConverter(objectMapper: ObjectMapper) =
      JacksonPubSubMessageConverter(objectMapper)
}

fun main(args: Array<String>) {
        runApplication<DemoApplication>(*args)
}
ในตอนนี้ คุณสามารถลองเรียกใช้แอปพลิเคชันอีกครั้งได้โดยเรียกใช้คำสั่งต่อไปนี้
$ ./mvnw spring-boot:run
จากแบบฟอร์มบนเว็บในหน้าหลัก ตอนนี้แอปพลิเคชันจะส่งข้อมูลไปยังหัวข้อ Pub/Sub ที่คุณสร้างขึ้น อย่างไรก็ตาม ฟังก์ชันนี้ยังไม่สามารถทำอะไรที่เป็นประโยชน์ได้ เนื่องจากเรายังต้องอ่านจากหัวข้อ Pub/Sub นั้น ซึ่งทำได้ในขั้นตอนถัดไป
9. การอ่านผู้ลงทะเบียนจากหัวข้อ Pub/Sub
ในขั้นตอนสุดท้าย เราจะประมวลผลข้อมูลผู้ลงทะเบียนจากหัวข้อ Pub/Sub และบันทึกข้อมูลลงในฐานข้อมูล Cloud MySQL ซึ่งจะทำให้การสมัครเสร็จสมบูรณ์ และช่วยให้คุณส่งผู้ลงทะเบียนใหม่ผ่านแบบฟอร์มและดูผู้ใช้ที่ลงทะเบียนทั้งหมดผ่านปลายทาง /registrants ได้
แอปพลิเคชันนี้จะใช้ประโยชน์จาก Spring Integration ซึ่งมี Abstraction ที่สะดวกมากมายสำหรับการจัดการการรับส่งข้อความ เราจะเพิ่ม PubSubInboundChannelAdapter เพื่อให้เราอ่านข้อความจากหัวข้อ Pub/Sub และวางข้อความเหล่านั้นไว้ใน pubsubInputChannel เพื่อประมวลผลเพิ่มเติมได้ จากนั้นเราจะกำหนดค่าฟังก์ชัน messageReceiver โดยใช้ @ServiceActivator เพื่อเรียกใช้กับข้อความที่มาถึงใน pubsubInputChannel
src/main/kotlin/com/example/demo/DemoApplication.kt
package com.example.demo

import org.springframework.boot.autoconfigure.SpringBootApplication
import org.springframework.boot.runApplication

import org.springframework.context.annotation.Bean
import com.fasterxml.jackson.databind.ObjectMapper
import org.springframework.cloud.gcp.pubsub.support.converter.JacksonPubSubMessageConverter

// new imports to add
import com.google.cloud.spring.pubsub.core.PubSubTemplate
import com.google.cloud.spring.pubsub.integration.AckMode
import com.google.cloud.spring.pubsub.integration.inbound.PubSubInboundChannelAdapter
import com.google.cloud.spring.pubsub.support.BasicAcknowledgeablePubsubMessage
import com.google.cloud.spring.pubsub.support.GcpPubSubHeaders
import org.springframework.beans.factory.annotation.Autowired
import org.springframework.beans.factory.annotation.Qualifier
import org.springframework.integration.annotation.ServiceActivator
import org.springframework.integration.channel.DirectChannel
import org.springframework.messaging.MessageChannel
import org.springframework.messaging.handler.annotation.Header

@SpringBootApplication
class DemoApplication {

  private val REGISTRANT_SUBSCRIPTION = "registrations-sub"

  @Autowired
  private lateinit var personRepository: PersonRepository

  // New Spring Beans to add
  @Bean
  fun pubsubInputChannel() = DirectChannel()

  @Bean
  fun messageChannelAdapter(
      @Qualifier("pubsubInputChannel") inputChannel: MessageChannel,
      pubSubTemplate: PubSubTemplate): PubSubInboundChannelAdapter {

    val adapter = PubSubInboundChannelAdapter(
        pubSubTemplate, REGISTRANT_SUBSCRIPTION)
    adapter.outputChannel = inputChannel
    adapter.ackMode = AckMode.MANUAL
    adapter.payloadType = Person::class.java
    return adapter
  }

  @ServiceActivator(inputChannel = "pubsubInputChannel")
  fun messageReceiver(
      payload: Person,
      @Header(GcpPubSubHeaders.ORIGINAL_MESSAGE) message: BasicAcknowledgeablePubsubMessage) {
    personRepository.save(payload)
    print("Message arrived! Payload: $payload")
    message.ack()
  }

  // ObjectMapper bean from previous step
  @Bean
  fun jacksonPubSubMessageConverter(objectMapper: ObjectMapper) = JacksonPubSubMessageConverter(objectMapper)
}

fun main(args: Array<String>) {
        runApplication<DemoApplication>(*args)
}
ตอนนี้คุณตั้งค่าแอปพลิเคชันเสร็จเรียบร้อยแล้ว หากต้องการยืนยันว่าแอปทำงานได้อย่างถูกต้อง ให้เรียกใช้คำสั่งต่อไปนี้
$ ./mvnw spring-boot:run
คลิกปุ่มแสดงตัวอย่างอีกครั้ง แล้วลองลงทะเบียนผู้ใช้โดยกรอกแบบฟอร์มและส่ง
คลิกลิงก์ผู้ลงทะเบียนเพื่อยืนยันว่าผู้ลงทะเบียนใหม่ปรากฏในตาราง
ยินดีด้วย คุณทำเสร็จแล้ว สิ้นสุดแอปพลิเคชันโดยกด CTRL+C ในหน้าต่างเทอร์มินัล
10. ล้างข้อมูล
หากต้องการล้างข้อมูลในสภาพแวดล้อม คุณต้องลบหัวข้อ Pub/Sub และอินสแตนซ์ Cloud MySQL ที่สร้างขึ้น
การลบอินสแตนซ์ Cloud MySQL
$ gcloud sql instances delete codelab-instance
การลบทรัพยากร Pub/Sub
$ gcloud pubsub subscriptions delete registrations-sub
$ gcloud pubsub topics delete registrations
11. ยินดีด้วย
ตอนนี้คุณเขียนแอปพลิเคชัน Spring Kotlin ที่ผสานรวมกับ Cloud Pub/Sub และ Cloud SQL (MySQL) เสร็จแล้ว
ดูข้อมูลเพิ่มเติม
- โปรเจ็กต์ Spring บน GCP: http://cloud.spring.io/spring-cloud-gcp/
- ที่เก็บ Spring บน GCP ใน GitHub: https://github.com/GoogleCloudPlatform/spring-cloud-gcp
- Java ใน Google Cloud Platform: https://cloud.google.com/java/
- แอปพลิเคชัน Kotlin ตัวอย่างที่ใช้ GCP: https://github.com/GoogleCloudPlatform/spring-cloud-gcp/tree/master/spring-cloud-gcp-kotlin-samples
ใบอนุญาต
ผลงานนี้ได้รับอนุญาตภายใต้สัญญาอนุญาตครีเอทีฟคอมมอนส์สำหรับยอมรับสิทธิของผู้สร้าง (Creative Commons Attribution License) 2.0 แบบทั่วไป