
1. 簡介
Spring Framework 5.0 新增了專屬的 Kotlin 支援,讓 Kotlin 開發人員能輕鬆使用 Spring。因此,這些變更也代表 Spring Cloud GCP 提供的 Google Cloud 整合功能,也能在 Kotlin 中順暢運作。在本程式碼研究室中,您會瞭解在 Kotlin 應用程式中使用 Google Cloud 服務有多麼簡單!
本程式碼研究室將逐步說明如何使用 Kotlin 設定簡單的註冊應用程式,並示範如何使用 GCP 服務,包括 Cloud Pub/Sub 和 Cloud SQL。
建構項目
在本程式碼研究室中,您將設定 Kotlin Spring Boot 應用程式,該應用程式會接受註冊者資訊、將資訊發布至 Cloud Pub/Sub 主題,並將資訊保存至 Cloud MySQL 資料庫。
課程內容
瞭解如何在 Kotlin Spring 應用程式中整合 Google Cloud 服務。
軟硬體需求
- Google Cloud Platform 專案
- Chrome 或 Firefox 等瀏覽器
您會如何使用這項教學課程?
您對建構 HTML/CSS 網頁應用程式的體驗滿意嗎?
您對使用 Google Cloud Platform 服務的體驗有何評價?
2. 設定和需求
自修實驗室環境設定

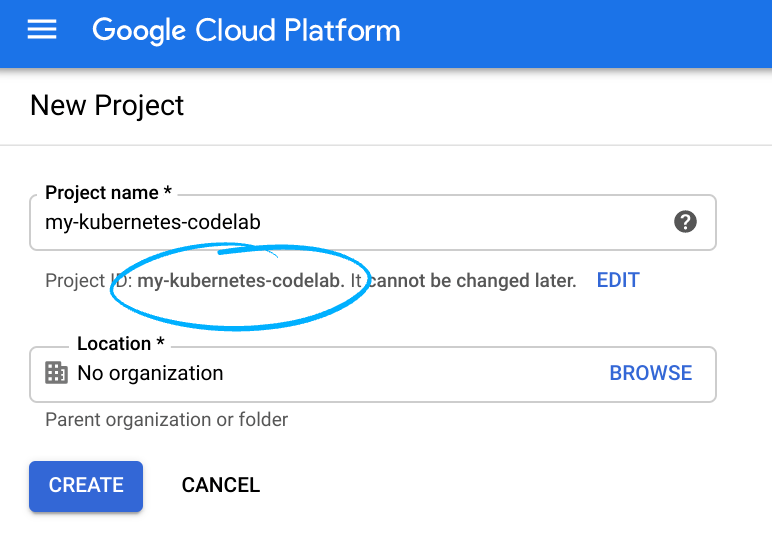
請記住專案 ID,這是所有 Google Cloud 專案中不重複的名稱 (上述名稱已遭占用,因此不適用於您,抱歉!)。本程式碼研究室稍後會將其稱為 PROJECT_ID。
- 接著,您必須在 Cloud 控制台中啟用帳單,才能使用 Google Cloud 資源。
完成本程式碼研究室的費用應該不高,甚至完全免費。請務必按照「清除」部分的指示操作,瞭解如何停用資源,避免在本教學課程結束後繼續產生帳單費用。Google Cloud 新使用者可參加價值$300 美元的免費試用計畫。
Google Cloud Shell
雖然您可以透過筆電遠端操作 Google Cloud,但在本程式碼研究室中,我們將使用 Google Cloud Shell,這是可在雲端執行的指令列環境。
啟用 Cloud Shell
- 在 Cloud 控制台,點選「啟用 Cloud Shell」 圖示
。

如果您是首次啟動 Cloud Shell,系統會顯示中繼畫面 (摺疊式螢幕下方),說明這個指令列環境。點選「繼續」後,這則訊息日後就不會再出現。以下是這個初次畫面的樣子:

佈建並連至 Cloud Shell 預計只需要幾分鐘。

這部虛擬機器搭載各種您需要的開發工具,並提供永久的 5GB 主目錄,而且可在 Google Cloud 運作,大幅提升網路效能並強化驗證功能。本程式碼研究室幾乎所有工作都可在瀏覽器或 Chromebook 上完成。
連線至 Cloud Shell 後,您應會發現自己通過驗證,且專案已設為您的專案 ID。
- 在 Cloud Shell 中執行下列指令,確認您已通過驗證:
gcloud auth list
指令輸出
 Credentialed Accounts
ACTIVE  ACCOUNT
*       <my_account>@<my_domain.com>

To set the active account, run:
    $ gcloud config set account `ACCOUNT`
gcloud config list project
指令輸出
[core]
project = <PROJECT_ID>
如未設定,請輸入下列指令手動設定專案:
gcloud config set project <PROJECT_ID>
指令輸出
Updated property [core/project].
3. 佈建 Pub/Sub 資源
首先,我們需要設定 Cloud Pub/Sub 主題和訂閱項目。在這個應用程式中,我們會將註冊資訊發布至 Pub/Sub 主題,然後從該主題讀取資訊,並保留在資料庫中。
在本教學課程中,我們將使用 Cloud Shell 佈建資源。請注意,您也可以透過 Google Cloud 控制台的 Cloud Pub/Sub 區段設定 Pub/Sub 資源。
在 Cloud Shell 終端機中,先啟用 Pub/Sub API。
$ gcloud services enable pubsub.googleapis.com
接下來,我們要為這個應用程式建立名為 registrations 的 Pub/Sub 主題。透過應用程式提交的註冊資訊會發布至這個主題。
$ gcloud pubsub topics create registrations
最後,為主題建立訂閱項目。Pub/Sub 訂閱項目可讓您接收來自主題的訊息。
$ gcloud pubsub subscriptions create registrations-sub --topic=registrations
您已完成為應用程式建立 Cloud Pub/Sub 主題和訂閱項目。
4. 建立 Cloud SQL (MySQL) 執行個體和資料庫
對於範例應用程式,我們也需要設定資料庫執行個體來保存註冊者資訊。這個步驟也會依賴 Cloud Shell 終端機來佈建 Cloud SQL 資源。請注意,您也可以透過 Google Cloud 控制台查看及設定 Cloud SQL 執行個體。
首先,請啟用 Cloud SQL Admin API。
$ gcloud services enable sqladmin.googleapis.com
接著,我們將佈建 Cloud SQL (MySQL) 執行個體。這個指令可能需要一段時間才能完成。
$ gcloud sql instances create codelab-instance --region=us-east1
成功建立 Cloud SQL 執行個體後,請在執行個體中建立名為 registrants 的新資料庫。
$ gcloud sql databases create registrants --instance codelab-instance
您已完成應用程式的 Cloud SQL 執行個體和資料庫設定。
5. 初始化 Spring Boot 應用程式
我們現在可以開始撰寫應用程式。後續步驟會繼續使用設定步驟中說明的 Cloud Shell。
首先,我們會使用 Initializr 為專案產生架構程式碼。在 Cloud Shell 視窗中執行下列指令:
$ cd ~
$ curl https://start.spring.io/starter.tgz \
  -d language=kotlin \
  -d bootVersion=2.4.0 \
  -d dependencies=web,data-jpa,integration,cloud-gcp-pubsub,thymeleaf \
  -d baseDir=registrations-codelab | tar -xzvf -
$ cd registrations-codelab
這個指令會在 registrations-codelab/ 目錄中,為應用程式產生初始 Maven 專案設定和架構程式碼。以下各節說明產生可運作應用程式時必須進行的程式碼編輯。
Cloud Shell 程式碼編輯器
如要在 Cloud Shell 環境中開始修改及查看程式碼,最簡單的方法是使用內建的 Cloud Shell 程式碼編輯器。
開啟 Cloud Shell 執行個體後,點選鉛筆圖示開啟程式碼編輯器。編輯器應可讓您直接修改 Initialzr 產生的專案檔案。

6. 資料庫設定
首先,請設定應用程式,以便連線至您設定的 Cloud MySQL 資料庫。Spring Cloud GCP 程式庫提供 Cloud MySQL 啟動器,可提供連線至 Cloud MySQL 執行個體所需的依附元件。
將 spring-cloud-gcp-starter-sql-mysql 依附元件新增至專案 pom.xml:
registrations-codelab/pom.xml
...
<dependencies>

  ... Other dependencies above ...

  <!-- Add the MySQL starter to the list of dependencies -->
  <dependency>
    <groupId>com.google.cloud</groupId>
    <artifactId>spring-cloud-gcp-starter-sql-mysql</artifactId>
  </dependency>
</dependencies>
此外,您還需要修改 application.properties 設定檔,說明資料庫設定。將下列屬性複製到 application.properties 檔案中。
找出資料庫的執行個體連線名稱:
$ gcloud sql instances describe codelab-instance \
  --format 'value(connectionName)'
這個指令的輸出內容會用於 application.properties 檔案,設定連線資訊。
src/main/resources/application.properties
# Modify this property using the output from the previous command line.
spring.cloud.gcp.sql.instance-connection-name=INSTANCE_CONNECTION_NAME

# Your database name
spring.cloud.gcp.sql.database-name=registrants

# So app starts despite "table already exists" errors.
spring.datasource.continue-on-error=true

# Enforces database initialization
spring.datasource.initialization-mode=always

# Cloud SQL (MySQL) only supports InnoDB, not MyISAM
spring.jpa.database-platform=org.hibernate.dialect.MySQL55Dialect
spring.jpa.hibernate.ddl-auto=create-drop

# This is used if you want to connect to a different database instance
# user other than root; not used in codelab.
# spring.datasource.username=root

# This is used to specify the password of the database user;
# not used in codelab.
# spring.datasource.password=password
您唯一需要修改的屬性是執行個體連線名稱。這個值必須以半形冒號分隔,格式為:YOUR_GCP_PROJECT_ID:REGION:DATABASE_INSTANCE_NAME。
7. 建立靜態內容
首先,我們要為應用程式建立前端。應用程式應提供表單,供使用者註冊個人,並顯示所有成功註冊者。
請建立包含註冊表單的 index.html 做為首頁。
src/main/resources/static/index.html
<!DOCTYPE html>
<html lang="en">
<head>
  <meta charset="UTF-8">
  <title>Registration Sample Application</title>
</head>
<body>

<h1>Registration</h1>

<div>
  <nav>
    <a href="/">Home</a><br>
    <a href="/registrants">Registered People</a><br>
  </nav>

  <p>
    This is a demo registration application which sends user information to a Pub/Sub topic and
    persists it into a MySQL database.
  </p>

  <h2>Register Person</h2>
  <div>
    <form action="/registerPerson" method="post">
      First Name: <input type="text" name="firstName" />
      Last Name: <input type="text" name="lastName" />
      Email: <input type="text" name="email" />
      <input type="submit" value="Submit"/>
    </form>
  </div>
</div>

</body>
</html>
接著,我們將建立名為 registrants.html 的 Thymeleaf 範本,用於顯示已註冊的使用者。Thymeleaf 是範本架構,我們用來建構及放送動態建立的 HTML。您會發現範本看起來像 HTML,但其中包含一些額外的 Markdown 元素,可處理動態內容。這個範本會接受名為 personsList 的單一參數,其中包含透過應用程式註冊的所有註冊者。
src/main/resources/templates/registrants.html
<!DOCTYPE HTML>
<html xmlns:th="http://www.thymeleaf.org">
<head>
  <title>Registrants List</title>
  <meta http-equiv="Content-Type" content="text/html; charset=UTF-8"/>
</head>
<body>
<h1>Registrants List</h1>
<p>
  This page displays all the people who were registered through the Pub/Sub topic.
  All results are retrieved from the MySQL database.
</p>
<table border="1">
  <tr>
    <th>First Name</th>
    <th>Last Name</th>
    <th>Email</th>
  </tr>
  <tr th:each="person : ${personsList}">
    <td>[[${person.firstName}]]</td>
    <td>[[${person.lastName}]]</td>
    <td>[[${person.email}]]</td>
  </tr>
</table>

</body>
</html>
此時,您可以確認系統是否提供靜態內容。
使用 Maven 建構及執行應用程式:
$ ./mvnw spring-boot:run
按一下 Cloud Shell 視窗中的預覽按鈕,確認您看到首頁正在算繪。不過,由於缺少網頁控制器,使用者介面上的任何功能都無法運作。我們會在下一個步驟中新增這項資訊。

預覽應用程式後,請按 CTRL+C 終止應用程式。
8. 將註冊者傳送至 Pub/Sub 主題
在這個步驟中,我們將實作這項功能:透過網路表單提交的註冊者資訊會發布至 Cloud Pub/Sub 主題。
新增資料類別
首先,我們要建立一些 Kotlin 資料類別,這些類別會是 JPA 實體,也會做為透過表單提交的註冊者中繼表示法。
在示範套件中新增兩個檔案:Person 類別和 Spring Data PersonRepository。這兩個類別可讓我們使用 Spring Data JPA,輕鬆儲存及擷取 MySQL 資料庫中的註冊項目。
src/main/kotlin/com/example/demo/Person.kt
package com.example.demo

import javax.persistence.Entity
import javax.persistence.GeneratedValue
import javax.persistence.Id

@Entity
data class Person(
    val firstName: String,
    val lastName: String,
    val email: String,
    @Id @GeneratedValue
    var id: Long? = 0)
src/main/kotlin/com/example/demo/PersonRepository.kt
package com.example.demo

import org.springframework.data.repository.CrudRepository

interface PersonRepository : CrudRepository<Person, Long>
新增 Web 控制器
接著,我們將建立 Controller 類別,處理表單中的註冊者,並將資訊傳送至先前建立的 Cloud Pub/Sub 主題。這個控制器會建立兩個端點:
/registerPerson:POST 端點,註冊者資訊會提交至此端點,然後傳送至 Pub/Sub 主題。在registerPerson(..)函式中,註冊者資訊會使用PubSubTemplate傳送至 Pub/Sub 主題。PubSubTemplate是 Spring Cloud GCP Pub/Sub 整合中的便利類別,可盡量減少與 Cloud Pub/Sub 互動所需的樣板程式碼。/registrants:顯示資料庫中所有成功註冊的註冊者。這項資訊是使用上一個步驟中建立的 Spring Data 存放區,從 MySQL 執行個體擷取而來。
在示範套件中建立下列 Controller 類別:
src/main/kotlin/com/example/demo/Controller.kt
package com.example.demo

import com.google.cloud.spring.pubsub.core.PubSubTemplate
import org.springframework.web.bind.annotation.GetMapping
import org.springframework.web.bind.annotation.PostMapping
import org.springframework.web.bind.annotation.RequestParam
import org.springframework.web.bind.annotation.RestController
import org.springframework.web.servlet.ModelAndView
import org.springframework.web.servlet.view.RedirectView

@RestController
class Controller(val pubSubTemplate: PubSubTemplate, val personRepository: PersonRepository) {

  // The Pub/Sub topic name created earlier.
  val REGISTRATION_TOPIC = "registrations"

  @PostMapping("/registerPerson")
  fun registerPerson(
    @RequestParam("firstName") firstName: String,
    @RequestParam("lastName") lastName: String,
    @RequestParam("email") email: String): RedirectView {

    pubSubTemplate.publish(
        REGISTRATION_TOPIC,
        Person(firstName, lastName, email))
    return RedirectView("/")
  }

  @GetMapping("/registrants")
  fun getRegistrants(): ModelAndView {
    val personsList = personRepository.findAll().toList()
    return ModelAndView("registrants", mapOf("personsList" to personsList))
  }
}
控制器會讀取透過網路表單提交的註冊者資訊,然後將資訊發布至 Pub/Sub 主題。
新增 JSON 物件對應器 Bean
您可能已在控制器中發現,我們將 Person 物件發布至 Pub/Sub 主題,而非字串。這是因為我們利用 Spring Cloud GCP 支援將自訂 JSON 酬載傳送至主題的功能,讓程式庫可將物件序列化為 JSON、將 JSON 酬載傳送至主題,並在收到酬載時將其還原序列化。
如要使用這項功能,我們必須將 ObjectMapper Bean 新增至應用程式環境。應用程式傳送及接收訊息時,會使用這個 ObjectMapper Bean 將物件序列化為 JSON,以及從 JSON 序列化物件。在 DemoApplication.kt 類別中,新增 JacksonPubSubMessageConverter Spring Bean:
src/main/kotlin/com/example/demo/DemoApplication.kt
package com.example.demo

import org.springframework.boot.autoconfigure.SpringBootApplication
import org.springframework.boot.runApplication

// new imports to add
import org.springframework.context.annotation.Bean
import com.fasterxml.jackson.databind.ObjectMapper
import com.google.cloud.spring.pubsub.support.converter.JacksonPubSubMessageConverter

@SpringBootApplication
class DemoApplication {
  // This bean enables serialization/deserialization of
  // Java objects to JSON for Pub/Sub payloads
  @Bean
  fun jacksonPubSubMessageConverter(objectMapper: ObjectMapper) =
      JacksonPubSubMessageConverter(objectMapper)
}

fun main(args: Array<String>) {
        runApplication<DemoApplication>(*args)
}
此時,您可以執行下列指令,再次嘗試執行應用程式:
$ ./mvnw spring-boot:run
現在,應用程式會透過主頁面的網路表單,將資訊傳送至您建立的 Pub/Sub 主題。不過,我們還需要從該 Pub/Sub 主題讀取資料,因此目前仍無法執行任何實用操作!這項操作會在下一個步驟完成。
9. 從 Pub/Sub 主題讀取註冊者
最後一個步驟是處理 Pub/Sub 主題中的註冊者資訊,並將資訊保留在 Cloud MySQL 資料庫中。這樣一來,應用程式就會完成,您就能透過表單提交新註冊者,並透過 /registrants 端點查看所有已註冊的使用者。
這個應用程式會運用 Spring Integration,其中提供許多便利的訊息傳遞處理抽象化。我們會新增 PubSubInboundChannelAdapter,以便從 Pub/Sub 主題讀取訊息,並將訊息放入 pubsubInputChannel,以供後續處理。接著,我們會使用 @ServiceActivator 設定 messageReceiver 函式,以便在 pubsubInputChannel 上收到訊息時叫用該函式。
src/main/kotlin/com/example/demo/DemoApplication.kt
package com.example.demo

import org.springframework.boot.autoconfigure.SpringBootApplication
import org.springframework.boot.runApplication

import org.springframework.context.annotation.Bean
import com.fasterxml.jackson.databind.ObjectMapper
import org.springframework.cloud.gcp.pubsub.support.converter.JacksonPubSubMessageConverter

// new imports to add
import com.google.cloud.spring.pubsub.core.PubSubTemplate
import com.google.cloud.spring.pubsub.integration.AckMode
import com.google.cloud.spring.pubsub.integration.inbound.PubSubInboundChannelAdapter
import com.google.cloud.spring.pubsub.support.BasicAcknowledgeablePubsubMessage
import com.google.cloud.spring.pubsub.support.GcpPubSubHeaders
import org.springframework.beans.factory.annotation.Autowired
import org.springframework.beans.factory.annotation.Qualifier
import org.springframework.integration.annotation.ServiceActivator
import org.springframework.integration.channel.DirectChannel
import org.springframework.messaging.MessageChannel
import org.springframework.messaging.handler.annotation.Header

@SpringBootApplication
class DemoApplication {

  private val REGISTRANT_SUBSCRIPTION = "registrations-sub"

  @Autowired
  private lateinit var personRepository: PersonRepository

  // New Spring Beans to add
  @Bean
  fun pubsubInputChannel() = DirectChannel()

  @Bean
  fun messageChannelAdapter(
      @Qualifier("pubsubInputChannel") inputChannel: MessageChannel,
      pubSubTemplate: PubSubTemplate): PubSubInboundChannelAdapter {

    val adapter = PubSubInboundChannelAdapter(
        pubSubTemplate, REGISTRANT_SUBSCRIPTION)
    adapter.outputChannel = inputChannel
    adapter.ackMode = AckMode.MANUAL
    adapter.payloadType = Person::class.java
    return adapter
  }

  @ServiceActivator(inputChannel = "pubsubInputChannel")
  fun messageReceiver(
      payload: Person,
      @Header(GcpPubSubHeaders.ORIGINAL_MESSAGE) message: BasicAcknowledgeablePubsubMessage) {
    personRepository.save(payload)
    print("Message arrived! Payload: $payload")
    message.ack()
  }

  // ObjectMapper bean from previous step
  @Bean
  fun jacksonPubSubMessageConverter(objectMapper: ObjectMapper) = JacksonPubSubMessageConverter(objectMapper)
}

fun main(args: Array<String>) {
        runApplication<DemoApplication>(*args)
}
此時應用程式設定已完成。如要確認應用程式是否正常運作,請執行下列指令:
$ ./mvnw spring-boot:run
再次點選「預覽」按鈕,然後填寫並提交表單,嘗試註冊使用者。

按一下「已註冊人員」連結,確認新註冊者是否顯示在表格中。

恭喜,您已完成!在終端機視窗中按下 CTRL+C 鍵,即可終止應用程式。
10. 清除
如要清除環境,請刪除您建立的 Pub/Sub 主題和 Cloud MySQL 執行個體。
刪除 Cloud MySQL 執行個體
$ gcloud sql instances delete codelab-instance
刪除 Pub/Sub 資源
$ gcloud pubsub subscriptions delete registrations-sub
$ gcloud pubsub topics delete registrations
11. 恭喜!
您已完成編寫 Spring Kotlin 應用程式,並與 Cloud Pub/Sub 和 Cloud SQL (MySQL) 整合。
瞭解詳情
- GCP 上的 Spring 專案:http://cloud.spring.io/spring-cloud-gcp/
- GCP 上的 Spring GitHub 存放區:https://github.com/GoogleCloudPlatform/spring-cloud-gcp
- 在 Google Cloud Platform 上使用 Java:https://cloud.google.com/java/
- 使用 GCP 的 Kotlin 應用程式範例:https://github.com/GoogleCloudPlatform/spring-cloud-gcp/tree/master/spring-cloud-gcp-kotlin-samples
授權
這項內容採用的授權為 Creative Commons 姓名標示 2.0 通用授權。