
1. Descripción general
Cloud Spanner es un SGBDR multirregional, altamente disponible y con capacidad de expansión horizontal. En este codelab, se usará la instancia más pequeña de Cloud Spanner, pero no olvides apagarla cuando termines.
Qué aprenderás
- Cómo usar Cloud Spanner para guardar y recuperar datos con Spring Boot
Requisitos
¿Cómo usarás este instructivo?
¿Cómo calificarías tu experiencia con el uso de los servicios de Google Cloud Platform?
2. Configuración y requisitos
Configuración del entorno de autoaprendizaje
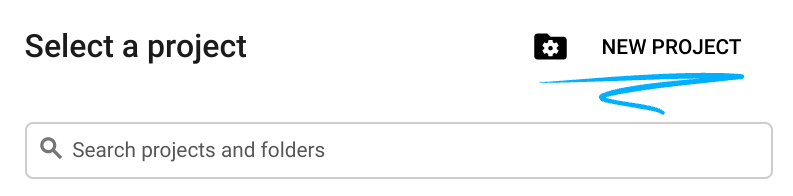
- Accede a la consola de Cloud y crea un proyecto nuevo o reutiliza uno existente. (Si todavía no tienes una cuenta de Gmail o de G Suite, debes crear una).

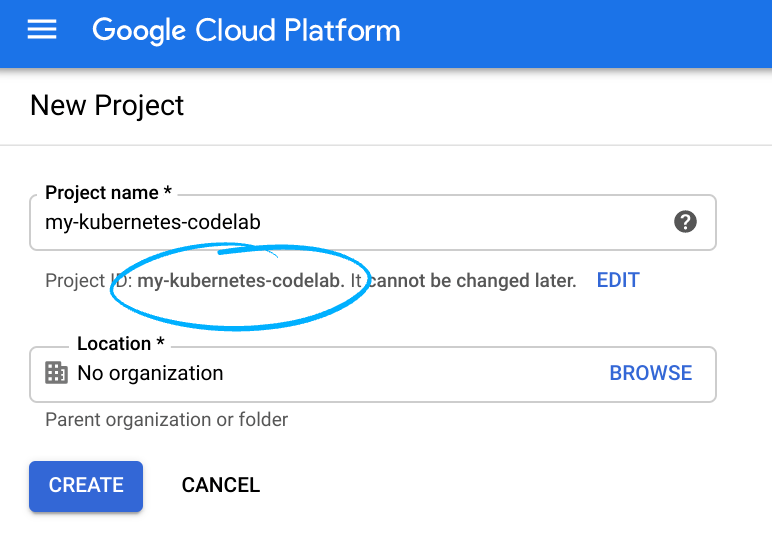
Recuerde el ID de proyecto, un nombre único en todos los proyectos de Google Cloud (el nombre anterior ya se encuentra en uso y no lo podrá usar). Se mencionará más adelante en este codelab como PROJECT_ID.
- A continuación, deberás habilitar la facturación en la consola de Cloud para usar los recursos de Google Cloud recursos.
Ejecutar este codelab no debería costar mucho, tal vez nada. Asegúrate de seguir las instrucciones de la sección “Realiza una limpieza”, en la que se aconseja cómo cerrar recursos para que no se te facture más allá de este instructivo. Los usuarios nuevos de Google Cloud son aptos para participar en el programa Prueba gratuita de $300.
Activar Cloud Shell
- En la consola de Cloud, haz clic en Activar Cloud Shell
.

Si nunca ha iniciado Cloud Shell, aparecerá una pantalla intermedia (debajo de la mitad inferior de la página) que describe qué es. Si ese es el caso, haz clic en Continuar (y no volverás a verlo). Así es como se ve la pantalla única:

El aprovisionamiento y la conexión a Cloud Shell solo tomará unos minutos.

Esta máquina virtual está cargada con todas las herramientas de desarrollo que necesitarás. Ofrece un directorio principal persistente de 5 GB y se ejecuta en Google Cloud, lo que permite mejorar considerablemente el rendimiento de la red y la autenticación. Gran parte de tu trabajo en este codelab, si no todo, se puede hacer simplemente con un navegador o tu Chromebook.
Una vez conectado a Cloud Shell, debería ver que ya se autenticó y que el proyecto ya se configuró con tu ID del proyecto.
- En Cloud Shell, ejecuta el siguiente comando para confirmar que está autenticado:
gcloud auth list
Resultado del comando
 Credentialed Accounts
ACTIVE  ACCOUNT
*       <my_account>@<my_domain.com>

To set the active account, run:
    $ gcloud config set account `ACCOUNT`
gcloud config list project
Resultado del comando
[core]
project = <PROJECT_ID>
De lo contrario, puedes configurarlo con el siguiente comando:
gcloud config set project <PROJECT_ID>
Resultado del comando
Updated property [core/project].
3. Inicializa Cloud Spanner
Habilita la API de Cloud Spanner con gcloud CLI:
gcloud services enable spanner.googleapis.com
Crea una instancia de Cloud Spanner:
gcloud spanner instances create spanner-instance \
 --config=regional-us-central1 \
 --nodes=1 --description="A Spanner Instance"
Crea una base de datos dentro de la instancia:
gcloud spanner databases create orders \
  --instance=spanner-instance
Crea un archivo schema.ddl para describir el esquema de datos:
cat << EOF > schema.ddl
CREATE TABLE orders (
  order_id STRING(36) NOT NULL,
  description STRING(255),
  creation_timestamp TIMESTAMP,
) PRIMARY KEY (order_id);

CREATE TABLE order_items (
  order_id STRING(36) NOT NULL,
  order_item_id STRING(36) NOT NULL,
  description STRING(255),
  quantity INT64,
) PRIMARY KEY (order_id, order_item_id),
  INTERLEAVE IN PARENT orders ON DELETE CASCADE;
EOF
Aplica el esquema a la base de datos de Cloud Spanner:
gcloud spanner databases ddl update orders \
  --instance=spanner-instance \
  --ddl="$(<schema.ddl)"
4. Cómo iniciar una nueva aplicación de Spring Boot Java
Desde el entorno de Cloud Shell, usa el siguiente comando para inicializar y arrancar una nueva aplicación de Spring Boot:
$ curl https://start.spring.io/starter.tgz \
  -d packaging=jar \
  -d dependencies=cloud-gcp,web,lombok \
  -d baseDir=spanner-example \
  -d type=maven-project \
  -d bootVersion=3.2.6 | tar -xzvf -

$ cd spanner-example
Esto creará un nuevo directorio spanner-example/ con un nuevo proyecto de Maven, junto con pom.xml de Maven, un wrapper de Maven y un punto de entrada de la aplicación.
En el archivo pom.xml, agrega el iniciador de Spring Data Cloud Spanner.
spanner-example/pom.xml
<project>
  ...
  <dependencies>
        ...
        <!-- Add Spring Cloud GCP Spanner Starter -->
        <dependency>
                <groupId>com.google.cloud</groupId>
                <artifactId>spring-cloud-gcp-starter-data-spanner</artifactId>
        </dependency>

        ...

  </dependencies>

  ...
</project>
En application.properties, configura la información de conexión de la base de datos de Spanner:
spanner-example/src/main/resources/application.properties
spring.cloud.gcp.spanner.instance-id=spanner-instance
spring.cloud.gcp.spanner.database=orders
Asegúrate de que JAVA_HOME esté configurado en la versión correcta:
export JAVA_HOME=/usr/lib/jvm/java-17-openjdk-amd64/
Vuelve a compilar la app para asegurarte de que la configuración de Maven sea correcta:
./mvnw package
5. Crea las entidades
Con la compatibilidad de Spring Data Spanner de Spring Cloud GCP, puedes crear fácilmente un objeto Java y una asignación idiomática de ORM a una tabla de Spanner con Spring Data.
Primero, crea una clase Order Item.
spanner-example/src/main/java/com/example/demo/OrderItem.java
package com.example.demo;

import com.google.cloud.spring.data.spanner.core.mapping.Column;
import com.google.cloud.spring.data.spanner.core.mapping.PrimaryKey;
import com.google.cloud.spring.data.spanner.core.mapping.Table;

@Table(name="order_items")
@Data
class OrderItem {
  @PrimaryKey(keyOrder = 1)
  @Column(name="order_id")
  private String orderId;

  @PrimaryKey(keyOrder = 2)
  @Column(name="order_item_id")
  private String orderItemId;

  private String description;
  private Long quantity;
}
Para las relaciones principal/secundaria en Spanner, debes usar una clave primaria compuesta. En este ejemplo, la clave compuesta es order_id y order_item_id.
A continuación, crea una clase Order:
spanner-example/src/main/java/com/example/demo/Order.java
package com.example.demo;

import java.time.LocalDateTime;
import java.util.List;
import lombok.Data;
import com.google.cloud.spring.data.spanner.core.mapping.Column;
import com.google.cloud.spring.data.spanner.core.mapping.Interleaved;
import com.google.cloud.spring.data.spanner.core.mapping.PrimaryKey;
import com.google.cloud.spring.data.spanner.core.mapping.Table;

@Table(name="orders")
@Data
public class Order {
  @PrimaryKey
  @Column(name="order_id")
  private String id;

  private String description;

  @Column(name="creation_timestamp")
  private LocalDateTime timestamp;

  @Interleaved
  private List<OrderItem> items;
}
Esta clase usa la anotación @Interleaved para crear una relación de uno a varios con los elementos del pedido.
6. Crea la interfaz OrderRepository
Crea la clase OrderRepository con el siguiente contenido:
spanner-example/src/main/java/com/example/demo/OrderRepository.java
package com.example.demo;

import com.google.cloud.spring.data.spanner.repository.SpannerRepository;
import org.springframework.stereotype.Repository;

@Repository
public interface OrderRepository extends SpannerRepository<Order, String> {
}
La interfaz extiende SpannerRepository<Order, String>, donde Order es la clase de dominio y String es el tipo de clave principal. Spring Data proporcionará automáticamente acceso CRUD a través de esta interfaz, y no necesitarás crear ningún código adicional.
7. Crea un controlador REST para operaciones básicas
Abre la clase DemoApplication de la aplicación principal y modifícala para que se vea de la siguiente manera:
spanner-example/src/main/java/com/example/demo/DemoApplication.java
package com.example.demo;

import java.time.LocalDateTime;
import java.util.UUID;
import org.springframework.boot.SpringApplication;
import org.springframework.boot.autoconfigure.SpringBootApplication;
import org.springframework.http.HttpStatus;
import org.springframework.web.bind.annotation.*;
import org.springframework.web.server.ResponseStatusException;

@SpringBootApplication
public class DemoApplication {
        public static void main(String[] args) {
                SpringApplication.run(DemoApplication.class, args);
        }
}

@RestController
class OrderController {
  private final OrderRepository orderRepository;

        OrderController(OrderRepository orderRepository) {
                this.orderRepository = orderRepository;
        }

        @GetMapping("/api/orders/{id}")
        public Order getOrder(@PathVariable String id) {
          return orderRepository.findById(id)
                                .orElseThrow(() -> new ResponseStatusException(HttpStatus.NOT_FOUND, id + " not found"));
        }

        @PostMapping("/api/orders")
        public String createOrder(@RequestBody Order order) {
                // Spanner currently does not auto generate IDs
                // Generate UUID on new orders
                order.setId(UUID.randomUUID().toString());
                order.setTimestamp(LocalDateTime.now());

                order.getItems().forEach(item -> {
                        // Assign parent ID, and also generate child ID
                        item.setOrderId(order.getId());
                        item.setOrderItemId(UUID.randomUUID().toString());
                });

          Order saved = orderRepository.save(order);
          return saved.getId();
        }
}
8. Cómo ejecutar la aplicación
Vuelve a compilar y ejecutar la aplicación.
./mvnw spring-boot:run
Debería iniciarse correctamente y escuchar en el puerto 8080.
Puedes publicar un registro de Order en el extremo:
curl -H"Content-Type: application/json" -d'{"description": "My orders", "items": [{"description": "Android Phone", "quantity": "1"}]}' \
  http://localhost:8080/api/orders
Debería responder con el UUID del pedido.
Luego, puedes recuperar el pedido con UUID:
curl http://localhost:8080/api/orders/REPLACE_WITH_ORDER_UUID
Para ver cómo se almacenan los datos en Cloud Spanner, ve a Cloud Console y navega a Spanner → Instancia de Spanner → base de datos de pedidos → tabla de pedidos → Datos.

9. Limpia
Para limpiar, borra la instancia de Spanner para que ya no genere cargos.
gcloud spanner instances delete spanner-instance -q
10. ¡Felicitaciones!
En este codelab, creaste una aplicación de CLI interactiva que puede almacenar y recuperar datos de Cloud Spanner.
Más información
- Cloud Spanner: https://cloud.google.com/spanner/
- Proyecto de Spring en GCP: https://googlecloudplatform.github.io/spring-cloud-gcp/reference/html/
- Repositorio de GitHub de Spring on GCP: https://github.com/spring-cloud/spring-cloud-gcp
- Java en Google Cloud: https://cloud.google.com/java/
Licencia
Este trabajo cuenta con una licencia Atribución 2.0 Genérica de Creative Commons.