
1. 總覽
開發人員可透過 Google Cloud Text-to-Speech API,在應用程式中加入自然的合成人類語音,並轉成可播放的音訊。Text-to-Speech API 會將文字或語音合成標記語言 (SSML) 輸入內容轉換成音訊資料,例如 MP3 或 LINEAR16 (WAV 檔案使用的編碼)。
在本程式碼研究室中,您將著重於使用 Node.js 搭配 Text-to-Speech API。您將瞭解如何列出可用語音,以及如何從文字合成音訊。
課程內容
- 如何使用 Cloud Shell
- 如何啟用 Text-to-Speech API
- 如何驗證 API 要求
- 如何安裝 Node.js 適用的 Google Cloud 用戶端程式庫
- 如何列出可用語音
- 如何從文字合成音訊
軟硬體需求
問卷調查
您會如何使用本教學課程?
您對 Node.js 的體驗滿意嗎?
您對使用 Google Cloud Platform 服務的體驗有何評價?
2. 設定和需求
自修實驗室環境設定

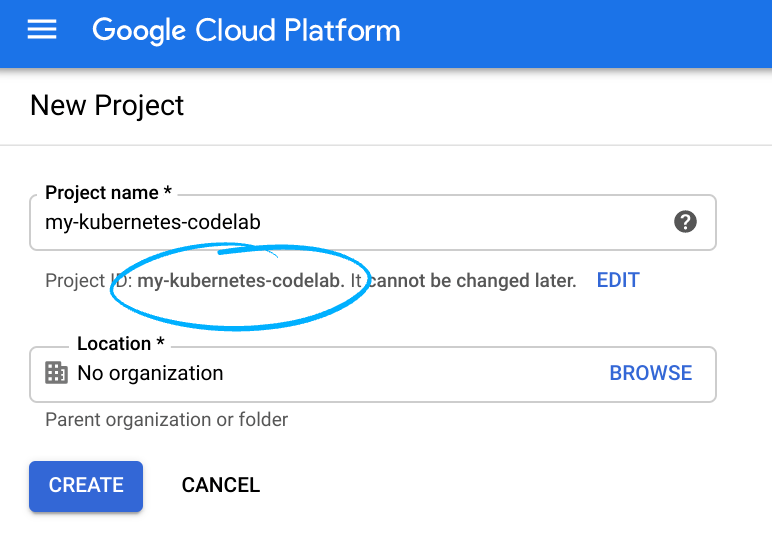
請記住專案 ID,這是所有 Google Cloud 專案中不重複的名稱 (上述名稱已遭占用,因此不適用於您,抱歉!)。本程式碼研究室稍後會將其稱為 PROJECT_ID。
- 接著,您必須在 Cloud 控制台中啟用帳單,才能使用 Google Cloud 資源。
完成本程式碼研究室的費用應該不高,甚至完全免費。請務必按照「清除」部分的指示操作,瞭解如何停用資源,避免在本教學課程結束後繼續產生帳單費用。Google Cloud 新使用者可參加價值$300 美元的免費試用計畫。
啟動 Cloud Shell
雖然可以透過筆電遠端操作 Google Cloud,但在本程式碼研究室中,您將使用 Google Cloud Shell,這是可在雲端執行的指令列環境。
啟用 Cloud Shell
- 在 Cloud 控制台,點選「啟用 Cloud Shell」 圖示
。

如果您是首次啟動 Cloud Shell,系統會顯示中繼畫面 (摺疊式螢幕下方),說明這個指令列環境。點選「繼續」後,這則訊息日後就不會再出現。以下是這個初次畫面的樣子:

佈建並連至 Cloud Shell 預計只需要幾分鐘。

這部虛擬機器搭載各種您需要的開發工具,並提供永久的 5GB 主目錄,而且可在 Google Cloud 運作,大幅提升網路效能並強化驗證功能。本程式碼研究室幾乎所有工作都可在瀏覽器或 Chromebook 上完成。
連線至 Cloud Shell 後,您應會發現自己通過驗證,且專案已設為您的專案 ID。
- 在 Cloud Shell 中執行下列指令,確認您已通過驗證:
gcloud auth list
指令輸出
 Credentialed Accounts
ACTIVE  ACCOUNT
*       <my_account>@<my_domain.com>

To set the active account, run:
    $ gcloud config set account `ACCOUNT`
gcloud config list project
指令輸出
[core]
project = <PROJECT_ID>
如未設定,請輸入下列指令手動設定專案:
gcloud config set project <PROJECT_ID>
指令輸出
Updated property [core/project].
3. 啟用 Text-to-Speech API
您必須先啟用 API,才能開始使用 Text-to-Speech API。您可以在 Cloud Shell 中使用下列指令啟用 API:
gcloud services enable texttospeech.googleapis.com
4. 驗證 API 要求
如要向 Text-to-Speech API 提出要求,必須使用「服務帳戶」。「服務帳戶」屬於您的專案,Google Client Node.js 程式庫會使用此帳戶提出 Text-to-Speech API 要求。服務帳戶與其他使用者帳戶一樣,都是以電子郵件地址表示。在本節中,您將使用 Cloud SDK 建立服務帳戶,然後建立以服務帳戶身分進行驗證所需的憑證。
請先使用 GOOGLE_CLOUD_PROJECT 設定環境變數,本程式碼研究室全程都會使用這個環境變數:
export GOOGLE_CLOUD_PROJECT=$(gcloud config get-value core/project)
接著,請使用下列方式建立新的服務帳戶,用以存取 Text-to-Speech API:
gcloud iam service-accounts create my-text-to-speech-sa \
  --display-name "my text-to-speech codelab service account"
接著,建立 Node.js 程式碼使用的憑證,用以登入新的服務帳戶。輸入下列指令,建立憑證並儲存為 JSON 檔案「~/key.json」:
gcloud iam service-accounts keys create ~/key.json \
  --iam-account  my-text-to-speech-sa@${GOOGLE_CLOUD_PROJECT}.iam.gserviceaccount.com
最後,設定 GOOGLE_APPLICATION_CREDENTIALS 環境變數,Text-to-Speech API Node.js 程式庫 (下一個步驟會介紹) 會使用這個變數尋找憑證。環境變數應設為您所建立 JSON 憑證檔案的完整路徑,方法如下:
export GOOGLE_APPLICATION_CREDENTIALS="/home/${USER}/key.json"
5. 安裝適用於 Node.js 的 Google Cloud Text-to-Speech API 用戶端程式庫
首先,請建立專案,用於執行這項 Text-to-Speech API 實驗室,並在所選資料夾中初始化新的 Node.js 套件:
npm init
NPM 會詢問專案設定的相關問題,例如名稱和版本。針對每個問題按下 ENTER,接受預設值。預設進入點是名為 index.js 的檔案。
接著,請將 Google Cloud Speech 程式庫安裝至專案:
npm install --save @google-cloud/text-to-speech
如需更多關於如何設定 Google Cloud Node.js 開發環境的說明,請參閱設定指南。
您現在可以使用 Text-to-Speech API 了!
6. 列出可用語音
在本節中,您會先列出所有可用的英文語音,用於音訊合成。
前往 index.js 檔案,並將程式碼替換成下列程式碼:
'use strict';

/**
 * Lists available voices for the specified language.
 *
 * @param {string} languageCode - The language code.
 */
async function listVoices(languageCode) {
  const textToSpeech = require('@google-cloud/text-to-speech');

  const client = new textToSpeech.TextToSpeechClient();

  const [result] = await client.listVoices({languageCode});
  const voices = result.voices;

  voices.forEach((voice) => {
    console.log(`${voice.name} (${voice.ssmlGender}): ${voice.languageCodes}`);
  });
}

listVoices('en');
請花一兩分鐘研究程式碼。執行應用程式:
node .
您應該會看到以下的輸出內容:
en-US-Standard-A (MALE): en-US
en-US-Standard-B (MALE): en-US
en-US-Standard-C (FEMALE): en-US
en-US-Standard-D (MALE): en-US
en-US-Standard-E (FEMALE): en-US
en-US-Standard-F (FEMALE): en-US
...
7. 從文字合成音訊
您可以使用 Text-to-Speech API 將字串轉換為音訊資料。您可以透過各種方式設定語音合成的輸出,包括選取不重複的語音或調節輸出的音調、音量、說話速度和取樣率。
前往 index.js 檔案,並附加下列程式碼:
/**
 * Sythesizes sample text into an .mp3 file.
 */
async function synthesize() {
  const textToSpeech = require('@google-cloud/text-to-speech');
  const fs = require('fs');
  const util = require('util');

  const client = new textToSpeech.TextToSpeechClient();

  const text = 'This is a demonstration of the Google Cloud Text-to-Speech API';

  const request = {
    input: {text: text},
    voice: {languageCode: 'en-US', ssmlGender: 'NEUTRAL'},
    audioConfig: {audioEncoding: 'MP3'},
  };

  const [response] = await client.synthesizeSpeech(request);
  // Write the binary audio content to a local file
  const writeFile = util.promisify(fs.writeFile);
  await writeFile('output.mp3', response.audioContent, 'binary');
  console.log('Audio content written to file: output.mp3');
}

synthesize();
請花一兩分鐘研究程式碼,瞭解如何使用程式碼從文字建立音訊檔。
node .
您應該會看到以下的輸出內容:
Audio content written to file "output.mp3"
8. 恭喜!
您已瞭解如何使用 Node.js 透過 Text-to-Speech API,對音訊檔案執行不同類型的轉錄作業!
清除所用資源
如何避免系統向您的 Google Cloud Platform 帳戶收取您在本快速入門導覽課程中所用資源的相關費用:
- 前往 Cloud Platform Console。
- 選取要關閉的專案,然後按一下頂端的「刪除」,系統就會排定刪除專案的時間。
瞭解詳情
- Google Cloud Text-to-Speech API:https://cloud.google.com/text-to-speech/docs
- Google Cloud Platform 上的 Node.js:https://cloud.google.com/nodejs/
- Google Cloud Node.js 用戶端:https://googlecloudplatform.github.io/google-cloud-node/
授權
這項內容採用的授權為 Creative Commons 姓名標示 2.0 通用授權。