1. Overview

The Text-to-Speech API enables developers to generate human-like speech. The API converts text into audio formats such as WAV, MP3, or Ogg Opus. It also supports Speech Synthesis Markup Language (SSML) inputs to specify pauses, numbers, date and time formatting, and other pronunciation instructions.
In this tutorial, you will focus on using the Text-to-Speech API with Python.
What you'll learn
- How to set up your environment
- How to list supported languages
- How to list available voices
- How to synthesize audio from text
What you'll need
Survey
How will you use this tutorial?
How would you rate your experience with Python?
How would you rate your experience with Google Cloud services?
2. Setup and requirements
Self-paced environment setup
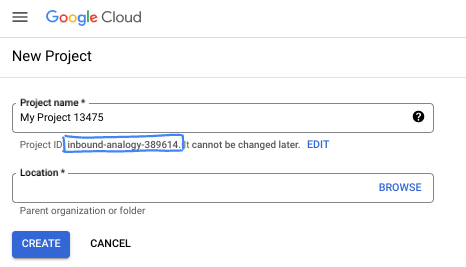
- Sign-in to the Google Cloud Console and create a new project or reuse an existing one. If you don't already have a Gmail or Google Workspace account, you must create one.


- The Project name is the display name for this project's participants. It is a character string not used by Google APIs. You can always update it.
- The Project ID is unique across all Google Cloud projects and is immutable (cannot be changed after it has been set). The Cloud Console auto-generates a unique string; usually you don't care what it is. In most codelabs, you'll need to reference your Project ID (typically identified as
PROJECT_ID). If you don't like the generated ID, you might generate another random one. Alternatively, you can try your own, and see if it's available. It can't be changed after this step and remains for the duration of the project. - For your information, there is a third value, a Project Number, which some APIs use. Learn more about all three of these values in the documentation.
- Next, you'll need to enable billing in the Cloud Console to use Cloud resources/APIs. Running through this codelab won't cost much, if anything at all. To shut down resources to avoid incurring billing beyond this tutorial, you can delete the resources you created or delete the project. New Google Cloud users are eligible for the $300 USD Free Trial program.
Start Cloud Shell
While Google Cloud can be operated remotely from your laptop, in this codelab you will be using Cloud Shell, a command line environment running in the Cloud.
Activate Cloud Shell
- From the Cloud Console, click Activate Cloud Shell
 .
.

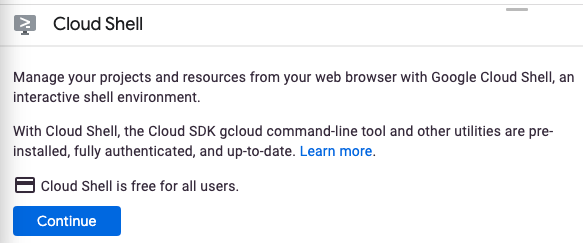
If this is your first time starting Cloud Shell, you're presented with an intermediate screen describing what it is. If you were presented with an intermediate screen, click Continue.

It should only take a few moments to provision and connect to Cloud Shell.

This virtual machine is loaded with all the development tools needed. It offers a persistent 5 GB home directory and runs in Google Cloud, greatly enhancing network performance and authentication. Much, if not all, of your work in this codelab can be done with a browser.
Once connected to Cloud Shell, you should see that you are authenticated and that the project is set to your project ID.
- Run the following command in Cloud Shell to confirm that you are authenticated:
gcloud auth list
Command output
 Credentialed Accounts
ACTIVE  ACCOUNT
*       <my_account>@<my_domain.com>

To set the active account, run:
    $ gcloud config set account `ACCOUNT`
- Run the following command in Cloud Shell to confirm that the gcloud command knows about your project:
gcloud config list project
Command output
[core]
project = <PROJECT_ID>
If it is not, you can set it with this command:
gcloud config set project <PROJECT_ID>
Command output
Updated property [core/project].
3. Environment setup
Before you can begin using the Text-to-Speech API, run the following command in Cloud Shell to enable the API:
gcloud services enable texttospeech.googleapis.com
You should see something like this:
Operation "operations/..." finished successfully.
Now, you can use the Text-to-Speech API!
Navigate to your home directory:
cd ~
Create a Python virtual environment to isolate the dependencies:
virtualenv venv-texttospeech
Activate the virtual environment:
source venv-texttospeech/bin/activate
Install IPython and the Text-to-Speech API client library:
pip install ipython google-cloud-texttospeech
You should see something like this:
...
Installing collected packages: ..., ipython, google-cloud-texttospeech
Successfully installed ... google-cloud-texttospeech-2.16.3 ...
Now, you're ready to use the Text-to-Speech API client library!
In the next steps, you'll use an interactive Python interpreter called IPython, which you installed in the previous step. Start a session by running ipython in Cloud Shell:
ipython
You should see something like this:
Python 3.9.2 (default, Feb 28 2021, 17:03:44)
Type 'copyright', 'credits' or 'license' for more information
IPython 8.18.1 -- An enhanced Interactive Python. Type '?' for help.

In [1]:
You're ready to make your first request and list the supported languages...
4. List supported languages
In this section, you will get the list of all supported languages.
Copy the following code into your IPython session:
from typing import Sequence

import google.cloud.texttospeech as tts


def unique_languages_from_voices(voices: Sequence[tts.Voice]):
    language_set = set()
    for voice in voices:
        for language_code in voice.language_codes:
            language_set.add(language_code)
    return language_set


def list_languages():
    client = tts.TextToSpeechClient()
    response = client.list_voices()
    languages = unique_languages_from_voices(response.voices)

    print(f" Languages: {len(languages)} ".center(60, "-"))
    for i, language in enumerate(sorted(languages)):
        print(f"{language:>10}", end="\n" if i % 5 == 4 else "")
Take a moment to study the code and see how it uses the list_voices client library method to build the list of supported languages.
Call the function:
list_languages()
You should get the following (or a larger) list:
---------------------- Languages: 58 -----------------------
     af-ZA     am-ET     ar-XA     bg-BG     bn-IN
     ca-ES    cmn-CN    cmn-TW     cs-CZ     da-DK
     de-DE     el-GR     en-AU     en-GB     en-IN
     en-US     es-ES     es-US     eu-ES     fi-FI
    fil-PH     fr-CA     fr-FR     gl-ES     gu-IN
     he-IL     hi-IN     hu-HU     id-ID     is-IS
     it-IT     ja-JP     kn-IN     ko-KR     lt-LT
     lv-LV     ml-IN     mr-IN     ms-MY     nb-NO
     nl-BE     nl-NL     pa-IN     pl-PL     pt-BR
     pt-PT     ro-RO     ru-RU     sk-SK     sr-RS
     sv-SE     ta-IN     te-IN     th-TH     tr-TR
     uk-UA     vi-VN    yue-HK
The list shows 58 languages and variants such as:
- Chinese and Taiwanese Mandarin,
- Australian, British, Indian, and American English,
- French from Canada and France,
- Portuguese from Brazil and Portugal.
This list is not fixed and grows as new voices are available.
Summary
This step allowed you to list the supported languages.
5. List available voices
In this section, you will get the list of voices available in different languages.
Copy the following code into your IPython session:
import google.cloud.texttospeech as tts


def list_voices(language_code=None):
    client = tts.TextToSpeechClient()
    response = client.list_voices(language_code=language_code)
    voices = sorted(response.voices, key=lambda voice: voice.name)

    print(f" Voices: {len(voices)} ".center(60, "-"))
    for voice in voices:
        languages = ", ".join(voice.language_codes)
        name = voice.name
        gender = tts.SsmlVoiceGender(voice.ssml_gender).name
        rate = voice.natural_sample_rate_hertz
        print(f"{languages:<8} | {name:<24} | {gender:<8} | {rate:,} Hz")
Take a moment to study the code and see how it uses the client library method list_voices(language_code) to list voices available for a given language.
Now, get the list of available German voices:
list_voices("de")
You should see something like this:
------------------------ Voices: 20 ------------------------
de-DE    | de-DE-Neural2-A          | FEMALE   | 24,000 Hz
de-DE    | de-DE-Neural2-B          | MALE     | 24,000 Hz
...
de-DE    | de-DE-Standard-A         | FEMALE   | 24,000 Hz
de-DE    | de-DE-Standard-B         | MALE     | 24,000 Hz
...
de-DE    | de-DE-Studio-B           | MALE     | 24,000 Hz
de-DE    | de-DE-Studio-C           | FEMALE   | 24,000 Hz
de-DE    | de-DE-Wavenet-A          | FEMALE   | 24,000 Hz
de-DE    | de-DE-Wavenet-B          | MALE     | 24,000 Hz
...
Multiple female and male voices are available, as well as standard, WaveNet, Neural2, and Studio voices:
- Standard voices are generated by signal processing algorithms.
- WaveNet, Neural2, and Studio voices are higher quality voices synthesized by machine learning models and sounding more natural.
Now, get the list of available English voices:
list_voices("en")
You should get something like this:
------------------------ Voices: 90 ------------------------
en-AU    | en-AU-Neural2-A          | FEMALE   | 24,000 Hz
...
en-AU    | en-AU-Wavenet-A          | FEMALE   | 24,000 Hz
...
en-GB    | en-GB-Neural2-A          | FEMALE   | 24,000 Hz
...
en-GB    | en-GB-Wavenet-A          | FEMALE   | 24,000 Hz
...
en-IN    | en-IN-Standard-A         | FEMALE   | 24,000 Hz
...
en-IN    | en-IN-Wavenet-A          | FEMALE   | 24,000 Hz
...
en-US    | en-US-Neural2-A          | MALE     | 24,000 Hz
...
en-US    | en-US-News-K             | FEMALE   | 24,000 Hz
...
en-US    | en-US-Standard-A         | MALE     | 24,000 Hz
...
en-US    | en-US-Studio-M           | MALE     | 24,000 Hz
...
en-US    | en-US-Wavenet-A          | MALE     | 24,000 Hz
...
In addition to a selection of multiple voices in different genders and qualities, multiple accents are available: Australian, British, Indian, and American English.
Take a moment to list the voices available for your preferred languages and variants (or even all of them):
list_voices("fr")
list_voices("pt")
list_voices()
Summary
This step allowed you to list the available voices. You can read more about the supported voices and languages.
6. Synthesize audio from text
You can use the Text-to-Speech API to convert a string into audio data. You can configure the output of speech synthesis in a variety of ways, including selecting a unique voice or modulating the output in pitch, volume, speaking rate, and sample rate.
Copy the following code into your IPython session:
import google.cloud.texttospeech as tts


def text_to_wav(voice_name: str, text: str):
    language_code = "-".join(voice_name.split("-")[:2])
    text_input = tts.SynthesisInput(text=text)
    voice_params = tts.VoiceSelectionParams(
        language_code=language_code, name=voice_name
    )
    audio_config = tts.AudioConfig(audio_encoding=tts.AudioEncoding.LINEAR16)

    client = tts.TextToSpeechClient()
    response = client.synthesize_speech(
        input=text_input,
        voice=voice_params,
        audio_config=audio_config,
    )

    filename = f"{voice_name}.wav"
    with open(filename, "wb") as out:
        out.write(response.audio_content)
        print(f'Generated speech saved to "{filename}"')
Take a moment to study the code and see how it uses the synthesize_speech client library method to generate the audio data and save it as a wav file.
Now, generate sentences in a few different accents:
text_to_wav("en-AU-Neural2-A", "What is the temperature in Sydney?")
text_to_wav("en-GB-Neural2-B", "What is the temperature in London?")
text_to_wav("en-IN-Wavenet-C", "What is the temperature in Delhi?")
text_to_wav("en-US-Studio-O", "What is the temperature in New York?")
text_to_wav("fr-FR-Neural2-A", "Quelle est la température à Paris ?")
text_to_wav("fr-CA-Neural2-B", "Quelle est la température à Montréal ?")
You should see something like this:
Generated speech saved to "en-AU-Neural2-A.wav"
Generated speech saved to "en-GB-Neural2-B.wav"
Generated speech saved to "en-IN-Wavenet-C.wav"
Generated speech saved to "en-US-Studio-O.wav"
Generated speech saved to "fr-FR-Neural2-A.wav"
Generated speech saved to "fr-CA-Neural2-B.wav"
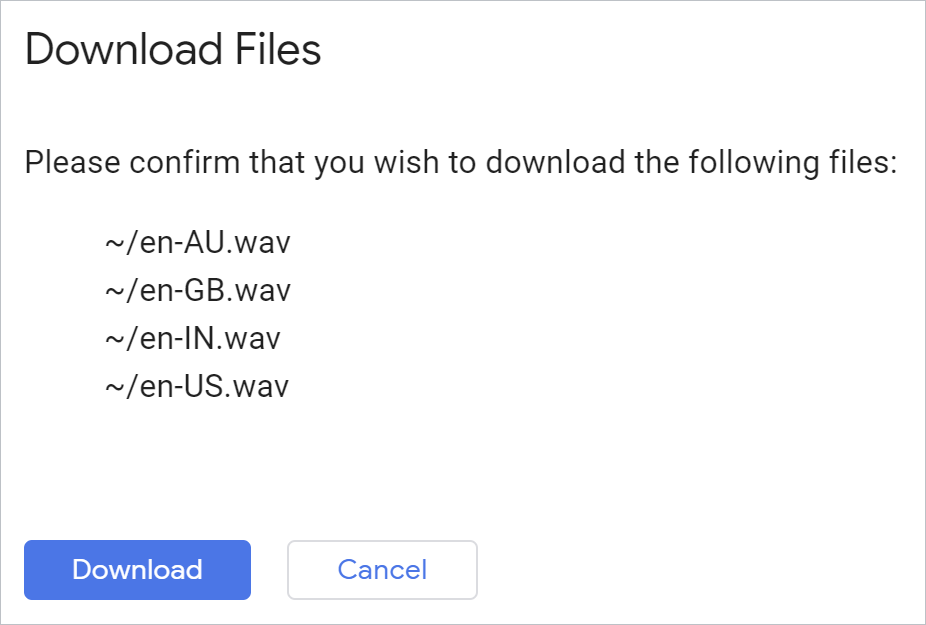
To download all generated files at once, you can use this Cloud Shell command from your Python environment:
!cloudshell download *.wav
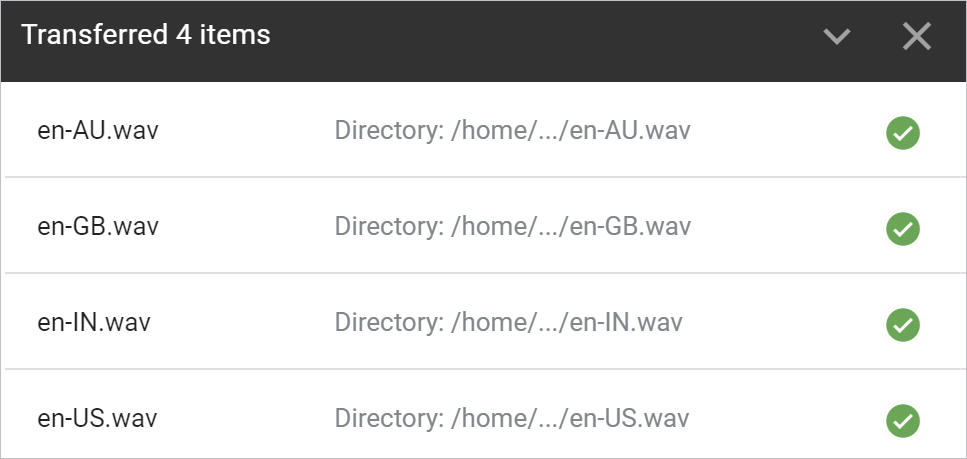
Validate and your browser will download the files:


Open each file and hear the result.
Summary
In this step, you were able to use Text-to-Speech API to convert sentences into audio wav files. Read more about creating voice audio files.
7. Congratulations!

You learned how to use the Text-to-Speech API using Python to generate human-like speech!
Clean up
To clean up your development environment, from Cloud Shell:
- If you're still in your IPython session, go back to the shell:
exit - Stop using the Python virtual environment:
deactivate - Delete your virtual environment folder:
cd ~ ; rm -rf ./venv-texttospeech
To delete your Google Cloud project, from Cloud Shell:
- Retrieve your current project ID:
PROJECT_ID=$(gcloud config get-value core/project) - Make sure this is the project you want to delete:
echo $PROJECT_ID - Delete the project:
gcloud projects delete $PROJECT_ID
Learn more
- Test the demo in your browser: https://cloud.google.com/text-to-speech
- Text-to-Speech documentation: https://cloud.google.com/text-to-speech/docs
- Python on Google Cloud: https://cloud.google.com/python
- Cloud Client Libraries for Python: https://github.com/googleapis/google-cloud-python
License
This work is licensed under a Creative Commons Attribution 2.0 Generic License.
