
1. Introduction & Set Up
Welcome
Hi! Welcome to Coding Jam. In the next 75 minutes, you're going to build a real, working AI web app.
See Website here: Coding Jam Website
What You'll Build
An AI-powered web app based on this week's project brief. Runs in your browser. Uses Google's Gemini AI. Fully yours by the end of the session.
Install Antigravity
Antigravity is the AI assistant we'll use for everything. It's an app that goes on your computer.
Step 1 — Download
👉 Go to https://antigravity.google/download in your browser.
👉 Click the download button at Antigravity 2.0 for your operating system (Mac, Windows, or Linux).
👉 Run the downloaded installer. Default settings are fine — click through them.
Step 2 — Launch & Sign In
👉 Launch Antigravity from your Applications folder (Mac) or Start Menu (Windows).
👉 Click "Sign In" when prompted.
👉 Use your Google account.
Step 3 — Verify the Welcome Screen
You should see Antigravity's welcome screen with three big buttons:
- Open Folder — opens an existing folder as a workspace
- Clone Repository — downloads a project from GitHub (we'll use this in Section 3A)
More docs at https://antigravity.google/ if you ever want to dig deeper.
✅ Checkpoint: Antigravity is installed, you're signed in, you see the welcome screen with three buttons.
2. Install Required Tools (via Antigravity)
Antigravity needs two helper tools on your computer:
Tool | What it is (plain English) |
uv | Manages Python — the language behind your app's backend |
git | Downloads project files from the internet (Antigravity uses this for cloning) |
You won't type install commands yourself. You'll ask Antigravity in English; it does the rest.
Step 1 — Open a Temporary Workspace
Antigravity needs a folder open to have a chat. (No folder = no chat.)
👉 On the welcome screen, click "Open Folder".
👉 Create or pick any empty folder. Suggested: a new folder called coding-jam-setup somewhere convenient (your Desktop is fine).
👉 Click Open (or Select Folder).
The Agent Manager view opens with your new (empty) workspace selected.
Step 2 — Ask Antigravity to Check & Install Tools
👉 Press Cmd+L (Mac) or Ctrl+L (Win/Linux) to focus the chat input.
👉 Confirm the model picker at the bottom shows Gemini 3 Flash (default — fine for this).
📝 Simplest prompt — paste this into the chat:
Install uv and git on my computer if they're not already there.
Don't install Node.js. Ask permission before each install command.
📝 More detailed version (if you want):
Check whether uv and git are installed by running their --version commands.
For any tool that's missing, install it using the best method for my OS:
- Mac: prefer `brew install` (install Homebrew first if missing)
- Windows: prefer `winget install`
- Linux: prefer `apt install` or `dnf install`
Ask permission before each install command.
Do NOT install Node.js — we'll install it later only if needed.
When done, give me a summary of what's installed.
👉 Press Enter to send.
🤖 Watch the Agent Work, Click Allow on Pop-Ups
Step 3 — Read the Summary
When the agent is done, you'll see something like:
✅ Setup complete:
- uv 0.4.18 ✅ (installed)
- git 2.42.0 ✅ (already had it)
- Node.js: skipped (will install later if needed)
If Something Goes Wrong
✅ Checkpoint: Agent confirms uv and git are both installed. Total time: ~3-5 min (or ~7 min if Homebrew has to install first on Mac).
Clone Your Project
Step 1 — Pick This Week's Project
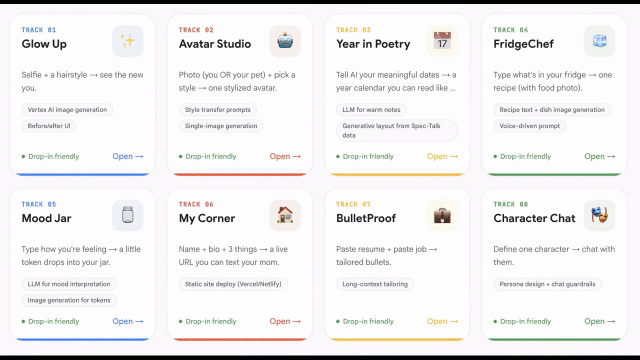
Coding Jam is an 8-week program with a different mini-project each week. Your facilitator will tell you which week we're doing today. Find that row and copy the URL.
Week | Project | Repo URL |
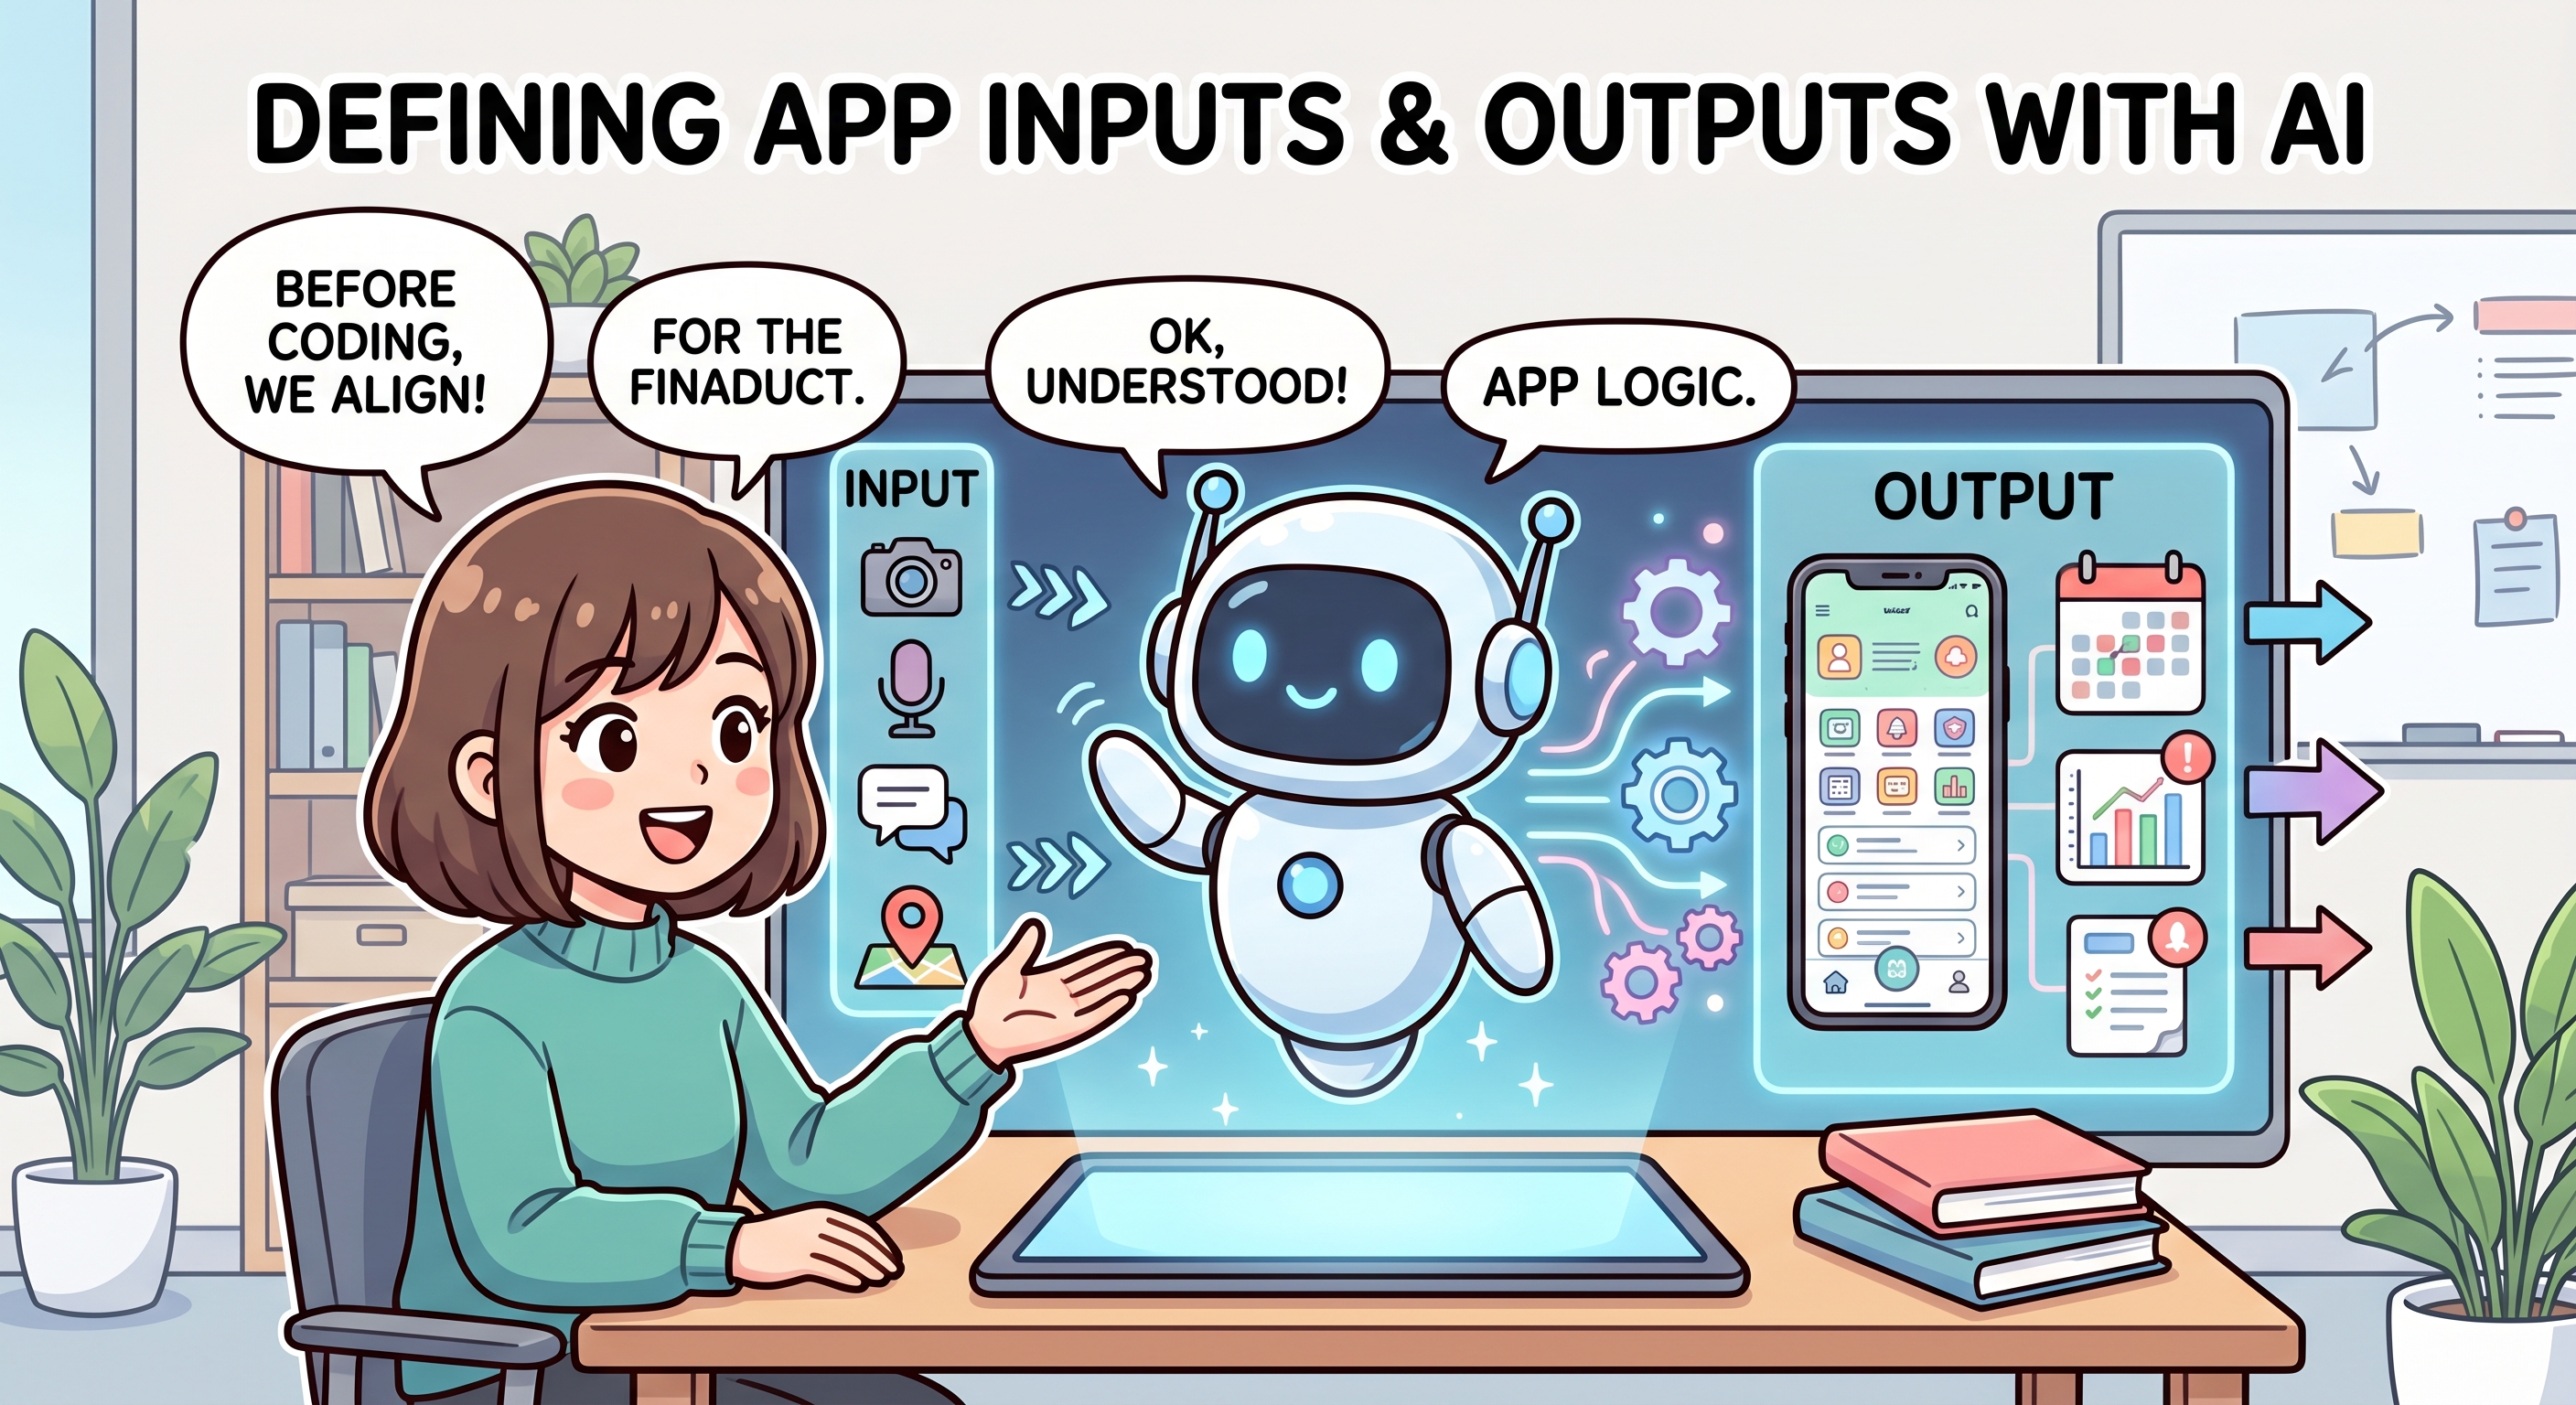
1 | AI Hairstyle Try-On |
|
2 | AI Avatar Generator |
|
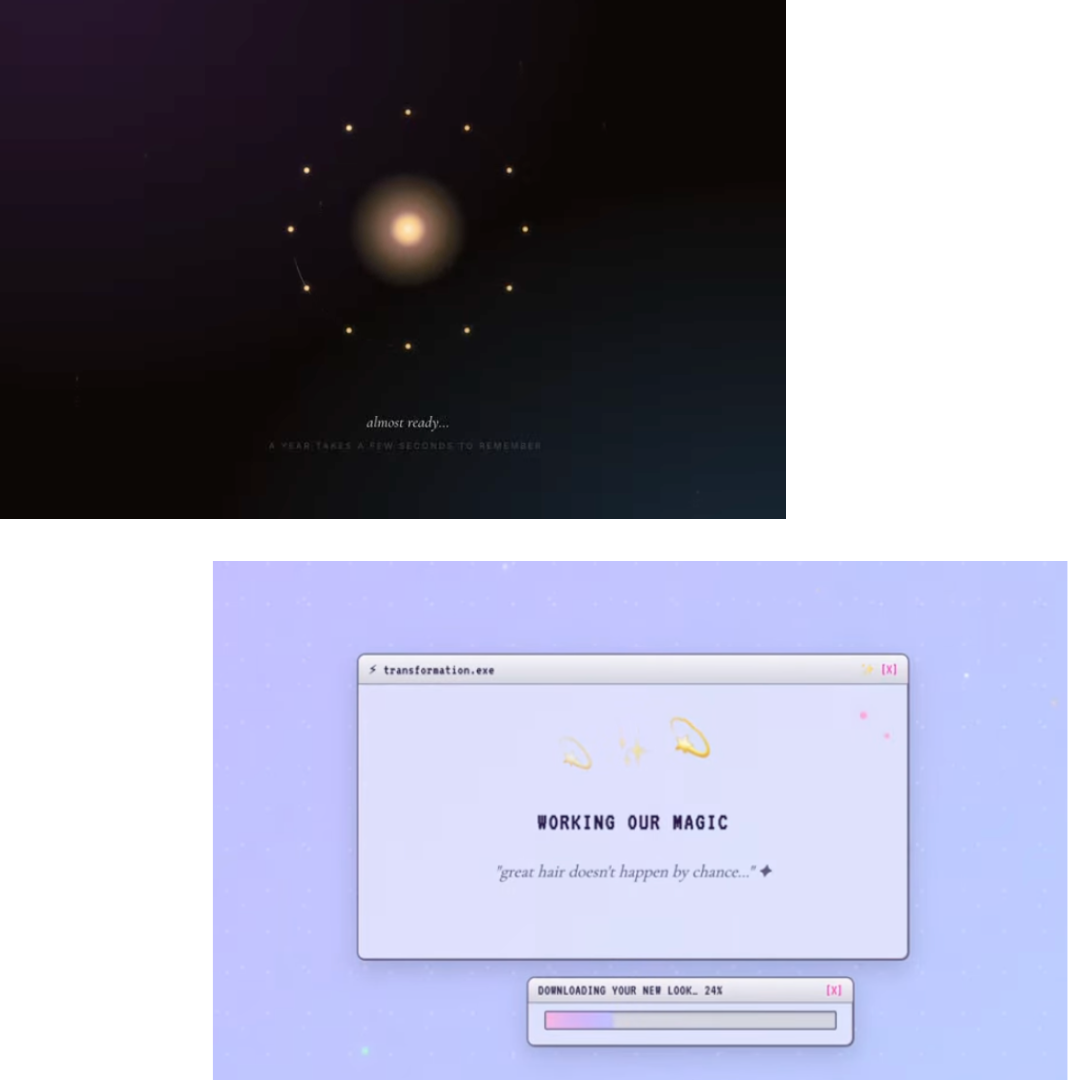
3 | My Special Year Calendar |
|
4 | Fridge to Recipe |
|
5 | AI Mood Jar |
|
6 | One-Page Portfolio |
|
7 | Resume Tailor |
|
8 | AI Character Chat |
|
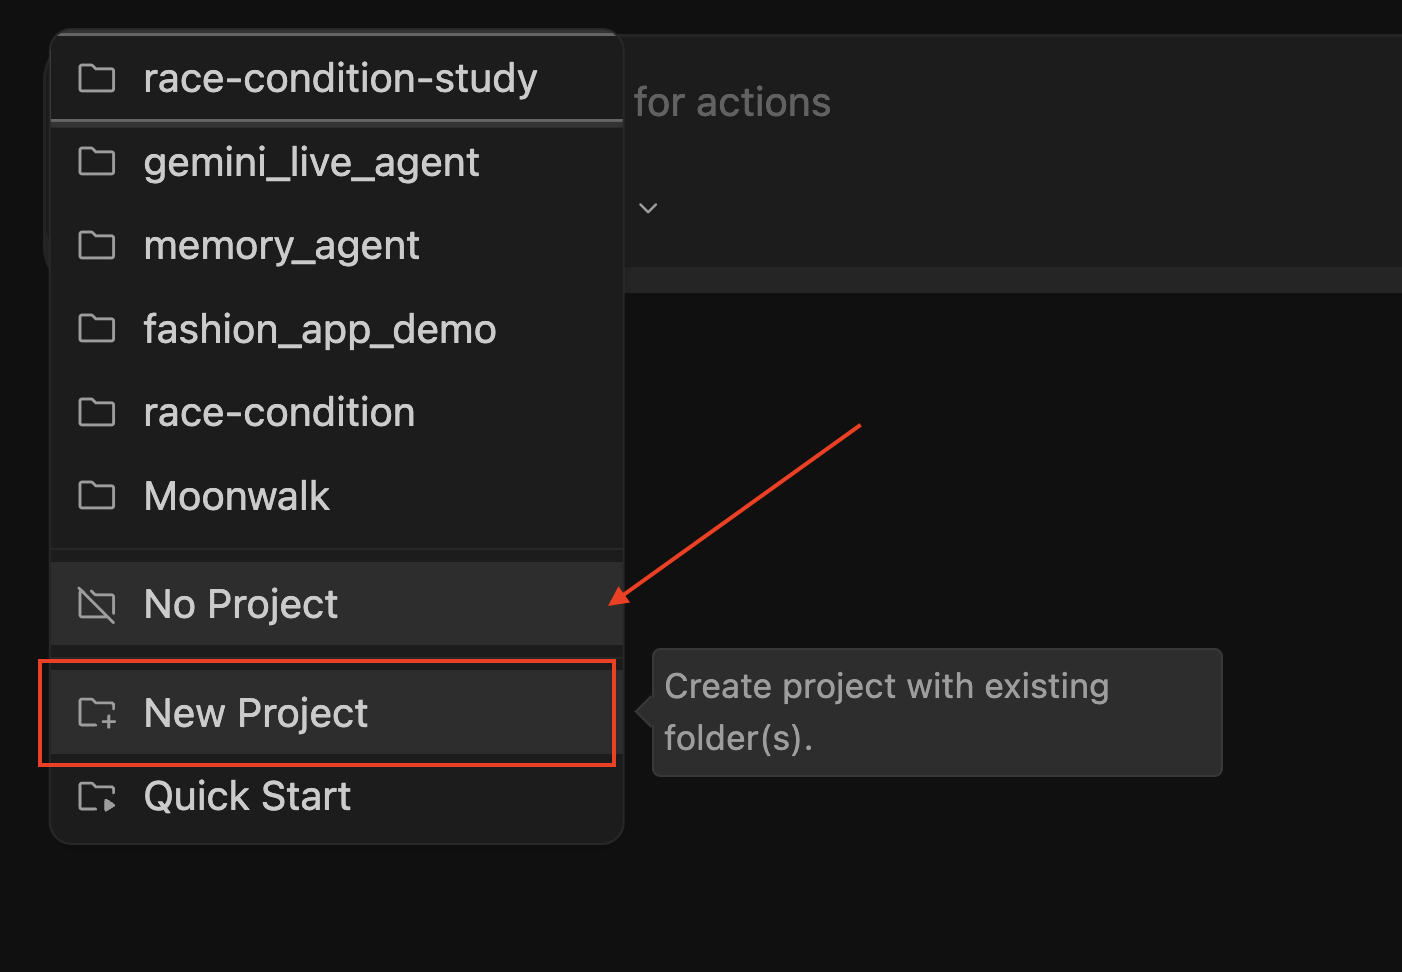
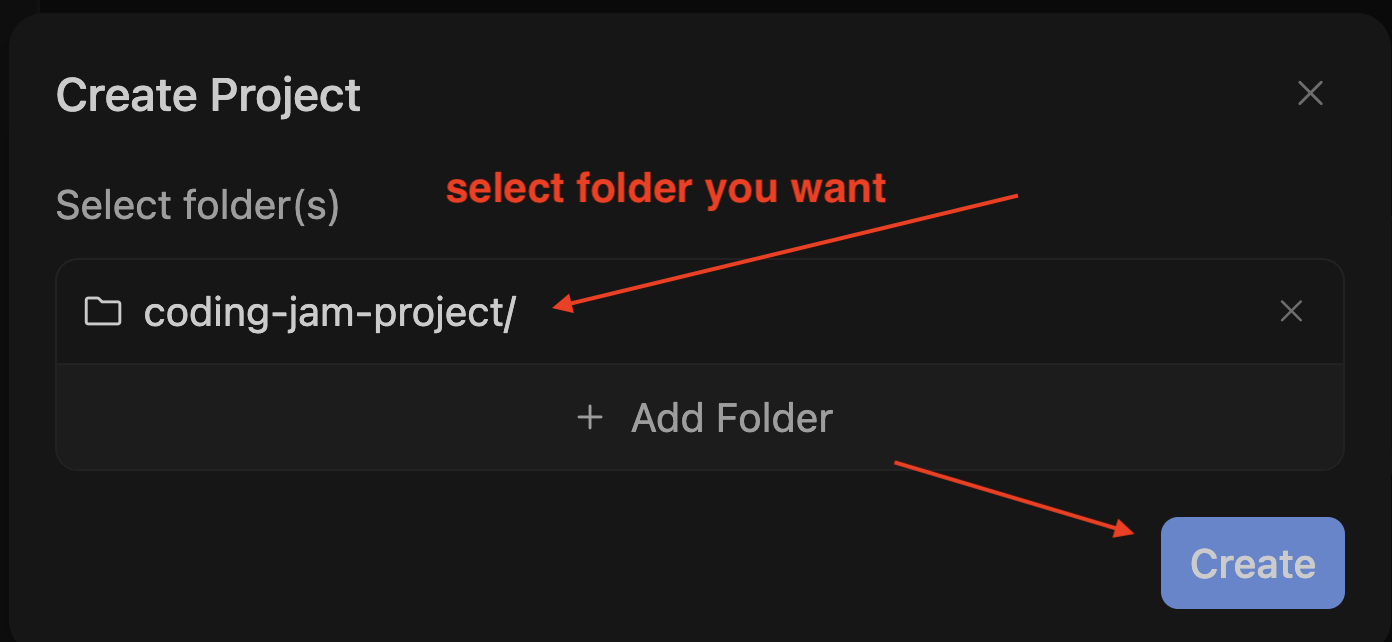
Step 2 — Clone via Antigravity
We need to get back to the launch screen to use the "Clone Repository" button.
👉 In Antigravity, clone the project of your choice Example of clone week 1, but you need to input the correct repo
📝 Reference Prompt
Git clone ⚠️ PASTE_YOUR_PROJECT and save to my local folder: ⚠️ PASTE_YOUR_LOCATION
Step 3 — Tour the Project
Look at the file list. You should see:
File / Folder | What It Is |
BRIEF.md | The product idea — what we're building, in plain English |
reference/ | A folder with a working example app. AI will read this when writing your code, so your app matches the patterns. |
.gitignore | A list of files git should ignore (technical — ignore it) |
👉 Click
BRIEF.md to open it and here is the project idea.
✅ Checkpoint: You've cloned the project, opened it as a workspace, and read BRIEF.md.
3. Install Workshop Skills
A "skill" is a set of instructions stored on GitHub that you can hand to your AI.
Step 1 — Ask Antigravity to Install the Skills
📝 Paste this prompt in the chat:
Please install the workshop skills into this workspace's .agent/skills/
folder. Run these two git clones from the project root:

1. git clone https://github.com/gca-americas/skills-garden .agent/skills/skills-garden
2. git clone https://github.com/google-gemini/gemini-skills .agent/skills/gemini-skills

When Antigravity asks permission to run each command, I'll click Allow.

When done, list the skills that are now available in this workspace.
Step 2 — Click Allow on the Two Pop-Ups
🤖 You should see something like
I'll create the .agent/skills/ folder and clone both repos into it.

Running: git clone https://github.com/gca-americas/skills-garden .agent/skills/skills-garden
Allow any actions if agent prompts.
👉 Check your file list. You should now see a new .agent/ folder. Click to expand it and make sure there are multiple skills in this folders like skills-garden and gemini-skills.
What Each Skill Does (for reference, no action needed)
Skill | What it does |
| Writes the Product Design doc |
| Writes the UX Design doc |
| Writes the Engineering Design doc (with Testing strategy section) |
| Writes tests, runs them, auto-fixes failures (max 3 tries) |
| Official Google skill — how to use Gemini API correctly |
| A simpler backup if the official skill is unavailable |
| Visual style references |
For example, after the MVP(Step 9), you can use skills like y2k-dreamcore to polish UX like below:
✅ Checkpoint: Your file list shows a new .agent/skills/ folder with both skills-garden/ and gemini-skills/ inside.
4. The Spec Talk
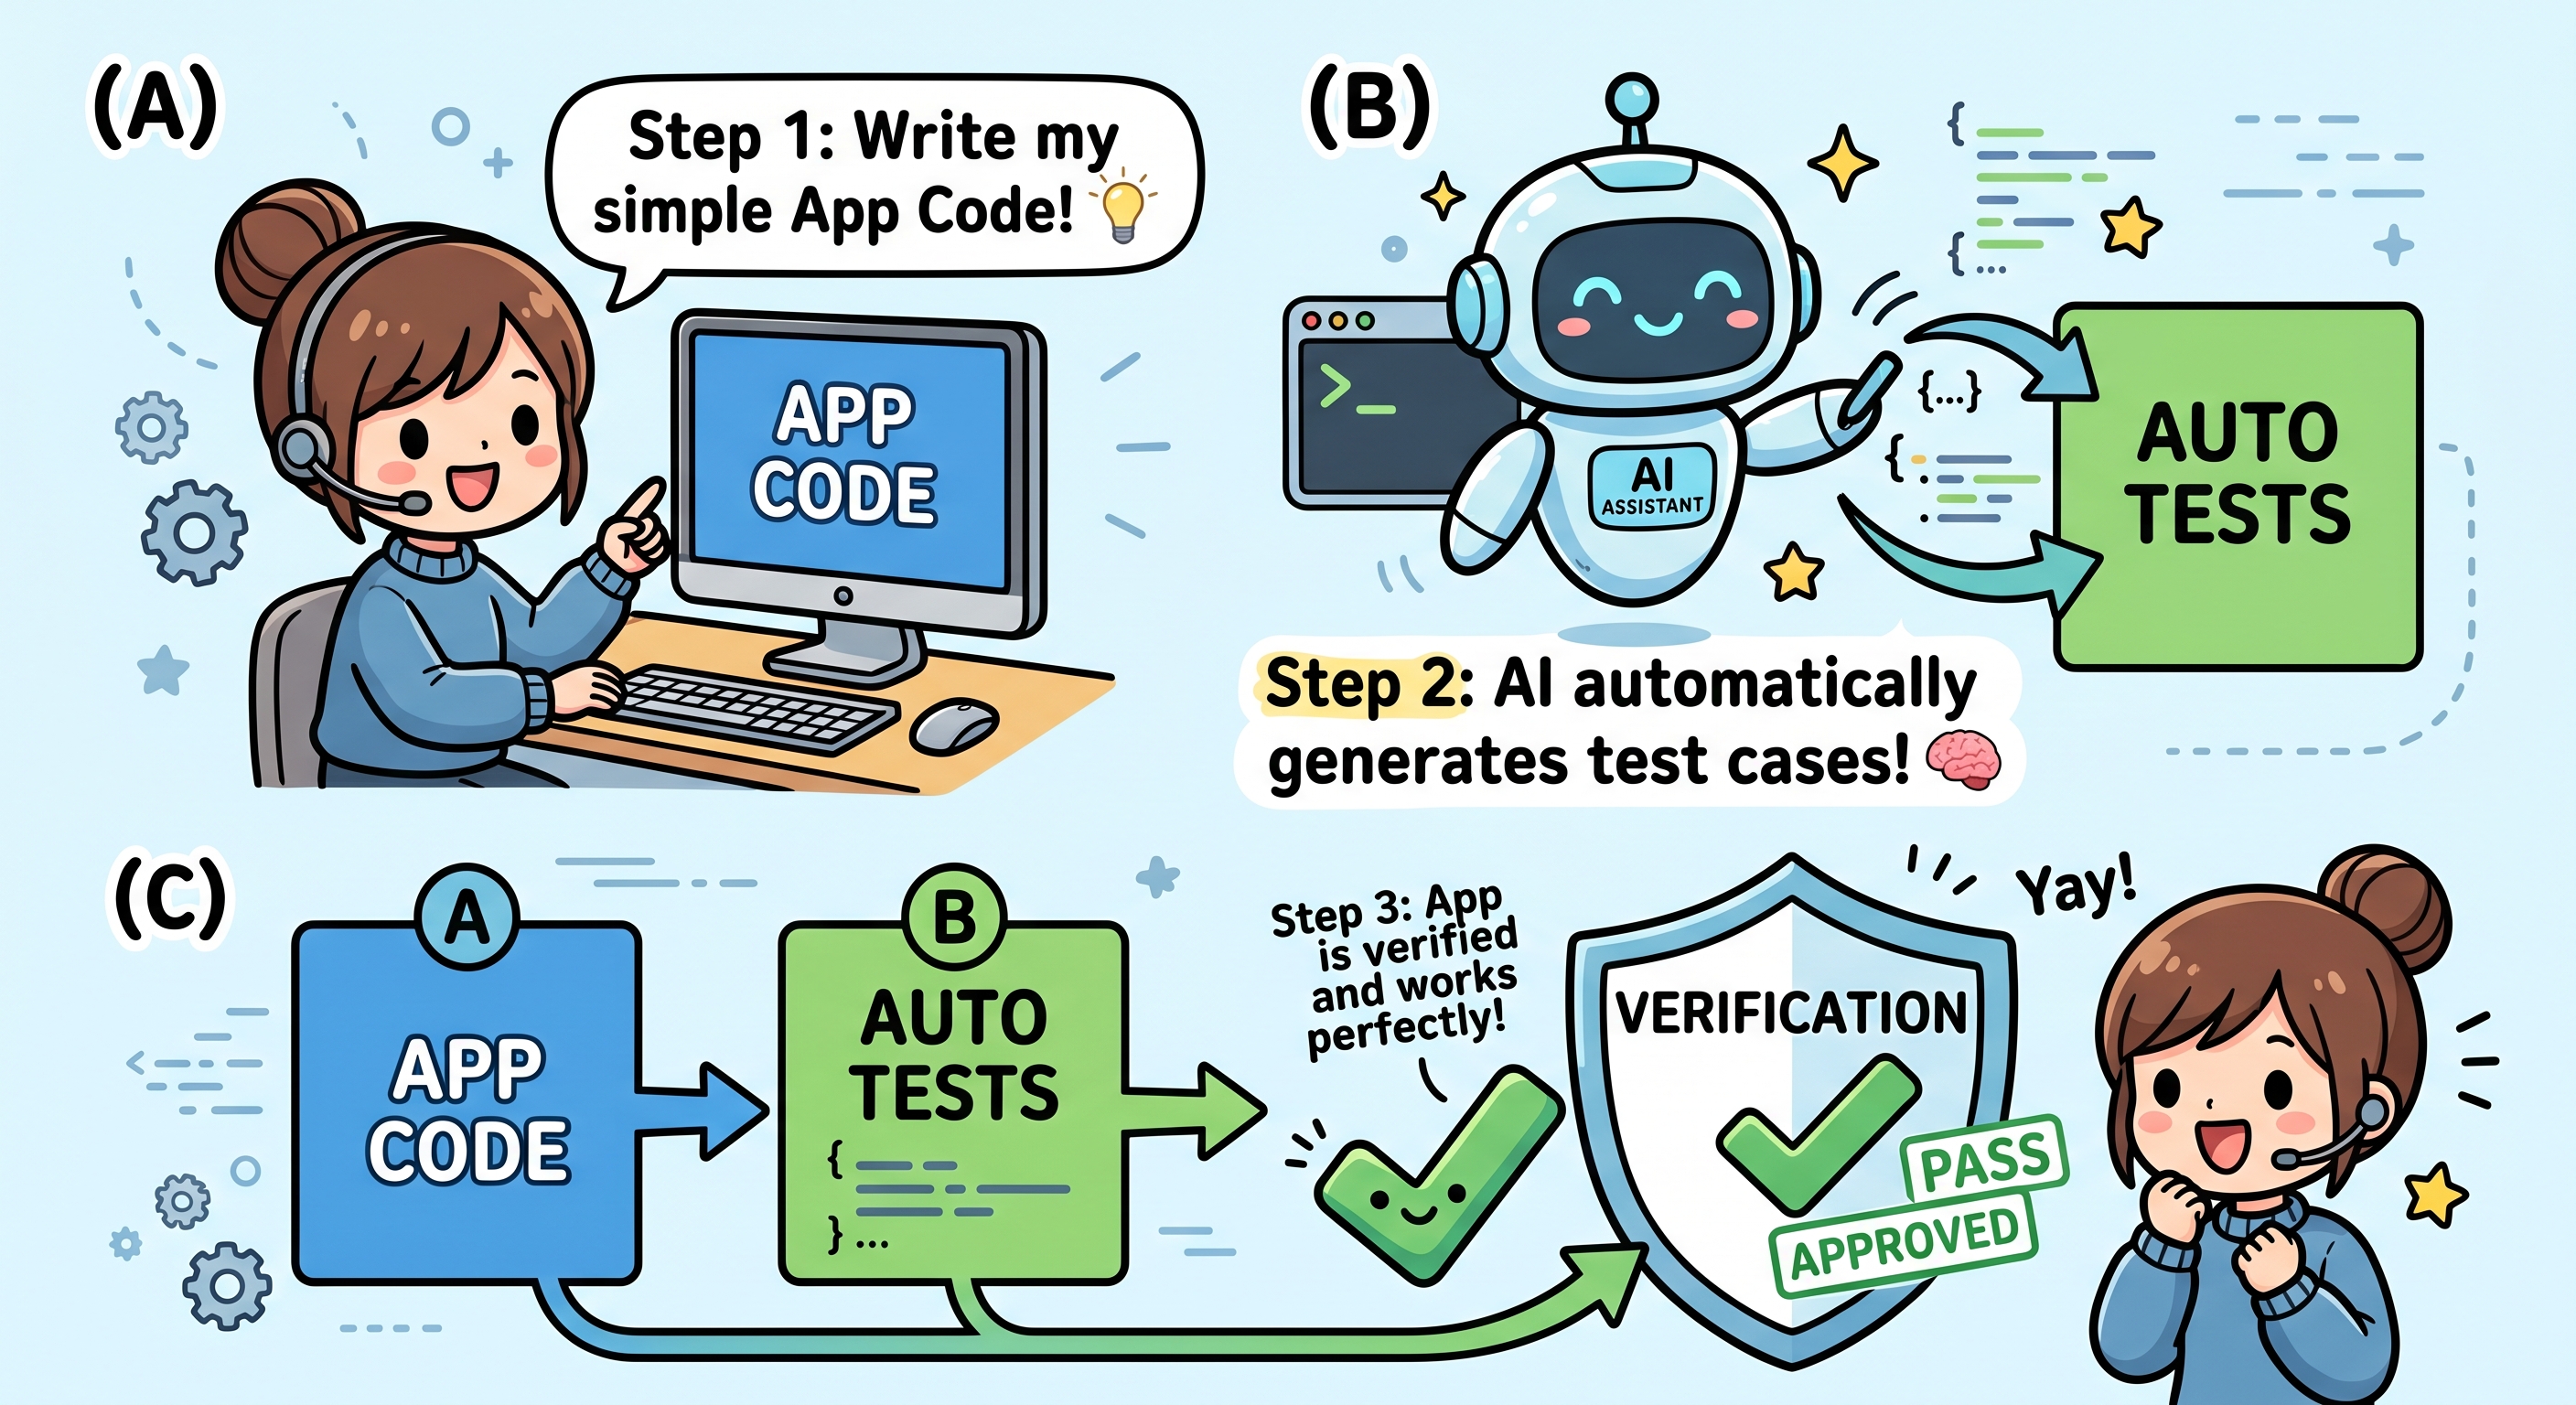
The Spec Talk is a 2-minute conversation where you tell AI what you want to build. No code, no docs, nothing built yet. We're just talking it through.
The One Required Question
The most important thing AI needs to know:
"What goes IN, what comes OUT?"
🎯 MODEL: Gemini 3 Flash (default) — simple Q&A.
📝 Paste this:
Here's what's in @BRIEF.md. Before we lock the spec, ask me 3 short
questions to refine it:
1. What's the one input I want the user to provide?
2. What's the magical moment for the user?
3. What are we deliberately NOT building (to keep scope tight)?

DO NOT generate any plans, docs, or code yet. Just ask me the questions
and wait for my answers.

DO NOT NEED TO WRITE implementation plan.
🤖 Talk to AI and refine your plan
Don't Generate Docs Yet
At the end of the Spec Talk, the agent should NOT have generated any files. If you see product.md or other new files appearing, you can tell the agent: "Stop — delete any docs you just created. We're still in the Spec Talk phase."
Tips
✅ Checkpoint: You've had a short conversation with Antigravity about your product idea, and it understands the inputs and outputs. No files have been generated yet.
5. Generate 3 Design Docs
Now AI writes three plans, on paper, before any code happens. We do all three in one prompt using the three design-doc skills in sequence.

The 3 Docs
File | What's In It | Skill Used |
product.md | Who the user is, what we're solving, what features |
|
ui.md | What screens look like, colors, fonts, layout |
|
engineering.md | Tech stack, file structure, + Testing strategy section |
|
Step 1 — Generate All Three Docs at Once
🤖 Switch to Gemini 3.1 Pro With Low Thinking (Recommended)
📝 Paste this — one prompt does all three:
Apply all three design-doc skills in this order:

1. pm-design-doc from .agent/skills/skills-garden/design-doc-skills/pm-design-doc/
   → Generates product.md

2. ux-design-doc from .agent/skills/skills-garden/design-doc-skills/ux-design-doc/
   → Generates ui.md (based on the product.md you just created)

3. eng-design-doc from .agent/skills/skills-garden/design-doc-skills/eng-design-doc/
   → Generates engineering.md (based on product.md, ui.md, and @BRIEF.md)
   → MUST include a "Testing strategy" section with real content
     (specific functions to unit-test, one integration test per major flow,
     and what's deliberately NOT being tested)

Use the patterns in @reference/ as guidance for the engineering doc
(but vary if the brief justifies it).

Save all three files in the project root. After each one is saved,
briefly confirm what you saved before moving to the next.

When all three are done, give me a final summary listing the section
titles in each file.

DO NOT NEED TO WRITE implementation plan. ONLY show me all three generated files and a final summary
Step 2 — Verify the Files Saved
👉 Check your file list. You should now see (in addition to what was there before):
codingjam-week-1/
├── product.md          ← NEW
├── ui.md               ← NEW
├── engineering.md      ← NEW
├── BRIEF.md
├── reference/
└── .agent/
Step 3 - Review & Iterate
You're the boss. AI wrote the plan. Now you read it and request changes.
The Most Important Habit
When you want a change, change the DOC — not the code. The doc is the source of truth.
🤖 Read & Review All Three Docs
👉 In the file list (left panel), click the file name (product.md).
The doc previews in the panel on the right.
Step 2 — Read & Comment, Google Docs Style
👉 With each doc previewed, read top to bottom and ask:
product.md— Does this describe what I want?ui.md— Are the screens and look right?engineering.md— Does the Testing strategy make sense? (You don't need to understand the tech — just check there IS a plan.)
🤖 Once the agent has applied your comments and the docs read right, move on to the next section.
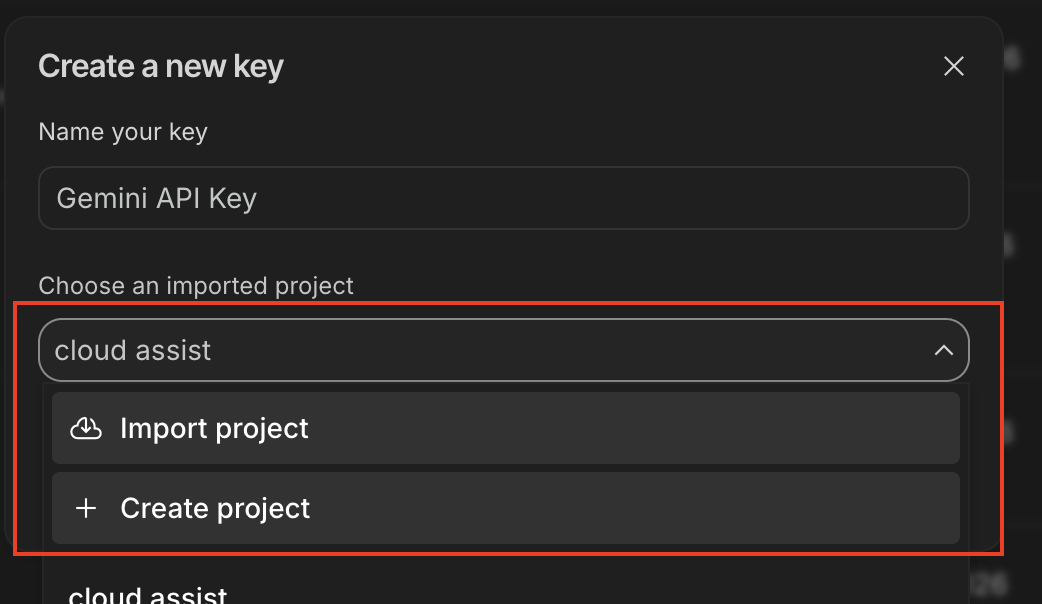
6. Implement + Test
The biggest section of the codelab. AI takes the three docs and builds the app — code AND tests together, in one go. When this section ends, you'll have a working codebase that passes its own tests.
Why Code + Tests Together?
Your engineering.md already specifies what tests should exist (the Testing strategy section). The implementation isn't complete until those tests pass. So we do both in one stage.
🤖 Switch to Gemini 3.1 Pro With High Thinking (Recommended)
Step 1 — Ask AI to Build the Code AND the Tests
📝 Paste this:
You're going to do two things in one shot.

PART 1 — IMPLEMENT THE APP CODE
- Build it according to @engineering.md (stack, file structure)
- Match the UI described in @ui.md
- Use the patterns in @reference/ as guidance for code style
- Backend: use Python with `uv` for dependency management
- If your chosen stack requires Node.js and it isn't installed on my
  system, install it via Antigravity (use brew/winget/apt) — ask
  permission first
- DO NOT start any dev servers — that's a later section

PART 2 — APPLY THE TEST-GATE SKILL
After the code is written, apply the test-driven-dev skill from
.agent/skills/skills-garden/eng-skills/test-driven-dev.md.

Use the "Testing strategy" section in @engineering.md as the test plan.

IMPORTANT: Mock the Gemini API calls in tests — use a stub that returns
fake response data. The real API key isn't set up yet, and tests should
be deterministic and free anyway (best practice).

The skill should:
1. Write the tests described in the Testing strategy
2. Run them (use pytest for Python, Vitest or Jest for JS)
3. If any fail, fix the CODE (not the tests) and re-run
4. Up to 3 retry attempts max
5. If still failing after 3 tries, STOP and tell me what's broken

When Antigravity asks permission to run commands (uv sync, uv pip
install, pytest, etc.), click Allow.

Report results when both parts are done.
🤖 Click Allow on Pop-Ups (Multiple)
Step 2 — Read the Final Report
When done, check for:
- ✅ A
backend/folder exists with code - ✅ A
frontend/folder exists with code - ✅ A
tests/folder exists with test files - ✅ The summary says "all tests passing" (not "failed after 3 retries")
- ✅ The agent did NOT start any servers
What If All 3 Test-Retries Fail?
Rare but possible. It usually means the engineering doc's Testing strategy is unrealistic for what got built.
📝 Paste this:
The auto-fix loop hit the 3-try cap. Pull up @engineering.md and look
at the Testing strategy section. Is the strategy realistic for what
got built? Suggest updates to the doc so the tests align with reality.
Don't change the code yet — update the doc, then re-apply the
test-driven-dev skill.
What If Something Looks Off?
👉 If AI built something that doesn't match the docs, go back to the doc — don't ask AI to "fix the code" in isolation.
Example:
I see you built the chat as a popup, but @ui.md says it should be a
full page. Either update ui.md if a popup is actually better, OR
rebuild the chat as a full page to match the current ui.md.
Always: the doc is the source of truth.
✅ Checkpoint: Code exists, tests exist, tests pass. Ready to set up the API key.
7. Google Cloud + API Key Setup
Step 1 — Get Your Gemini API Key from AI Studio (1 min)
- Open https://aistudio.google.com/app/apikey in a new browser tab.
- Sign in with the same Google account.
- Click "Create API key" (top-right).
- A dialog opens with a project dropdown:
- If you already have a google project created before you can select it and click "Create API key in existing project"
- If NOT in the list: click "Create Project".
- Copy the API key that appears. Starts with
AIza..., ~40 characters.
✏️ Paste it somewhere safe — you'll give it to Antigravity next.
Step 2 — Tell Antigravity to Set Up .env (30 sec)
Back in Antigravity, open the chat.
📝 Prompt to paste (replace the
⚠️ PASTE_...
markers first!):
Apply the gemini-api-dev skill from .agent/skills/gemini-skills/skills/gemini-api-dev/.
(If that skill isn't found, fall back to .agent/skills/skills-garden/eng-skills/gemini-api.md)

Create a .env file in the backend folder with these settings:
- GEMINI_API_KEY= ⚠️ PASTE_YOUR_API_KEY_HERE
- Any other env vars the app needs based on @engineering.md

Also verify:
- .env is in .gitignore so the key never gets committed
- The backend code reads GEMINI_API_KEY at startup
- The Gemini SDK is initialized correctly (use google-genai for Python)

When Antigravity asks permission to install Python packages, click Allow.
When done, show me the .env contents with the KEY redacted (just first 6 chars + ...).
🤖 Expected: Agent creates .env, installs google-genai (you click Allow), confirms with redacted key:
✅ .env created at backend/.env
GEMINI_API_KEY=AIzaSy... (40 chars, redacted)

.env is already in .gitignore ✓
Backend reads GEMINI_API_KEY via os.getenv() ✓
Gemini client initialized ✓
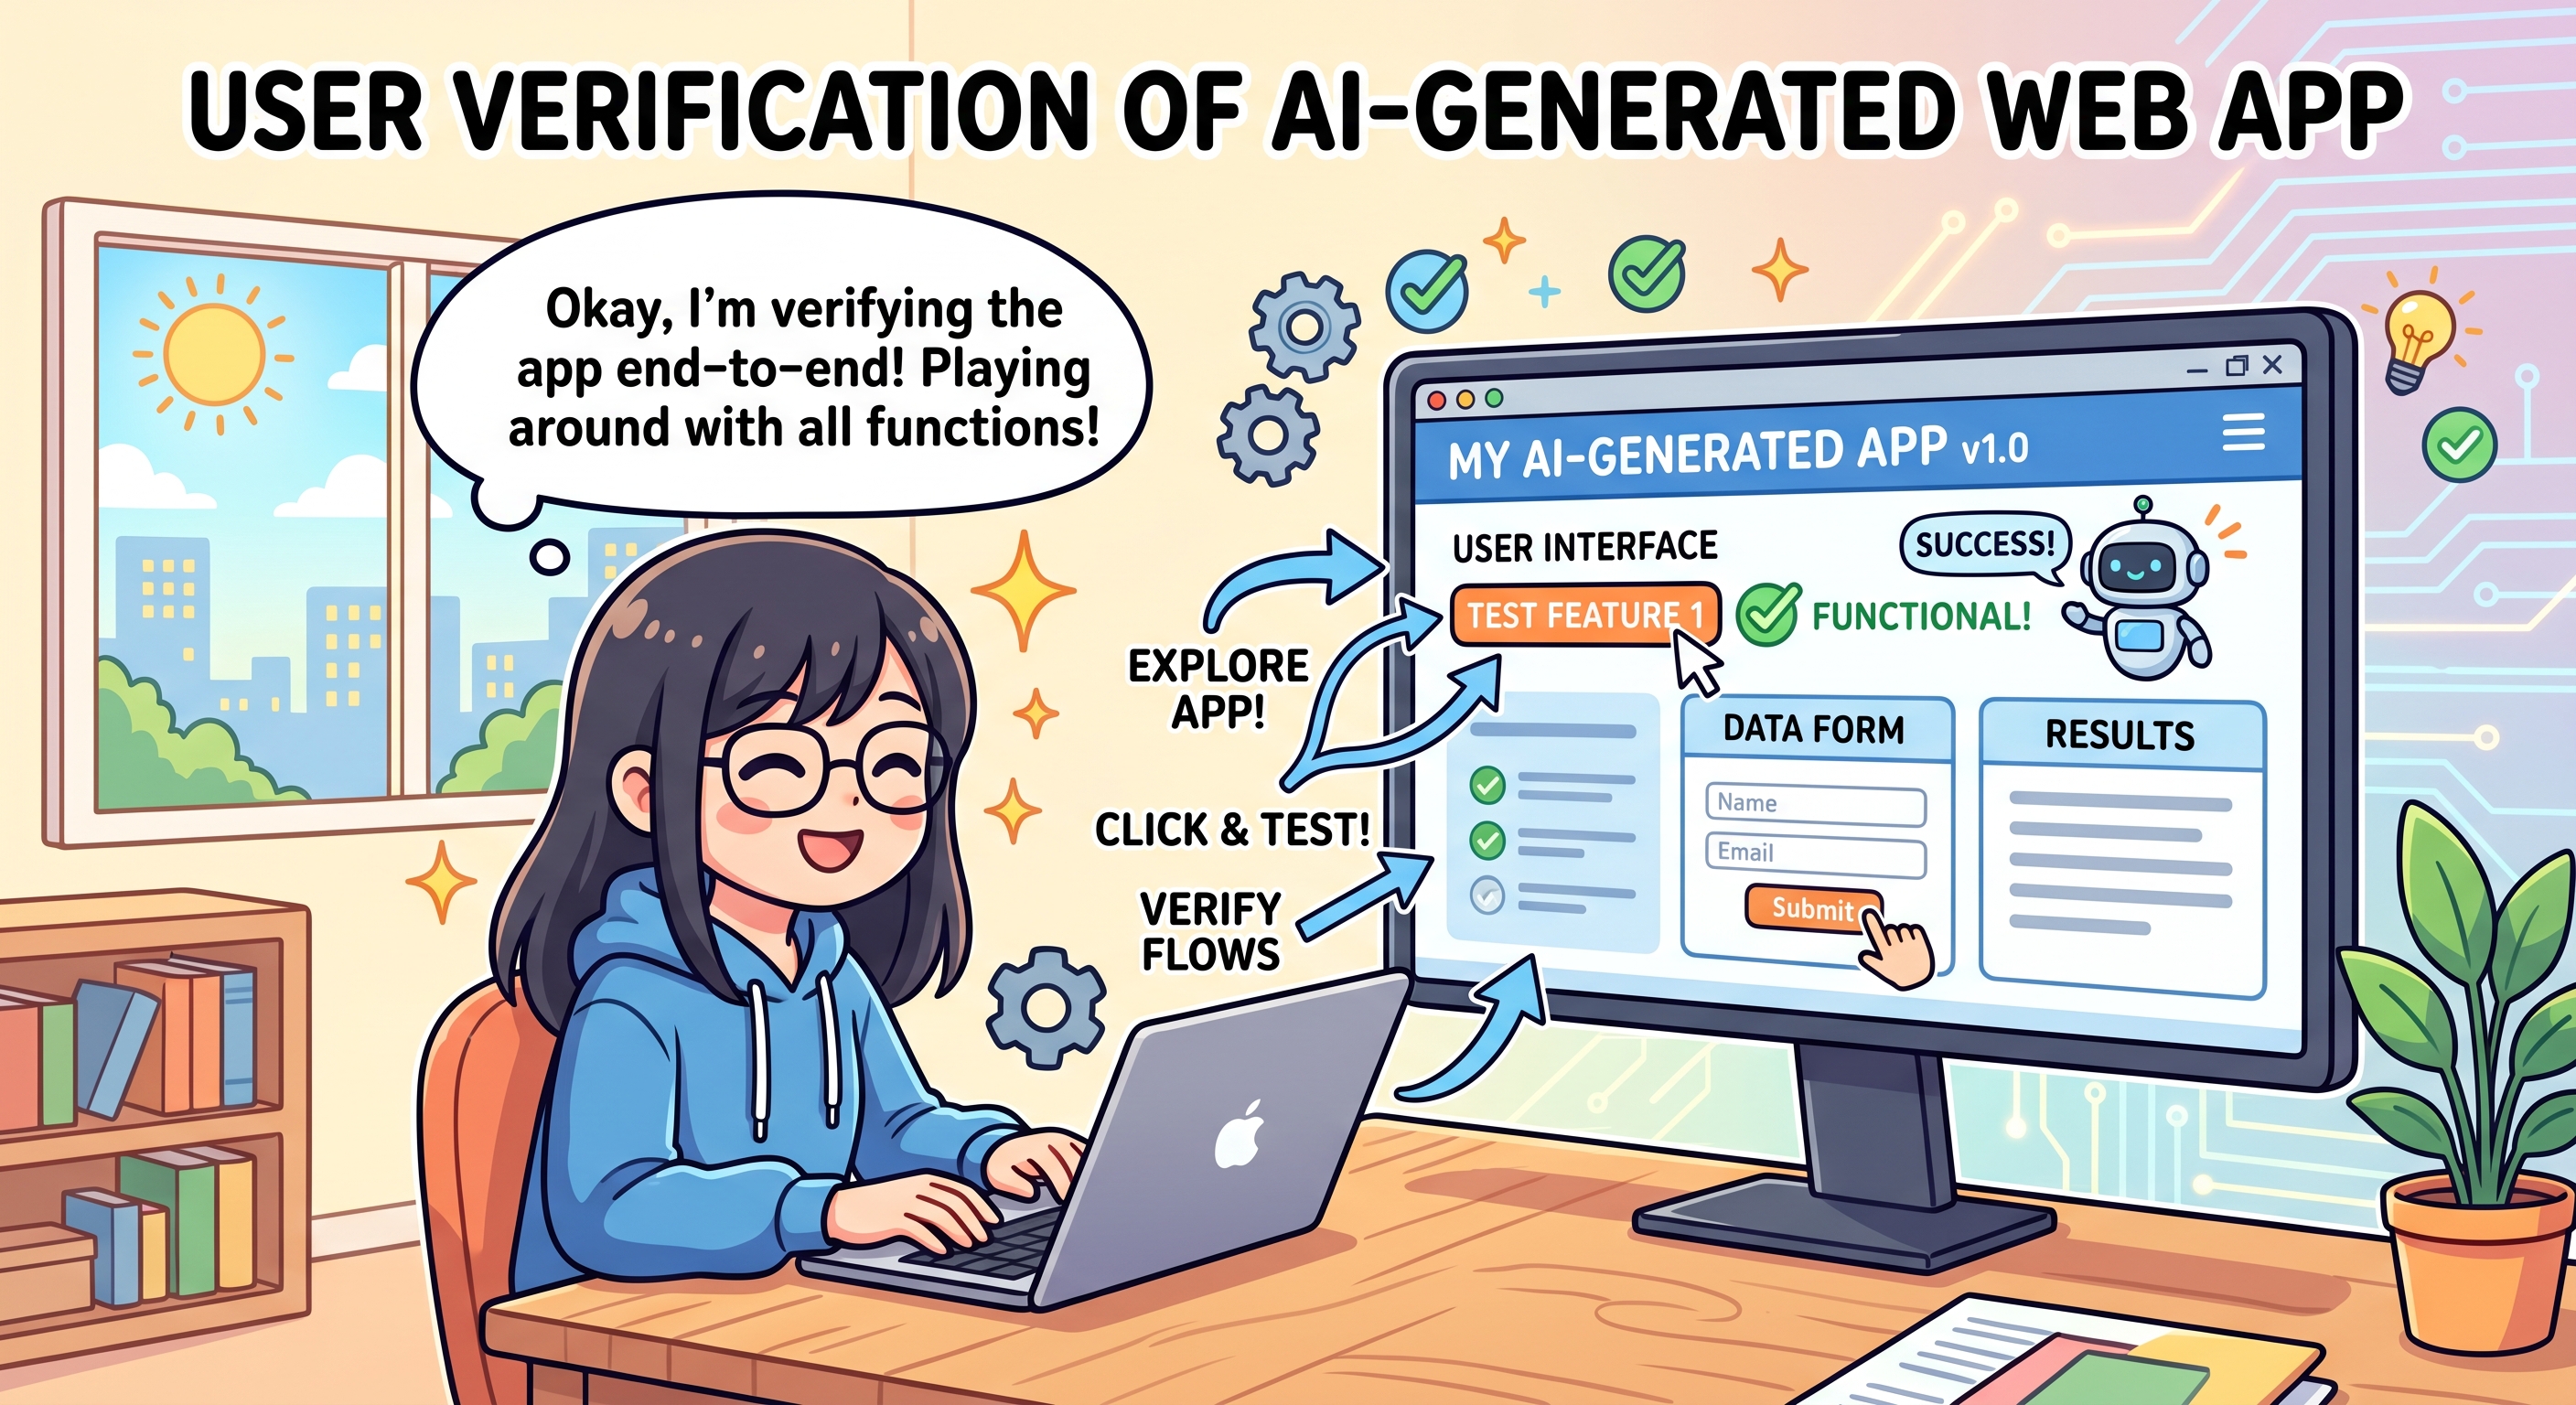
8. Preview & Verify
Code is built. Tests pass. API key configured. Now open the app and click around.
What Humans Catch (That Tests Miss)
Tests Catch | Humans Catch |
Wrong return values | Ugly colors |
Broken function calls | Confusing copy |
Missing imports | Buttons in weird places |
Off-by-one errors | Animation feels janky |
Logic bugs | The vibe is off |
Step 1 — Ask Antigravity to Start the Dev Server
🎯 MODEL: Default (Flash) is fine.
📝 Paste this:
Please start the dev server(s) so I can preview the app in my browser.
Tell me the URL when it's ready. When Antigravity asks permission to
run the server command, I'll click Allow.
🔔 Pop-up: uv run uvicorn main:app --reload (or similar) → Click Allow
Step 2 — Open the Preview URL
🤖 The agent reports:
Backend running at: http://localhost:8000
Frontend served at: http://localhost:8000 (backend serves it)
URL is usually http://localhost:8000 or http://localhost:5173.
👉 Click the URL in the chat, or copy-paste into a new browser tab.
Step 3 — Click Around
Use it like a real user would:
- Click every button
- Type things in
- Hover over things
- Try the main flow from start to finish
If everything looks and feels right, jump to
Step 4 — Write a README
below. Otherwise, click around first and report any issues to Antigravity before writing the README.
Step 4 — Write a README
Once your app works, lock it in:
📝 Paste this:
The app works! Please create a README.md in the project root that explains:
- What this app does (in plain English)
- How to install it on a new machine (uv sync, etc.)
- How to run the dev server(s)
- The 3 design docs (@product.md, @ui.md, @engineering.md) are the
  source of truth — anyone can read them to understand the system

Save it as README.md.
🤖 Expected: README.md appears in the file list.
Why the README Matters
✅ Checkpoint: You clicked around the app, fixed any issues (if any), and saved a README.
9. 🎉 You Shipped an MVP!
You did it.
What You Built
- ✅ An AI-powered web app
- ✅ Three design docs (
product.md,ui.md,engineering.md) - ✅ A real test suite that runs every time you change code
- ✅ A
README.mdso you can come back to this any time - ✅ A connection to Google's Gemini AI
You went from idea → working app, without writing a single line of code yourself. That's wild.
What You Learned
Skill | Why It Matters |
Spec → Code+Test → Verify | Plan first. Build code and tests together. Click around last. Always in that order. |
Fix the doc, not the code | When something's off, change the plan and rebuild. Don't patch. |
Tests as a safety gate | Built into implementation — AI catches the dumb stuff before you have to. |
The regression rule | Every human-found bug becomes a test. The bug can never come back. |
Doc-driven pivots | When direction changes, change the doc — AI handles the rest. |
Antigravity 3-layer flow | English in chat → agent picks command → you approve. |
Coming Back Next Week?
- Pick a different row from the 8-week table
- Clone that week's repo via Antigravity's "Clone Repository" button
- The skills install fresh per workspace (workspace-scoped = no leftover state)
- You can reuse your same Google Cloud project
- Everything else is the same workflow you just learned
What's Next
- Publish Your Project: Publish your project at Coding Jam site!
- Build at home: Your three docs are portable. Open them in any AI tool and keep building
- Bring a friend: Pair through this codelab with someone new. Teaching is the fastest way to learn