
1. Objetivo de este lab
En este lab práctico, aprenderás a crear agentes con el ADK (Kit de desarrollo de agentes) Visual Builder. ADK (Kit de desarrollo de agentes) Visual Builder proporciona una forma de crear agentes de ADK (Kit de desarrollo de agentes) con poco código. Aprenderás a probar la aplicación de forma local y a implementarla en Cloud Run.
Qué aprenderás
- Comprende los conceptos básicos del ADK (Kit de desarrollo de agentes) .
- Comprende los conceptos básicos de ADK (Kit de desarrollo de agentes) Visual Builder
- Aprende a crear agentes con herramientas de GUI.
- Aprende a implementar y usar fácilmente los agentes en Cloud Run.
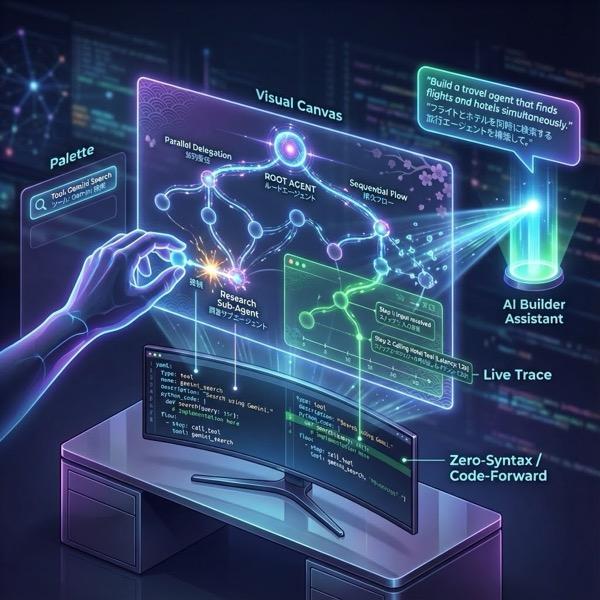
Figura 1: Con ADK Visual Builder, puedes crear agentes con una GUI que requiere poco código
2. Configuración del proyecto
- Haz clic en el siguiente vínculo Consola de GCP para ir a la consola de GCP.
- Si aún no tienes un proyecto que puedas usar, deberás crear uno nuevo en la consola de GCP. Selecciona el proyecto en el selector de proyectos (en la parte superior izquierda de la consola de Google Cloud). Si aún no tienes un proyecto, sigue estos pasos para crear uno nuevo. Una vez que crees un proyecto nuevo, selecciónalo.
Figura 2: Si haces clic en el cuadro que se encuentra junto al logotipo de Google Cloud, puedes seleccionar tu proyecto. Asegúrate de que tu proyecto esté seleccionado.
- En este lab, usaremos el Editor de Cloud Shell para realizar nuestras tareas. Abre Cloud Shell y configura el proyecto con Cloud Shell.
- Haz clic en este vínculo para navegar directamente al editor de Cloud Shell.
- En la barra lateral del editor de Cloud Shell, haz clic en el botón Abrir carpeta.
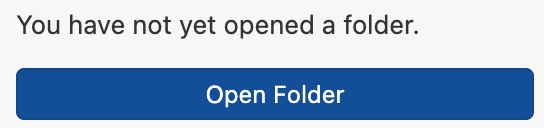
- Tu carpeta principal ya debería estar seleccionada. Solo presiona Aceptar y se convertirá en la carpeta raíz para esta tarea.

- Abre la terminal si aún no está abierta. Para ello, haz clic en Terminal > New Terminal en el menú. Puedes ejecutar todos los comandos de este instructivo en esta terminal.
- Puedes verificar si el proyecto ya está autenticado con el siguiente comando en la terminal de Cloud Shell.
gcloud auth list
- Si no recuerdas el ID de tu proyecto, puedes enumerar todos tus IDs de proyecto con
gcloud projects list
- Copia el ID del proyecto y usa el siguiente comando para configurarlo.
gcloud config set project <YOUR_PROJECT_ID>
- En Cloud Shell, ejecuta el siguiente comando para confirmar tu proyecto.
gcloud config list project
3. Habilita las APIs
Debemos habilitar algunos servicios de API para ejecutar este lab. Ejecuta el siguiente comando en Cloud Shell.
gcloud services enable aiplatform.googleapis.com
gcloud services enable cloudresourcemanager.googleapis.com
Introducción a las APIs
- La API de Vertex AI (
aiplatform.googleapis.com) permite acceder a la plataforma de Vertex AI , lo que permite que tu aplicación interactúe con los modelos de Gemini para la generación de texto, las sesiones de chat y las llamadas a funciones. - La API de Cloud Resource Manager (
cloudresourcemanager.googleapis.com) te permite administrar de forma programática los metadatos de tus proyectos de Google Cloud, como el ID y el nombre del proyecto, que a menudo requieren otras herramientas y SDKs para verificar la identidad y los permisos del proyecto.
4. Introducción al Kit de desarrollo de agentes
El Kit de desarrollo de agentes ofrece varias ventajas clave a los desarrolladores que crean aplicaciones de agentes:
- Sistemas multiagente: Crea aplicaciones modulares y escalables organizando varios agentes especializados en una jerarquía. Permite la coordinación y delegación complejas.
- Ecosistema de herramientas integral: Equipa a los agentes con diversas capacidades, como usar herramientas prediseñadas (búsqueda, ejecución de código, etc.), crear funciones personalizadas, integrar herramientas de frameworks de agentes externos (LangChain o CrewAI) o incluso utilizar otros agentes como herramientas.
- Organización flexible: Define flujos de trabajo con agentes de flujo de trabajo (
SequentialAgent,ParallelAgentyLoopAgent) para crear canalizaciones predecibles o aprovecha el enrutamiento dinámico basado en LLM (transferencia deLlmAgent) para lograr un comportamiento adaptativo. - Experiencia integrada para desarrolladores: Desarrolla, prueba y depura de forma local con una CLI potente y una IU de desarrollo interactiva. Inspecciona eventos, estados y la ejecución del agente paso a paso.
- Evaluación integrada: Evalúa sistemáticamente el rendimiento del agente analizando tanto la calidad de la respuesta final como la trayectoria de ejecución paso a paso en comparación con casos de prueba predefinidos.
- Listo para la implementación: Crea contenedores e implementa tus agentes en cualquier lugar. Ejecútalos de manera local, escálalos con Vertex AI Agent Engine o intégralos en una infraestructura personalizada con Cloud Run o Docker.
Si bien otros SDK de IA generativa o frameworks de agentes también te permiten consultar modelos y hasta potenciarlos con herramientas, la coordinación dinámica entre varios modelos requiere una gran cantidad de trabajo de tu parte.
El Kit de desarrollo de agentes ofrece un framework de nivel superior en comparación con esas herramientas, lo que te permite conectar sin problemas varios agentes entre sí para flujos de trabajo complejos pero fáciles de mantener.
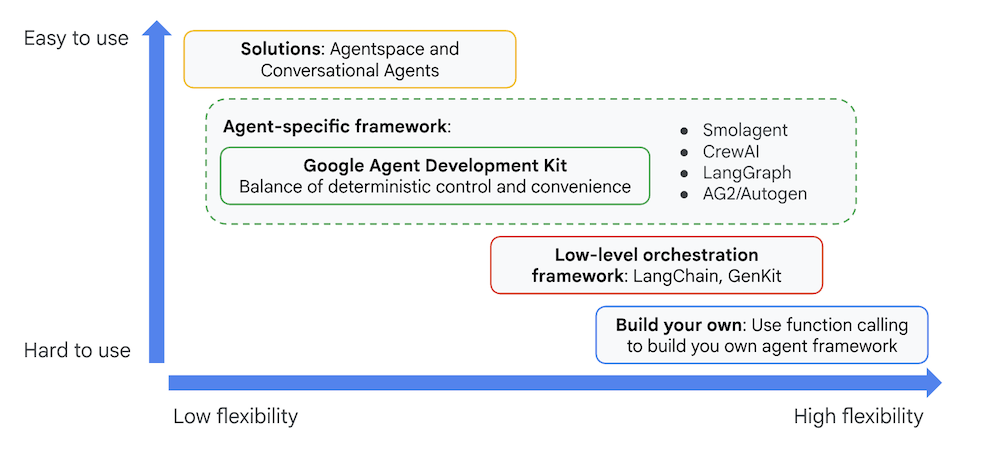
Figura 3: Posicionamiento del ADK (Kit de desarrollo de agentes)
En las versiones recientes, se agregó una herramienta ADK Visual Builder al ADK (Kit de desarrollo de agentes) que te permite crear agentes de ADK (Kit de desarrollo de agentes) con poco código. En este lab, exploraremos en detalle la herramienta ADK Visual Builder.
5. Instala el ADK y configura tu entorno
En primer lugar, debemos configurar el entorno para poder ejecutar el ADK (Kit de desarrollo de agentes). En este lab, ejecutaremos el ADK (Kit de desarrollo de agentes) y realizaremos todas las tareas en el Editor de Cloud Shell de Google Cloud .
Prepara un editor de Cloud Shell
- Si el editor de Cloud Shell ya está abierto, puedes omitir estos pasos y continuar con la siguiente sección "Inicia el editor visual del ADK".
- Si aún no estás en Cloud Shell Editor, sigue los pasos de configuración del proyecto.
- En este lab, usaremos el Editor de Cloud Shell para realizar nuestras tareas. Abre Cloud Shell y configura el proyecto con Cloud Shell.
- Haz clic en este vínculo para navegar directamente al editor de Cloud Shell.
- En la barra lateral del editor de Cloud Shell, haz clic en el botón Abrir carpeta.
- Tu carpeta principal ya debería estar seleccionada. Solo presiona Aceptar y se convertirá en la carpeta raíz para esta tarea.
- Abre la terminal si aún no está abierta. Para ello, haz clic en Terminal > New Terminal en el menú. Puedes ejecutar todos los comandos de este instructivo en esta terminal.
- Puedes verificar si el proyecto ya está autenticado con el siguiente comando en la terminal de Cloud Shell.
gcloud auth list
- Si no recuerdas el ID de tu proyecto, puedes enumerar todos tus IDs de proyecto con
gcloud projects list
- Copia el ID del proyecto y usa el siguiente comando para configurarlo.
gcloud config set project <YOUR_PROJECT_ID>
- En Cloud Shell, ejecuta el siguiente comando para confirmar tu proyecto.
gcloud config list project
Inicia el editor visual del ADK
- Ejecuta los siguientes comandos para clonar el código fuente necesario desde GitHub y, luego, instalar las bibliotecas necesarias. Ejecuta los comandos en la terminal que se abrió en el Editor de Cloud Shell.
#create the project directory
mkdir ~/adkui
cd ~/adkui
- Usaremos uv para crear el entorno de Python (ejecuta en la terminal del editor de Cloud Shell):
#Install uv if you do not have installed yet
pip install uv

#go to the project directory
cd ~/adkui

#Create the virtual environment
uv venv


#use the newly created environment
source .venv/bin/activate

#install libraries
uv pip install google-adk==2.3.0
uv pip install python-dotenv
Nota: Si alguna vez necesitas reiniciar la terminal, asegúrate de configurar tu entorno de Python ejecutando "source .venv/bin/activate".
- En el editor, ve a View->Toggle hidden files. En la carpeta adkui, crea un archivo .env con el siguiente contenido.
#go to adkui folder
cd ~/adkui
cat <<EOF>> .env
GOOGLE_GENAI_USE_VERTEXAI=1
GOOGLE_CLOUD_PROJECT=$(gcloud config get-value project)
GOOGLE_CLOUD_LOCATION=us-central1
IMAGEN_MODEL="imagen-3.0-generate-002"
GENAI_MODEL="gemini-3.5-flash"
EOF
6. Crea un agente simple con ADK Visual Builder
En esta sección, crearemos un agente simple con ADK Visual Builder.ADK Visual Builder es una herramienta basada en la Web que proporciona un entorno de diseño de flujo de trabajo visual para crear y administrar agentes de ADK (Kit de desarrollo de agentes). Te permite diseñar, compilar y probar tus agentes en una interfaz gráfica apta para principiantes, y también incluye un asistente potenciado por IA para ayudarte a compilar agentes.
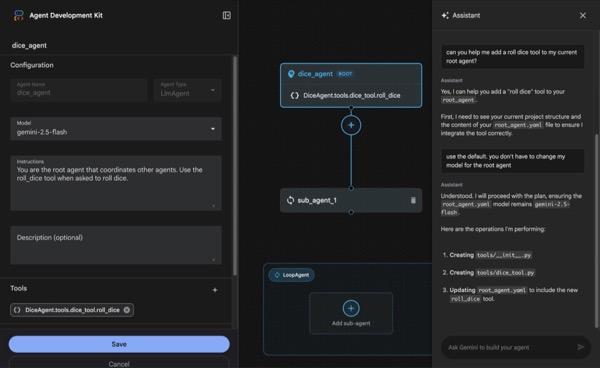
Figura 4: ADK Visual Builder
- Vuelve al directorio superior adkui en la terminal y ejecuta el siguiente comando para ejecutar el agente de forma local (ejecuta en la terminal del Editor de Cloud Shell). Deberías poder iniciar el servidor de ADK y ver resultados similares a los de la figura 5 en la terminal.
#go to the directory adkui
cd ~/adkui
# Run the following command to run ADK locally
adk web --host 0.0.0.0 --port 8080 --allow_origins "regex:https://.*8080-.*\.cloudshell\.dev"
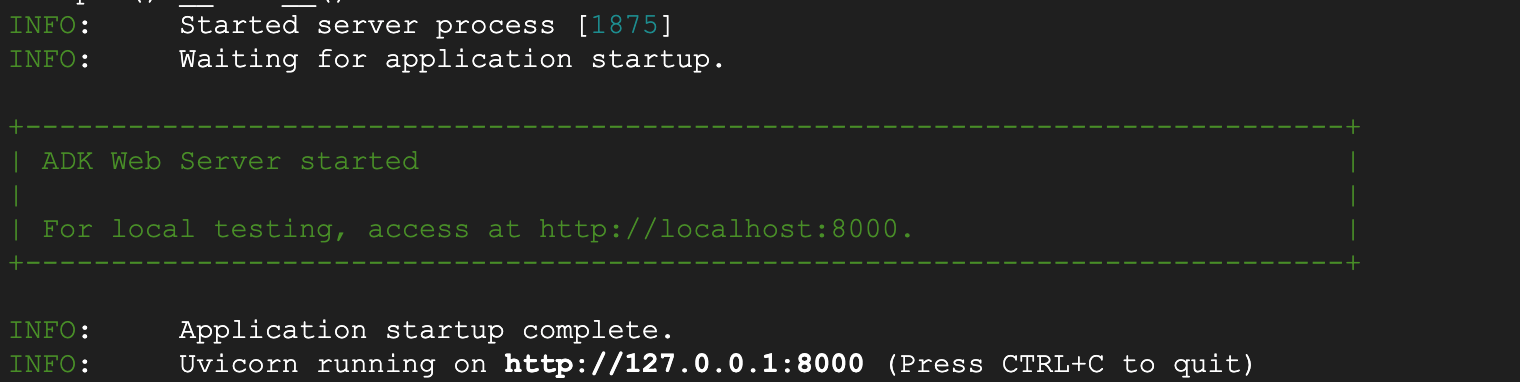
- Figura 5: Inicio de la aplicación del ADK
- Ctrl+clic (Cmd+clic para macOS) en la URL http:// que se muestra en la terminal para abrir la herramienta de GUI basada en el navegador ADK (Agent Development Kit).

Figura 6: IU web del ADK, el ADK tiene los siguientes componentes
- Haz clic en el menú desplegable Selecciona una app y presiona el botón "+" para crear un agente nuevo.
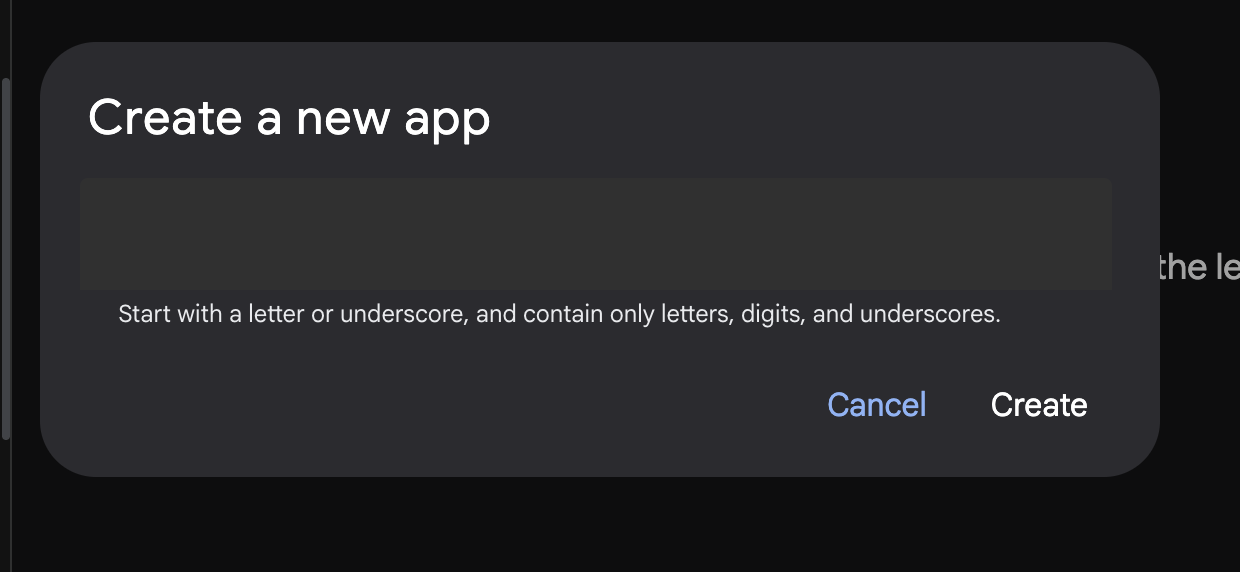
Figura 7: Diálogo para crear una app nueva
- Asigna el nombre "Agent1" y haz clic en Crear.
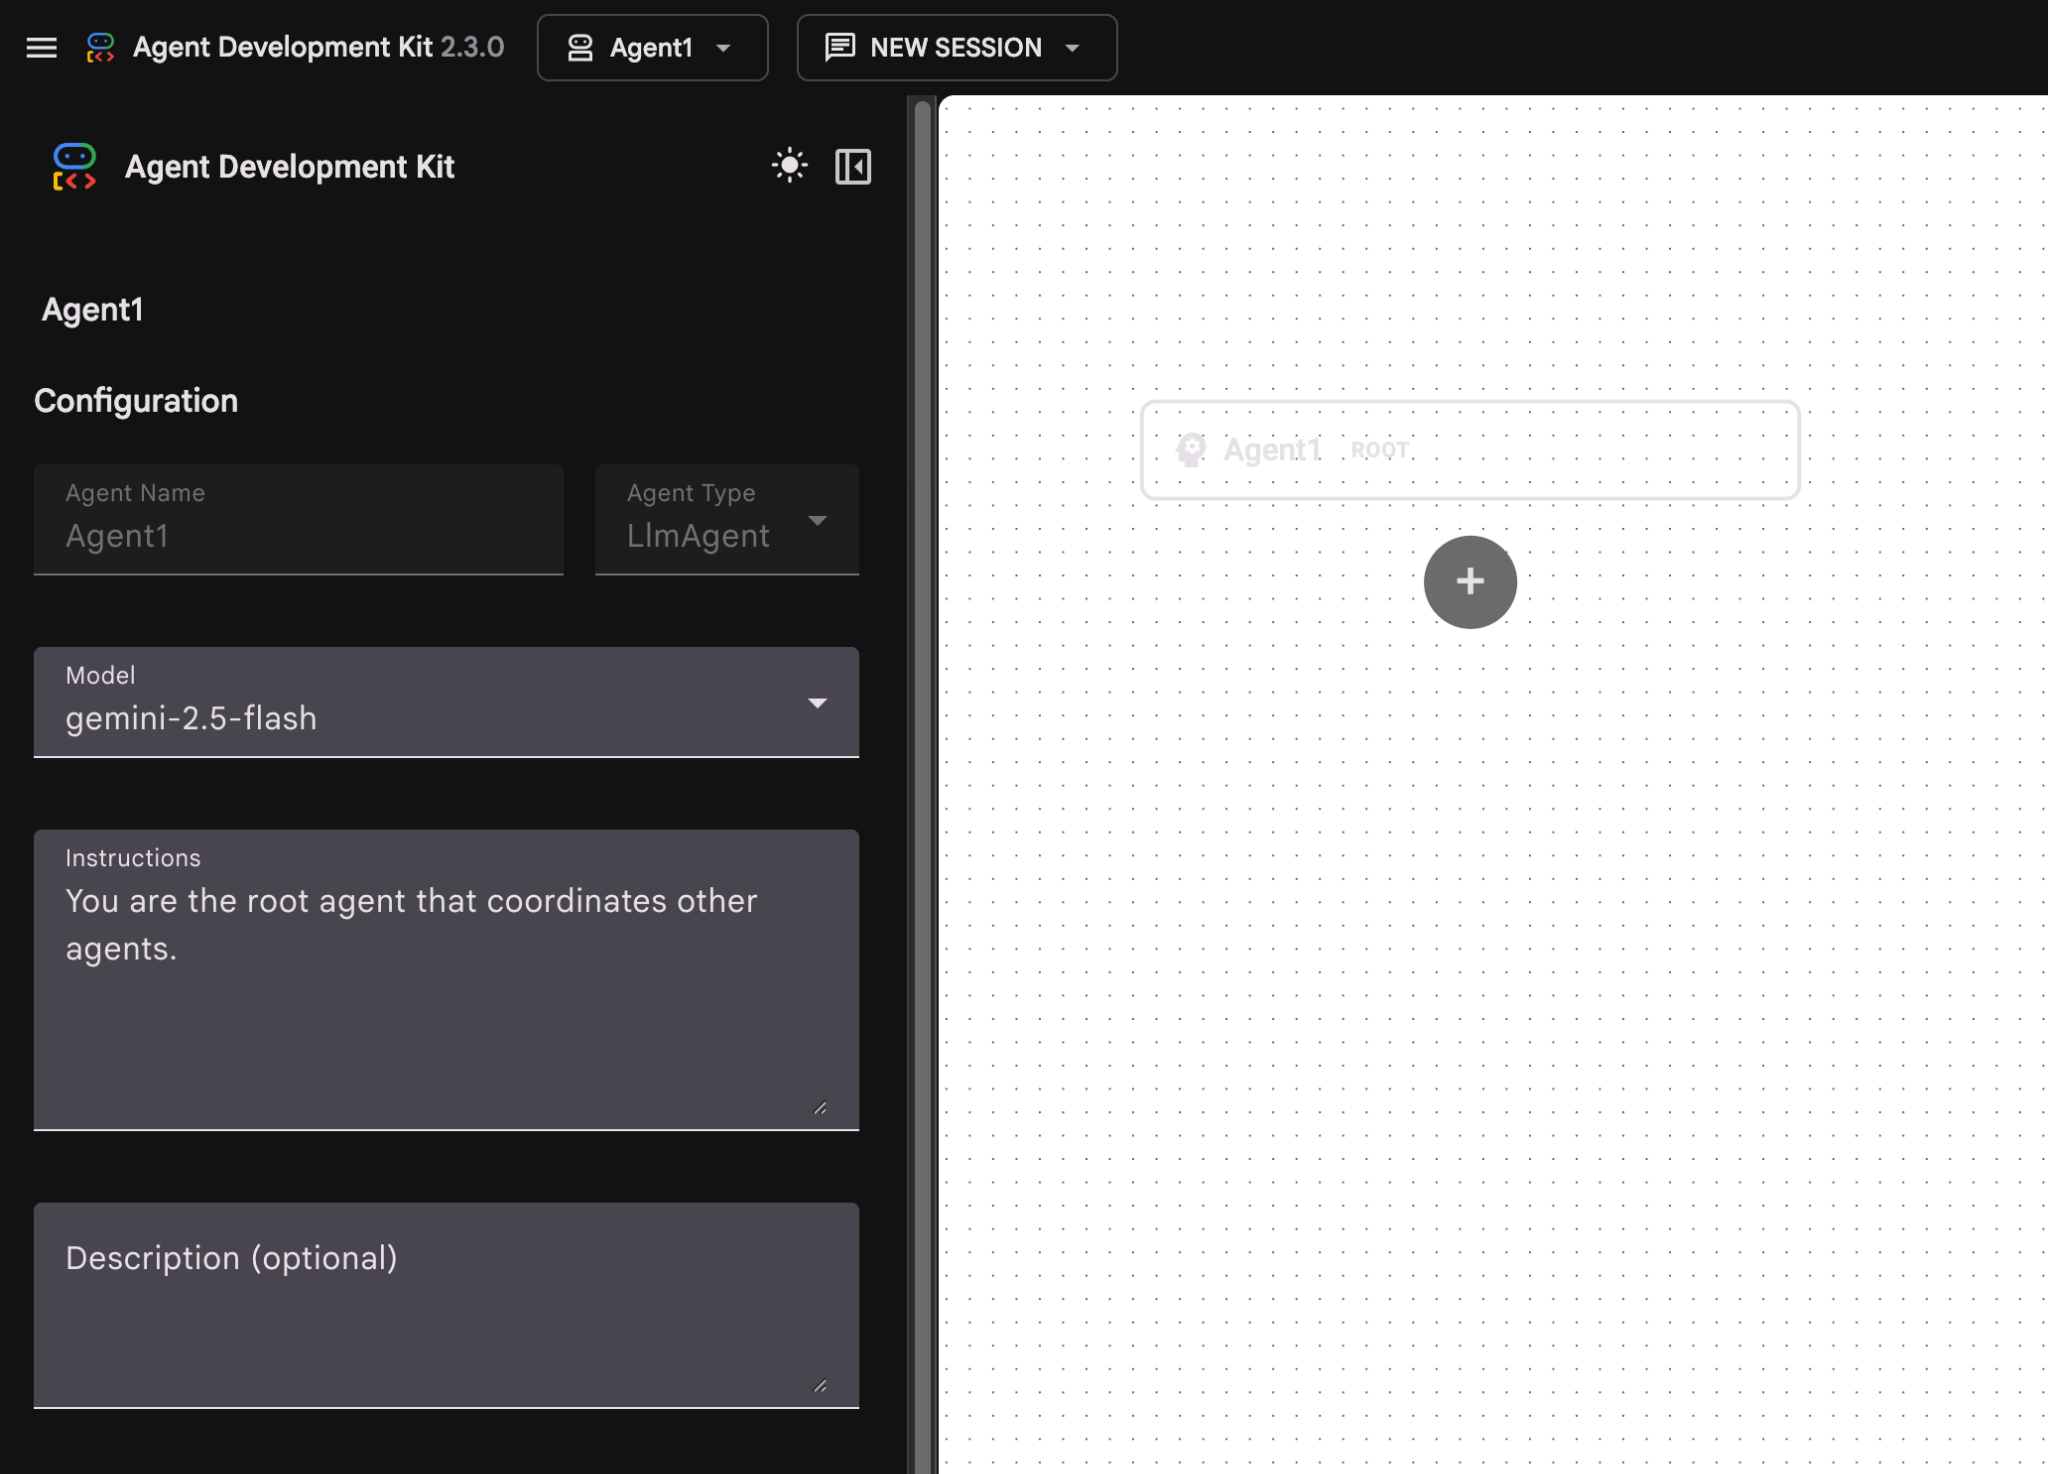
Figura 8: IU del compilador de agentes
- El panel se organiza en tres secciones principales: el lado izquierdo contiene los controles para la creación de agentes basados en la GUI, el centro proporciona una visualización de tu progreso y el lado derecho contiene el asistente para crear agentes con lenguaje natural.
- Se creó correctamente tu agente. Haz clic en el botón Guardar para continuar. (Nota: Para no perder los cambios, es fundamental que presiones Guardar).
- El agente ya debería estar listo para las pruebas. Para comenzar, ingresa una instrucción en el cuadro de chat, como la siguiente:
Hi, what can you do?
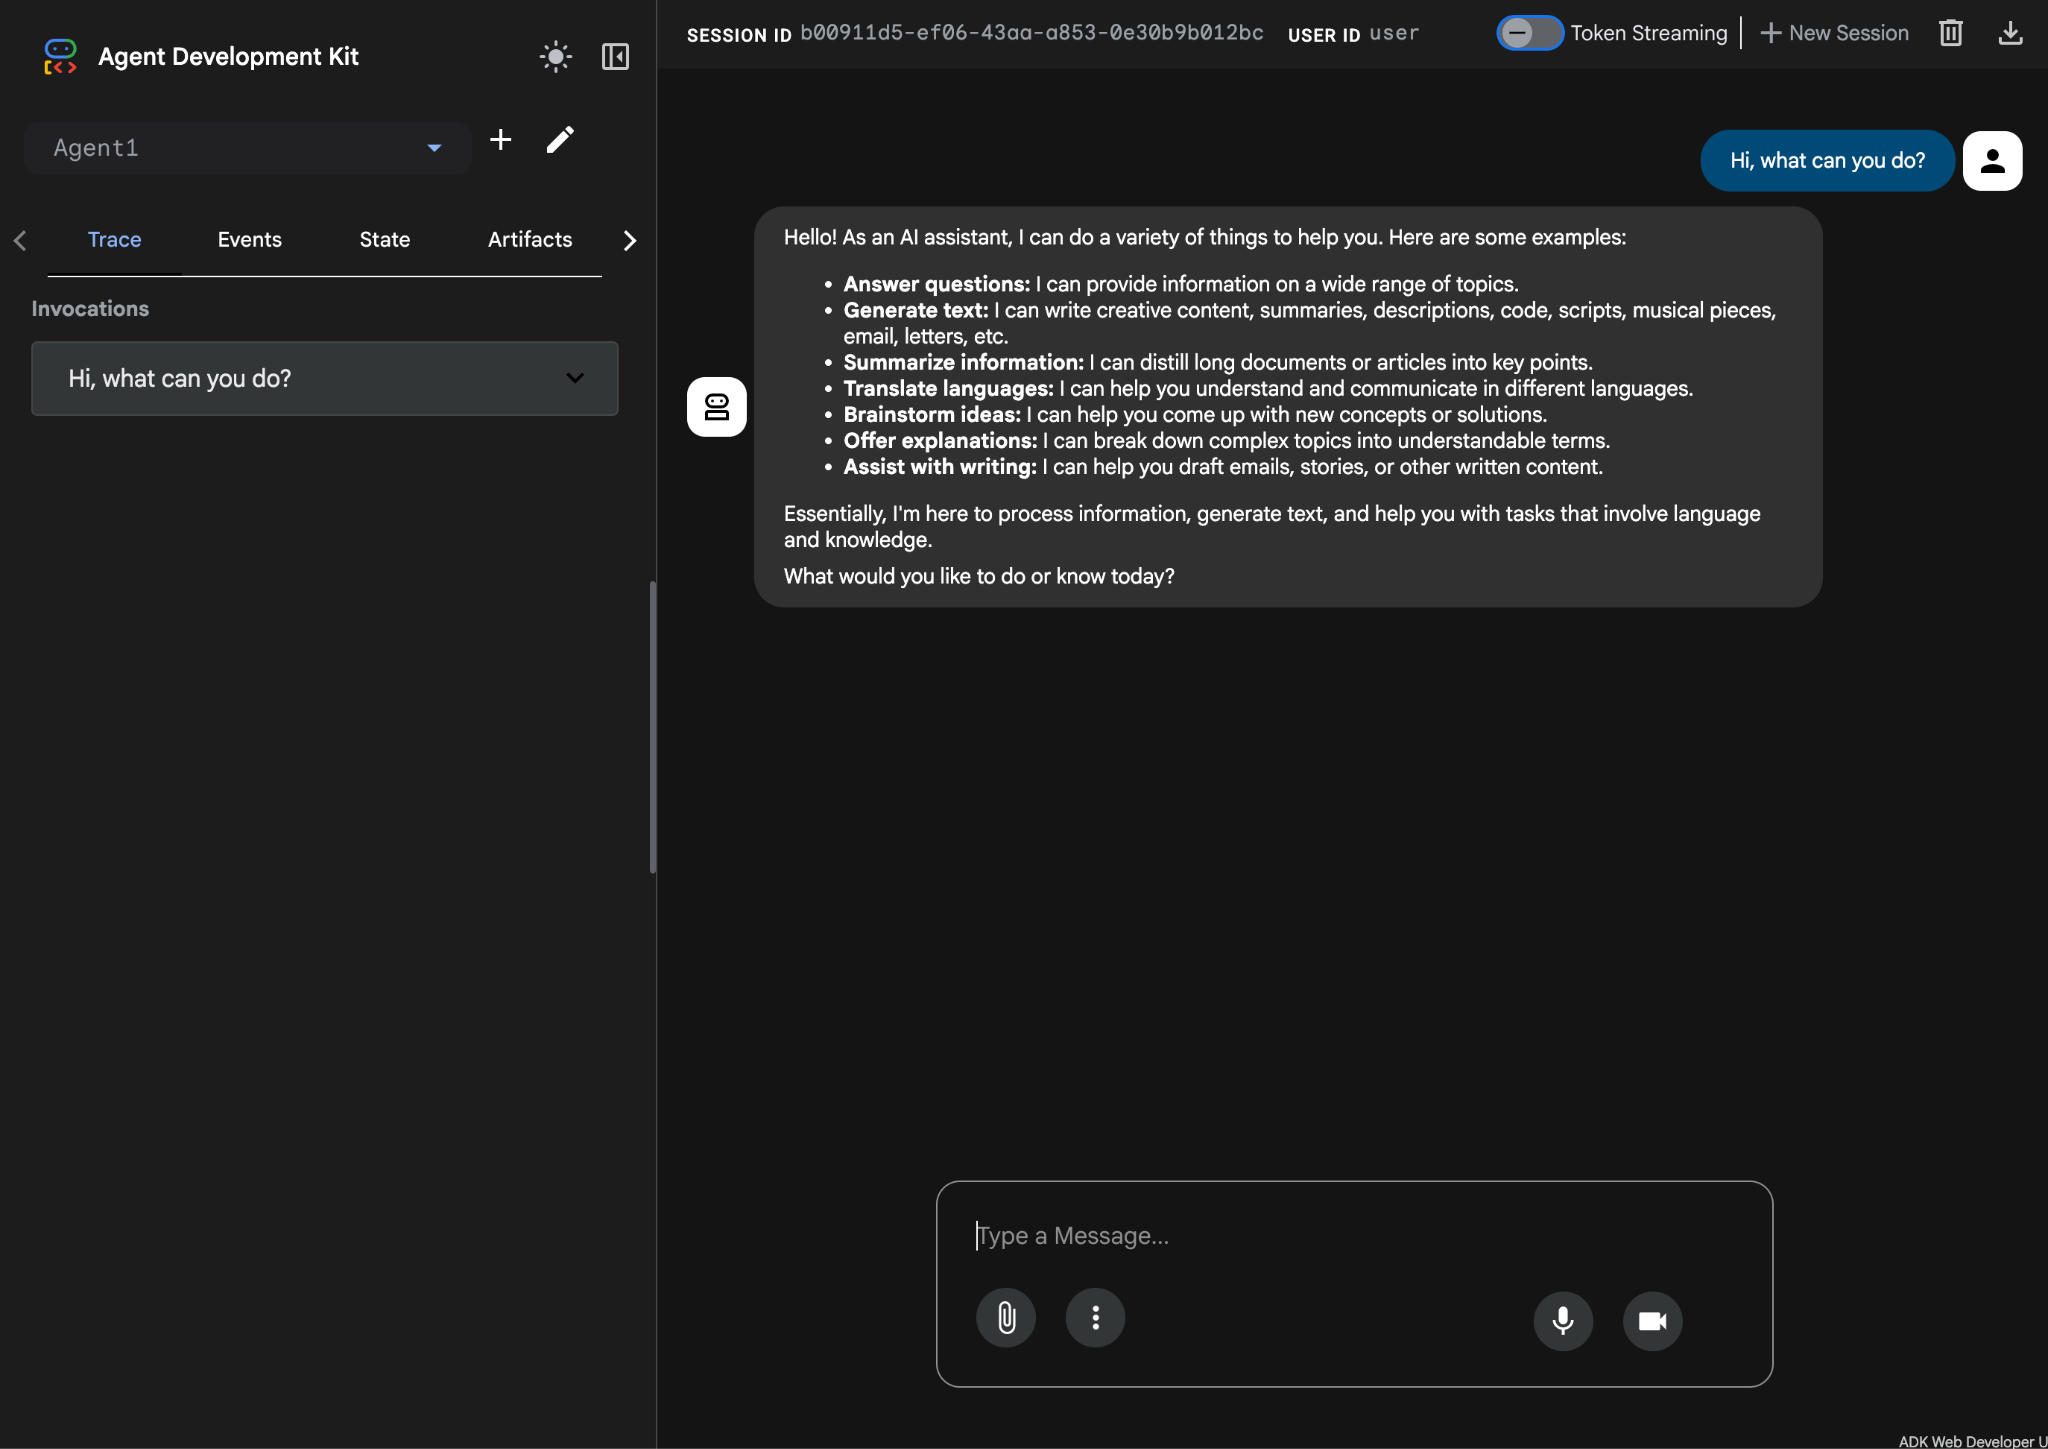
Figura 9: Prueba del agente.
7.Volvamos al editor para examinar los archivos recién generados. Encontrarás el explorador en el lado izquierdo. Navega a la carpeta adkgui y expándela para revelar el directorio Agent 1. En la carpeta, puedes consultar el archivo YAML que define el agente, como se ilustra en la siguiente figura.

Figura 10: Definición del agente con un archivo YAML
- Ahora, volvamos al editor de GUI y agreguemos algunas funciones al agente. Para ello, presiona el botón de edición (ícono de lápiz).
- Agregaremos una función de Búsqueda de Google al agente. Para ello, debemos agregar la Búsqueda de Google como una herramienta disponible para el agente y que este pueda usar. Para ello, haz clic en el signo "+" junto a la sección Herramientas en la parte inferior izquierda de la pantalla y, luego, en Herramienta integrada en el menú (consulta la Figura 11).
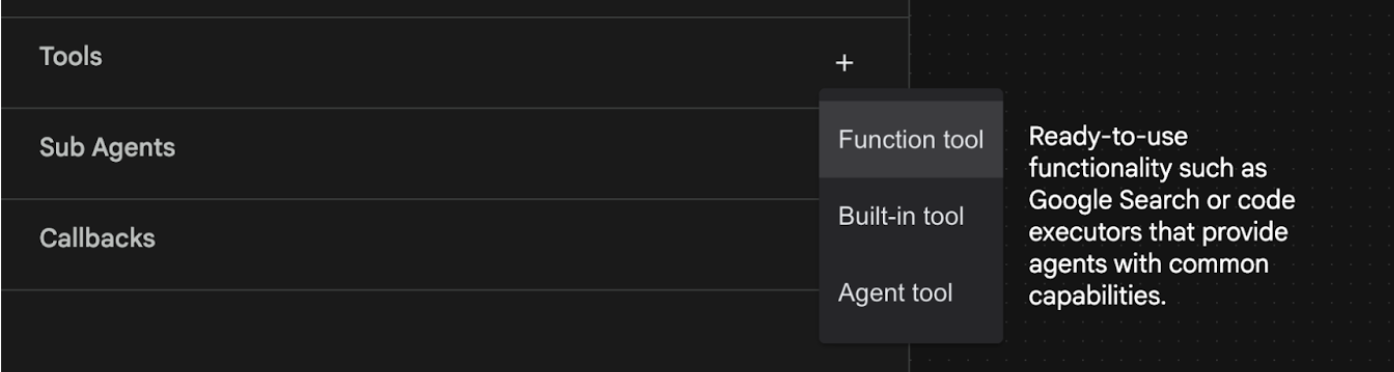
Figura 11: Cómo agregar una herramienta nueva a un agente
- En la lista de Herramienta integrada, selecciona google_search y haz clic en Crear (ver la figura 11). Esto agregará la Búsqueda de Google como herramienta en tu agente.
- Presiona el botón Guardar para guardar los cambios.
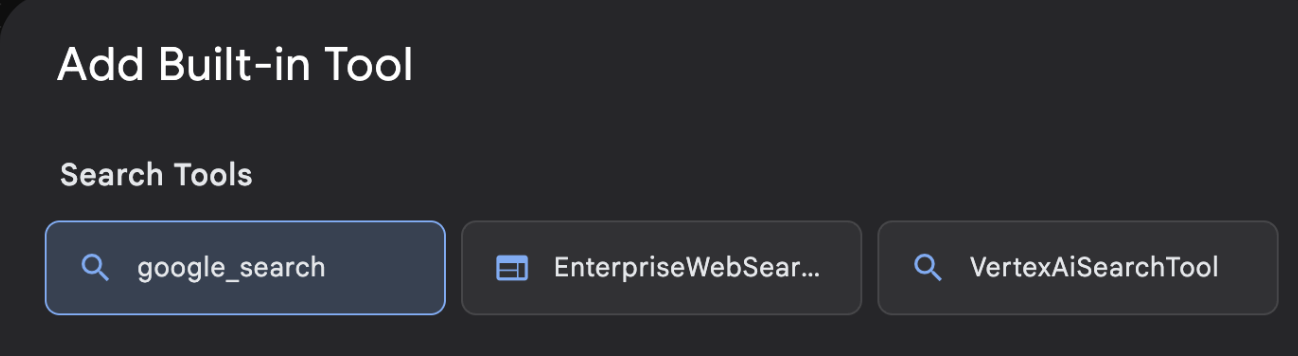
Figura 12: Lista de las herramientas disponibles en la IU del compilador visual del ADK
- Ahora ya puedes probar el agente. Primero, reinicia el servidor del ADK. Ve a la terminal en la que iniciaste el servidor del ADK (Agent Development Kit) y presiona CTRL+C para apagarlo.
CTRL+C (Windows) o CMD+C (Mac)
- Ejecuta el siguiente comando para reiniciar el servidor.
#make sure you are in the right folder.
cd ~/adkui

#start the server
adk web --host 0.0.0.0 --port 8080 --allow_origins "regex:https://.*8080-.*\.cloudshell\.dev"
- Haz clic con la tecla Ctrl presionada en la URL (p. ej., http://localhost:8000) que se muestra en la pantalla. La GUI del ADK (Kit de desarrollo de agentes) debería mostrarse en la pestaña del navegador.
- Selecciona Agent1 en la lista de agentes. Tu agente ahora puede realizar búsquedas en Google. En el cuadro de chat, prueba con la siguiente instrucción.
What is the weather today in Yokohama?
Deberías ver la respuesta de la Búsqueda de Google como se muestra a continuación. 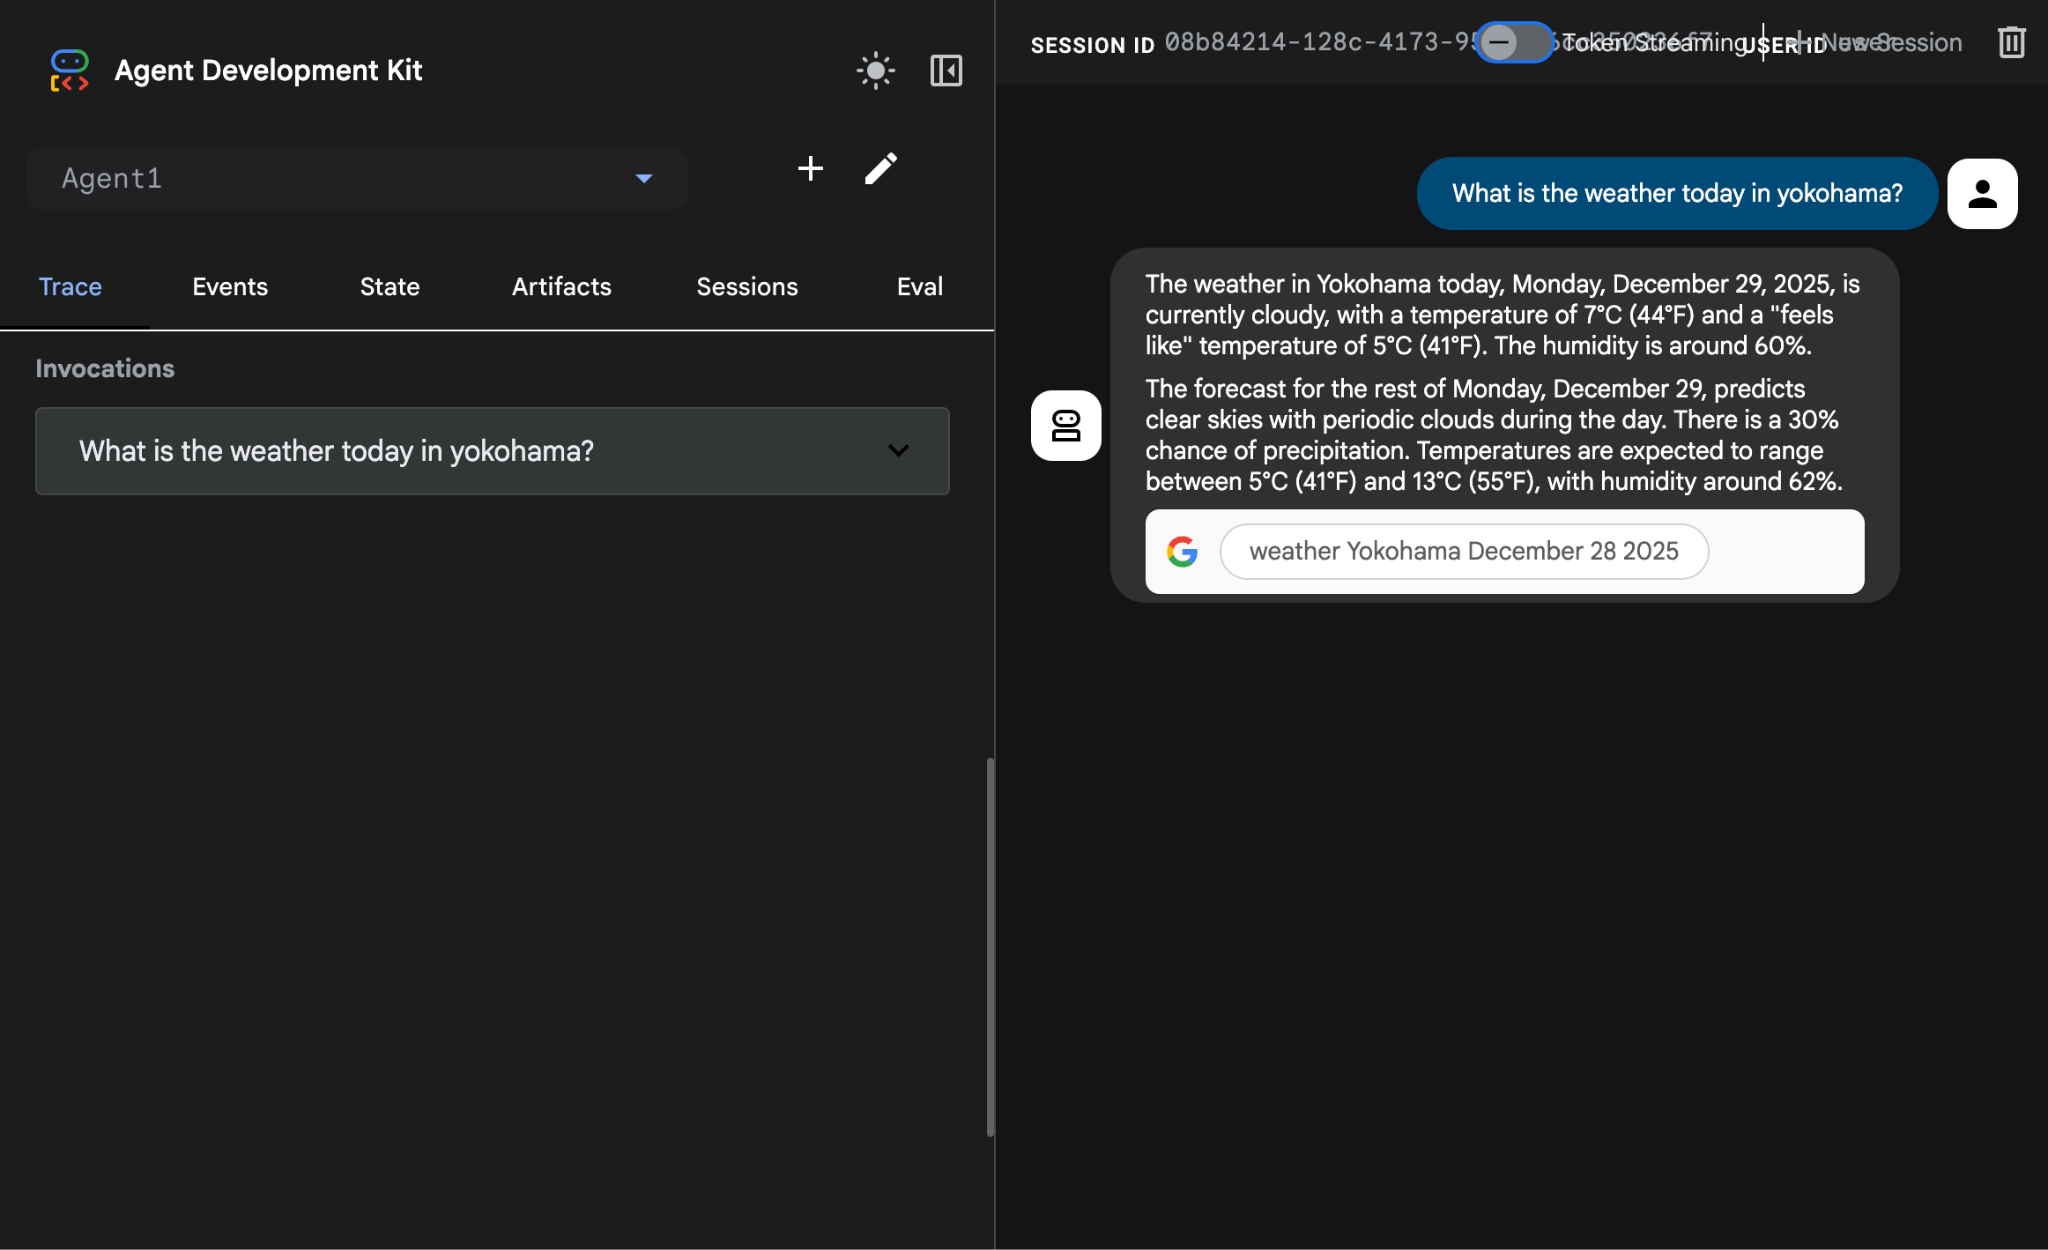
Figura 13: Búsqueda de Google con el agente
- Ahora, volvamos al editor y verifiquemos el código que se creó en este paso. En el panel lateral Explorador del editor, haz clic en root_agent.yaml para abrirlo. Confirma que se haya agregado google_search como herramienta (figura 15).
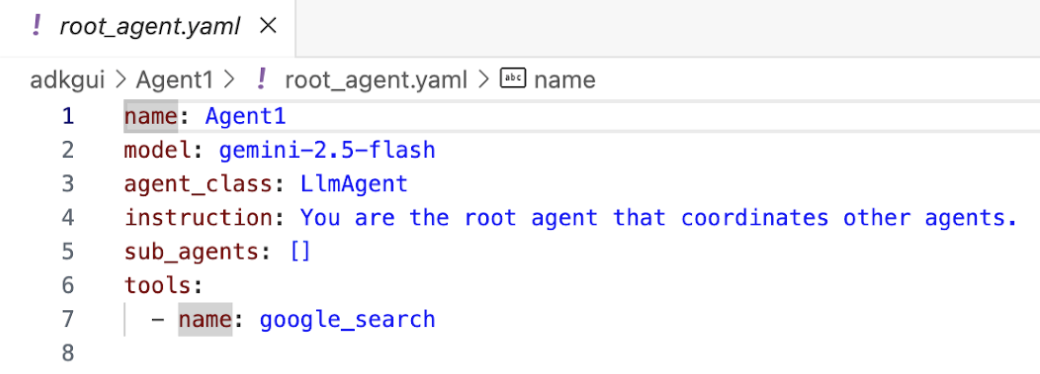
Figura 14: Confirmación de que se agregó google_search como herramienta en Agent1
7. Implementa el agente en Cloud Run
Ahora implementemos el agente creado en Cloud Run. Con Cloud Run, puedes compilar apps o sitios web rápidamente en una plataforma completamente administrada.
Puedes ejecutar servicios de frontend y backend, trabajos por lotes, LLM de host y cargas de trabajo de procesamiento de colas sin tener que administrar la infraestructura.
- En la terminal del editor de Cloud Shell, si aún se está ejecutando el servidor del ADK (Agent Development Kit), presiona Ctrl + C para detenerlo.
CTRL+C (Windows) o CMD+C (Mac)
- Ve al directorio raíz del proyecto.
cd ~/adkui
- Obtén el código de implementación. Después de ejecutar el comando, deberías ver el archivo deploycloudrun.py en el panel Explorador del Editor de Cloud Shell.
curl -LO https://raw.githubusercontent.com/haren-bh/codelabs/main/adk_visual_builder/deploycloudrun.py
- Verifica las opciones de implementación en deploycloudrun.py. Usaremos el comando adk deploy para implementar nuestro agente en Cloud Run. El ADK (Kit de desarrollo de agentes) tiene la opción integrada para implementar el agente en Cloud Run. Debemos especificar los parámetros, como el ID del proyecto de Google Cloud, la región, etcétera. Para la ruta de acceso de la app, esta secuencia de comandos supone que agent_path=./Agent1. También crearemos una cuenta de servicio nueva con los permisos necesarios y la adjuntaremos a Cloud Run. Cloud Run necesita acceder a servicios como Vertex AI y Cloud Storage para ejecutar el agente.
- Ejecuta la secuencia de comandos deploycloudrun.py**. La implementación debería comenzar como se muestra en la siguiente figura.**
python3 deploycloudrun.py
Si recibes el mensaje de confirmación que se muestra a continuación, presiona Y y, luego, Intro para todos los mensajes. El archivo deploycloudrun.py supone que tu agente se encuentra en la carpeta Agent1, como se creó anteriormente.
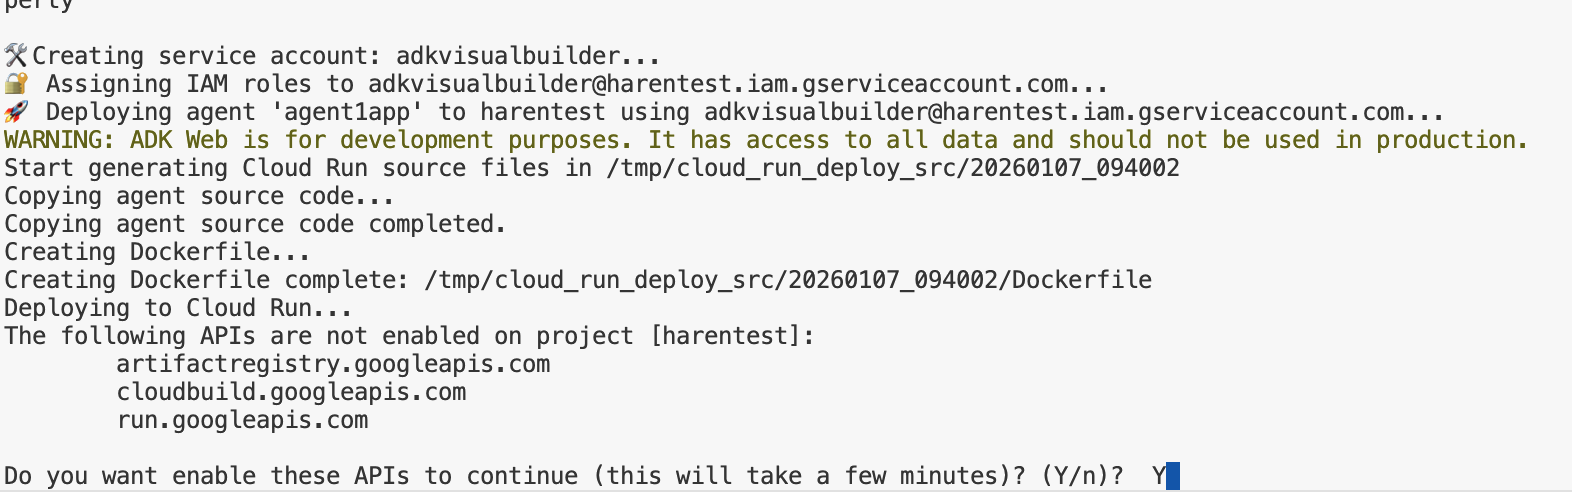
Figura 15: Implementa el agente en Cloud Run y presiona Y en los mensajes de confirmación.
- Una vez que se complete la implementación, deberías ver la URL del servicio, como https://agent1service-78833623456.us-central1.run.app.
- Accede a la URL en tu navegador web para iniciar la app.
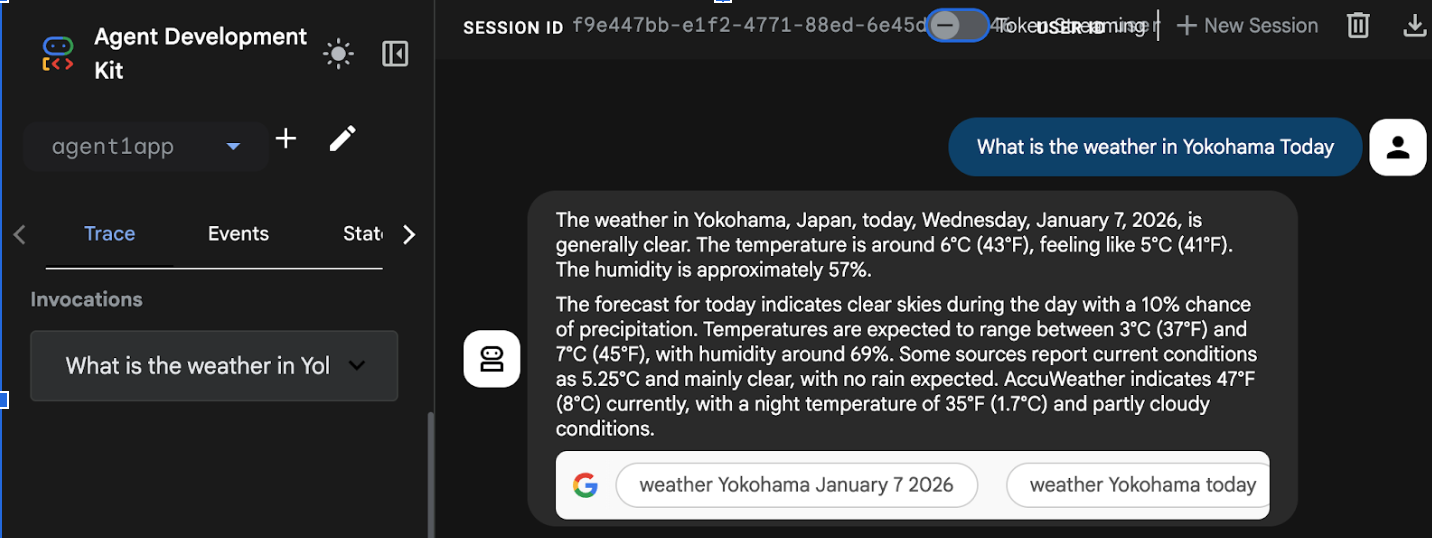
Figure 16: Agent running in Cloud Run
8. Crea un agente con un subagente y una herramienta personalizada
En la sección anterior, creaste un solo agente con una herramienta de búsqueda de Google integrada. En esta sección, crearás un sistema multiagente en el que permitiremos que los agentes usen las herramientas personalizadas.
- Primero, reinicia el servidor del ADK (Kit de desarrollo de agentes). Ve a la terminal en la que iniciaste el servidor del ADK (Agent Development Kit) y presiona CTRL + C para apagar el servidor si aún se está ejecutando. Ejecuta el siguiente comando para reiniciar el servidor.
#make sure you are in the right folder.
cd ~/adkui

#start the server
adk web --host 0.0.0.0 --port 8080 --allow_origins "regex:https://.*8080-.*\.cloudshell\.dev"
- Haz clic con la tecla Ctrl presionada en la URL (p. ej., http://localhost:8000) que se muestra en la pantalla. La GUI del ADK (Kit de desarrollo de agentes) debería mostrarse en la pestaña del navegador.
- Haz clic en el botón "+" para crear un agente nuevo. En el diálogo del agente, ingresa "Agent2" (figura 18) y haz clic en "Crear".
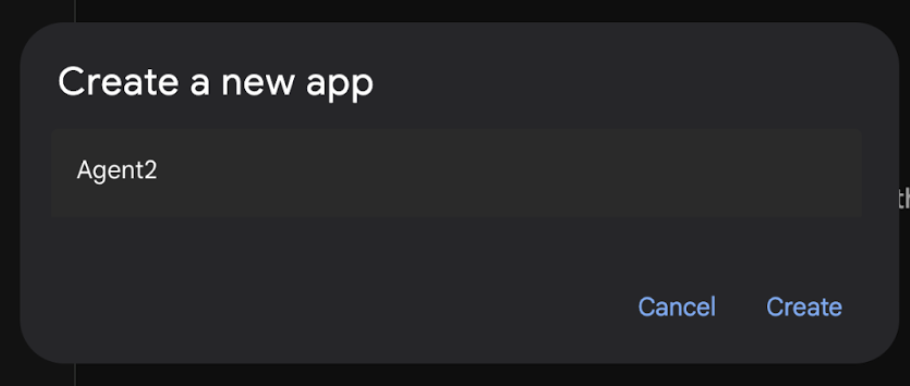
Figura 17: Creación de una app de Agent nueva
- En la sección de instrucciones de Agent2, ingresa lo siguiente.
You are an agent that takes image creation instruction from the user and passes it to your sub agent
- Ahora agregaremos un agente secundario al agente raíz. Para ello, haz clic en el botón "+" que se encuentra en el lado izquierdo del menú Sub Agent, en la parte inferior del panel izquierdo (figura 19), y haz clic en "LLM Agent". Esto creará un agente nuevo como subagente del agente raíz.

Figura 18: Agrega un subagente nuevo.
- En las instrucciones para sub_agent_1, ingresa el siguiente texto.
You are an Agent that can take instructions about an image and create an image using the create_image tool.
- Ahora, agreguemos una herramienta personalizada a este agente secundario. Esta herramienta llamará al modelo Imagen para generar una imagen según las instrucciones del usuario. Para ello, primero haz clic en el subagente que creaste en el paso anterior y, luego, en el botón "+" junto al menú Herramientas. En la lista de opciones de herramientas, haz clic en "Herramienta de función". Esta herramienta nos permitirá agregar nuestro propio código personalizado.
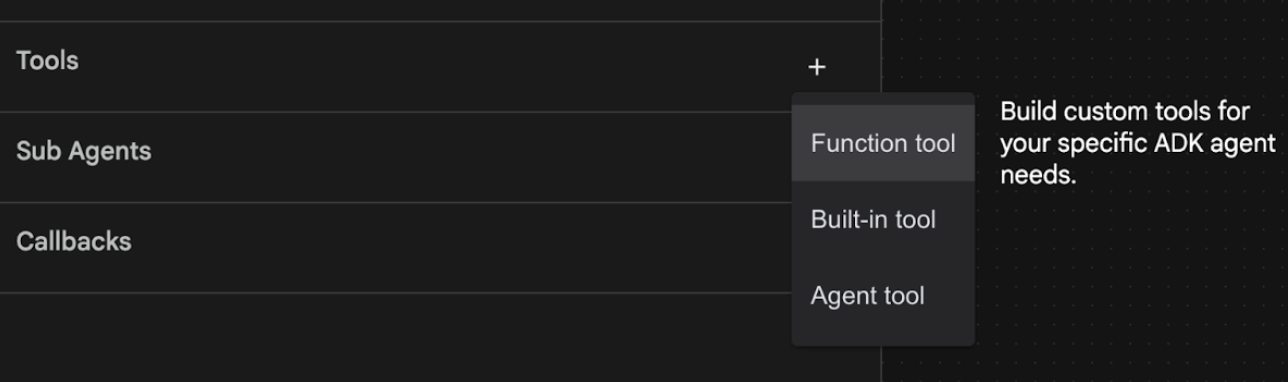
Figura 19: Haz clic en la herramienta Function para crear una herramienta nueva. 8. Asigna el nombre Agent2.image_creation_tool.create_image a la herramienta en el cuadro de diálogo. 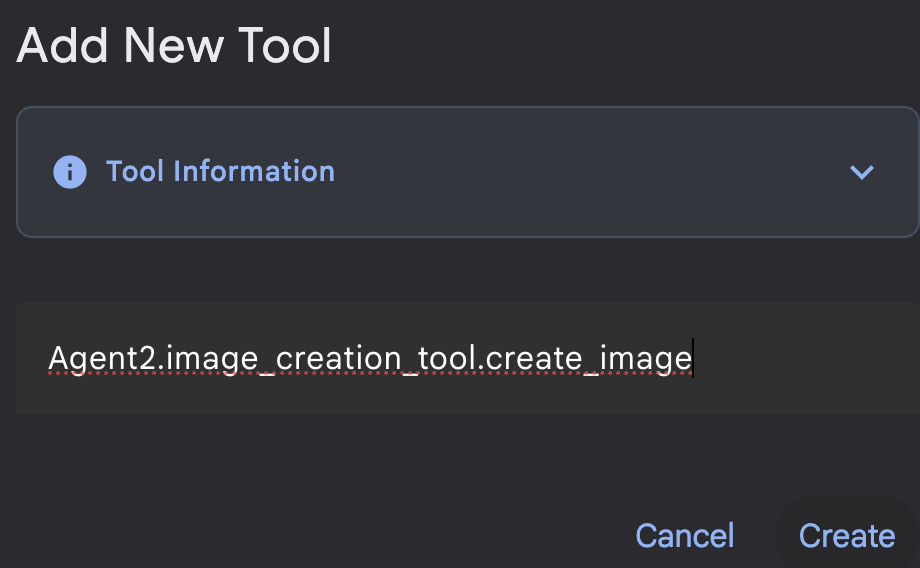
Figura 20: Agregar nombre de la herramienta
- Haz clic en el botón Guardar para guardar los cambios.
- En la terminal del Editor de Cloud Shell, presiona Ctrl + S para detener el servidor del ADK.
- En la terminal, ingresa el siguiente comando para crear el archivo image_creation_tool.py.
touch ~/adkui/Agent2/image_creation_tool.py
- Haz clic en el archivo image_creation_tool.py recién creado en el panel Explorador del editor de Cloud Shell para abrirlo. Reemplaza el contenido de image_creation_tool.py por lo siguiente y guárdalo (Ctrl+S).
import os
import io
import vertexai
from vertexai.preview.vision_models import ImageGenerationModel
from dotenv import load_dotenv
import uuid
from typing import Union
from datetime import datetime
from google import genai
from google.genai import types
from google.adk.tools import ToolContext
import logging

# Configure logging
logging.basicConfig(level=logging.INFO)
logger = logging.getLogger(__name__)

async def create_image(prompt: str,tool_context: ToolContext) -> Union[bytes, str]:
  """
  Generates an image based on a text prompt using a Vertex AI Imagen model.
  Args:
      prompt: The text prompt to generate the image from.

  Returns:
      The binary image data (PNG format) on success, or an error message string on failure.
  """
  print(f"Attempting to generate image for prompt: '{prompt}'")

  try:
      # Load environment variables from .env file two levels up
      dotenv_path = os.path.join(os.path.dirname(__file__), '..', '..', '.env')
      load_dotenv(dotenv_path=dotenv_path)
      project_id = os.getenv("GOOGLE_CLOUD_PROJECT")
      location = os.getenv("GOOGLE_CLOUD_LOCATION")
      model_name = os.getenv("IMAGEN_MODEL")
      client = genai.Client(
          vertexai=True,
          project=project_id,
          location=location,
      )
      response = client.models.generate_images(
          model="imagen-3.0-generate-002",
          prompt=prompt,
          config=types.GenerateImagesConfig(
              number_of_images=1,
              aspect_ratio="9:16",
              safety_filter_level="block_low_and_above",
              person_generation="allow_adult",
          ),
      )
      if not all([project_id, location, model_name]):
          return "Error: Missing GOOGLE_CLOUD_PROJECT, GOOGLE_CLOUD_LOCATION, or IMAGEN_MODEL in .env file."
      vertexai.init(project=project_id, location=location)
      model = ImageGenerationModel.from_pretrained(model_name)
      images = model.generate_images(
          prompt=prompt,
          number_of_images=1
      )
      if response.generated_images is  None:
          return "Error: No image was generated."
      for generated_image in response.generated_images:
          # Get the image bytes
          image_bytes = generated_image.image.image_bytes
          counter = str(tool_context.state.get("loop_iteration", 0))
          artifact_name = f"generated_image_" + counter + ".png"
          # Save as ADK artifact (optional, if still needed by other ADK components)
          report_artifact = types.Part.from_bytes(
              data=image_bytes, mime_type="image/png"
          )
          await tool_context.save_artifact(artifact_name, report_artifact)
          logger.info(f"Image also saved as ADK artifact: {artifact_name}")
          return {
              "status": "success",
              "message": f"Image generated .  ADK artifact: {artifact_name}.",
              "artifact_name": artifact_name,
          }
  except Exception as e:
      error_message = f"An error occurred during image generation: {e}"
      print(error_message)
      return error_message
- Primero, reinicia el servidor del ADK (Kit de desarrollo de agentes). Ve a la terminal en la que iniciaste el servidor del ADK (Agent Development Kit) y presiona CTRL + C para apagar el servidor si aún se está ejecutando. Ejecuta el siguiente comando para reiniciar el servidor.
#make sure you are in the right folder.
cd ~/adkui

#start the server
adk web --host 0.0.0.0 --port 8080 --allow_origins "regex:https://.*8080-.*\.cloudshell\.dev"
- Haz clic con la tecla Ctrl presionada en la URL (p. ej., http://localhost:8000) que se muestra en la pantalla. La GUI del ADK (Kit de desarrollo de agentes) debería mostrarse en la pestaña del navegador.
- En la pestaña de la IU del ADK (Agent Development Kit), selecciona Agent2 en la lista de agentes y presiona el botón de edición (ícono de lápiz). En el editor visual del ADK (Agent Development Kit), haz clic en el botón Save para conservar los cambios.
- Ahora podemos probar el nuevo agente.
- En la interfaz de chat de la IU del ADK (Agent Development Kit), ingresa la siguiente instrucción. También puedes probar otras instrucciones. Deberías ver los resultados que se muestran en la figura 21.
Create an image of a cat
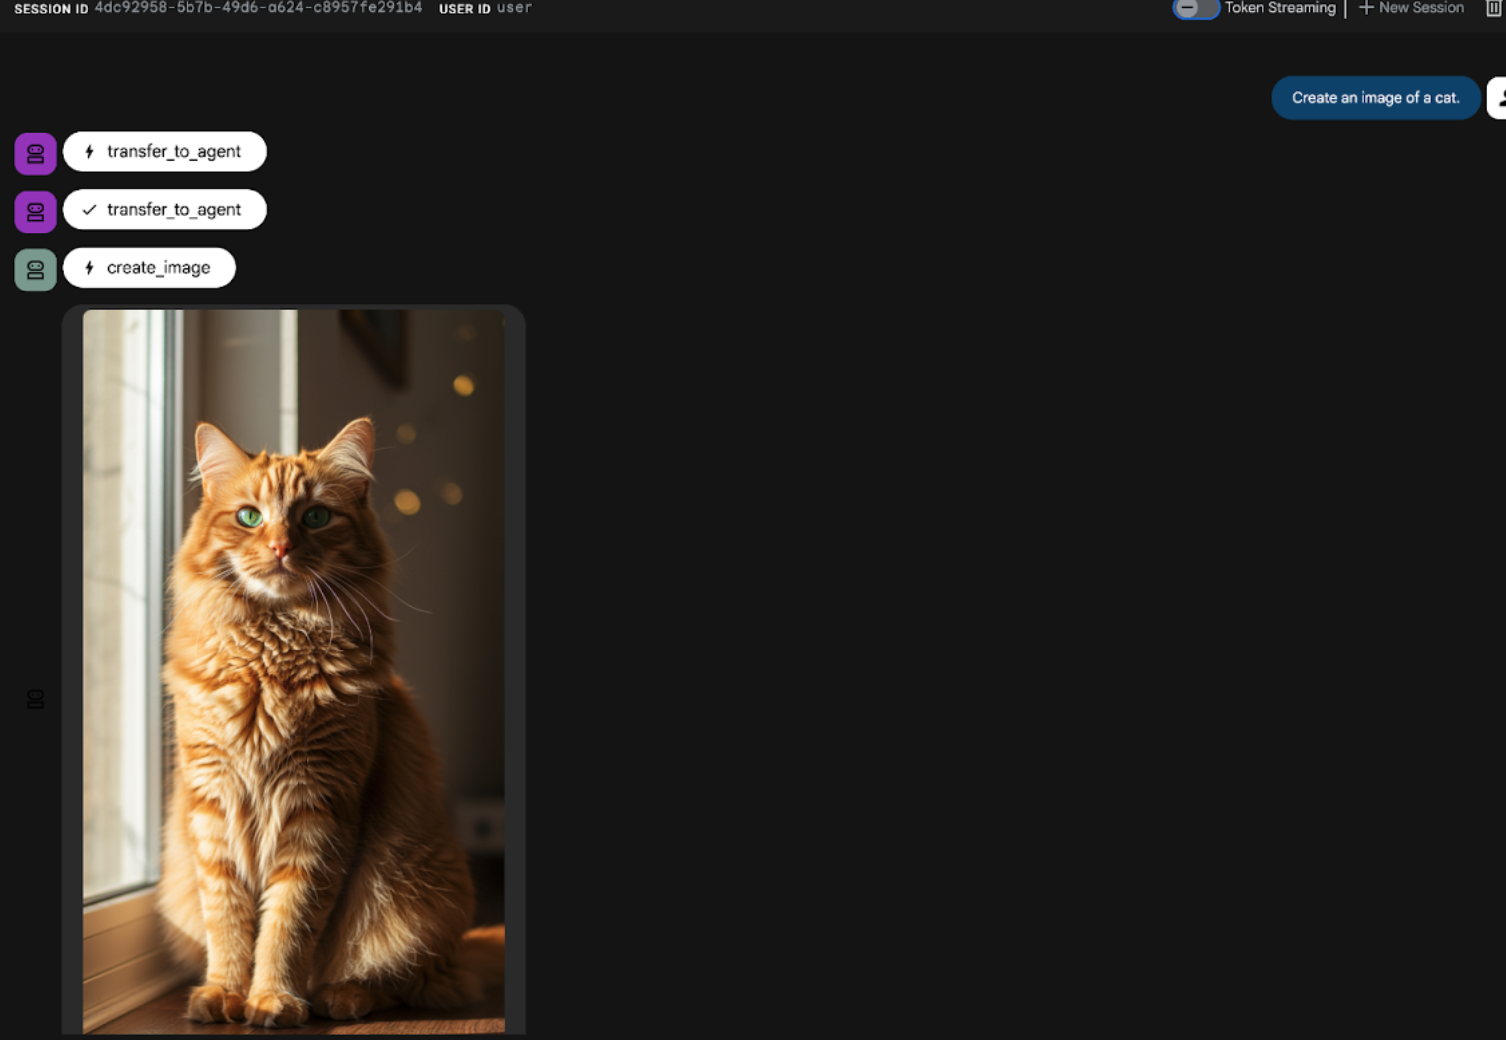
Figura 21: Interfaz de chat de la IU del ADK
9. Crea un agente de flujo de trabajo
Si bien el paso anterior implicó la creación de un agente con un subagente y herramientas especializadas de creación de imágenes, esta fase se enfoca en perfeccionar las capacidades del agente. Mejoraremos el proceso asegurándonos de que la instrucción inicial del usuario esté optimizada antes de que se genere la imagen. Para lograrlo, se integrará un agente secuencial en el agente raíz para controlar el siguiente flujo de trabajo de dos pasos:
- Recibe la instrucción del agente raíz y la mejora.
- Reenvía la instrucción refinada al agente de creación de imágenes para producir la imagen final con IMAGEN.
- Primero, reinicia el servidor del ADK (Kit de desarrollo de agentes). Ve a la terminal en la que iniciaste el servidor del ADK (Agent Development Kit) y presiona CTRL + C para apagar el servidor si aún se está ejecutando. Ejecuta el siguiente comando para reiniciar el servidor.
#make sure you are in the right folder.
cd ~/adkui

#start the server
adk web --host 0.0.0.0 --port 8080 --allow_origins "regex:https://.*8080-.*\.cloudshell\.dev"
- Haz clic con la tecla Ctrl presionada en la URL (p. ej., http://localhost:8000) que se muestra en la pantalla. La GUI del ADK (Kit de desarrollo de agentes) debería mostrarse en la pestaña del navegador.
- Selecciona Agent2 en el selector de agentes y haz clic en el botón Editar (ícono de lápiz).
- Haz clic en Agent2 (agente raíz) y, luego, en el botón "+" junto al menú Agentes secundarios. En la lista de opciones, haz clic en Sequential Agent.
- Deberías ver la estructura del agente, como la que se muestra en la Figura 22.
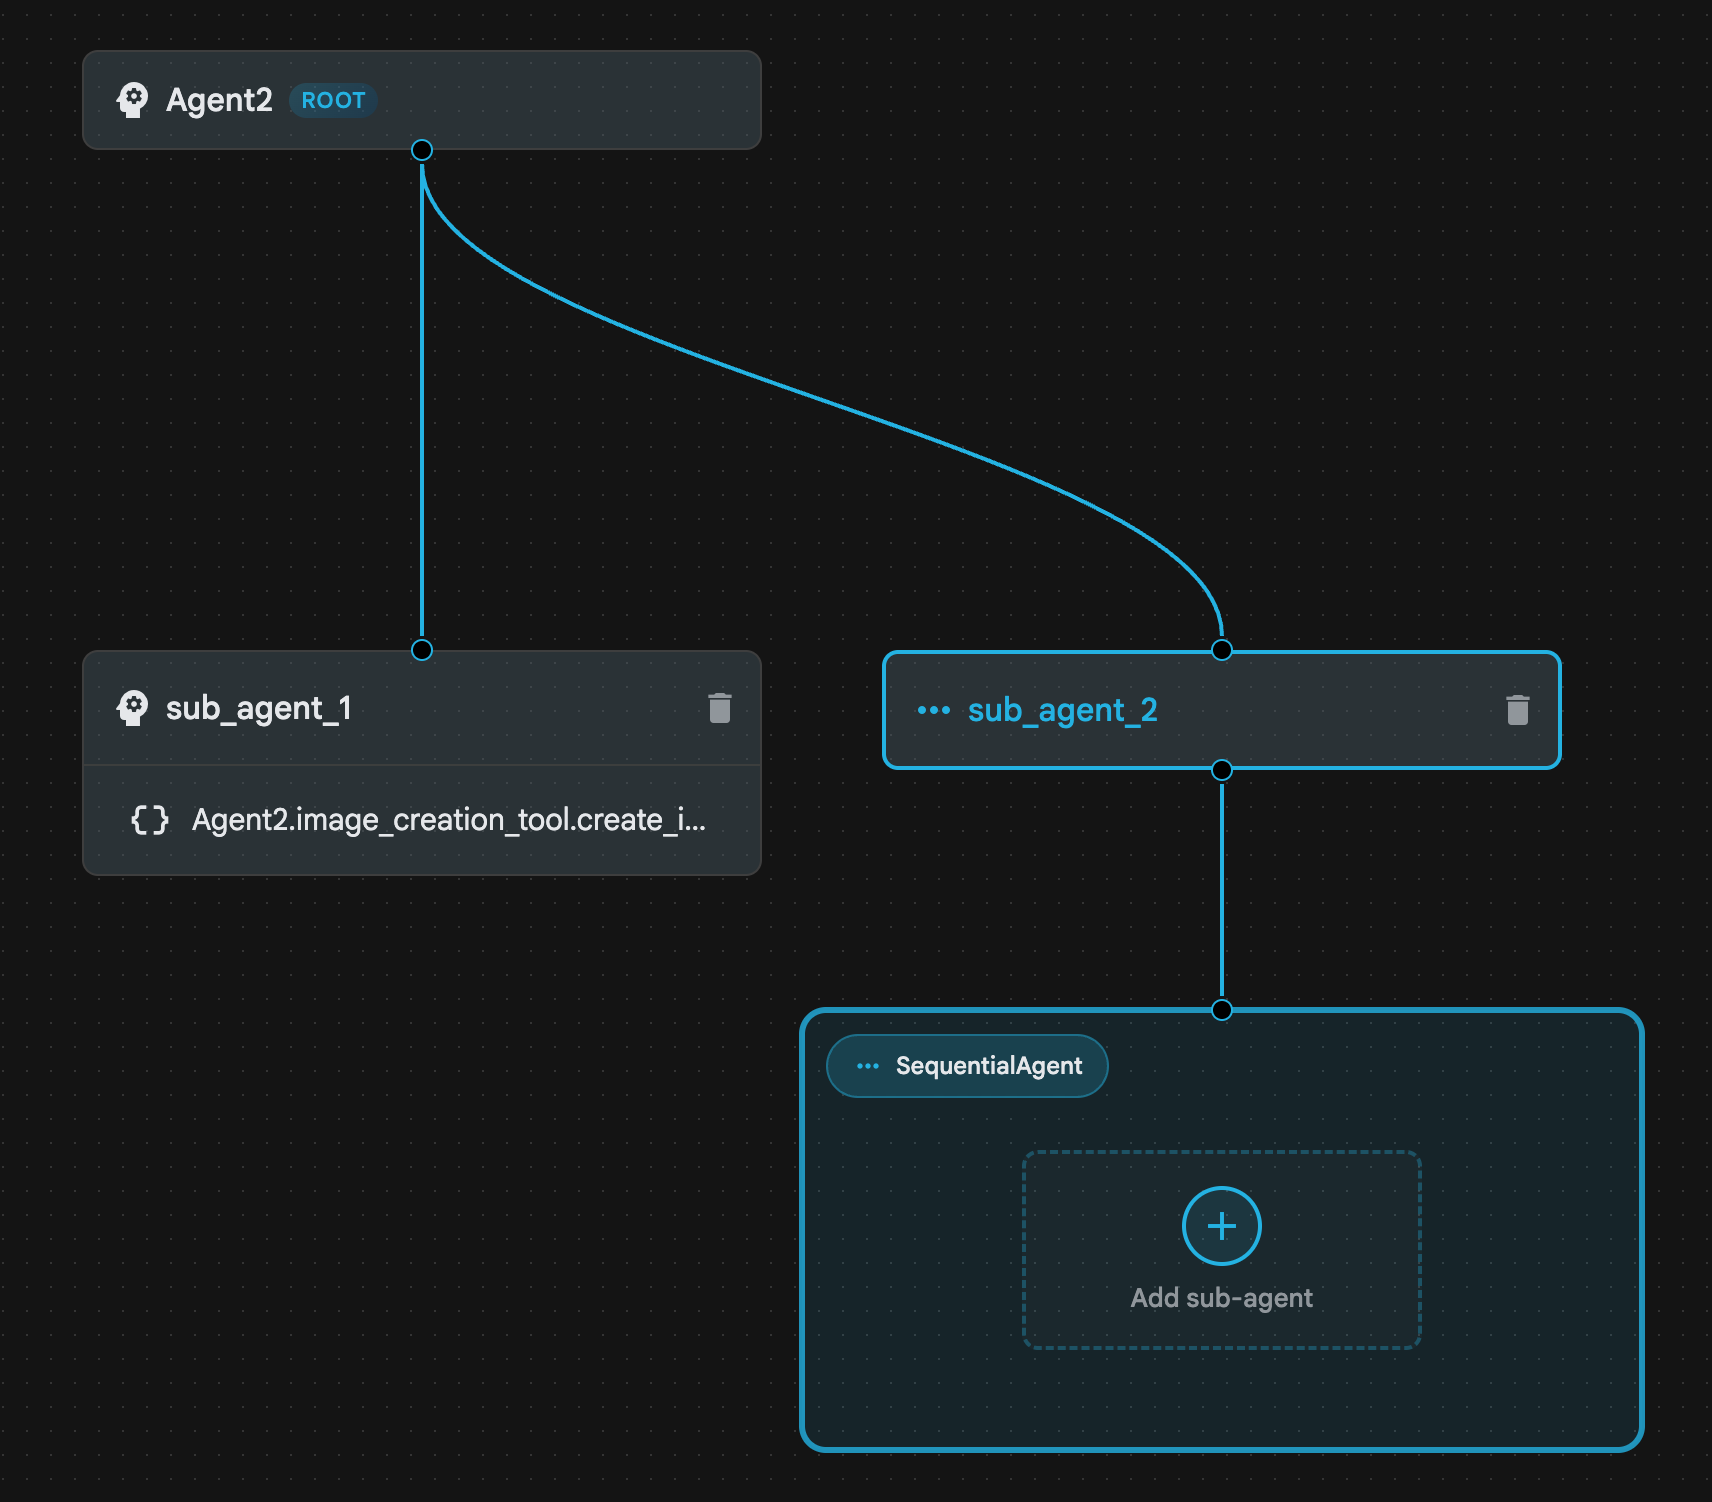
Figura 22: Estructura del agente secuencial
- Ahora agregaremos el primer agente al agente secuencial, que actuará como un potenciador de instrucciones. Para ello, haz clic en el botón Add sub-agent dentro del cuadro SequentialAgent y haz clic en LLM Agent.
- Debemos agregar otro agente a la secuencia, por lo que debes repetir el paso 6 para agregar otro agente de LLM (presiona el botón + y selecciona LLMAgent).
- Haz clic en sub_agent_4 y agrega una herramienta nueva haciendo clic en el ícono"+" junto a Herramientas en el panel izquierdo. Haz clic en "Herramienta de función" en las opciones. En el cuadro de diálogo, asígnale el nombre Agent2.image_creation_tool.create_image a la herramienta y presiona "Crear".
- Ahora podemos borrar sub_agent_1, ya que se reemplazó por sub_agent_2, que es más avanzado. Para ello, haz clic en el botón Borrar que se encuentra a la derecha de sub_agent_1 en el diagrama.
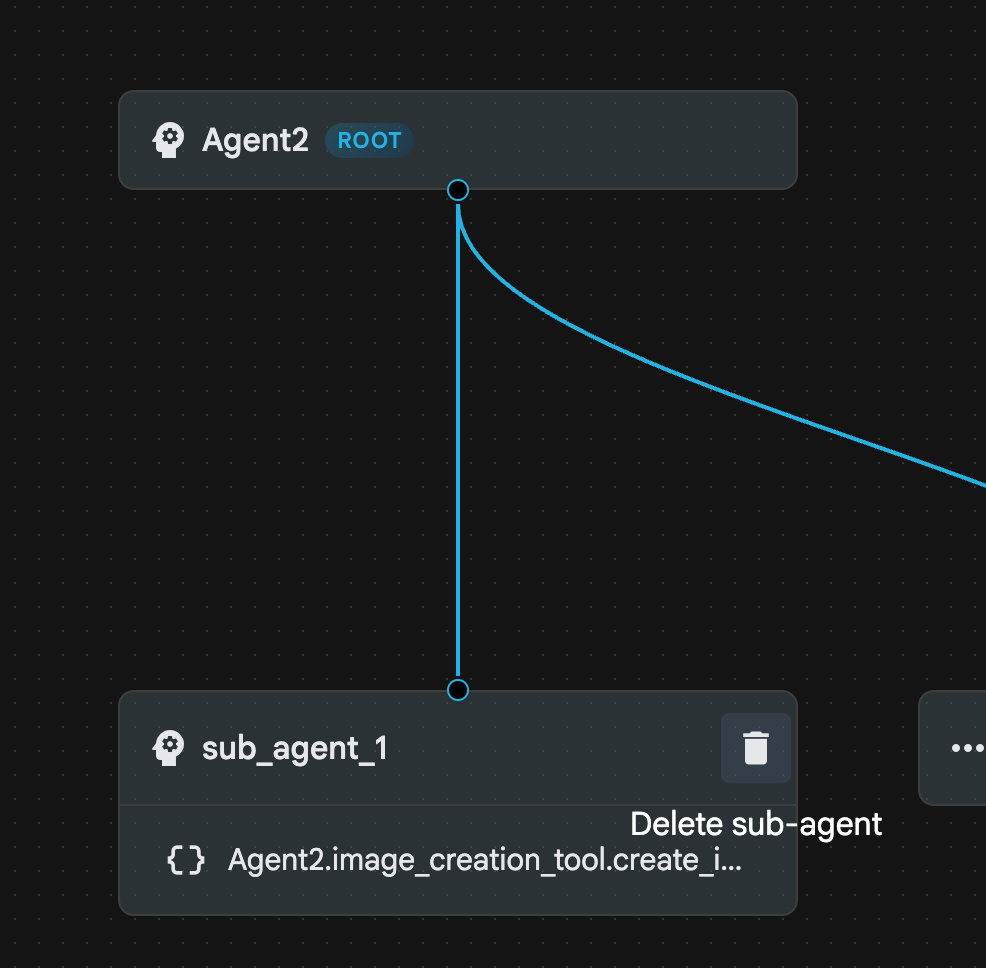
Figura 23: Borra sub_agent_1 10. La estructura de nuestro agente se ve como la de la figura 24.

Figura 24: Estructura final del agente mejorado
- Haz clic en sub_agent_3 y, en las instrucciones, ingresa lo siguiente.
     Act as a professional AI Image Prompt Engineer. I will provide you
    with a basic idea for an image. Your job is to expand my idea into
    a detailed, high-quality prompt for models like Imagen.

    For every input, output the following structure:
    1. **Optimized Prompt**: A vivid, descriptive paragraph including
    subject, background, lighting, and textures.
    2. **Style & Medium**: Specify if it is photorealistic, digital art,
    oil painting, etc.
    3. **Camera & Lighting**: Define the lens (e.g., 85mm), angle,
    and light quality (e.g., volumetric, golden hour).

    Guidelines: Use sensory language, avoid buzzwords like 'photorealistic'
    unless necessary, and focus on specific artistic descriptors.
    Once the prompt is created send the prompt to the
- Haz clic en sub_agent_4. Cambia la instrucción por la siguiente.
You are an agent that takes instructions about an image and can generate the image using the create_image tool.
- Haz clic en el botón Guardar.
- Ve al panel del explorador del Editor de Cloud Shell y abre los archivos YAML del agente. Los archivos del agente deberían verse de la siguiente manera:
root_agent.yaml

name: Agent2
model: gemini-2.5-flash
agent_class: LlmAgent
instruction: You are an agent that takes image creation instruction from the
  user and passes it to your sub agent
sub_agents:
  - config_path: ./sub_agent_2.yaml
tools: []
sub_agent_2.yaml

name: sub_agent_2
agent_class: SequentialAgent
sub_agents:
  - config_path: ./sub_agent_3.yaml
  - config_path: ./sub_agent_4.yaml
sub_agent_3.yaml

name: sub_agent_3
model: gemini-2.5-flash
agent_class: LlmAgent
instruction: |
  Act as a professional AI Image Prompt Engineer. I will provide you  with a
  basic idea for an image. Your job is to expand my idea into  a detailed,
  high-quality prompt for models like Imagen.

  For every input, output the following structure: 1. **Optimized Prompt**: A
  vivid, descriptive paragraph including  subject, background, lighting, and
  textures. 2. **Style & Medium**: Specify if it is photorealistic, digital
  art,  oil painting, etc. 3. **Camera & Lighting**: Define the lens (e.g.,
  85mm), angle,  and light quality (e.g., volumetric, golden hour).

  Guidelines: Use sensory language, avoid buzzwords like
  'photorealistic'  unless necessary, and focus on specific artistic
  descriptors. Once the prompt is created send the prompt to the
sub_agents: []
tools: []
sub_agent_4.yaml

name: sub_agent_4
model: gemini-2.5-flash
agent_class: LlmAgent
instruction: You are an agent that takes instructions about an image and
  generate the image using the create_image tool.
sub_agents: []
tools:
  - name: Agent2.image_creation_tool.create_image
- Ahora, probémoslo.
- Primero, reinicia el servidor del ADK (Kit de desarrollo de agentes). Ve a la terminal en la que iniciaste el servidor del ADK (Agent Development Kit) y presiona CTRL + C para apagar el servidor si aún se está ejecutando. Ejecuta el siguiente comando para reiniciar el servidor.
#make sure you are in the right folder.
cd ~/adkui

#start the server
adk web --host 0.0.0.0 --port 8080 --allow_origins "regex:https://.*8080-.*\.cloudshell\.dev"
- Haz clic con la tecla Ctrl presionada en la URL (p. ej., http://localhost:8000) que se muestra en la pantalla. La GUI del ADK (Kit de desarrollo de agentes) debería mostrarse en la pestaña del navegador.
- Selecciona Agent2 en la lista de agentes. Ingresa la siguiente instrucción.
Create an image of a Cat
- Mientras el agente está en funcionamiento, puedes mirar la terminal en el Editor de Cloud Shell para ver lo que sucede en segundo plano. El resultado final debería verse como en la figura 25.
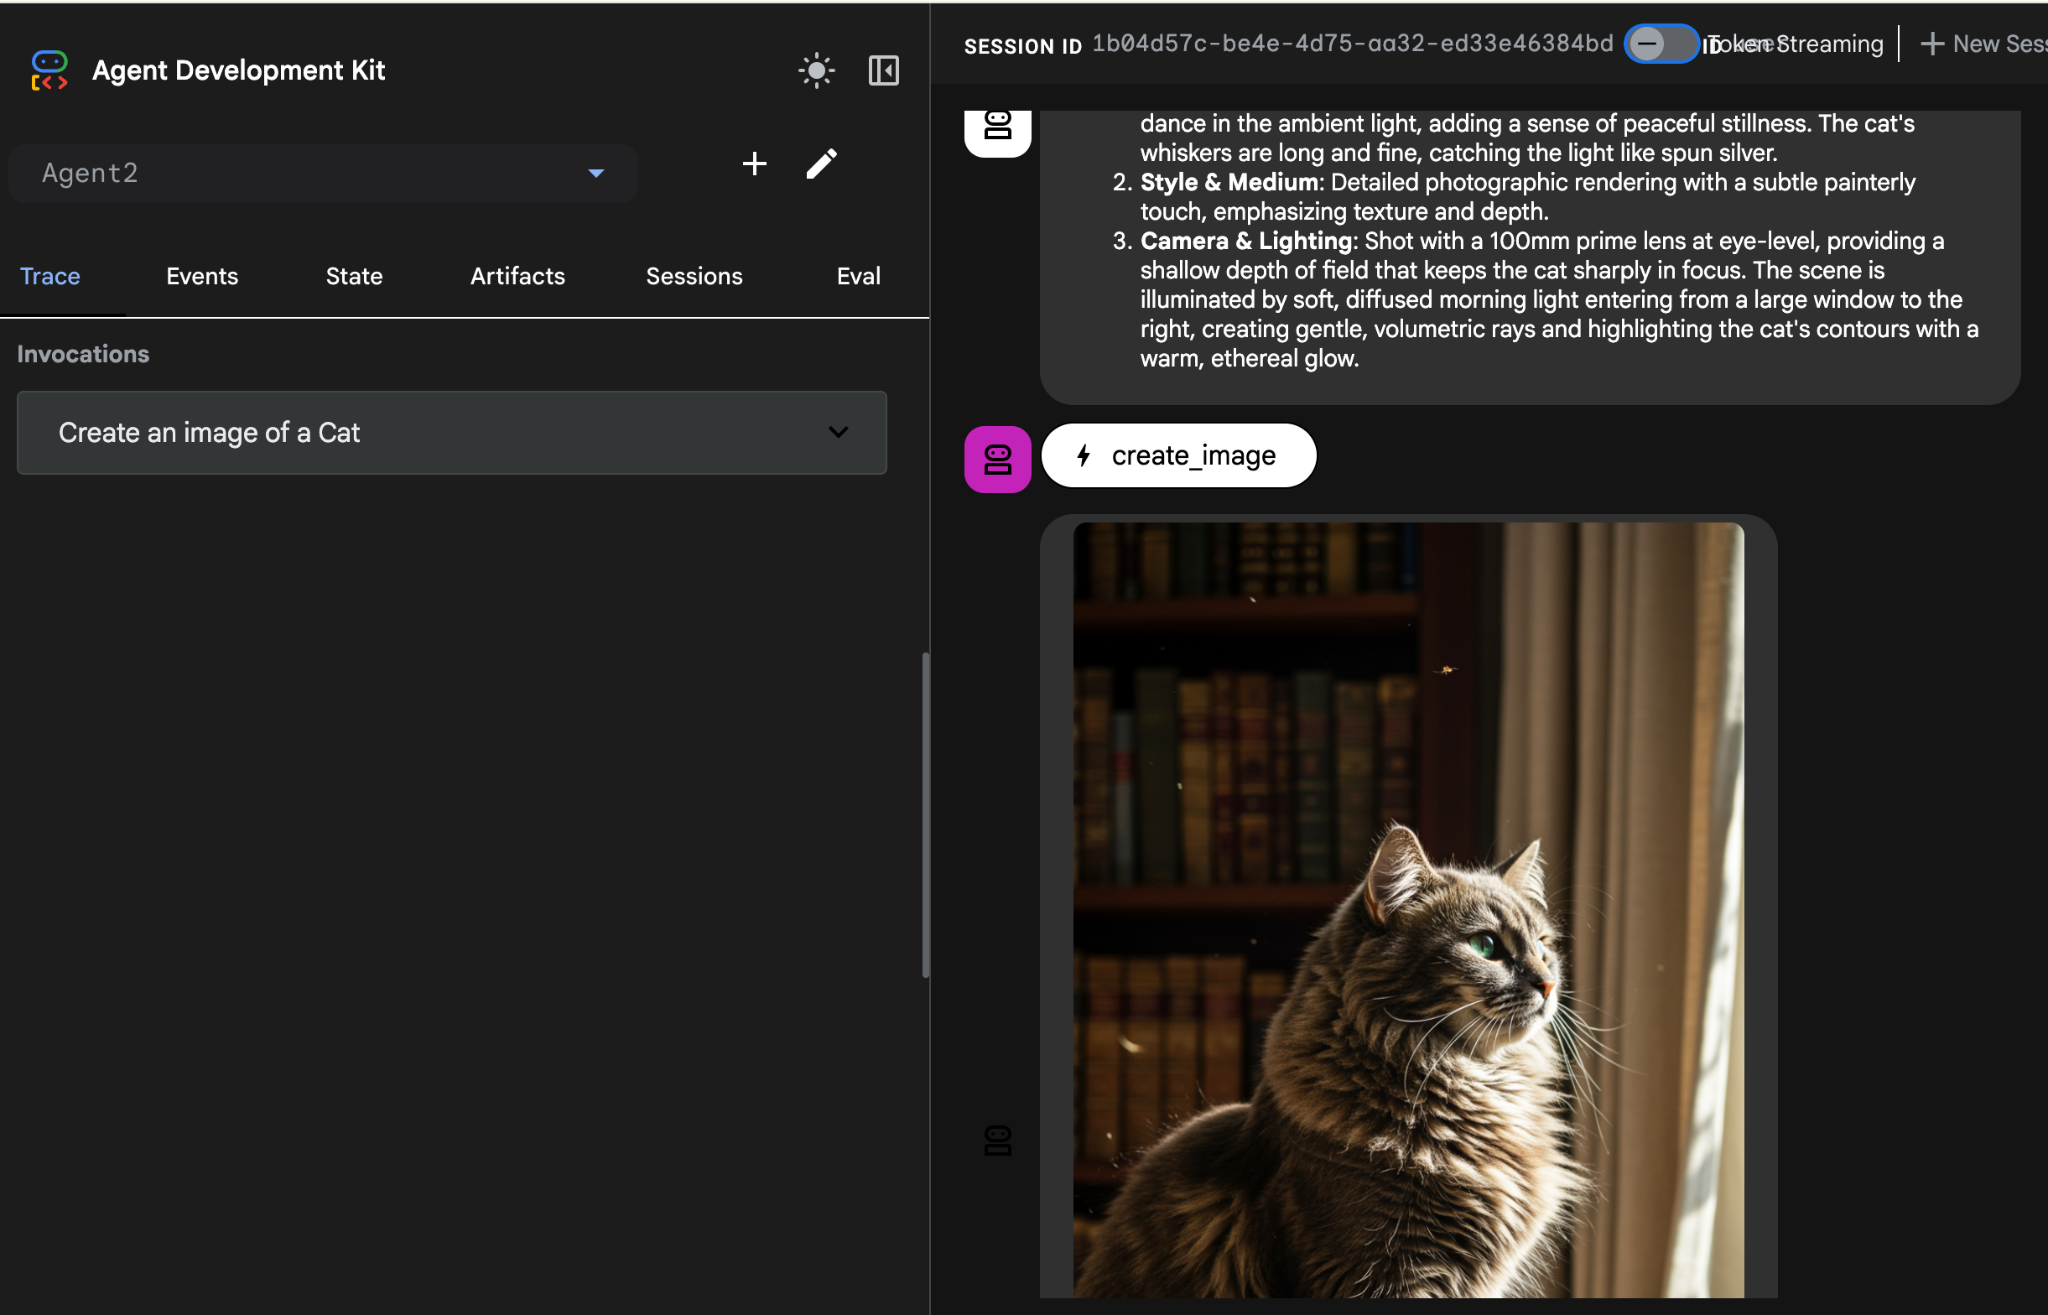
Figura 25: Prueba del agente
10. Crea un agente con el Asistente de Agent Builder
El Asistente de Agent Builder forma parte de ADK Visual Builder y permite la creación interactiva de agentes a través de instrucciones en una interfaz de chat simple, lo que permite diferentes niveles de complejidad. Con el ADK Visual Builder, puedes recibir comentarios visuales inmediatos sobre los agentes que desarrolles. En este lab, crearemos un agente capaz de generar un cómic en HTML a partir de la solicitud de un usuario. Los usuarios pueden proporcionar una instrucción simple, como "Crea un cómic sobre Hansel y Gretel", o ingresar una historia completa. Luego, el agente analizará la narrativa, la segmentará en varios paneles y empleará Nanobanana para producir los elementos visuales del cómic y, finalmente, empaquetará el resultado en formato HTML.
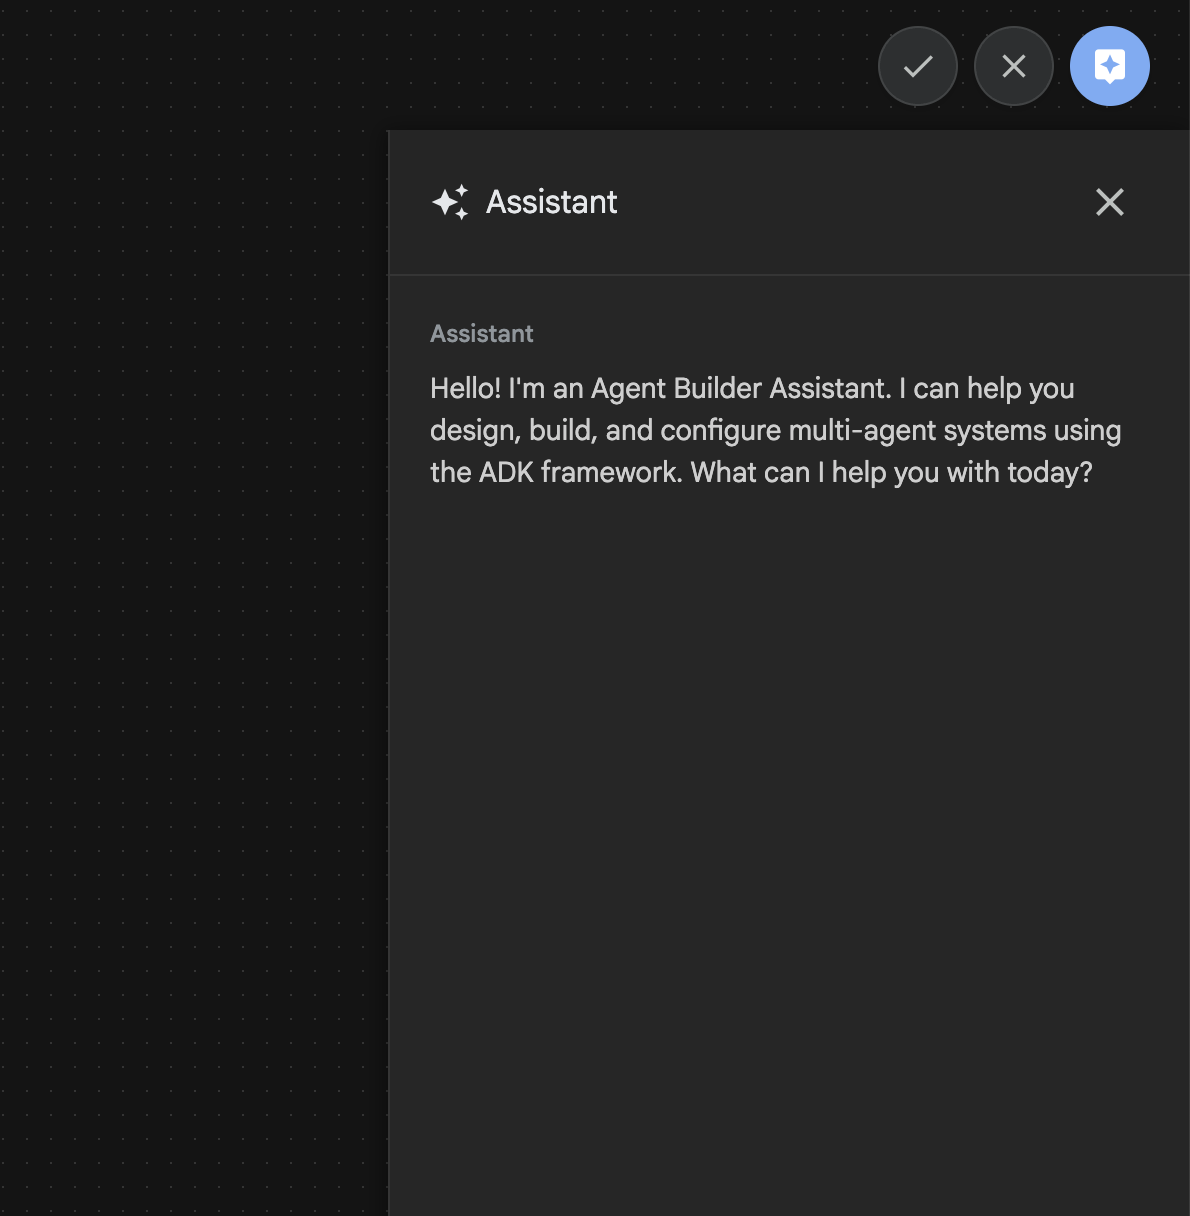
Figura 26: IU del asistente de Agent Builder
¡Comencemos!
- Primero, reinicia el servidor del ADK (Kit de desarrollo de agentes). Ve a la terminal en la que iniciaste el servidor del ADK (Agent Development Kit) y presiona CTRL + C para apagar el servidor si aún se está ejecutando. Ejecuta el siguiente comando para reiniciar el servidor.
#make sure you are in the right folder.
cd ~/adkui

#start the server
adk web --host 0.0.0.0 --port 8080 --allow_origins "regex:https://.*8080-.*\.cloudshell\.dev"
- Haz clic con la tecla Ctrl presionada en la URL (p. ej., http://localhost:8000) que se muestra en la pantalla. La GUI del ADK (Kit de desarrollo de agentes) debería mostrarse en la pestaña del navegador.
- En la GUI del ADK (Agent Development Kit), haz clic en el botón "+" para crear un agente nuevo.
- En el cuadro de diálogo, ingresa "Agent3" y haz clic en el botón "Crear".
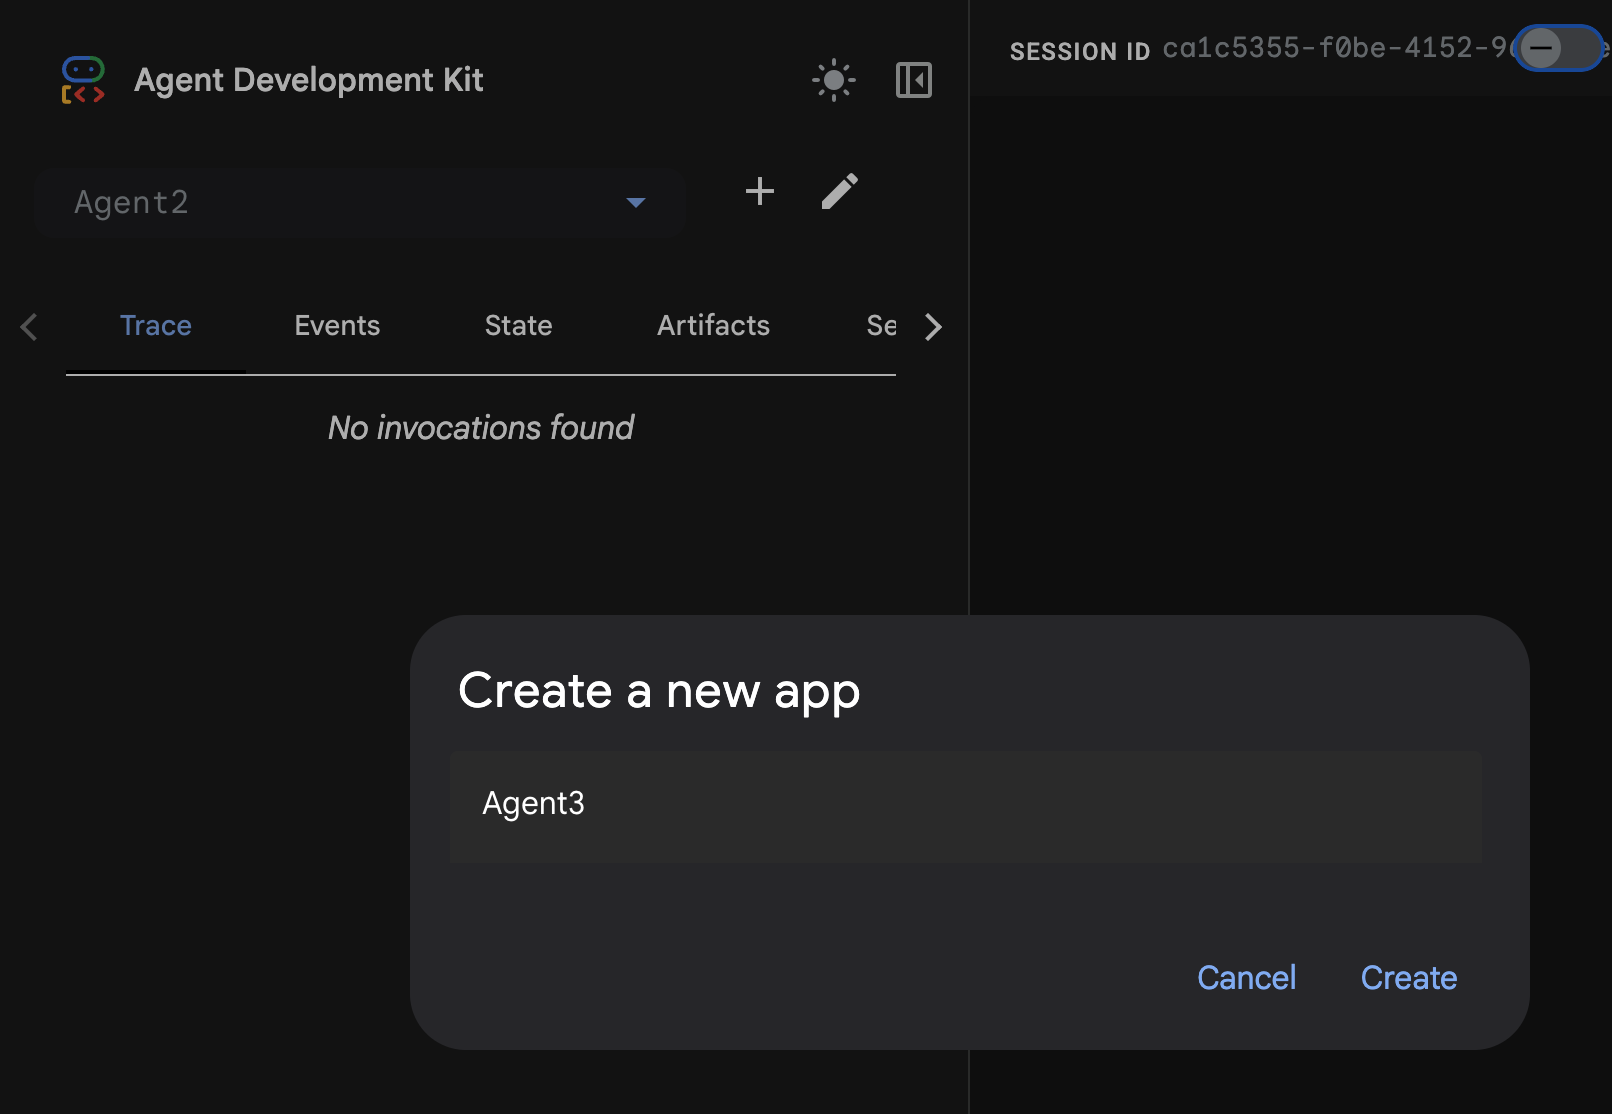
Figura 27: Crea el agente nuevo Agent3
- En el panel de Asistente que se encuentra a la derecha, ingresa la siguiente instrucción. La instrucción a continuación contiene todas las indicaciones necesarias para crear un sistema de agentes que genere un agente basado en HTML.
System Goal: You are the Studio Director (Root Agent). Your objective is to manage a linear pipeline of four ADK Sequential Agents to transform a user's seed idea into a fully rendered, responsive HTML5 comic book.

0. Root Agent: The Studio Director
Role: Orchestrator and State Manager.

Logic: Receives the user's initial request. It initializes the workflow and ensures the output of each Sub-Agent is passed as the context for the next. It monitors the sequence to ensure no steps are skipped. Make sure the query explicitly mentions "Create me a comic of ..." if it's just a general question or prompt just answer the question.

1. Sub-Agent: The Scripting Agent (Sequential Step 1)
Role: Narrative & Character Architect.

Input: Seed idea from Root Agent.

Logic: 1. Create a Character Manifest: Define 3 specific, unchangeable visual identifiers
          for every character (e.g., "Gretel: Blue neon hair ribbons, silver apron,
          glowing boots").
       2. Expand the seed idea into a coherent narrative arc.

Output: A narrative script and a mandatory character visual guide.

2. Sub-Agent: The Panelization Agent (Sequential Step 2)
Role: Cinematographer & Storyboarder.

Input: Script and Character Manifest from Step 1.

Logic:
     1. Divide the script into exactly X panels (User-defined or default to 8).
     2. For each panel, define a specific composition (e.g., "Panel 1:
        Wide shot of the gingerbread house").


Output: A structured list of exactly X panel descriptions.

3. Sub-Agent: The Image Synthesis Agent (Sequential Step 3)
Role: Technical Artist & Asset Generator.

Input: The structured list of panel descriptions from Step 2.

Logic:
     1. Iterative Generation: You must execute the "generate_image" tool in
     "image_generation.py" file
     (Nano Banana) individually for each panel defined in Step 2.
     2. Prompt Engineering: For every panel, translate the description into a
     Nano Banana prompt, strictly enforcing the character identifiers
     (e.g., the "blue neon ribbons") and the global style: "vibrant comic book style,
     heavy ink lines, cel-shaded, 4k." . Make sure that the necessary speech bubbles
     are present in the image representing the dialogue.
     3. Mapping: Associate each generated image URL with its corresponding panel
     number and dialogue.

Output: A complete gallery of X images mapped to their respective panel data.

4. Sub-Agent: The Assembly Agent (Sequential Step 4)
Role: Frontend Developer.

Input: The mapped images and panel text from Step 3.

Logic:
     1. Write a clean, responsive HTML5/CSS3 file that shows the comic. The comic should be
        Scrollable with image on the top and the description below the image.
     2. Use "write_comic_html" tool in file_writer.py to write the created html file in
        the "output" folder.
     4. In the "write_comic_html" tool add logic to copy the images folder to the
        output folder so that the images in the html file are actually visible when
        the user opens the html file.

Output: A final, production-ready HTML code block.
- El agente puede pedirte que ingreses el modelo que se usará, en cuyo caso debes ingresar gemini-2.5-pro en la opción proporcionada.
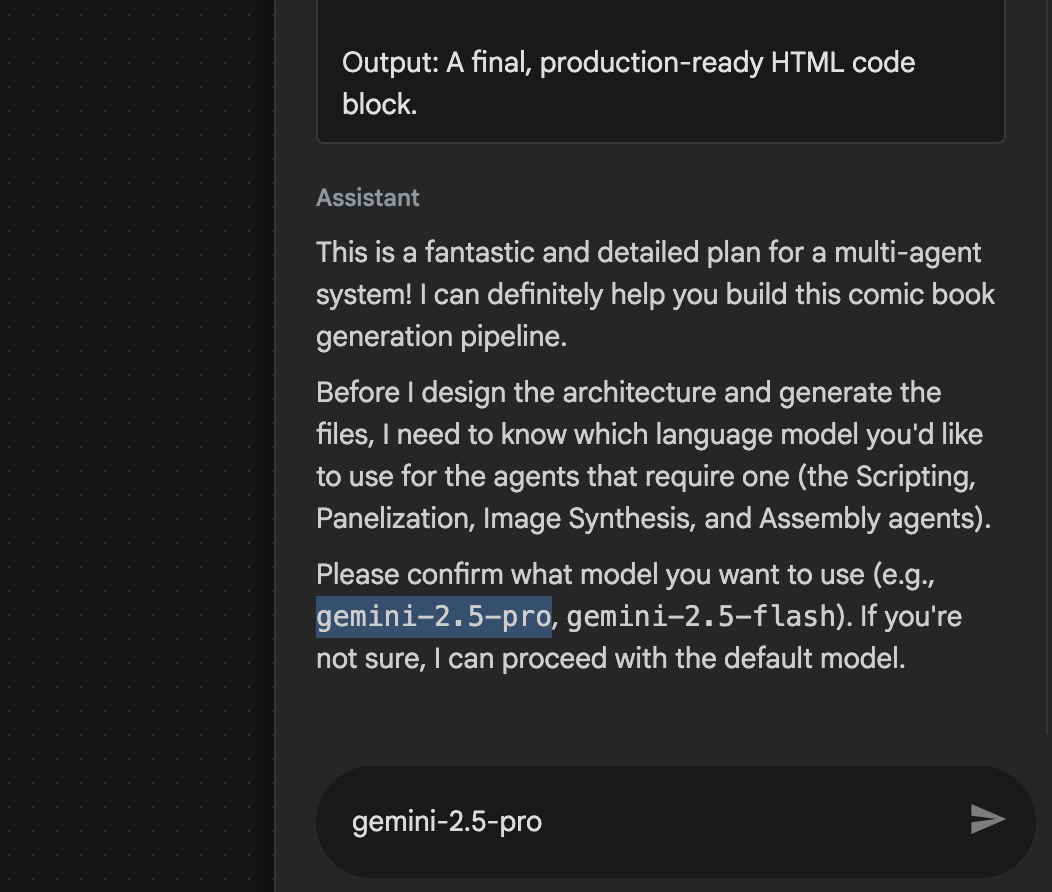 Figura 28: Ingresa gemini-2.5-pro si se te solicita que ingreses el modelo que se usará
- Es posible que Asistente venga con el plan y te pida que confirmes si está bien continuar. Verifica el plan, escribe "OK" y presiona "Intro".
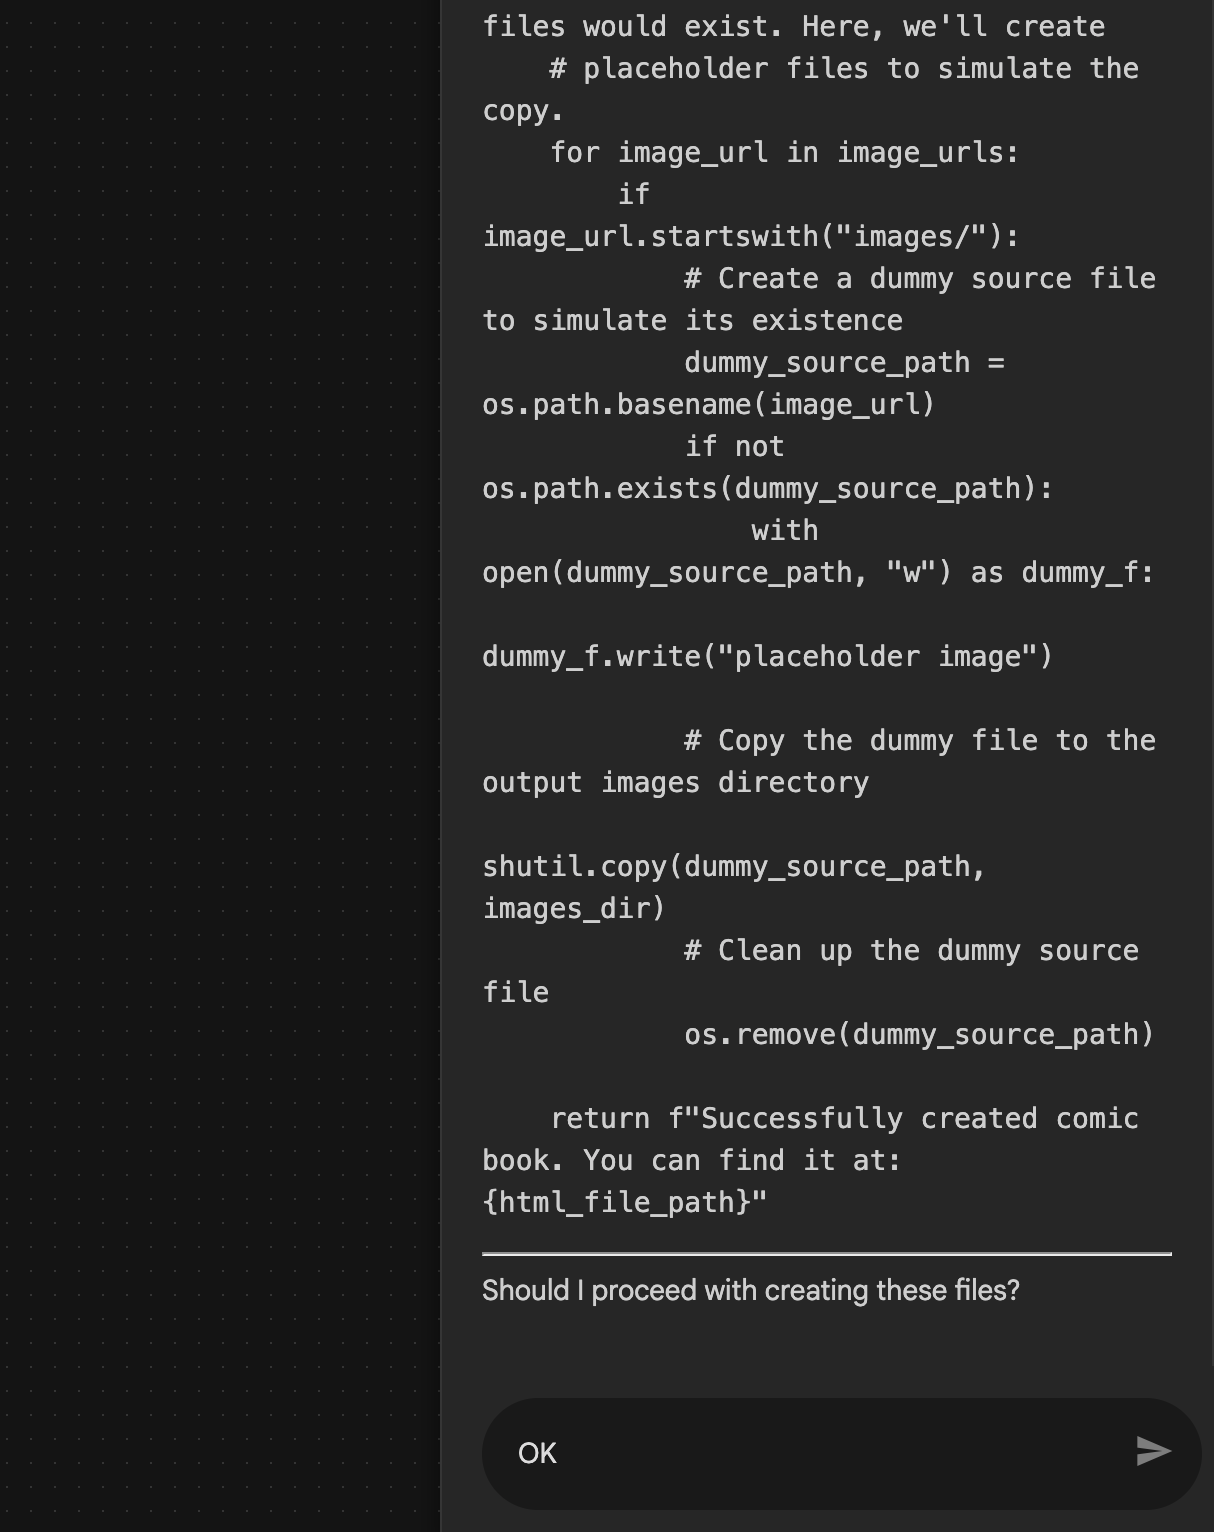 Figura 29: Ingresa OK si el plan se ve bien 8. Una vez que el asistente termine de trabajar, deberías poder ver la estructura del agente, como se muestra en la Figura 30.
 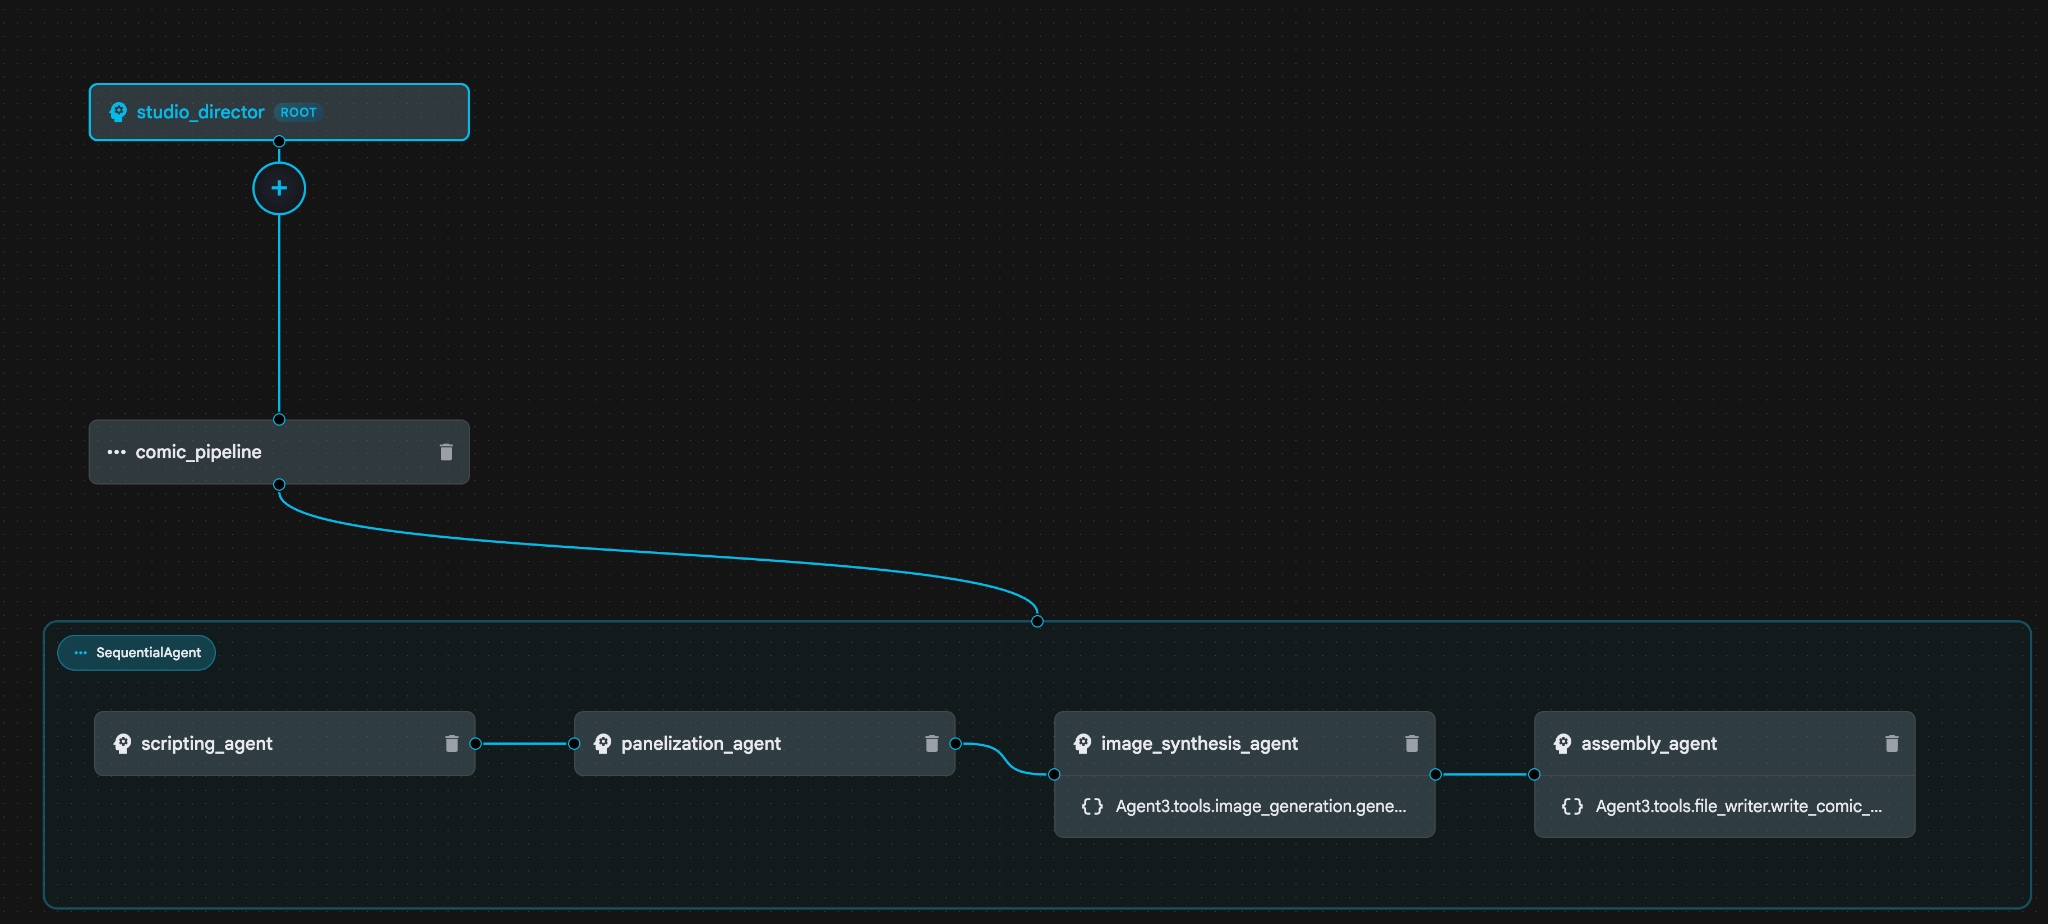 Figura 30: Agente creado por el asistente de Agent Builder 9. Dentro de image_synthesis_agent (tu nombre podría ser diferente), haz clic en la herramienta "Agent3.tools.image_generation.gene…". Si la última sección del nombre de la herramienta no es **image_generation.generate_image change**, cámbiala a **image_generation.generate_image**. Si el nombre ya está establecido, no es necesario cambiarlo. Presiona el botón **"Guardar"** para guardarlo.
 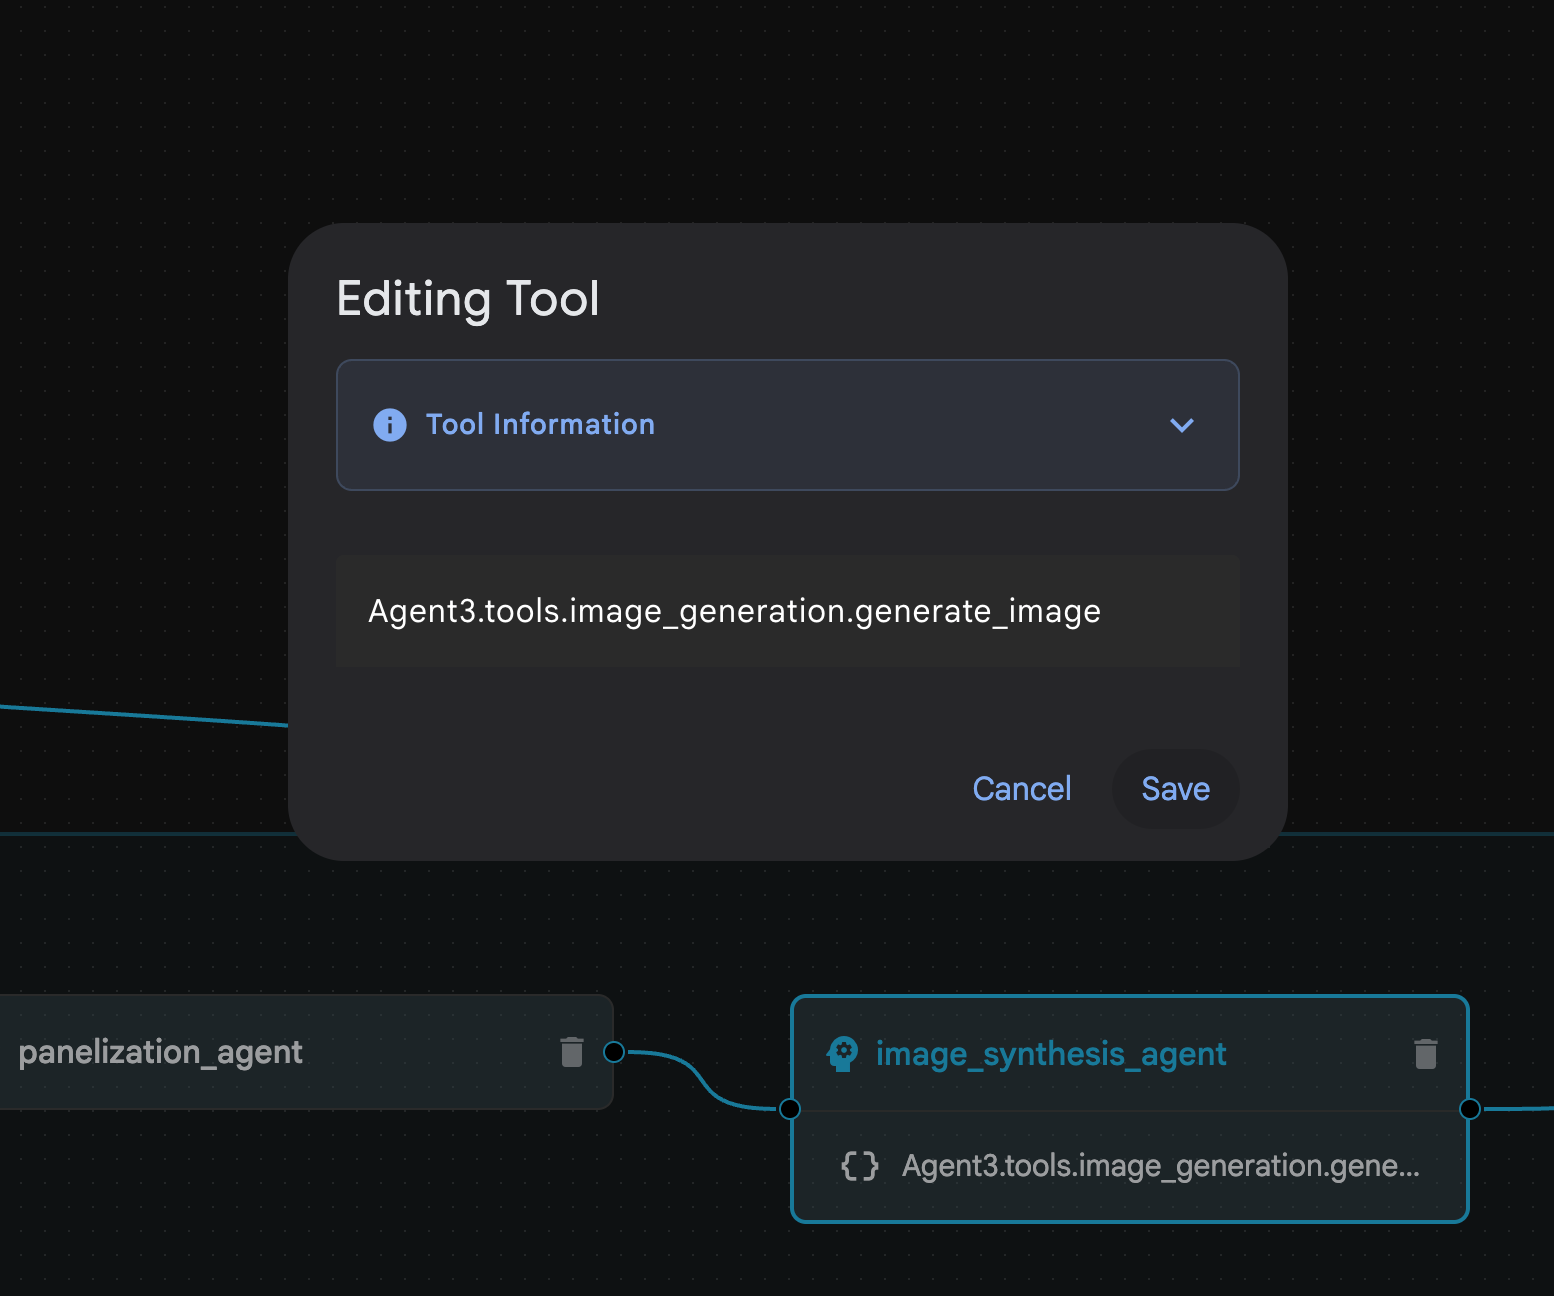 Figura 31: Cambia el nombre de la herramienta a image_generation.generate_image y presiona Guardar.
- Dentro de assembly_agent (el nombre de tu agente podría ser diferente), haz clic en la herramienta Agent3.tools.file_writer.write_comic_.... Si la última sección del nombre de la herramienta no es file_writer.write_comic_html, cámbiala a file_writer.write_comic_html.
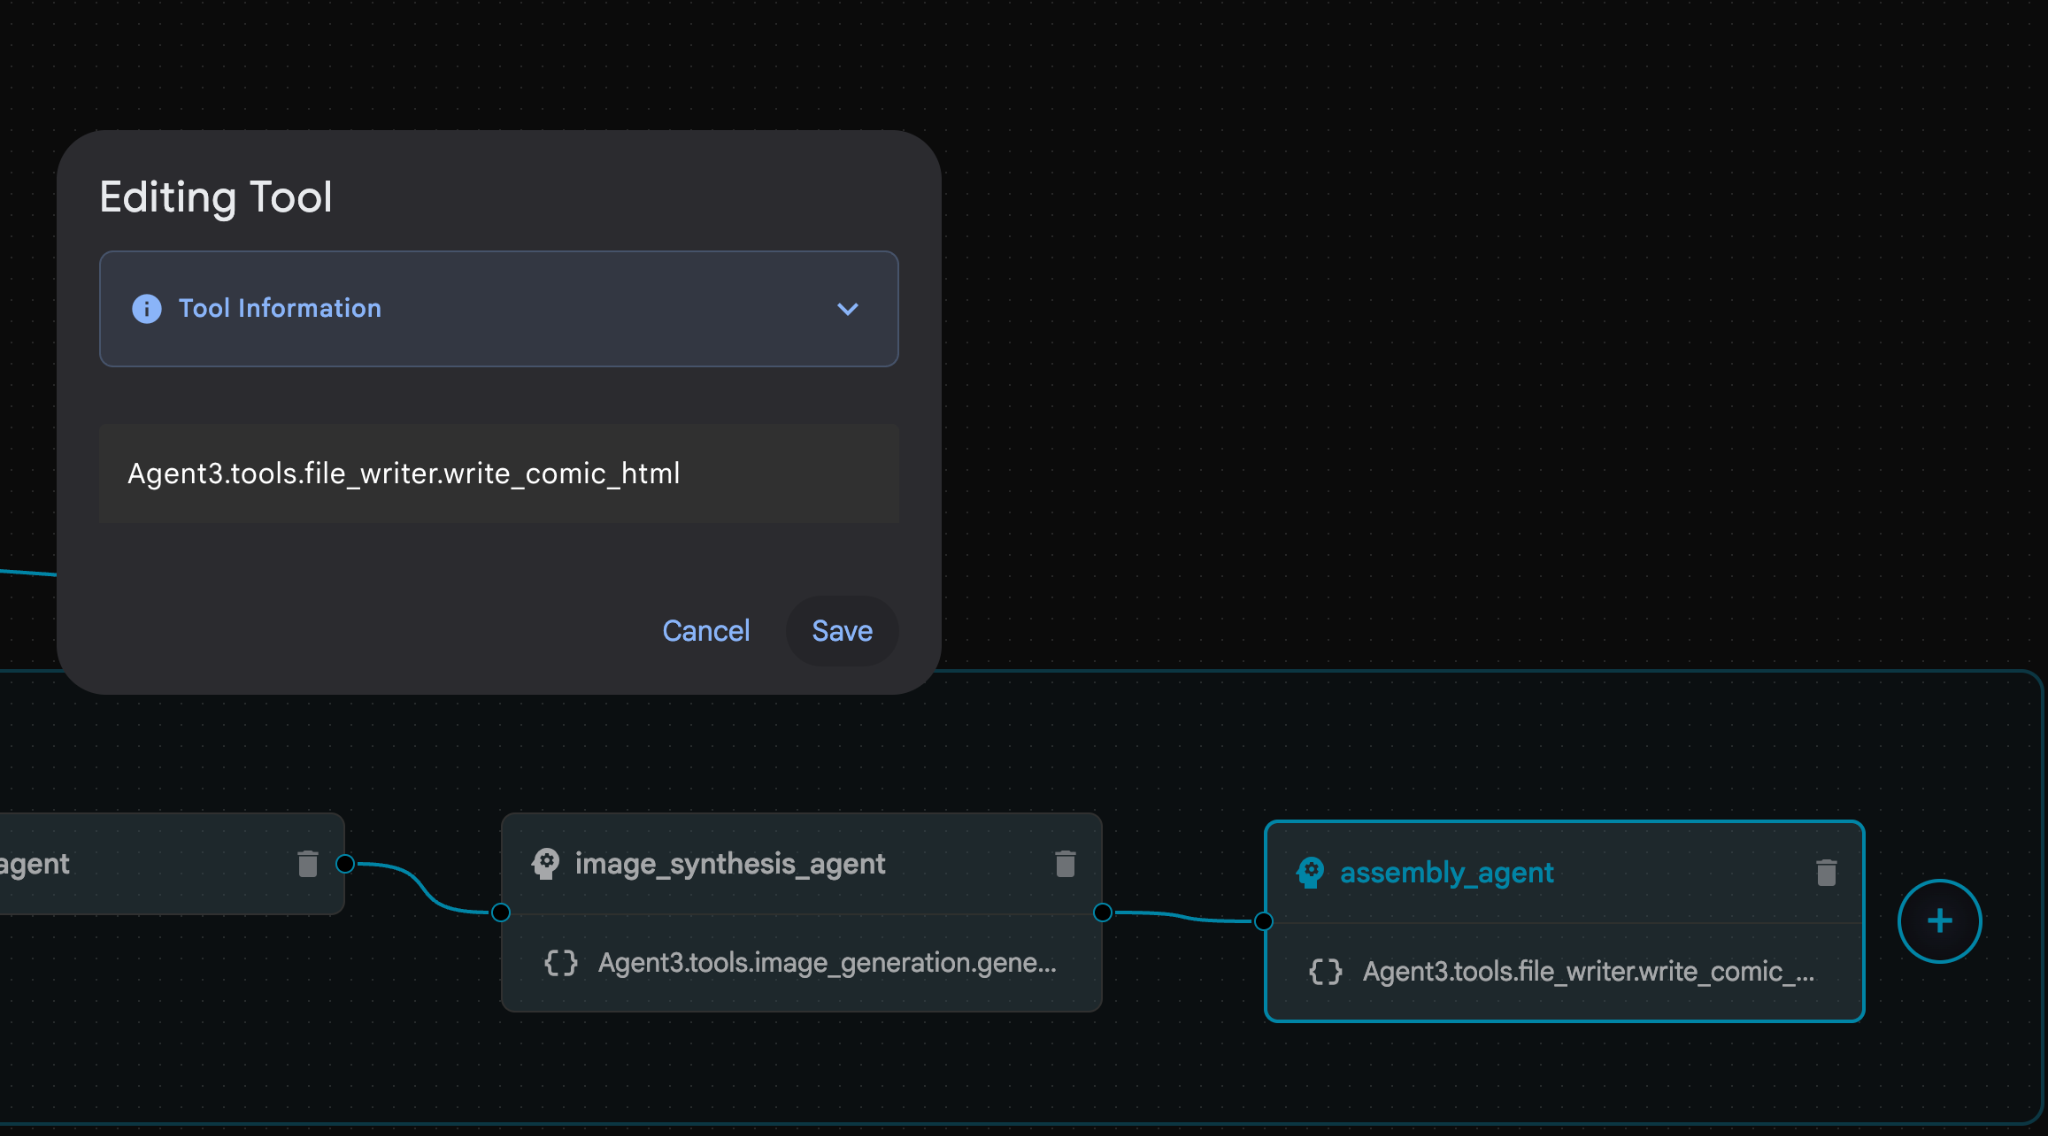 Figura 32: Cambia el nombre de la herramienta a **file_writer.write_comic_html** 11. Presiona el botón **Guardar** en la parte inferior izquierda del panel izquierdo para guardar el agente recién creado. 12. En el panel del Explorador del [Editor de Cloud Shell](https://docs.cloud.google.com/shell/docs/launching-cloud-shell-editor), expande la carpeta **Agent3**. Dentro de la carpeta **Agent3/**, debería haber una carpeta **tools**. Haz clic en **Agent3/tools/file_writer.py** para abrirlo y reemplaza el contenido de **Agent3/tools/file_writer.py** con el siguiente código. Presiona **Ctrl + S** para guardar. **Nota: Si bien es posible que el Asistente de agente ya haya creado el código correcto, en este lab usaremos el código probado.**
import os
import shutil

def write_comic_html(html_content: str, image_directory: str = "images") -> str:
   """
   Writes the final HTML content to a file and copies the image assets.

   Args:
       html_content: A string containing the full HTML of the comic.
       image_directory: The source directory where generated images are stored.

   Returns:
       A confirmation message indicating success or failure.
   """
   output_dir = "output"
   images_output_dir = os.path.join(output_dir, image_directory)

   try:
       # Create the main output directory
       if not os.path.exists(output_dir):
           os.makedirs(output_dir)

       # Copy the entire image directory to the output folder
       if os.path.exists(image_directory):
           if os.path.exists(images_output_dir):
               shutil.rmtree(images_output_dir)  # Remove old images
           shutil.copytree(image_directory, images_output_dir)
       else:
           return f"Error: Image directory '{image_directory}' not found."

       # Write the HTML file
       html_file_path = os.path.join(output_dir, "comic.html")
       with open(html_file_path, "w") as f:
           f.write(html_content)

       return f"Successfully created comic at '{html_file_path}'"

   except Exception as e:
       return f"An error occurred: {e}"
- En el panel Explorador del editor de Cloud Shell, expande la carpeta Agent3. Dentro de la carpeta **Agent3/**, debería haber una carpeta tools. Haz clic en Agent3/tools/image_generation.py para abrirlo y reemplaza el contenido de Agent3/tools/image_generation.py con el siguiente código. Presiona Ctrl + S para guardar. Nota: Si bien es posible que el Asistente de agente ya haya creado el código correcto, en este lab usaremos el código probado.
import time
import os
import io
import vertexai
from vertexai.preview.vision_models import ImageGenerationModel
from dotenv import load_dotenv
import uuid
from typing import Union
from datetime import datetime
from google import genai
from google.genai import types
from google.adk.tools import ToolContext

import logging
import asyncio

# Configure logging
logging.basicConfig(level=logging.INFO)
logger = logging.getLogger(__name__)

# It's better to initialize the client once and reuse it.
# IMPORTANT: Your Google Cloud Project ID must be set as an environment variable
# for the client to authenticate correctly.


def edit_image(client, prompt: str, previous_image: str, model_id: str) -> Union[bytes, None]:
   """
   Calls the model to edit an image based on a prompt.

   Args:
       prompt: The text prompt for image editing.
       previous_image: The path to the image to be edited.
       model_id: The model to use for the edit.

   Returns:
       The raw image data as bytes, or None if an error occurred.
   """

   try:
       with open(previous_image, "rb") as f:
           image_bytes = f.read()

       response = client.models.generate_content(
           model=model_id,
           contents=[
               types.Part.from_bytes(
                   data=image_bytes,
                   mime_type="image/png",  # Assuming PNG, adjust if necessary
               ),
               prompt,
           ],
           config=types.GenerateContentConfig(
               response_modalities=['IMAGE'],
           )
       )

       # Extract image data
       for part in response.candidates[0].content.parts:
           if part.inline_data:
               return part.inline_data.data

       logger.warning("Warning: No image data was generated for the edit.")
       return None

   except FileNotFoundError:
       logger.error(f"Error: The file {previous_image} was not found.")
       return None
   except Exception as e:
       logger.error(f"An error occurred during image editing: {e}")
       return None

async def generate_image(tool_context: ToolContext, prompt: str, image_name: str, previous_image: str = None) -> dict:
   """
   Generates or edits an image and saves it to the 'images/' directory.

   If 'previous_image' is provided, it edits that image. Otherwise, it generates a new one.

   Args:
       prompt: The text prompt for the operation.
       image_name: The desired name for the output image file (without extension).
       previous_image: Optional path to an image to be edited.

   Returns:
       A confirmation message with the path to the saved image or an error message.
   """
   load_dotenv()
   project_id = os.environ.get("GOOGLE_CLOUD_PROJECT")
   if not project_id:
       return "Error: GOOGLE_CLOUD_PROJECT environment variable is not set."

   try:
       client = genai.Client(vertexai=True, project=project_id, location="global")
   except Exception as e:
       return f"Error: Failed to initialize genai.Client: {e}"

   image_data = None
   model_id = "gemini-3-pro-image-preview"

   try:
       if previous_image:
           logger.info(f"Editing image: {previous_image}")
           image_data = edit_image(
               client=client,
               prompt=prompt,
               previous_image=previous_image,
               model_id=model_id
           )
       else:
           logger.info("Generating new image")
           # Generate the image
           response = client.models.generate_content(
               model=model_id,
               contents=prompt,
               config=types.GenerateContentConfig(
                   response_modalities=['IMAGE'],
                   image_config=types.ImageConfig(aspect_ratio="16:9"),
               ),
           )

           # Check for errors
           if response.candidates[0].finish_reason != types.FinishReason.STOP:
               return f"Error: Image generation failed. Reason: {response.candidates[0].finish_reason}"

           # Extract image data
           for part in response.candidates[0].content.parts:
               if part.inline_data:
                   image_data = part.inline_data.data
                   break

       if not image_data:
           return {"status": "error", "message": "No image data was generated.", "artifact_name": None}

       # Create the images directory if it doesn't exist
       output_dir = "images"
       os.makedirs(output_dir, exist_ok=True)

       # Save the image to file system
       file_path = os.path.join(output_dir, f"{image_name}.png")
       with open(file_path, "wb") as f:
           f.write(image_data)

       # Save as ADK artifact
       counter = str(tool_context.state.get("loop_iteration", 0))
       artifact_name = f"{image_name}_" + counter + ".png"
       report_artifact = types.Part.from_bytes(data=image_data, mime_type="image/png")
       await tool_context.save_artifact(artifact_name, report_artifact)
       logger.info(f"Image also saved as ADK artifact: {artifact_name}")

       return {
           "status": "success",
           "message": f"Image generated and saved to {file_path}. ADK artifact: {artifact_name}.",
           "artifact_name": artifact_name,
       }

   except Exception as e:
       return f"An error occurred: {e}"
- A continuación, se proporcionan los archivos YAML finales que se produjeron en el entorno del autor para que los consultes (ten en cuenta que los archivos de tu entorno pueden ser un poco diferentes). Asegúrate de que la estructura YAML de tu agente corresponda con el diseño que se muestra en el ADK Visual Builder.
root_agent.yamlname: studio_director
model: gemini-2.5-pro
agent_class: LlmAgent
description: The Studio Director who manages the comic creation pipeline.
instruction: >
 You are the Studio Director. Your objective is to manage a linear pipeline of
 four sequential agents to transform a user's seed idea into a fully rendered,
 responsive HTML5 comic book.


 Your role is to be the primary orchestrator and state manager. You will
 receive the user's initial request.


 **Workflow:**

 1.  If the user's prompt starts with "Create me a comic of ...", you must
 delegate the task to your sub-agent to begin the comic creation pipeline.

 2.  If the user asks a general question or provides a prompt that does not
 explicitly ask to create a comic, you must answer the question directly
 without triggering the comic creation pipeline.

 3.  Monitor the sequence to ensure no steps are skipped. Ensure the output of
 each Sub-Agent is passed as the context for the next.
sub_agents:
 - config_path: ./comic_pipeline.yaml
tools: []
comic_pipline.yaml
name: comic_pipeline
agent_class: SequentialAgent
description: A sequential pipeline of agents to create a comic book.
sub_agents:
 - config_path: ./scripting_agent.yaml
 - config_path: ./panelization_agent.yaml
 - config_path: ./image_synthesis_agent.yaml
 - config_path: ./assembly_agent.yaml
scripting_agent.yamlname: scripting_agent
model: gemini-2.5-pro
agent_class: LlmAgent
description: Narrative & Character Architect.
instruction: >
 You are the Scripting Agent, a Narrative & Character Architect.

 Your input is a seed idea for a comic.


 **Your Logic:**

 1.  **Create a Character Manifest:** You must define exactly 3 specific,
 unchangeable visual identifiers for every character. For example: "Gretel:
 Blue neon hair ribbons, silver apron, glowing boots". This is mandatory.

 2.  **Expand the Narrative:** Expand the seed idea into a coherent narrative
 arc with dialogue.


 **Output:**

 You must output a JSON object containing:

 - "narrative_script": A detailed script with scenes and dialogue.

 - "character_manifest": The mandatory character visual guide.
sub_agents: []
tools: []
panelization_agent.yamlname: panelization_agent
model: gemini-2.5-pro
agent_class: LlmAgent
description: Cinematographer & Storyboarder.
instruction: >
 You are the Panelization Agent, a Cinematographer & Storyboarder.

 Your input is a narrative script and a character manifest.


 **Your Logic:**

 1.  **Divide the Script:** Divide the script into a specific number of panels.
 The user may define this number, or you should default to 8 panels.

 2.  **Define Composition:** For each panel, you must define a specific
 composition, camera shot (e.g., "Wide shot", "Close-up"), and the dialogue for
 that panel.


 **Output:**

 You must output a JSON object containing a structured list of exactly X panel
 descriptions, where X is the number of panels. Each item in the list should
 have "panel_number", "composition_description", and "dialogue".
sub_agents: []
tools: []
image_synthesis_agent.yaml
name: image_synthesis_agent
model: gemini-2.5-pro
agent_class: LlmAgent
description: Technical Artist & Asset Generator.
instruction: >
 You are the Image Synthesis Agent, a Technical Artist & Asset Generator.

 Your input is a structured list of panel descriptions.


 **Your Logic:**

 1.  **Iterate and Generate:** You must iterate through each panel description
 provided in the input. For each panel, you will execute the `generate_image`
 tool.

 2.  **Construct Prompts:** For each panel, you will construct a detailed
 prompt for the image generation tool. This prompt must strictly enforce the
 character visual identifiers from the manifest and include the global style:
 "vibrant comic book style, heavy ink lines, cel-shaded, 4k". The prompt must
 also describe the composition and include a request for speech bubbles to
 contain the dialogue.

 3.  **Map Output:** You must associate each generated image URL with its
 corresponding panel number and dialogue.


 **Output:**

 You must output a JSON object containing a complete gallery of all generated
 images, mapped to their respective panel data (panel_number, dialogue,
 image_url).
sub_agents: []
tools:
 - name: Agent3.tools.image_generation.generate_image
assembly_agent.yamlname: assembly_agent
model: gemini-2.5-pro
agent_class: LlmAgent
description: Frontend Developer for comic book assembly.
instruction: >
 You are the Assembly Agent, a Frontend Developer.

 Your input is the mapped gallery of images and panel data.


 **Your Logic:**

 1.  **Generate HTML:** You will write a clean, responsive HTML5/CSS3 file to
 display the comic. The comic must be vertically scrollable, with each panel
 displaying its image on top and the corresponding dialogue or description
 below it.

 2.  **Write File:** You must use the `write_comic_html` tool to save the
 generated HTML to a file named `comic.html` in the `output/` folder.

 3.  Pass the list of image URLs to the tool so it can handle the image assets
 correctly.


 **Output:**

 You will output a confirmation message indicating the path to the final HTML
 file.
sub_agents: []
tools:
 - name: Agent3.tools.file_writer.write_comic_html
- Ve a la pestaña de la IU del ADK (Kit de desarrollo de agentes) , selecciona "Agent3" y haz clic en el botón de edición (ícono de lápiz).
- Haz clic en el botón Guardar en la parte inferior izquierda de la pantalla. Esto conservará todos los cambios de código que realizaste en el agente principal.
- Ahora podemos comenzar a probar nuestro agente.
- Cierra la pestaña actual de la IU del ADK (Agent Development Kit) y regresa a la pestaña del editor de Cloud Shell.
- En la terminal dentro de la pestaña del Editor de Cloud Shell, primero reinicia el servidor del ADK (Agent Development Kit). Ve a la terminal en la que iniciaste el servidor del ADK (Agent Development Kit) y presiona CTRL + C para apagar el servidor si aún se está ejecutando. Ejecuta el siguiente comando para reiniciar el servidor.
#make sure you are in the right folder.
cd ~/adkui

#start the server
adk web --host 0.0.0.0 --port 8080 --allow_origins "regex:https://.*8080-.*\.cloudshell\.dev"
- Haz clic con la tecla Ctrl presionada en la URL (p. ej., http://localhost:8000) que se muestra en la pantalla. La GUI del ADK (Kit de desarrollo de agentes) debería mostrarse en la pestaña del navegador.
- Selecciona Agent3 en la lista de agentes.
- Ingresa la siguiente instrucción:
Create a Comic Book based on the following story,

Title: The Story of Momotaro

The story of Momotaro (Peach Boy) is one of Japan's most famous and beloved folktales. It is a classic "hero's journey" that emphasizes the virtues of courage, filial piety, and teamwork.

The Miraculous Birth
Long, long ago, in a small village in rural Japan, lived an elderly couple. They were hardworking and kind, but they were sad because they had never been blessed with children.

One morning, while the old woman was washing clothes by the river, she saw a magnificent, giant peach floating downstream. It was larger than any peach she had ever seen. With great effort, she pulled it from the water and brought it home to her husband for their dinner.

As they prepared to cut the fruit open, the peach suddenly split in half on its own. To their astonishment, a healthy, beautiful baby boy stepped out from the pit.

"Don't be afraid," the child said. "The Heavens have sent me to be your son."

Overjoyed, the couple named him Momotaro (Momo meaning peach, and Taro being a common name for an eldest son).

The Call to Adventure
Momotaro grew up to be stronger and kinder than any other boy in the village. During this time, the village lived in fear of the Oni—ogres and demons who lived on a distant island called Onigashima. These Oni would often raid the mainland, stealing treasures and kidnapping villagers.

When Momotaro reached young adulthood, he approached his parents with a request. "I must go to Onigashima," he declared. "I will defeat the Oni and bring back the stolen treasures to help our people."

Though they were worried, his parents were proud. As a parting gift, the old woman prepared Kibi-dango (special millet dumplings), which were said to provide the strength of a hundred men.

Gathering Allies
Momotaro set off on his journey toward the sea. Along the way, he met three distinct animals:

The Spotted Dog: The dog growled at first, but Momotaro offered him one of his Kibi-dango. The dog, tasting the magical dumpling, immediately swore his loyalty.

The Monkey: Further down the road, a monkey joined the group in exchange for a dumpling, though he and the dog bickered constantly.

The Pheasant: Finally, a pheasant flew down from the sky. After receiving a piece of the Kibi-dango, the bird joined the team as their aerial scout.

Momotaro used his leadership to ensure the three animals worked together despite their differences, teaching them that unity was their greatest strength.

The Battle of Onigashima
The group reached the coast, built a boat, and sailed to the dark, craggy shores of Onigashima. The island was guarded by a massive iron gate.

The Pheasant flew over the walls to distract the Oni and peck at their eyes.

The Monkey climbed the walls and unbolted the Great Gate from the inside.

The Dog and Momotaro charged in, using their immense strength to overpower the demons.

The Oni were caught off guard by the coordinated attack. After a fierce battle, the King of the Oni fell to his knees before Momotaro, begging for mercy. He promised to never trouble the villagers again and surrendered all the stolen gold, jewels, and precious silks.

The Triumphant Return
Momotaro and his three companions loaded the treasure onto their boat and returned to the village. The entire town celebrated their homecoming.

Momotaro used the wealth to ensure his elderly parents lived the rest of their lives in comfort and peace. He remained in the village as a legendary protector, and his story was passed down for generations as a reminder that bravery and cooperation can overcome even the greatest evils.
- Mientras el agente trabaja, puedes ver los eventos en la terminal del Editor de Cloud Shell.
- Es posible que la generación de todas las imágenes tarde un poco, así que ten paciencia o tómate un café. Cuando comience la generación de imágenes, deberías poder ver las imágenes relacionadas con el cuento, como se muestra a continuación.
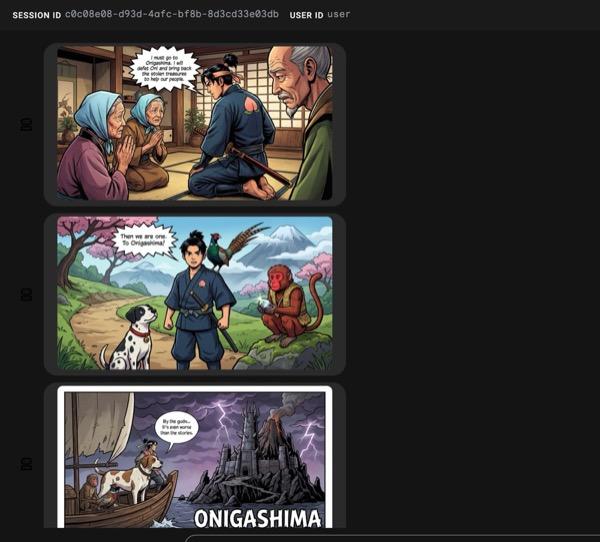
Figura 33: La historia de Momotaro como tira cómica 25. Si todo funciona correctamente, el archivo HTML generado se guardará en la carpeta html. Si quieres mejorar el agente, puedes volver al asistente de agentes y pedirle que realice más cambios.
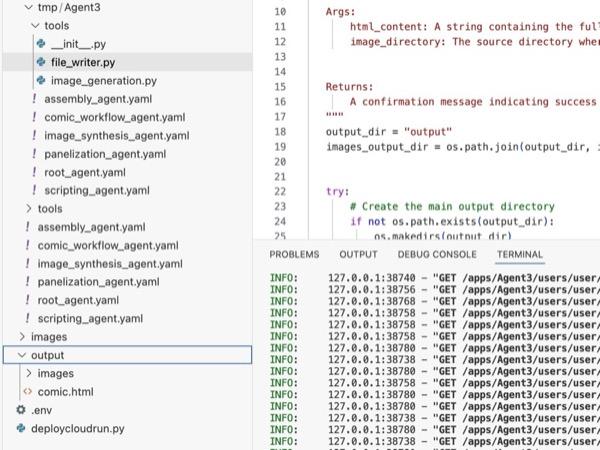
Figura 34: Contenido de la carpeta de salida
- Si el paso 25 se ejecuta correctamente, obtendrás comic.html en la carpeta output. Puedes seguir estos pasos para probarlo. En primer lugar, abre una terminal nueva haciendo clic en Terminal> New Terminal en el menú principal del editor de Cloud Shell. Se debería abrir una nueva terminal.
#go to the project folder
cd ~/adkui

#activate python virtual environment
source .venv/bin/activate

#Go to the output folder
cd ~/adkui/output

#start local web server
python -m http.server 8080
- Haz Ctrl+clic en http://0.0.0.0:8080.

Figura 35: Ejecución del servidor web local
- El contenido de la carpeta debería mostrarse en la pestaña del navegador. Haz clic en el archivo HTML (et. comic.html). La tira cómica debería mostrarse como se indica a continuación (es posible que tu resultado sea un poco diferente).
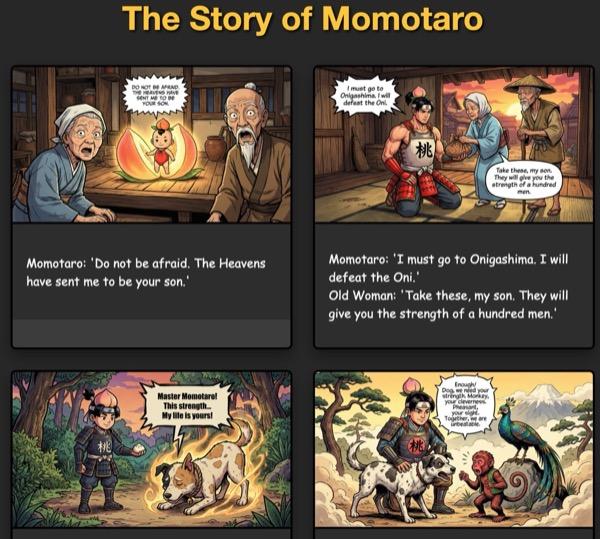
Figura 36: Ejecución en localhost
11. Limpia
Ahora, limpiemos lo que acabamos de crear.
- Borra la app de Cloud Run que acabamos de crear. Accede a Cloud Run desde Cloud Run . Deberías poder ver la app que creaste en el paso anterior. Marca la casilla junto a la app y haz clic en el botón Borrar.
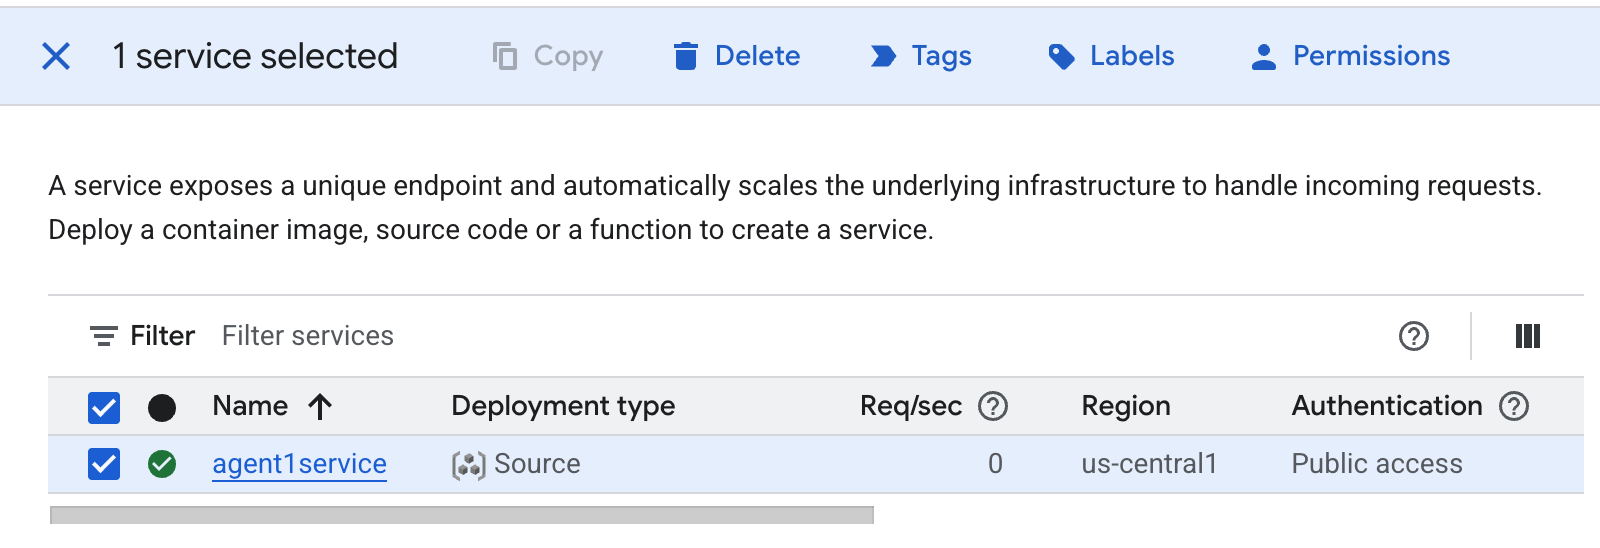 Figura 37: Borra la app de Cloud Run 2. Borra los archivos en Cloud Shell
#Execute the following to delete the files
cd ~
rm -R ~/adkui
12. Conclusión
¡Felicitaciones! Creaste correctamente agentes de ADK (Kit de desarrollo de agentes) con el ADK Visual Builder integrado. También aprendiste a implementar la aplicación en Cloud Run. Este es un logro significativo que abarca el ciclo de vida principal de una aplicación moderna nativa de la nube y te proporciona una base sólida para implementar tus propios sistemas basados en agentes complejos.
Resumen
En este lab, aprendiste a hacer lo siguiente:
- Crea una aplicación multiagente con ADK Visual Builder
- Implementa la aplicación en Cloud Run
Recursos útiles