
1. วัตถุประสงค์ของห้องทดลองนี้
ในแล็บเชิงปฏิบัตินี้ คุณจะได้เรียนรู้วิธีสร้าง Agent โดยใช้ ADK (Agent Development Kit) Visual Builder Visual Builder ของ ADK (Agent Development Kit) ช่วยให้คุณสร้าง Agent ของ ADK (Agent Development Kit) ได้โดยใช้โค้ดน้อย คุณจะได้ดูวิธีทดสอบแอปพลิเคชันในเครื่องและติดตั้งใช้งานใน Cloud Run
สิ่งที่คุณจะได้เรียนรู้
- ทำความเข้าใจพื้นฐานของ ADK (Agent Development Kit)
- ทําความเข้าใจพื้นฐานของ ADK (Agent Development Kit) Visual Builder
- ดูวิธีสร้าง Agent โดยใช้เครื่องมือ GUI
- ดูวิธีทําให้ Agent ใช้งานได้และใช้งานใน Cloud Run ได้อย่างง่ายดาย
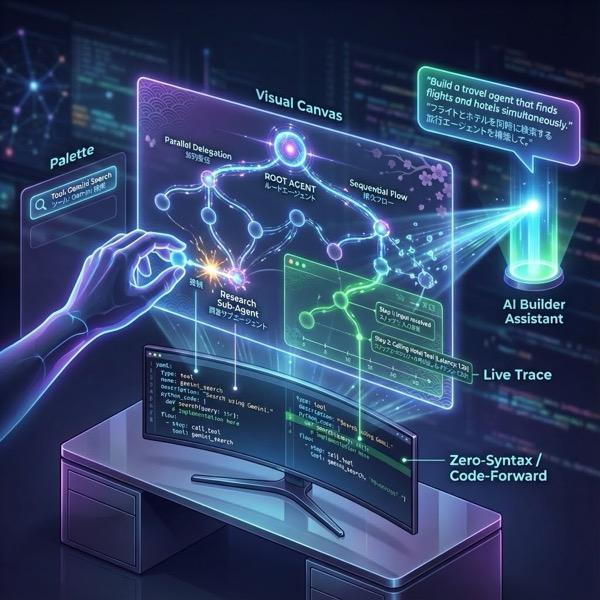
รูปที่ 1: ADK Visual Builder ช่วยให้คุณสร้าง Agent โดยใช้ GUI ที่มีโค้ดน้อยได้
2. การตั้งค่าโปรเจ็กต์
- หากยังไม่มีโปรเจ็กต์ที่ใช้ได้ คุณจะต้องสร้างโปรเจ็กต์ใหม่ในคอนโซล GCP เลือกโปรเจ็กต์ที่ตัวเลือกโปรเจ็กต์ (ด้านซ้ายบนของคอนโซล Google Cloud)
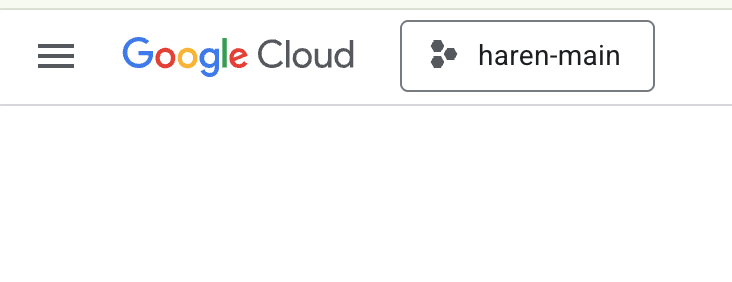
รูปที่ 2: การคลิกช่องข้างโลโก้ Google Cloud จะช่วยให้คุณเลือกโปรเจ็กต์ได้ ตรวจสอบว่าได้เลือกโปรเจ็กต์แล้ว
- ใน Lab นี้ เราจะใช้ Cloud Shell Editor เพื่อทำงาน เปิด Cloud Shell แล้วตั้งค่าโปรเจ็กต์โดยใช้ Cloud Shell
- คลิกลิงก์นี้เพื่อไปยัง Cloud Shell Editor โดยตรง
- เปิดเทอร์มินัลหากยังไม่ได้เปิดโดยคลิกเทอร์มินัล>ใหม่จากเมนู คุณเรียกใช้คำสั่งทั้งหมดในบทแนะนำนี้ได้ในเทอร์มินัลนี้
- คุณตรวจสอบได้ว่าโปรเจ็กต์ได้รับการตรวจสอบสิทธิ์แล้วหรือไม่โดยใช้คำสั่งต่อไปนี้ในเทอร์มินัล Cloud Shell
gcloud auth list
- เรียกใช้คำสั่งต่อไปนี้ใน Cloud Shell เพื่อยืนยันโปรเจ็กต์
gcloud config list project
- คัดลอกรหัสโปรเจ็กต์และใช้คำสั่งต่อไปนี้เพื่อตั้งค่า
gcloud config set project <YOUR_PROJECT_ID>
- หากจำรหัสโปรเจ็กต์ไม่ได้ คุณสามารถแสดงรหัสโปรเจ็กต์ทั้งหมดได้โดยใช้คำสั่งต่อไปนี้
gcloud projects list
3. เปิดใช้ API
เราต้องเปิดใช้บริการ API บางอย่างเพื่อเรียกใช้แล็บนี้ เรียกใช้คำสั่งต่อไปนี้ใน Cloud Shell
gcloud services enable aiplatform.googleapis.com
gcloud services enable cloudresourcemanager.googleapis.com
ขอแนะนำ API
- Vertex AI API (
aiplatform.googleapis.com) ช่วยให้เข้าถึงแพลตฟอร์ม Vertex AI ได้ ซึ่งจะช่วยให้แอปพลิเคชันของคุณโต้ตอบกับโมเดล Gemini เพื่อสร้างข้อความ เซสชันแชท และการเรียกใช้ฟังก์ชันได้ - Cloud Resource Manager API (
cloudresourcemanager.googleapis.com) ช่วยให้คุณจัดการข้อมูลเมตาสำหรับโปรเจ็กต์ Google Cloud แบบเป็นโปรแกรมได้ เช่น รหัสและชื่อโปรเจ็กต์ ซึ่งมักจะต้องใช้ในเครื่องมือและ SDK อื่นๆ เพื่อยืนยันข้อมูลประจำตัวและสิทธิ์ของโปรเจ็กต์
4. ยืนยันว่าระบบใช้เครดิตของคุณแล้ว
ในขั้นตอนการตั้งค่าโปรเจ็กต์ คุณได้สมัครรับเครดิตฟรีที่ช่วยให้คุณใช้บริการใน Google Cloud ได้ เมื่อใช้เครดิต ระบบจะสร้างบัญชีสำหรับการเรียกเก็บเงินฟรีใหม่ชื่อ "บัญชีสำหรับการเรียกเก็บเงินช่วงทดลองใช้ Google Cloud Platform" หากต้องการตรวจสอบว่ามีการใช้เครดิตแล้ว ให้ทำตามขั้นตอนต่อไปนี้ในโปรแกรมแก้ไข Cloud Shell
curl -s https://raw.githubusercontent.com/haren-bh/gcpbillingactivate/main/activate.py | python3
หากสำเร็จ คุณควรจะเห็นผลลัพธ์ดังด้านล่าง หากเห็นข้อความ "ลิงก์โปรเจ็กต์สำเร็จ" แสดงว่าได้ตั้งค่าบัญชีสำหรับการเรียกเก็บเงินอย่างถูกต้องแล้ว การทำตามขั้นตอนข้างต้นจะช่วยให้คุณตรวจสอบได้ว่าบัญชีลิงก์อยู่หรือไม่ หากยังไม่ได้ลิงก์ ระบบจะลิงก์ให้คุณ หากคุณยังไม่ได้เลือกโปรเจ็กต์ ระบบจะแจ้งให้คุณเลือกโปรเจ็กต์ หรือคุณจะเลือกโปรเจ็กต์ล่วงหน้าได้โดยทำตามขั้นตอนในการตั้งค่าโปรเจ็กต์ 
รูปที่ 3: การยืนยันการลิงก์บัญชีสำหรับการเรียกเก็บเงิน
5. ข้อมูลเบื้องต้นเกี่ยวกับ Agent Development Kit
Agent Development Kit มีข้อดีหลักๆ หลายประการสำหรับนักพัฒนาแอปที่สร้างแอปพลิเคชันแบบเอเจนต์
- ระบบ Multi-Agent: สร้างแอปพลิเคชันแบบโมดูลาร์และปรับขนาดได้โดยการรวมเอเจนต์เฉพาะทางหลายตัวในลำดับชั้น เปิดใช้การประสานงานและการมอบหมายที่ซับซ้อน
- ระบบนิเวศของเครื่องมือที่หลากหลาย: ติดตั้งความสามารถที่หลากหลายให้กับ Agent: ใช้เครื่องมือที่สร้างไว้ล่วงหน้า (ค้นหา, การดำเนินการโค้ด ฯลฯ) สร้างฟังก์ชันที่กำหนดเอง ผสานรวมเครื่องมือจากเฟรมเวิร์ก Agent ของบุคคลที่สาม (LangChain, CrewAI) หรือแม้แต่ใช้ Agent อื่นๆ เป็นเครื่องมือ
- การจัดการเป็นกลุ่มที่ยืดหยุ่น: กำหนดเวิร์กโฟลว์โดยใช้ Agent เวิร์กโฟลว์ (
SequentialAgent,ParallelAgentและLoopAgent) สำหรับไปป์ไลน์ที่คาดการณ์ได้ หรือใช้ประโยชน์จากการกำหนดเส้นทางแบบไดนามิกที่ขับเคลื่อนด้วย LLM (การโอนLlmAgent) เพื่อให้มีลักษณะการทำงานที่ปรับเปลี่ยนได้ - ประสบการณ์ของนักพัฒนาซอฟต์แวร์แบบบูรณาการ: พัฒนา ทดสอบ และแก้ไขข้อบกพร่องในเครื่องด้วย CLI ที่มีประสิทธิภาพและ UI สำหรับนักพัฒนาซอฟต์แวร์แบบอินเทอร์แอกทีฟ ตรวจสอบเหตุการณ์ สถานะ และขั้นตอนการดำเนินการของเอเจนต์ทีละขั้นตอน
- การประเมินในตัว: ประเมินประสิทธิภาพของเอเจนต์อย่างเป็นระบบโดยการประเมินทั้งคุณภาพของคำตอบสุดท้ายและเส้นทางการดำเนินการแบบทีละขั้นตอนเทียบกับกรณีทดสอบที่กำหนดไว้ล่วงหน้า
- พร้อมใช้งาน: สร้างคอนเทนเนอร์และติดตั้งใช้งาน Agent ได้ทุกที่ ไม่ว่าจะเรียกใช้ในเครื่อง ปรับขนาดด้วย Vertex AI Agent Engine หรือผสานรวมเข้ากับโครงสร้างพื้นฐานที่กำหนดเองโดยใช้ Cloud Run หรือ Docker
แม้ว่า SDK หรือเฟรมเวิร์กเอเจนต์ Gen AI อื่นๆ จะช่วยให้คุณค้นหาโมเดลและแม้กระทั่งเพิ่มประสิทธิภาพด้วยเครื่องมือต่างๆ ได้ แต่การประสานงานแบบไดนามิกระหว่างโมเดลหลายๆ โมเดลนั้นต้องใช้ความพยายามอย่างมากในฝั่งของคุณ
Agent Development Kit มีเฟรมเวิร์กระดับสูงกว่าเครื่องมือเหล่านี้ ซึ่งช่วยให้คุณเชื่อมต่อ Agent หลายตัวเข้าด้วยกันได้อย่างง่ายดายเพื่อเวิร์กโฟลว์ที่ซับซ้อนแต่ดูแลรักษาง่าย
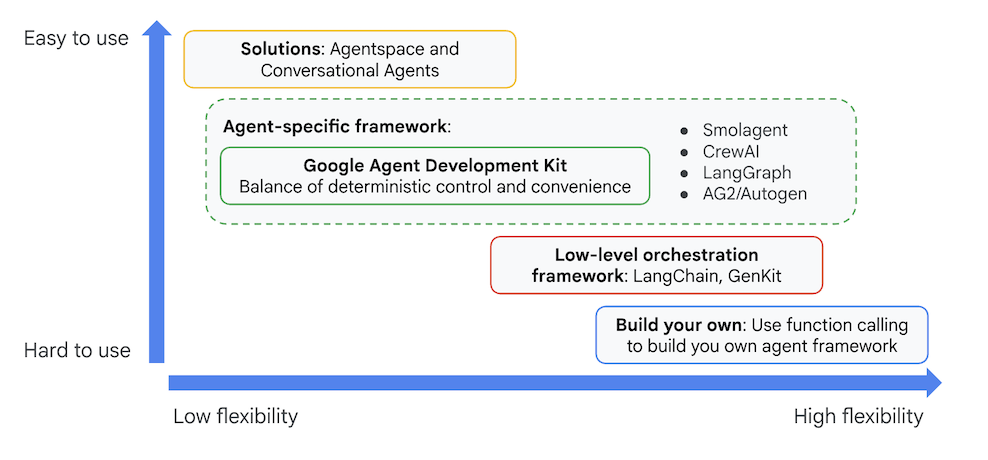
รูปที่ 4: ตำแหน่งของ ADK (Agent Development Kit)
ในเวอร์ชันล่าสุด เราได้เพิ่มเครื่องมือ ADK Visual Builder ลงใน ADK (Agent Development Kit) ซึ่งช่วยให้คุณสร้าง Agent ADK (Agent Development Kit) ได้โดยใช้โค้ดน้อย ใน Lab นี้ เราจะมาเจาะลึกเครื่องมือ ADK Visual Builder
6. ติดตั้ง ADK และตั้งค่าสภาพแวดล้อม
ก่อนอื่นเราต้องตั้งค่าสภาพแวดล้อมเพื่อให้เรียกใช้ ADK (Agent Development Kit) ได้ ใน Lab นี้ เราจะเรียกใช้ ADK (Agent Development Kit) และทำงานทั้งหมดใน Google Cloud ใน Cloud Shell Editor
เตรียม Cloud Shell Editor
- คลิกลิงก์นี้เพื่อไปยัง Cloud Shell Editor โดยตรง
- คลิกต่อไป
- เมื่อได้รับข้อความแจ้งให้ให้สิทธิ์ Cloud Shell ให้คลิกให้สิทธิ์
- ตลอดช่วงที่เหลือของแล็บนี้ คุณสามารถทำงานในหน้าต่างนี้เป็น IDE ด้วย Cloud Shell Editor และเทอร์มินัล Cloud Shell
- เปิดเทอร์มินัลใหม่โดยใช้เทอร์มินัล>เทอร์มินัลใหม่ใน Cloud Shell Editor คำสั่งทั้งหมดด้านล่างจะทำงานในเทอร์มินัลนี้
เริ่ม ADK Visual Editor
- เรียกใช้คำสั่งต่อไปนี้เพื่อโคลนแหล่งข้อมูลที่จำเป็นจาก GitHub และติดตั้งไลบรารีที่จำเป็น เรียกใช้คำสั่งในเทอร์มินัลที่เปิดใน Cloud Shell Editor
#create the project directory
mkdir ~/adkui
cd ~/adkui
- เราจะใช้ uv เพื่อสร้างสภาพแวดล้อม Python (เรียกใช้ในเทอร์มินัลของ Cloud Shell Editor)
#Install uv if you do not have installed yet
pip install uv

#go to the project directory
cd ~/adkui

#Create the virtual environment
uv venv


#use the newly created environment
source .venv/bin/activate

#install libraries
uv pip install google-adk==1.22.1
uv pip install python-dotenv
หมายเหตุ: หากต้องรีสตาร์ทเทอร์มินัล โปรดตรวจสอบว่าได้ตั้งค่าสภาพแวดล้อม Python โดยการเรียกใช้ "source .venv/bin/activate"
- ในโปรแกรมแก้ไข ให้ไปที่มุมมอง -> สลับไฟล์ที่ซ่อนอยู่ และในโฟลเดอร์ adkui ให้สร้างไฟล์ .env ที่มีเนื้อหาต่อไปนี้
#go to adkui folder
cd ~/adkui
cat <<EOF>> .env
GOOGLE_GENAI_USE_VERTEXAI=1
GOOGLE_CLOUD_PROJECT=$(gcloud config get-value project)
GOOGLE_CLOUD_LOCATION=us-central1
IMAGEN_MODEL="imagen-3.0-generate-002"
GENAI_MODEL="gemini-2.5-flash"
EOF
7. สร้าง Agent แบบง่ายด้วย ADK Visual Builder
ในส่วนนี้ เราจะสร้าง Agent อย่างง่ายโดยใช้ ADK Visual Builder ซึ่งเป็นเครื่องมือบนเว็บที่ให้สภาพแวดล้อมการออกแบบเวิร์กโฟลว์แบบภาพสำหรับการสร้างและจัดการ Agent ADK (Agent Development Kit) ซึ่งช่วยให้คุณออกแบบ สร้าง และทดสอบเอเจนต์ในอินเทอร์เฟซแบบกราฟิกที่เป็นมิตรต่อผู้เริ่มต้น รวมถึงมีผู้ช่วยที่ทำงานด้วยระบบ AI เพื่อช่วยคุณสร้างเอเจนต์
รูปที่ 5: ADK Visual Builder
- กลับไปที่ไดเรกทอรีระดับบนสุด adkui ในเทอร์มินัล แล้วเรียกใช้คำสั่งต่อไปนี้เพื่อเรียกใช้ Agent ในเครื่อง (เรียกใช้ในเทอร์มินัล Cloud Shell Editor) คุณควรจะเริ่มเซิร์ฟเวอร์ ADK และเห็นผลลัพธ์ที่คล้ายกับรูปที่ 6 ในเทอร์มินัลได้
#go to the directory adkui
cd ~/adkui
# Run the following command to run ADK locally
adk web
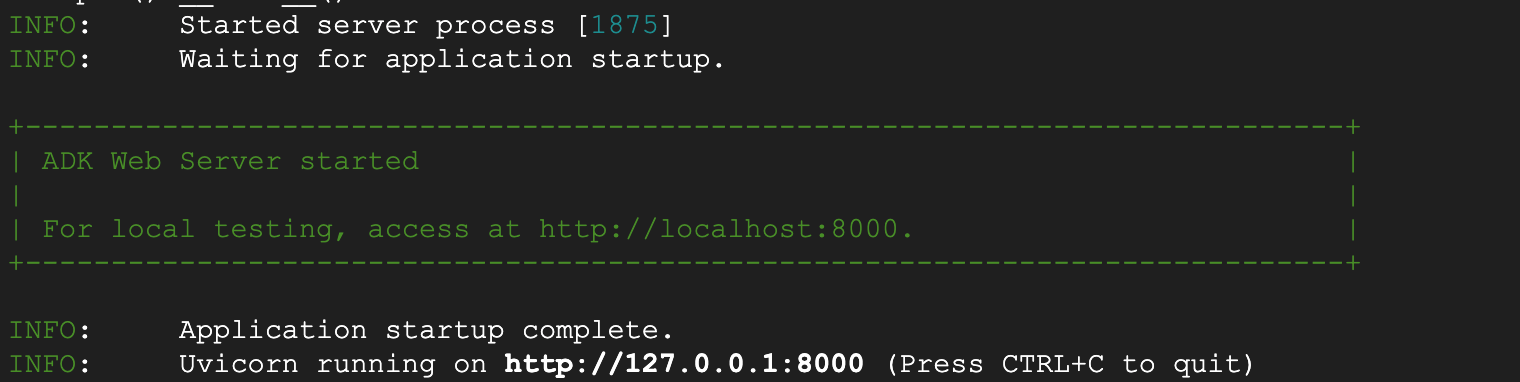
รูปที่ 6: การเริ่มต้นแอปพลิเคชัน ADK
- Ctrl+คลิก (CMD+คลิกสำหรับ MacOS) ที่ URL http:// ที่แสดงในเทอร์มินัลเพื่อเปิดเครื่องมือ GUI ที่ใช้เบราว์เซอร์ของ ADK (Agent Development Kit)
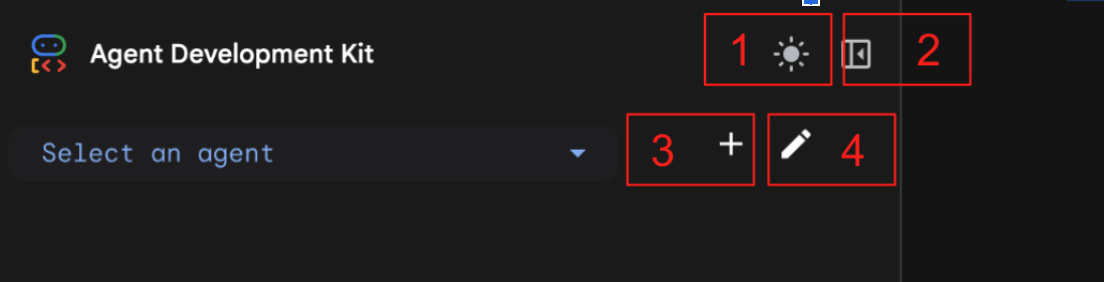
รูปที่ 7: UI ทางเว็บของ ADK, ADK มีคอมโพเนนต์ต่อไปนี้ 1: สลับโหมดสว่างและโหมดมืด 2: ยุบแผง 3: สร้าง Agent 4: แก้ไข Agent
- หากต้องการสร้างเอเจนต์ใหม่ ให้กดปุ่ม "+"
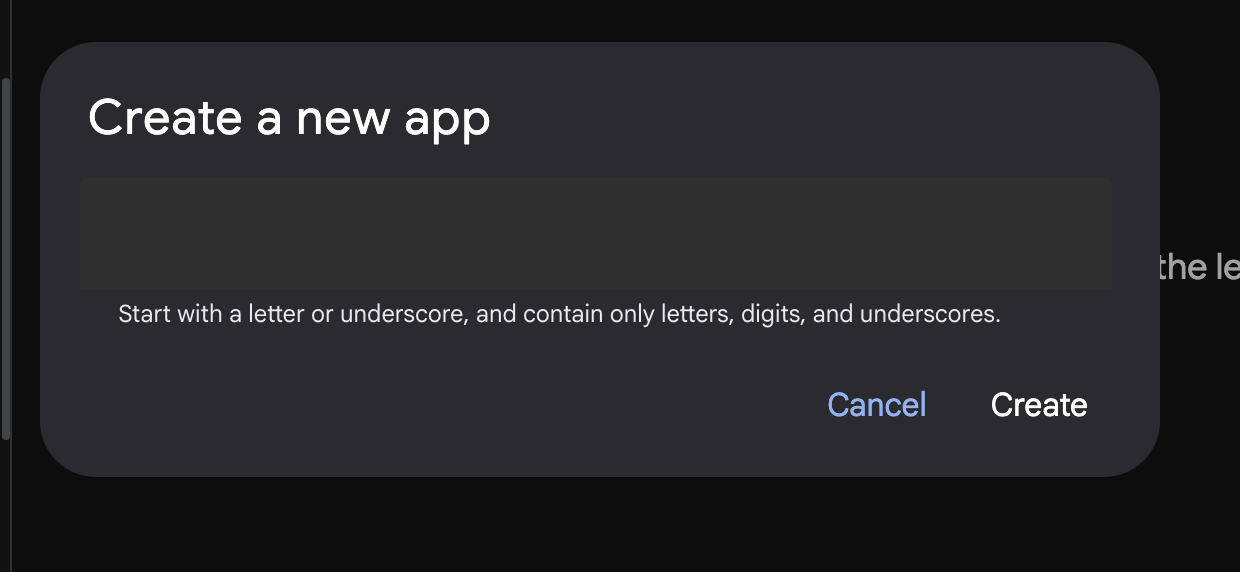
รูปที่ 8: กล่องโต้ตอบเพื่อสร้างแอปใหม่
- ตั้งชื่อว่า "Agent1" แล้วสร้าง
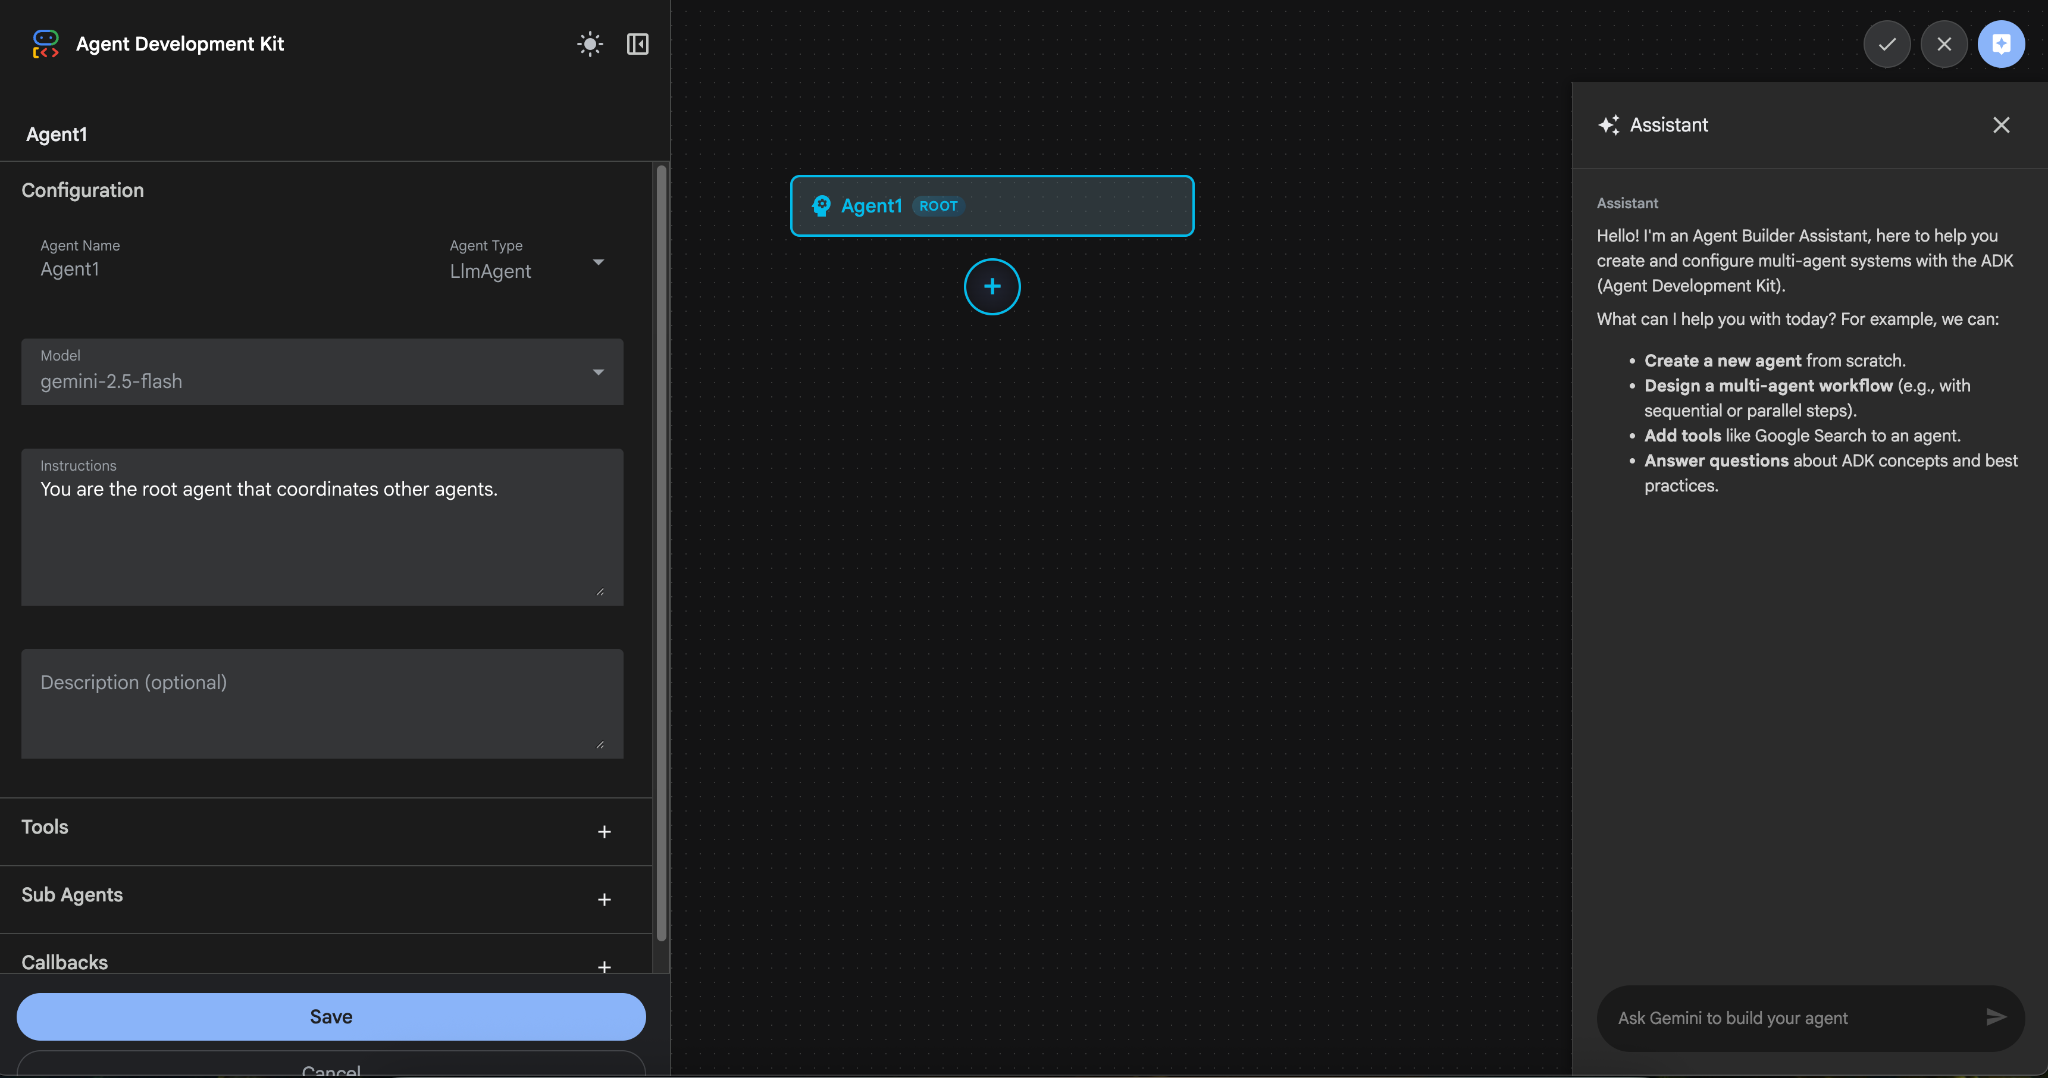
รูปที่ 9: UI สำหรับเครื่องมือสร้างเอเจนต์
- แผงนี้แบ่งออกเป็น 3 ส่วนหลัก ได้แก่ ด้านซ้ายมีตัวควบคุมสำหรับการสร้างเอเจนต์แบบ GUI ตรงกลางแสดงภาพความคืบหน้า และด้านขวามีผู้ช่วยสำหรับการสร้างเอเจนต์โดยใช้ภาษาธรรมชาติ
- สร้าง Agent เรียบร้อยแล้ว คลิกปุ่มบันทึกเพื่อดำเนินการต่อ (หมายเหตุ: คุณต้องกดบันทึกเพื่อไม่ให้การเปลี่ยนแปลงสูญหาย)
- ตอนนี้เอเจนต์ควรพร้อมสำหรับการทดสอบแล้ว หากต้องการเริ่มต้น ให้ป้อนพรอมต์ในช่องแชท เช่น
Hi, what can you do?
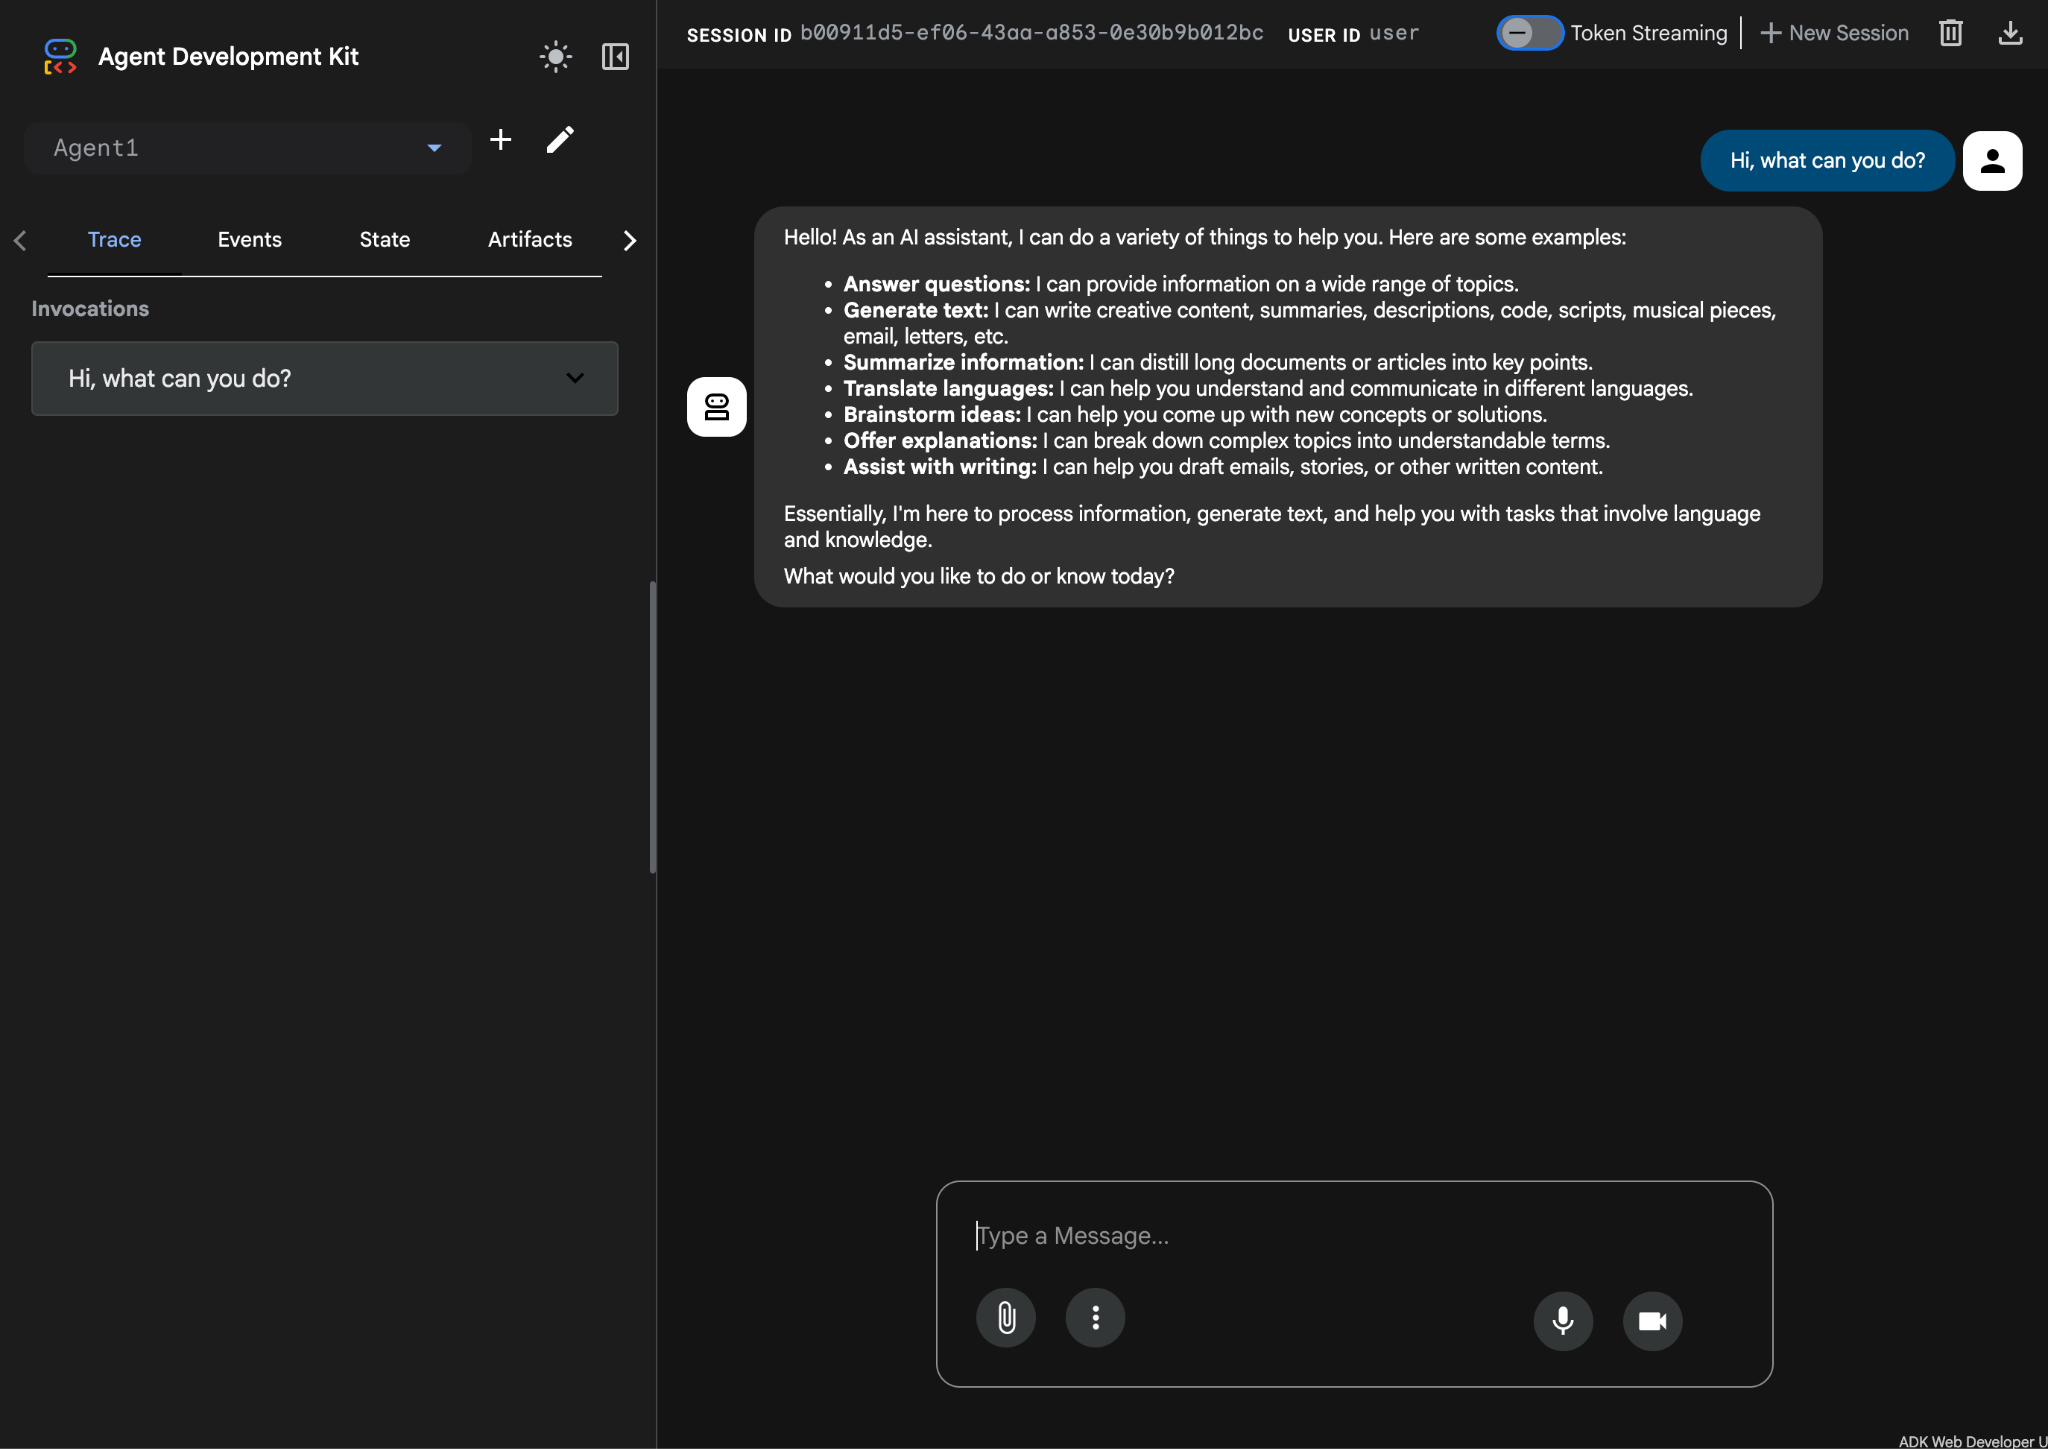
รูปที่ 10: การทดสอบเอเจนต์
7. กลับไปที่โปรแกรมแก้ไข แล้วมาดูไฟล์ที่สร้างขึ้นใหม่กัน คุณจะเห็น Explorer ทางด้านซ้ายมือ ไปที่โฟลเดอร์ adkgui แล้วขยายเพื่อแสดงไดเรกทอรี Agent 1 ในโฟลเดอร์ คุณสามารถตรวจสอบไฟล์ YAML ที่กำหนดเอเจนต์ได้ตามที่แสดงในรูปด้านล่าง
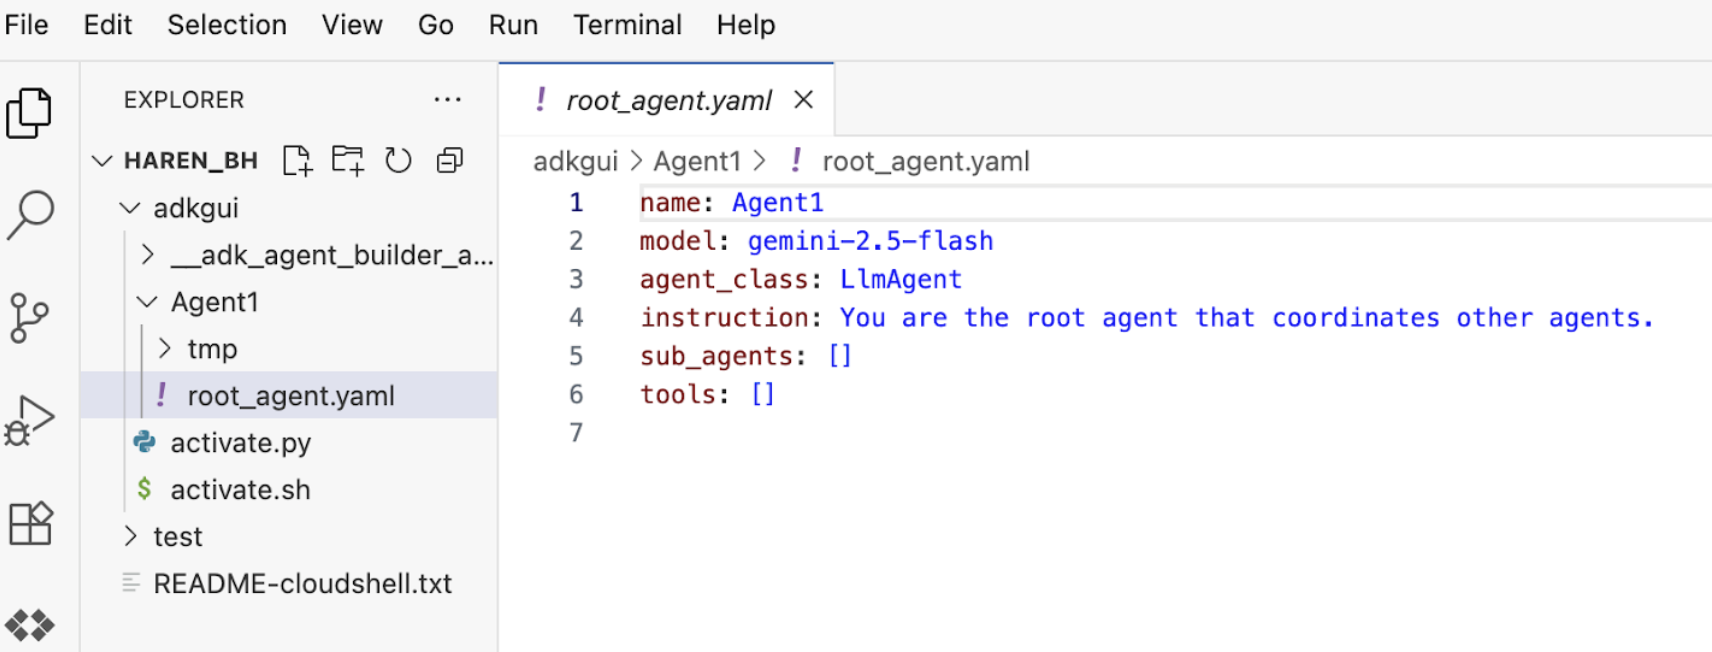
รูปที่ 11: คำจำกัดความของเอเจนต์โดยใช้ไฟล์ YAML
- ตอนนี้กลับไปที่เครื่องมือแก้ไข GUI แล้วเพิ่มฟีเจอร์บางอย่างให้กับเอเจนต์ โดยให้กดปุ่มแก้ไข (ดูรูปที่ 7 หมายเลขคอมโพเนนต์ 4 ไอคอนปากกา)
- เราจะเพิ่มฟีเจอร์ Google Search ลงในเอเจนต์ เพื่อให้ทำเช่นนั้นได้ เราจึงต้องเพิ่ม Google Search เป็นเครื่องมือที่เอเจนต์และเอเจนต์สามารถใช้ได้ โดยคลิกเครื่องหมาย "+" ข้างส่วนเครื่องมือที่ด้านซ้ายล่างของหน้าจอ แล้วคลิกเครื่องมือในตัวจากเมนู (ดูรูปที่ 12)
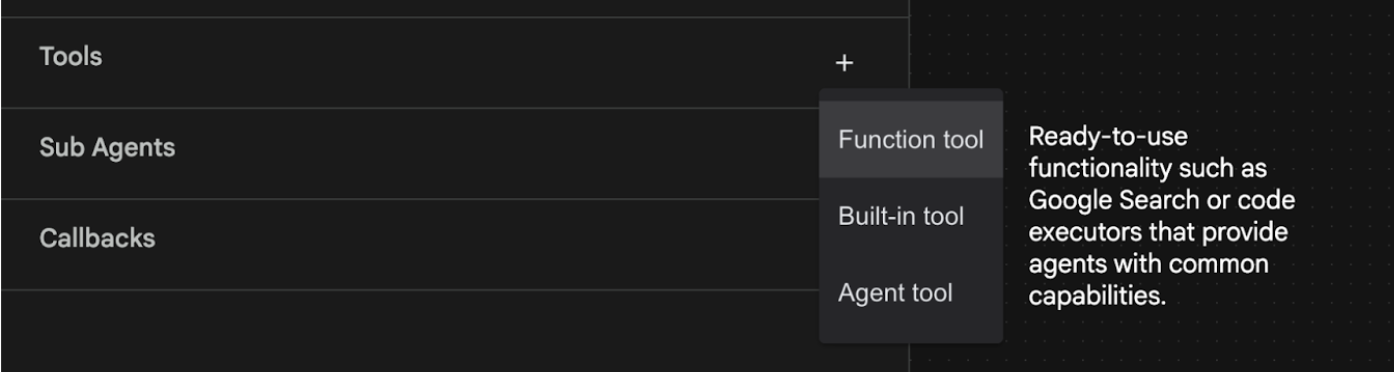
รูปที่ 12: การเพิ่มเครื่องมือใหม่ให้กับเอเจนต์
- จากรายการเครื่องมือในตัว ให้เลือก google_search แล้วคลิกสร้าง (ดูรูปที่ 12) ซึ่งจะเป็นการเพิ่ม Google Search เป็นเครื่องมือในเอเจนต์
- กดปุ่มบันทึกเพื่อให้ระบบบันทึกการเปลี่ยนแปลง
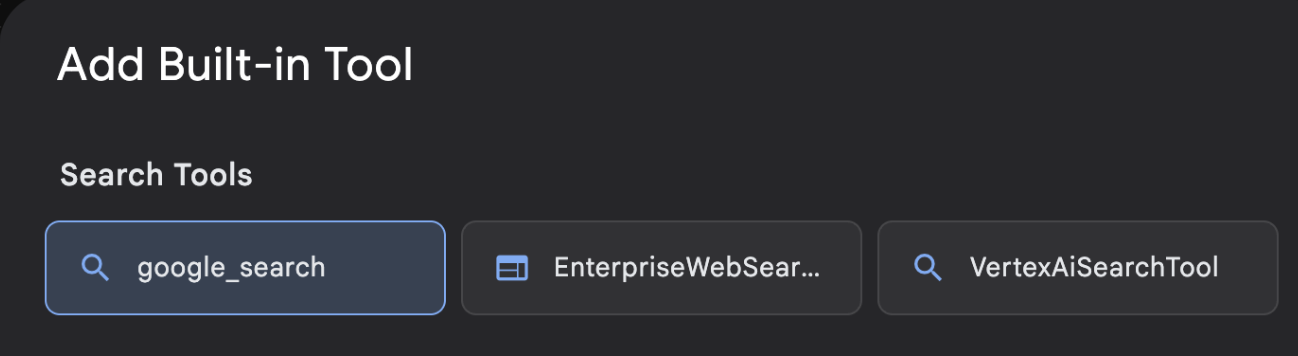
รูปที่ 13: รายการเครื่องมือที่มีอยู่ใน UI ของ ADK Visual Builder
- ตอนนี้คุณก็พร้อมทดสอบเอเจนต์แล้ว ก่อนอื่น ให้รีสตาร์ทเซิร์ฟเวอร์ ADK ไปที่เทอร์มินัลที่คุณเริ่มเซิร์ฟเวอร์ ADK (Agent Development Kit) แล้วกด CTRL+C เพื่อปิดเซิร์ฟเวอร์หากยังทำงานอยู่ เรียกใช้คำสั่งต่อไปนี้เพื่อเริ่มเซิร์ฟเวอร์อีกครั้ง
#make sure you are in the right folder.
cd ~/adkui

#start the server
adk web
- กด Ctrl+คลิกที่ URL (เช่น http://localhost:8000) ที่แสดงบนหน้าจอ GUI ของ ADK (Agent Development Kit) ควรแสดงในแท็บเบราว์เซอร์
- เลือกAgent1 จากรายชื่อตัวแทน ตอนนี้เอเจนต์ของคุณสามารถค้นหาใน Google ได้แล้ว ทดสอบในช่องแชทด้วยพรอมต์ต่อไปนี้
What is the weather today in Yokohama?
คุณควรเห็นคำตอบจาก Google Search ดังที่แสดงด้านล่าง 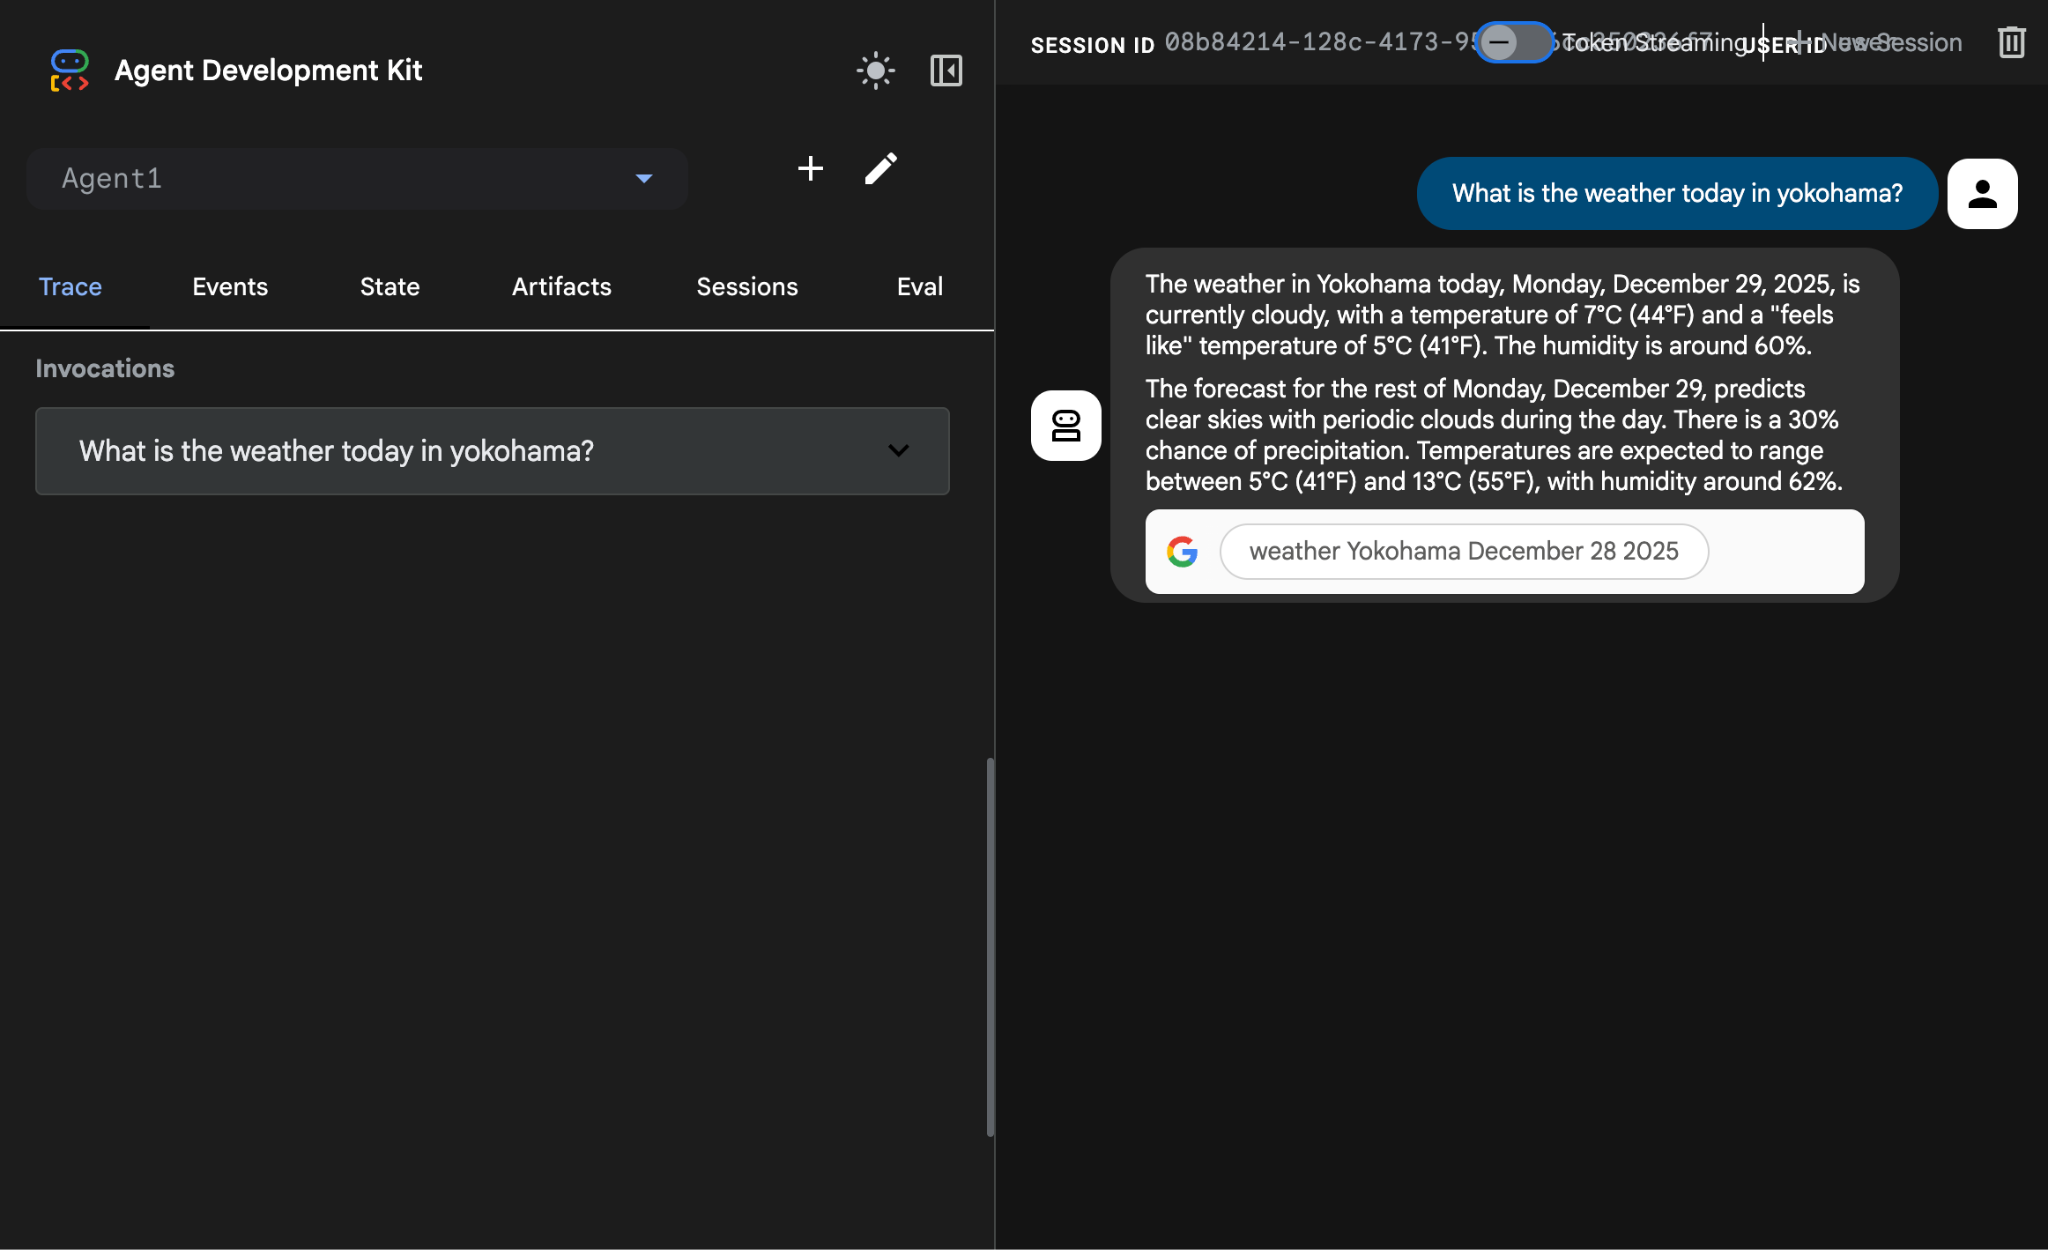
รูปที่ 14: Google Search พร้อมเอเจนต์
- ตอนนี้เราจะกลับไปที่เครื่องมือแก้ไขและตรวจสอบโค้ดที่สร้างขึ้นในขั้นตอนนี้ จากแผงด้านข้างของเครื่องมือสำรวจของเครื่องมือแก้ไข ให้คลิก root_agent.yaml เพื่อเปิด ยืนยันว่าได้เพิ่ม google_search เป็นเครื่องมือแล้ว (รูปที่ 15)
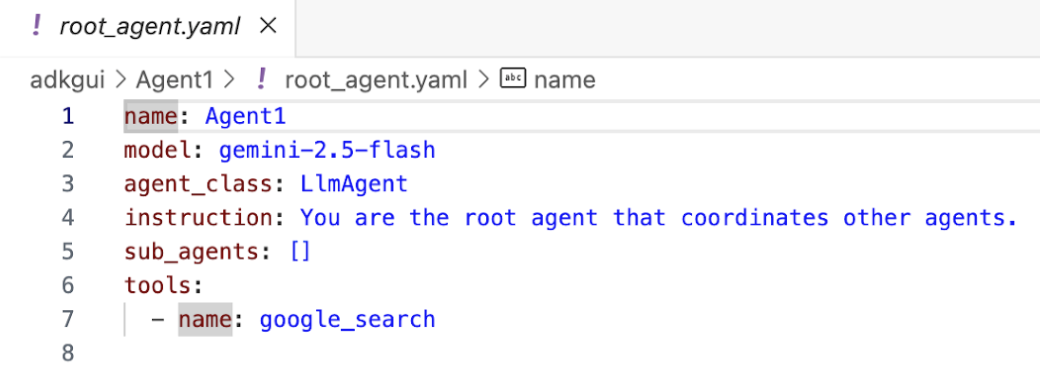
รูปที่ 15: การยืนยันว่าได้เพิ่ม google_search เป็นเครื่องมือใน Agent1 แล้ว
8. ติดตั้งใช้งาน Agent ใน Cloud Run
ตอนนี้เรามาทำให้ Agent ที่สร้างขึ้นใช้งานได้ใน Cloud Run กัน Cloud Run ช่วยให้คุณสร้างแอปหรือเว็บไซต์ได้อย่างรวดเร็วบนแพลตฟอร์มที่มีการจัดการครบวงจร
คุณสามารถเรียกใช้บริการส่วนหน้าและบริการแบ็กเอนด์ งานแบบกลุ่ม โฮสต์ LLM และจัดคิวปริมาณงานการประมวลผลได้โดยไม่ต้องจัดการโครงสร้างพื้นฐาน
ในเทอร์มินัลของ Cloud Shell Editor หากคุณยังเรียกใช้เซิร์ฟเวอร์ ADK (Agent Development Kit) อยู่ ให้กด Ctrl+C เพื่อหยุด
- ไปที่ไดเรกทอรีรากของโปรเจ็กต์
cd ~/adkui
- รับโค้ดการติดตั้งใช้งาน หลังจากเรียกใช้คำสั่งแล้ว คุณควรเห็นไฟล์ deploycloudrun.py ในแผง Explorer ของโปรแกรมแก้ไข Cloud Shell
curl -LO https://raw.githubusercontent.com/haren-bh/codelabs/main/adk_visual_builder/deploycloudrun.py
- ตรวจสอบตัวเลือกการติดตั้งใช้งานใน deploycloudrun.py เราจะใช้คำสั่ง adk deploy เพื่อติดตั้งใช้งาน Agent ใน Cloud Run ADK (Agent Development Kit) มีตัวเลือกในตัวเพื่อติดตั้งใช้งาน Agent ใน Cloud Run เราต้องระบุพารามิเตอร์ เช่น รหัสโปรเจ็กต์ Google Cloud, ภูมิภาค ฯลฯ สำหรับเส้นทางแอป สคริปต์นี้จะถือว่า agent_path=./Agent1 นอกจากนี้ เราจะสร้างบัญชีบริการใหม่ที่มีสิทธิ์ที่จำเป็นและแนบไปกับ Cloud Run Cloud Run ต้องมีสิทธิ์เข้าถึงบริการต่างๆ เช่น Vertex AI และ Cloud Storage เพื่อเรียกใช้ Agent
   command = [
        "adk", "deploy", "cloud_run",
        f"--project={project_id}",
        f"--region={location}",
        f"--service_name={service_name}",
        f"--app_name={app_name}",
        f"--artifact_service_uri=memory://",
        f"--with_ui",
        agent_path,
        f"--",
        f"--service-account={sa_email}",
    ]
- เรียกใช้สคริปต์ deploycloudrun.py** การติดตั้งใช้งานควรเริ่มต้นดังที่แสดงในรูปด้านล่าง**
python3 deploycloudrun.py
หากได้รับข้อความยืนยันดังที่แสดงด้านล่าง ให้กด Y แล้วกด Enter สำหรับข้อความทั้งหมด depoycloudrun.py จะถือว่า Agent อยู่ในโฟลเดอร์ Agent1 เหมือนที่สร้างไว้ข้างต้น
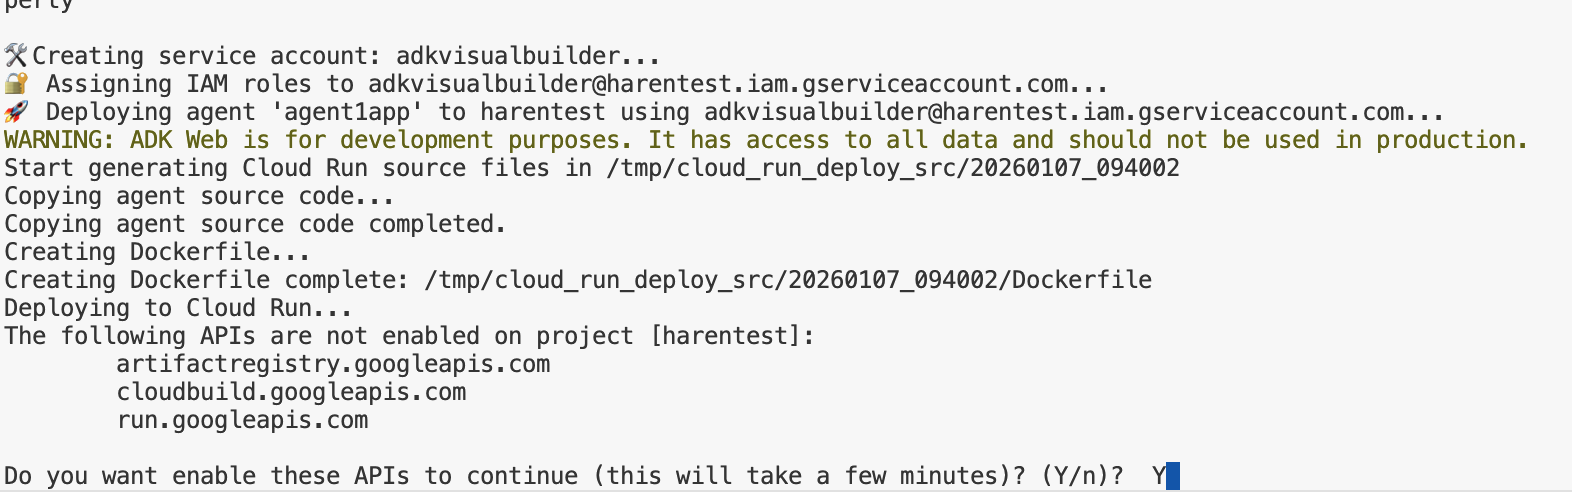
รูปที่ 16: การทําให้ Agent ใช้งานได้ใน Cloud Run ให้กด Y ในข้อความยืนยัน
- เมื่อการติดตั้งใช้งานเสร็จสมบูรณ์ คุณควรเห็น URL ของบริการ เช่น https://agent1service-78833623456.us-central1.run.app
- เข้าถึง URL ในเว็บเบราว์เซอร์เพื่อเปิดแอป
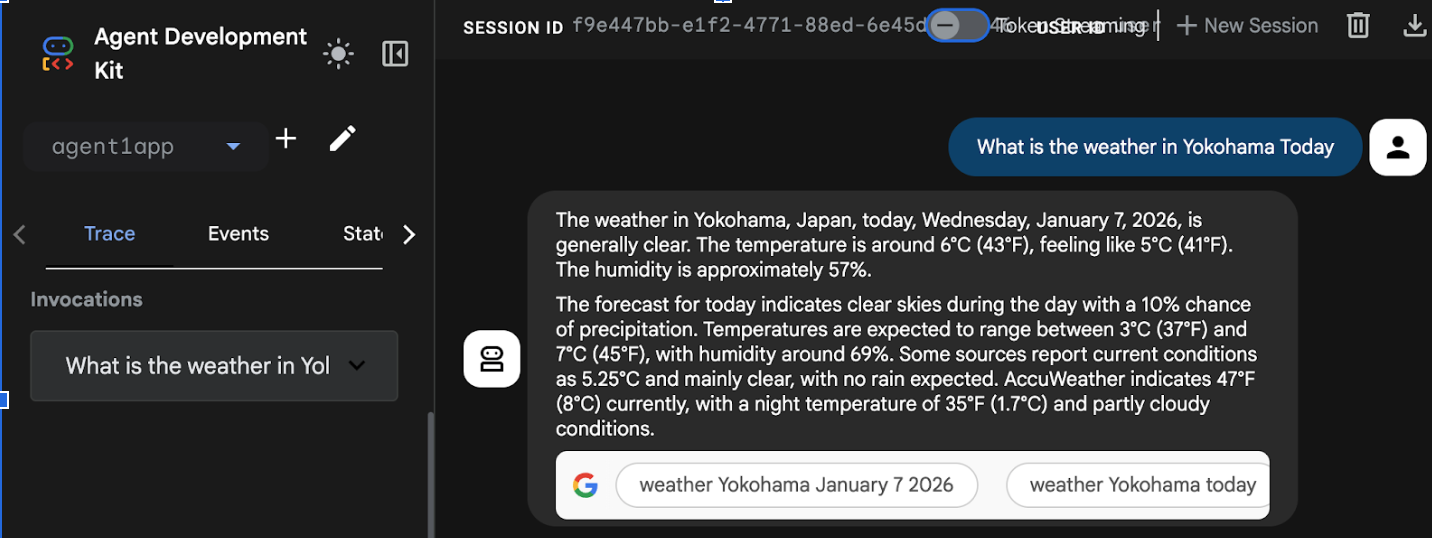
Figure 17: Agent running in Cloud Run
9. สร้าง Agent ที่มี Agent ย่อย และเครื่องมือที่กำหนดเอง
ในส่วนก่อนหน้า คุณได้สร้าง Agent เดียวที่มีเครื่องมือ Google Search ในตัว ในส่วนนี้ คุณจะสร้างระบบหลายเอเจนต์ซึ่งเราอนุญาตให้เอเจนต์ใช้เครื่องมือที่กำหนดเอง
- ก่อนอื่น ให้รีสตาร์ทเซิร์ฟเวอร์ ADK (Agent Development Kit) ไปที่เทอร์มินัลที่คุณเริ่มเซิร์ฟเวอร์ ADK (Agent Development Kit) แล้วกด CTRL+C เพื่อปิดเซิร์ฟเวอร์หากยังทำงานอยู่ เรียกใช้คำสั่งต่อไปนี้เพื่อเริ่มเซิร์ฟเวอร์อีกครั้ง
#make sure you are in the right folder.
cd ~/adkui

#start the server
adk web
- กด Ctrl+คลิกที่ URL (เช่น http://localhost:8000) ที่แสดงบนหน้าจอ GUI ของ ADK (Agent Development Kit) ควรแสดงในแท็บเบราว์เซอร์
- คลิกปุ่ม "+" เพื่อสร้างเอเจนต์ใหม่ ในกล่องโต้ตอบของเอเจนต์ ให้ป้อน "Agent2" (รูปที่ 18) แล้วคลิก "สร้าง"
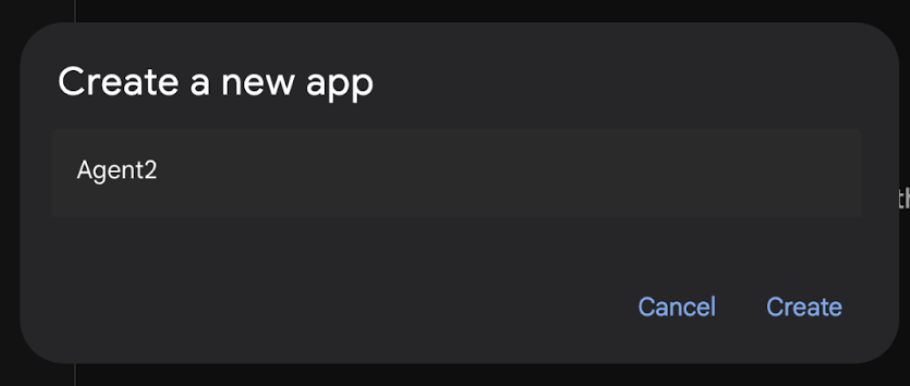
รูปที่ 18: การสร้างแอป Agent ใหม่
- ในส่วนวิธีการของ Agent2 ให้ป้อนข้อมูลต่อไปนี้
You are an agent that takes image creation instruction from the user and passes it to your sub agent
- ตอนนี้เราจะเพิ่ม Agent ย่อยให้กับ Agent หลัก โดยคลิกปุ่ม "+" ทางด้านซ้ายของเมนูตัวแทนย่อยที่ด้านล่างของแผงด้านซ้าย (รูปที่ 19) แล้วคลิก "LLM Agent" การดำเนินการนี้จะสร้างตัวแทนใหม่เป็นตัวแทนย่อยใหม่ของตัวแทนรูท
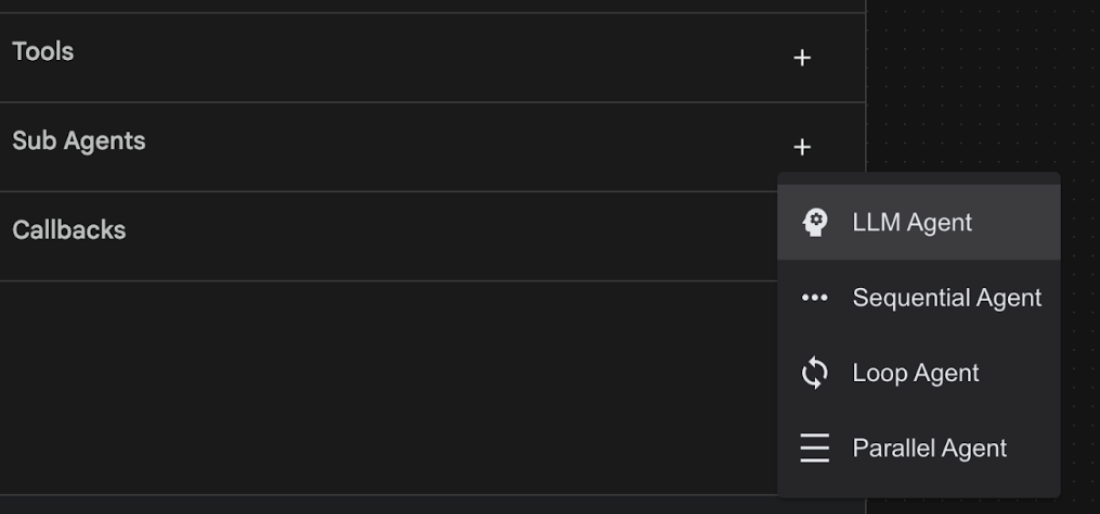
รูปที่ 19: เพิ่ม Agent ย่อยใหม่
- ในวิธีการสำหรับ sub_agent_1 ให้ป้อนข้อความต่อไปนี้
You are an Agent that can take instructions about an image and create an image using the create_image tool.
- ตอนนี้มาเพิ่มเครื่องมือที่กำหนดเองใน Agent ย่อยนี้กัน เครื่องมือนี้จะเรียกใช้โมเดล Imagen เพื่อสร้างรูปภาพโดยใช้คำสั่งของผู้ใช้ โดยคลิกตัวแทนย่อยที่สร้างขึ้นในขั้นตอนก่อนหน้าก่อน แล้วคลิกปุ่ม "+" ข้างเมนูเครื่องมือ จากรายการตัวเลือกเครื่องมือ ให้คลิก "เครื่องมือฟังก์ชัน" เครื่องมือนี้จะช่วยให้เราเพิ่มโค้ดที่กำหนดเองลงในเครื่องมือได้
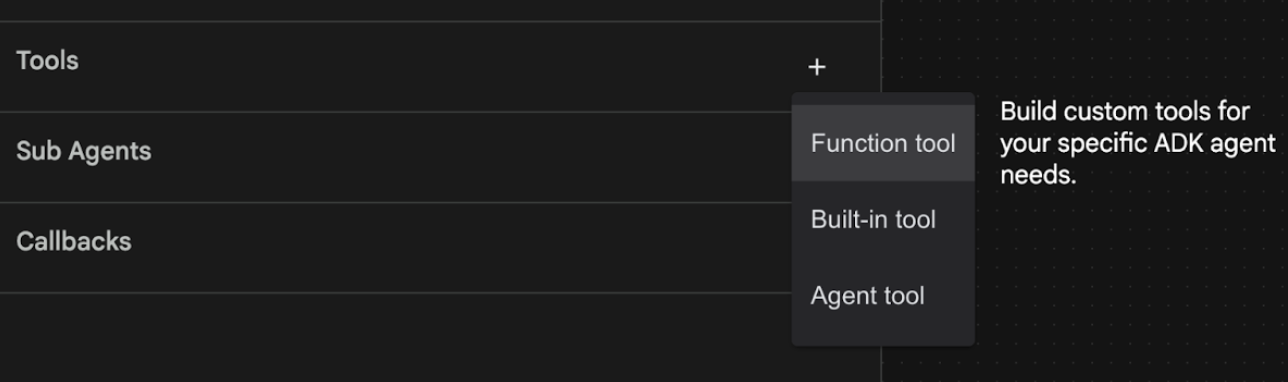
รูปที่ 20: คลิกเครื่องมือฟังก์ชันเพื่อสร้างเครื่องมือใหม่ 8. ตั้งชื่อเครื่องมือเป็น Agent2.image_creation_tool.create_image ในกล่องโต้ตอบ 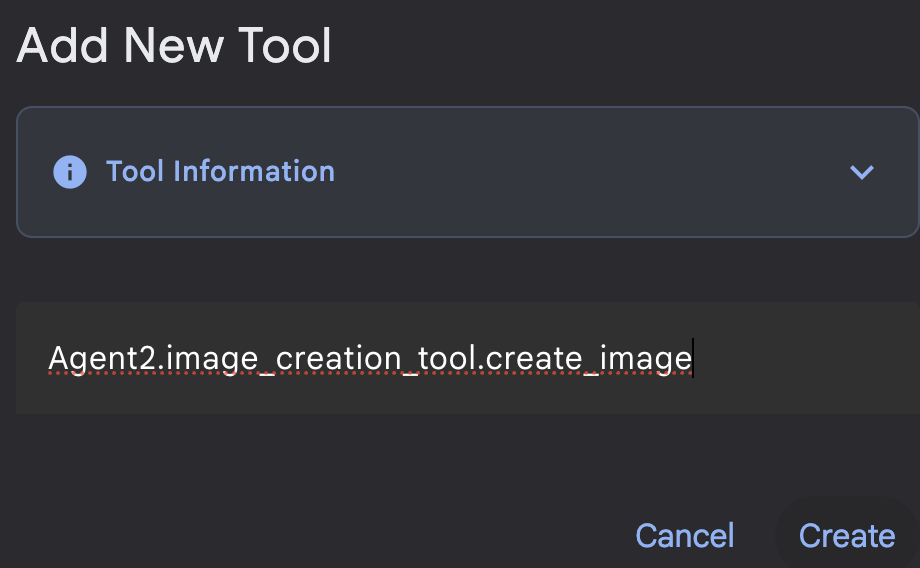
รูปที่ 21: เพิ่มชื่อเครื่องมือ
- คลิกปุ่มบันทึกเพื่อบันทึกการเปลี่ยนแปลง
- ในเทอร์มินัล Cloud Shell Editor ให้กด Ctrl+S เพื่อปิดเซิร์ฟเวอร์ adk
- ในเทอร์มินัล ให้ป้อนคำสั่งต่อไปนี้เพื่อสร้างไฟล์ image_creation_tool.py
touch ~/adkui/Agent2/image_creation_tool.py
- เปิด image_creation_tool.py ที่สร้างขึ้นใหม่โดยคลิกในแผง Explorer ของ Cloud Shell Editor จากนั้นแทนที่เนื้อหาของ image_creation_tool.py ด้วยเนื้อหาต่อไปนี้ แล้วบันทึก (Ctrl+S)
import os
import io
import vertexai
from vertexai.preview.vision_models import ImageGenerationModel
from dotenv import load_dotenv
import uuid
from typing import Union
from datetime import datetime
from google import genai
from google.genai import types
from google.adk.tools import ToolContext
import logging

# Configure logging
logging.basicConfig(level=logging.INFO)
logger = logging.getLogger(__name__)

async def create_image(prompt: str,tool_context: ToolContext) -> Union[bytes, str]:
  """
  Generates an image based on a text prompt using a Vertex AI Imagen model.
  Args:
      prompt: The text prompt to generate the image from.

  Returns:
      The binary image data (PNG format) on success, or an error message string on failure.
  """
  print(f"Attempting to generate image for prompt: '{prompt}'")

  try:
      # Load environment variables from .env file two levels up
      dotenv_path = os.path.join(os.path.dirname(__file__), '..', '..', '.env')
      load_dotenv(dotenv_path=dotenv_path)
      project_id = os.getenv("GOOGLE_CLOUD_PROJECT")
      location = os.getenv("GOOGLE_CLOUD_LOCATION")
      model_name = os.getenv("IMAGEN_MODEL")
      client = genai.Client(
          vertexai=True,
          project=project_id,
          location=location,
      )
      response = client.models.generate_images(
          model="imagen-3.0-generate-002",
          prompt=prompt,
          config=types.GenerateImagesConfig(
              number_of_images=1,
              aspect_ratio="9:16",
              safety_filter_level="block_low_and_above",
              person_generation="allow_adult",
          ),
      )
      if not all([project_id, location, model_name]):
          return "Error: Missing GOOGLE_CLOUD_PROJECT, GOOGLE_CLOUD_LOCATION, or IMAGEN_MODEL in .env file."
      vertexai.init(project=project_id, location=location)
      model = ImageGenerationModel.from_pretrained(model_name)
      images = model.generate_images(
          prompt=prompt,
          number_of_images=1
      )
      if response.generated_images is  None:
          return "Error: No image was generated."
      for generated_image in response.generated_images:
          # Get the image bytes
          image_bytes = generated_image.image.image_bytes
          counter = str(tool_context.state.get("loop_iteration", 0))
          artifact_name = f"generated_image_" + counter + ".png"
          # Save as ADK artifact (optional, if still needed by other ADK components)
          report_artifact = types.Part.from_bytes(
              data=image_bytes, mime_type="image/png"
          )
          await tool_context.save_artifact(artifact_name, report_artifact)
          logger.info(f"Image also saved as ADK artifact: {artifact_name}")
          return {
              "status": "success",
              "message": f"Image generated .  ADK artifact: {artifact_name}.",
              "artifact_name": artifact_name,
          }
  except Exception as e:
      error_message = f"An error occurred during image generation: {e}"
      print(error_message)
      return error_message
- ก่อนอื่น ให้รีสตาร์ทเซิร์ฟเวอร์ ADK (Agent Development Kit) ไปที่เทอร์มินัลที่คุณเริ่มเซิร์ฟเวอร์ ADK (Agent Development Kit) แล้วกด CTRL+C เพื่อปิดเซิร์ฟเวอร์หากยังทำงานอยู่ เรียกใช้คำสั่งต่อไปนี้เพื่อเริ่มเซิร์ฟเวอร์อีกครั้ง
#make sure you are in the right folder.
cd ~/adkui

#start the server
adk web
- กด Ctrl+คลิกที่ URL (เช่น http://localhost:8000) ที่แสดงบนหน้าจอ GUI ของ ADK (Agent Development Kit) ควรแสดงในแท็บเบราว์เซอร์
- ในแท็บ UI ของ ADK (Agent Development Kit) ให้เลือก Agent2 ในรายการ Agent แล้วกดปุ่มแก้ไข (ไอคอนปากกา) ในโปรแกรมแก้ไขภาพของ ADK (Agent Development Kit) ให้คลิกปุ่มบันทึกเพื่อบันทึกการเปลี่ยนแปลง
- ตอนนี้เรามาทดสอบ Agent ใหม่กัน
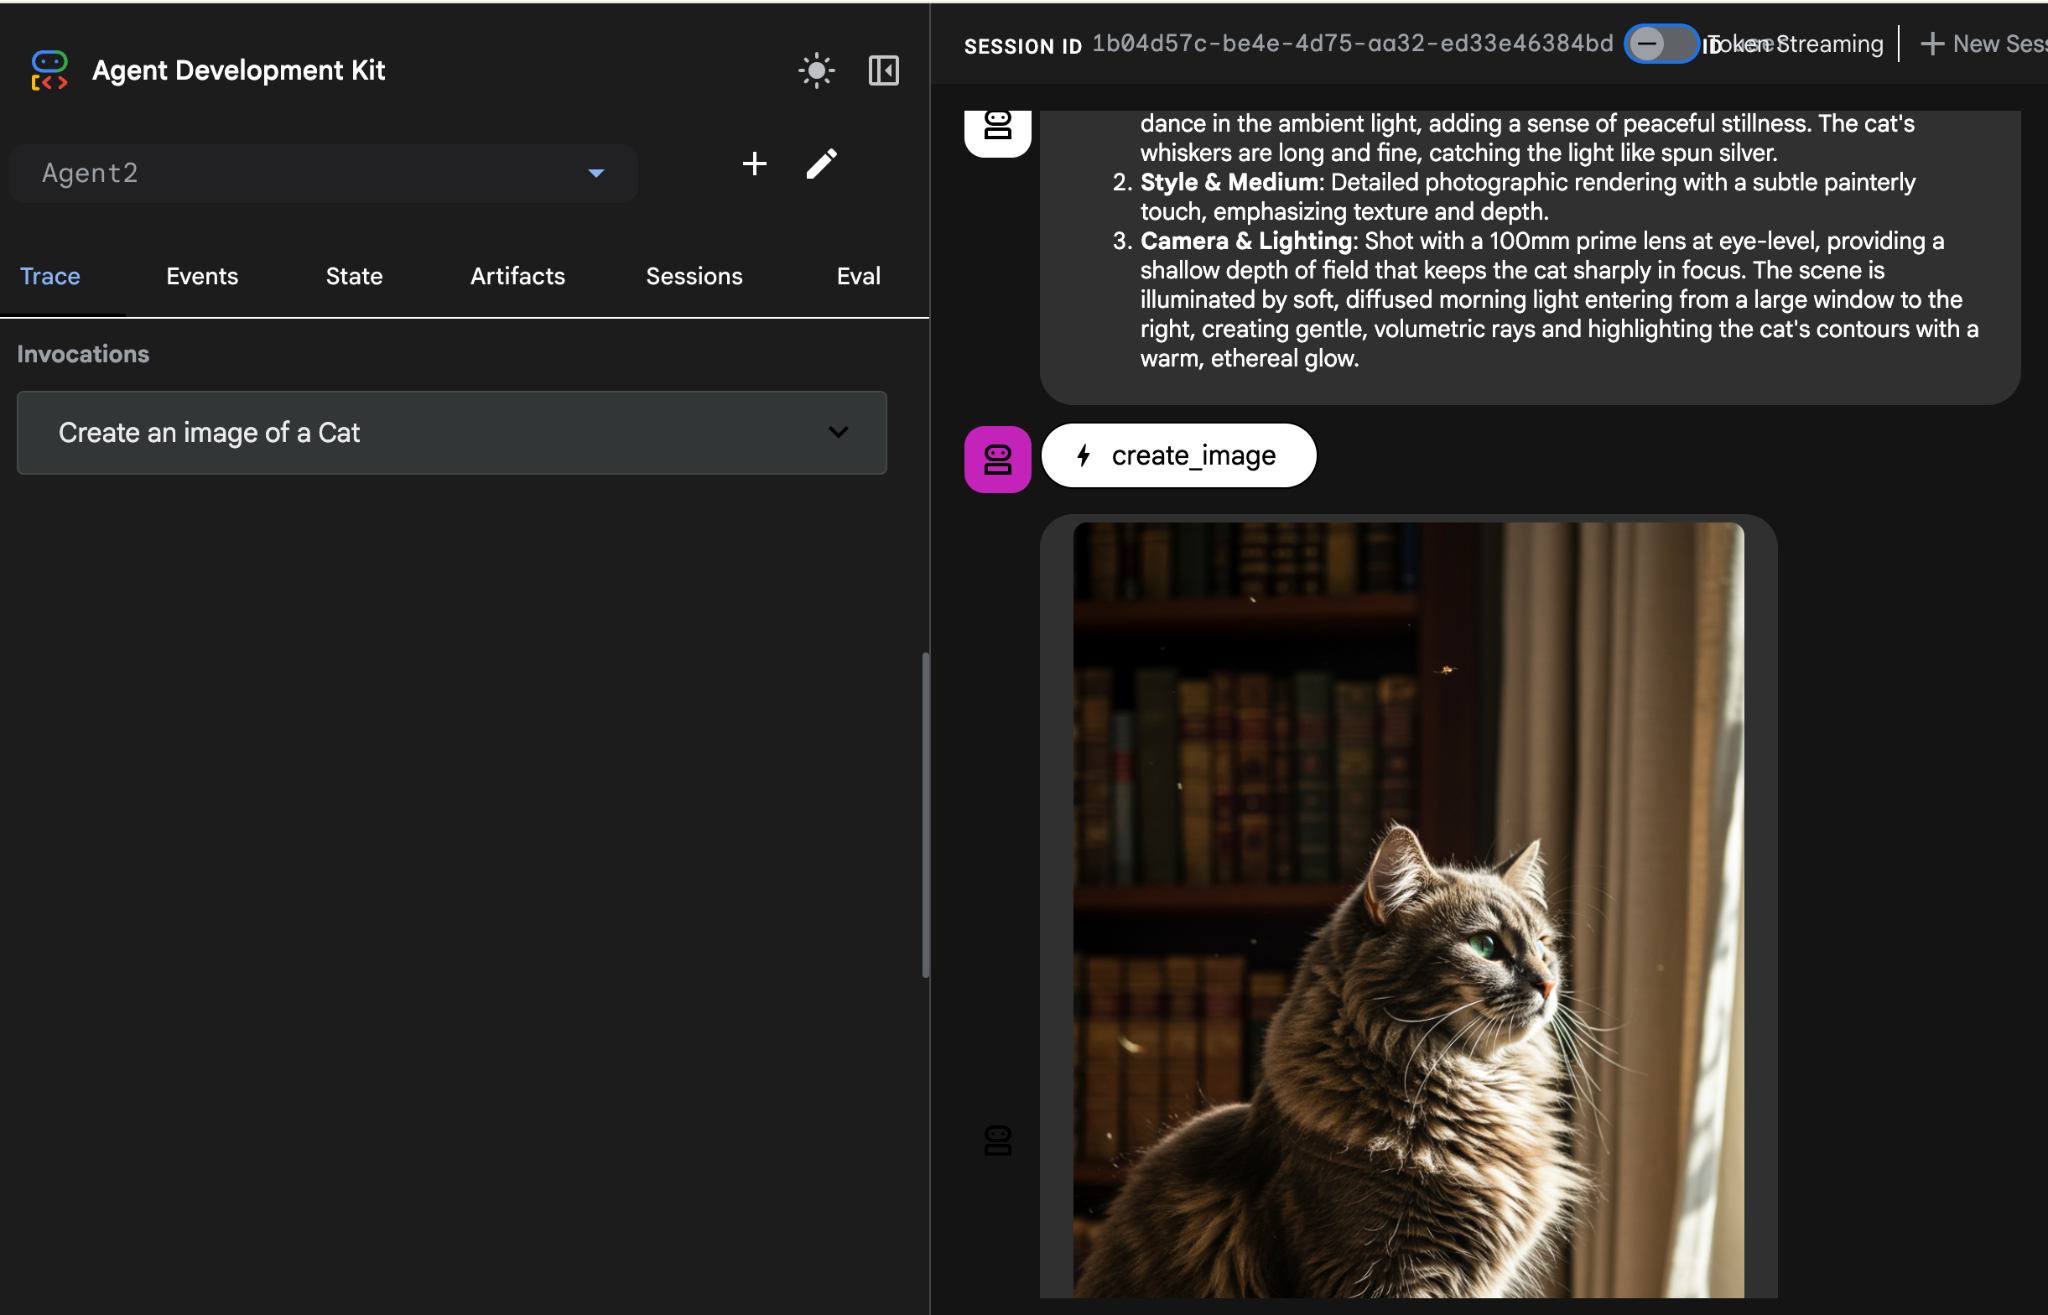
- ในอินเทอร์เฟซแชทของ UI ADK (Agent Development Kit) ให้ป้อนพรอมต์ต่อไปนี้ นอกจากนี้ คุณยังลองใช้พรอมต์อื่นๆ ได้ด้วย คุณควรเห็นผลลัพธ์ที่แสดงในรูปที่ 22)
Create an image of a cat
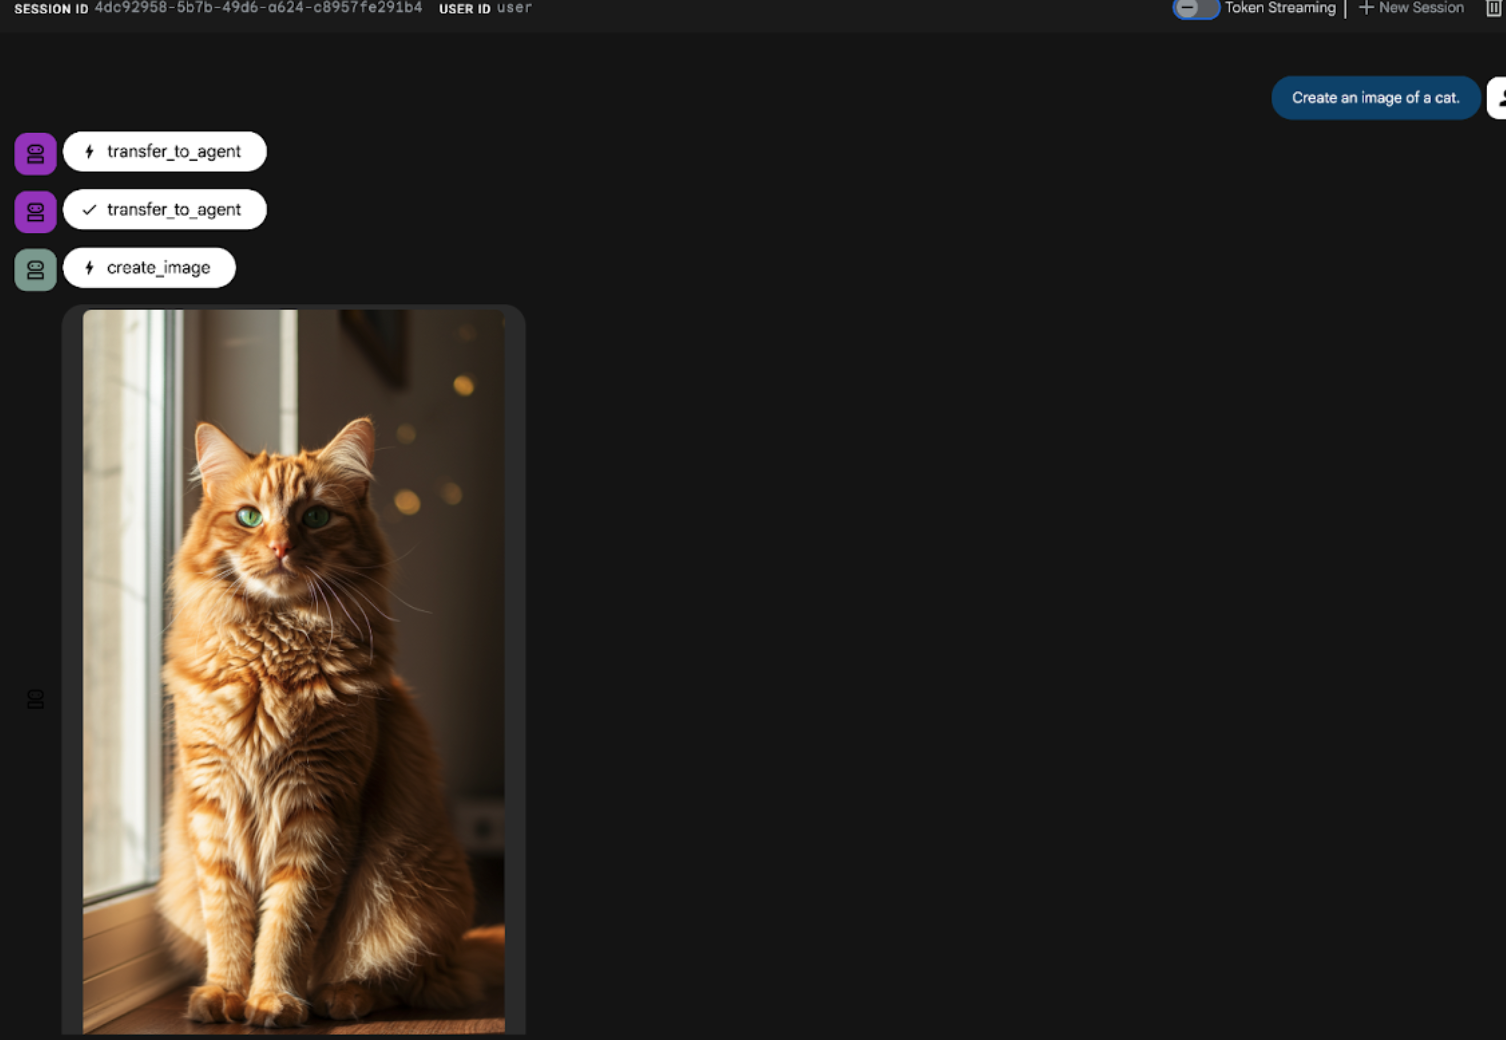
รูปที่ 22: อินเทอร์เฟซแชทของ UI ของ ADK
10. สร้างเอเจนต์เวิร์กโฟลว์
แม้ว่าขั้นตอนก่อนหน้าจะเกี่ยวข้องกับการสร้าง Agent ด้วย Sub Agent และเครื่องมือสร้างรูปภาพเฉพาะทาง แต่ระยะนี้จะมุ่งเน้นที่การปรับแต่งความสามารถของ Agent เราจะปรับปรุงกระบวนการนี้โดยตรวจสอบว่าพรอมต์เริ่มต้นของผู้ใช้ได้รับการเพิ่มประสิทธิภาพก่อนที่จะมีการสร้างรูปภาพ ในการดำเนินการนี้ เราจะผสานรวม Sequential Agent เข้ากับ Root Agent เพื่อจัดการเวิร์กโฟลว์ 2 ขั้นตอนต่อไปนี้
- รับพรอมต์จากตัวแทนรูทและปรับปรุงพรอมต์
- ส่งต่อพรอมต์ที่ปรับแต่งแล้วไปยังเอเจนต์ผู้สร้างรูปภาพเพื่อสร้างรูปภาพสุดท้ายโดยใช้ IMAGEN
- ก่อนอื่น ให้รีสตาร์ทเซิร์ฟเวอร์ ADK (Agent Development Kit) ไปที่เทอร์มินัลที่คุณเริ่มเซิร์ฟเวอร์ ADK (Agent Development Kit) แล้วกด CTRL+C เพื่อปิดเซิร์ฟเวอร์หากยังทำงานอยู่ เรียกใช้คำสั่งต่อไปนี้เพื่อเริ่มเซิร์ฟเวอร์อีกครั้ง
#make sure you are in the right folder.
cd ~/adkui

#start the server
adk web
- กด Ctrl+คลิกที่ URL (เช่น http://localhost:8000) ที่แสดงบนหน้าจอ GUI ของ ADK (Agent Development Kit) ควรแสดงในแท็บเบราว์เซอร์
- เลือก Agent2 จากตัวเลือกเอเจนต์ แล้วคลิกปุ่มแก้ไข (ไอคอนปากกา)
- คลิก Agent2 (Root Agent) แล้วคลิกปุ่ม "+" ข้างเมนูตัวแทนย่อย และจากรายการตัวเลือก ให้คลิกSequential Agent
- คุณควรเห็นโครงสร้างตัวแทนเหมือนกับที่แสดงในรูปที่ 23
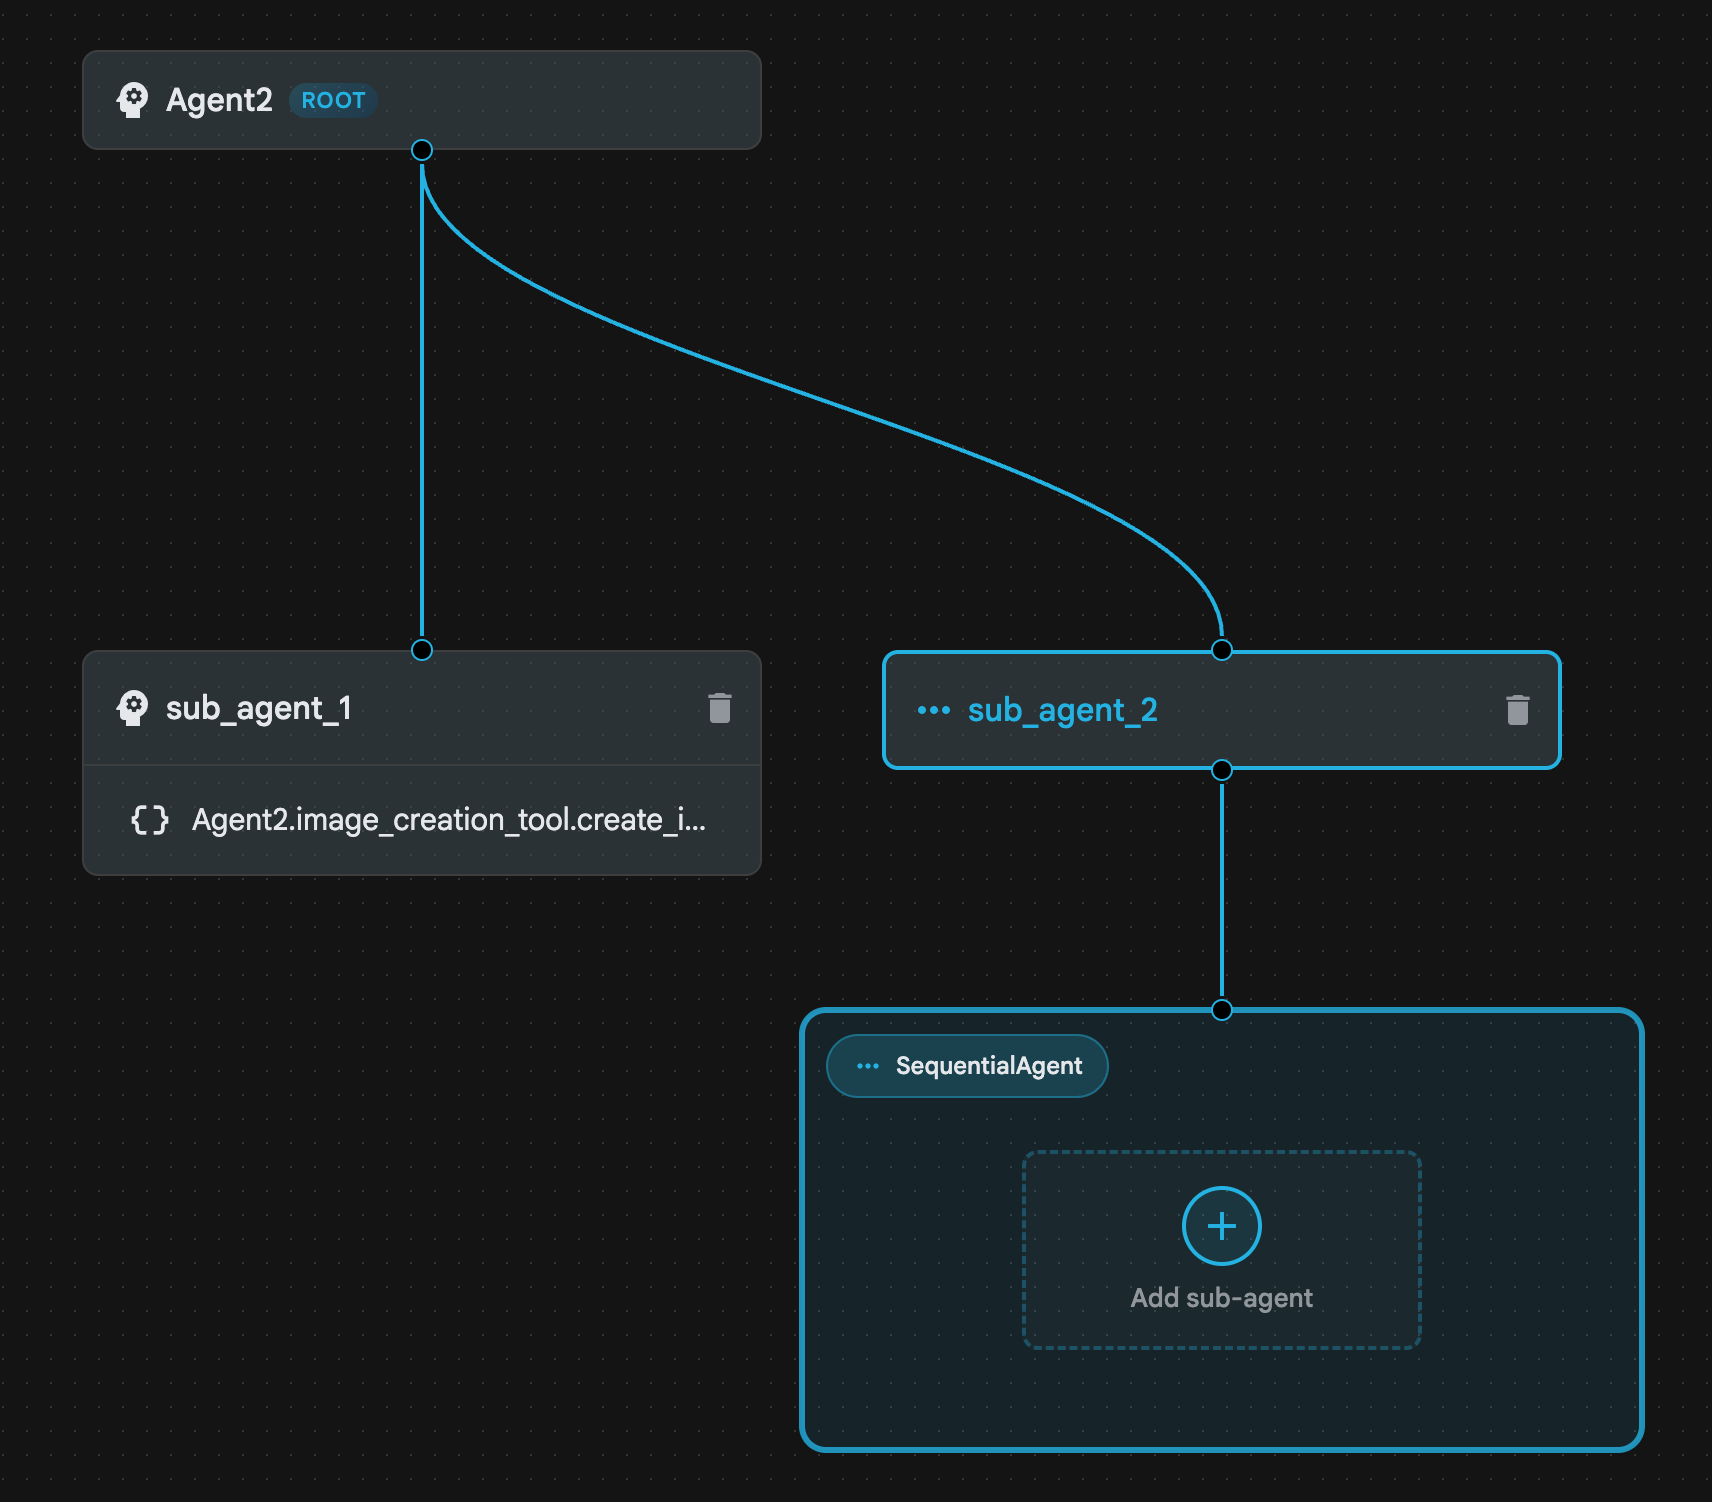
รูปที่ 23: โครงสร้างเอเจนต์แบบลำดับ
- ตอนนี้เราจะเพิ่มเอเจนต์ตัวแรกไปยัง Sequential Agent ซึ่งจะทำหน้าที่เป็นตัวเพิ่มประสิทธิภาพพรอมต์ หากต้องการทำเช่นนั้น ให้คลิกที่ปุ่มเพิ่ม Agent ย่อยภายในกล่อง SequentialAgent แล้วคลิก LLM Agent
- เราต้องเพิ่ม Agent อีกตัวลงในลำดับ ดังนั้นให้ทำซ้ำขั้นตอนที่ 6 เพื่อเพิ่ม LLM Agent อีกตัว (กดปุ่ม + แล้วเลือก LLMAgent)
- คลิก sub_agent_4 แล้วเพิ่มเครื่องมือใหม่โดยคลิกไอคอน"+" ข้างเครื่องมือในแผงด้านซ้าย คลิก "เครื่องมือฟังก์ชัน" จากตัวเลือก ในกล่องโต้ตอบ ให้ตั้งชื่อเครื่องมือเป็น Agent2.image_creation_tool.create_image แล้วกด "สร้าง"
- ตอนนี้เราลบ sub_agent_1 ได้แล้วเนื่องจากมี sub_agent_2 ที่มีความสามารถขั้นสูงกว่ามาแทนที่ โดยคลิกปุ่มลบทางด้านขวาของ sub_agent_1 ในไดอะแกรม
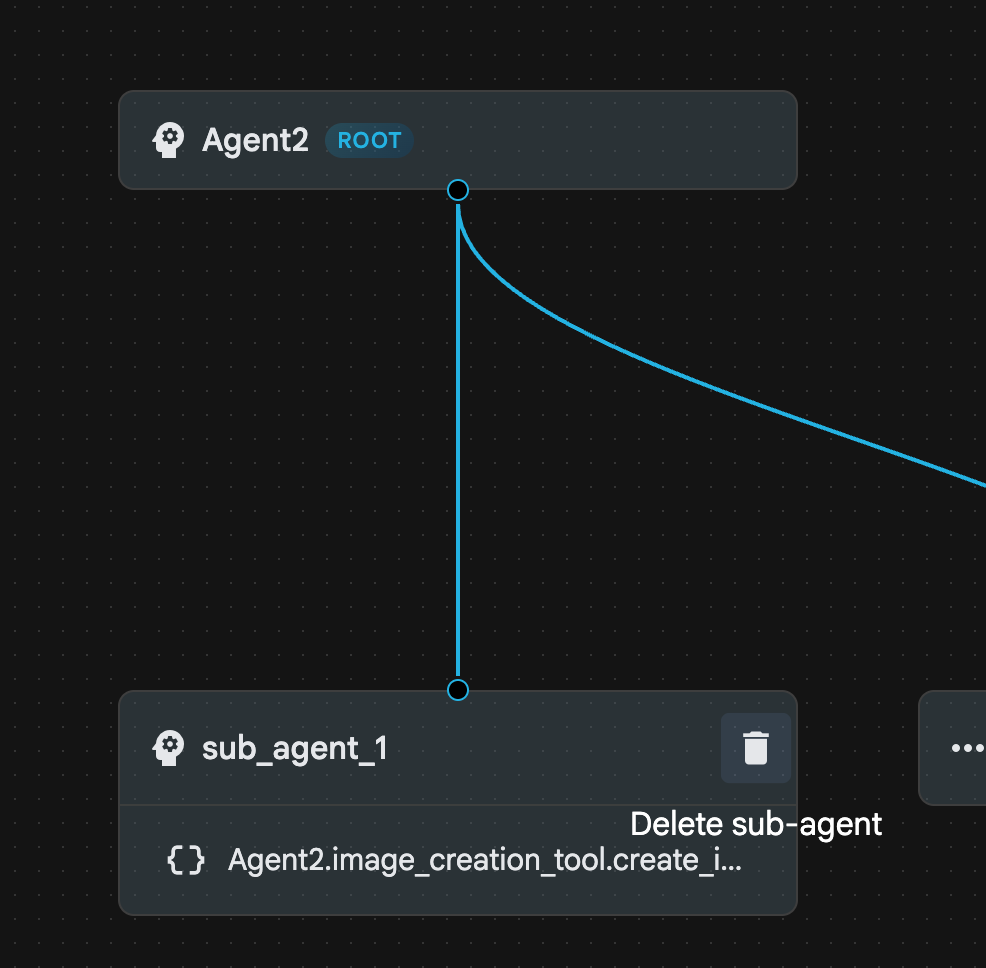
รูปที่ 24: ลบ sub_agent_1 10 โครงสร้างตัวแทนของเรามีลักษณะเหมือนในรูปที่ 25
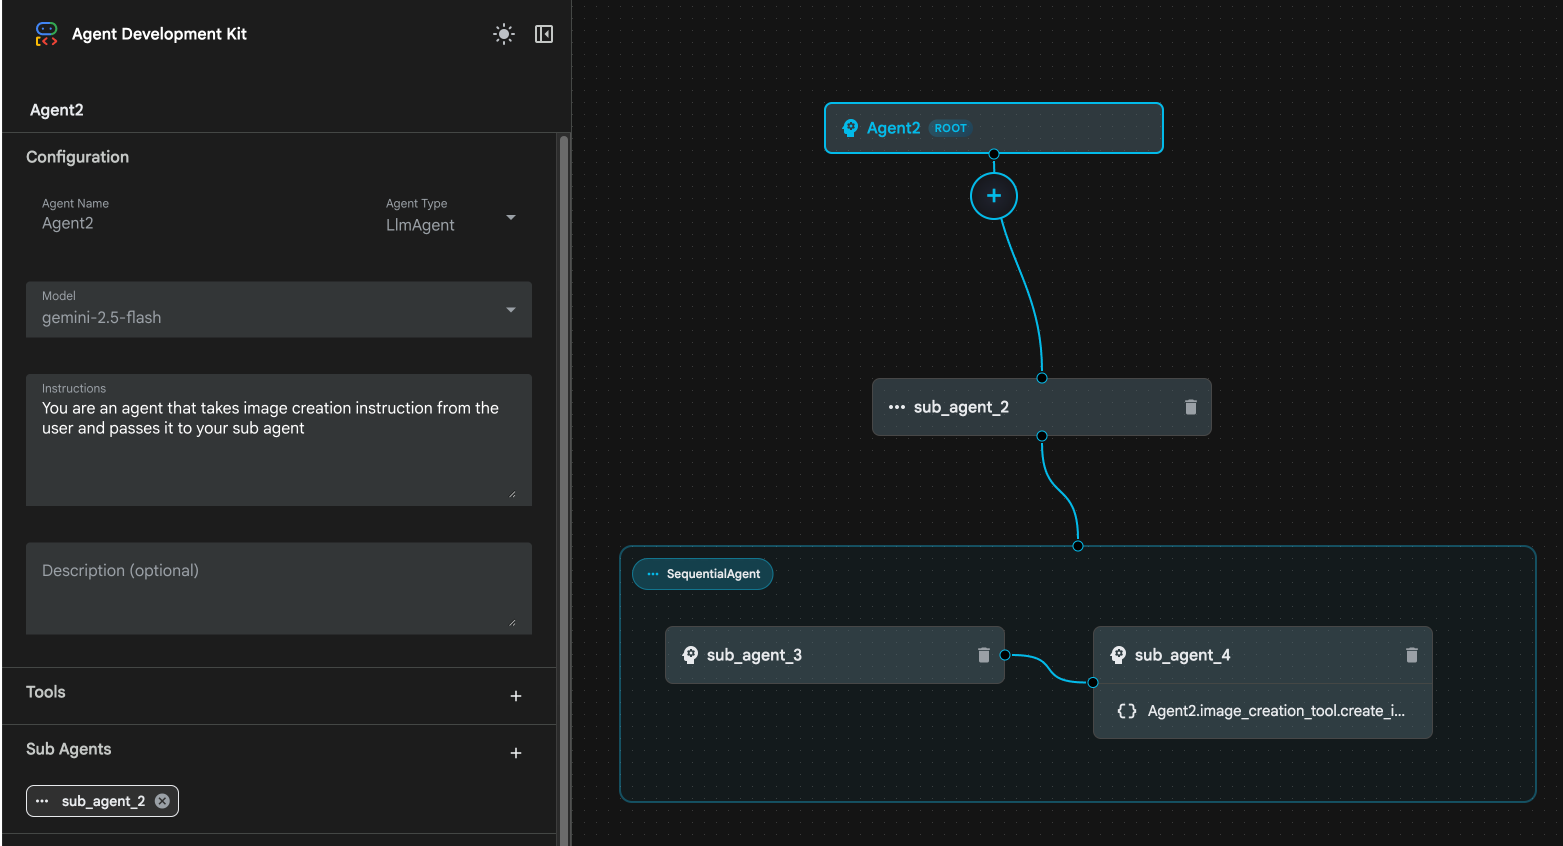
รูปที่ 25: โครงสร้างสุดท้ายของเอเจนต์ที่ได้รับการปรับปรุง
- คลิก sub_agent_3 แล้วป้อนข้อมูลต่อไปนี้ในวิธีการ
     Act as a professional AI Image Prompt Engineer. I will provide you
    with a basic idea for an image. Your job is to expand my idea into
    a detailed, high-quality prompt for models like Imagen.

    For every input, output the following structure:
    1. **Optimized Prompt**: A vivid, descriptive paragraph including
    subject, background, lighting, and textures.
    2. **Style & Medium**: Specify if it is photorealistic, digital art,
    oil painting, etc.
    3. **Camera & Lighting**: Define the lens (e.g., 85mm), angle,
    and light quality (e.g., volumetric, golden hour).

    Guidelines: Use sensory language, avoid buzzwords like 'photorealistic'
    unless necessary, and focus on specific artistic descriptors.
    Once the prompt is created send the prompt to the
- คลิก sub_agent_4 เปลี่ยนวิธีการเป็นดังนี้
You are an agent that takes instructions about an image and can generate the image using the create_image tool.
- คลิกปุ่มบันทึก
- ไปที่แผง Explorer ของ Cloud Shell Editor แล้วเปิดไฟล์ YAML ของเอเจนต์ ไฟล์ตัวแทนควรมีลักษณะดังนี้
root_agent.yaml

name: Agent2
model: gemini-2.5-flash
agent_class: LlmAgent
instruction: You are an agent that takes image creation instruction from the
  user and passes it to your sub agent
sub_agents:
  - config_path: ./sub_agent_2.yaml
tools: []
sub_agent_2.yaml

name: sub_agent_2
agent_class: SequentialAgent
sub_agents:
  - config_path: ./sub_agent_3.yaml
  - config_path: ./sub_agent_4.yaml
sub_agent_3.yaml

name: sub_agent_3
model: gemini-2.5-flash
agent_class: LlmAgent
instruction: |
  Act as a professional AI Image Prompt Engineer. I will provide you  with a
  basic idea for an image. Your job is to expand my idea into  a detailed,
  high-quality prompt for models like Imagen.

  For every input, output the following structure: 1. **Optimized Prompt**: A
  vivid, descriptive paragraph including  subject, background, lighting, and
  textures. 2. **Style & Medium**: Specify if it is photorealistic, digital
  art,  oil painting, etc. 3. **Camera & Lighting**: Define the lens (e.g.,
  85mm), angle,  and light quality (e.g., volumetric, golden hour).

  Guidelines: Use sensory language, avoid buzzwords like
  'photorealistic'  unless necessary, and focus on specific artistic
  descriptors. Once the prompt is created send the prompt to the
sub_agents: []
tools: []
sub_agent_4.yaml

name: sub_agent_4
model: gemini-2.5-flash
agent_class: LlmAgent
instruction: You are an agent that takes instructions about an image and
  generate the image using the create_image tool.
sub_agents: []
tools:
  - name: Agent2.image_creation_tool.create_image
- ตอนนี้มาทดสอบกัน
- ก่อนอื่น ให้รีสตาร์ทเซิร์ฟเวอร์ ADK (Agent Development Kit) ไปที่เทอร์มินัลที่คุณเริ่มเซิร์ฟเวอร์ ADK (Agent Development Kit) แล้วกด CTRL+C เพื่อปิดเซิร์ฟเวอร์หากยังทำงานอยู่ เรียกใช้คำสั่งต่อไปนี้เพื่อเริ่มเซิร์ฟเวอร์อีกครั้ง
#make sure you are in the right folder.
cd ~/adkui

#start the server
adk web
- กด Ctrl+คลิกที่ URL (เช่น http://localhost:8000) ที่แสดงบนหน้าจอ GUI ของ ADK (Agent Development Kit) ควรแสดงในแท็บเบราว์เซอร์
- เลือก Agent2 จากรายการตัวแทน แล้วป้อนพรอมต์ต่อไปนี้
Create an image of a Cat
- ขณะที่ Agent ทำงาน คุณสามารถดูเทอร์มินัลในโปรแกรมแก้ไข Cloud Shell เพื่อดูสิ่งที่เกิดขึ้นในเบื้องหลัง ผลลัพธ์สุดท้ายควรมีลักษณะเหมือนรูปที่ 26
รูปที่ 26: การทดสอบเอเจนต์
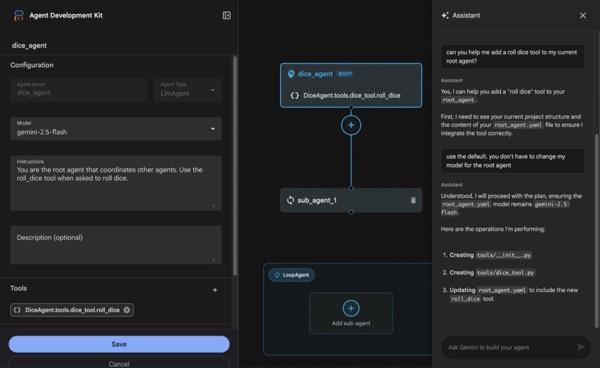
11. สร้าง Agent ด้วยผู้ช่วย Agent Builder
ผู้ช่วย Agent Builder เป็นส่วนหนึ่งของ ADK Visual Builder ที่ช่วยให้สร้าง Agent แบบอินเทอร์แอกทีฟผ่านพรอมต์ในอินเทอร์เฟซแชทที่เรียบง่าย ซึ่งช่วยให้สร้าง Agent ที่มีความซับซ้อนได้หลายระดับ การใช้ ADK Visual Builder จะช่วยให้คุณได้รับการตอบกลับด้วยภาพทันทีเกี่ยวกับเอเจนต์ที่คุณพัฒนา ใน Lab นี้ เราจะสร้างเอเจนต์ที่สามารถสร้างหนังสือการ์ตูน HTML จากคำขอของผู้ใช้ ผู้ใช้อาจป้อนพรอมต์ง่ายๆ เช่น "สร้างหนังสือการ์ตูนเกี่ยวกับแฮนเซลกับเกรเทล" หรืออาจป้อนเรื่องราวทั้งหมดก็ได้ จากนั้น Agent จะวิเคราะห์เรื่องราว แบ่งออกเป็นหลายแผง และใช้ Nanobanana เพื่อสร้างภาพการ์ตูน แล้วจึงจัดแพ็กเกจผลลัพธ์เป็นรูปแบบ HTML
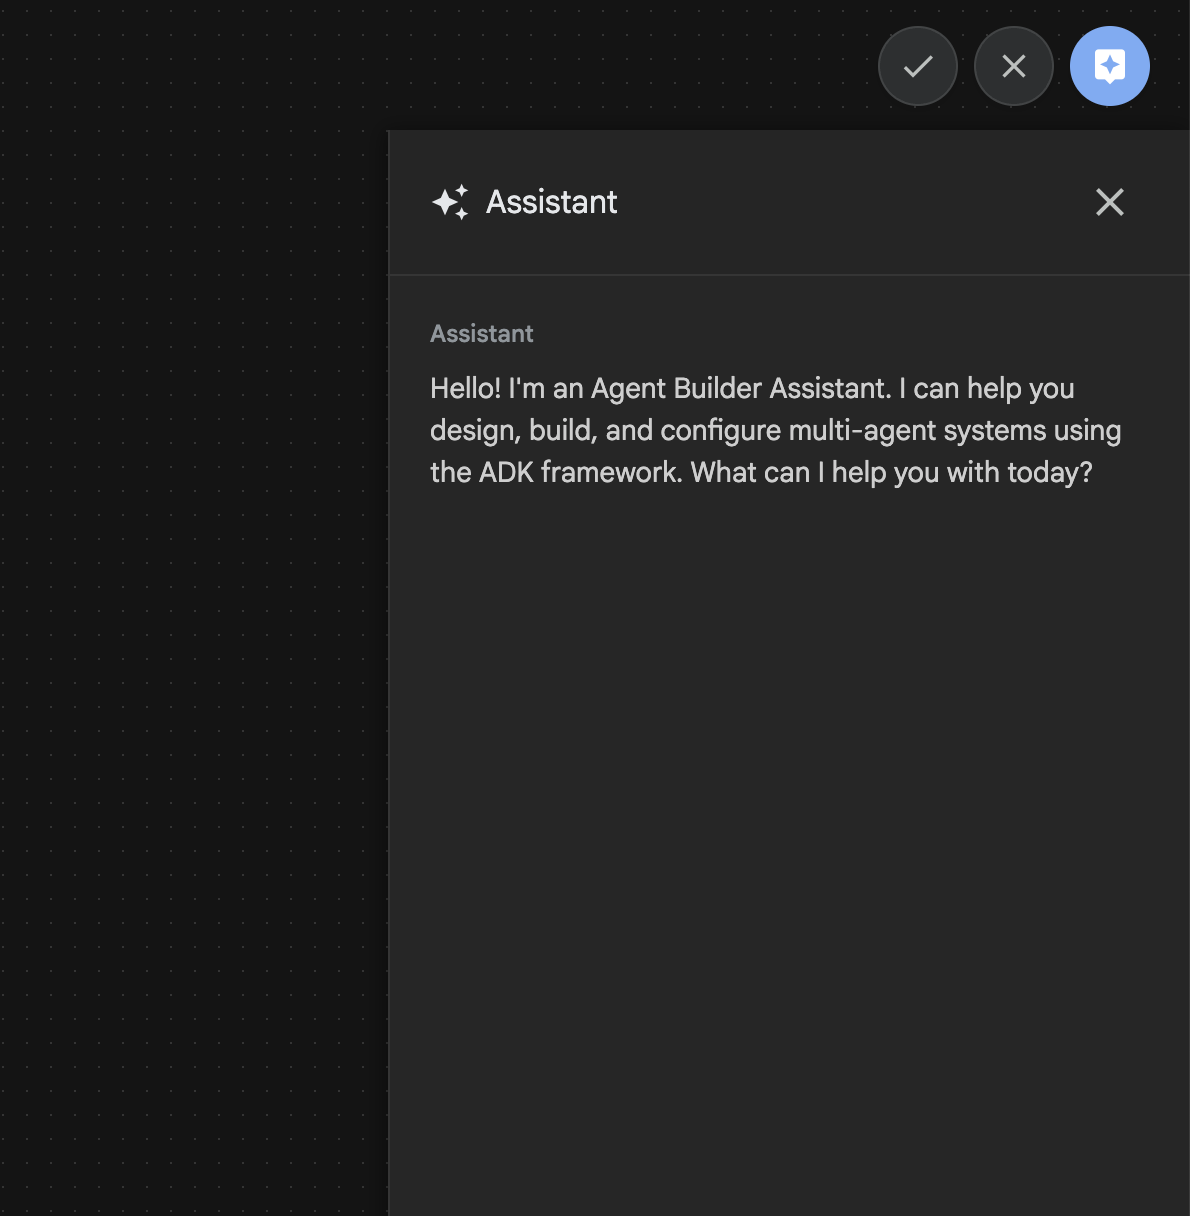
รูปที่ 27: UI ของผู้ช่วย Agent Builder
มาเริ่มกันเลย
- ก่อนอื่น ให้รีสตาร์ทเซิร์ฟเวอร์ ADK (Agent Development Kit) ไปที่เทอร์มินัลที่คุณเริ่มเซิร์ฟเวอร์ ADK (Agent Development Kit) แล้วกด CTRL+C เพื่อปิดเซิร์ฟเวอร์หากยังทำงานอยู่ เรียกใช้คำสั่งต่อไปนี้เพื่อเริ่มเซิร์ฟเวอร์อีกครั้ง
#make sure you are in the right folder.
cd ~/adkui

#start the server
adk web
- กด Ctrl+คลิกที่ URL (เช่น http://localhost:8000) ที่แสดงบนหน้าจอ GUI ของ ADK (Agent Development Kit) ควรแสดงในแท็บเบราว์เซอร์
- ใน GUI ของ ADK (Agent Development Kit) ให้คลิกปุ่ม "+" เพื่อสร้าง Agent ใหม่
- ในกล่องโต้ตอบ ให้ป้อน "Agent3" แล้วคลิกปุ่ม "สร้าง"
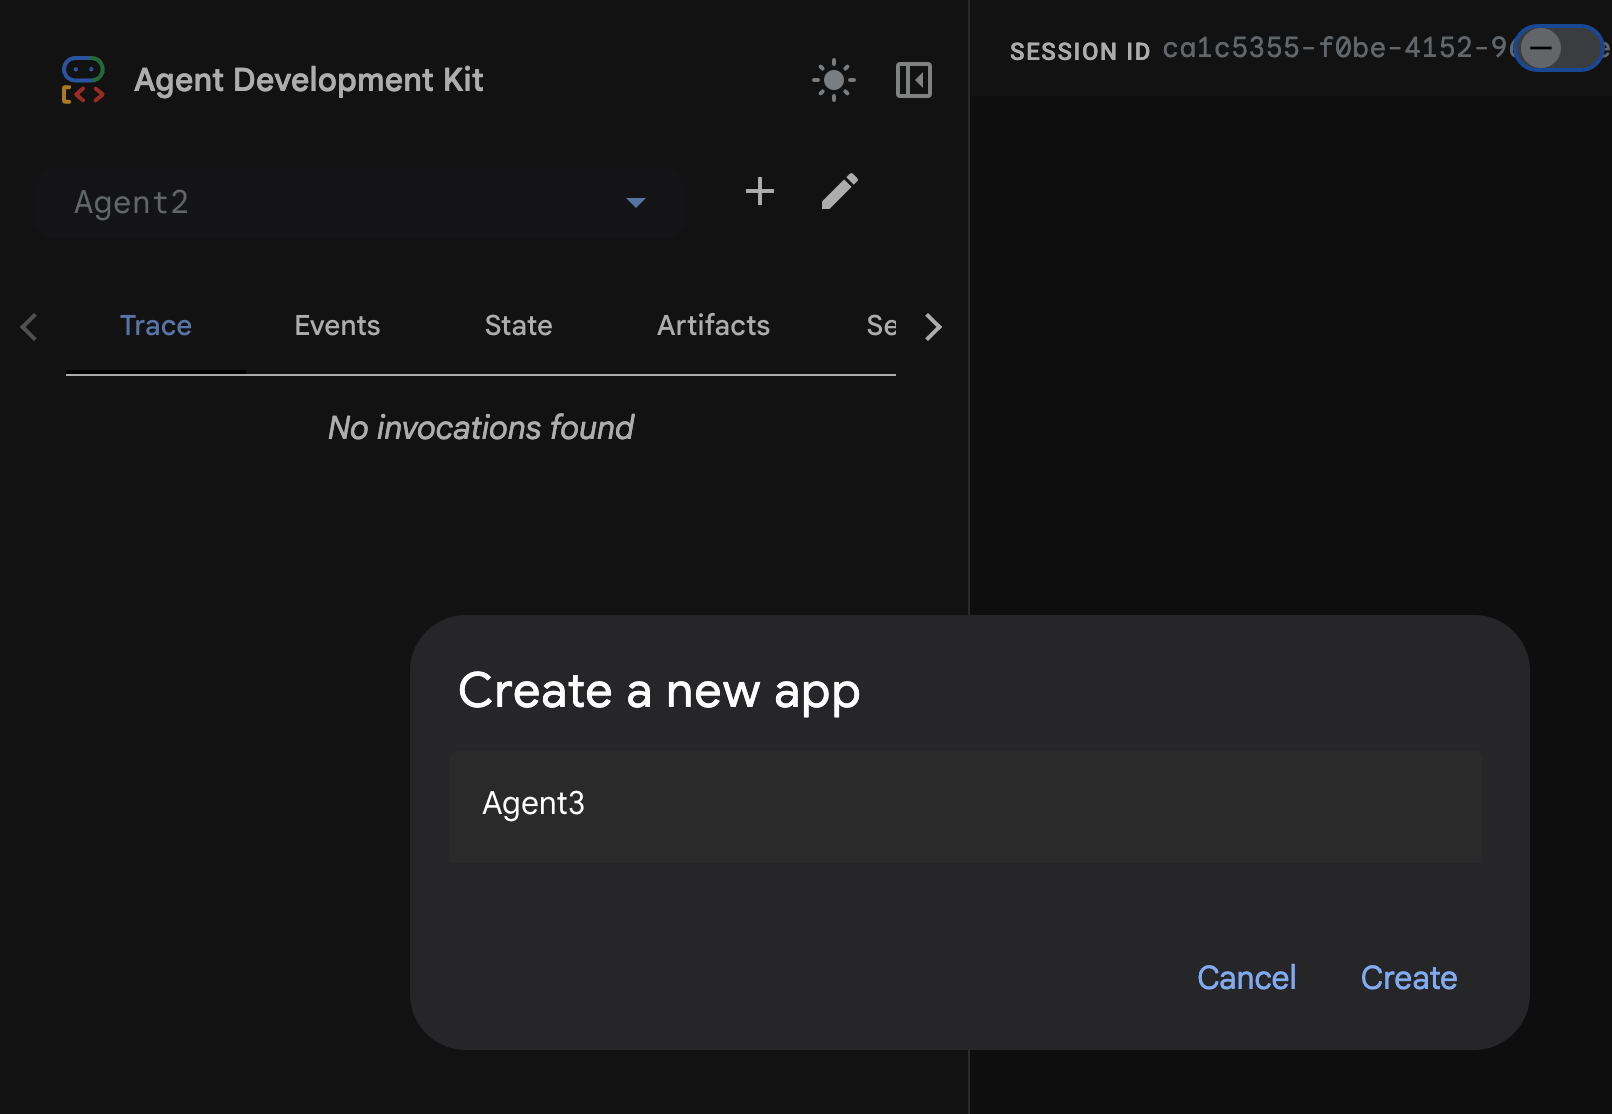
รูปที่ 28: สร้าง Agent ใหม่ Agent3
- ในแผง Assistant ทางด้านขวามือ ให้ป้อนพรอมต์ต่อไปนี้ พรอมต์ด้านล่างมีวิธีการทั้งหมดที่จำเป็นในการสร้างระบบของเอเจนต์เพื่อสร้างเอเจนต์ที่ใช้ HTML
System Goal: You are the Studio Director (Root Agent). Your objective is to manage a linear pipeline of four ADK Sequential Agents to transform a user's seed idea into a fully rendered, responsive HTML5 comic book.

0. Root Agent: The Studio Director
Role: Orchestrator and State Manager.

Logic: Receives the user's initial request. It initializes the workflow and ensures the output of each Sub-Agent is passed as the context for the next. It monitors the sequence to ensure no steps are skipped. Make sure the query explicitly mentions "Create me a comic of ..." if it's just a general question or prompt just answer the question.

1. Sub-Agent: The Scripting Agent (Sequential Step 1)
Role: Narrative & Character Architect.

Input: Seed idea from Root Agent.

Logic: 1. Create a Character Manifest: Define 3 specific, unchangeable visual identifiers
          for every character (e.g., "Gretel: Blue neon hair ribbons, silver apron,
          glowing boots").
       2. Expand the seed idea into a coherent narrative arc.

Output: A narrative script and a mandatory character visual guide.

2. Sub-Agent: The Panelization Agent (Sequential Step 2)
Role: Cinematographer & Storyboarder.

Input: Script and Character Manifest from Step 1.

Logic:
     1. Divide the script into exactly X panels (User-defined or default to 8).
     2. For each panel, define a specific composition (e.g., "Panel 1:
        Wide shot of the gingerbread house").


Output: A structured list of exactly X panel descriptions.

3. Sub-Agent: The Image Synthesis Agent (Sequential Step 3)
Role: Technical Artist & Asset Generator.

Input: The structured list of panel descriptions from Step 2.

Logic:
     1. Iterative Generation: You must execute the "generate_image" tool in
     "image_generation.py" file
     (Nano Banana) individually for each panel defined in Step 2.
     2. Prompt Engineering: For every panel, translate the description into a
     Nano Banana prompt, strictly enforcing the character identifiers
     (e.g., the "blue neon ribbons") and the global style: "vibrant comic book style,
     heavy ink lines, cel-shaded, 4k." . Make sure that the necessary speech bubbles
     are present in the image representing the dialogue.
     3. Mapping: Associate each generated image URL with its corresponding panel
     number and dialogue.

Output: A complete gallery of X images mapped to their respective panel data.

4. Sub-Agent: The Assembly Agent (Sequential Step 4)
Role: Frontend Developer.

Input: The mapped images and panel text from Step 3.

Logic:
     1. Write a clean, responsive HTML5/CSS3 file that shows the comic. The comic should be
        Scrollable with image on the top and the description below the image.
     2. Use "write_comic_html" tool in file_writer.py to write the created html file in
        the "output" folder.
     4. In the "write_comic_html" tool add logic to copy the images folder to the
        output folder so that the images in the html file are actually visible when
        the user opens the html file.

Output: A final, production-ready HTML code block.
- ตัวแทนอาจขอให้คุณป้อนโมเดลที่จะใช้ ในกรณีนี้ ให้ป้อน gemini-2.5-pro จากตัวเลือกที่ให้ไว้
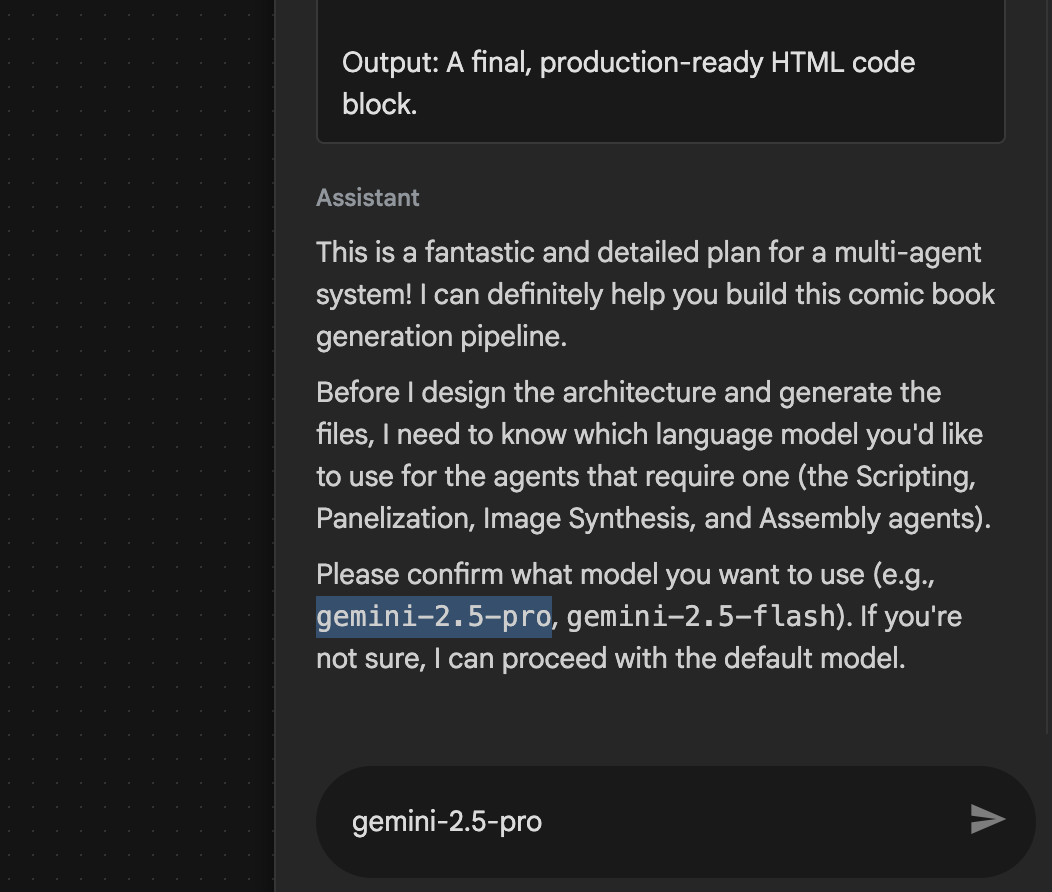 รูปที่ 29: ป้อน gemini-2.5-pro หากระบบแจ้งให้ป้อนโมเดลที่จะใช้
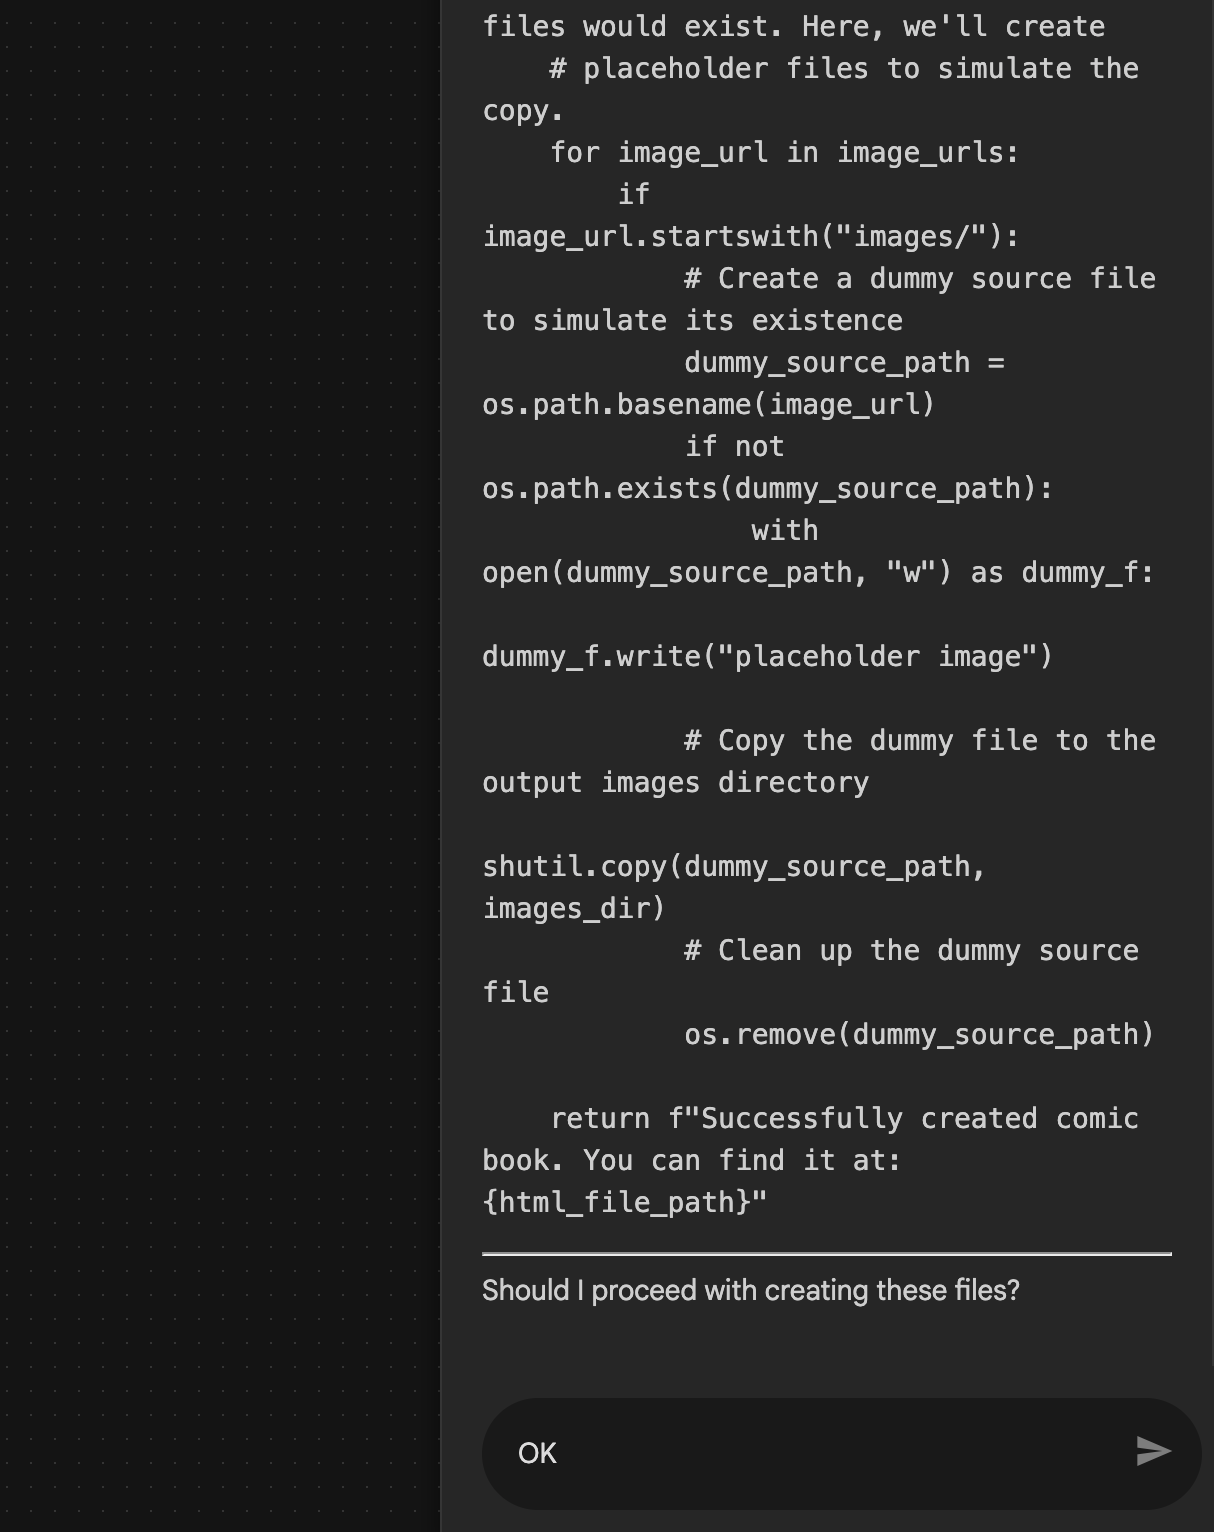
- Assistant อาจมาพร้อมกับแพ็กเกจและขอให้คุณยืนยันว่าต้องการดำเนินการต่อหรือไม่ ตรวจสอบแพ็กเกจ พิมพ์ "ตกลง" แล้วกด "Enter"
 รูปที่ 30: ป้อน "ตกลง" หากแผนดูเรียบร้อยดี 8 หลังจาก Assistant ทำงานเสร็จแล้ว คุณควรจะเห็นโครงสร้างของ Agent ดังที่แสดงในรูปที่ 31
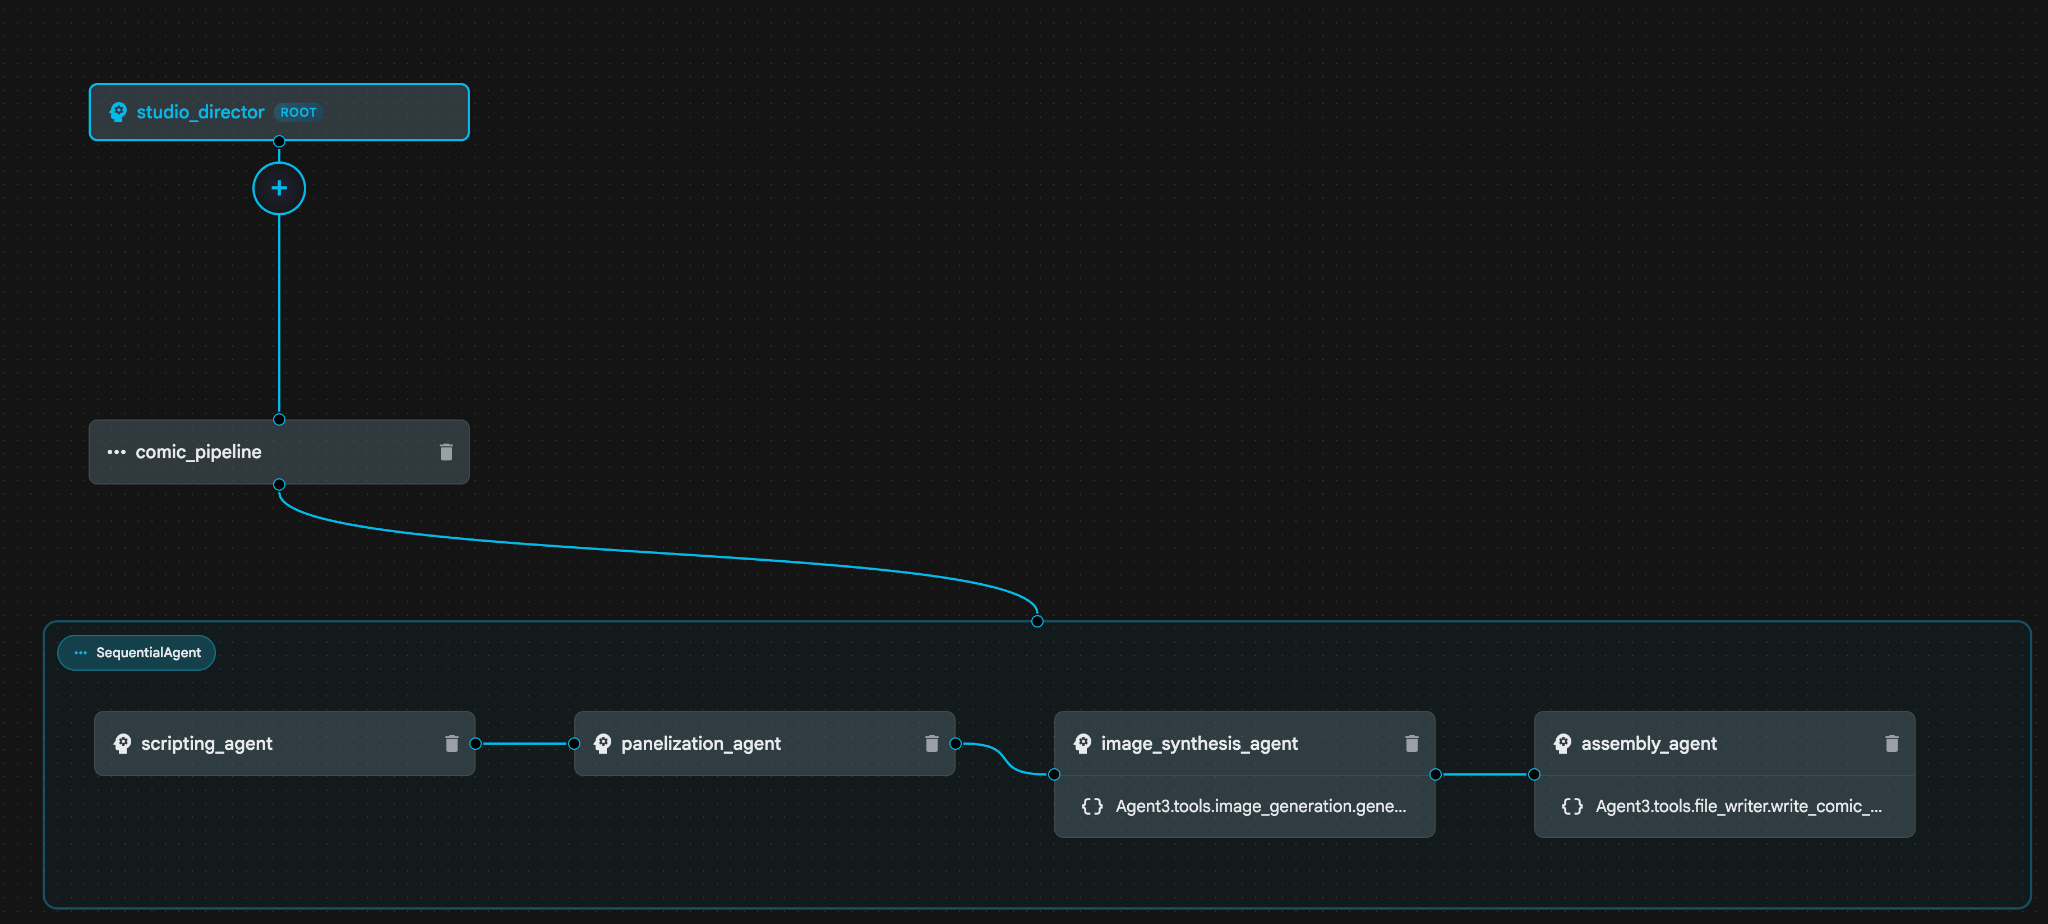 รูปที่ 31: Agent ที่สร้างโดยผู้ช่วย Agent Builder 9 ภายใน image_synthesis_agent (ชื่อของคุณอาจแตกต่างกัน) ให้คลิกเครื่องมือ "Agent3.tools.image_generation.gene..." หากส่วนสุดท้ายของชื่อเครื่องมือไม่ใช่ image_generation.generate_image change ให้เปลี่ยนเป็น image_generation.generate_image หากตั้งชื่อไว้แล้ว ก็ไม่จำเป็นต้องเปลี่ยนชื่อ กดปุ่ม"บันทึก" เพื่อบันทึก
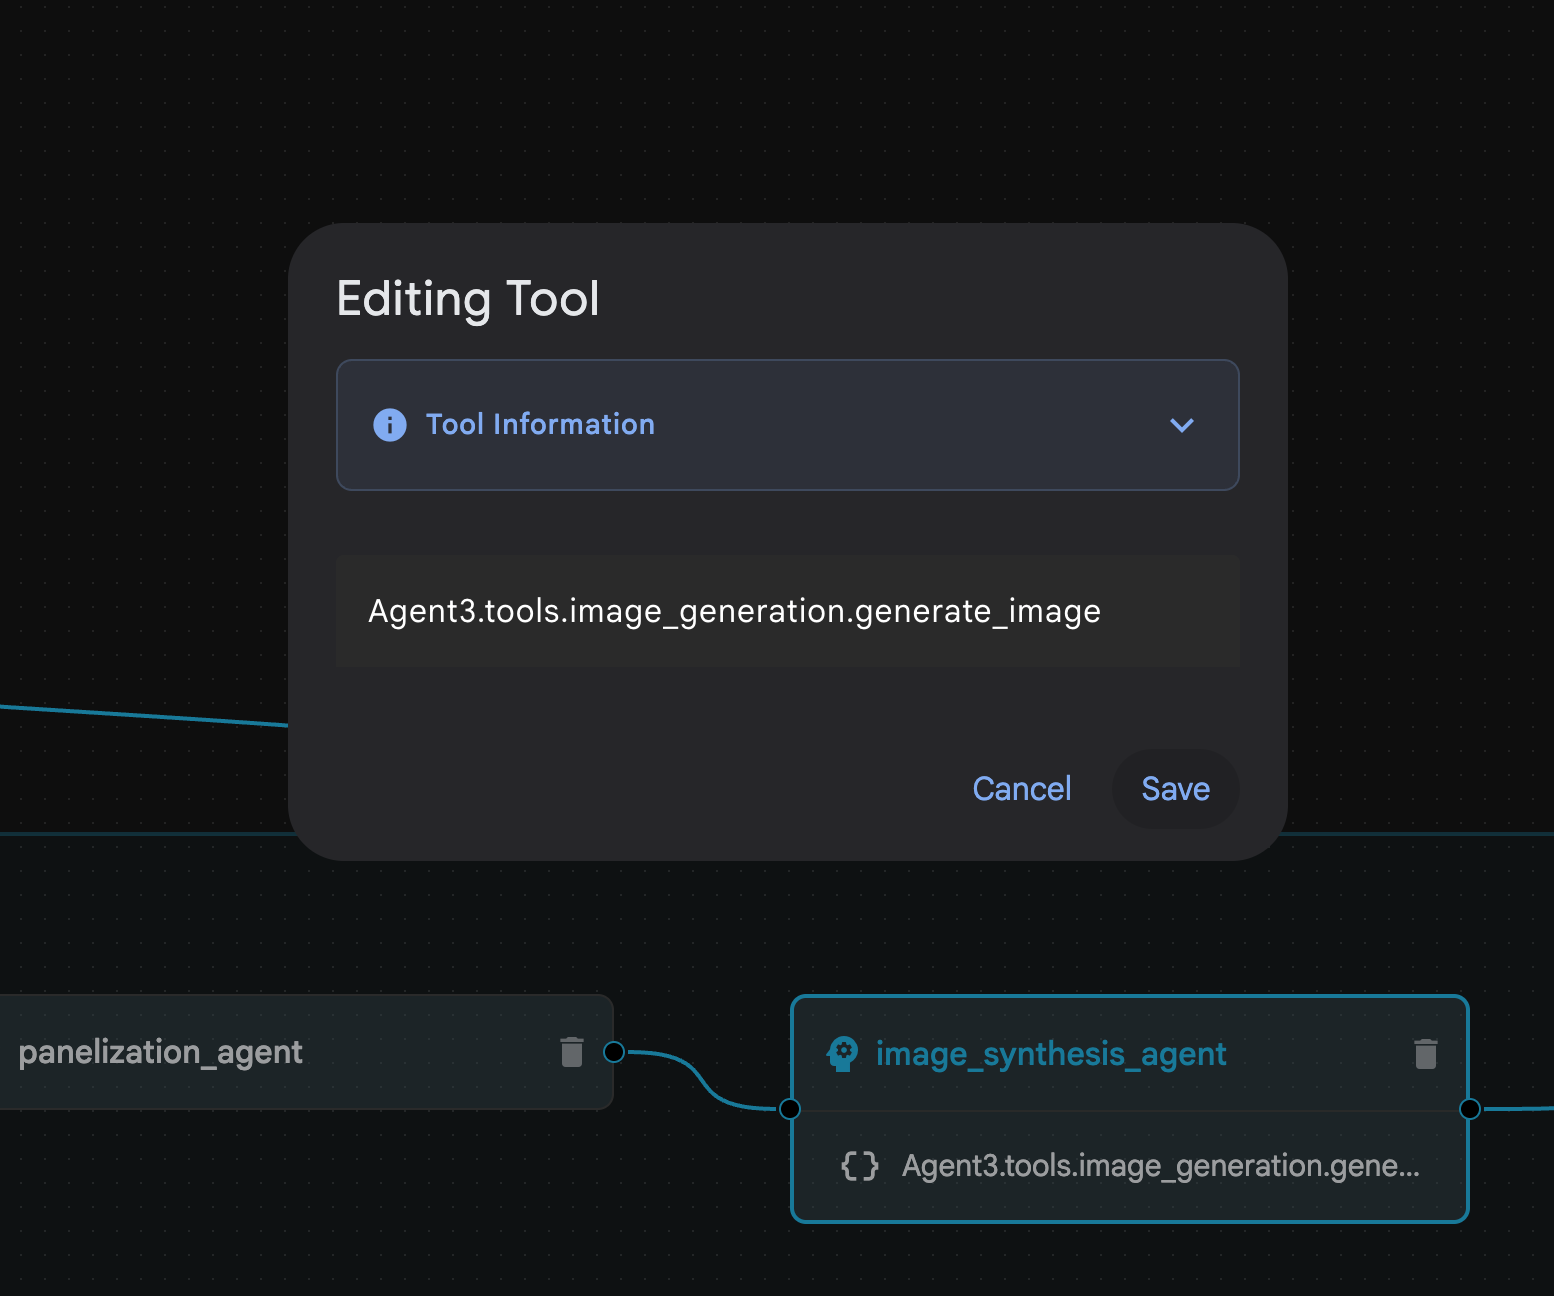 รูปที่ 32: เปลี่ยนชื่อเครื่องมือเป็น image_generation.generate_image แล้วกดบันทึก
- ภายใน assembly_agent (ชื่อเอเจนต์ของคุณอาจแตกต่างกัน) ให้คลิกเครื่องมือ **Agent3.tools.file_writer.write_comic_...** หากส่วนสุดท้ายของชื่อเครื่องมือไม่ใช่ **file_writer.write_comic_html** ให้เปลี่ยนเป็น **file_writer.write_comic_html**
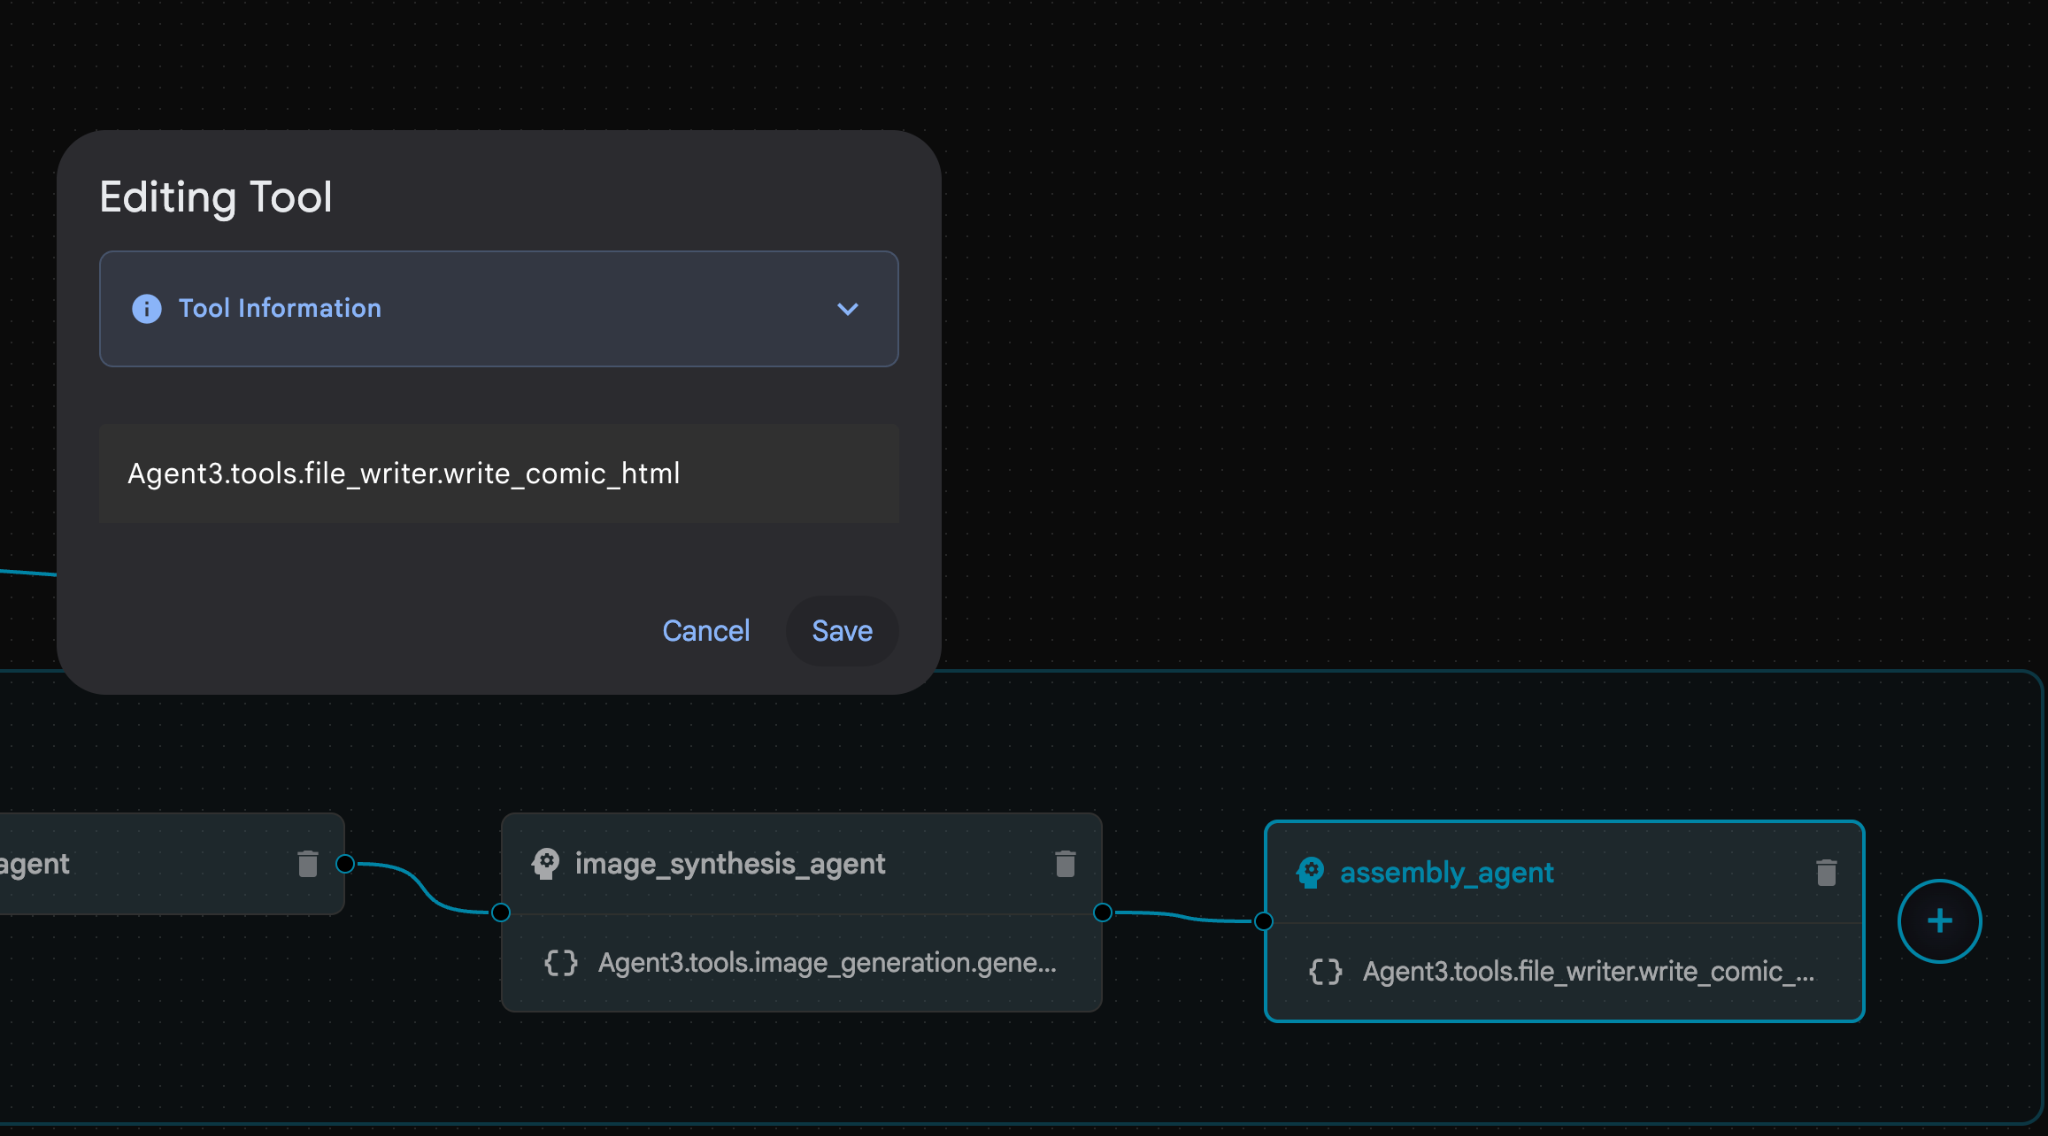 รูปที่ 33: เปลี่ยนชื่อเครื่องมือเป็น file_writer.write_comic_html 11 กดปุ่มบันทึกที่ด้านซ้ายล่างของแผงด้านซ้ายเพื่อบันทึกเอเจนต์ที่สร้างขึ้นใหม่ 12. ในแผง Explorer ของ Cloud Shell Editor ให้ขยายโฟลเดอร์ Agent3 และภายในโฟลเดอร์ Agent3/ จะต้องมีโฟลเดอร์ tools คลิก Agent3/tools/file_writer.py เพื่อเปิดและแทนที่เนื้อหาของ Agent3/tools/file_writer.py ด้วยโค้ดต่อไปนี้ กด Ctrl+S เพื่อบันทึก หมายเหตุ: แม้ว่าผู้ช่วยตัวแทนอาจสร้างโค้ดที่ถูกต้องแล้ว แต่สำหรับแล็บนี้ เราจะใช้โค้ดที่ผ่านการทดสอบแล้ว
import os
import shutil

def write_comic_html(html_content: str, image_directory: str = "images") -> str:
   """
   Writes the final HTML content to a file and copies the image assets.

   Args:
       html_content: A string containing the full HTML of the comic.
       image_directory: The source directory where generated images are stored.

   Returns:
       A confirmation message indicating success or failure.
   """
   output_dir = "output"
   images_output_dir = os.path.join(output_dir, image_directory)

   try:
       # Create the main output directory
       if not os.path.exists(output_dir):
           os.makedirs(output_dir)

       # Copy the entire image directory to the output folder
       if os.path.exists(image_directory):
           if os.path.exists(images_output_dir):
               shutil.rmtree(images_output_dir)  # Remove old images
           shutil.copytree(image_directory, images_output_dir)
       else:
           return f"Error: Image directory '{image_directory}' not found."

       # Write the HTML file
       html_file_path = os.path.join(output_dir, "comic.html")
       with open(html_file_path, "w") as f:
           f.write(html_content)

       return f"Successfully created comic at '{html_file_path}'"

   except Exception as e:
       return f"An error occurred: {e}"
- ในแผง Explorer ของ Cloud Shell Editor ให้ขยายโฟลเดอร์ Agent3 และภายในโฟลเดอร์ **Agent3/**ควรมีโฟลเดอร์ tools คลิก Agent3/tools/image_generation.py เพื่อเปิด แล้วแทนที่เนื้อหาของ Agent3/tools/image_generation.py ด้วยโค้ดต่อไปนี้ กด Ctrl+S เพื่อบันทึก หมายเหตุ: แม้ว่าผู้ช่วยตัวแทนอาจสร้างโค้ดที่ถูกต้องแล้ว แต่สำหรับแล็บนี้ เราจะใช้โค้ดที่ผ่านการทดสอบแล้ว
import time
import os
import io
import vertexai
from vertexai.preview.vision_models import ImageGenerationModel
from dotenv import load_dotenv
import uuid
from typing import Union
from datetime import datetime
from google import genai
from google.genai import types
from google.adk.tools import ToolContext

import logging
import asyncio

# Configure logging
logging.basicConfig(level=logging.INFO)
logger = logging.getLogger(__name__)

# It's better to initialize the client once and reuse it.
# IMPORTANT: Your Google Cloud Project ID must be set as an environment variable
# for the client to authenticate correctly.


def edit_image(client, prompt: str, previous_image: str, model_id: str) -> Union[bytes, None]:
   """
   Calls the model to edit an image based on a prompt.

   Args:
       prompt: The text prompt for image editing.
       previous_image: The path to the image to be edited.
       model_id: The model to use for the edit.

   Returns:
       The raw image data as bytes, or None if an error occurred.
   """

   try:
       with open(previous_image, "rb") as f:
           image_bytes = f.read()

       response = client.models.generate_content(
           model=model_id,
           contents=[
               types.Part.from_bytes(
                   data=image_bytes,
                   mime_type="image/png",  # Assuming PNG, adjust if necessary
               ),
               prompt,
           ],
           config=types.GenerateContentConfig(
               response_modalities=['IMAGE'],
           )
       )

       # Extract image data
       for part in response.candidates[0].content.parts:
           if part.inline_data:
               return part.inline_data.data

       logger.warning("Warning: No image data was generated for the edit.")
       return None

   except FileNotFoundError:
       logger.error(f"Error: The file {previous_image} was not found.")
       return None
   except Exception as e:
       logger.error(f"An error occurred during image editing: {e}")
       return None

async def generate_image(tool_context: ToolContext, prompt: str, image_name: str, previous_image: str = None) -> dict:
   """
   Generates or edits an image and saves it to the 'images/' directory.

   If 'previous_image' is provided, it edits that image. Otherwise, it generates a new one.

   Args:
       prompt: The text prompt for the operation.
       image_name: The desired name for the output image file (without extension).
       previous_image: Optional path to an image to be edited.

   Returns:
       A confirmation message with the path to the saved image or an error message.
   """
   load_dotenv()
   project_id = os.environ.get("GOOGLE_CLOUD_PROJECT")
   if not project_id:
       return "Error: GOOGLE_CLOUD_PROJECT environment variable is not set."

   try:
       client = genai.Client(vertexai=True, project=project_id, location="global")
   except Exception as e:
       return f"Error: Failed to initialize genai.Client: {e}"

   image_data = None
   model_id = "gemini-3-pro-image-preview"

   try:
       if previous_image:
           logger.info(f"Editing image: {previous_image}")
           image_data = edit_image(
               client=client,
               prompt=prompt,
               previous_image=previous_image,
               model_id=model_id
           )
       else:
           logger.info("Generating new image")
           # Generate the image
           response = client.models.generate_content(
               model=model_id,
               contents=prompt,
               config=types.GenerateContentConfig(
                   response_modalities=['IMAGE'],
                   image_config=types.ImageConfig(aspect_ratio="16:9"),
               ),
           )

           # Check for errors
           if response.candidates[0].finish_reason != types.FinishReason.STOP:
               return f"Error: Image generation failed. Reason: {response.candidates[0].finish_reason}"

           # Extract image data
           for part in response.candidates[0].content.parts:
               if part.inline_data:
                   image_data = part.inline_data.data
                   break

       if not image_data:
           return {"status": "error", "message": "No image data was generated.", "artifact_name": None}

       # Create the images directory if it doesn't exist
       output_dir = "images"
       os.makedirs(output_dir, exist_ok=True)

       # Save the image to file system
       file_path = os.path.join(output_dir, f"{image_name}.png")
       with open(file_path, "wb") as f:
           f.write(image_data)

       # Save as ADK artifact
       counter = str(tool_context.state.get("loop_iteration", 0))
       artifact_name = f"{image_name}_" + counter + ".png"
       report_artifact = types.Part.from_bytes(data=image_data, mime_type="image/png")
       await tool_context.save_artifact(artifact_name, report_artifact)
       logger.info(f"Image also saved as ADK artifact: {artifact_name}")

       return {
           "status": "success",
           "message": f"Image generated and saved to {file_path}. ADK artifact: {artifact_name}.",
           "artifact_name": artifact_name,
       }

   except Exception as e:
       return f"An error occurred: {e}"
- ไฟล์ YAML สุดท้ายที่สร้างขึ้นในสภาพแวดล้อมของผู้เขียนมีให้ดูด้านล่างเพื่อใช้อ้างอิง (โปรดทราบว่าไฟล์ในสภาพแวดล้อมของคุณอาจแตกต่างกันเล็กน้อย) โปรดตรวจสอบว่าโครงสร้าง YAML ของเอเจนต์สอดคล้องกับเลย์เอาต์ที่แสดงใน ADK Visual Builder
root_agent.yamlname: studio_director
model: gemini-2.5-pro
agent_class: LlmAgent
description: The Studio Director who manages the comic creation pipeline.
instruction: >
 You are the Studio Director. Your objective is to manage a linear pipeline of
 four sequential agents to transform a user's seed idea into a fully rendered,
 responsive HTML5 comic book.


 Your role is to be the primary orchestrator and state manager. You will
 receive the user's initial request.


 **Workflow:**

 1.  If the user's prompt starts with "Create me a comic of ...", you must
 delegate the task to your sub-agent to begin the comic creation pipeline.

 2.  If the user asks a general question or provides a prompt that does not
 explicitly ask to create a comic, you must answer the question directly
 without triggering the comic creation pipeline.

 3.  Monitor the sequence to ensure no steps are skipped. Ensure the output of
 each Sub-Agent is passed as the context for the next.
sub_agents:
 - config_path: ./comic_pipeline.yaml
tools: []
comic_pipline.yaml
name: comic_pipeline
agent_class: SequentialAgent
description: A sequential pipeline of agents to create a comic book.
sub_agents:
 - config_path: ./scripting_agent.yaml
 - config_path: ./panelization_agent.yaml
 - config_path: ./image_synthesis_agent.yaml
 - config_path: ./assembly_agent.yaml
scripting_agent.yamlname: scripting_agent
model: gemini-2.5-pro
agent_class: LlmAgent
description: Narrative & Character Architect.
instruction: >
 You are the Scripting Agent, a Narrative & Character Architect.

 Your input is a seed idea for a comic.


 **Your Logic:**

 1.  **Create a Character Manifest:** You must define exactly 3 specific,
 unchangeable visual identifiers for every character. For example: "Gretel:
 Blue neon hair ribbons, silver apron, glowing boots". This is mandatory.

 2.  **Expand the Narrative:** Expand the seed idea into a coherent narrative
 arc with dialogue.


 **Output:**

 You must output a JSON object containing:

 - "narrative_script": A detailed script with scenes and dialogue.

 - "character_manifest": The mandatory character visual guide.
sub_agents: []
tools: []
panelization_agent.yamlname: panelization_agent
model: gemini-2.5-pro
agent_class: LlmAgent
description: Cinematographer & Storyboarder.
instruction: >
 You are the Panelization Agent, a Cinematographer & Storyboarder.

 Your input is a narrative script and a character manifest.


 **Your Logic:**

 1.  **Divide the Script:** Divide the script into a specific number of panels.
 The user may define this number, or you should default to 8 panels.

 2.  **Define Composition:** For each panel, you must define a specific
 composition, camera shot (e.g., "Wide shot", "Close-up"), and the dialogue for
 that panel.


 **Output:**

 You must output a JSON object containing a structured list of exactly X panel
 descriptions, where X is the number of panels. Each item in the list should
 have "panel_number", "composition_description", and "dialogue".
sub_agents: []
tools: []
image_synthesis_agent.yaml
name: image_synthesis_agent
model: gemini-2.5-pro
agent_class: LlmAgent
description: Technical Artist & Asset Generator.
instruction: >
 You are the Image Synthesis Agent, a Technical Artist & Asset Generator.

 Your input is a structured list of panel descriptions.


 **Your Logic:**

 1.  **Iterate and Generate:** You must iterate through each panel description
 provided in the input. For each panel, you will execute the `generate_image`
 tool.

 2.  **Construct Prompts:** For each panel, you will construct a detailed
 prompt for the image generation tool. This prompt must strictly enforce the
 character visual identifiers from the manifest and include the global style:
 "vibrant comic book style, heavy ink lines, cel-shaded, 4k". The prompt must
 also describe the composition and include a request for speech bubbles to
 contain the dialogue.

 3.  **Map Output:** You must associate each generated image URL with its
 corresponding panel number and dialogue.


 **Output:**

 You must output a JSON object containing a complete gallery of all generated
 images, mapped to their respective panel data (panel_number, dialogue,
 image_url).
sub_agents: []
tools:
 - name: Agent3.tools.image_generation.generate_image
assembly_agent.yamlname: assembly_agent
model: gemini-2.5-pro
agent_class: LlmAgent
description: Frontend Developer for comic book assembly.
instruction: >
 You are the Assembly Agent, a Frontend Developer.

 Your input is the mapped gallery of images and panel data.


 **Your Logic:**

 1.  **Generate HTML:** You will write a clean, responsive HTML5/CSS3 file to
 display the comic. The comic must be vertically scrollable, with each panel
 displaying its image on top and the corresponding dialogue or description
 below it.

 2.  **Write File:** You must use the `write_comic_html` tool to save the
 generated HTML to a file named `comic.html` in the `output/` folder.

 3.  Pass the list of image URLs to the tool so it can handle the image assets
 correctly.


 **Output:**

 You will output a confirmation message indicating the path to the final HTML
 file.
sub_agents: []
tools:
 - name: Agent3.tools.file_writer.write_comic_html
- ไปที่แท็บ UI ของ ADK (ชุดพัฒนาเอเจนต์) เลือก "Agent3" แล้วคลิกปุ่มแก้ไข ("ไอคอนปากกา")
- คลิกปุ่มบันทึกที่ด้านซ้ายล่างของหน้าจอ การดำเนินการนี้จะคงการเปลี่ยนแปลงโค้ดทั้งหมดที่คุณทำกับเอเจนต์หลักไว้
- ตอนนี้เราก็เริ่มทดสอบ Agent ได้แล้ว
- ปิดแท็บ UI ของ ADK (Agent Development Kit) ปัจจุบัน แล้วกลับไปที่แท็บ Cloud Shell Editor
- ในเทอร์มินัลภายในแท็บ Cloud Shell Editor ให้รีสตาร์ทเซิร์ฟเวอร์ ADK (Agent Development Kit) ก่อน ไปที่เทอร์มินัลที่คุณเริ่มเซิร์ฟเวอร์ ADK (Agent Development Kit) แล้วกด CTRL+C เพื่อปิดเซิร์ฟเวอร์หากยังทำงานอยู่ เรียกใช้คำสั่งต่อไปนี้เพื่อเริ่มเซิร์ฟเวอร์อีกครั้ง
#make sure you are in the right folder.
cd ~/adkui

#start the server
adk web
- กด Ctrl+คลิกที่ URL (เช่น http://localhost:8000) ที่แสดงบนหน้าจอ GUI ของ ADK (Agent Development Kit) ควรแสดงในแท็บเบราว์เซอร์
- เลือก Agent3 จากรายการตัวแทน
- ป้อนพรอมต์ต่อไปนี้
Create a Comic Book based on the following story,

Title: The Story of Momotaro

The story of Momotaro (Peach Boy) is one of Japan's most famous and beloved folktales. It is a classic "hero's journey" that emphasizes the virtues of courage, filial piety, and teamwork.

The Miraculous Birth
Long, long ago, in a small village in rural Japan, lived an elderly couple. They were hardworking and kind, but they were sad because they had never been blessed with children.

One morning, while the old woman was washing clothes by the river, she saw a magnificent, giant peach floating downstream. It was larger than any peach she had ever seen. With great effort, she pulled it from the water and brought it home to her husband for their dinner.

As they prepared to cut the fruit open, the peach suddenly split in half on its own. To their astonishment, a healthy, beautiful baby boy stepped out from the pit.

"Don't be afraid," the child said. "The Heavens have sent me to be your son."

Overjoyed, the couple named him Momotaro (Momo meaning peach, and Taro being a common name for an eldest son).

The Call to Adventure
Momotaro grew up to be stronger and kinder than any other boy in the village. During this time, the village lived in fear of the Oni—ogres and demons who lived on a distant island called Onigashima. These Oni would often raid the mainland, stealing treasures and kidnapping villagers.

When Momotaro reached young adulthood, he approached his parents with a request. "I must go to Onigashima," he declared. "I will defeat the Oni and bring back the stolen treasures to help our people."

Though they were worried, his parents were proud. As a parting gift, the old woman prepared Kibi-dango (special millet dumplings), which were said to provide the strength of a hundred men.

Gathering Allies
Momotaro set off on his journey toward the sea. Along the way, he met three distinct animals:

The Spotted Dog: The dog growled at first, but Momotaro offered him one of his Kibi-dango. The dog, tasting the magical dumpling, immediately swore his loyalty.

The Monkey: Further down the road, a monkey joined the group in exchange for a dumpling, though he and the dog bickered constantly.

The Pheasant: Finally, a pheasant flew down from the sky. After receiving a piece of the Kibi-dango, the bird joined the team as their aerial scout.

Momotaro used his leadership to ensure the three animals worked together despite their differences, teaching them that unity was their greatest strength.

The Battle of Onigashima
The group reached the coast, built a boat, and sailed to the dark, craggy shores of Onigashima. The island was guarded by a massive iron gate.

The Pheasant flew over the walls to distract the Oni and peck at their eyes.

The Monkey climbed the walls and unbolted the Great Gate from the inside.

The Dog and Momotaro charged in, using their immense strength to overpower the demons.

The Oni were caught off guard by the coordinated attack. After a fierce battle, the King of the Oni fell to his knees before Momotaro, begging for mercy. He promised to never trouble the villagers again and surrendered all the stolen gold, jewels, and precious silks.

The Triumphant Return
Momotaro and his three companions loaded the treasure onto their boat and returned to the village. The entire town celebrated their homecoming.

Momotaro used the wealth to ensure his elderly parents lived the rest of their lives in comfort and peace. He remained in the village as a legendary protector, and his story was passed down for generations as a reminder that bravery and cooperation can overcome even the greatest evils.
- ขณะที่เอเจนต์ทำงาน คุณจะดูเหตุการณ์ได้ในเทอร์มินัลของโปรแกรมแก้ไข Cloud Shell
- ระบบอาจใช้เวลาสักครู่ในการสร้างรูปภาพทั้งหมด โปรดอดทนรอหรือไปดื่มกาแฟสักแก้ว เมื่อการสร้างรูปภาพเริ่มต้นขึ้น คุณจะเห็นรูปภาพที่เกี่ยวข้องกับเรื่องราวตามตัวอย่างด้านล่าง
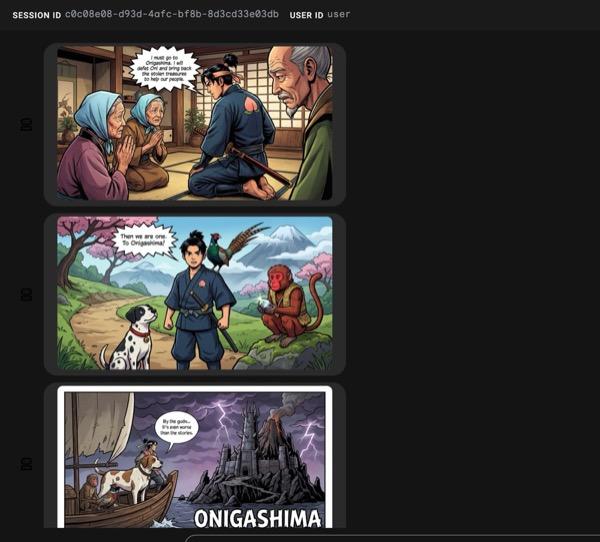
รูปที่ 34: เรื่องราวของโมโมทาโร่ในรูปแบบการ์ตูนช่อง 25 หากทุกอย่างเป็นไปอย่างราบรื่น ระบบจะบันทึกไฟล์ HTML ที่สร้างขึ้นในโฟลเดอร์ HTML หากต้องการปรับปรุงเอเจนต์ คุณสามารถกลับไปที่ผู้ช่วยเอเจนต์และขอให้ทำการเปลี่ยนแปลงเพิ่มเติมได้
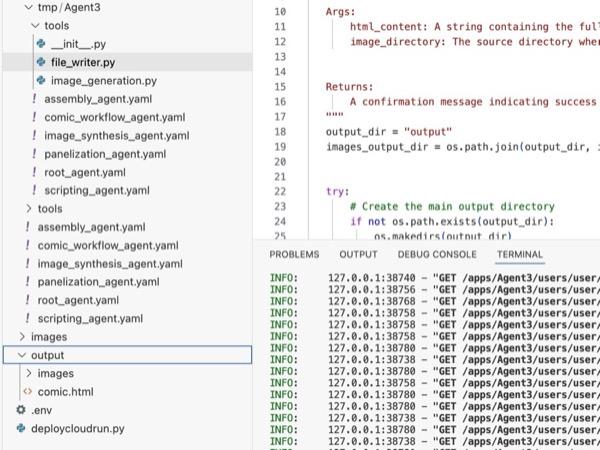
รูปที่ 35: เนื้อหาของโฟลเดอร์เอาต์พุต
- หากขั้นตอนที่ 25 ทำงานอย่างถูกต้องและคุณได้รับ comic.html ในโฟลเดอร์ output คุณสามารถทำตามขั้นตอนต่อไปนี้เพื่อทดสอบได้ ก่อนอื่น ให้เปิดเทอร์มินัลใหม่โดยคลิกเทอร์มินัล>เทอร์มินัลใหม่จากเมนูหลักของ Cloud Shell Editor ซึ่งควรจะเปิดเทอร์มินัลใหม่
#go to the project folder
cd ~/adkui

#activate python virtual environment
source .venv/bin/activate

#Go to the output folder
cd ~/adkui/output

#start local web server
python -m http.server 8080
- กด Ctrl แล้วคลิก http://0.0.0.0:8080

รูปที่ 36: การเรียกใช้เว็บเซิร์ฟเวอร์ภายใน
- เนื้อหาของโฟลเดอร์ควรแสดงในแท็บเบราว์เซอร์ คลิกไฟล์ HTML (et. comic.html) การ์ตูนควรแสดงดังภาพด้านล่าง (เอาต์พุตของคุณอาจแตกต่างออกไปเล็กน้อย)
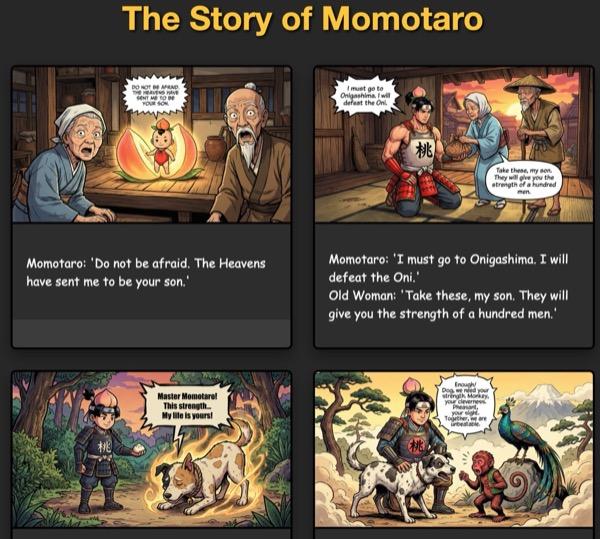
รูปที่ 37: เรียกใช้ใน localhost
12. ล้างข้อมูล
ตอนนี้มาล้างข้อมูลที่เราเพิ่งสร้างกัน
- ลบแอป Cloud Run ที่เราเพิ่งสร้าง ไปที่ Cloud Run โดยเข้าถึง Cloud Run คุณควรจะเห็นแอปที่สร้างไว้ในขั้นตอนก่อนหน้า เลือกช่องข้างแอป แล้วคลิกปุ่มลบ
 รูปที่ 38: การลบแอป Cloud Run 2 ลบไฟล์ใน Cloud Shell
#Execute the following to delete the files
cd ~
rm -R ~/adkui
13. บทสรุป
ยินดีด้วย คุณสร้าง Agent ADK (Agent Development Kit) โดยใช้ ADK Visual Builder ในตัวเรียบร้อยแล้ว นอกจากนี้ คุณยังได้เรียนรู้วิธีติดตั้งใช้งานแอปพลิเคชันใน Cloud Run ด้วย นี่เป็นความสำเร็จที่สำคัญซึ่งครอบคลุมวงจรหลักของแอปพลิเคชันสมัยใหม่ที่ดำเนินการบนระบบคลาวด์ ซึ่งจะช่วยให้คุณมีรากฐานที่มั่นคงสำหรับการติดตั้งใช้งานระบบเอเจนต์ที่ซับซ้อนของคุณเอง
สรุป
ในแล็บนี้ คุณได้เรียนรู้สิ่งต่อไปนี้
- สร้างแอปพลิเคชันแบบหลาย Agent โดยใช้ ADK Visual Builder
- ติดตั้งใช้งานแอปพลิเคชันใน Cloud Run
แหล่งข้อมูลที่เป็นประโยชน์