
1. 本实验的目标
在本实操实验中,您将使用 ADK(智能体开发套件) 构建一个多智能体应用,该应用可根据您的提示生成图片,并根据您的提示评估该图片。如果生成的图片未能令人满意地满足提示中所述的要求,代理会持续生成图片,直到生成符合您要求的图片为止。本实践实验中的每个代理都有一个单一用途,这些代理相互协作以实现总体目标。您将了解如何在本地测试应用,以及如何在 Agent Runtime 中部署应用。
学习内容
- 了解 ADK(智能体开发套件) 的基础知识,并学习如何创建多智能体系统。
- 了解如何在 Agent Runtime 中轻松部署和使用代理。
- 了解 A2A 协议的基础知识
- 了解如何将 A2A protocol与 ADK(智能体开发套件) 搭配使用来创建开放式智能体。
2. 项目设置
- 如果您还没有可用的项目,则需要在 GCP 控制台中创建一个新项目。
- 在本实验中,我们将使用 GCP Cloud Shell 来执行任务。打开 Cloud Shell 并使用 Cloud Shell 设置项目。
- 点击此处 Cloud Shell 打开 GCP Cloud Shell。如果您看到“授权 Shell”弹出式窗口,请点击以授权 Cloud Shell 编辑器。
- 您可以在 Cloud Shell 终端中使用以下命令检查项目是否已通过身份验证。
gcloud auth list
- 在 Cloud Shell 中运行以下命令,以确认您的项目
gcloud config list project
- 复制项目 ID,然后使用以下命令进行设置
gcloud config set project <YOUR_PROJECT_ID>
- 如果您不记得自己的项目 ID,可以使用以下命令列出所有项目 ID:
gcloud projects list
3. 启用 API
我们需要启用一些 API 服务才能运行本实验。在 Cloud Shell 中运行以下命令。
gcloud services enable aiplatform.googleapis.com
gcloud services enable cloudresourcemanager.googleapis.com
API 简介
- Gemini Enterprise Agent Platform API (
aiplatform.googleapis.com) 可让您访问 Gemini Enterprise Agent Platform 平台,从而使您的应用能够与 Gemini 模型互动,进行文本生成、聊天会话和函数调用。 - Cloud Resource Manager API (
cloudresourcemanager.googleapis.com) 可让您以编程方式管理 Google Cloud 项目的元数据,例如项目 ID 和名称,其他工具和 SDK 通常需要这些元数据来验证项目身份和权限。
4. 智能体开发套件简介
对于构建智能体应用的开发者,智能体开发套件具有以下几项关键优势:
- 多智能体系统:通过分层组合多个专业智能体来构建模块化且可伸缩的应用,实现复杂的协调和委托。
- 丰富的工具生态系统:赋予智能体多种功能,包括使用预构建工具(搜索、代码执行等)、创建自定义函数、整合第三方智能体框架的工具(LangChain、CrewAI),甚至调用其他智能体作为工具。
- 灵活的编排:使用工作流智能体(
SequentialAgent、ParallelAgent和LoopAgent)为可预测的流水线定义工作流,或利用 LLM 驱动的动态路由(LlmAgent转移)实现自适应行为。 - 集成式开发者体验:使用强大的 CLI 和交互式开发者界面,在本地开发、测试和调试,并分步检查事件、状态及智能体执行情况。
- 内置评估:通过将最终回答质量和分步执行轨迹与预定义测试用例对比,系统地评估智能体性能。
- 可随时部署:将智能体容器化并部署至任意环境 - 本地运行、使用 Agent Runtime 扩缩,或通过 Cloud Run 或 Docker 集成到自定义基础设施。
虽然其他生成式 AI SDK 或智能体框架也允许您查询模型,甚至为模型添加工具功能,但在多个模型之间实现动态协调仍需您完成大量工作。
智能体开发套件提供了比这些工具更高级的框架,使您可以轻松地将多个智能体互相连接,从而实现复杂但容易维护的工作流。
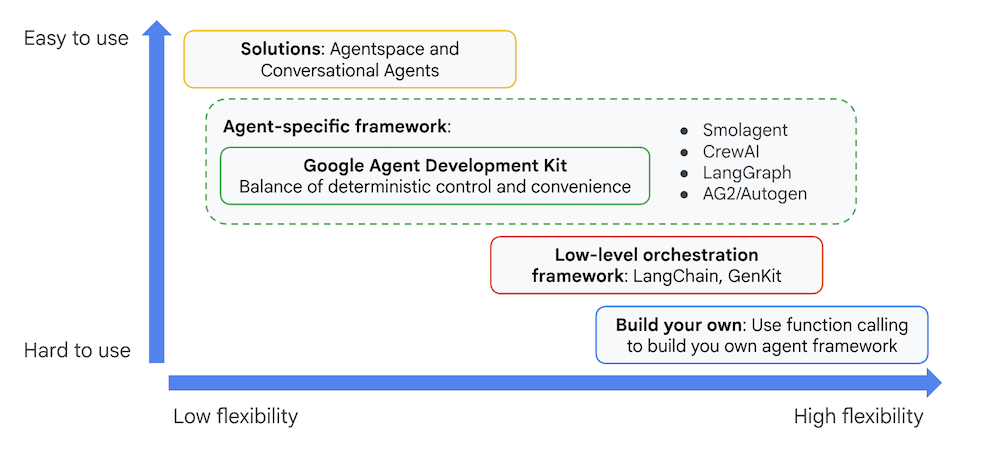
图 1:智能体开发套件 (ADK) 的定位
5. Agent Runtime 简介
Agent Runtime 是一项全托管式服务,可在 Google Cloud 中部署代理。借助 Agent Runtime,开发者可以在 Gemini Enterprise Agent Platform 上开发、自定义、部署、提供服务和管理 OSS AI 智能体(ADK(智能体开发套件) 、LangChain、LangGraph、CrewAI、AutoGen 等)。
代理运行时还提供用于处理用户数据(也称为代理记忆库)的服务。目前,有以下两种类型的内存服务。
- 短期记忆:借助 Agent Engine 会话,您可以存储、管理和检索单次会话中正在进行的对话记录(状态),将其作为短期记忆。
- 长期记忆:借助 Agent Engine 记忆库,您可以存储、转换和检索记忆内容(状态),尤其是多次会话中的记忆内容,将这些内容作为长期记忆。
您也可以在 Cloud Run 或 GKE 等其他 Google Cloud 服务中部署代理,但应考虑在以下使用场景中使用代理运行时。
- 有状态的全托管式运行时:如果您需要有状态的全托管式运行时来部署代理,Agent Runtime 是一个不错的选择,因为它可抽象出常见任务,例如会话管理、AI 代理的持久性。
- 代码执行:如果您的代理需要执行在用户会话期间动态生成的代码,Agent Runtime 会提供一个安全的沙盒,您可以在其中执行代码。
- 灵活的长期记忆:如果您需要为代理提供灵活的长期记忆,Gemini Enterprise Agent Platform Memory Bank(可与 Agent Runtime 搭配使用)可提供一种灵活的方式来记住有关用户的信息,以便在各个会话中使用。
您还可以将 Agent Runtime 与 Cloud Run 等其他运行时结合使用,以创建灵活的应用架构。下面是一个使用各种服务构建代理的参考架构示例。
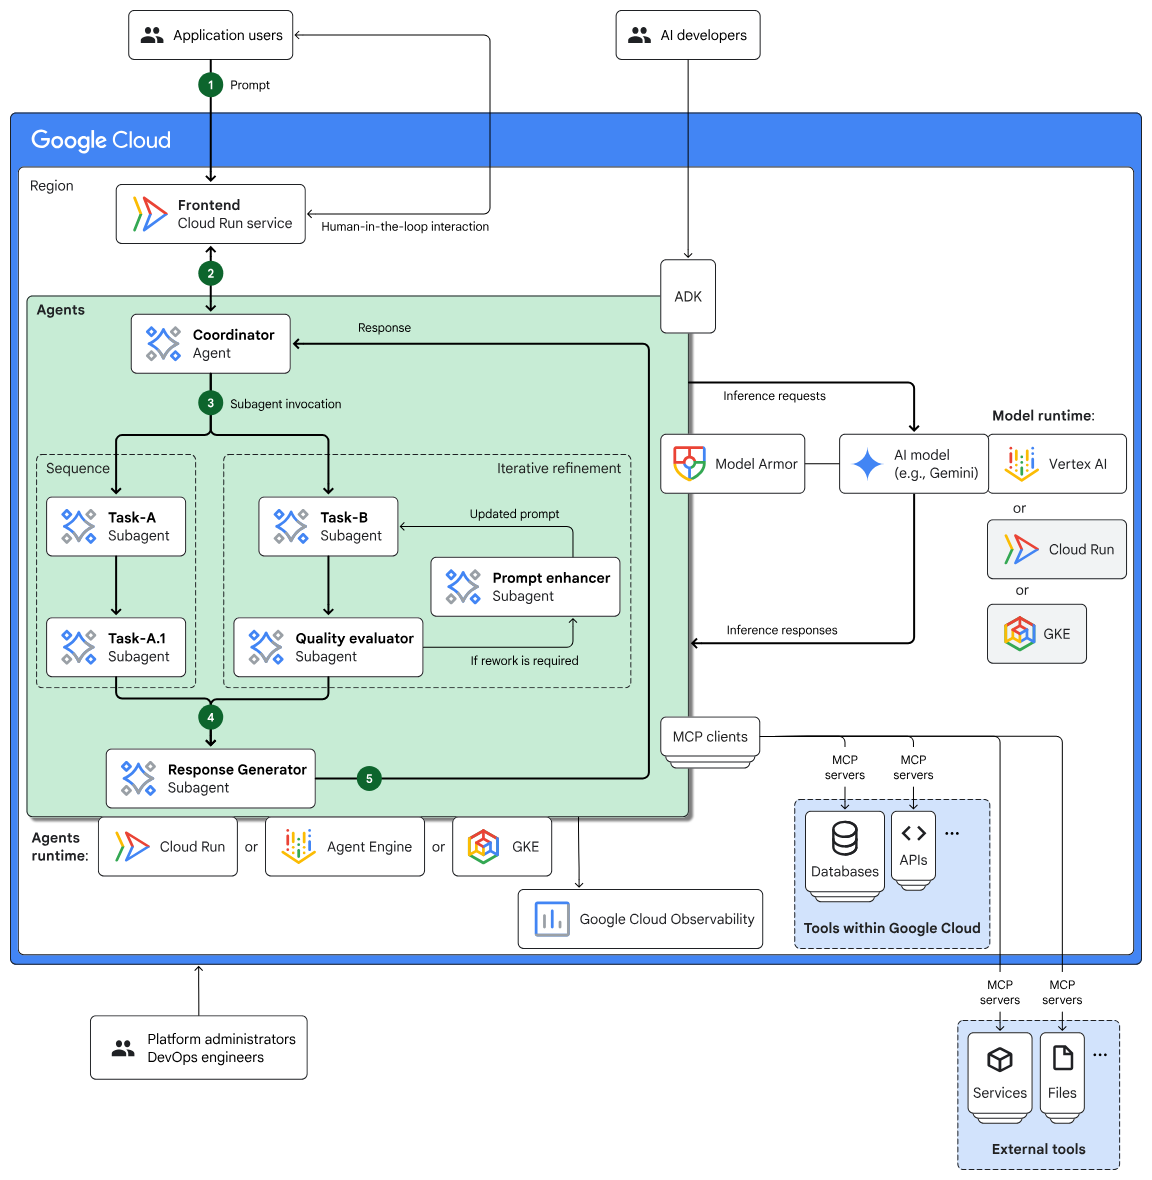
图 2:使用多种服务构建代理的参考架构示例。
6. A2A 简介
Agent2Agent (A2A) 协议是一种开放标准,旨在让来自不同框架、供应商和网域的自主 AI 代理之间实现无缝且安全的通信和协作。
- 通用互操作性:A2A 允许代理协同工作,而无需考虑其底层技术,从而打造真正的多代理生态系统。这意味着,不同公司在不同平台上构建的代理可以进行通信和协调。
- 功能发现:智能体可以使用“智能体卡片”(JSON 文档) 通告自身的功能特性,其中描述了智能体的身份、支持的 A2A 功能、技能和身份验证要求。这样,其他代理就可以发现并选择最适合给定任务的代理。
- 默认安全:安全是核心原则。A2A 采用企业级身份验证和授权机制,利用 HTTPS/TLS、JWT、OIDC 和 API 密钥等标准来确保安全互动并保护敏感数据。
- 模态无关:该协议支持各种通信模态,包括文本、音频和视频流,以及互动式表单和嵌入式 iframe。这种灵活性使代理能够以最适合任务和用户的格式交换信息。
- 结构化任务管理:A2A 为任务委派、监控和完成定义了清晰的协议。它支持对相关任务进行分组,并使用唯一的任务 ID 在不同代理之间管理这些任务。任务可以经历已定义的生命周期(例如,已提交、正在处理、已完成)。
- 不透明的执行:一个重要特征是,智能体无需向其他智能体透露其内部推理过程、记忆或特定工具。它们仅公开其可调用服务,从而提高模块化程度和隐私性。
- 基于现有标准构建:A2A 利用成熟的网络技术,例如 HTTP、用于实时流式传输的服务器发送的事件 (SSE) 和用于结构化数据交换的 JSON-RPC,从而更轻松地与现有 IT 基础设施集成。
- 异步通信:该协议在设计时主要考虑了异步通信,可实现灵活的任务进度,即使未持续保持连接,也能推送更新通知。
7. 代理架构
在本实验中,您将创建一个多智能体应用,该应用会根据您的要求生成图片,并在向您展示图片之前对其进行评估。
该系统采用结构化设计,包含一个名为 image_scoring 的主代理,用于编排整个流程。此主代理有一个名为 image_generation_scoring_agent 的分代理,该分代理本身也有自己的分代理,用于执行更具体的任务。这样一来,主智能体就可以将任务委派给子智能体,从而形成层级关系。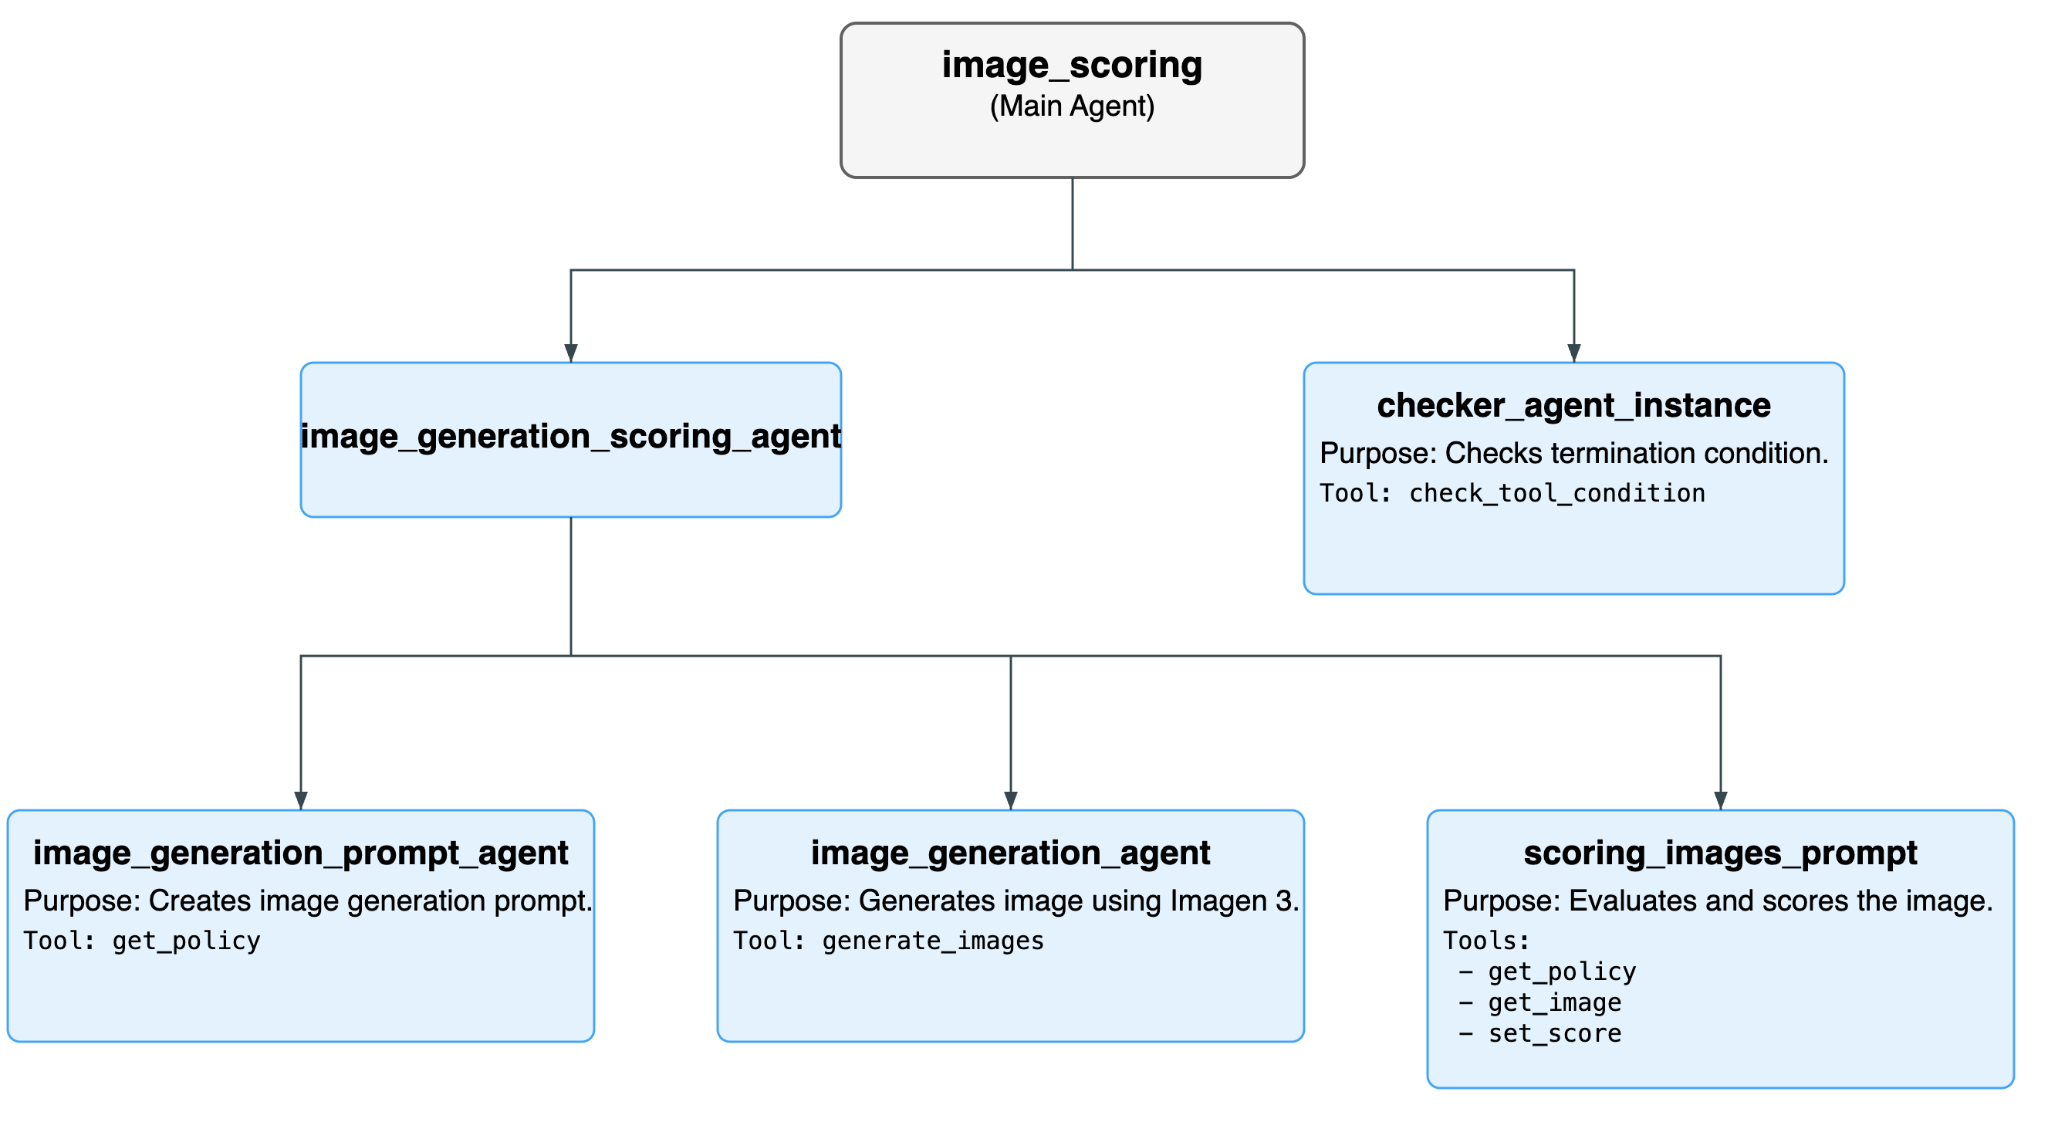
图 3:智能体的总体流程。
所有代理的列表
Agent | 用途 | 子代理 |
image_scoring(主代理) | 这是管理整个工作流的根代理。它会循环重复运行 image_generation_scoring_agent 和 checker_agent,直到满足终止条件。 | image_generation_scoring_agent |
image_generation_scoring_agent(image_scoring 的分代理) | 此代理负责生成和评分图片的核心逻辑。它会执行一系列三个子代理来实现此目的。 | image_generation_prompt_agent |
checker_agent_instance(image_scoring 的分代理) | 此代理会检查图片评分流程是否应继续或终止。它使用 check_tool_condition 工具来评估终止条件。 | - |
checker_agent_instance(image_scoring 的分代理) | 此智能体擅长创建图片生成提示。它接受输入文本,并生成适合图片生成模型的详细提示。 | - |
image_generation_prompt_agent(image_generation_scoring_agent 的分代理) | 此智能体擅长创建图片生成提示。它接受输入文本,并生成适合图像生成模型的详细提示。 | - |
scoring_images_prompt (image_generation_scoring_agent 的分代理): | 此代理擅长根据各种标准评估图片并为其评分。它会获取生成的图片并为其分配得分。 | - |
所用工具的完整列表
工具 | 说明 | 用户代理 |
check_tool_condition | 此工具会检查是否满足循环终止条件,或者是否已达到最大迭代次数。如果满足上述任一条件,则停止循环。 | checker_agent_instance |
generate_images | 此工具使用 Imagen 3 模型生成图片。它还可以将生成的图片保存到 Google Cloud Storage 存储分区。 | image_generation_agent |
get_policy | 此工具可从 JSON 文件中提取政策。image_generation_prompt_agent 使用该政策创建图片生成提示,scoring_images_prompt 使用该政策对图片进行评分。 | image_generation_agent |
get_image | 此工具会加载生成的图片制品,以便对其进行评分。 | scoring_images_prompt |
set_score | 此工具用于在会话状态中设置生成的图片的总得分。 | scoring_images_prompt |
8. 安装 ADK 并设置环境
在此实践中,我们将使用 Cloud Shell 来执行任务。
准备 Cloud Shell 编辑器标签页
- 点击此链接可直接前往 Cloud Shell Editor
- 点击继续。
- 如果系统提示您为 Cloud Shell 授权,请点击授权。
- 在本实验的其余部分,您可以在此窗口中将 Cloud Shell 编辑器和 Cloud Shell 终端用作 IDE。
- 在 Cloud Shell Editor 中,依次选择终端> 新终端,打开新终端。以下所有命令都将在此终端上运行。
下载并安装 ADK 和本实验的代码示例
- 执行以下命令,从 GitHub 克隆所需的源代码并安装必要的库。在 Cloud Shell 编辑器中打开的终端中运行命令。
#create the project directory
mkdir ~/imagescoring
cd ~/imagescoring
#clone the code in the local directory
git clone https://github.com/haren-bh/multiagenthandson.git
- 我们将使用 uv 创建 Python 环境(在 Cloud Shell 编辑器终端中运行):
#Install uv if you do not have installed yet
pip install uv

#Create the virtual environment
uv venv .adkvenv

source .adkvenv/bin/activate

#go to the project directory
cd ~/imagescoring/multiagenthandson

#install dependencies
uv pip install -r pyproject.toml
- 如果您没有 Cloud Storage 存储分区,请在 Google Cloud Storage 中创建一个新存储分区。您还可以使用 gsutil 命令创建存储分区。向代理运行时授予对 Google Cloud Storage 的访问权限(在 Cloud Shell 编辑器终端中运行)。
# First, make sure your PROJECT_ID variable is set
PROJECT_ID=$(gcloud config get-value project)

# Now, create the bucket with a unique name
# We'll use the project ID to help ensure uniqueness
gsutil mb gs://${PROJECT_ID}-imagescoring-bucket

#Now lets give Agent Runtime the permission to access Cloud Storage
# 1. Get the current Project ID (text) and Project Number (numeric)
PROJECT_ID=$(gcloud config get-value project)
PROJECT_NUMBER=$(gcloud projects describe $PROJECT_ID --format="value(projectNumber)")

# 2. Construct the Reasoning Engine Service Account email
SA_EMAIL="service-${PROJECT_NUMBER}@gcp-sa-aiplatform-re.iam.gserviceaccount.com"
# 3. Create Agent Runtime Service account if not already created
gcloud beta services identity create --service=aiplatform.googleapis.com --project=${PROJECT_NUMBER}

# 3. Grant GCS Access
gcloud projects add-iam-policy-binding $PROJECT_ID --member="serviceAccount:$SA_EMAIL" --role="roles/storage.objectUser" --condition=None
- 在编辑器中,依次前往“查看”>“显示/不显示隐藏文件”。在 image_scoring 文件夹中,创建一个包含以下内容的 .env 文件。添加所需详细信息,例如项目名称和 Cloud Storage 存储分区(在 Cloud Shell 编辑器终端中运行)。
#go to image_scoring folder
cd ~/imagescoring/multiagenthandson/image_scoring
cat <<EOF>> .env
GOOGLE_GENAI_USE_VERTEXAI=1
GOOGLE_CLOUD_PROJECT=$(gcloud config get-value project)
GOOGLE_CLOUD_LOCATION=us-central1
GOOGLE_CLOUD_STORAGE_BUCKET=$(gcloud config get-value project)-imagescoring-bucket
GCS_BUCKET_NAME=$(gcloud config get-value project)-imagescoring-bucket
SCORE_THRESHOLD=40
IMAGEN_MODEL="imagen-3.0-generate-002"
GENAI_MODEL="gemini-2.5-flash"
EOF
- 在 Cloud Shell 编辑器菜单中,选择文件 > 打开文件夹。
- 在随即显示的框中,在您的用户名后添加以下文件夹信息:
imagescoring/。点击确定。现在,您应该会在左侧的探索器窗格中看到完整的项目结构。 - 在“探索器”侧边栏中前往 image_scoring 文件夹。点击 agent.py 文件以将其打开,并查看其中的代理结构。此代理包含将连接到其他子代理的根代理。
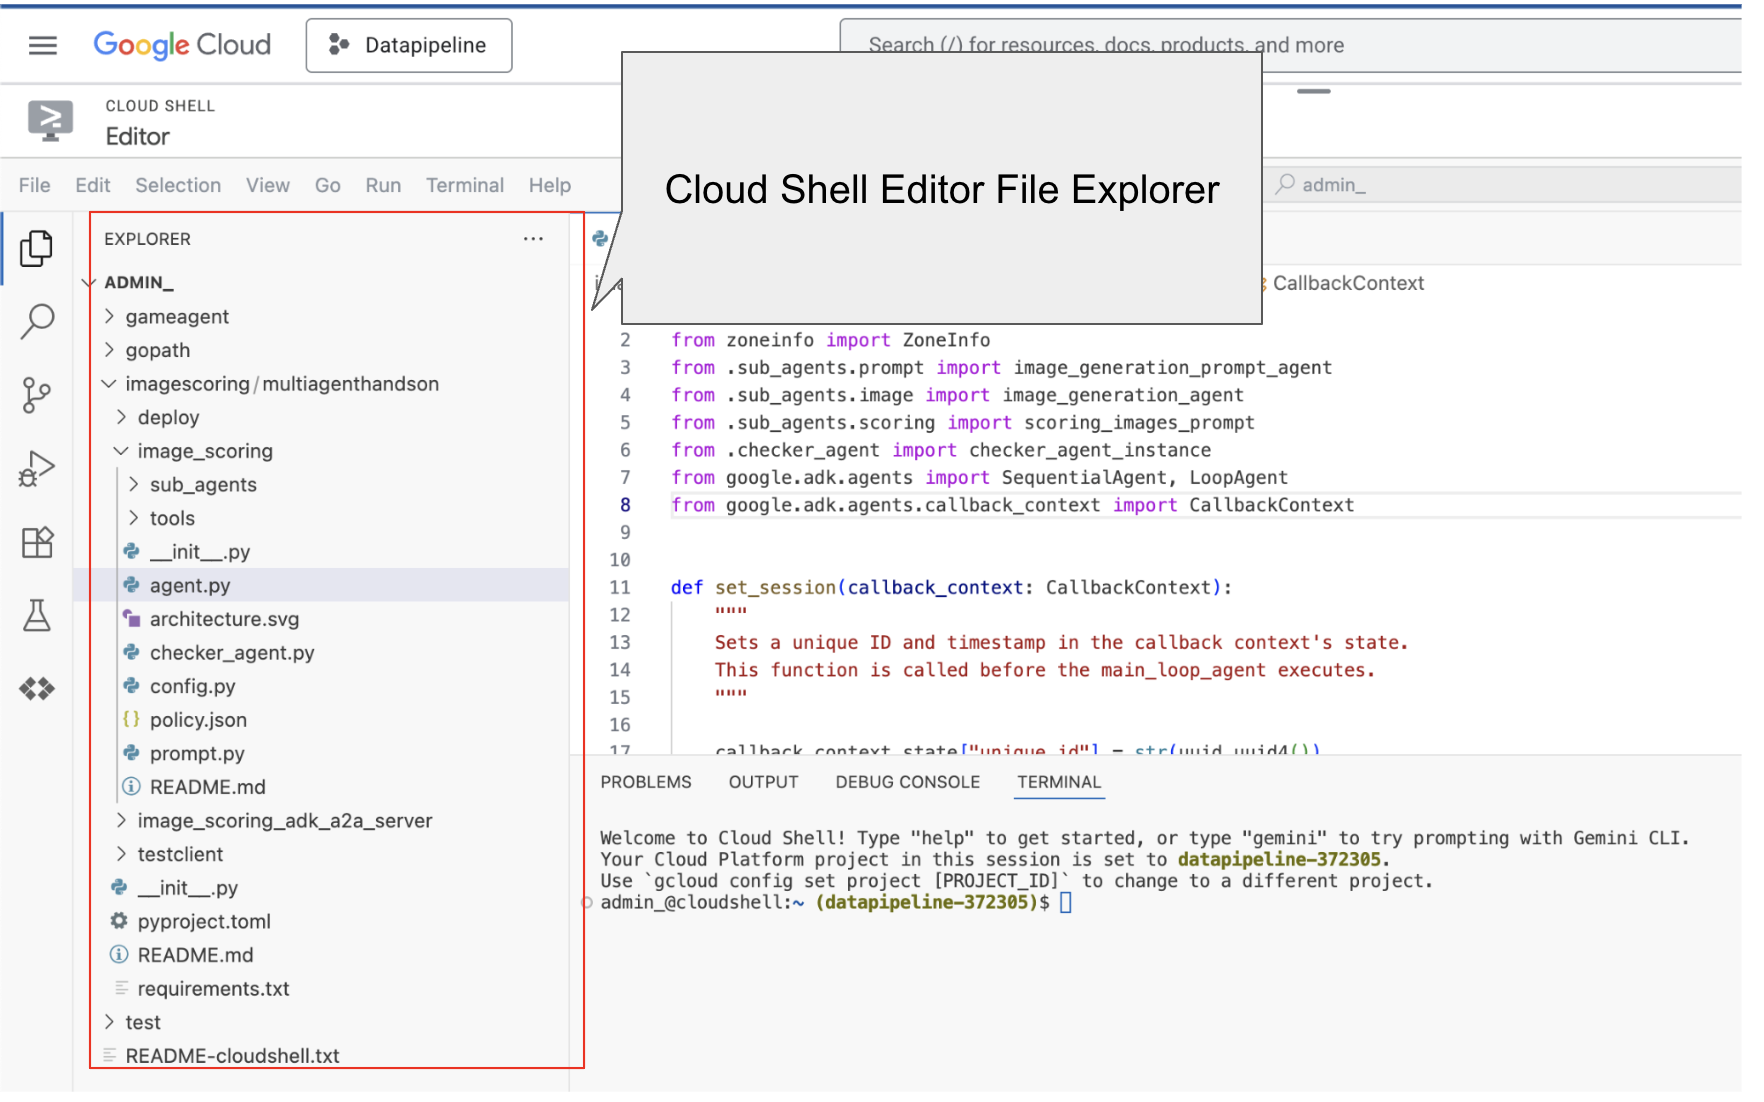
图 4:可从“资源管理器”侧边栏中看到的文件夹结构。您只需点击文件即可查看文件内容。
- 返回终端中的顶级目录 multiagenthandson,然后执行以下命令以在本地运行智能体(在 Cloud Shell 编辑器终端中运行)。
#go to the directory multiagenthandson
cd ~/imagescoring/multiagenthandson
# Run the following command to run agents locally
adk web
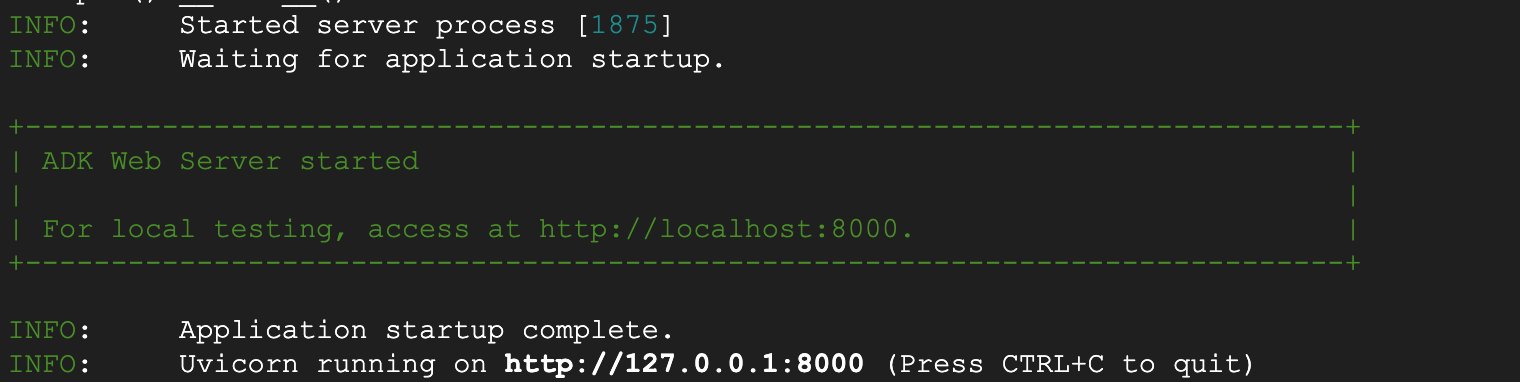
图 5:ADK 应用启动
- Ctrl+点击(在 MacOS 上为 CMD+点击)终端上显示的 http:// 网址,以打开基于浏览器的 ADK GUI 客户端。它应该类似于图 5
- 在左上角的下拉菜单中选择 image_scoring(参见图 5)。现在,我们来生成一些图片!您还应在 Google Cloud Storage 存储分区中找到这些图片。您可以尝试使用以下提示,也可以使用自己的提示。
- 日落时分宁静的山景
- 一只猫骑着自行车
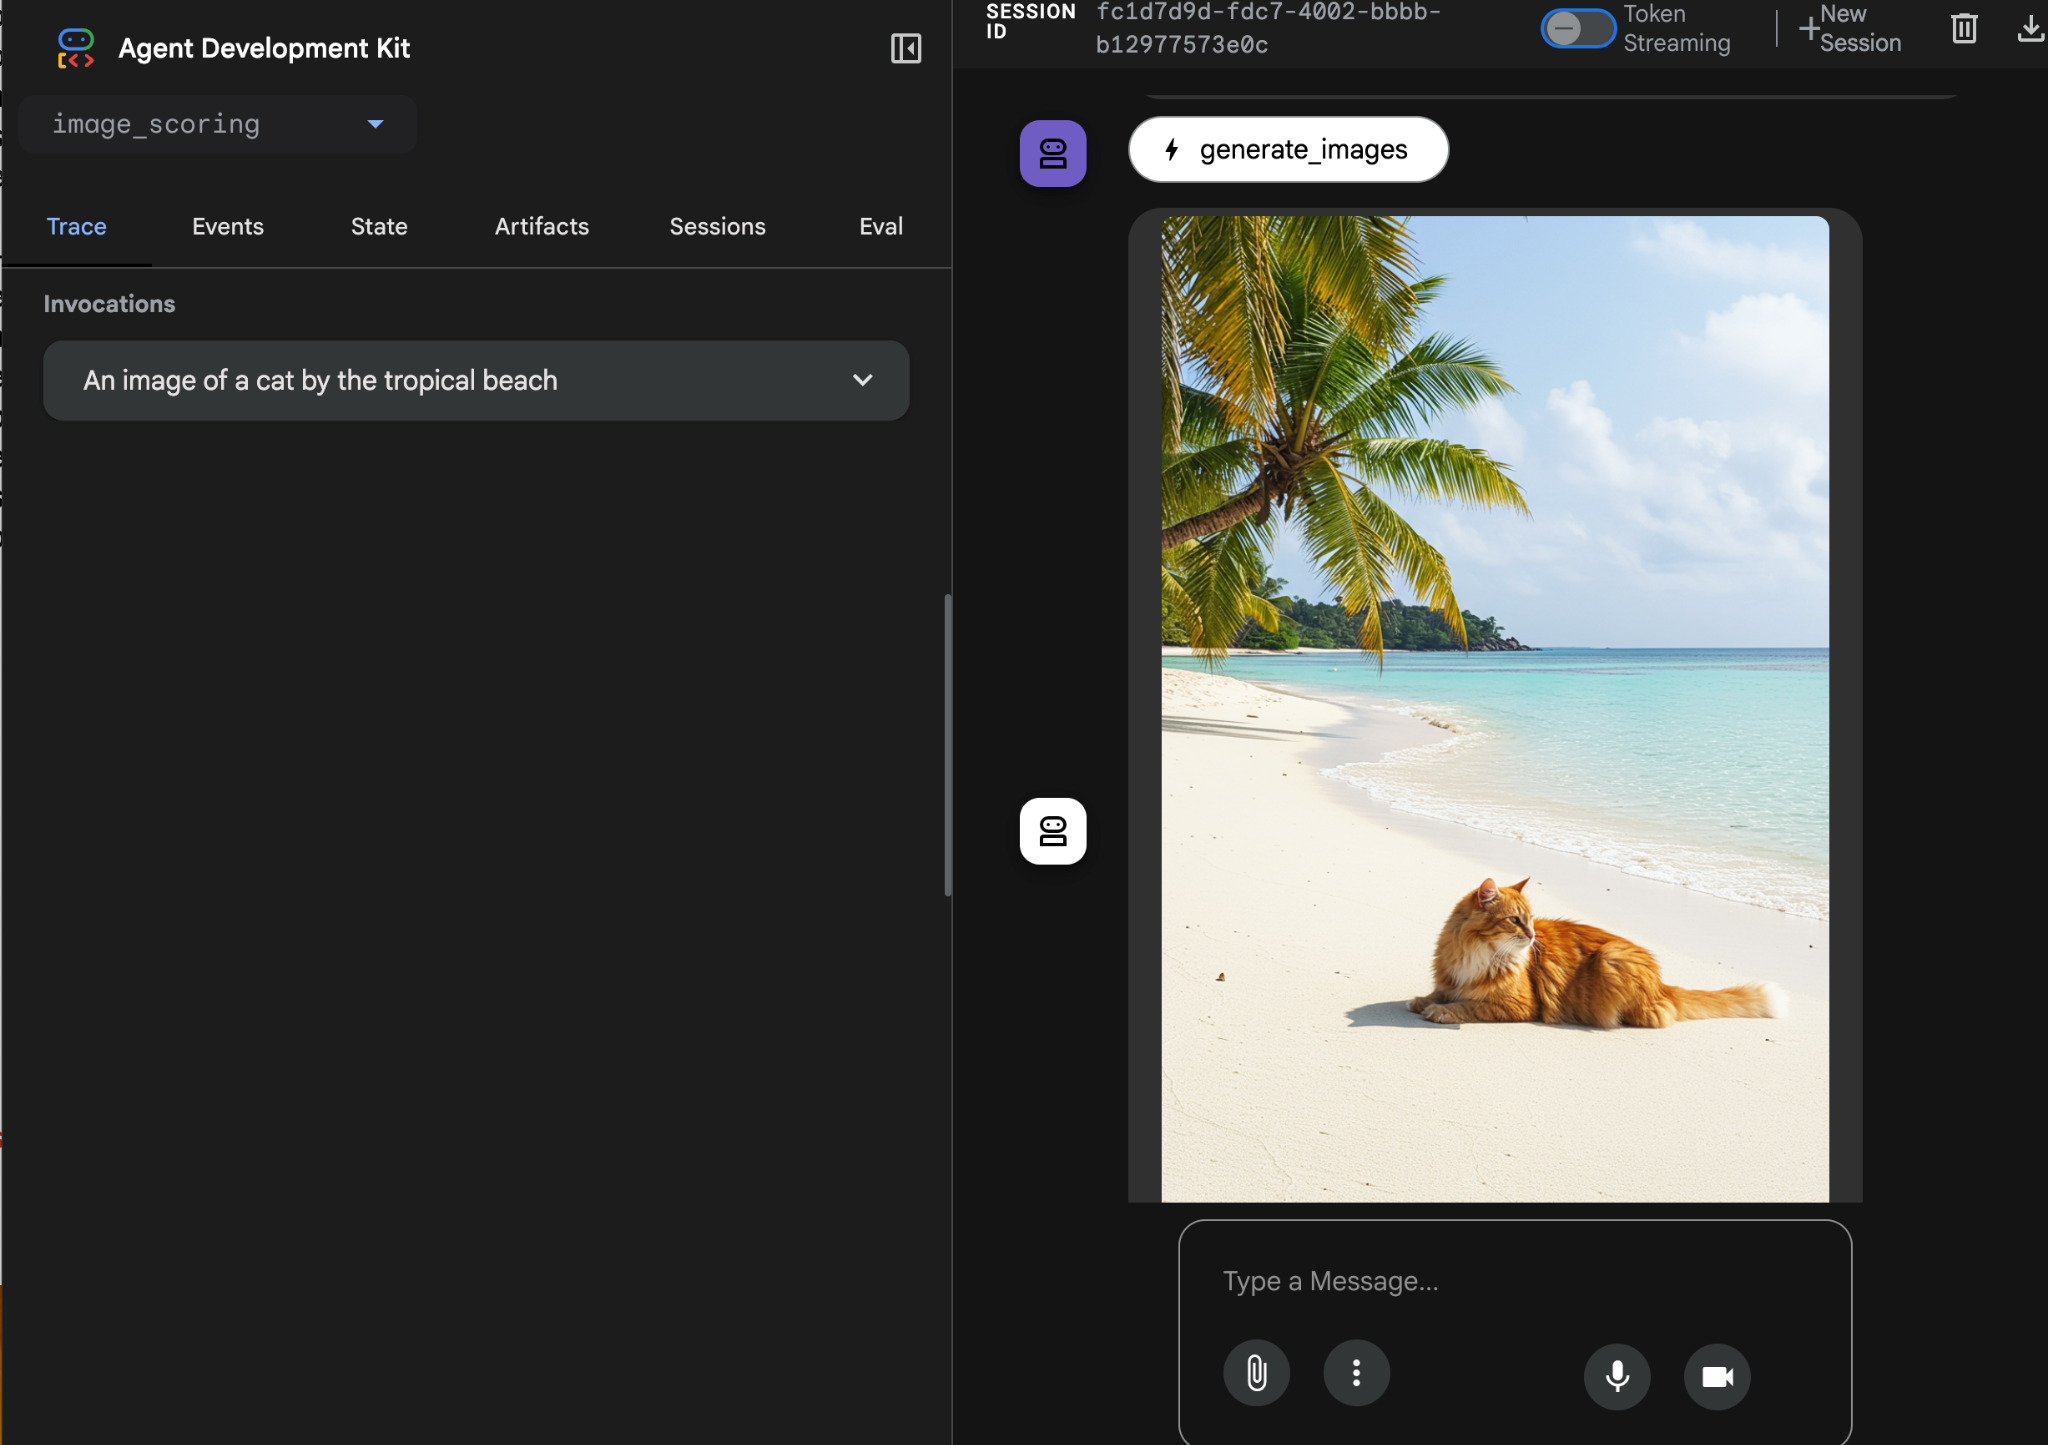
图 6:输出示例
9. 部署到 Agent Runtime
现在,我们将代理部署到 Agent Engine。Agent Engine 是一项全托管式服务,用于在 GCP 中部署代理。Agent Engine 与 ADK(智能体开发套件)兼容,因此使用 ADK(智能体开发套件)构建的智能体可以部署在 Agent Engine 中。
- 在 Cloud Shell 编辑器终端中执行以下步骤之前,请按 Ctrl+C 关闭 ADK 服务器。
- 使用 Poetry 创建 requirements.txt 文件。Poetry 将使用 pyproject.toml 创建 requirements.txt 文件。运行命令后,检查是否已创建 requirements.txt 文件(在 Cloud Shell 编辑器终端中运行)。
# Go to the parent folder containing pyproject.toml file
cd ~/imagescoring/multiagenthandson

# install poetry-plugin-export
uv pip install poetry-plugin-export

#Create requirements.txt file
python3 -m poetry export -f requirements.txt --output requirements.txt --without-hashes
- 创建软件包。我们需要将应用打包到 .whl Python 软件包中。我们将使用 Poetry 来实现这一点。执行命令后,请确保系统创建了一个 dist 文件夹,其中包含 .whl 文件(在 Cloud Shell 编辑器终端中运行)。
# Go to the parent folder containing pyproject.toml file
cd ~/imagescoring/multiagenthandson

#Create python package, to create whl file
python3 -m poetry build
- 现在,我们将准备用于将图片评分代理部署到 Agent Engine 服务的脚本。在 deploy 目录中,找到 Cloud Shell 编辑器侧边栏中的 deploy.py,然后点击以将其打开。按如下方式验证其内容
import vertexai
from image_scoring.agent import root_agent
import os
import glob # To easily find the wheel file
from dotenv import load_dotenv

# Load environment variables from image_scoring/.env
env_path = os.path.join(os.path.dirname(__file__), "..", "image_scoring", ".env")
load_dotenv(env_path)

PROJECT_ID = os.getenv("GOOGLE_CLOUD_PROJECT")
LOCATION = os.getenv("GOOGLE_CLOUD_LOCATION", "us-central1")
STAGING_BUCKET = f"gs://{os.getenv('GOOGLE_CLOUD_STORAGE_BUCKET')}"

from vertexai import agent_engines

client=vertexai.Client(
    project=PROJECT_ID,
    location=LOCATION,
)
remote_app = client.agent_engines.create(
    agent=root_agent,
    config={
        "display_name": "image-scoring",
        "staging_bucket": STAGING_BUCKET,
        "requirements": open(os.path.join(os.getcwd(), "requirements.txt")).readlines() + ["./dist/image_scoring-0.1.0-py3-none-any.whl"],
        "extra_packages": [
            "./dist/image_scoring-0.1.0-py3-none-any.whl",
        ],     "env_vars":{"GCS_BUCKET_NAME":os.getenv('GOOGLE_CLOUD_STORAGE_BUCKET')}
    }
)
print(f"DEBUG: AgentEngine attributes: {dir(remote_app)}")
try:
    print(remote_app.api_resource.name)
except AttributeError:
    print("Could not find resource_name, check DEBUG output above.")
- 我们现在可以运行部署脚本了。首先,前往顶级文件夹 multiagenthandson(在 Cloud Shell 编辑器终端中运行)。
#go to multiagenthandson folder
cd ~/imagescoring/multiagenthandson

#run deploy script from the parent folder containing deploy.py
python3 -m deploy.deploy
部署后,您应该会看到类似以下内容,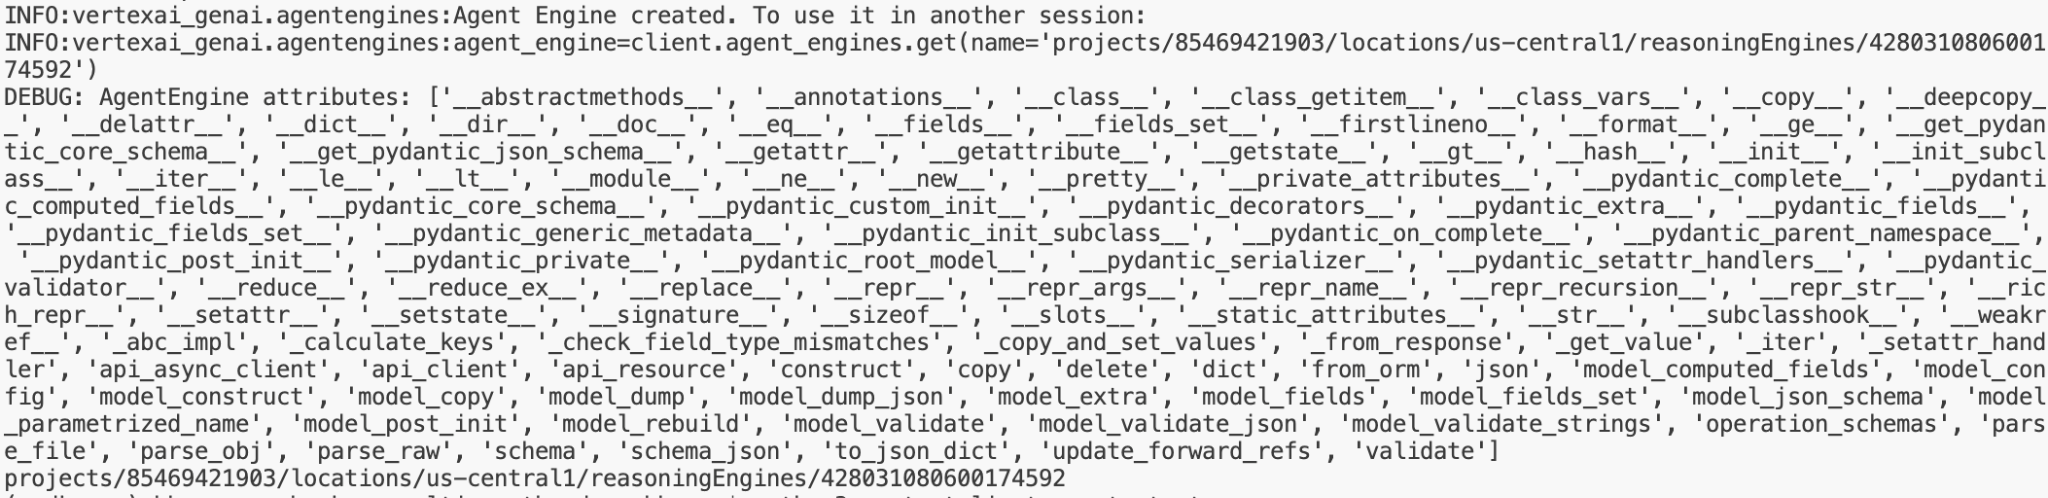
图 7:输出示例
- 现在,我们来测试已部署的代理。为了测试远程部署的 Agent Engine,请先从终端的部署输出中复制代理位置。它应如下所示:projects/85469421903/locations/us-central1/reasoningEngines/7369674597261639680。
在 Cloud Shell 编辑器的侧边栏中,前往 testclient 文件夹,点击 remote_test.py 将其打开,然后修改以下行:
REASONING_ENGINE_ID = "projects/xxx/locations/us-central1/reasoningEngines/xxx" # TODO: Change this
- 在 Cloud Shell 编辑器终端中,从 multiagenthandson 根目录运行以下命令。您的输出应与图 8 一致。
#go to multiagenthandson folder
cd ~/imagescoring/multiagenthandson

#execute remote_test.py
python3 -m testclient.remote_test
图 8:示例输出
10. 创建 A2A 代理
在此步骤中,我们将基于之前步骤中创建的代理创建一个简单的 A2A 代理。现有的 ADK(智能体开发套件)智能体可以在 A2A 协议下发布。以下是您将在本步骤中学习的关键内容。
在此实操中,我们将使用 image_scoring_adk_a2a_server 文件夹中的代码。在开始任务之前,请将目录更改为此文件夹(在 Cloud Shell 编辑器终端中运行)。
#change directory to image_scoring_adk_a2a_server
cd ~/imagescoring/multiagenthandson/image_scoring_adk_a2a_server

#copy the env file
cp ~/imagescoring/multiagenthandson/image_scoring/.env remote_a2a/image_scoring
1. 创建 A2A 智能体卡片
A2A 协议需要一张智能体卡片,其中包含有关智能体的所有信息,例如智能体功能、智能体使用指南等。A2A 智能体部署完毕后,可以使用“.well-known/agent-card.json”链接查看智能体卡片。客户端可以参考此信息向代理发送请求。
前往 remote_a2a/image_scoring 目录,然后在 Cloud Shell 编辑器侧边栏中找到 agents.json。点击该文件以将其打开,并验证其内容是否与以下内容一致:
{
 "name": "image_scoring",
 "description": "Agent that generates images based on user prompts and scores their adherence to the prompt.",
 "url": "http://localhost:8001/a2a/image_scoring",
 "version": "1.0.0",
 "defaultInputModes": ["text/plain"],
 "defaultOutputModes": ["image/png", "text/plain"],
 "capabilities": {
   "streaming": true,
   "functions": true
 },
 "skills": [
   {
     "id": "generate_and_score_image",
     "name": "Generate and Score Image",
     "description": "Generates an image from a given text prompt and then evaluates how well the generated image adheres to the original prompt, providing a score.",
     "tags": ["image generation", "image scoring", "evaluation", "AI art"],
     "examples": [
       "Generate an image of a futuristic city at sunset",
       "Create an image of a cat playing a piano",
       "Show me an image of a serene forest with a hidden waterfall"
     ]
   }
 ]
}
2. 创建 A2A 代理在 image_scoring_adk_a2a_server 根目录中,验证 a2a_agent.py 文件是否存在。您可以在 Cloud Shell 编辑器的侧边栏中点击文件名来打开该文件。此文件用作 A2A 代理的入口点,应包含以下内容:
#change directory to image_scoring_adk_a2a_server
cd ~/imagescoring/multiagenthandson/image_scoring_adk_a2a_server
from google.adk.agents.remote_a2a_agent import RemoteA2aAgent

root_agent = RemoteA2aAgent(
   name="image_scoring",
   description="Agent to give interesting facts.",
   agent_card="http://localhost:8001/a2a/image_scoring/.well-known/agent.json",

   # Optional configurations
   timeout=300.0,          # HTTP timeout (seconds)
   httpx_client=None,      # Custom HTTP client
)
3. 运行 A2A 代理
现在,我们已准备好运行代理!如需运行代理,请从顶级文件夹 image_scoring_adk_a2a_server 中执行以下命令(在 Cloud Shell 编辑器终端中运行)。
#following command runs the ADK agent as a2a agent
adk api_server --a2a --port 8001 remote_a2a
4. 测试 A2A 智能体
智能体运行后,我们就可以去测试智能体了。首先,我们先来查看一下智能体卡片。使用“终端”>“新建终端”打开新终端,然后运行以下命令(在新打开的 Cloud Shell 编辑器终端中运行)。
#Execute the following
curl http://localhost:8001/a2a/image_scoring/.well-known/agent.json
执行上述命令后,系统应显示 A2A 代理的代理卡片,该卡片主要包含我们在上一步中创建的 agent.json 的内容。
现在,我们向智能体发送请求。我们可以使用 curl 向代理发送请求(在新打开的 Cloud Shell 编辑器终端中运行),
curl -X POST   http://localhost:8001/a2a/image_scoring   -H 'Content-Type: application/json'   -d '{
    "id": "uuid-123",
    "params": {
      "message": {
        "messageId": "msg-456",
        "parts": [{"text": "Create an image of a cat"}],
        "role": "user"
      }
    }
  }'
在上述请求中,您可以更改“Create an image of a cat”(创作一张猫的图片)这一行来更改提示。运行命令后,您可以在指定的 Google Cloud Storage 中查看输出映像。
11. 清理
现在,我们来清理刚刚创建的内容。
- 删除我们刚刚创建的 Agent Runtime 服务器。在 Google Cloud 控制台的搜索栏中输入“Gemini Enterprise Agent Platform”,前往 Gemini Enterprise Agent Platform。点击左侧的代理引擎。您可以点击“删除”来删除代理。
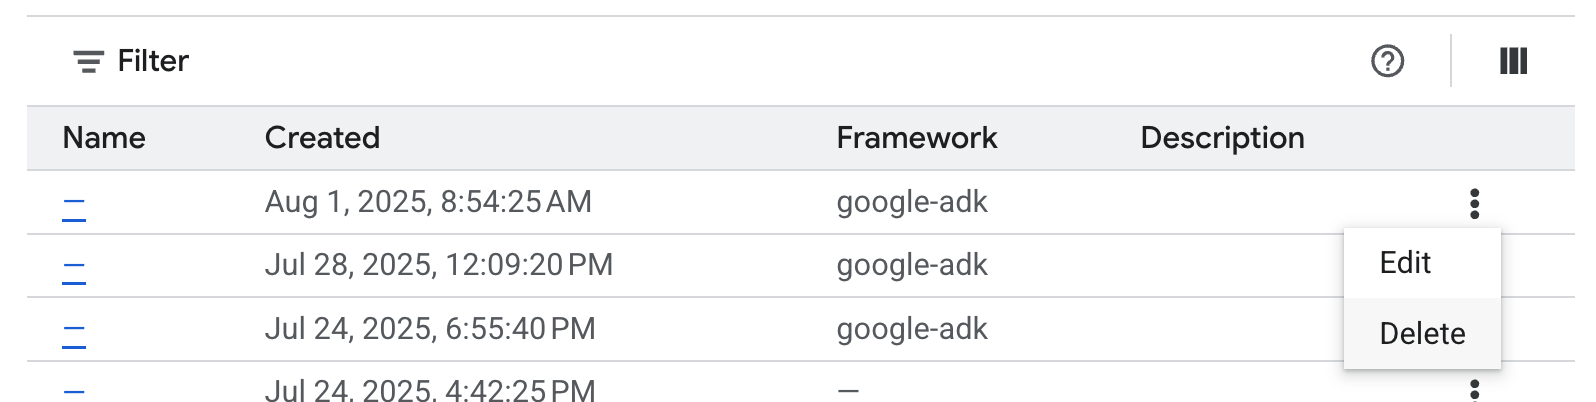
图 9:您可以在 Google Cloud 控制台中删除代理运行时实例
- 删除 Cloud Shell 中的文件
#Execute the following to delete the files
cd ~
rm -R ~/imagescoring
- 删除存储分区。您可以前往 GCP 控制台->Cloud Storage,选择并删除您的存储分区。
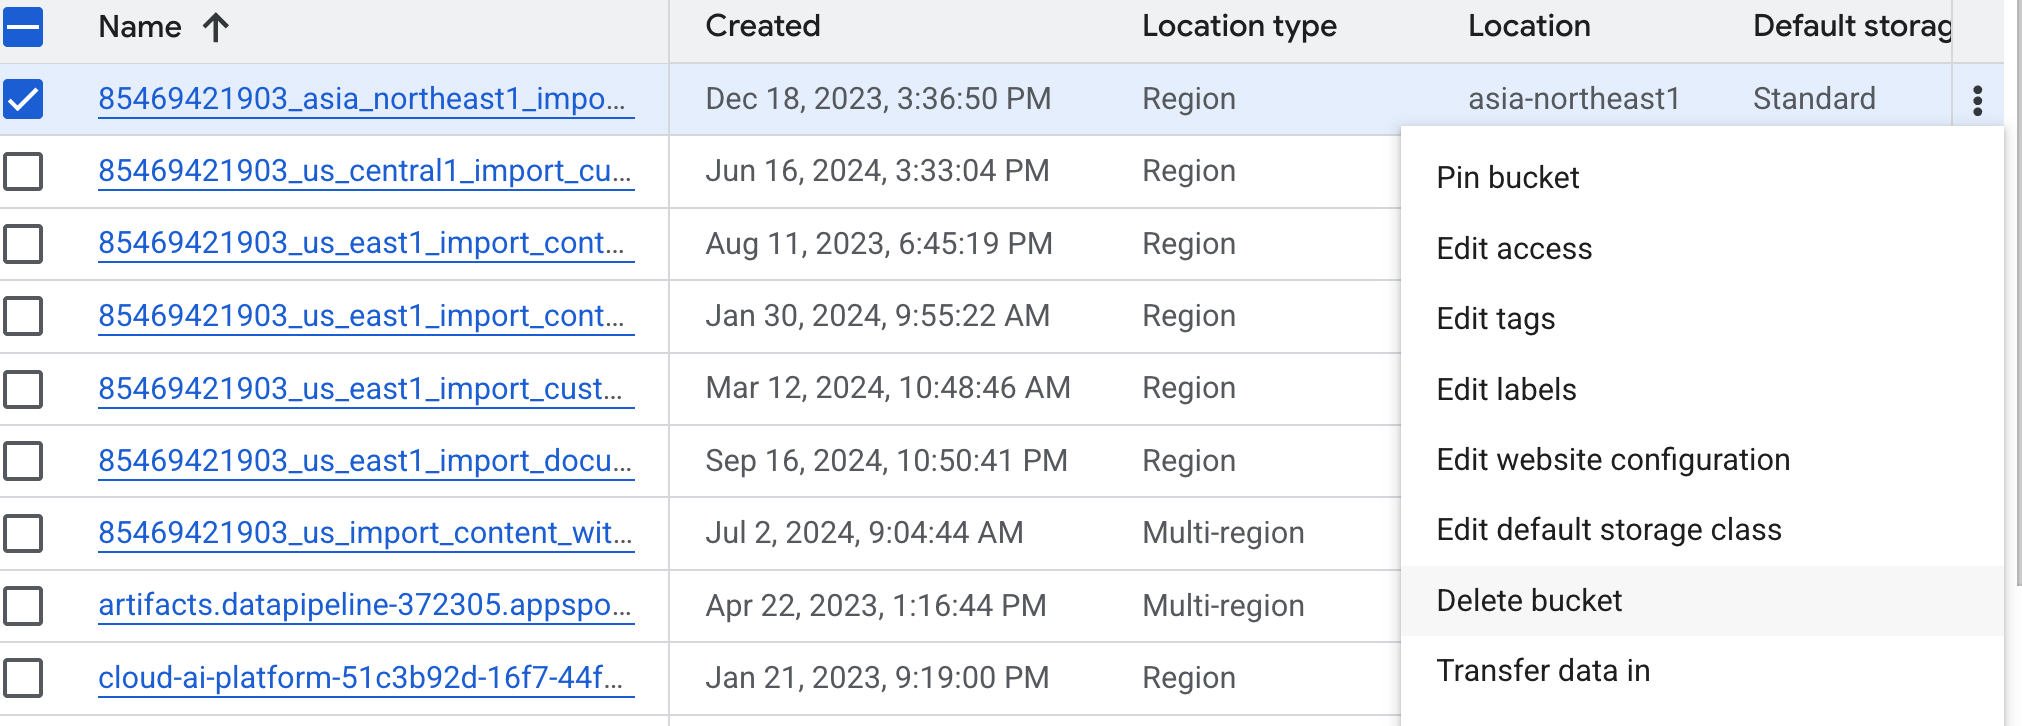
图 10:删除存储分区
12. 总结
恭喜!您已成功将多智能体 ADK(智能体开发套件)应用部署到 Agent Runtime。这是一项重大成就,涵盖了现代云原生应用的核心生命周期,为您部署自己的复杂智能体系统奠定了坚实的基础。
回顾
在本实验中,您学习了如何执行以下操作:
- 使用 ADK(智能体开发套件)创建多智能体应用
- 将应用部署到 Agent Runtime
- 创建可使用 A2A 协议进行通信的代理。
实用资源
从原型设计到生产
本实验是利用 Google Cloud 构建可用于生产用途的 AI 学习路线的组成部分。
- 探索完整课程,弥合从原型设计到生产的差距。
- 使用 #ProductionReadyAI 标签分享您的进度。