
1. 本實驗室的目標
在本實作實驗室中,您將使用 ADK (Agent Development Kit) 建構多代理應用程式,根據提示生成圖片,並根據提示評估圖片。如果生成的圖片不符合提示中的規定,智慧助理會持續生成圖片,直到生成符合規定的圖片為止。本實作實驗室中的每個代理程式都有單一用途,這些代理程式會互相合作,以達成整體目標。您將瞭解如何在本機測試應用程式,並在 Agent Runtime 中部署。
課程內容
- 瞭解 ADK (Agent Development Kit) 的基本概念,以及如何建立多代理系統。
- 瞭解如何在 Agent Runtime 中輕鬆部署及使用代理。
- 瞭解 A2A 通訊協定的基本概念
- 瞭解如何搭配使用 A2A 通訊協定和 ADK (Agent Development Kit) ,建立開放代理。
2. 專案設定
- 如果沒有可用的專案,請在 GCP 主控台中建立新專案。
- 在本實驗室中,我們將使用 GCP Cloud Shell 執行工作。開啟 Cloud Shell,並使用 Cloud Shell 設定專案。
- 按一下這裡開啟 GCP Cloud Shell 。如果看到「授權 Shell」彈出式視窗,請點選授權 Cloud Shell 編輯器。
- 您可以在 Cloud Shell 終端機中執行下列指令,檢查專案是否已通過驗證。
gcloud auth list
- 在 Cloud Shell 中執行下列指令,確認專案
gcloud config list project
- 複製專案 ID,然後使用下列指令設定
gcloud config set project <YOUR_PROJECT_ID>
- 如果忘記專案 ID,可以使用下列指令列出所有專案 ID:
gcloud projects list
3. 啟用 API
我們需要啟用一些 API 服務,才能執行本實驗室。在 Cloud Shell 中執行下列指令。
gcloud services enable aiplatform.googleapis.com
gcloud services enable cloudresourcemanager.googleapis.com
API 簡介
- Gemini Enterprise Agent Platform API (
aiplatform.googleapis.com) 可存取 Gemini Enterprise Agent Platform 平台,讓應用程式與 Gemini 模型互動,生成文字、進行即時通訊,以及呼叫函式。 - Cloud Resource Manager API (
cloudresourcemanager.googleapis.com) 可讓您以程式輔助方式管理 Google Cloud 專案的中繼資料,例如專案 ID 和名稱。其他工具和 SDK 通常需要這些資料,才能驗證專案身分和權限。
4. Agent Development Kit 簡介
使用 Agent Development Kit 建構代理應用程式,可以為開發人員帶來以下主要好處:
- 多代理系統:可在階層結構中組合多個專用代理,建構出可擴充的模組化應用程式,藉以執行複雜的協調和委派作業。
- 豐富的工具生態系統:為代理提供多元功能,像是使用預先建構的工具 (搜尋、程式碼執行等)、建立自訂函式、整合第三方代理框架的工具 (LangChain、CrewAI),甚至還可以使用其他代理做為工具。
- 彈性的自動化調度管理功能:使用工作流程代理 (
SequentialAgent、ParallelAgent和LoopAgent) 定義可預測的管道工作流程,或透過使用 LLM 的動態轉送功能 (LlmAgent轉移),創造靈活應變的代理。 - 整合式開發人員體驗:使用功能強大的 CLI 和互動式開發 UI,在本機開發、測試及偵錯,逐步檢查事件、狀態和代理執行作業。
- 內建評估功能:與預先定義的測試案例比較,評估最終回覆品質和逐步執行軌跡,有系統地判斷代理效能。
- 可隨時部署:將代理容器化並部署至任何位置,無論是在本機執行、透過 Agent Runtime 擴充,或使用 Cloud Run/Docker 整合至自訂基礎架構都沒問題。
雖然其他生成式 AI SDK 或代理框架同樣能查詢模型,甚至為模型提供工具,但您必須投入大量心力,在多個模型間靈活調度。
相較之下,Agent Development Kit 比上述工具更加高階,您可以輕鬆相互連結多個代理,建立複雜但方便維護的工作流程。
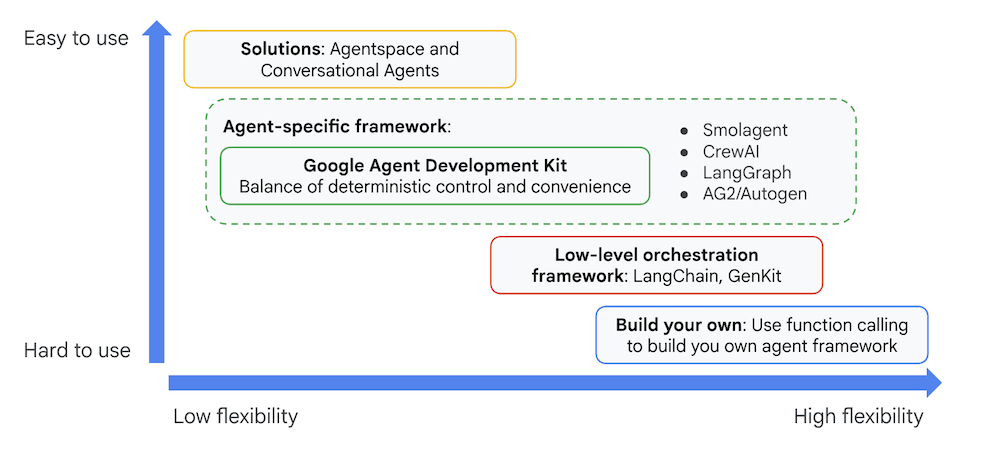
圖 1:ADK (Agent Development Kit) 的定位
5. Agent Runtime 簡介
Agent Runtime 是一項全代管服務,可在 Google Cloud 中部署代理程式。開發人員可透過 Agent Runtime,在 Gemini Enterprise Agent Platform 上開發、自訂、部署、提供及管理 OSS AI 代理( ADK (Agent Development Kit) 、LangChain、LangGraph、CrewAI、AutoGen 等!)。
Agent Runtime 也提供服務來處理使用者資料,也就是所謂的代理程式記憶體。目前提供兩種記憶體服務。
- 短期記憶:透過 Agent Engine 工作階段,您可以在單一工作階段中儲存、管理及擷取進行中的對話記錄 (狀態),做為短期記憶。
- 長期記憶:透過 Agent Engine Memory Bank 儲存、轉換及擷取記憶 (狀態),特別是跨多個工作階段的長期記憶。
您也可以在其他 Google Cloud 服務 (例如 Cloud Run 或 GKE) 中部署 Agent,並考慮在下列用途中使用 Agent Runtime。
- 具狀態的代管執行階段:如果您需要具狀態的全代管執行階段來部署代理程式,Agent Runtime 是不錯的選擇,因為它會將常見工作 (例如工作階段管理、AI 代理程式的持續性) 抽象化。
- 程式碼執行:如果 Agent 需要執行在使用者工作階段期間動態產生的程式碼,Agent Runtime 會提供安全的沙箱,供您執行程式碼。
- 彈性長期記憶:如要為代理提供彈性長期記憶,Gemini Enterprise Agent Platform Memory Bank 可與 Agent Runtime 搭配使用,彈性記憶使用者資訊,以便在不同工作階段中使用。
您也可以將 Agent Runtime 與 Cloud Run 等其他執行階段結合,建立彈性的應用程式架構。以下是使用各種服務建構代理程式的參考架構範例。
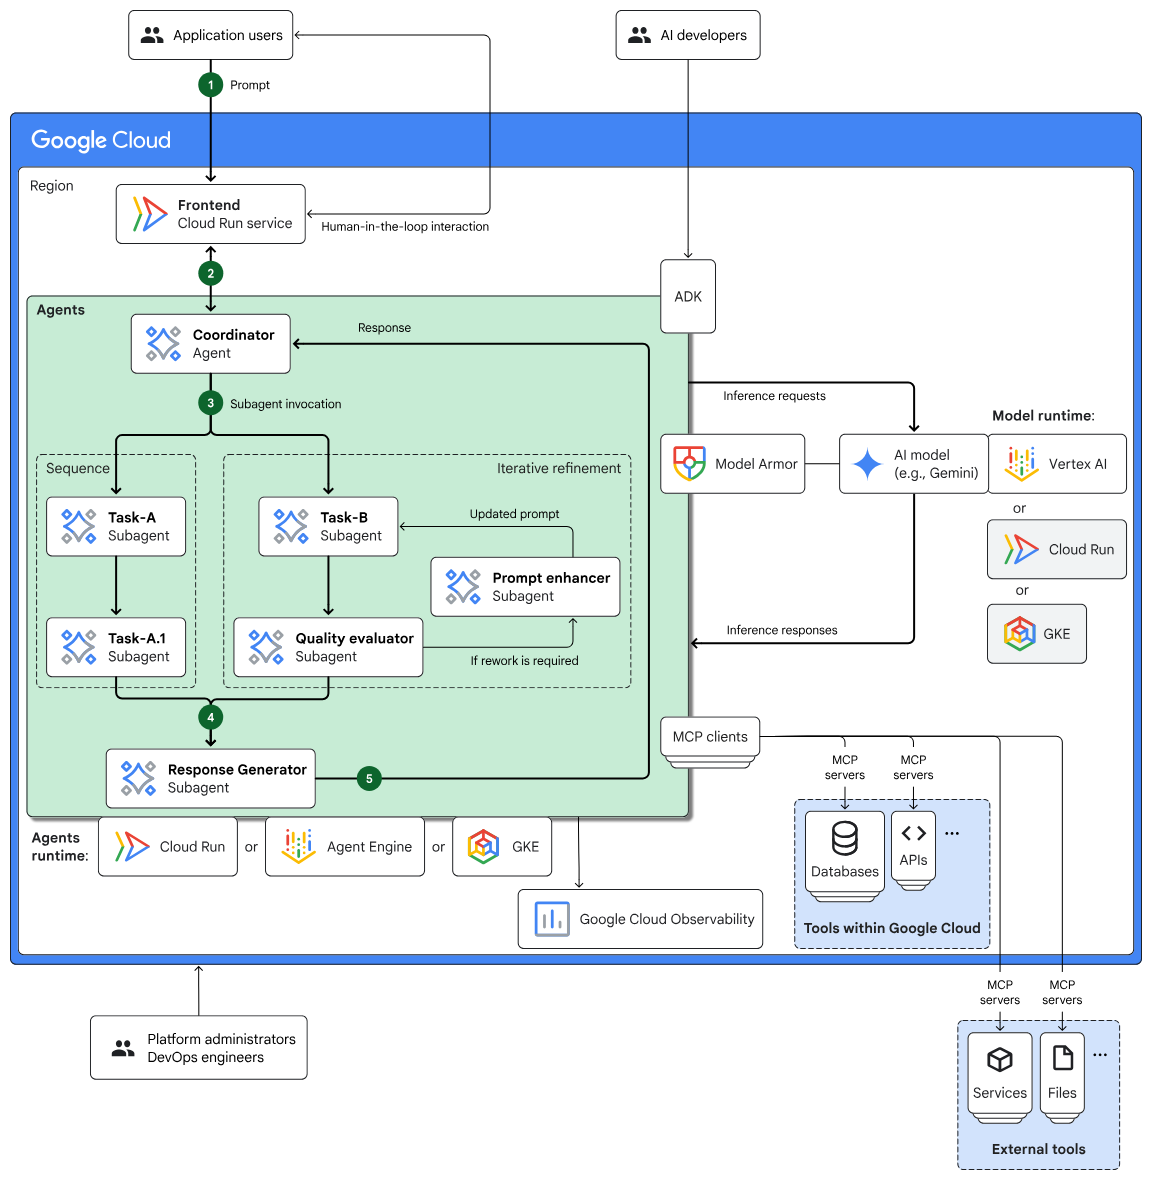
圖 2:使用多項服務建構 Agent 的參考架構範例。
6. A2A 簡介
Agent2Agent (A2A) 通訊協定是一項開放標準,旨在讓不同架構、供應商和網域的自主 AI 代理,能夠流暢且安全地通訊及協作。
- 普遍互通性:A2A 可讓代理協同運作,不受基礎技術限制,打造真正的多代理生態系統。也就是說,不同公司在不同平台上建構的代理程式可以通訊及協調。
- 功能探索:代理可以使用「代理資訊卡」(JSON 文件) 宣傳功能,說明身分、支援的 A2A 功能、技能和驗證需求。這樣一來,其他代理程式就能找出並選取最適合特定工作的代理程式。
- 預設採用安全設定:安全性是核心原則。A2A 採用企業級驗證和授權機制,並使用 HTTPS/TLS、JWT、OIDC 和 API 金鑰等標準,確保互動安全無虞,並保護機密資料。
- 不限模式:通訊協定支援各種通訊模式,包括文字、音訊和視訊串流,以及互動式表單和嵌入式 iframe。代理程式可根據工作和使用者需求,以最合適的格式交換資訊。
- 結構化工作管理:A2A 會明確定義工作委派、監控和完成的通訊協定。這項功能支援將相關工作分組,並使用不重複的工作 ID,在不同代理之間管理工作。工作可以經歷定義的生命週期 (例如已提交、處理中、已完成)。
- 不透明的執行作業:這項重要功能是指代理不必向其他代理揭露內部推論程序、記憶體或特定工具。這些服務只會公開可呼叫的服務,有助於提升模組化程度和隱私權。
- 以現有標準為基礎:A2A 採用 HTTP、伺服器傳送事件 (SSE) 等成熟的網路技術,可即時串流資料,並使用 JSON-RPC 交換結構化資料,因此更容易與現有 IT 基礎架構整合。
- 非同步通訊:通訊協定的設計主要考量非同步通訊,可促進彈性工作進度,即使連線未持續維護,也能推送更新通知。
7. 代理程式架構
在本實驗室中,您將建立多代理程式應用程式,根據規格生成圖片並評估圖片,然後向您呈現。
系統架構包含一個名為 image_scoring 的主要代理,負責協調整個程序。這個主要代理有一個名為 image_generation_scoring_agent 的子代理,而這個子代理本身也有自己的子代理,負責執行更具體的任務。這會建立階層關係,主代理會將工作委派給子代理。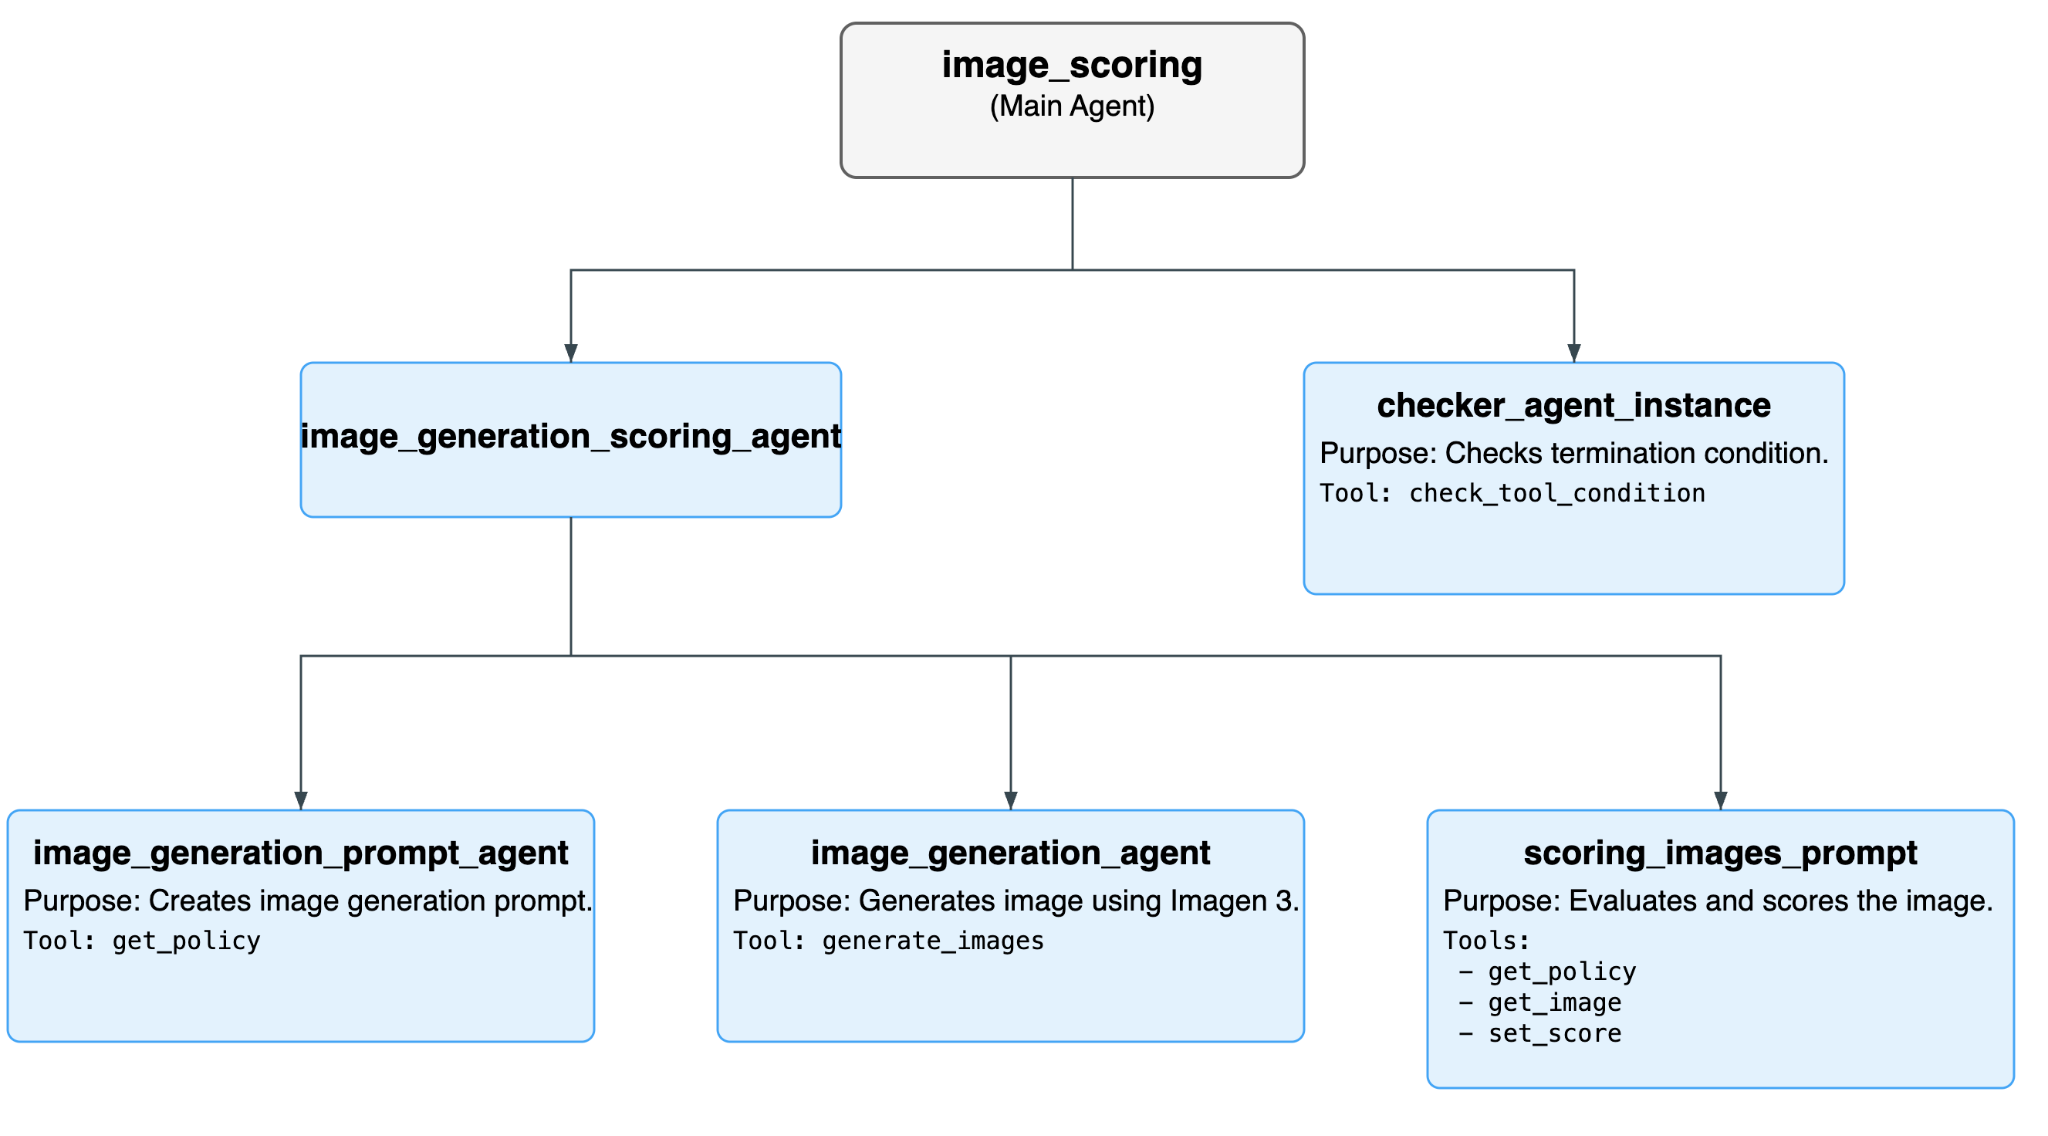
圖 3:整體代理流程。
所有代理程式的清單
Agent | Purpose | 子代理程式 |
image_scoring (主要代理程式) | 這是管理整體工作流程的根代理程式。它會以迴圈方式反覆執行 image_generation_scoring_agent 和 checker_agent,直到符合終止條件為止。 | image_generation_scoring_agent |
image_generation_scoring_agent (image_scoring 的子代理) | 這個代理負責生成及評估圖片的核心邏輯。為此,這項代理程式會執行一連串的子代理。 | image_generation_prompt_agent |
checker_agent_instance (image_scoring 的子代理程式) | 這個代理程式會檢查是否應繼續或終止圖片評分程序。這項工具會使用 check_tool_condition 工具評估終止條件。 | - |
checker_agent_instance (image_scoring 的子代理程式) | 這個代理擅長建立圖像生成提示,這項工具會接收輸入文字,並生成適合圖像生成模型的詳細提示。 | - |
image_generation_prompt_agent (image_generation_scoring_agent 的子代理) | 這個代理擅長建立圖像生成提示,這項工具會根據輸入文字生成詳細提示,供圖像生成模型使用。 | - |
scoring_images_prompt (image_generation_scoring_agent 的子代理程式): | 這個代理程式擅長根據各種條件評估圖片並給予分數。並為生成的圖片評分。 | - |
使用的所有工具清單
工具 | 說明 | 使用者代理程式 |
check_tool_condition | 這項工具會檢查是否符合迴圈終止條件,或是否已達到疊代次數上限。如果符合任一條件,迴圈就會停止。 | checker_agent_instance |
generate_images | 這項工具會使用 Imagen 3 模型生成圖片。也可以將生成的圖片儲存至 Google Cloud Storage bucket。 | image_generation_agent |
get_policy | 這項工具會從 JSON 檔案擷取政策。image_generation_prompt_agent 會使用這項政策建立圖像生成提示詞,scoring_images_prompt 則會使用這項政策為圖片評分。 | image_generation_agent |
get_image | 這項工具會載入生成的圖像構件,以便評分。 | scoring_images_prompt |
set_score | 這項工具會在工作階段狀態中設定生成圖片的總分。 | scoring_images_prompt |
8. 安裝 ADK 並設定環境
在本實作實驗中,我們將使用 Cloud Shell 執行工作。
準備 Cloud Shell 編輯器分頁
- 按一下這個連結,直接前往 Cloud Shell 編輯器
- 按一下「繼續」。
- 系統提示您授權 Cloud Shell 時,點選「授權」。
- 操作本實驗室其餘步驟時,可以全程用這個視窗做為 IDE,並搭配 Cloud Shell 編輯器和 Cloud Shell 終端機。
- 在 Cloud Shell 編輯器中,依序點選「Terminal」(終端機) >「New Terminal」(新增終端機),開啟新的終端機。下列所有指令都會在這個終端機上執行。
下載並安裝本實驗室所需的 ADK 和程式碼範例
- 執行下列指令,從 GitHub 複製所需來源,並安裝必要程式庫。在 Cloud Shell 編輯器中開啟的終端機中執行指令。
#create the project directory
mkdir ~/imagescoring
cd ~/imagescoring
#clone the code in the local directory
git clone https://github.com/haren-bh/multiagenthandson.git
- 我們會使用 uv 建立 Python 環境 (在 Cloud Shell 編輯器終端機中執行):
#Install uv if you do not have installed yet
pip install uv

#Create the virtual environment
uv venv .adkvenv

source .adkvenv/bin/activate

#go to the project directory
cd ~/imagescoring/multiagenthandson

#install dependencies
uv pip install -r pyproject.toml
- 如果沒有雲端儲存空間值區,請在 Google Cloud Storage 中建立新的值區。您也可以使用 gsutil 指令建立 bucket。授予 Agent Runtime Google Cloud Storage 存取權 (在 Cloud Shell 編輯器終端機中執行)。
# First, make sure your PROJECT_ID variable is set
PROJECT_ID=$(gcloud config get-value project)

# Now, create the bucket with a unique name
# We'll use the project ID to help ensure uniqueness
gsutil mb gs://${PROJECT_ID}-imagescoring-bucket

#Now lets give Agent Runtime the permission to access Cloud Storage
# 1. Get the current Project ID (text) and Project Number (numeric)
PROJECT_ID=$(gcloud config get-value project)
PROJECT_NUMBER=$(gcloud projects describe $PROJECT_ID --format="value(projectNumber)")

# 2. Construct the Reasoning Engine Service Account email
SA_EMAIL="service-${PROJECT_NUMBER}@gcp-sa-aiplatform-re.iam.gserviceaccount.com"
# 3. Create Agent Runtime Service account if not already created
gcloud beta services identity create --service=aiplatform.googleapis.com --project=${PROJECT_NUMBER}

# 3. Grant GCS Access
gcloud projects add-iam-policy-binding $PROJECT_ID --member="serviceAccount:$SA_EMAIL" --role="roles/storage.objectUser" --condition=None
- 在編輯器中,依序前往「View」->「Toggle hidden files」。在 image_scoring 資料夾中,建立含有以下內容的 .env 檔案。新增必要詳細資料,例如專案名稱和 Cloud Storage bucket (在 Cloud Shell 編輯器終端機中執行)。
#go to image_scoring folder
cd ~/imagescoring/multiagenthandson/image_scoring
cat <<EOF>> .env
GOOGLE_GENAI_USE_VERTEXAI=1
GOOGLE_CLOUD_PROJECT=$(gcloud config get-value project)
GOOGLE_CLOUD_LOCATION=us-central1
GOOGLE_CLOUD_STORAGE_BUCKET=$(gcloud config get-value project)-imagescoring-bucket
GCS_BUCKET_NAME=$(gcloud config get-value project)-imagescoring-bucket
SCORE_THRESHOLD=40
IMAGEN_MODEL="imagen-3.0-generate-002"
GENAI_MODEL="gemini-2.5-flash"
EOF
- 在 Cloud Shell 編輯器選單中,依序選取「File」>「Open Folder」。
- 在彈出式方塊中,於使用者名稱後方新增下列資料夾資訊:
imagescoring/。按一下「確定」。現在左側的檔案總管窗格中,應該會顯示完整的專案結構。 - 前往「Explorer」側邊窗格中的 image_scoring 資料夾。點選「agent.py」agent.py開啟檔案,查看代理程式結構。這個代理程式包含根代理程式,可連結至其他子代理程式。
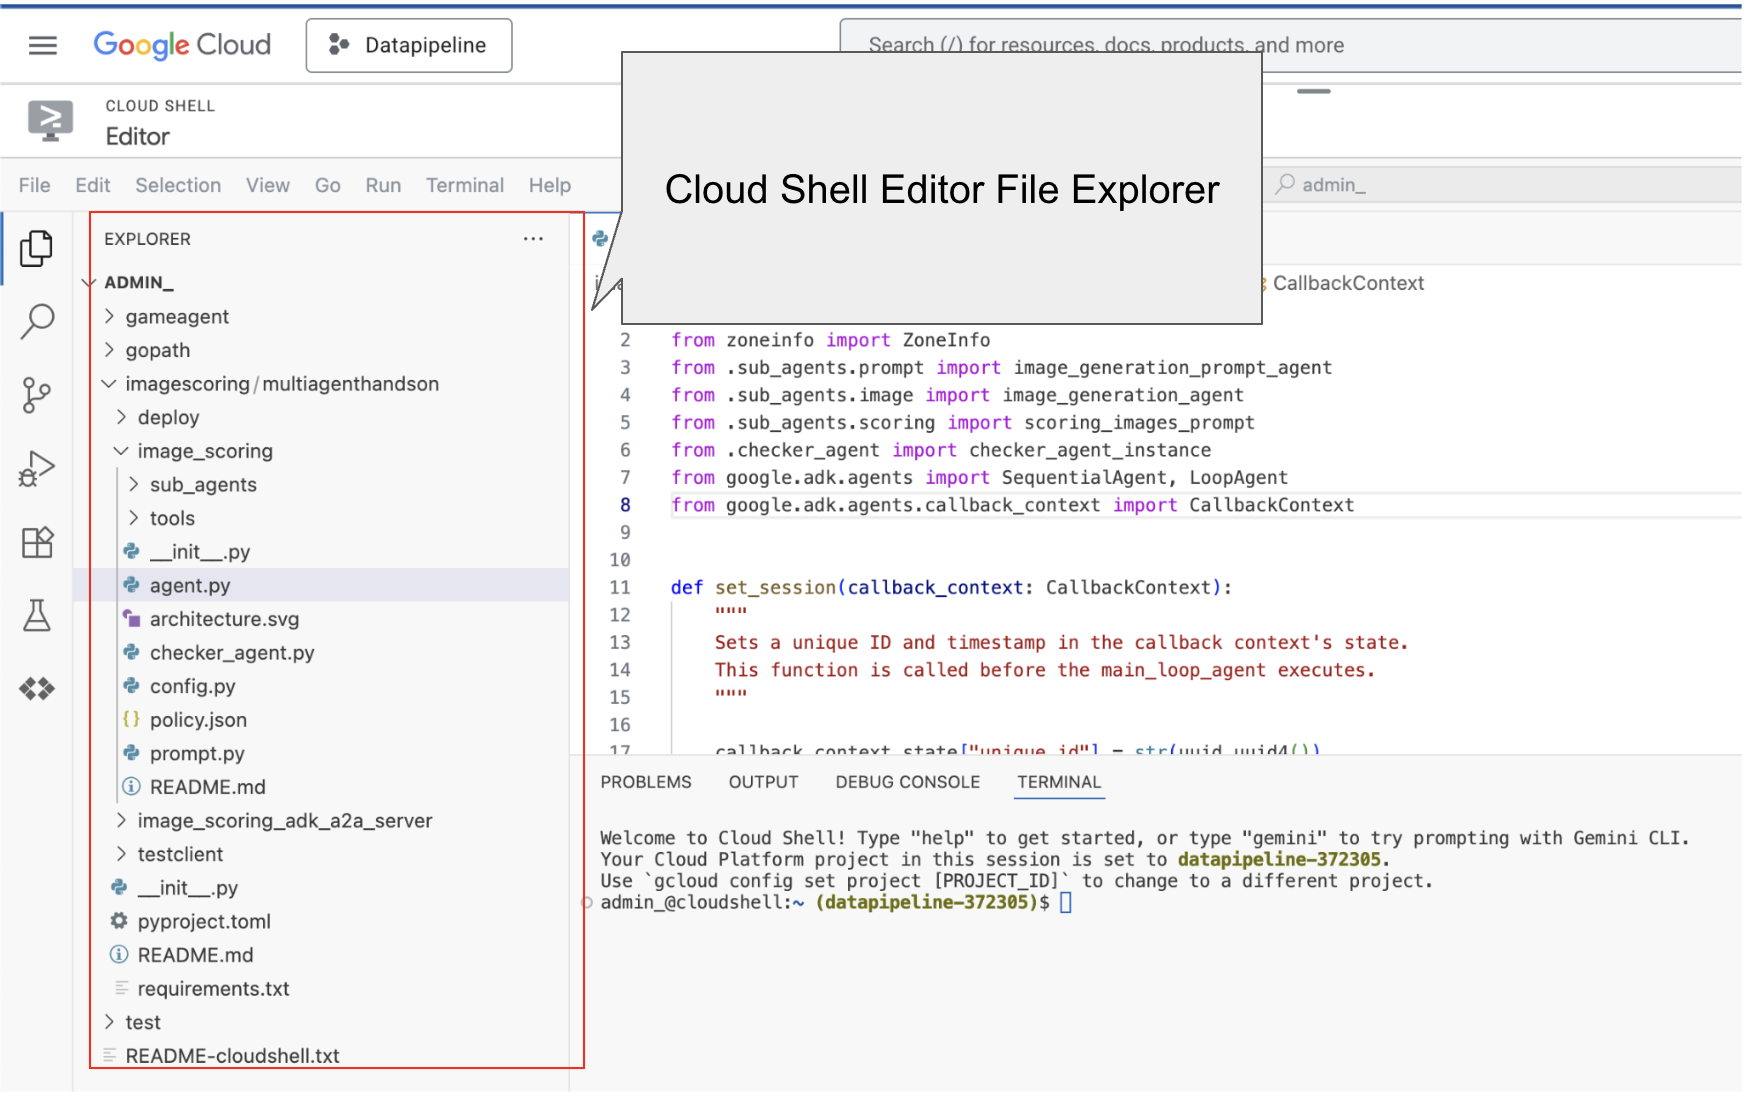
圖 4:從「Explorer」側邊窗格看到的資料夾結構。只要點選檔案,即可查看檔案內容。
- 返回終端機中的頂層目錄 multiagenthandson,然後執行下列指令,在本地執行代理程式 (在 Cloud Shell 編輯器終端機中執行)。
#go to the directory multiagenthandson
cd ~/imagescoring/multiagenthandson
# Run the following command to run agents locally
adk web
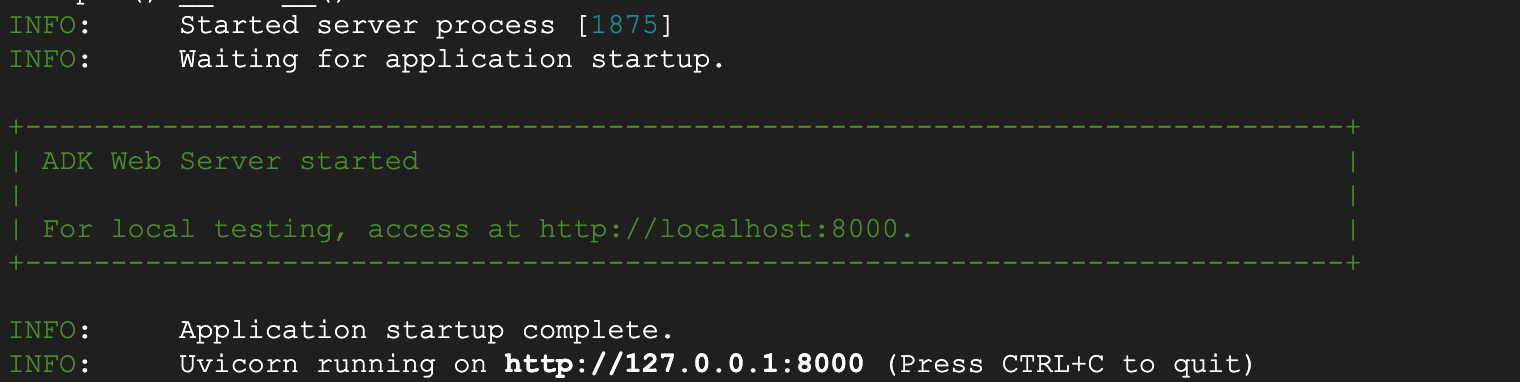
圖 5:啟動 ADK 應用程式
- 在終端機上顯示的 http:// 網址上按住 Ctrl 鍵並點選 (MacOS 則為按住 CMD 鍵並點選),即可開啟 ADK 的瀏覽器型 GUI 用戶端。畫面應如圖 5 所示
- 選取左上側下拉式選單中的「image_scoring」(請參閱圖 5)。現在來生成幾張圖片吧!您也應該會在 Google Cloud Storage bucket 中找到圖片。請嘗試使用下列提示詞或自訂提示詞。
- 日落時分,寧靜的山景
- 貓騎自行車
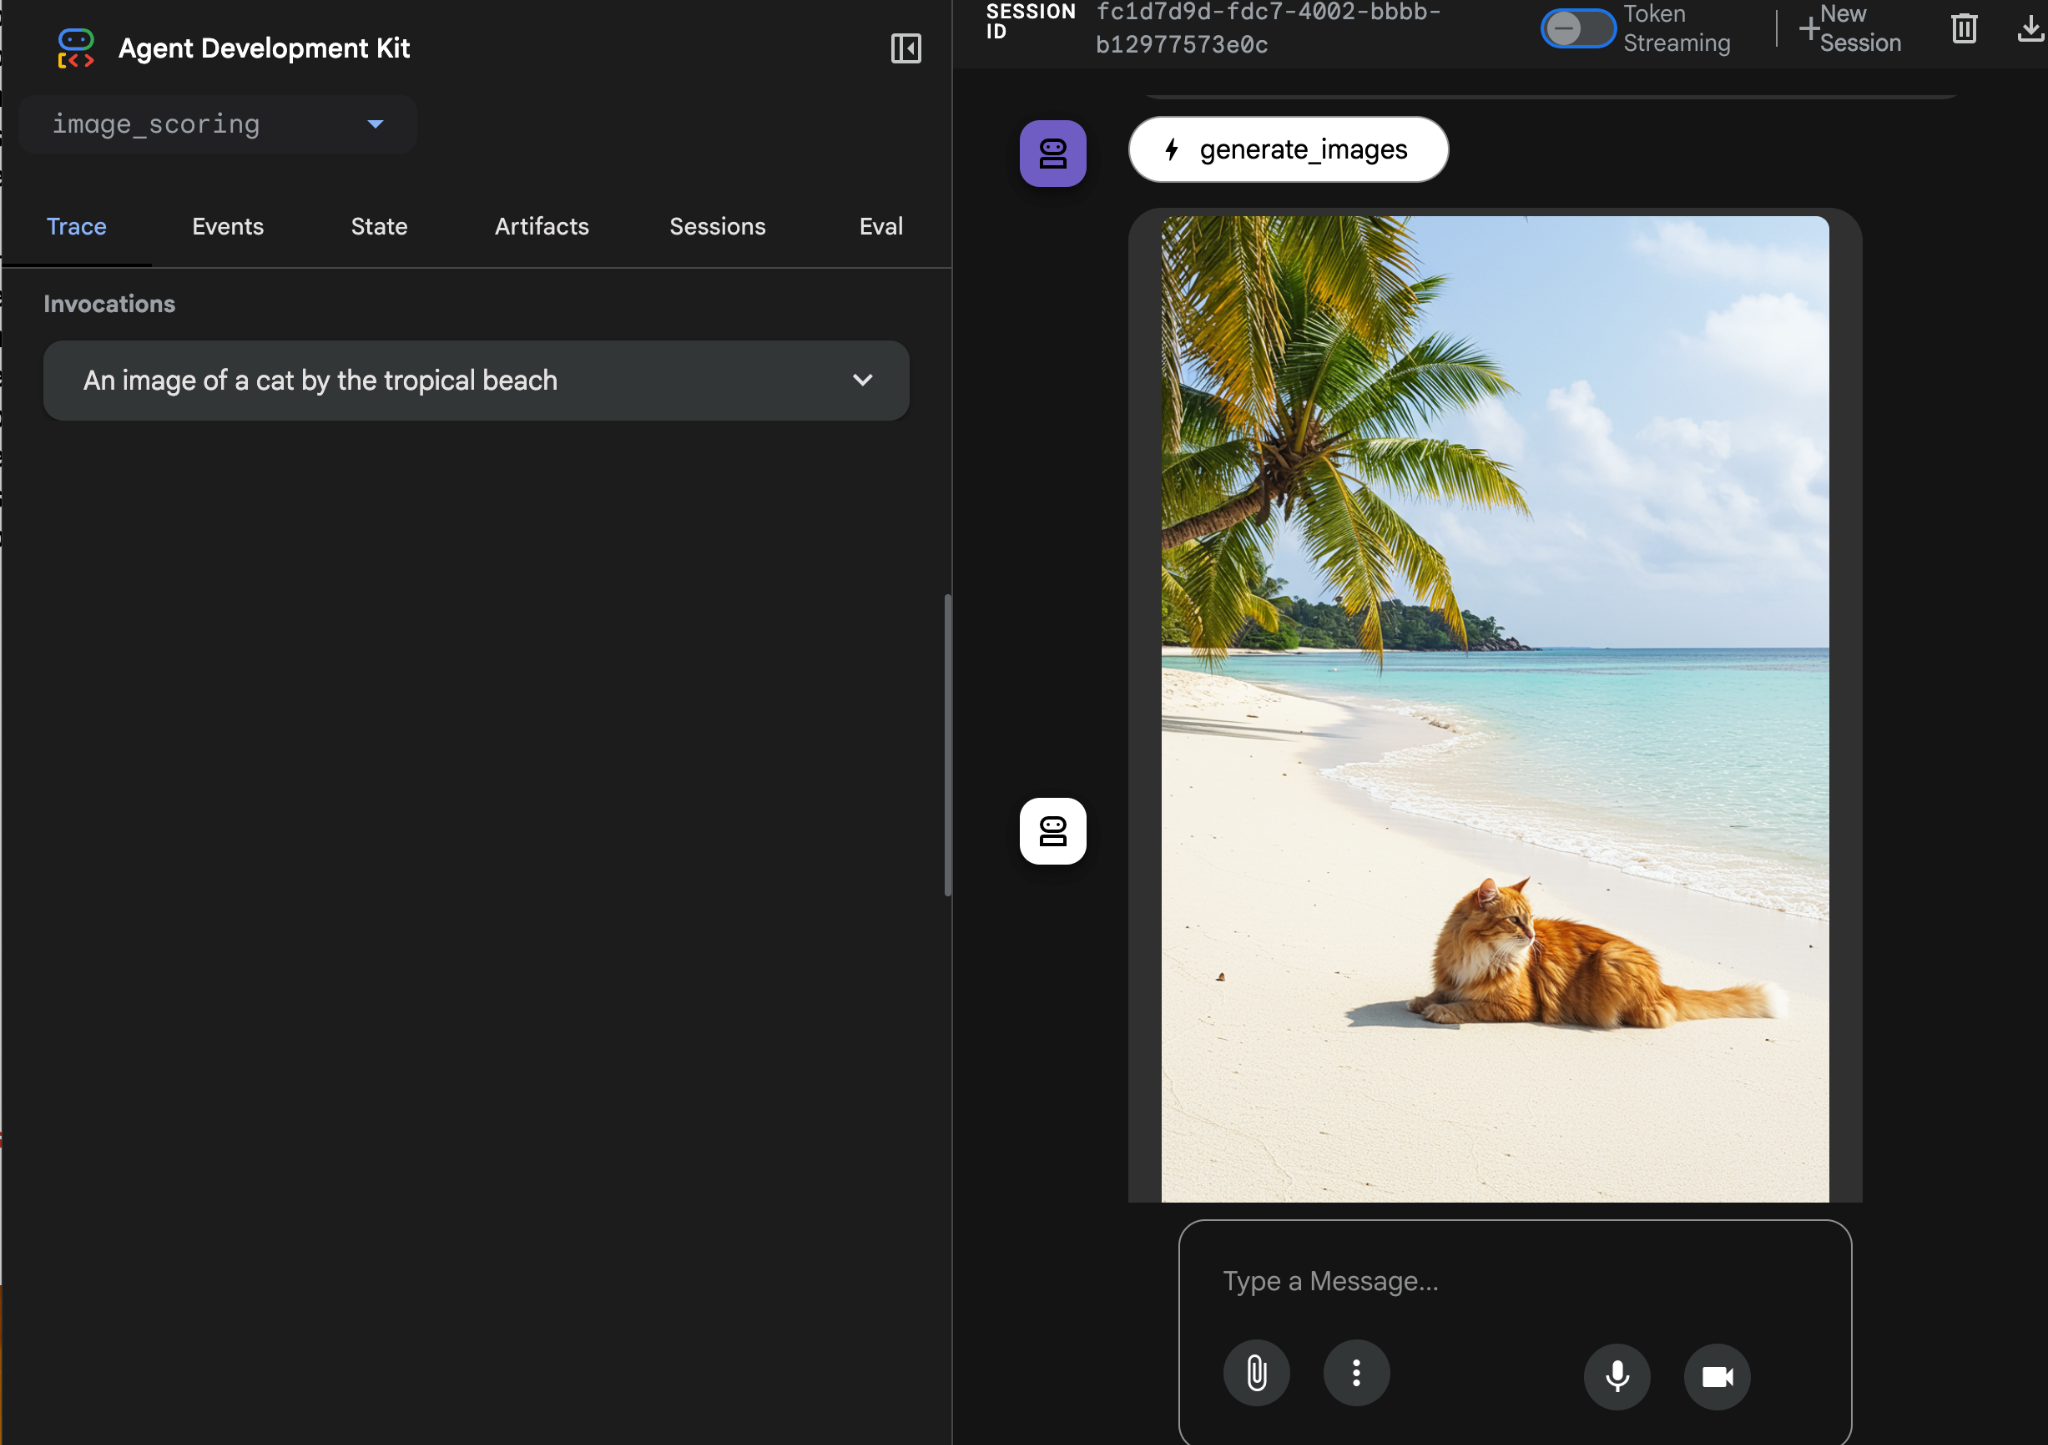
圖 6:輸出內容範例
9. 部署至 Agent Runtime
現在將代理部署至 Agent Engine。Agent Engine 是一項全代管服務,可在 GCP 中部署代理程式。Agent Engine 與 ADK (Agent Development Kit) 相容,因此以 ADK (Agent Development Kit) 建構的代理可部署在 Agent Engine 中。
- 在 Cloud Shell 編輯器終端機中執行下列步驟前,請先按下 Ctrl+C 鍵關閉 ADK 伺服器。
- 使用 Poetry 建立 requirements.txt 檔案。Poetry 會使用 pyproject.toml 建立 requirements.txt 檔案。執行指令後,請檢查是否已建立 requirements.txt 檔案 (在 Cloud Shell 編輯器終端機中執行)。
# Go to the parent folder containing pyproject.toml file
cd ~/imagescoring/multiagenthandson

# install poetry-plugin-export
uv pip install poetry-plugin-export

#Create requirements.txt file
python3 -m poetry export -f requirements.txt --output requirements.txt --without-hashes
- 建立套件。我們需要將應用程式打包成 .whl Python 套件。我們會使用 Poetry 執行這項操作。執行指令後,請確認已建立 dist 資料夾,且其中包含 .whl 檔案 (在 Cloud Shell 編輯器終端機中執行)。
# Go to the parent folder containing pyproject.toml file
cd ~/imagescoring/multiagenthandson

#Create python package, to create whl file
python3 -m poetry build
- 現在我們要準備將圖片評分代理部署至 Agent Engine 服務的指令碼。在 deploy 目錄中,於 Cloud Shell 編輯器側邊窗格找到 deploy.py,然後點選開啟。請按照下列步驟驗證內容:
import vertexai
from image_scoring.agent import root_agent
import os
import glob # To easily find the wheel file
from dotenv import load_dotenv

# Load environment variables from image_scoring/.env
env_path = os.path.join(os.path.dirname(__file__), "..", "image_scoring", ".env")
load_dotenv(env_path)

PROJECT_ID = os.getenv("GOOGLE_CLOUD_PROJECT")
LOCATION = os.getenv("GOOGLE_CLOUD_LOCATION", "us-central1")
STAGING_BUCKET = f"gs://{os.getenv('GOOGLE_CLOUD_STORAGE_BUCKET')}"

from vertexai import agent_engines

client=vertexai.Client(
    project=PROJECT_ID,
    location=LOCATION,
)
remote_app = client.agent_engines.create(
    agent=root_agent,
    config={
        "display_name": "image-scoring",
        "staging_bucket": STAGING_BUCKET,
        "requirements": open(os.path.join(os.getcwd(), "requirements.txt")).readlines() + ["./dist/image_scoring-0.1.0-py3-none-any.whl"],
        "extra_packages": [
            "./dist/image_scoring-0.1.0-py3-none-any.whl",
        ],     "env_vars":{"GCS_BUCKET_NAME":os.getenv('GOOGLE_CLOUD_STORAGE_BUCKET')}
    }
)
print(f"DEBUG: AgentEngine attributes: {dir(remote_app)}")
try:
    print(remote_app.api_resource.name)
except AttributeError:
    print("Could not find resource_name, check DEBUG output above.")
- 現在可以執行部署指令碼。首先,請前往頂層資料夾 multiagenthandson (在 Cloud Shell 編輯器終端機中執行)。
#go to multiagenthandson folder
cd ~/imagescoring/multiagenthandson

#run deploy script from the parent folder containing deploy.py
python3 -m deploy.deploy
部署完成後,您應該會看到類似下方的內容,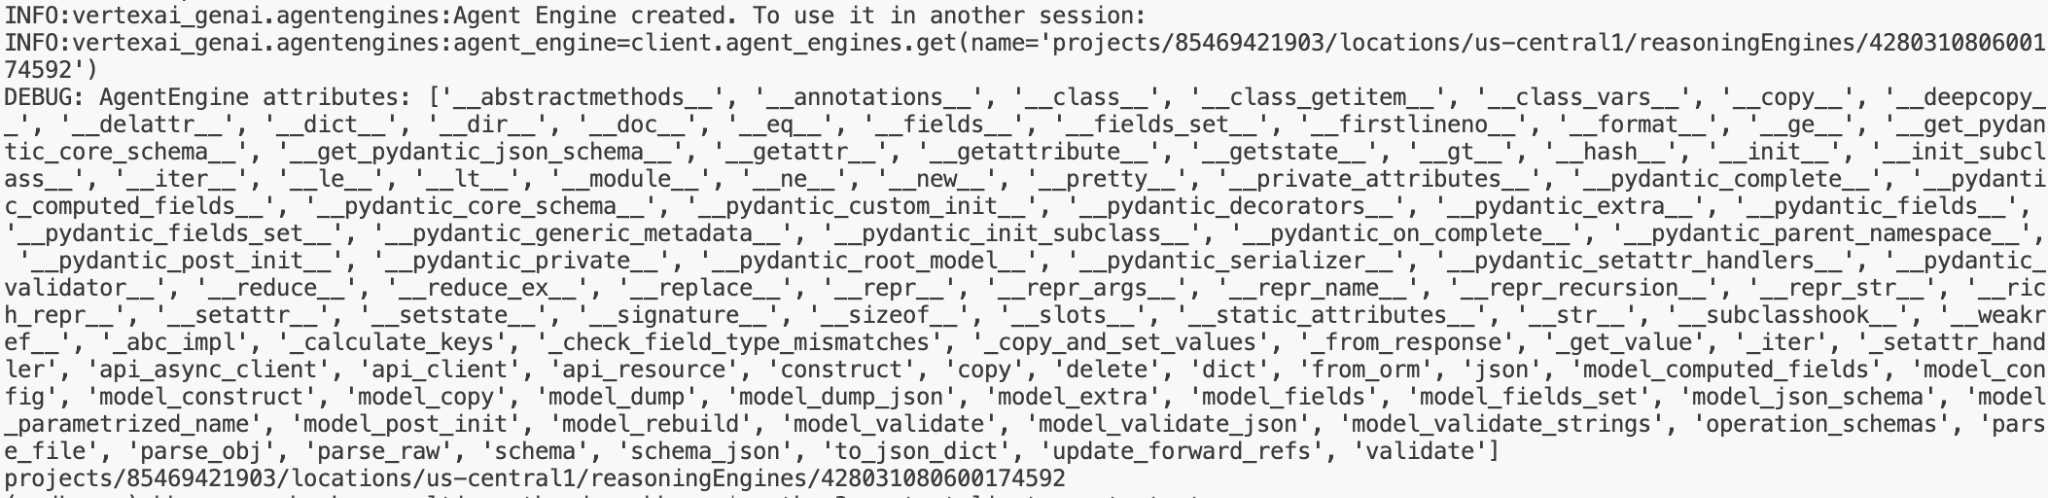
圖 7:輸出範例
- 現在來測試已部署的代理程式。如要測試遠端部署的代理程式引擎,請先從終端機的部署輸出內容複製代理程式位置。格式應類似:projects/85469421903/locations/us-central1/reasoningEngines/7369674597261639680。
在 Cloud Shell 編輯器的側邊窗格中,前往 testclient 資料夾,點選 remote_test.py 開啟檔案,然後編輯下列幾行:
REASONING_ENGINE_ID = "projects/xxx/locations/us-central1/reasoningEngines/xxx" # TODO: Change this
- 在 multiagenthandson 根目錄中,於 Cloud Shell 編輯器終端機執行下列指令。輸出內容應與圖 8 相同。
#go to multiagenthandson folder
cd ~/imagescoring/multiagenthandson

#execute remote_test.py
python3 -m testclient.remote_test
圖 8:輸出範例
10. 建立 A2A 代理程式
在這個步驟中,我們將根據上一個步驟建立的代理,建立簡單的 A2A 代理。現有的 ADK (Agent Development Kit) 代理可透過 A2A 通訊協定發布。這些是您將在本步驟中學到的重點。
在本實作練習中,我們將使用 image_scoring_adk_a2a_server 資料夾中的程式碼。開始工作前,請將目錄變更為這個資料夾 (在 Cloud Shell 編輯器終端機中執行)。
#change directory to image_scoring_adk_a2a_server
cd ~/imagescoring/multiagenthandson/image_scoring_adk_a2a_server

#copy the env file
cp ~/imagescoring/multiagenthandson/image_scoring/.env remote_a2a/image_scoring
1. 建立 A2A 代理資訊卡
A2A 通訊協定需要代理資訊卡,其中包含代理的所有資訊,例如代理功能、代理使用指南等。部署 A2A 代理後,即可使用「.well-known/agent-card.json」連結查看代理資訊卡。客戶可以參考這項資訊,將要求傳送給服務專員。
前往 remote_a2a/image_scoring 目錄,然後在 Cloud Shell 編輯器側邊窗格中找到 agents.json。按一下檔案開啟,並確認內容與下列項目相符:
{
 "name": "image_scoring",
 "description": "Agent that generates images based on user prompts and scores their adherence to the prompt.",
 "url": "http://localhost:8001/a2a/image_scoring",
 "version": "1.0.0",
 "defaultInputModes": ["text/plain"],
 "defaultOutputModes": ["image/png", "text/plain"],
 "capabilities": {
   "streaming": true,
   "functions": true
 },
 "skills": [
   {
     "id": "generate_and_score_image",
     "name": "Generate and Score Image",
     "description": "Generates an image from a given text prompt and then evaluates how well the generated image adheres to the original prompt, providing a score.",
     "tags": ["image generation", "image scoring", "evaluation", "AI art"],
     "examples": [
       "Generate an image of a futuristic city at sunset",
       "Create an image of a cat playing a piano",
       "Show me an image of a serene forest with a hidden waterfall"
     ]
   }
 ]
}
2. 建立 A2A 代理 在 image_scoring_adk_a2a_server 根目錄中,確認 a2a_agent.py 檔案是否存在。如要開啟,請在 Cloud Shell 編輯器的側邊窗格中點選檔案名稱。這個檔案是 A2A 代理的進入點,應包含下列內容:
#change directory to image_scoring_adk_a2a_server
cd ~/imagescoring/multiagenthandson/image_scoring_adk_a2a_server
from google.adk.agents.remote_a2a_agent import RemoteA2aAgent

root_agent = RemoteA2aAgent(
   name="image_scoring",
   description="Agent to give interesting facts.",
   agent_card="http://localhost:8001/a2a/image_scoring/.well-known/agent.json",

   # Optional configurations
   timeout=300.0,          # HTTP timeout (seconds)
   httpx_client=None,      # Custom HTTP client
)
3. 執行 A2A 代理
現在可以執行代理程式了!如要執行代理程式,請從頂層資料夾 image_scoring_adk_a2a_server 內執行下列指令 (在 Cloud Shell 編輯器終端機中執行)。
#following command runs the ADK agent as a2a agent
adk api_server --a2a --port 8001 remote_a2a
4. 測試 A2A 代理
代理程式執行後,我們就可以測試代理程式。首先,請查看代理程式資訊卡。使用「Terminal」(終端機) >「New Terminal」(新增終端機) 開啟新的終端機,然後執行下列指令 (在開啟的 Cloud Shell 編輯器終端機中執行)。
#Execute the following
curl http://localhost:8001/a2a/image_scoring/.well-known/agent.json
執行上述指令後,應該會顯示 A2A 代理的代理資訊卡,這主要是我們在上一個步驟中建立的 agent.json 內容。
現在,讓我們向代理傳送要求。我們可以使用 curl 將要求傳送至代理程式 (在剛開啟的 Cloud Shell 編輯器終端機中執行),
curl -X POST   http://localhost:8001/a2a/image_scoring   -H 'Content-Type: application/json'   -d '{
    "id": "uuid-123",
    "params": {
      "message": {
        "messageId": "msg-456",
        "parts": [{"text": "Create an image of a cat"}],
        "role": "user"
      }
    }
  }'
在上述要求中,您可以變更「Create an image of a cat」這一行,藉此變更提示。執行指令後,您可以在指定的 Google Cloud Storage 中查看輸出圖片。
11. 清理
現在來清理剛建立的內容。
- 刪除我們剛建立的 Agent Runtime 伺服器。在 Google Cloud 控制台的搜尋列中輸入「Gemini Enterprise Agent Platform」,然後前往該平台。按一下左側的「代理程式引擎」。按一下「刪除」即可刪除代理程式。
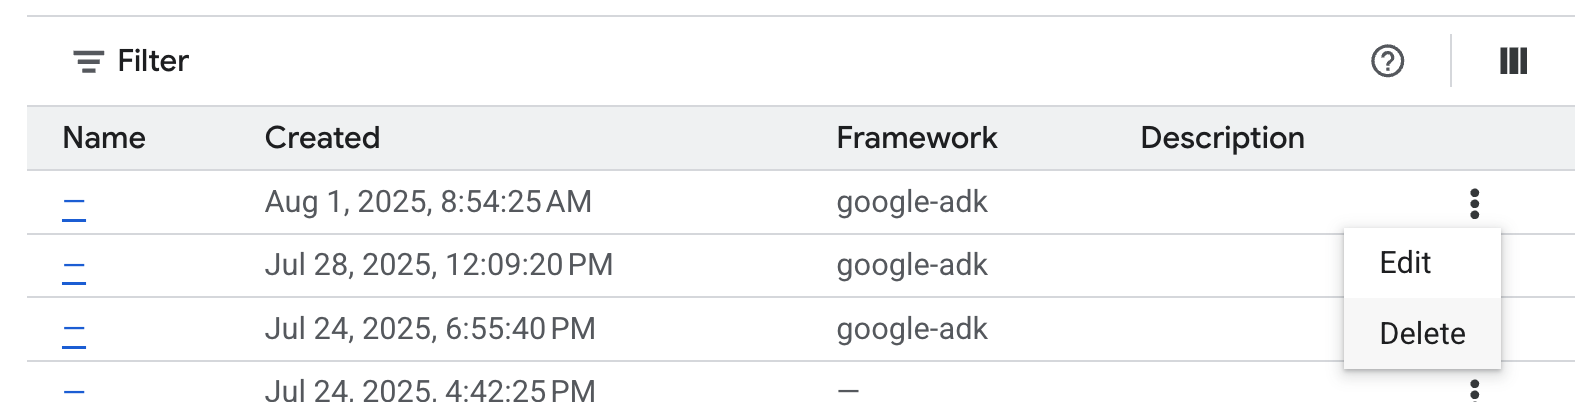
圖 9:您可以從 Google Cloud 控制台刪除 Agent Runtime 執行個體
- 刪除 Cloud Shell 中的檔案
#Execute the following to delete the files
cd ~
rm -R ~/imagescoring
- 刪除 bucket。前往 GCP 控制台的「Cloud Storage」,選取並刪除 bucket。
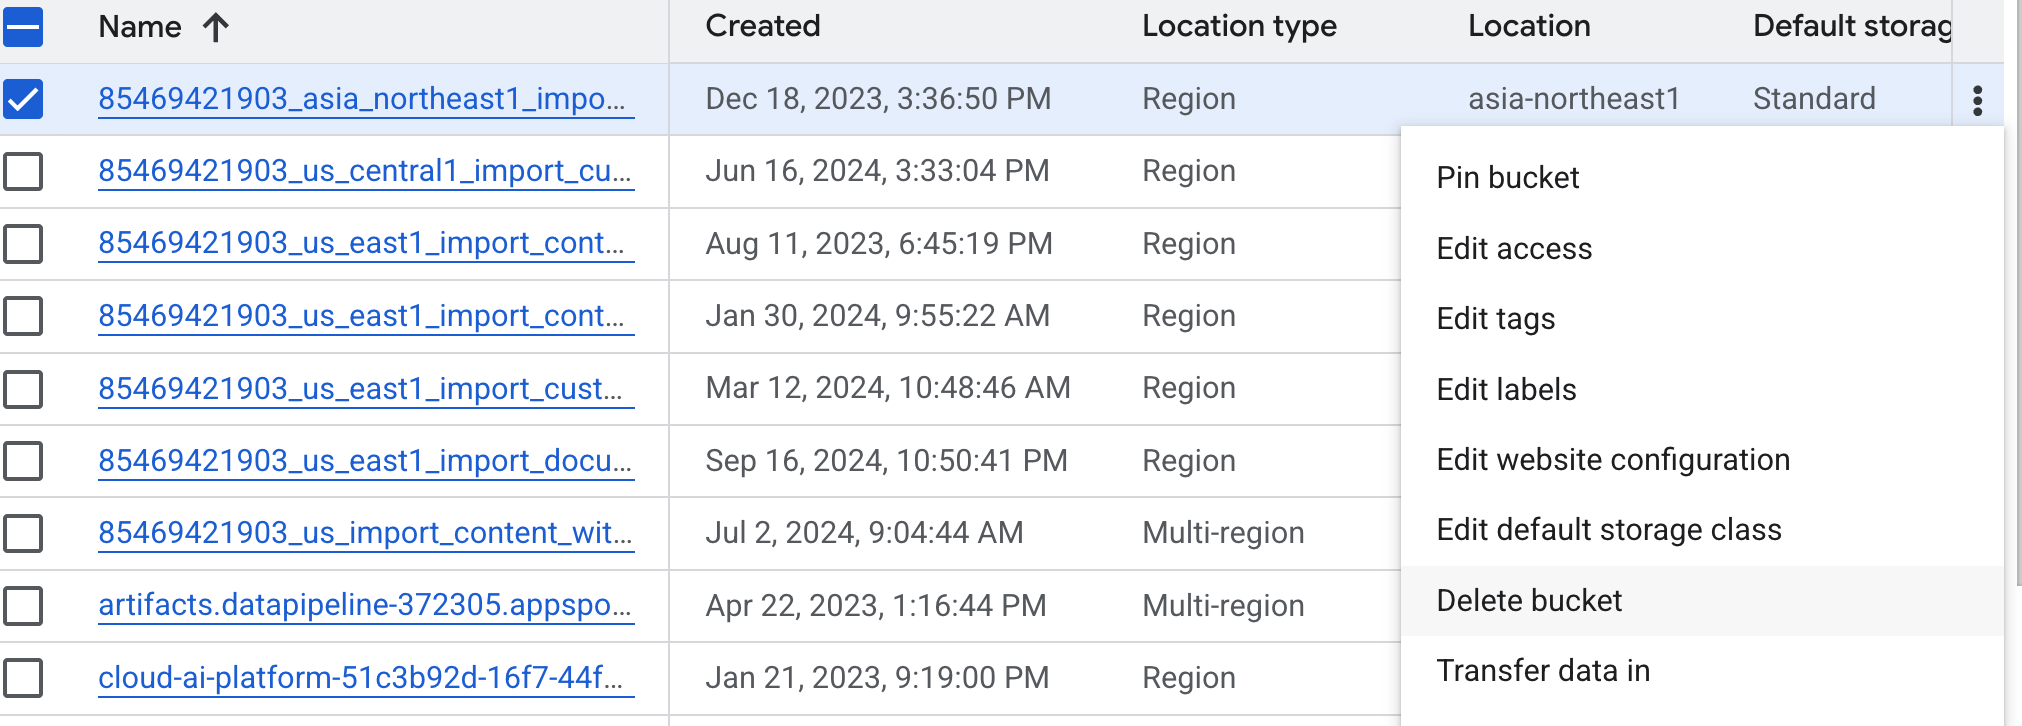
圖 10:刪除 bucket
12. 結語
恭喜!您已成功將多代理 ADK (Agent Development Kit) 應用程式部署至 Agent Runtime。這項重大成就涵蓋現代雲端原生應用程式的核心生命週期,為您部署複雜的代理程式系統奠定堅實基礎。
重點回顧
在本實驗室中,您學會如何:
- 使用 ADK (Agent Development Kit) 建立多代理應用程式
- 將應用程式部署至 Agent Runtime
- 建立可使用 A2A 通訊協定通訊的代理。
實用資源
從原型設計到投入正式環境
這個實驗室屬於「Google Cloud 學習路徑:打造可用於正式環境的 AI」。
- 探索完整課程,從設計原型開始,一步步把專案投入正式環境。
- 使用 #ProductionReadyAI 主題標記分享進度。