
1. Panoramica
Che cos'è Document AI?
Document AI è una soluzione di comprensione dei documenti che prende dati non strutturati (ad es. documenti, email, fatture, moduli e così via) e li rende più facili da comprendere, analizzare e utilizzare. L'API fornisce una struttura tramite la classificazione dei contenuti, l'estrazione di entità, la ricerca avanzata e altro ancora.
In questo lab imparerai a eseguire il riconoscimento ottico dei caratteri utilizzando l'API Document AI con Python.
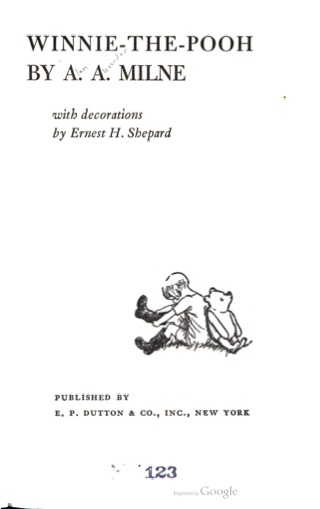
Utilizzeremo un file PDF del romanzo classico "Winnie the Pooh" di A.A. Milne, che di recente è diventato di dominio pubblico negli Stati Uniti. Questo file è stato scansionato e digitalizzato da Google Libri.
Cosa imparerai a fare
- Come abilitare l'API Document AI
- Come autenticare le richieste API
- Come installare la libreria client per Python
- Come utilizzare le API di elaborazione batch e online
- Come analizzare il testo di un file PDF
Che cosa ti serve
- Un progetto Google Cloud
- Un browser, ad esempio Chrome o Firefox
- Familiarità con l'utilizzo di Python (3.9+)
Sondaggio
Come utilizzerai questo tutorial?
Come valuteresti la tua esperienza con Python?
Come valuti la tua esperienza di utilizzo dei servizi Google Cloud?
2. Configurazione e requisiti
Configurazione dell'ambiente autonomo
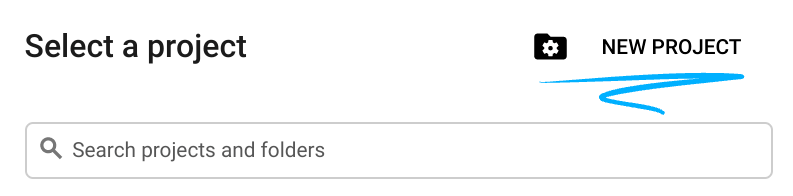
- Accedi alla console Cloud e crea un nuovo progetto o riutilizzane uno esistente. Se non hai già un account Gmail o Google Workspace, devi crearne uno.

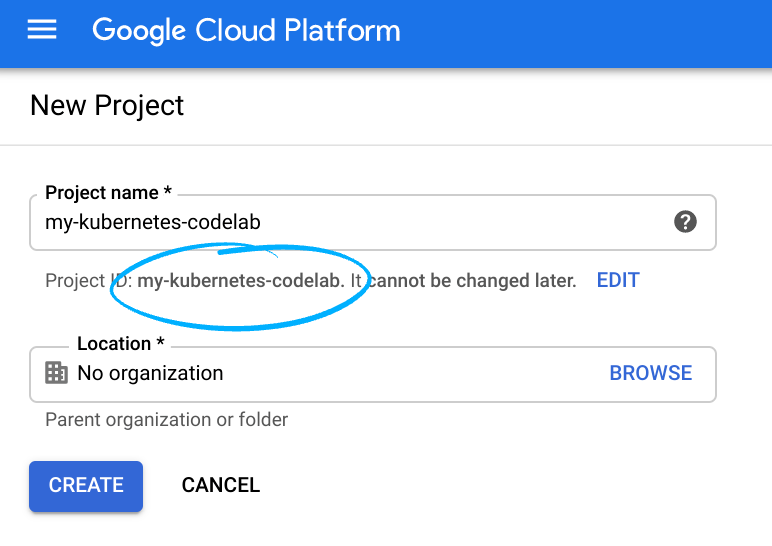
Ricorda l'ID progetto, un nome univoco tra tutti i progetti Google Cloud. L'ID progetto riportato sopra è già stato utilizzato e non funzionerà per te. Ci dispiace. Devi fornire questo ID in un secondo momento come PROJECT_ID.
- Successivamente, devi abilitare la fatturazione in Cloud Console per utilizzare le risorse Google Cloud.
Assicurati di seguire le istruzioni riportate nella sezione "Pulizia". La sezione ti consiglia come arrestare le risorse in modo che non vengano addebitati costi di fatturazione al termine di questo tutorial. I nuovi utenti di Google Cloud possono beneficiare del programma prova senza costi di 300$.
Avvia Cloud Shell
Anche se puoi gestire Google Cloud da remoto dal tuo laptop, questo codelab utilizza Google Cloud Shell, un ambiente a riga di comando in esecuzione nel cloud.
Attiva Cloud Shell
- Nella console Cloud, fai clic su Attiva Cloud Shell


Se non hai mai avviato Cloud Shell, viene visualizzata una schermata intermedia (sotto la piega) che ne descrive le funzionalità. In questo caso, fai clic su Continua (e non comparirà più). Ecco come si presenta la schermata intermedia:

Bastano pochi istanti per eseguire il provisioning e connettersi a Cloud Shell.

Cloud Shell fornisce l'accesso tramite terminale a una macchina virtuale ospitata nel cloud. La macchina virtuale include tutti gli strumenti per sviluppatori di cui avrai bisogno. Offre una home directory permanente da 5 GB e viene eseguita in Google Cloud, migliorando notevolmente le prestazioni e l'autenticazione della rete. Gran parte del lavoro per questo codelab, se non tutto, può essere svolto semplicemente con un browser.
Una volta eseguita la connessione a Cloud Shell, dovresti vedere che il tuo account è già autenticato e il progetto è già impostato sul tuo ID progetto.
- Esegui questo comando in Cloud Shell per verificare che l'account sia autenticato:
gcloud auth list
Output comando
 Credentialed Accounts
ACTIVE  ACCOUNT
*      <my_account>@<my_domain.com>

To set the active account, run:
    $ gcloud config set account `ACCOUNT`
gcloud config list project
Output comando
[core]
project = <PROJECT_ID>
In caso contrario, puoi impostarlo con questo comando:
gcloud config set project <PROJECT_ID>
Output comando
Updated property [core/project].
3. Abilita l'API Document AI
Prima di poter iniziare a utilizzare Document AI, devi abilitare l'API. Puoi farlo utilizzando l'interfaccia a riga di comando gcloud o la console Cloud.
Utilizza l'interfaccia a riga di comando gcloud
- Se non utilizzi Cloud Shell, segui i passaggi descritti in Installare l'interfaccia a riga di comando
gcloudsulla tua macchina locale. - Le API possono essere abilitate utilizzando i seguenti comandi
gcloud.
gcloud services enable documentai.googleapis.com storage.googleapis.com
Il risultato dovrebbe essere simile a questo:
Operation "operations/..." finished successfully.
Utilizzo di Cloud Console
Apri Cloud Console nel browser.
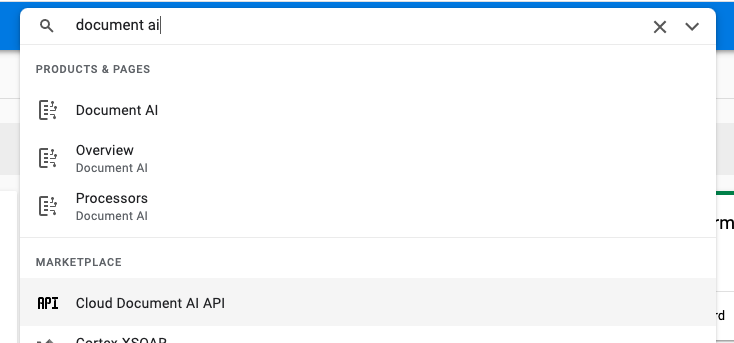
- Utilizzando la barra di ricerca nella parte superiore della console, cerca "API Document AI", quindi fai clic su Abilita per utilizzare l'API nel tuo progetto Google Cloud.
- Ripeti il passaggio precedente per l'API Google Cloud Storage.
Ora puoi utilizzare Document AI.
4. Creare e testare un processore
Devi prima creare un'istanza del processore OCR di documenti che eseguirà l'estrazione. Questa operazione può essere completata utilizzando Cloud Console o l'API Processor Management.
Cloud Console
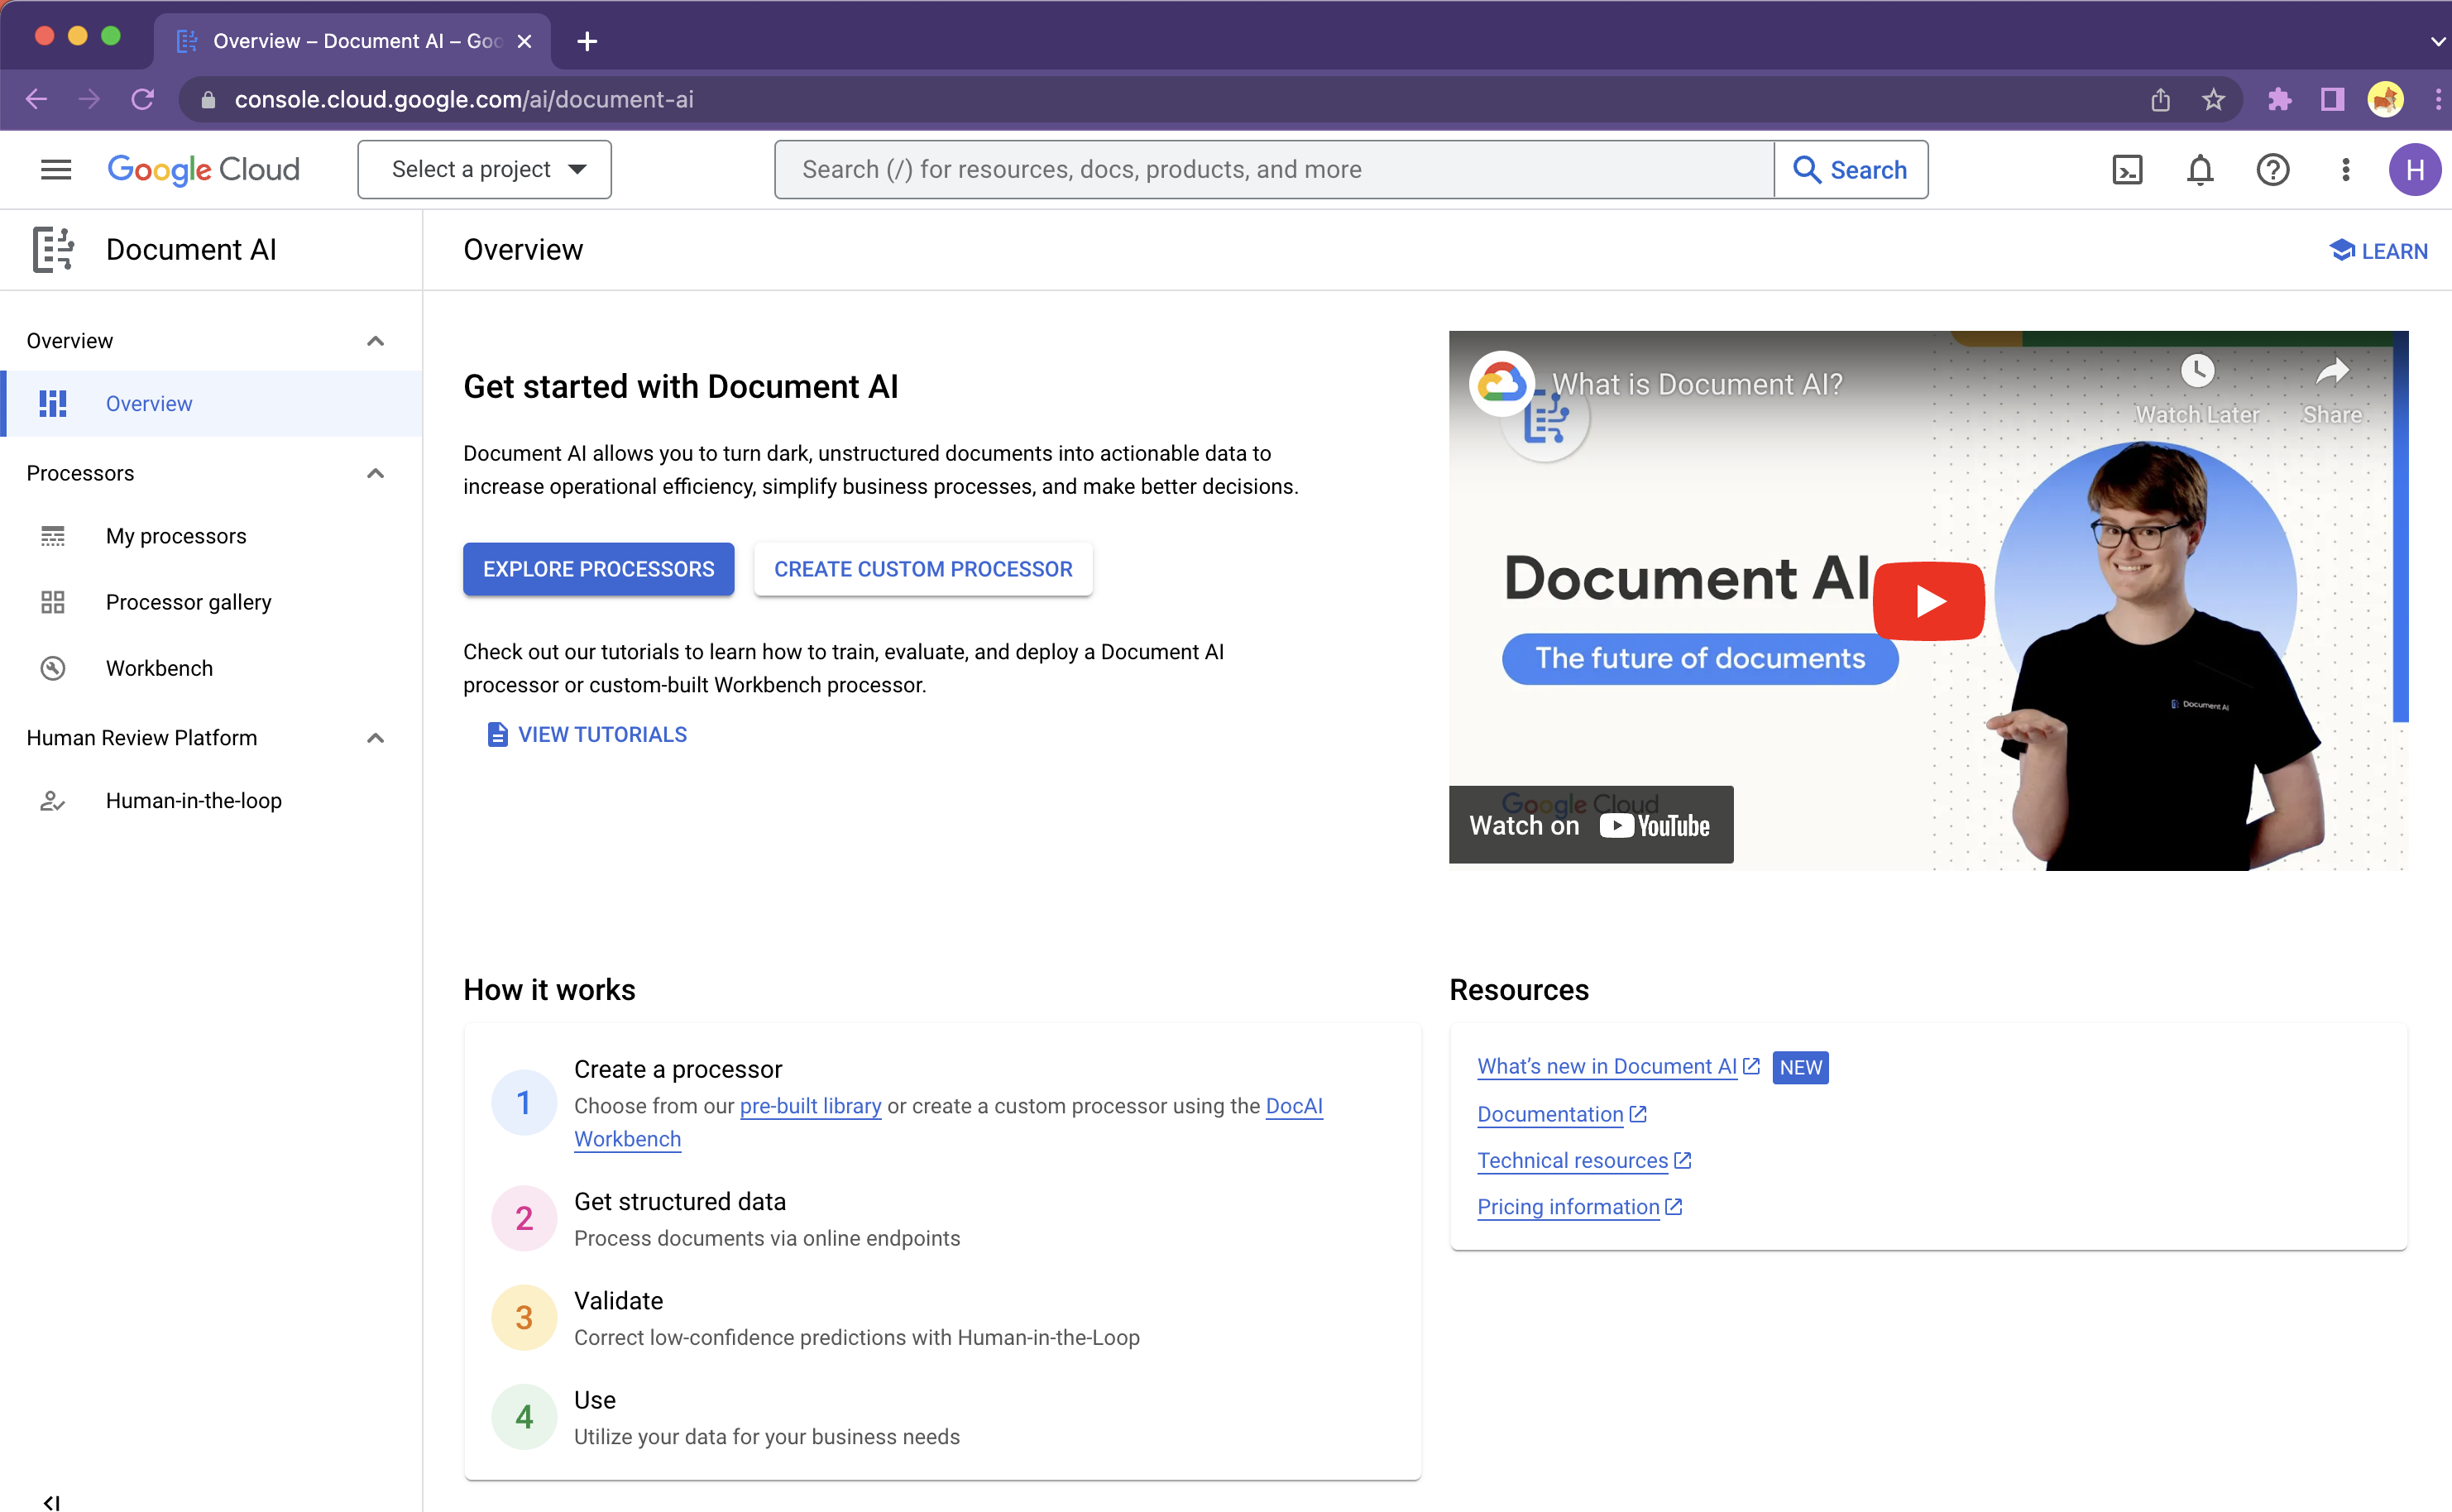
- Nella console, vai alla panoramica della piattaforma Document AI.
- Fai clic su Esplora processori e seleziona OCR di documenti

- Assegna il nome
codelab-ocr(o un altro nome che ricorderai) e seleziona la regione più vicina nell'elenco. - Fai clic su Crea per creare il processore.
- Copia il tuo ID processore. Lo dovrai utilizzare nel tuo codice in un secondo momento.
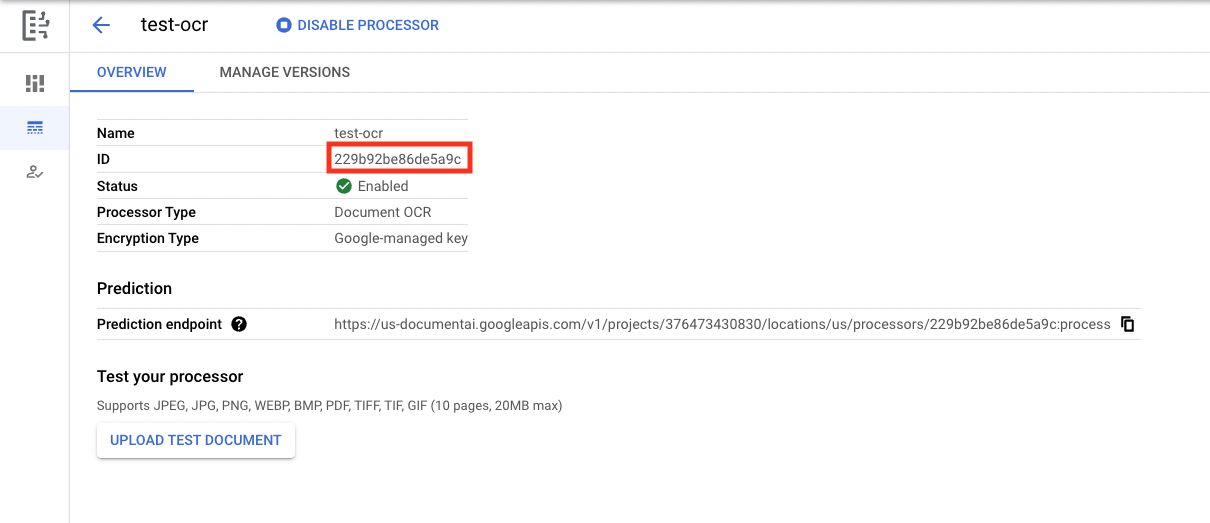
Puoi testare il processore nella console caricando un documento. Fai clic su Carica documento di test e seleziona un documento da analizzare.
Puoi scaricare il file PDF di seguito, che contiene le prime 3 pagine del nostro romanzo.
L'output dovrebbe avere il seguente aspetto: 
Libreria client Python
Segui questo codelab per scoprire come gestire i processori Document AI con la libreria client Python:
5. Autenticare le richieste API
Per effettuare richieste all'API Document AI, devi utilizzare un service account. Un service account appartiene al tuo progetto e viene utilizzato dalla libreria client Python per effettuare richieste API. Come qualsiasi altro account utente, un service account è rappresentato da un indirizzo email. In questa sezione utilizzerai Cloud SDK per creare un service account e poi creare le credenziali necessarie per l'autenticazione come service account.
Innanzitutto, apri Cloud Shell e imposta una variabile di ambiente con il tuo PROJECT_ID che utilizzerai durante questo codelab:
export GOOGLE_CLOUD_PROJECT=$(gcloud config get-value core/project)
Successivamente, crea un nuovo service account per accedere all'API Document AI utilizzando:
gcloud iam service-accounts create my-docai-sa \
  --display-name "my-docai-service-account"
Successivamente, concedi al service account le autorizzazioni per accedere a Document AI e Cloud Storage nel tuo progetto.
gcloud projects add-iam-policy-binding ${GOOGLE_CLOUD_PROJECT} \
    --member="serviceAccount:my-docai-sa@${GOOGLE_CLOUD_PROJECT}.iam.gserviceaccount.com" \
    --role="roles/documentai.admin"

gcloud projects add-iam-policy-binding ${GOOGLE_CLOUD_PROJECT} \
    --member="serviceAccount:my-docai-sa@${GOOGLE_CLOUD_PROJECT}.iam.gserviceaccount.com" \
    --role="roles/storage.admin"

gcloud projects add-iam-policy-binding ${GOOGLE_CLOUD_PROJECT} \
    --member="serviceAccount:my-docai-sa@${GOOGLE_CLOUD_PROJECT}.iam.gserviceaccount.com" \
    --role="roles/serviceusage.serviceUsageConsumer"
Successivamente, crea le credenziali che il codice Python utilizza per accedere al nuovo service account. Utilizza il seguente comando per creare le credenziali e salvarle in un file JSON denominato ~/key.json:
gcloud iam service-accounts keys create ~/key.json \
  --iam-account  my-docai-sa@${GOOGLE_CLOUD_PROJECT}.iam.gserviceaccount.com
Infine, imposta la variabile di ambiente GOOGLE_APPLICATION_CREDENTIALS, che viene utilizzata dalla libreria per trovare le tue credenziali. Per saperne di più su questa forma di autenticazione, consulta la guida. Il valore della variabile di ambiente deve essere il percorso completo del file JSON delle credenziali che hai creato, utilizzando:
export GOOGLE_APPLICATION_CREDENTIALS="/path/to/key.json"
6. Installa la libreria client
Installa le librerie client Python per Document AI, Cloud Storage e Document AI Toolbox:
pip3 install --upgrade google-cloud-documentai
pip3 install --upgrade google-cloud-storage
pip3 install --upgrade google-cloud-documentai-toolbox
Il risultato dovrebbe essere simile a questo:
...
Installing collected packages: google-cloud-documentai
Successfully installed google-cloud-documentai-2.15.0
.
.
Installing collected packages: google-cloud-storage
Successfully installed google-cloud-storage-2.9.0
.
.
Installing collected packages: google-cloud-documentai-toolbox
Successfully installed google-cloud-documentai-toolbox-0.6.0a0
Ora puoi utilizzare l'API Document AI.
7. Scarica il PDF di esempio
Abbiamo un documento di esempio che contiene le prime 3 pagine del romanzo.
Puoi scaricare il PDF utilizzando il seguente link. Quindi caricalo nell'istanza Cloud Shell.
Puoi anche scaricarlo dal nostro bucket Google Cloud Storage pubblico utilizzando gsutil.
gsutil cp gs://cloud-samples-data/documentai/codelabs/ocr/Winnie_the_Pooh_3_Pages.pdf .
8. Inviare una richiesta di elaborazione online
In questo passaggio, elaborerai le prime tre pagine del romanzo utilizzando l'API di elaborazione online (sincrona). Questo metodo è più adatto per i documenti più piccoli archiviati localmente. Consulta l'elenco completo dei processori per conoscere il numero massimo di pagine e le dimensioni massime dei file per ogni tipo di processore.
Utilizza l'editor di Cloud Shell o un editor di testo sulla tua macchina locale per creare un file denominato online_processing.py e utilizza il codice riportato di seguito.
Sostituisci YOUR_PROJECT_ID, YOUR_PROJECT_LOCATION, YOUR_PROCESSOR_ID e FILE_PATH con i valori appropriati per il tuo ambiente.
online_processing.py
from google.api_core.client_options import ClientOptions
from google.cloud import documentai


PROJECT_ID = "YOUR_PROJECT_ID"
LOCATION = "YOUR_PROJECT_LOCATION"  # Format is 'us' or 'eu'
PROCESSOR_ID = "YOUR_PROCESSOR_ID"  # Create processor in Cloud Console

# The local file in your current working directory
FILE_PATH = "Winnie_the_Pooh_3_Pages.pdf"
# Refer to https://cloud.google.com/document-ai/docs/file-types
# for supported file types
MIME_TYPE = "application/pdf"

# Instantiates a client
docai_client = documentai.DocumentProcessorServiceClient(
    client_options=ClientOptions(api_endpoint=f"{LOCATION}-documentai.googleapis.com")
)

# The full resource name of the processor, e.g.:
# projects/project-id/locations/location/processor/processor-id
# You must create new processors in the Cloud Console first
RESOURCE_NAME = docai_client.processor_path(PROJECT_ID, LOCATION, PROCESSOR_ID)

# Read the file into memory
with open(FILE_PATH, "rb") as image:
    image_content = image.read()

# Load Binary Data into Document AI RawDocument Object
raw_document = documentai.RawDocument(content=image_content, mime_type=MIME_TYPE)

# Configure the process request
request = documentai.ProcessRequest(name=RESOURCE_NAME, raw_document=raw_document)

# Use the Document AI client to process the sample form
result = docai_client.process_document(request=request)

document_object = result.document
print("Document processing complete.")
print(f"Text: {document_object.text}")
Esegui il codice, che estrarrà il testo e lo stamperà nella console.
Se utilizzi il nostro documento di esempio, dovresti vedere il seguente output:
Document processing complete.
Text: CHAPTER I
IN WHICH We Are Introduced to
Winnie-the-Pooh and Some
Bees, and the Stories Begin
Here is Edward Bear, coming
downstairs now, bump, bump, bump, on the back
of his head, behind Christopher Robin. It is, as far
as he knows, the only way of coming downstairs,
but sometimes he feels that there really is another
way, if only he could stop bumping for a moment
and think of it. And then he feels that perhaps there
isn't. Anyhow, here he is at the bottom, and ready
to be introduced to you. Winnie-the-Pooh.
When I first heard his name, I said, just as you
are going to say, "But I thought he was a boy?"
"So did I," said Christopher Robin.
"Then you can't call him Winnie?"
"I don't."
"But you said "

...

Digitized by
Google
9. Inviare una richiesta di elaborazione batch
Ora supponiamo che tu voglia leggere il testo dell'intero romanzo.
- L'elaborazione online prevede limiti al numero di pagine e alle dimensioni dei file che possono essere inviati e consente un solo file di documento per chiamata API.
- L'elaborazione batch consente di elaborare file più grandi/multipli in modo asincrono.
In questo passaggio, elaboreremo l'intero romanzo "Winnie the Pooh" con l'API Document AI Batch Processing e restituiremo il testo in un bucket Google Cloud Storage.
L'elaborazione batch utilizza operazioni di lunga durata per gestire le richieste in modo asincrono, pertanto dobbiamo effettuare la richiesta e recuperare l'output in modo diverso rispetto all'elaborazione online. Tuttavia, l'output sarà nello stesso formato dell'oggetto Document, indipendentemente dall'utilizzo dell'elaborazione batch o online.
Questo passaggio mostra come fornire documenti specifici da elaborare a Document AI. Un passaggio successivo mostrerà come elaborare un'intera directory di documenti.
Carica il PDF su Cloud Storage
Il metodo batch_process_documents() attualmente accetta file da Google Cloud Storage. Per ulteriori informazioni sulla struttura dell'oggetto, puoi fare riferimento a documentai_v1.types.BatchProcessRequest.
Per questo esempio, puoi leggere il file direttamente dal nostro bucket di esempio.
Puoi anche copiare il file nel tuo bucket utilizzando gsutil…
gsutil cp gs://cloud-samples-data/documentai/codelabs/ocr/Winnie_the_Pooh.pdf gs://YOUR_BUCKET_NAME/
...oppure puoi scaricare il file di esempio del romanzo dal link sottostante e caricarlo nel tuo bucket.
Avrai anche bisogno di un bucket GCS per archiviare l'output dell'API.
Per scoprire come creare bucket di archiviazione, puoi consultare la documentazione di Cloud Storage.
Utilizzo del metodo batch_process_documents()
Crea un file denominato batch_processing.py e utilizza il codice riportato di seguito.
Sostituisci YOUR_PROJECT_ID, YOUR_PROCESSOR_LOCATION, YOUR_PROCESSOR_ID, YOUR_INPUT_URI e YOUR_OUTPUT_URI con i valori appropriati per il tuo ambiente.
Assicurati che YOUR_INPUT_URI rimandi direttamente al file PDF, ad esempio: gs://cloud-samples-data/documentai/codelabs/ocr/Winnie_the_Pooh.pdf.
batch_processing.py
"""
Makes a Batch Processing Request to Document AI
"""

import re

from google.api_core.client_options import ClientOptions
from google.api_core.exceptions import InternalServerError
from google.api_core.exceptions import RetryError
from google.cloud import documentai
from google.cloud import storage

# TODO(developer): Fill these variables before running the sample.
project_id = "YOUR_PROJECT_ID"
location = "YOUR_PROCESSOR_LOCATION"  # Format is "us" or "eu"
processor_id = "YOUR_PROCESSOR_ID"  # Create processor before running sample
gcs_output_uri = "YOUR_OUTPUT_URI"  # Must end with a trailing slash `/`. Format: gs://bucket/directory/subdirectory/
processor_version_id = (
    "YOUR_PROCESSOR_VERSION_ID"  # Optional. Example: pretrained-ocr-v1.0-2020-09-23
)

# TODO(developer): If `gcs_input_uri` is a single file, `mime_type` must be specified.
gcs_input_uri = "YOUR_INPUT_URI"  # Format: `gs://bucket/directory/file.pdf` or `gs://bucket/directory/`
input_mime_type = "application/pdf"
field_mask = "text,entities,pages.pageNumber"  # Optional. The fields to return in the Document object.


def batch_process_documents(
    project_id: str,
    location: str,
    processor_id: str,
    gcs_input_uri: str,
    gcs_output_uri: str,
    processor_version_id: str = None,
    input_mime_type: str = None,
    field_mask: str = None,
    timeout: int = 400,
):
    # You must set the api_endpoint if you use a location other than "us".
    opts = ClientOptions(api_endpoint=f"{location}-documentai.googleapis.com")

    client = documentai.DocumentProcessorServiceClient(client_options=opts)

    if not gcs_input_uri.endswith("/") and "." in gcs_input_uri:
        # Specify specific GCS URIs to process individual documents
        gcs_document = documentai.GcsDocument(
            gcs_uri=gcs_input_uri, mime_type=input_mime_type
        )
        # Load GCS Input URI into a List of document files
        gcs_documents = documentai.GcsDocuments(documents=[gcs_document])
        input_config = documentai.BatchDocumentsInputConfig(gcs_documents=gcs_documents)
    else:
        # Specify a GCS URI Prefix to process an entire directory
        gcs_prefix = documentai.GcsPrefix(gcs_uri_prefix=gcs_input_uri)
        input_config = documentai.BatchDocumentsInputConfig(gcs_prefix=gcs_prefix)

    # Cloud Storage URI for the Output Directory
    gcs_output_config = documentai.DocumentOutputConfig.GcsOutputConfig(
        gcs_uri=gcs_output_uri, field_mask=field_mask
    )

    # Where to write results
    output_config = documentai.DocumentOutputConfig(gcs_output_config=gcs_output_config)

    if processor_version_id:
        # The full resource name of the processor version, e.g.:
        # projects/{project_id}/locations/{location}/processors/{processor_id}/processorVersions/{processor_version_id}
        name = client.processor_version_path(
            project_id, location, processor_id, processor_version_id
        )
    else:
        # The full resource name of the processor, e.g.:
        # projects/{project_id}/locations/{location}/processors/{processor_id}
        name = client.processor_path(project_id, location, processor_id)

    request = documentai.BatchProcessRequest(
        name=name,
        input_documents=input_config,
        document_output_config=output_config,
    )

    # BatchProcess returns a Long Running Operation (LRO)
    operation = client.batch_process_documents(request)

    # Continually polls the operation until it is complete.
    # This could take some time for larger files
    # Format: projects/{project_id}/locations/{location}/operations/{operation_id}
    try:
        print(f"Waiting for operation {operation.operation.name} to complete...")
        operation.result(timeout=timeout)
    # Catch exception when operation doesn"t finish before timeout
    except (RetryError, InternalServerError) as e:
        print(e.message)

    # NOTE: Can also use callbacks for asynchronous processing
    #
    # def my_callback(future):
    #   result = future.result()
    #
    # operation.add_done_callback(my_callback)

    # Once the operation is complete,
    # get output document information from operation metadata
    metadata = documentai.BatchProcessMetadata(operation.metadata)

    if metadata.state != documentai.BatchProcessMetadata.State.SUCCEEDED:
        raise ValueError(f"Batch Process Failed: {metadata.state_message}")

    storage_client = storage.Client()

    print("Output files:")
    # One process per Input Document
    for process in list(metadata.individual_process_statuses):
        # output_gcs_destination format: gs://BUCKET/PREFIX/OPERATION_NUMBER/INPUT_FILE_NUMBER/
        # The Cloud Storage API requires the bucket name and URI prefix separately
        matches = re.match(r"gs://(.*?)/(.*)", process.output_gcs_destination)
        if not matches:
            print(
                "Could not parse output GCS destination:",
                process.output_gcs_destination,
            )
            continue

        output_bucket, output_prefix = matches.groups()

        # Get List of Document Objects from the Output Bucket
        output_blobs = storage_client.list_blobs(output_bucket, prefix=output_prefix)

        # Document AI may output multiple JSON files per source file
        for blob in output_blobs:
            # Document AI should only output JSON files to GCS
            if blob.content_type != "application/json":
                print(
                    f"Skipping non-supported file: {blob.name} - Mimetype: {blob.content_type}"
                )
                continue

            # Download JSON File as bytes object and convert to Document Object
            print(f"Fetching {blob.name}")
            document = documentai.Document.from_json(
                blob.download_as_bytes(), ignore_unknown_fields=True
            )

            # For a full list of Document object attributes, please reference this page:
            # https://cloud.google.com/python/docs/reference/documentai/latest/google.cloud.documentai_v1.types.Document

            # Read the text recognition output from the processor
            print("The document contains the following text:")
            print(document.text)


if __name__ == "__main__":
    batch_process_documents(
        project_id=project_id,
        location=location,
        processor_id=processor_id,
        gcs_input_uri=gcs_input_uri,
        gcs_output_uri=gcs_output_uri,
        input_mime_type=input_mime_type,
        field_mask=field_mask,
    )
Esegui il codice e dovresti visualizzare il testo completo del romanzo estratto e stampato nella console.
Il completamento di questa operazione potrebbe richiedere del tempo, poiché il file è molto più grande dell'esempio precedente. (Oh, che seccatura…)
Tuttavia, con l'API Batch Processing, riceverai un ID operazione che può essere utilizzato per ottenere l'output da GCS una volta completata l'attività.
L'output dovrebbe avere un aspetto simile al seguente:
Waiting for operation projects/PROJECT_NUMBER/locations/LOCATION/operations/OPERATION_NUMBER to complete...
Document processing complete.
Fetching docai-output/OPERATION_NUMBER/0/Winnie_the_Pooh-0.json
Fetching docai-output/OPERATION_NUMBER/0/Winnie_the_Pooh-1.json
Fetching docai-output/OPERATION_NUMBER/0/Winnie_the_Pooh-10.json
Fetching docai-output/OPERATION_NUMBER/0/Winnie_the_Pooh-11.json
Fetching docai-output/OPERATION_NUMBER/0/Winnie_the_Pooh-12.json
Fetching docai-output/OPERATION_NUMBER/0/Winnie_the_Pooh-13.json
Fetching docai-output/OPERATION_NUMBER/0/Winnie_the_Pooh-14.json
Fetching docai-output/OPERATION_NUMBER/0/Winnie_the_Pooh-15.json
Fetching docai-output/OPERATION_NUMBER/0/Winnie_the_Pooh-16.json
Fetching docai-output/OPERATION_NUMBER/0/Winnie_the_Pooh-17.json
Fetching docai-output/OPERATION_NUMBER/0/Winnie_the_Pooh-18.json
Fetching docai-output/OPERATION_NUMBER/0/Winnie_the_Pooh-2.json
Fetching docai-output/OPERATION_NUMBER/0/Winnie_the_Pooh-3.json
Fetching docai-output/OPERATION_NUMBER/0/Winnie_the_Pooh-4.json
Fetching docai-output/OPERATION_NUMBER/0/Winnie_the_Pooh-5.json
Fetching docai-output/OPERATION_NUMBER/0/Winnie_the_Pooh-6.json
Fetching docai-output/OPERATION_NUMBER/0/Winnie_the_Pooh-7.json
Fetching docai-output/OPERATION_NUMBER/0/Winnie_the_Pooh-8.json
Fetching docai-output/OPERATION_NUMBER/0/Winnie_the_Pooh-9.json

This is a reproduction of a library book that was digitized
by Google as part of an ongoing effort to preserve the
information in books and make it universally accessible.
TM
Google books
https://books.google.com

.....

He nodded and went
out ... and in a moment
I heard Winnie-the-Pooh
-bump, bump, bump-go-ing up the stairs behind
him.
Digitized by
Google
10. Invia una richiesta di elaborazione batch per una directory
A volte potresti voler elaborare un'intera directory di documenti, senza elencare ogni documento singolarmente. Il metodo batch_process_documents() supporta l'input di un elenco di documenti specifici o di un percorso di directory.
Questo passaggio mostra come elaborare una directory completa di file di documenti. La maggior parte del codice funziona come nel passaggio precedente, l'unica differenza è l'URI GCS inviato con BatchProcessRequest.
Nel nostro bucket di esempio è presente una directory che contiene più pagine del romanzo in file separati.
gs://cloud-samples-data/documentai/codelabs/ocr/multi-document/
Puoi leggere i file direttamente o copiarli nel tuo bucket Cloud Storage.
Esegui di nuovo il codice del passaggio precedente, sostituendo YOUR_INPUT_URI con una directory in Cloud Storage.
Esegui il codice e dovresti visualizzare il testo estratto da tutti i file di documenti nella directory Cloud Storage.
L'output dovrebbe avere un aspetto simile al seguente:
Waiting for operation projects/PROJECT_NUMBER/locations/LOCATION/operations/OPERATION_NUMBER to complete...
Document processing complete.
Fetching docai-output/OPERATION_NUMBER/0/Winnie_the_Pooh_Page_0-0.json
Fetching docai-output/OPERATION_NUMBER/1/Winnie_the_Pooh_Page_1-0.json
Fetching docai-output/OPERATION_NUMBER/2/Winnie_the_Pooh_Page_10-0.json
Fetching docai-output/OPERATION_NUMBER/3/Winnie_the_Pooh_Page_12-0.json
Fetching docai-output/OPERATION_NUMBER/4/Winnie_the_Pooh_Page_16-0.json
Fetching docai-output/OPERATION_NUMBER/5/Winnie_the_Pooh_Page_7-0.json

Introduction
(I₂
F YOU happen to have read another
book about Christopher Robin, you may remember
th
CHAPTER I
IN WHICH We Are Introduced to
Winnie-the-Pooh and Some
Bees, and the Stories Begin
HERE is
10
WINNIE-THE-POOH
"I wonder if you've got such a thing as a balloon
about you?"
"A balloon?"
"Yes,
12
WINNIE-THE-POOH
and you took your gun with you, just in case, as
you always did, and Winnie-the-P
16
WINNIE-THE-POOH
this song, and one bee sat down on the nose of the
cloud for a moment, and then g
WE ARE INTRODUCED
7
"Oh, help!" said Pooh, as he dropped ten feet on
the branch below him.
"If only
11. Gestire la risposta all'elaborazione batch con Document AI Toolbox
L'elaborazione batch richiede diversi passaggi a causa dell'integrazione con Cloud Storage. L'output Document può anche essere "suddiviso" in più file .json a seconda delle dimensioni del documento di input.
L'SDK Python Document AI Toolbox è stato creato per semplificare la post-elaborazione e altre attività comuni con Document AI. Questa libreria è pensata per integrare la libreria client Document AI, non per sostituirla. Per le specifiche complete, consulta la documentazione di riferimento.
Questo passaggio mostra come effettuare una richiesta di elaborazione batch e recuperare l'output utilizzando Document AI Toolbox.
batch_processing_toolbox.py
"""
Makes a Batch Processing Request to Document AI using Document AI Toolbox
"""

from google.api_core.client_options import ClientOptions
from google.cloud import documentai
from google.cloud import documentai_toolbox

# TODO(developer): Fill these variables before running the sample.
project_id = "YOUR_PROJECT_ID"
location = "YOUR_PROCESSOR_LOCATION"  # Format is "us" or "eu"
processor_id = "YOUR_PROCESSOR_ID"  # Create processor before running sample
gcs_output_uri = "YOUR_OUTPUT_URI"  # Must end with a trailing slash `/`. Format: gs://bucket/directory/subdirectory/
processor_version_id = (
    "YOUR_PROCESSOR_VERSION_ID"  # Optional. Example: pretrained-ocr-v1.0-2020-09-23
)

# TODO(developer): If `gcs_input_uri` is a single file, `mime_type` must be specified.
gcs_input_uri = "YOUR_INPUT_URI"  # Format: `gs://bucket/directory/file.pdf`` or `gs://bucket/directory/``
input_mime_type = "application/pdf"
field_mask = "text,entities,pages.pageNumber"  # Optional. The fields to return in the Document object.


def batch_process_toolbox(
    project_id: str,
    location: str,
    processor_id: str,
    gcs_input_uri: str,
    gcs_output_uri: str,
    processor_version_id: str = None,
    input_mime_type: str = None,
    field_mask: str = None,
):
    # You must set the api_endpoint if you use a location other than "us".
    opts = ClientOptions(api_endpoint=f"{location}-documentai.googleapis.com")

    client = documentai.DocumentProcessorServiceClient(client_options=opts)

    if not gcs_input_uri.endswith("/") and "." in gcs_input_uri:
        # Specify specific GCS URIs to process individual documents
        gcs_document = documentai.GcsDocument(
            gcs_uri=gcs_input_uri, mime_type=input_mime_type
        )
        # Load GCS Input URI into a List of document files
        gcs_documents = documentai.GcsDocuments(documents=[gcs_document])
        input_config = documentai.BatchDocumentsInputConfig(gcs_documents=gcs_documents)
    else:
        # Specify a GCS URI Prefix to process an entire directory
        gcs_prefix = documentai.GcsPrefix(gcs_uri_prefix=gcs_input_uri)
        input_config = documentai.BatchDocumentsInputConfig(gcs_prefix=gcs_prefix)

    # Cloud Storage URI for the Output Directory
    gcs_output_config = documentai.DocumentOutputConfig.GcsOutputConfig(
        gcs_uri=gcs_output_uri, field_mask=field_mask
    )

    # Where to write results
    output_config = documentai.DocumentOutputConfig(gcs_output_config=gcs_output_config)

    if processor_version_id:
        # The full resource name of the processor version, e.g.:
        # projects/{project_id}/locations/{location}/processors/{processor_id}/processorVersions/{processor_version_id}
        name = client.processor_version_path(
            project_id, location, processor_id, processor_version_id
        )
    else:
        # The full resource name of the processor, e.g.:
        # projects/{project_id}/locations/{location}/processors/{processor_id}
        name = client.processor_path(project_id, location, processor_id)

    request = documentai.BatchProcessRequest(
        name=name,
        input_documents=input_config,
        document_output_config=output_config,
    )

    # BatchProcess returns a Long Running Operation (LRO)
    operation = client.batch_process_documents(request)

    # Operation Name Format: projects/{project_id}/locations/{location}/operations/{operation_id}
    documents = documentai_toolbox.document.Document.from_batch_process_operation(
        location=location, operation_name=operation.operation.name
    )

    for document in documents:
        # Read the text recognition output from the processor
        print("The document contains the following text:")
        # Truncated at 100 characters for brevity
        print(document.text[:100])


if __name__ == "__main__":
    batch_process_toolbox(
        project_id=project_id,
        location=location,
        processor_id=processor_id,
        gcs_input_uri=gcs_input_uri,
        gcs_output_uri=gcs_output_uri,
        input_mime_type=input_mime_type,
        field_mask=field_mask,
    )
12. Complimenti
Hai utilizzato Document AI per estrarre il testo da un romanzo utilizzando l'elaborazione online, l'elaborazione batch e Document AI Toolbox.
Ti invitiamo a sperimentare con altri documenti ed esplorare gli altri processori disponibili sulla piattaforma.
Esegui la pulizia
Per evitare che al tuo account Google Cloud vengano addebitati costi relativi alle risorse utilizzate in questo tutorial:
- In Cloud Console, vai alla pagina Gestisci risorse.
- Nell'elenco dei progetti, seleziona il tuo progetto e poi fai clic su Elimina.
- Nella finestra di dialogo, digita l'ID progetto, quindi fai clic su Chiudi per eliminare il progetto.
Scopri di più
Continua a scoprire Document AI con questi codelab di follow-up.
- Analisi dei moduli con Document AI (Python)
- Processori specializzati con Document AI (Python)
- Gestione dei processori Document AI con Python
- Document AI: Human in the Loop
Risorse
- The Future of Documents - YouTube Playlist
- Documentazione di Document AI
- Libreria client Python di Document AI
- Repository di esempi di Document AI
Licenza
Questo lavoro è concesso in licenza ai sensi di una licenza Creative Commons Attribution 2.0 Generic.