1. Overview
What is Document AI Warehouse?
Document AI Warehouse is a platform to store, search, organize, and analyze documents and their structured metadata. Documents can include structured data such as forms and invoices as well as unstructured data such as contracts and research papers. The metadata for documents can be automatically extracted using processors in Document AI or manually input using fields and tags.
In this codelab, you will learn how to ingest, process, and search documents using the Document AI Warehouse user interface. Sample PDF documents are provided for this codelab, including a license agreement, loan form, and order invoice.
Prerequisites
This codelab builds upon content presented in other Document AI codelabs. It is recommended that you read the following documentation and codelabs before proceeding:
- Quickstart: Set up the Document AI API
- Process documents by using the Google Cloud console
- Managing Document AI processors with Python
What you'll learn
- How to enable the Document AI Warehouse API
- How to configure document processors in Document AI Warehouse
- How to upload and parse text in various types of PDF documents
- How to search documents and their metadata in Document AI Warehouse
What you'll need
2. Download sample documents
Sample PDF documents are provided for this codelab, including a license agreement, loan form, and order invoice. You can download the following sample documents to use in this codelab.
Alternatively, you can download the sample documents from our public Google Cloud Storage Bucket using gsutil.
gsutil cp gs://cloud-samples-data/documentai/codelabs/warehouse/license-agreement.pdf .
gsutil cp gs://cloud-samples-data/documentai/codelabs/warehouse/loan-form.pdf .
gsutil cp gs://cloud-samples-data/documentai/codelabs/warehouse/order-invoice.pdf .
In a later step, you'll upload these sample documents, parse them with different document processors, and store the resulting documents and metadata in Document AI Warehouse.
3. Enable the Document AI Warehouse API
Before you can begin using Document AI Warehouse, you must enable the API.
Using the Cloud Console
- Open the Google Cloud console in your browser.
- In the Google Cloud console, navigate to the API Library to browse the APIs and services that can be enabled.
- Using the search bar at the top of the API Library page, search for
Document AI Warehouse, then click on the resulting service. - Click the Enable button to enable the Document AI Warehouse API in your Google Cloud project.

Alternative: Using the gcloud CLI
Alternatively, the API can be enabled using the following gcloud command:
gcloud services enable contentwarehouse.googleapis.com
If the API was successfully enabled, then you should see a message similar to the following:
Operation "operations/..." finished successfully.
Now, you are ready to use Document AI Warehouse!
4. View the Document AI Warehouse console
In your browser, navigate to the Document AI Warehouse console located at https://documentwarehouse.cloud.google.com (which is external to the Google Cloud console). You'll use the Document AI Warehouse console along with your Google Cloud project to perform the remaining steps in this codelab to upload, process, and search documents.
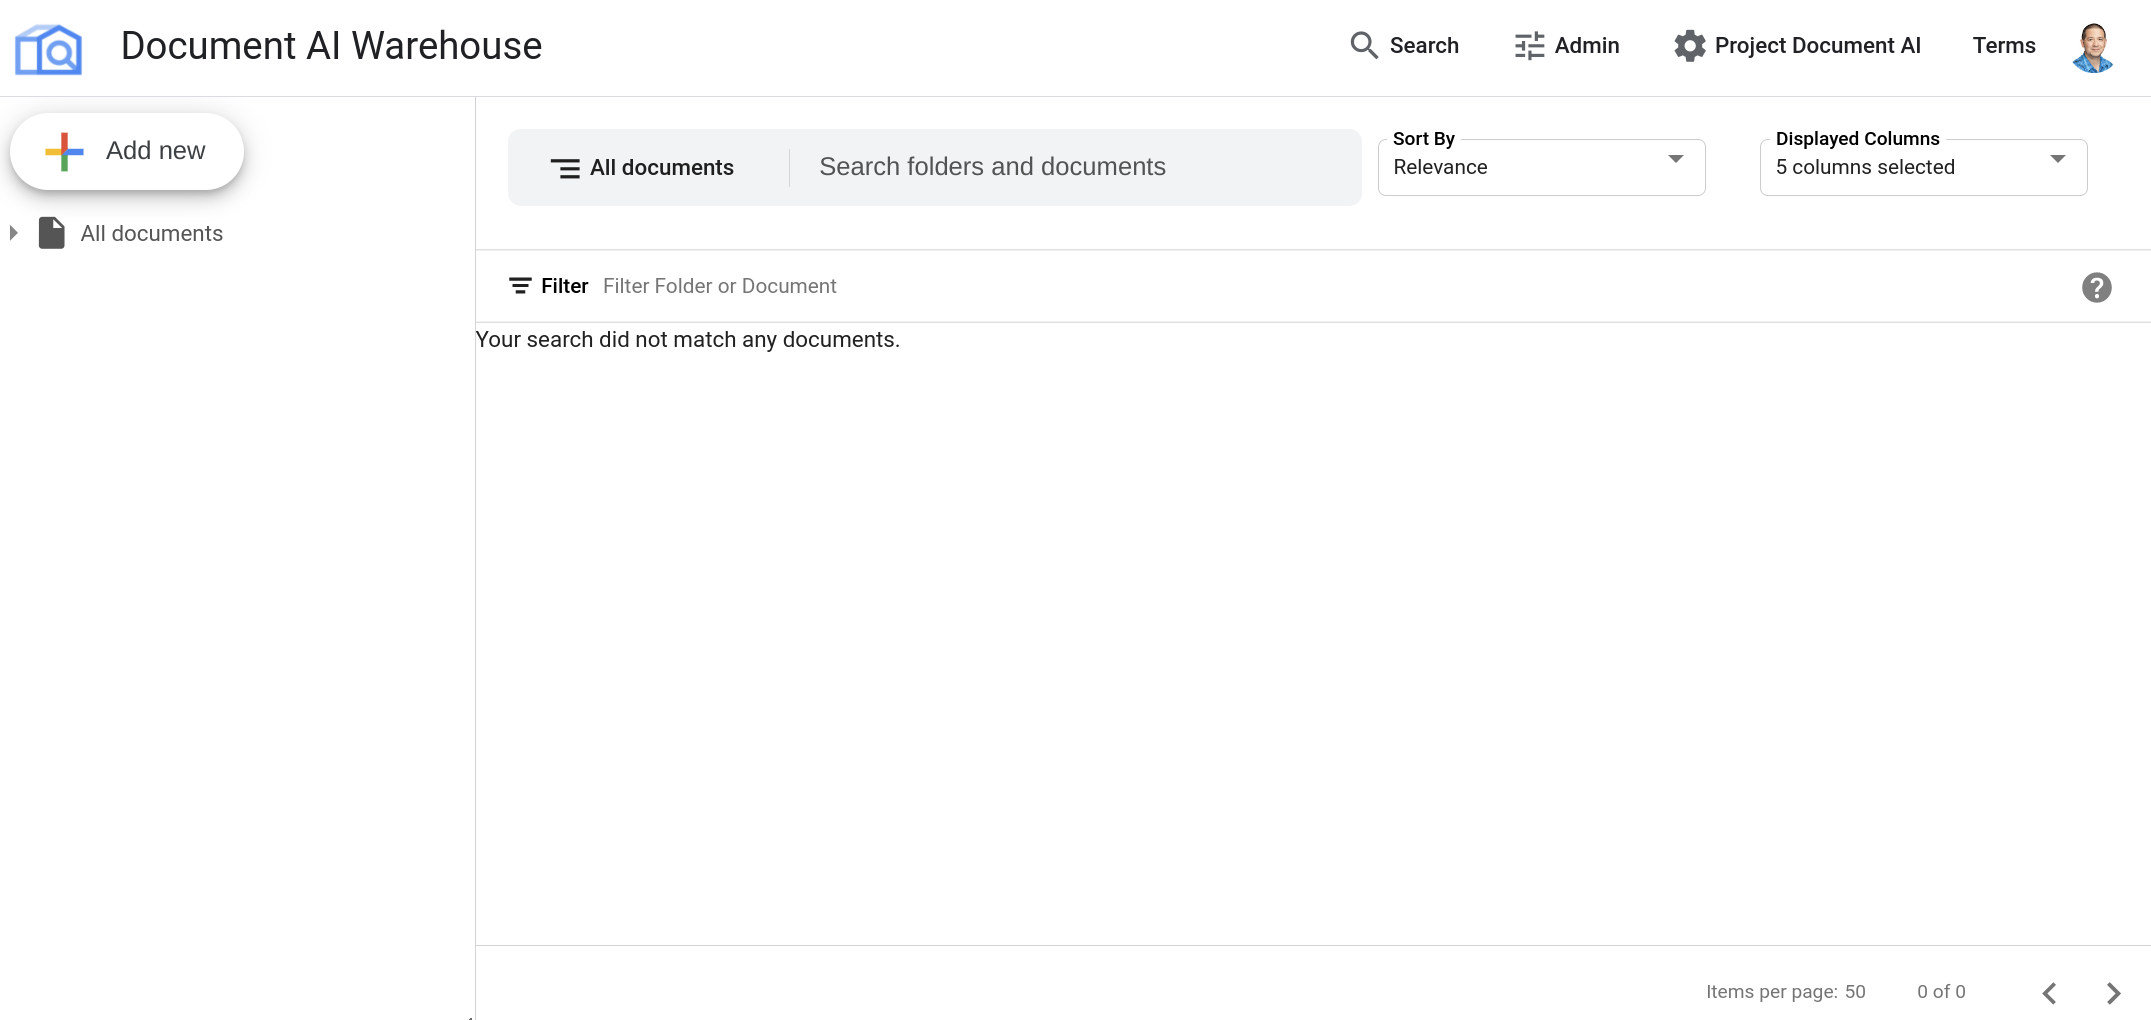
If this is your first time using Document AI Warehouse, refer to the Document AI Warehouse Documentation for more information on configuring your project and settings depending on your needs.
5. Create a document schema
Document schemas define the document type and fields for documents that you store in Document AI Warehouse. You'll need to create a schema before uploading any new documents.
- From the Document AI Warehouse console, click the Admin button on the top right corner of the page.
- Click the Schema item on the left navigation bar, then click the + Add new button.
- Enter a name for your schema, such as
Documents and Forms, and ensure that Document is selected as the Schema Type. Then, click the Next button to continue. - You can leave the default JSON schema definition as is, which should appear as the following:
{ "display_name": "Documents and Forms", "property_definitions": [], "document_is_folder": false, "description": "" } - Then click the Done button to finish creating the document schema.
Upon successful completion of these steps, you should see a message that your document schema has been created. You can click on the View Document Schema button, then the JSON tab to confirm the schema, which should appear similar to the following:

6. Create document processors
In this step, you'll create document processors that you can use to perform full-text search on different types of documents in Document AI Warehouse.
- In the Google Cloud console, navigate to the Document AI Platform overview page.
- Click Explore Processors, the select Document OCR as the type of processor to create.
- Specify a name for your document processor such as
ocrand your preferred region, then click Create to create your processor. - On the Processor Details page, copy the Processor ID, which we'll use later to configure a processor in Document AI Warehouse.
Repeat these steps and select Form Parser as the type of document processor to create and specify form as the processor name.
Repeat these steps and select Invoice Parser as the type of document processor to create and specify invoice as the processor name.
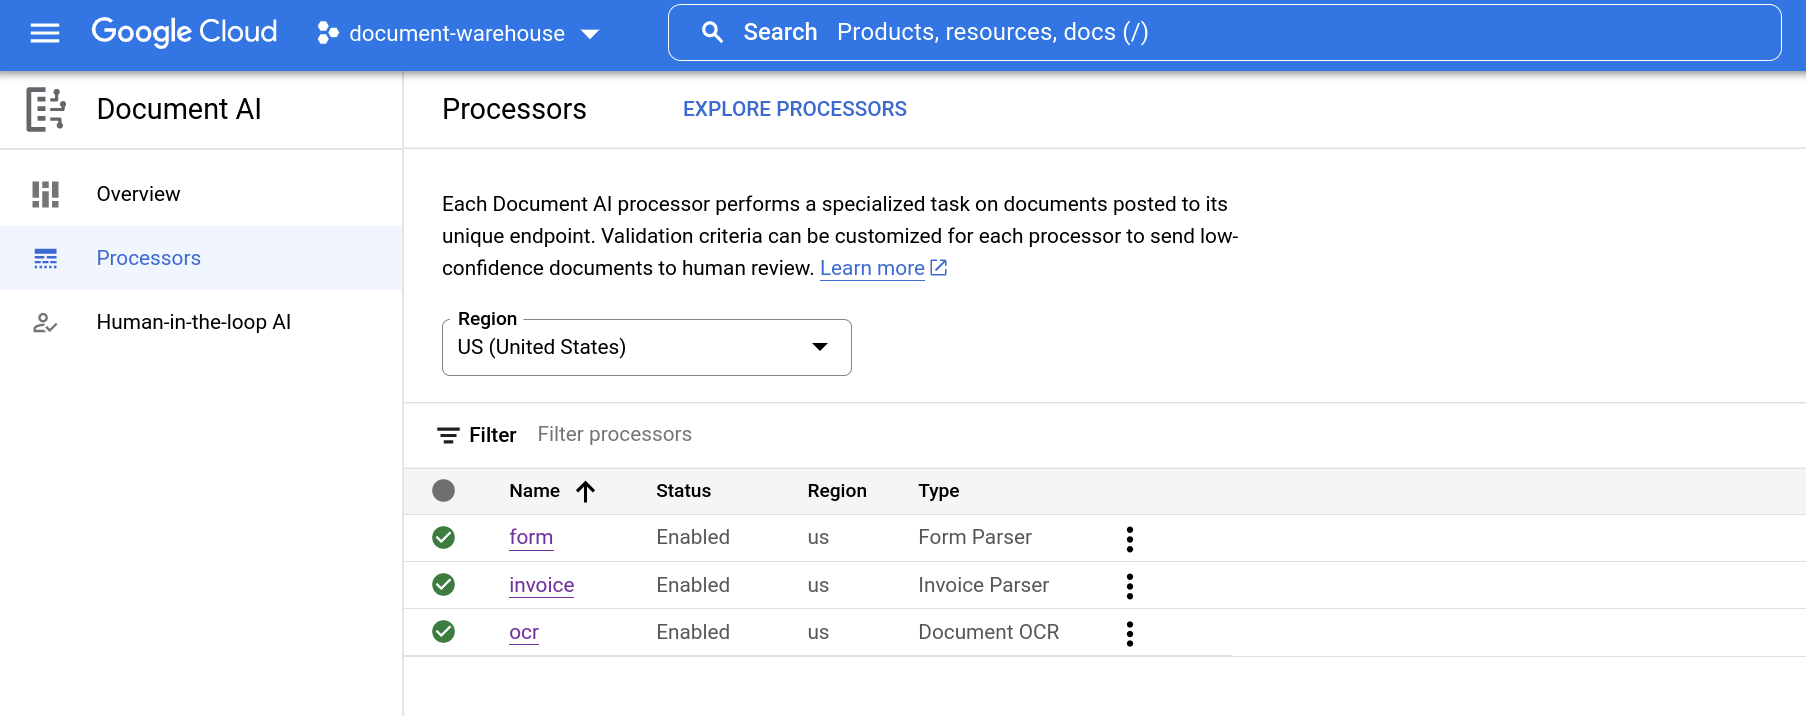
Upon successful completion of these steps, you should see a list of document processors that looks similar to the following:
7. Configure document processors
In this step, you'll configure document processors in Document AI Warehouse by referring to the processors that you created in the previous step.
- From the Document AI Warehouse console, click the Admin button on the top toolbar.
- Click the Doc AI Processors item on the left navigation bar, then click the + Add new button.
- Click the + Add New Processor button, then specify a name and the processor ID from the previous step.
- Click the Save button to save your changes.
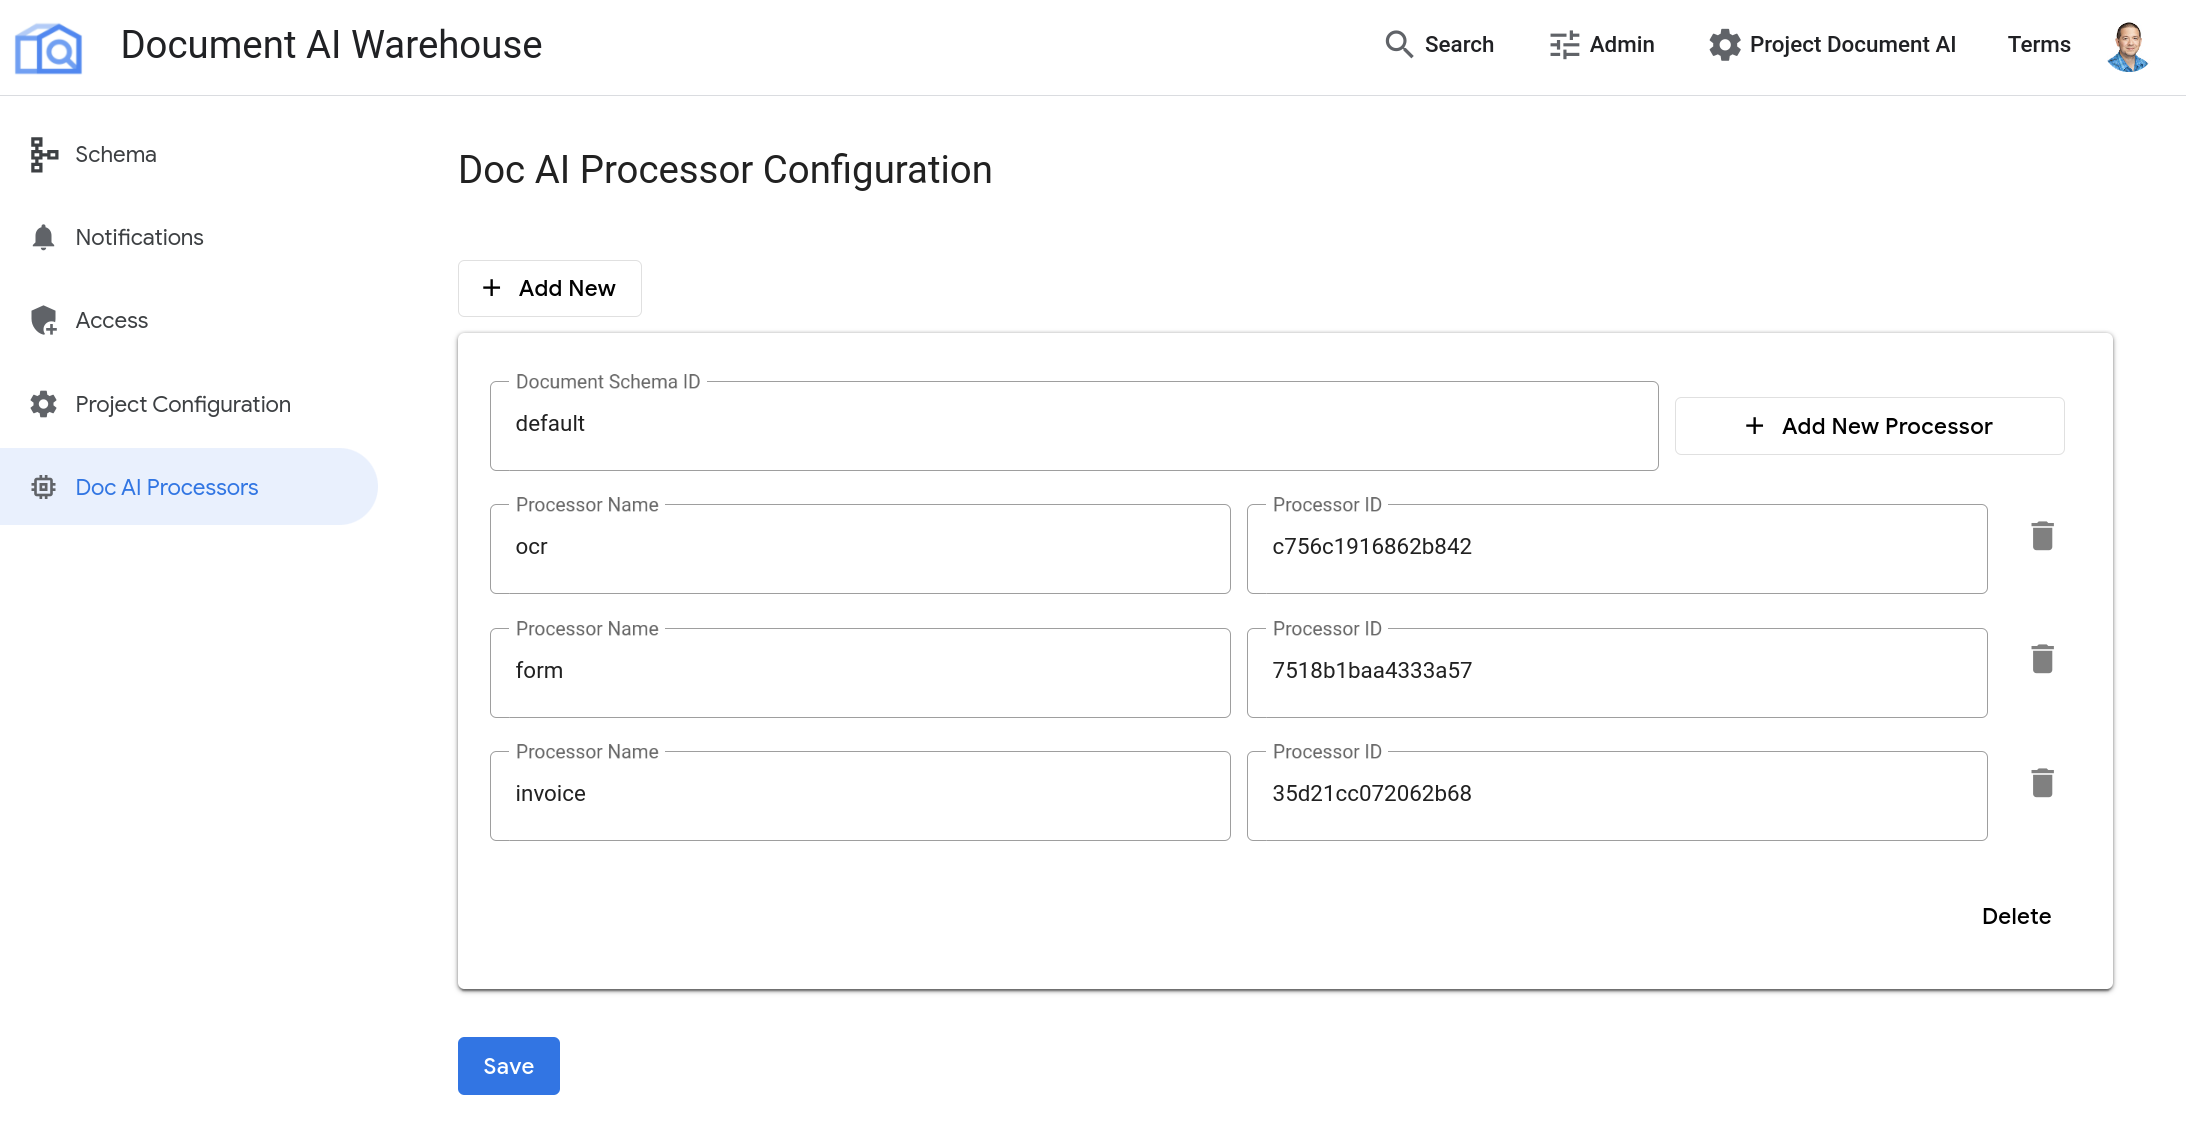
Repeat these steps to add the other two processors to the Document AI Warehouse configuration using the + Add New Processor button, including the form parser and invoice parser. Ensure that you add the two additional processors under the same Document Schema ID using the + Add New Processor button, rather than adding an additional schema using the + Add New button.
Upon successful completion of these steps, you should see a list of configured document processors that looks similar to the following:
8. Upload and process sample documents
Now that you've defined a schema and configured processors for your documents, you can upload documents to Document AI Warehouse.
- Return to the Document AI Warehouse console and click on the +Add new button in the left navigation bar, then select the option to Upload a new document.
- Drag the license-agreement.pdf document from your machine to the upload widget, or browse and select one of the sample documents that you downloaded. Then, click on the Next button to continue.
- For the Document Schema, select the name of the schema that you created earlier, such as Documents and Forms. For the Doc AI processor ID, select the OCR document processor that you configured in the previous step.
- For the Display Name, you can use the default name (i.e., the filename), or use your own custom document name.
- Click the Create button to upload and process your document.
Return to the Document AI Warehouse console and repeat these steps with the loan-form.pdf sample document. Select the form document processor that you configured previously.
Return to the Document AI Warehouse console and repeat these steps with the invoice-sample.pdf sample document. Select the invoice document processor that you configured previously.
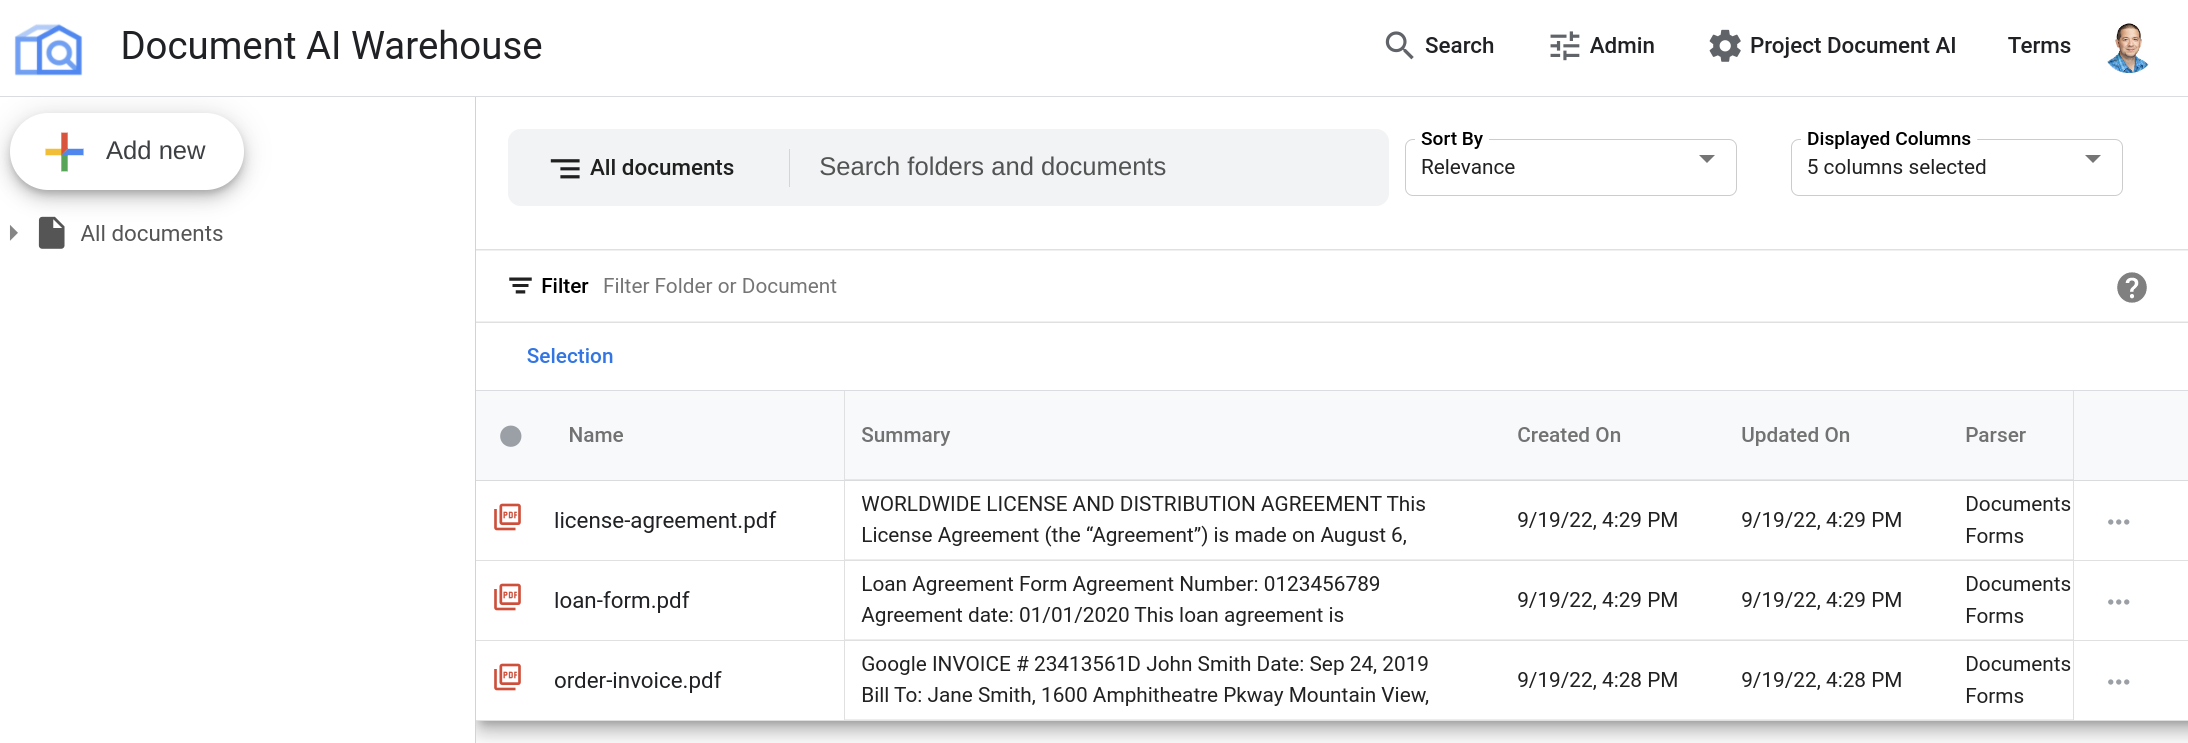
Upon successful completion of these steps, if you return to the Document AI Warehouse console, then you should see a list of processed documents that looks similar to the following:
9. Search and explore documents
Now that you've uploaded and processed a document to Document AI Warehouse, you can perform a full-text search on the documents.
From the Document AI Warehouse console, enter a search term that appears in the sample documents such as agreement, then press the Enter key. You can try other search queries such as mortgage and monitor to see results for the different sample documents that you uploaded.
In the results, you'll see all of the documents that contain that search term, along with a summary of the document text with the search term highlighted:

Click on the name of a document to view it.
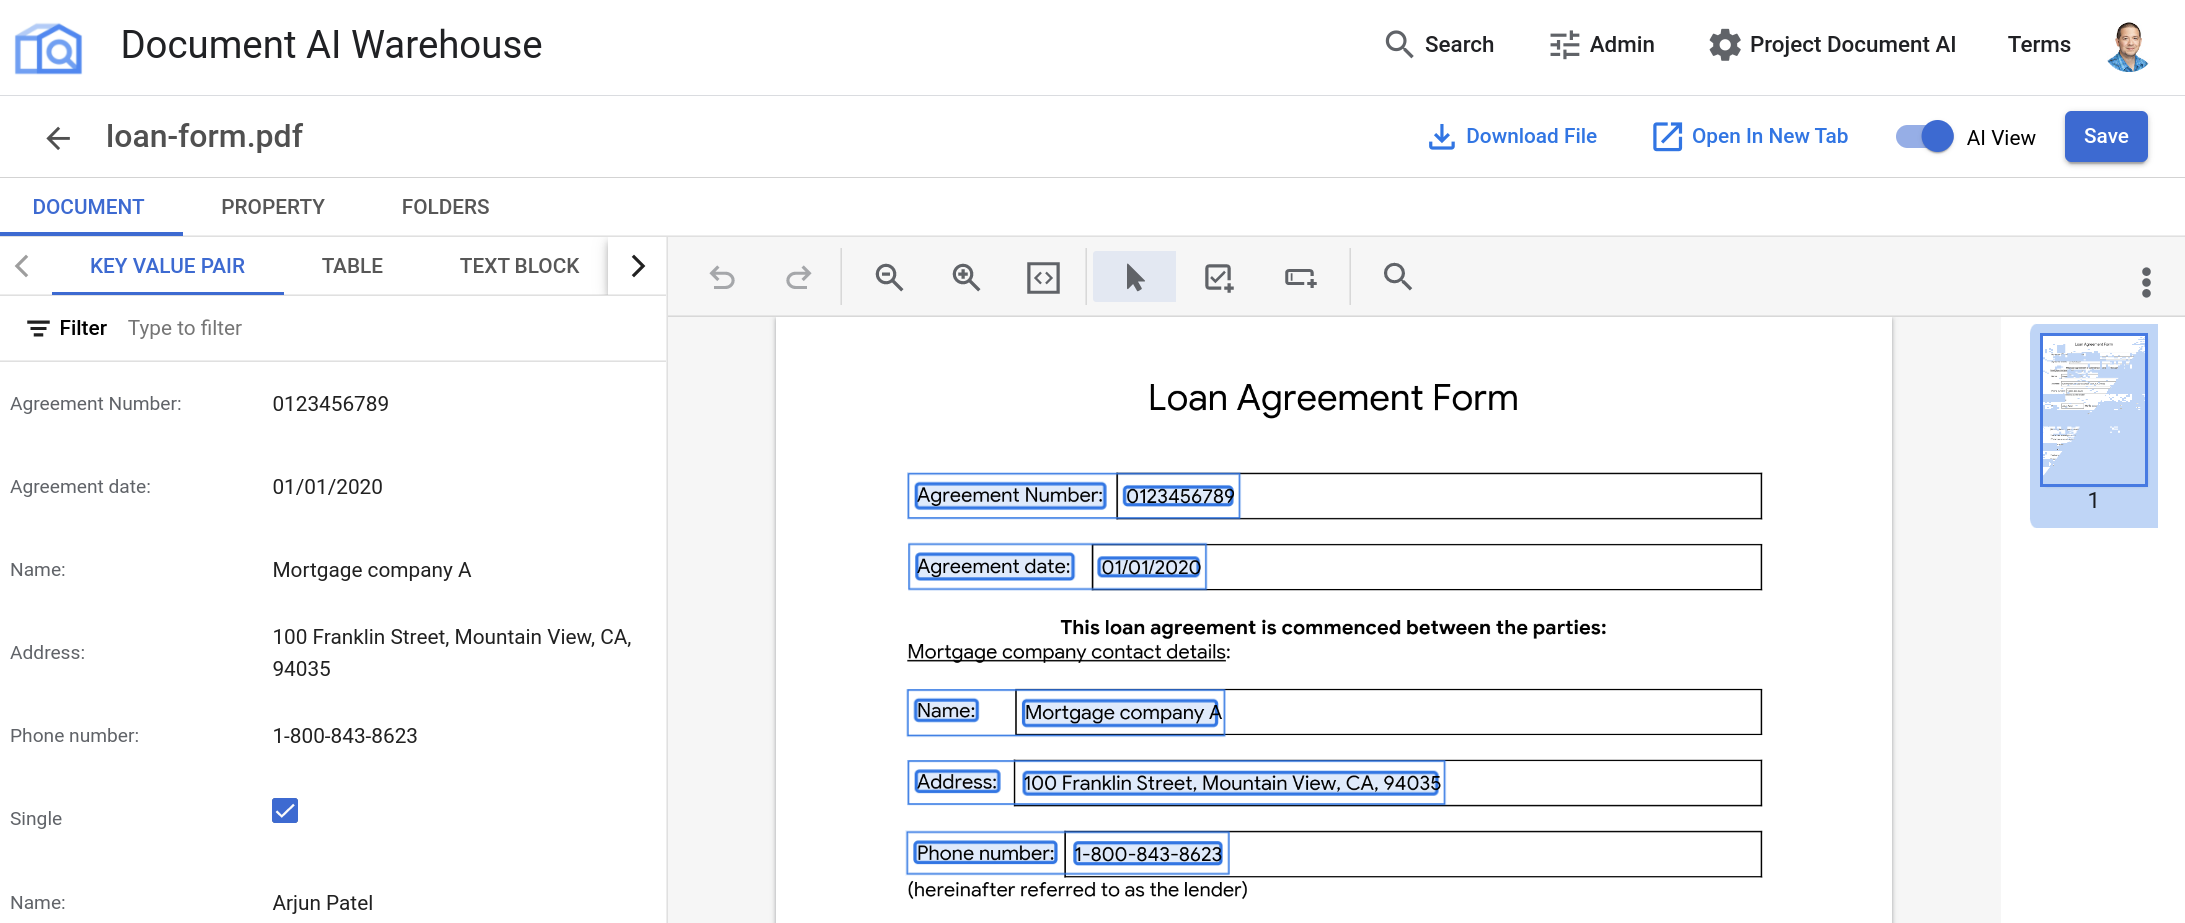
Click on the AI View toggle to see the document along with the detected fields and their associated data:
10. Congratulations
You've successfully uploaded, processed, and performed full-text search on documents with Document AI Warehouse and by using processors in Document AI. We encourage you to experiment with other documents and explore the other processors available on the platform.
Clean Up
You can perform the following cleanup to avoid incurring charges to your Google Cloud account for the resources used in this tutorial:
- Navigate to the Document Warehouse console page and delete all of the sample documents that you uploaded.
- In the Google Cloud console, navigate to the Document AI processors page and delete the sample processors that you created.
- In the Google Cloud console, navigate to the APIs and Services page and disable the Document AI Warehouse API.
Learn More
Continue learning about Document AI with these other codelabs.
- Optical Character Recognition with Document AI
- Form Parsing with Document AI (Python)
- Specialized Processors with Document AI (Python)
- Managing Document AI processors with Python
Resources
- Document AI Warehouse Documentation
- The Future of Documents - YouTube Playlist
- Document AI Samples Repository
License
This work is licensed under a Creative Commons Attribution 2.0 Generic License.
