1. Overview
In this codelab, you'll learn how to send an audio file through the Google Cloud Speech to Text API, then output the transcript to a Google Document. The Speech to Text API is easy-to-use, and applies powerful neural networks to enable developers to turn audio to text! Plus, it's powered by Machine Learning.
You will use the Google Docs API to create and write to a new document. You'll create a Java command-line application and run your code using the gradle build system then use the Docs API to view your results.
What you'll learn
- How to use the Google Cloud Speech to Text API
- How to use the Google Docs API to create a new document
- How to use the Docs API to write to a document
What you'll need
- Java installed (version 7 or above)
- Gradle installed (version 5 or above)
- Access to the internet and a web browser
- A Google account
- A Google Cloud Platform project
2. Set up your project
Create your cloud project
- Sign in to Cloud Console and create a new project or reuse an existing one. (If you don't already have a Gmail or Workspace account, you must create one.)
Remember the project ID, a unique name across all Google Cloud projects (the name above has already been taken and will not work for you, sorry!). It will be referred to later in this codelab as PROJECT_ID.
- Next, you'll need to enable billing in Cloud Console in order to use Google Cloud resources.
Running through this codelab shouldn't cost much, if anything at all. Be sure to to follow any instructions in the "Cleaning up" section which advises you how to shut down resources so you don't incur billing beyond this tutorial. New users of Google Cloud are eligible for the $300USD Free Trial program.
Get a service account key for the Cloud Speech-to-Text API

- Head over to the GCP console and find your new project
- Create a service account
- Download a service account key as JSON
- Set the environment variable GOOGLE_APPLICATION_CREDENTIALS to the file path of the JSON file that contains your service account key. If you restart your shell session, you'll have to set the variable again.
$ export GOOGLE_APPLICATION_CREDENTIALS="[PATH]"
For example:
$ export GOOGLE_APPLICATION_CREDENTIALS="/home/usr/downloads/ServiceAccount.json"
Get Credentials for the Docs API
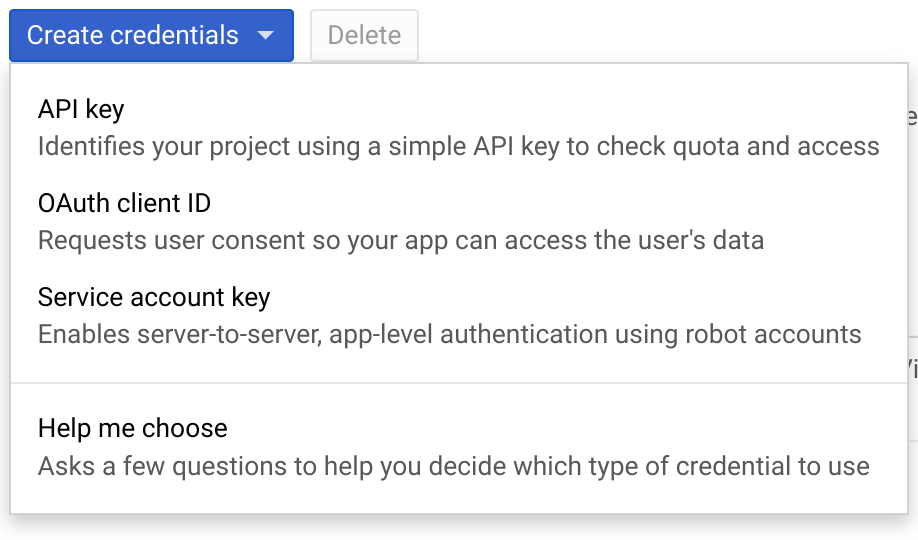
- Back in the GCP console, go to Credentials
- Create an OAuth 2.0 key and download it as JSON
- Rename the file
credentials.jsonand make sure it is in thesrc/main/resources/directory of your code
Enable APIs

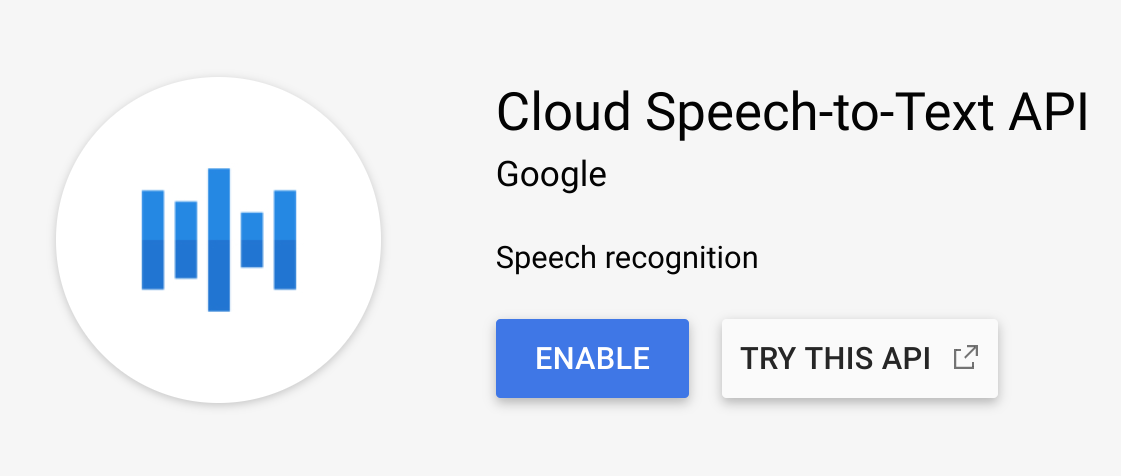
- Select the Dashboard tab, click the Enable APIs and Services button and enable the following 2 APIs:
- Speech to Text
- Google Docs

Now you are ready to go ahead and start working with your code.
3. Set up your code
Get the sample code
To get the sample code, either download the zip file to your computer...
...or clone the GitHub repository from the command line.
$ git clone git@github.com:googleworkspace/docs-transcript-codelab.git
You will be working in the CreateTranscript.java file inside of the start directory. The gradle files should not be modified.
In your directory, navigate to the start folder and open up the CreateTranscript.java file. Scroll down to where you see the CreateTranscript class declaration.
public class CreateTranscript {
  private static final String CREDENTIALS_FILE_PATH = "/credentials.json";

  // Specify audio file name below.
  private static final String AUDIO_FILENAME = "audioFile.wav";
  private static final String TOKENS_DIRECTORY_PATH = "tokens";
  private static final JsonFactory JSON_FACTORY = JacksonFactory.getDefaultInstance();
  private static final String APPLICATION_NAME = "CreateTranscript";
  private static final List<String> SCOPES = Collections.singletonList(DocsScopes.DOCUMENTS);
For your SCOPES variable, you have specified that your code will be able to view and manage your user's Google Docs documents. If your code requires authorization beyond or different than this access, make sure to adjust this variable accordingly based on the OAuth 2.0 Google API Scopes.
For example, if you were not writing to a Google Doc, you could change the scope to DOCUMENTS_READONLY. The SCOPES variable is necessary not only for your app to have proper access permissions, but also to maintain transparency with users. The user is displayed the specific scopes you request in the OAuth verification page where they must consent to use the app.
Rename Variables
Make sure that the above variables are declared correctly for your project.
- Make sure AUDIO_FILENAME is set to the name of the demo file you are sending to the Speech to Text API. In your CreateTranscript.java file, you should already see it set correctly.
- Rename CREDENTIALS_FILE_PATH to the name of downloaded credentials file (should be ‘/
credentials.json'). Make sure this file is inside your folder'ssrc/main/resourcesdirectory, so make sure to create this directory if GitHub cloning does not do it for you.
Now, you can get started running your code!
4. Initialize a Docs Client
In the CreateTranscript.java file, find the main method declaration and take a peek at what is inside:
final NetHttpTransport HTTP_TRANSPORT = GoogleNetHttpTransport.newTrustedTransport();
Docs service = new Docs.Builder(HTTP_TRANSPORT, JSON_FACTORY,
    getCredentials(HTTP_TRANSPORT))
          .setApplicationName(APPLICATION_NAME)
          .build();
Function Authorization
The first task you are performing here is the creation of the Docs service (variable). The service represents an authorized API client, holding your credentials and, in this case, your end-user authentication.
In your code, any function which makes a call to the Docs API will need to utilize this service variable in order to perform Docs-related tasks.
5. Creating a Google Document
You will create a new Google Document with a specified title. So, let's copy the code below in the createDocument function.
Document doc = new Document().setTitle("Transcript for " +
    AUDIO_FILENAME);
doc = service.documents().create(doc).execute();
String documentId = doc.getDocumentId();
return documentId;
This function returns the Drive File ID of the Google Doc. This same ID can be found within the Doc's URL.
Next, you will initialize the Speech-to-Text client.
6. Call the Speech to Text API
The next task you want to perform in your code is obtaining the written transcript for the audio file. Inside of CreateTranscript.java, find the getTranscript() function.
First, obtain the audio file's path and audio bytes:
SpeechClient speech = SpeechClient.create();
Path path = Paths.get(AUDIO_FILENAME);
byte[] data = Files.readAllBytes(path);
ByteString audioBytes = ByteString.copyFrom(data);
Configure Speech Recognition
Next, you must correctly initialize the RecognitionConfig variable.
Here, config provides information on how exactly your speech recognizer should process your request. You'll need to edit setLanguageCode() if, for example, your audio file is in a language other than English, and change setSampleRateHertz() if your audio file has a different sample rate in Hertz (1600 is optimal).
RecognitionConfig config =
    RecognitionConfig.newBuilder()
        .setEncoding(AudioEncoding.LINEAR16)
        .setLanguageCode("en-US")
        .setSampleRateHertz(8000)
        .build();
RecognitionAudio audio =
    RecognitionAudio.newBuilder().setContent(audioBytes).build();
RecognizeResponse response = speech.recognize(config, audio);
List<SpeechRecognitionResult> results = response.getResultsList();
Preparing the Text
Lastly, handle the audio file's transcript result variable and prepare it to be inserted into a document.
Every item in results is a transcript of type SpeechRecognitionAlternatives. Thus, each item contains two parts: a text transcript and the API's corresponding confidence score.
List<Request> requests = new ArrayList<>();
for (SpeechRecognitionResult result : results) {
     // Using the first + most likely alternative transcript
     SpeechRecognitionAlternative alternative =
         result.getAlternativesList().get(0);
     String toInsert = alternative.getTranscript();

     // Add requests array list to return.
     requests.add(
         new Request()
             .setInsertText(
                 new InsertTextRequest()
                     .setText(toInsert)
                     .setEndOfSegmentLocation(new
     EndOfSegmentLocation().setSegmentId(""))));
}
return requests;
7. Insert text into a Document
You will now insert the transcript text into the Google Doc. To make any modifications to a document, you will need to use the BatchUpdate method. BatchUpdate is a container for different types of write requests and, here, you will use InsertTextRequest.
EndOfSegmentLocation is an important parameter which specifies where in your Doc you'd like to print your text. In the source code, you are inserting text in your Doc's body.
Let's insert the below code into your function to see how your Speech-to-Text API results coupled with calls to the Docs API can allow us to insert an audio file's transcript in a Google Doc:
BatchUpdateDocumentRequest body = new BatchUpdateDocumentRequest();
service.documents().batchUpdate(docId,
    body.setRequests(insertRequests)).execute();
Creating the request
When making the BatchUpdate request, you set two very important specifications: what you'd like to print (.setText()), as well as where in your document you'd like to do so (.setIndex(1)).
You have now inserted your audio file's transcript into your created Doc.
8. Running the code
Now that you have all the code you need in order to take an audio file, obtain its transcript, and print its transcript into a newly created Google Doc, let's get this show on the road!
Since you are going to run your java code using the gradle build system, you have to tell your build.gradle file what exactly to build and run. In this project and others, make sure you keep the mainClassName consistent with what java class you wish to run.
Great! Now you are ready to run your code. To do so, type the following into your command line:
$ gradle run
End-user authentication
The first time that you run this code, you will see a URL be printed in the terminal, asking you to log into your service account and authorize access to its Google Docs. After allowing access, you will notice a new file stored in your directory.
Inside of your working directory, you'll see a newly created folder entitled tokens, containing a file StoredCredential. This is the authentication token you just provided, which your client requested from the Google Auth Server, extracted from its response, and will now send through to any API you call.
Solution
If your code does not happen to be working, take a look inside the CreateTranscript.java file inside the finish folder. This file has all of your code exactly how it needs to be in order to run successfully.
Now let's look at the result.
9. Viewing your results
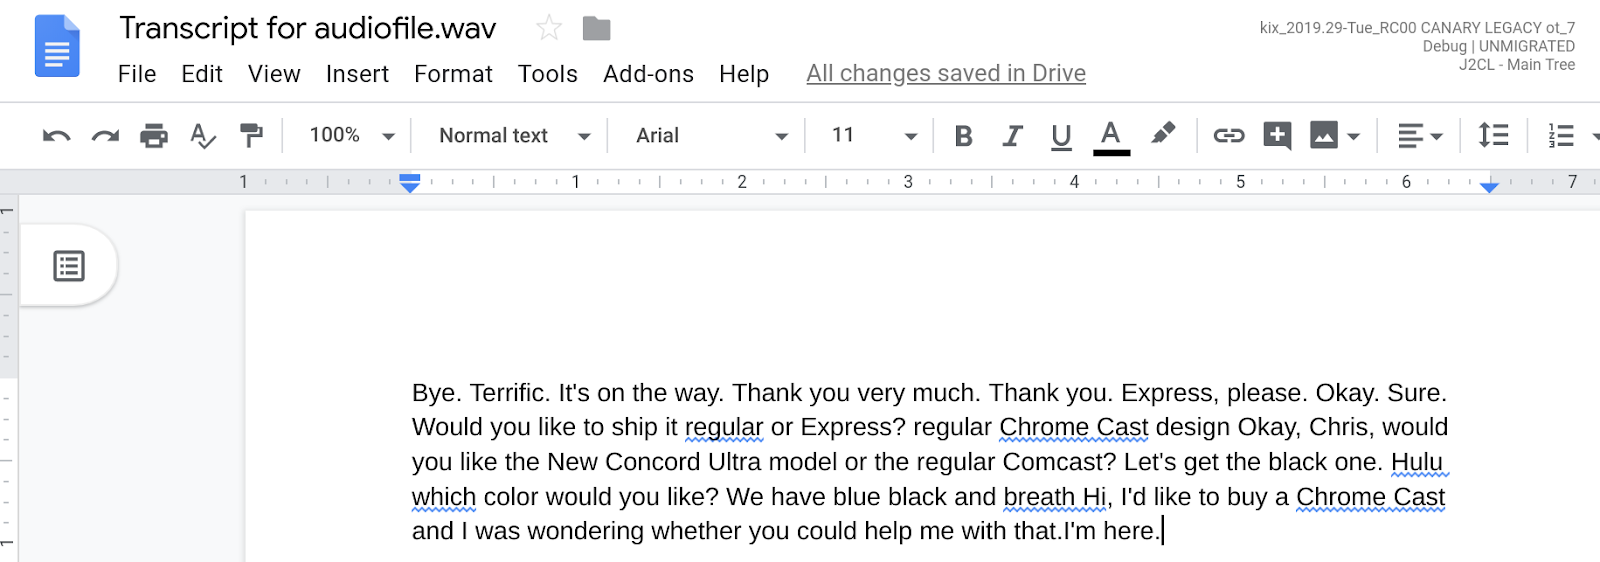
You've just created a new Google Document containing the transcript of your audio file, so let's take a look at it.
This Doc was created via the account with which the end-user provided authorization. One possible expansion is that you can automatically share this Document with others using the Drive API.
Using your source code and provided audio file, here is what you should see:

10. Congratulations!
You have now learned how to create a Google Doc, make a call to the Speech-to-Text API, and output your audio file's transcript into your created Doc.
Possible Improvements
Here are some ideas on how to make a more compelling integration:
- Set up your code to listen to when an audio file has been added to your Google Cloud Storage bucket Drive, and trigger a Google Cloud Function to execute this code
- Play around with inserting text into a Google Doc that is non-empty
Learn More
- Read the Google Docs API Developer documentation
- Post questions and find answers on Stack Overflow under the google-docs-api tag
