
1. Introduction
Modern web development provides an alternative to cloud-based round trips for AI usage. Chrome has started shipping built-in AI APIs that let you use everything from small expert models for translation to capable distilled full language models, all without token costs for you or your users, run privately on their device.
At the same time, AI agents offer a new way for users to interact with web applications, and making your web experience agent ready with WebMCP can help reduce token usage while providing more accurate results than traditional actuation that requires screenshots and DOM scraping.
In this codelab, you'll work on Mont-Royal Plein Air, an outdoor equipment e-commerce site. You'll learn how to build and integrate built-in AI APIs and WebMCP to:
- Infer customer intent from browsing history and dynamically build recommendations for them using on-device models.
- Expose tools agents and browser assistants can use to navigate the site, inspect product and recommendations, and manage a user's shopping cart.
- (Optional) Translate your site on-the-fly using small, on-device expert models.
- (Optional) Transform basic site search into an on-site agent powered using the same tools external agents use.
What you'll learn
- How to use the Prompt API and enforce structured JSON output from it.
- How to register WebMCP tools and strategies for thinking about tool composition and granularity.
- (Optional) How to use the Translator API to translate content quickly using an on-device expert model.
- (Optional) How to call WebMCP tools yourself.
Prerequisites
- A personal Google Account and Google Cloud.
- Google Chrome version 150+, or Canary, Dev or Beta channels, with the
#enable-webmcp-testingand#devtools-webmcp-supportflags enabled. - Familiarity with HTML, CSS, JavaScript, and TypeScript.
- Familiarity with JSON Schema.
2. Project setup
Google account
If you don't already have a personal Google Account, you must create a Google Account.
Sign in to the Google Cloud console
Sign in to the Google Cloud Console using a personal Google account.
Enable billing
To set up a personal billing account, enable billing in the Cloud Console.
Create a project (optional)
If you don't have a current project you'd like to use for this lab, create a new project here.
Open Cloud Shell editor
- Click this link to navigate directly to Cloud Shell Editor.
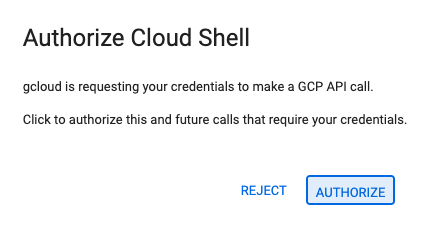
- If you're prompted to authorize at any point today, click Authorize to continue.
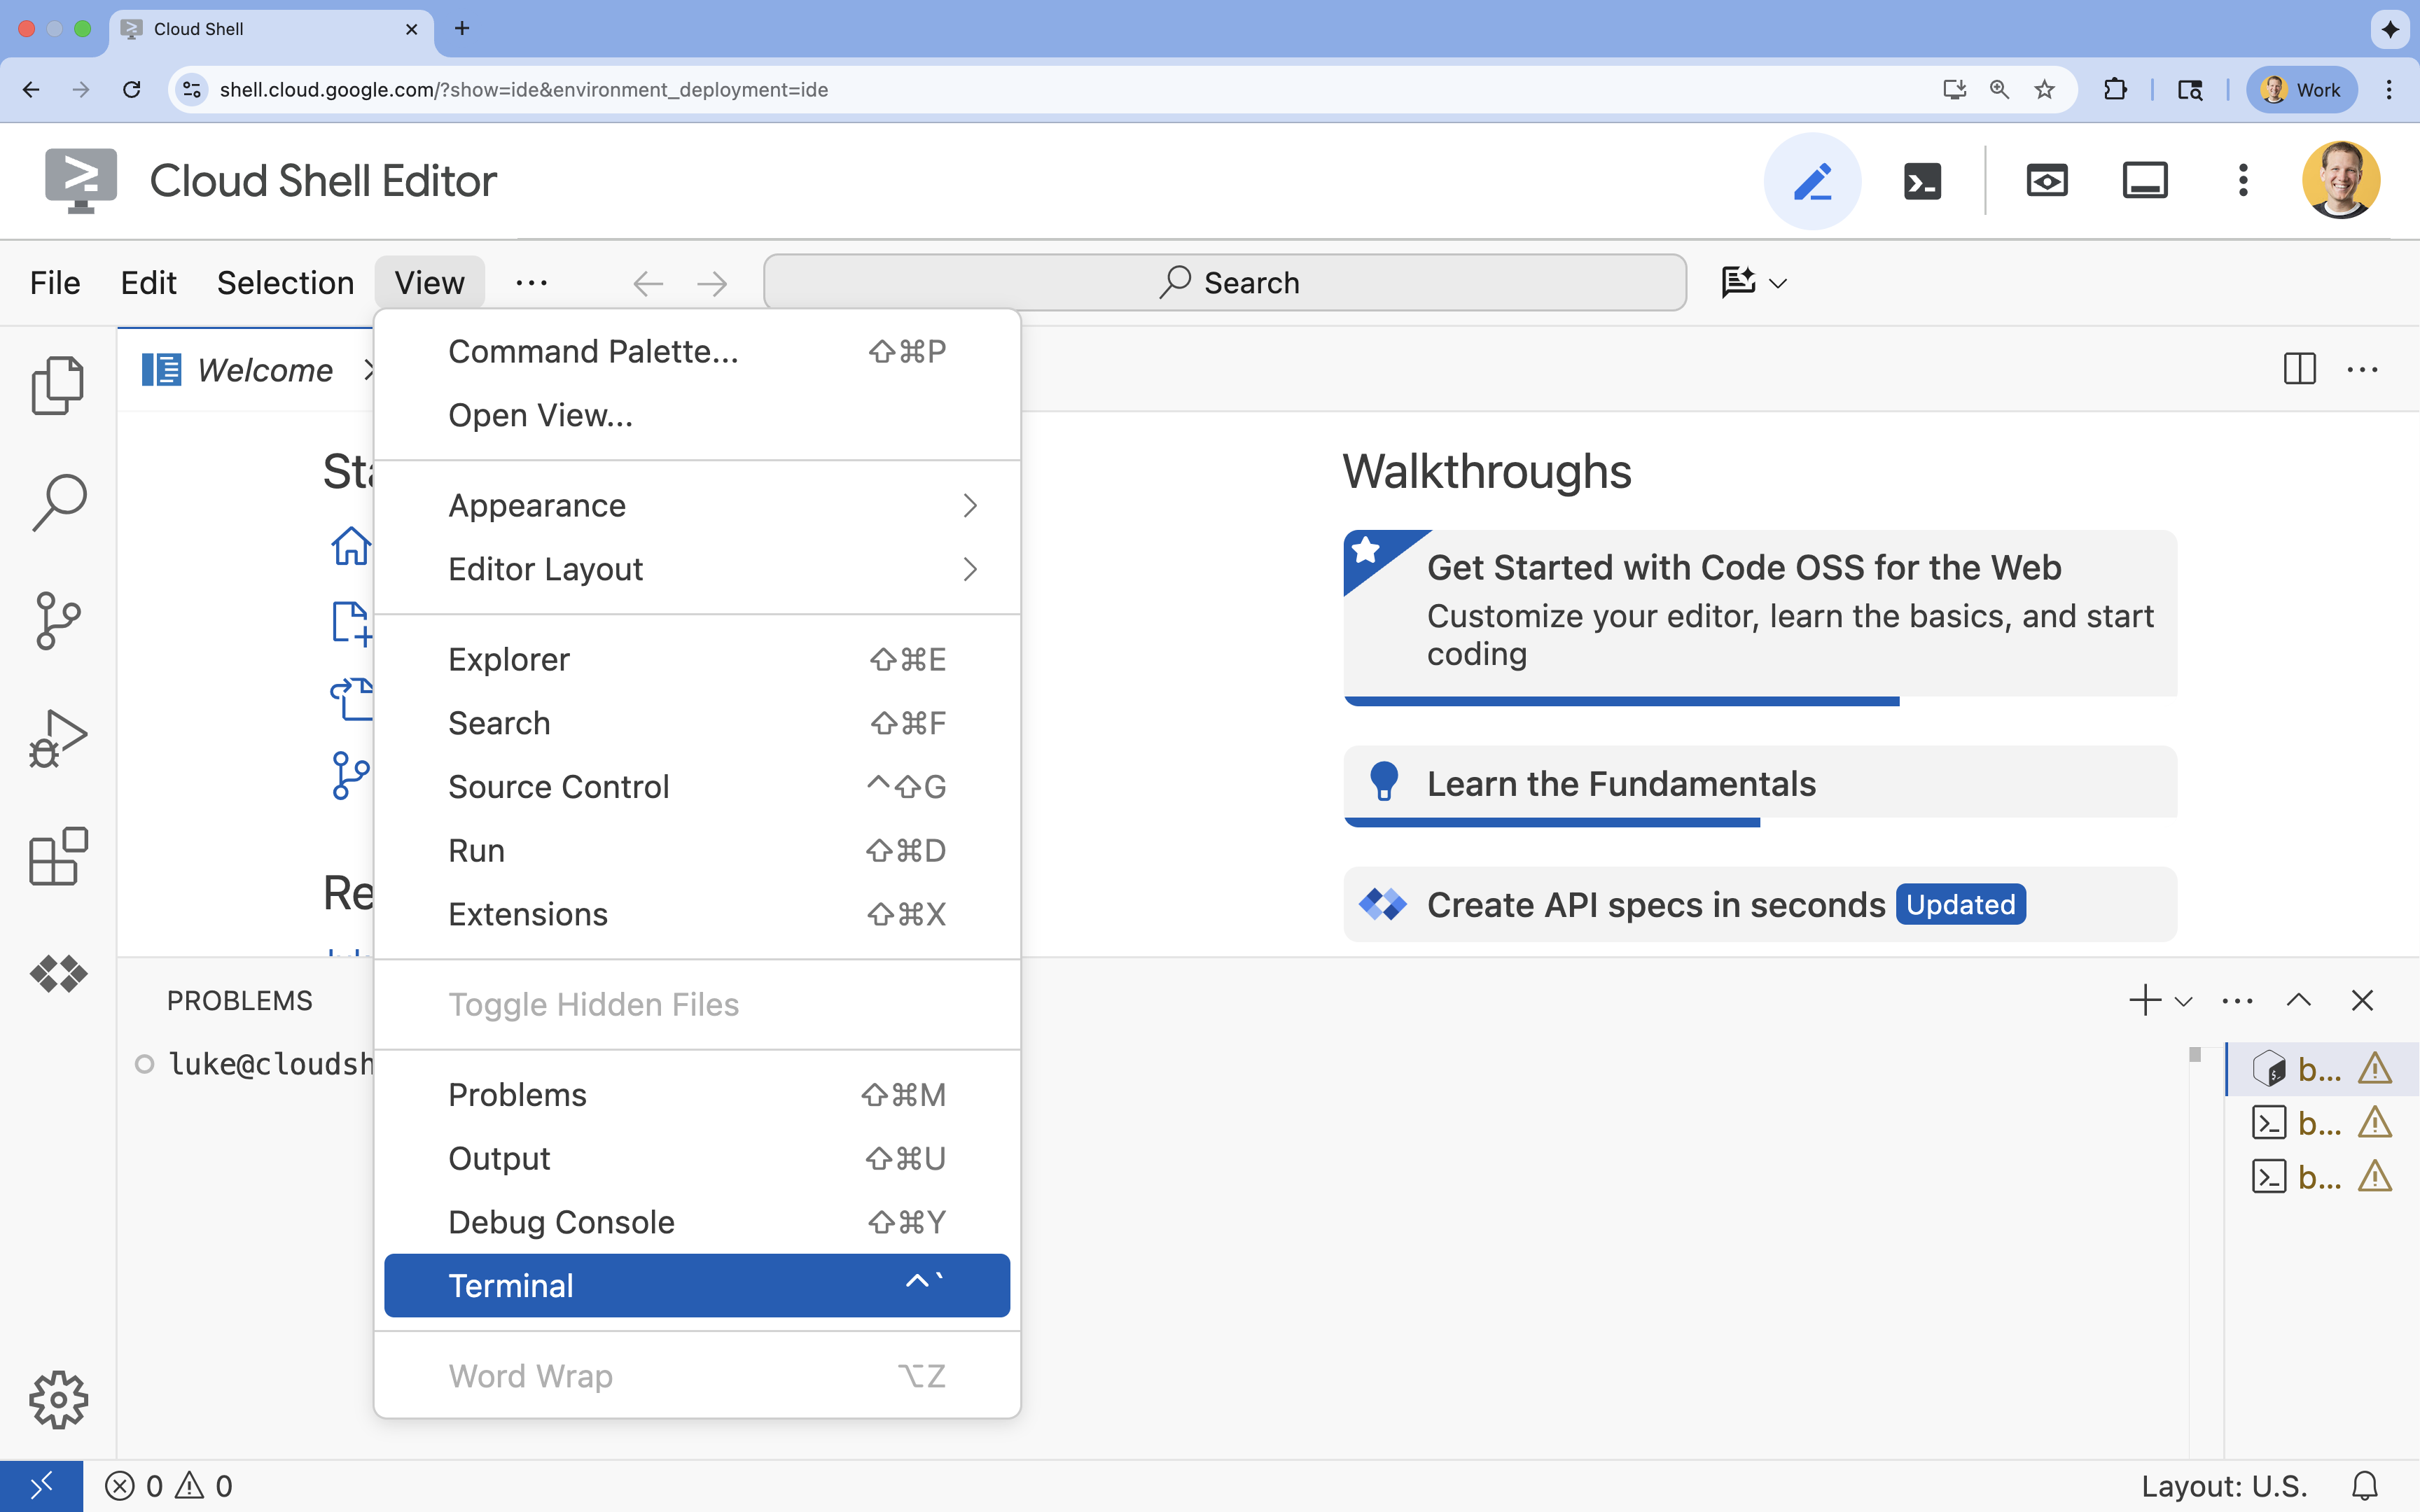
- If the terminal doesn't appear at the bottom of the screen, open it:
- Click View.
- Click Terminal.
Set your project
- In the terminal, set your project using this command:
gcloud config set project [PROJECT_ID]gcloud config set project lab-project-id-example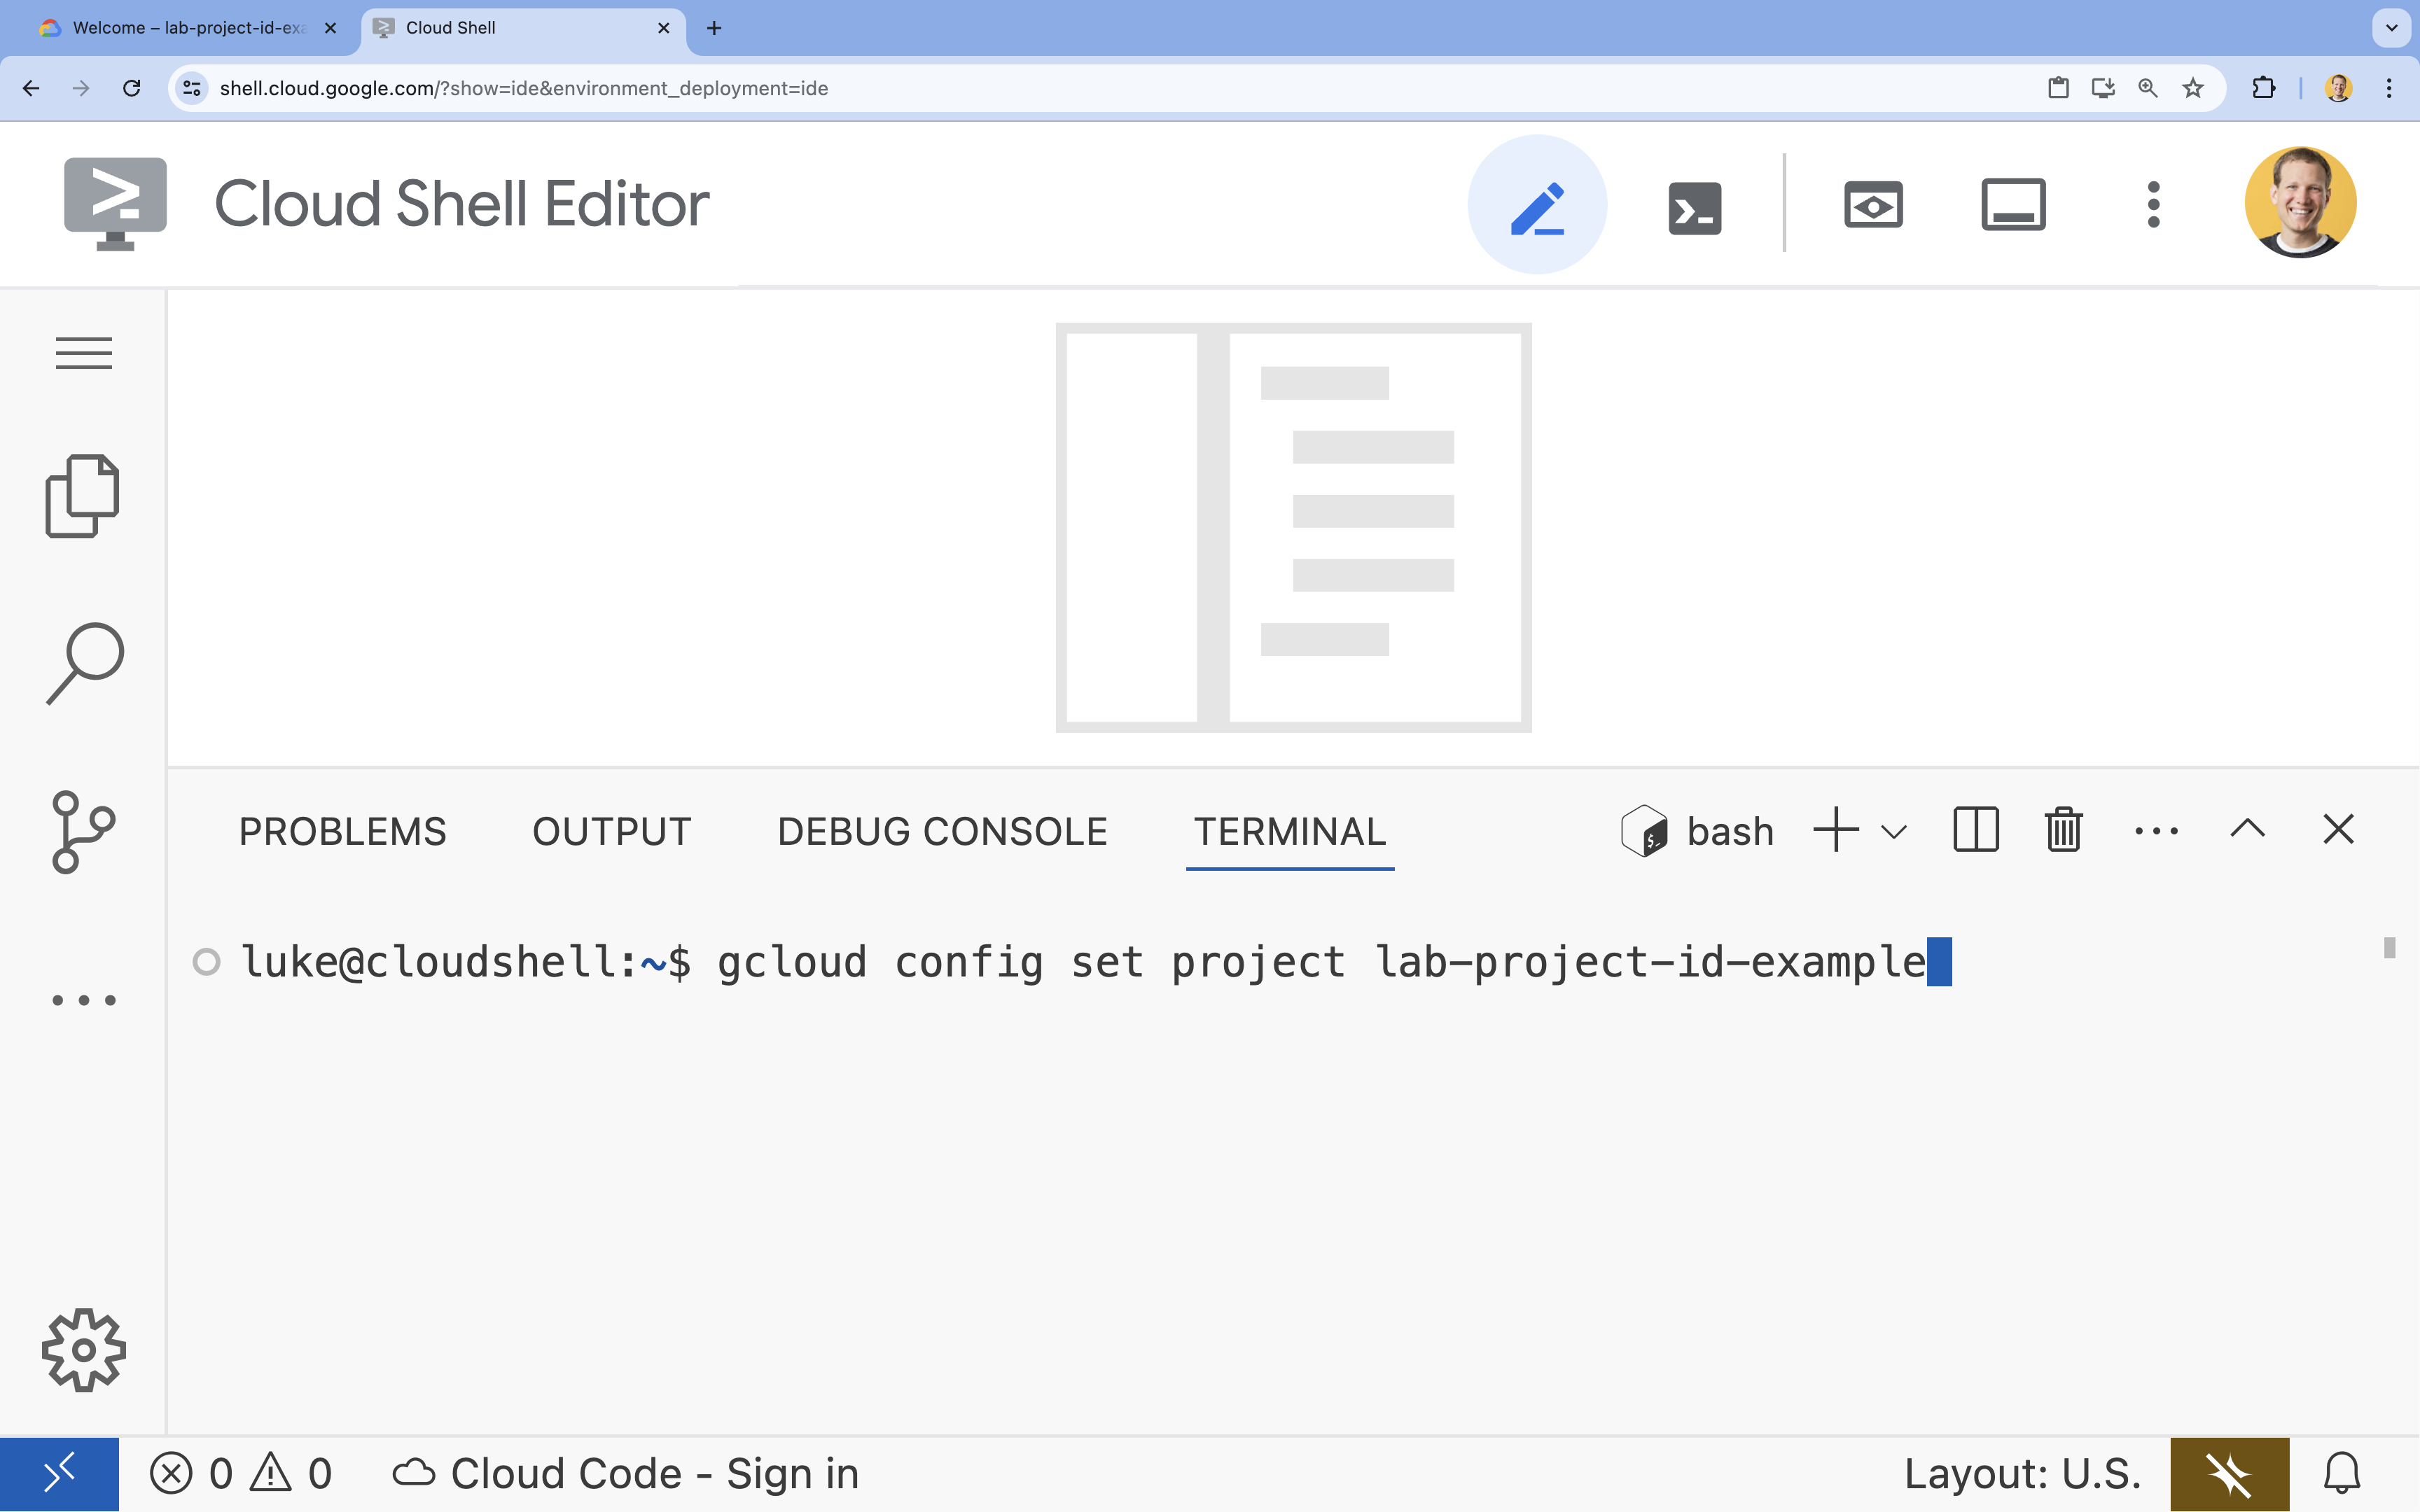
- You'll see the following message:
Updated property [core/project].
Local and workspace setup
- In your terminal (or Cloud Shell terminal), clone the project repository and navigate into the project directory:
git clone https://github.com/GoogleChromeLabs/codelabs mont-royal cd mont-royal - Navigate into the
ecommerce-ai-enhancements/starterfolder:cd ecommerce-ai-enhancements/starter - Install the dependencies using
pnpm:pnpm install - Start the local development server:
pnpm devhttp://localhost:5173to view the Mont-Royal Plein Air store.
(Optional) Install the WebMCP inspector extension
To make working with WebMCP easier, you can install the WebMCP Model Context Tool Inspector. Once installed, you need to get a Gemini API key to use it:
- Go to AI Studio.
- Click the Create API Key button to generate a new Gemini API Key tied to the project you set up earlier this step.
- Open the WebMCP Model Context Tool Inspector (it opens in the side panel) and click the Update Gemini API Key button.
- Paste your API key into the popup and save.
This extension has a basic agent that can use WebMCP, letting you try out your website through it instead of calling WebMCP tools directly through DevTools.
3. Built-in AI models on the web
What is the Prompt API?
The Prompt API gives web applications direct access to a small, multimodal language model running entirely on the user's device. Because inference executes locally:
- Zero cloud latency: No network roundtrips or backend server queuing.
- Private by default: Prompts, and any context passed to them, never leave the device
- Zero cost: Inference runs on client hardware without token billing or cloud hosting expenses.
- Offline capable: Works reliably even without an active internet connection.
In Chrome, the Prompt API is accessed via the global LanguageModel interface.
// 1. Set your expected inputs and outputs. This is multimodal, so you can
// include other types here, too
const languages = {
   expectedInputs: [{type: "text", languages: ["en"]}],
   expectedOutputs: [{type: "text", languages: ["en"]}],
}

// 2. Check availability. Always pass in your expected inputs and outputs,
// as some models may only support some inputs and outputs
const availability = await LanguageModel.availability(languages);
// 'available', 'downloading', or 'unavailable'

// 3. Create an isolated session with system prompt and language constraints
const session = await LanguageModel.create({
  ...languages,
  // Optional: add initial context to your session, like a system prompt
  initialPrompts: [
   {
      role: 'system',
      content: 'You are an expert outdoors sales assistant...'
   }
  ]
});

// 4. Define your expected output as JSON Schema
const schema = {
   //...
}

// 5. Prompt the model (supports plain text or structured models)
const result = await session.prompt('Recommend a 3-season tent footprint.', {
  responseConstraint: schema,
});
Exercise 1: Journey-based recommendations
E-commerce sites typically have carousels or upsells of "frequently bought together" items. For something like an outdoor site, it may be more useful to build those recommendations based on browsing history.
To accomplish this, you'll build a three-stage recommendation pipeline:
- Journey profiler: Using the Prompt API, you'll analyze the customer's chronological browsing timeline to attempt to infer the user's true adventure intent.
- Product query: From that intent, you'll make an API request to a fake product backend to get related items.
- Product recommendation: You'll pass those products back to the Product API to rank them, returning the five most cohesive companions to what the user's viewing.
Task 1.1: Prompt API initialization
Instead of initializing the Prompt API individually each time you want to use it, you centralize the calls into a single file, memoizing the creation by system prompt to reduce the startup time for multiple calls to the same agent.
Navigate to the file src/ai/prompt-api.ts and inspect getPromptSession() on lines 27–58:
export async function getPromptSession(
  systemPrompt: string = '',
  options: { signal?: AbortSignal } = {}
): Promise<LanguageModel>
- Reuse a cached base session. There's already a cache map on line 21,
baseSessions, keyed by system prompt. Reusing base models instead ofclone()ing new ones reduces startup time and inherits the core setup without each session interfering with each other. Return the clone—callers can interact with it, includingdestroy()it, freely without discarding your cached base. - Feature-detect the API. Feature detect if the API exists, throw an error if it doesn't.
- Declare your modalities and languages. Built-in models can support multimodal input. You need to declare what modes you need and what languages you want to support. All of the content you pass to the LLM is in English.
- Check availability before creating anything. Even if the API exists, a model that supports your requirements may not. Check to see if one exists. If it doesn't, throw an error. If it's just not downloaded yet, report download progress.
- Create the session. Set up the options to create a new Prompt API session with, and the system prompt, if included
Task 1.2: Implement the journey profiler
Navigate to the file src/ai/journey-profiler.ts and inspect the target function on lines 42–100:
export async function inferJourneyProfile(
  context: ProfilerInputContext,
  catalogMap: ReadonlyMap<string, Product>
): Promise<JourneyProfile>
- Use the function from Task 1 to generate a new prompt session to use.
- Prompt the model with the provided prompt text, using
journeyProfileSchemaas the JSON Schema for the structured return. - Parse the prompt output and deduplicate target categories.
- Replace the hardcoded string returns with the actual results from your prompt.
- Destroy the session when it's finished to free up memory.
Task 1.3: Implement the synergy re-ranker
Navigate to the file src/ai/synergy-reranker.ts and inspect the target function on lines 30–71:
export async function rankComplementaryGear(
  profile: JourneyProfile,
  candidates: readonly Product[],
  currentProduct?: Product | null,
  cartProducts?: readonly Product[],
  limit: number = 5
): Promise<readonly RecommendedItem[]>
- Use the function from Task 1 to generate a new prompt session to use.
- Prompt the model with the provided prompt text and generated schema.
- Parse the prompt output.
- Return the assembled recommendation list using
assembleRecommendations. - Destroy the session when it's finished to free up memory.
Verify the recommendation pipeline
- Open Chrome to
http://localhost:5173/catalog/tent-mont-tremblant-3p. - Scroll down to the For You section.
- Observe how the 5 companion cards update to reflect smart kit pairings (such as ground footprints, sleeping pads, and lightweight stakes) rather than random products.
- Open Chrome DevTools Console to inspect the real-time execution duration of both inference steps.
(Optional) Task 1.4: Explore more built-in AI models
There are several other built-in AI models available, including the Translator API expert model. The components in this codebase are already hooked up to a service that listens for changes in the current language and asks for their translation, and it's your job to hook it all up.
Navigate to the file: src/ai/translator.ts
Inspect the target function createTranslator on lines 29–45:
export async function createTranslator(
  targetLang: SupportedLanguage
): Promise<Translator | null>
- Check for support of the Translator API and ensure the target language isn't English (the content is in English by default).
- Build a language pair, from English to the target language, and check to see if that pair's available.
- Create options for the translator and attach a monitor show progress downloading the model.
- Return the initialized translator.
Next, inspect the target function translate on lines 50–58:
export async function translate(
  text: string,
  targetLang: SupportedLanguage
): Promise<string>
- Check to see if there's a translator available with
getCachedTranslatorpassing intargetLang. If there isn't, return the clean text. - If there is, use the translator to translate the clean text.
Navigate to the file: src/ai/translator.ts
Inspect the target function render on lines 204:
export async function translate(
  text: string,
  targetLang: SupportedLanguage
): Promise<string>
- Enable the Language Picker component
4. Using WebMCP to improve the agent experience
What is WebMCP?
As users start to use autonomous and co-browsing agents, it's become important to websites to adapt. Agents traditionally rely on actuation—taking screenshots and scraping the DOM and the accessibility trees—to determine how to interact with a site. This is slow, fragile and error-prone, and wastes user tokens.
WebMCP helps solve this by letting developers provide tools directly to agents to interact with the page they're on. Agents that support them can use those tools just like a tool in your coding harness, with clear, structured inputs and return values dictated by you.
// Register a tool directly on document.modelContext
document.modelContext.registerTool({
  name: 'get_product_specs',
  title: 'Get Product Specs',
  description: 'Retrieve technical specifications for the active product.',
  inputSchema: {
    type: 'object',
    properties: {
      // ...
    },
  },
  annotations: {
    readOnlyHint: true, // Informs the agent this tool causes no side-effects
  },
  execute: async (input) => {
    return {
      weight: '1.8 kg',
      capacity: '3 persons',
      seasons: '3-season',
    };
  },
});
When an agent connects to the webpage, it queries document.modelContext.getTools(). Each registered tool exposes:
name: Programmatic tool identifier used by agents when executing tools (e.g.'get_product_specs').title: Human-readable display label used by inspectors and agent interfaces (e.g.'Get Product Specs').description: Plain-text description informing the model what the tool does and when to call it. This is how an agent determines if it should call the tool, so be descriptive.inputSchema: JSON Schema defining accepted arguments.annotations: Behavior hints, such as{ readOnlyHint: true }for read-only tools that cause no state side-effects.execute: Asynchronous function executed when the tool is invoked.
Task 2.1: Recommendation and product tools
You start by registering a tool to let agents retrieve the recommendations you just built in the previous exercise.
Navigate to the file: src/components/product/ForYouSection.ts
Inspect registerWebMCPTools() on lines 71–94:
private registerWebMCPTools(): void
- Check to see if WebMCP's supported.
- If it is, register the tool.
- Choose a title and a description that entices an agent to choose the tool—think prompt engineering here.
- There's no input, so just include an empty object JSON Schema.
- This is a read-only tool.
- In the execute function, use the
recommendationStoreto get the current set of recommendations, then return the current product ID and the set of product recommendations. - Add an abort signal and catch it so it doesn't throw an error. This ensures the tool's removed properly when the component unmounts.
Navigate to the file: src/views/ProductView.ts
- Repeat the same process to register a
get_current_producttool, this time returning the full product as well as the recommendations
Task 2.2: Cart drawer tools
Navigate to the file: src/components/cart/CartDrawer.ts
Inspect registerWebMCPTools() on lines 83–114:
private registerWebMCPTools(): void
- Register the
view_carttool:
- Its
inputSchemashould be an object with a single boolean option,openDrawer. - It should be read only.
- Read the input as part of its
executefunction, decide whether to show or hide the cart, refresh therecommendationStore, then return the cart summary
- Register the
manage_carttool:
- Its
inputSchemashould be an object withitems, which is an array of objects with theproductID,add,remove, andupdateactionenum, and integerquantity, - It's
executefunction should pass items tothis.updateCart
Task 2.3: Language switching tool
Take WebMCP further by exposing a language tool to external agents.
Navigate to the file: src/components/navigation/LanguagePicker.ts
Inspect registerWebMCPTools() on lines 61–63:
private registerWebMCPTools(): void
- Register the
switch_languagetool:- The
inputSchemashould have alanguageproperty that is an enum ofSUPPORTED_LANGUAGE_CODES. - Its
executefunction should callthis.switchLanguagewith the provided language.
- The
Task 2.4: Store navigation tools
Enable autonomous agents to navigate the store, jump to product pages, browse categories, or initiate searches.
Navigate to the file: src/components/navigation/SiteHeader.ts
Inspect registerWebMCPTools() on lines 155–171:
private registerWebMCPTools(): void
- Check to see if WebMCP's supported.
- Register the
searchtool:- Input schema takes a
querystring. - In
execute, callthis.search(input?.query).
- Input schema takes a
- Register the
go_to_catalogtool:- Input schema accepts optional
activity(enum ofACTIVITIES) andcategory(enum ofPRODUCT_CATEGORIES). - In
execute, callthis.goToCatalog(input?.activity, input?.category).
- Input schema accepts optional
- Register the
get_categories_and_activitiestool:- Read-only tool with no input parameters.
- In
execute, callthis.getCategoriesAndActivities().
- Register the
go_to_producttool:- Input schema requires a
productIdstring. - In
execute, callthis.goToProduct(input?.productId).
- Input schema requires a
Verify with the WebMCP inspector
- Reload
http://localhost:5173/catalog/tent-mont-tremblant-3pin Chrome and navigate to a product page. - Open Chrome DevTools > Application > WebMCP.
- You should see your WebMCP tools:
get_recommendations,get_current_product,view_cart,manage_cart,switch_language,search,go_to_catalog,get_categories_and_activities, andgo_to_product. - Click one of them to see their details and their parameters.
- Choose one with parameters, choose some, and click Run Tool to see it in action.
- (Optional) If you installed and set up the WebMCP Model Context Tool Inspector, open it up—it opens in Chrome's side panel. Use the chat interface to tell the agent to take an action that you believe should call one of your tools to see how it responds.
5. (Optional) Building an on-site agent
Calling WebMCP tools in-page
WebMCP tools aren't just for external browser extensions or third-party bots—your own application can call them directly. By querying document.modelContext.getTools(), your client-side code can discover and execute tools dynamically.
You can use this to build an on-site AI shopping assistant, transforming the search bar into a product discovery tool based on natural language input. Instead of writing custom imperative code to coordinate numerous facet filters, your search bar can hand natural language queries to the Prompt API, which decides which in-page WebMCP tools to invoke.
To discover and invoke a WebMCP tool from JavaScript:
// getTools() returns a Promise — it must be awaited.
const tools = await document.modelContext.getTools();
const tool = tools.find(t => t.name === 'list_items');

const json = await document.modelContext.executeTool(tool, args);
const result = JSON.parse(json); // executeTool resolves with a DOMString
Task 3.1: Sidebar facet tools
Expose each catalog sidebar facet to WebMCP so agents (and your in-page search assistant) can toggle filters programmatically.
Each facet component in src/components/facets/ already provides a helper method on its class and an exported input schema in src/utils/filter-schemas.ts:
- In
src/components/facets/ActivityFacet.ts:- Register
activity_filterusingactivityFilterSchema. - In
execute, callthis.filterActivity(input?.activity, input?.selected).
- Register
- In
src/components/facets/CategoryFacet.ts:- Register
category_filterusingcategoryFilterSchema. - In
execute, callthis.filterCategory(input?.category, input?.selected).
- Register
- In
src/components/facets/ConditionFacet.ts:- Register
condition_filterusingconditionFilterSchema. - In
execute, callthis.filterCondition(input?.condition, input?.selected).
- Register
- In
src/components/facets/PriceFacet.ts:- Register
price_filterusingpriceFilterSchema. - In
execute, callthis.filterPrice(input?.priceRange || input?.bracket, input?.selected).
- Register
- In
src/components/facets/WeightFacet.ts:- Register
weight_filterusingweightFilterSchema. - In
execute, callthis.filterWeight(input?.weightRange || input?.bracket, input?.selected).
- Register
- In
src/components/facets/RatingFacet.ts:- Register
rating_filterusingratingFilterSchema. - In
execute, callthis.filterRating(input?.minRating || input?.rating, input?.selected).
- Register
- In
src/components/facets/SearchFacet.ts:- Register
keyword_filterusingkeywordFilterSchema. - In
execute, callthis.updateKeyword(input?.keyword).
- Register
Remember to check for WebMCP support and pass { signal: this.signal } with .catch(() => {}) as you learned in Step 2.
Task 3.2: Catalog view tools
Now register the catalog-level listing, filter reset, and semantic search tools on document.modelContext.
Navigate to the file: src/views/CatalogView.ts
Inspect registerWebMCPTools() on lines 125–140:
private registerWebMCPTools(): void
- Check to see if WebMCP is supported.
- Register the
list_itemstool:- It takes no input parameters and is read-only.
- Its
executefunction should callthis.getItemsSummary().
- Register the
reset_filterstool:- It takes no input parameters.
- Its
executefunction should callthis.resetFilters().
- Register the
semantic_catalog_filtertool:- Use
semanticCatalogFilterSchema. - Its
executefunction should callinterpretAndApplySemanticFilter(input.query).
- Use
Task 3.3: Orchestrating the semantic filter agent
Now it's time to wire it all up. This task transforms search into a semantic pipeline that powers the semantic_catalog_filter tool:
Navigate to the file: src/ai/catalog-semantic-filter.ts
Inspect prewarmSemanticFilterSession() on lines 84–88:
export async function prewarmSemanticFilterSession(): Promise<void>
- Check if
warmSessionalready exists; if so, return early. - Prewarm a Prompt API session with
SEMANTIC_FILTER_SYSTEM_PROMPTusinggetPromptSession()and store it inwarmSession. Wrap in atry/catchblock so search creation can still fallback gracefully if prewarming fails.
Inspect inferSearchFacets() on lines 93–134:
async function inferSearchFacets(
  searchTerm: string,
  cachedJourney: JourneyProfile | null
): Promise<{ parsed: SemanticFilterResponse; cacheHit: boolean }>
- Claim the prewarmed session from
warmSessionif available (and resetwarmSessiontonull), or create a new session usinggetPromptSession(SEMANTIC_FILTER_SYSTEM_PROMPT). - Prompt the model with
promptText, usingsemanticFilterSchemaas theresponseConstraint. - Parse the returned JSON, store the parsed result in the persistent cache with
cacheKey, and destroy the session in afinallyblock.
Inspect applyFacetsViaWebMCP() on lines 139–270:
async function applyFacetsViaWebMCP(
  searchTerm: string,
  parsed: SemanticFilterResponse
): Promise<{ appliedFilters: SemanticFilterResult['appliedFilters']; toolsExecuted: string[] }>
- Discover registered tools on
document.modelContextusingawait document.modelContext.getTools(). - Reset filters to start with a clean slate by calling
await executeFacet('reset_filters', {}). - Concurrently apply active facets using
await Promise.all(facetTasks).
Inspect interpretAndApplySemanticFilter() on lines 272–316:
export async function interpretAndApplySemanticFilter(
  searchTerm: string
): Promise<SemanticFilterResult>
- Infer search facets by calling
inferSearchFacets(searchTerm, cachedJourney). - Apply the inferred facets to the catalog using
applyFacetsViaWebMCP(searchTerm, parsed).
Verify the in-page agent
- Navigate to
http://localhost:5173/catalog. - In the top search bar, enter:
"lightweight 3 season tent for wet hikes" - Watch the Prompt API parse the request, invoke the
activity_filter(Hiking),category_filter(Tents), andcondition_filter(Wet), instantly narrowing the catalog down to matching gear without any manual checkbox clicks.
6. What you learned
Congratulations. You have transformed an e-commerce application into an intelligent, agent-forward experience powered entirely by on-device AI and standard web platform APIs.
What you built:
- On-device Prompt API: Synthesized user browsing timelines with
LanguageModelto generate real-timeJourneyProfilecontext, and built arankComplementaryGearsynergy engine using structured JSON schemas (responseConstraint). - WebMCP component tools: Registered modular, encapsulated tools across UI components (
get_recommendations,get_current_product,view_cart,manage_cart) viadocument.modelContext. - Agent-forward architecture: Tested and verified tool execution using the Chrome WebMCP Inspector extension.
- On-site in-page agent: Orchestrated client-side tools directly in the browser to power multi-facet natural language catalog search from the site header search bar.
- Specialized on-device AI models: Explored dynamic on-device translation using
Translator.
Key takeaways:
- Zero-latency & high privacy: On-device models like Gemini Nano eliminate cloud API keys, network latency, and data exfiltration concerns.
- Structured outputs are essential: Using JSON schemas with
responseConstraintturns creative text generation into reliable, type-safe application logic. - WebMCP prepares the web for AI agents: Registering tools directly in the DOM empowers both internal assistive features and external autonomous browser agents with verified, deterministic actions.
- Let the model propose, not execute: Constraining the model to an
enumof your registered tools and dispatching the result yourself keeps agentic behaviour auditable and prevents it from inventing actions.