
1. 시작하기 전에
스크린샷: YouTube Android 앱
ExoPlayer는 Android의 하위 수준 미디어 API를 토대로 개발된 앱 수준 미디어 플레이어입니다. ExoPlayer에는 Android에서 기본 제공되는 MediaPlayer에 비해 다수의 장점이 있습니다. ExoPlayer는 MediaPlayer와 동일한 미디어 형식을 다수 지원하며 DASH, SmoothStreaming과 같은 적응형 형식도 지원합니다. ExoPlayer는 맞춤설정 가능성과 확장성이 매우 높아 다수의 고급 사용 사례를 지원할 수 있습니다. YouTube 및 Google Play 무비/TV 등의 Google 앱에 사용되는 오픈소스 프로젝트입니다.
기본 요건
- Android 개발 및 Android 스튜디오에 관한 중간 정도의 지식
실행할 작업
- 다양한 소스의 미디어를 준비하고 재생하는
SimpleExoPlayer인스턴스를 만듭니다. - 단일 또는 멀티 윈도우 환경에서 백그라운드 작업, 포그라운드 작업, 재생 다시 시작을 지원하도록 앱의 활동 수명 주기에 ExoPlayer를 통합합니다.
MediaItem을 사용하여 재생목록을 만듭니다.- 사용할 수 있는 대역폭에 맞춰 미디어 품질을 조정하는 적응형 동영상 스트림을 재생합니다.
- 재생 상태를 모니터링하고 리스너를 사용해 재생 품질을 측정할 수 있는 방법을 표시하도록 이벤트 리스너를 등록합니다.
- 표준 ExoPlayer UI 구성요소를 사용하고 앱의 스타일에 맞게 이 구성요소를 맞춤설정합니다.
필요한 항목
- Android 스튜디오의 최신 정식 버전
- JellyBean(4.1) 이상을 사용하는 Android 기기(가장 좋은 것은 멀티 윈도우를 지원하는 Nougat(7.1) 이상을 사용하는 기기)
2. 설정
코드 가져오기
시작하려면 Android 스튜디오 프로젝트를 다운로드하세요.
또는 GitHub 저장소를 복제할 수도 있습니다.
git clone https://github.com/googlecodelabs/exoplayer-intro.git
디렉터리 구조
복제하거나 압축을 해제하면 루트 폴더(exoplayer-intro)가 생기며 이 폴더에는 필요한 모든 리소스와 함께 여러 모듈(앱 모듈 및 이 Codelab의 각 단계별 모듈)이 있는 단일 Gradle 프로젝트가 있습니다.
프로젝트 가져오기
- Android 스튜디오를 시작합니다.
- File > New > Import Project*를 클릭합니다.*
- 루트
build.gradle파일을 선택합니다.
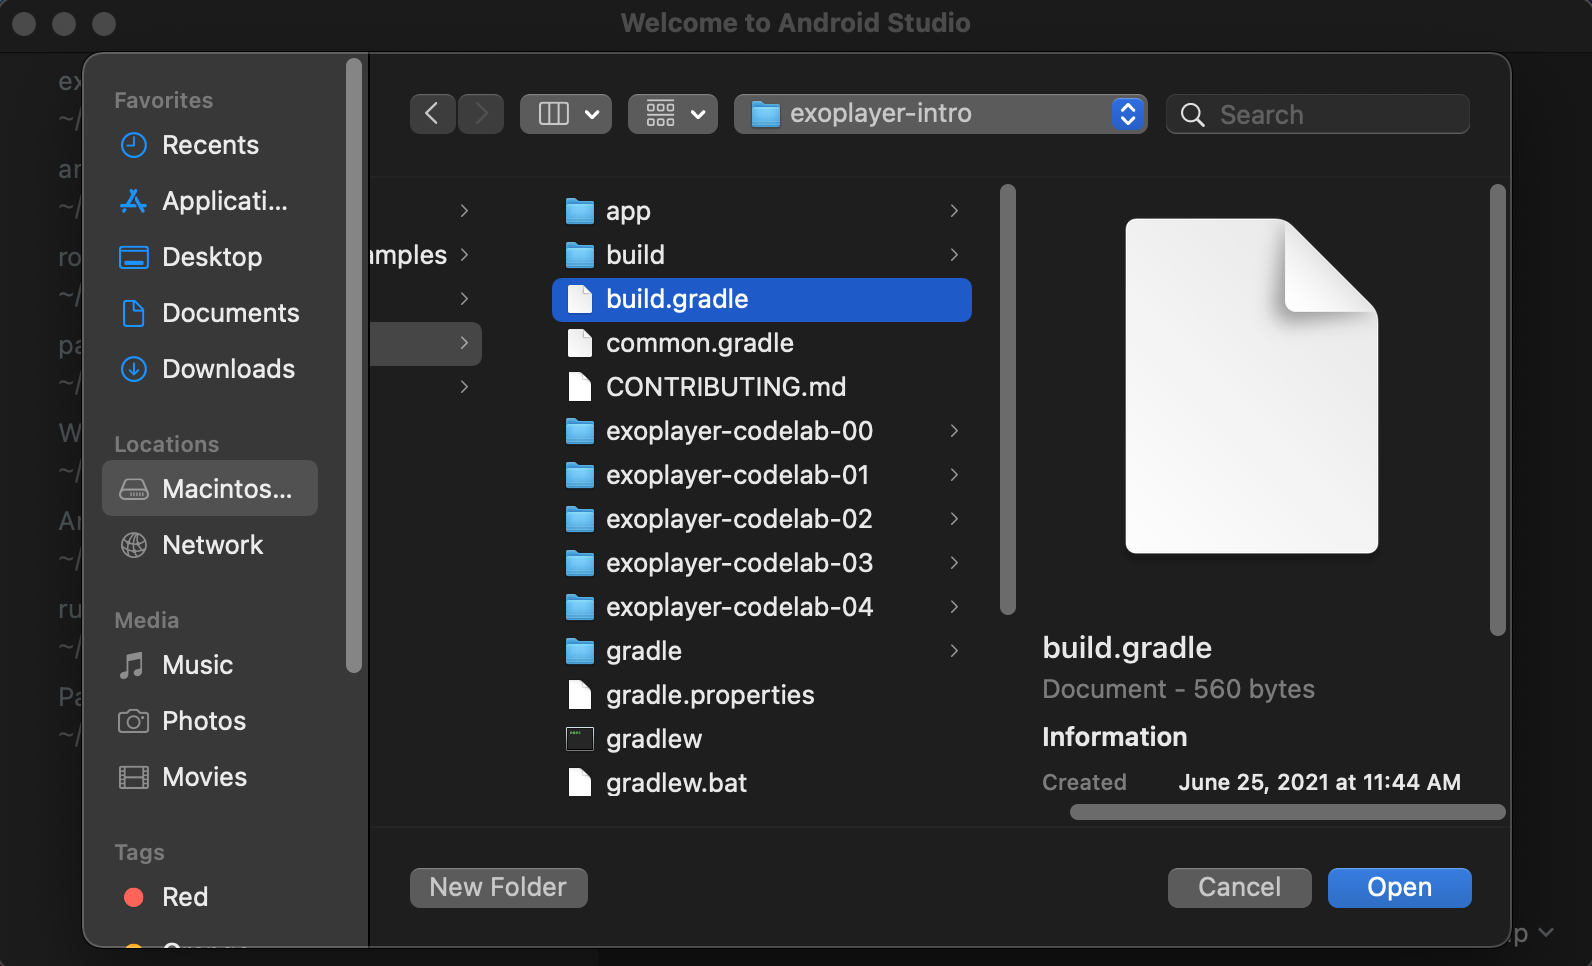
스크린샷: 가져올 때의 프로젝트 구조
빌드가 완료된 후에는 app 모듈(애플리케이션 유형) 하나와 이름이 exoplayer-codelab-N(여기서 N은 00부터 04,까지이고 각각 라이브러리 유형)인 모듈 5개 등 모듈 6개가 표시됩니다. app 모듈은 실제로 비어 있으며 매니페스트만 있습니다. app/build.gradle의 Gradle 종속 항목을 사용하여 앱이 빌드되면 현재 지정된 exoplayer-codelab-N 모듈의 모든 것이 병합됩니다.
app/build.gradle
dependencies {
   implementation project(":exoplayer-codelab-00")
}
내 미디어 플레이어 활동은 exoplayer-codelab-N 모듈에서 유지됩니다. 이러한 활동을 별도의 라이브러리 모듈에 유지하는 것은 모바일 및 Android TV 같은 다양한 플랫폼을 타겟팅하는 APK 간에 공유할 수 있게 하려는 이유입니다. 또한 사용자에게 필요할 때만 미디어 재생 기능을 설치할 수 있는 Dynamic Delivery와 같은 기능을 활용할 수도 있습니다.
- 모든 것이 정상인지 확인하는 앱을 배포하고 실행합니다. 이 앱은 화면을 검은색 배경으로 채웁니다.
스크린샷: 실행 중인 빈 앱
3. 스트림
ExoPlayer 종속 항목 추가
ExoPlayer는 GitHub에서 호스팅하는 오픈소스 프로젝트입니다. 매번 출시될 때마다 Android 스튜디오 및 Gradle이 사용하는 기본 패키지 저장소 중 하나인 Google Maven을 통해 배포됩니다. 각 출시 버전은 다음 형식의 문자열을 통해 고유하게 식별됩니다.
com.google.android.exoplayer:exoplayer:X.X.X
클래스와 UI 구성요소를 가져오기만 하면 프로젝트에 ExoPlayer를 추가할 수 있습니다. 크기가 상당히 작으며, 포함된 기능과 지원되는 형식에 따라 70~300KB 정도의 비교적 작은 공간이 사용됩니다. ExoPlayer 라이브러리는 모듈로 분할되어 개발자는 필요한 기능만 가져올 수 있습니다. ExoPlayer의 모듈형 구조에 관한 자세한 내용은 ExoPlayer 모듈 추가를 참고하세요.
player-lib모듈의build.gradle파일을 엽니다.- 다음 줄을
dependencies섹션에 추가하고 프로젝트를 동기화합니다.
exoplayer-codelab-00/build.gradle
dependencies {
   [...]

implementation 'com.google.android.exoplayer:exoplayer-core:2.12.0'
implementation 'com.google.android.exoplayer:exoplayer-dash:2.12.0'
implementation 'com.google.android.exoplayer:exoplayer-ui:2.12.0'

}
PlayerView element 추가
exoplayer-codelab-00모듈에서 레이아웃 리소스 파일activity_player.xml을 엽니다.FrameLayout요소 내부에 커서를 놓습니다.<PlayerView를 입력하기 시작하면 Android 스튜디오에서PlayerView요소가 자동으로 완성됩니다.width및height에 관해match_parent를 사용합니다.- ID를
video_view로 선언합니다.
activity_player.xml
<com.google.android.exoplayer2.ui.PlayerView
   android:id="@+id/video_view"
   android:layout_width="match_parent"
   android:layout_height="match_parent"/>
앞으로 이 UI 요소를 동영상 뷰라고 하겠습니다.
PlayerActivity에서 이제 방금 수정한 XML 파일에서 생성된 뷰 트리의 참조를 가져올 수 있습니다.
PlayerActivity.kt
    private val viewBinding by lazy(LazyThreadSafetyMode.NONE) {
        ActivityPlayerBinding.inflate(layoutInflater)
    }
- 뷰 트리의 루트를 활동의 콘텐츠 뷰로 설정합니다. 또한
viewBinding참조에videoView속성이 표시되는지 그리고 유형이PlayerView인지 확인합니다.
    override fun onCreate(savedInstanceState: Bundle?) {
        super.onCreate(savedInstanceState)
        setContentView(viewBinding.root)
    }
ExoPlayer 만들기
미디어 스트리밍을 재생하려면 ExoPlayer 객체가 필요합니다. 가장 간단하게 만드는 방법은 SimpleExoPlayer.Builder 클래스를 사용하는 것입니다. 이름에서 알 수 있듯이 빌더 패턴을 사용하여 SimpleExoPlayer 인스턴스를 빌드합니다.
SimpleExoPlayer는 ExoPlayer 인터페이스를 다목적으로 편리하게 구현한 것입니다.
SimpleExoPlayer를 만드는 비공개 메서드 initializePlayer를 추가하세요.
PlayerActivity.kt
private var player: SimpleExoPlayer? = null
[...]
   private fun initializePlayer() {
        player = SimpleExoPlayer.Builder(this)
            .build()
            .also { exoPlayer ->
                viewBinding.videoView.player = exoPlayer
            }
    }
컨텍스트를 사용하여 SimpleExoPlayer.Builder를 만든 다음 build를 호출하여 SimpleExoPlayer 객체를 만듭니다. 그러면 이 객체가 player에 할당되며, 이를 멤버 필드로 선언해야 합니다. 그런 다음 변경 가능한 viewBinding.videoView.player 속성을 사용하여 해당하는 뷰에 player를 바인딩합니다.
미디어 항목 만들기
이제 player에 재생할 일부 콘텐츠가 필요합니다. 이를 위해 MediaItem을 만듭니다. 다양한 유형의 MediaItem이 있지만 먼저 인터넷의 MP3 파일용 항목을 만듭니다.
가장 간단하게 MediaItem을 만드는 방법은 미디어 파일의 URI를 허용하는 MediaItem.fromUri를 사용하는 것입니다. player.setMediaItem을 사용하여 player에 MediaItem을 추가하세요.
also블록 내부의initializePlayer에 다음 코드를 추가합니다.
PlayerActivity.kt
private fun initializePlayer() {
    [...]
        .also { exoPlayer ->
            [...]
            val mediaItem = MediaItem.fromUri(getString(R.string.media_url_mp3))
            exoPlayer.setMediaItem(mediaItem)
        }
}
R.string.media_url_mp3는 strings.xml에서 https://storage.googleapis.com/exoplayer-test-media-0/play.mp3로 정의됩니다.
활동 수명 주기와 호환
이 player는 메모리, CPU, 네트워크 연결, 하드웨어 코덱을 비롯한 다양한 리소스를 고갈시킬 수 있습니다. 이러한 리소스의 상당수는 양이 적으며, 특히 하나만 있을 수 있는 하드웨어 코덱의 경우 그렇습니다. 사용 중이 아닐 때(예: 앱이 백그라운드로 전환되는 경우) 다른 앱에서 사용하도록 리소스를 해제하는 것이 중요합니다.
즉, 플레이어의 수명 주기는 앱의 수명 주기와 연결되어야 합니다. 이렇게 구현하려면 PlayerActivity의 4가지 메서드 즉 onStart, onResume, onPause, onStop을 재정의해야 합니다.
PlayerActivity를 열고 Code menu > Override methods...를 클릭합니다.onStart,onResume,onPause,onStop을 선택합니다.- API 수준에 따라
onStart또는onResume콜백에서 플레이어를 초기화합니다.
PlayerActivity.kt
public override fun onStart() {
 super.onStart()
 if (Util.SDK_INT >= 24) {
   initializePlayer()
 }
}

public override fun onResume() {
 super.onResume()
 hideSystemUi()
 if ((Util.SDK_INT < 24 || player == null)) {
   initializePlayer()
 }
}
Android API 수준 24 이상에서는 멀티 윈도우를 지원합니다. 앱이 표시되지만 분할 윈도우 모드로 활성화되지는 않으므로 onStart에서 플레이어를 초기화해야 합니다. Android API 수준 24 이하에서는 리소스를 포착할 때까지 최대한 오래 대기해야 하므로 onResume까지 기다린 후에 플레이어를 초기화합니다.
hideSystemUi메서드를 추가합니다.
PlayerActivity.kt
@SuppressLint("InlinedApi")
private fun hideSystemUi() {
 viewBinding.videoView.systemUiVisibility = (View.SYSTEM_UI_FLAG_LOW_PROFILE
     or View.SYSTEM_UI_FLAG_FULLSCREEN
     or View.SYSTEM_UI_FLAG_LAYOUT_STABLE
     or View.SYSTEM_UI_FLAG_IMMERSIVE_STICKY
     or View.SYSTEM_UI_FLAG_LAYOUT_HIDE_NAVIGATION
     or View.SYSTEM_UI_FLAG_HIDE_NAVIGATION)
}
hideSystemUi는 onResume에서 호출되는 도우미 메서드로, 전체 화면 환경을 표시합니다.
onPause및onStop에서releasePlayer(곧 생성함)를 사용하여 리소스를 해제합니다.
PlayerActivity.kt
public override fun onPause() {
 super.onPause()
 if (Util.SDK_INT < 24) {
   releasePlayer()
 }
}

public override fun onStop() {
 super.onStop()
 if (Util.SDK_INT >= 24) {
   releasePlayer()
 }
}
API 수준 24 이하에서는 onStop의 호출이 보장되지 않으므로 onPause에서 최대한 일찍 플레이어를 해제해야 합니다. API 수준 24 이상(멀티 윈도우 및 분할 윈도우 모드 도입)에서는 onStop의 호출이 보장됩니다. 일시중지 상태에서 활동은 여전히 표시되므로, onStop까지 대기한 후 플레이어를 해제합니다.
이제 플레이어의 리소스를 확보하고 플레이어를 제거하는 releasePlayer 메서드를 만들어야 합니다.
- 활동에 다음 코드를 추가합니다.
PlayerActivity.kt
private var playWhenReady = true
private var currentWindow = 0
private var playbackPosition = 0L
[...]

private fun releasePlayer() {
    player?.run {
        playbackPosition = this.currentPosition
        currentWindow = this.currentWindowIndex
        playWhenReady = this.playWhenReady
        release()
    }
    player = null
}
플레이어를 해제하고 제거하기 전에 다음 정보를 저장합니다.
playWhenReady를 사용한 재생/일시중지 정보currentPosition을 사용한 현재 재생 위치currentWindowIndex를 사용한 현재 윈도우 지수. 윈도우에 관한 자세한 내용은 타임라인을 참고하세요.
사용자가 중단한 부분부터 재생을 재개할 수 있습니다. 플레이어를 초기화할 때 이 상태 정보를 제공하기만 하면 됩니다.
최종 준비
이제 releasePlayer에 저장한 상태 정보를 초기화 중에 플레이어에 제공하기만 하면 됩니다.
- 다음을
initializePlayer에 추가합니다.
PlayerActivity.kt
private fun initializePlayer() {
    [...]
    exoPlayer.playWhenReady = playWhenReady
    exoPlayer.seekTo(currentWindow, playbackPosition)
    exoPlayer.prepare()
}
다음과 같이 진행됩니다.
playWhenReady가 재생에 사용되는 모든 리소스가 확보되면 곧바로 재생을 시작할지 여부를 플레이어에 알립니다.playWhenReady는 처음에true이므로 앱이 처음 실행될 때 재생이 자동으로 시작됩니다.seekTo가 플레이어에 특정 윈도우 내의 특정 위치를 찾도록 알립니다. 앱이 처음 실행될 때 맨 처음부터 재생이 시작되도록currentWindow와playbackPosition이 모두 0으로 초기화됩니다.prepare가 재생에 필요한 모든 리소스를 확보하도록 플레이어에 알립니다.
오디오 재생
완료되었습니다! 앱을 시작하여 MP3 파일을 재생하고 삽입된 아트워크를 확인하세요.
스크린샷: 단일 트랙을 재생하는 앱
활동 수명 주기 테스트
앱이 활동 수명 주기의 다양한 상태에서 모두 작동하는지 여부를 테스트합니다.
- 다른 앱을 시작했다가 앱을 다시 포그라운드로 전환합니다. 앱이 올바른 위치에서 재개되나요?
- 앱을 일시중지하여 백그라운드로 전환한 다음 다시 포그라운드로 가져옵니다. 일시중지 상태로 백그라운드에 있을 때 앱이 일시중지 상태를 유지하나요?
- 앱을 회전합니다. 방향을 세로에서 가로로 그리고 다시 세로로 변경하면 어떻게 작동하나요?
동영상 재생
동영상을 재생하는 경우 간단히 미디어 항목 URI를 MP4 파일로 수정하면 됩니다.
initializePlayer의 URI를R.string.media_url_mp4로 변경합니다.- 앱을 다시 시작하여 동영상 재생과 함께 백그라운드로 전환한 후에 어떻게 작동하는지 테스트합니다.
PlayerActivity.kt
private fun initializePlayer() {
  [...]
     val mediaItem = MediaItem.fromUri(getString(R.string.media_url_mp4));
  [...]
}
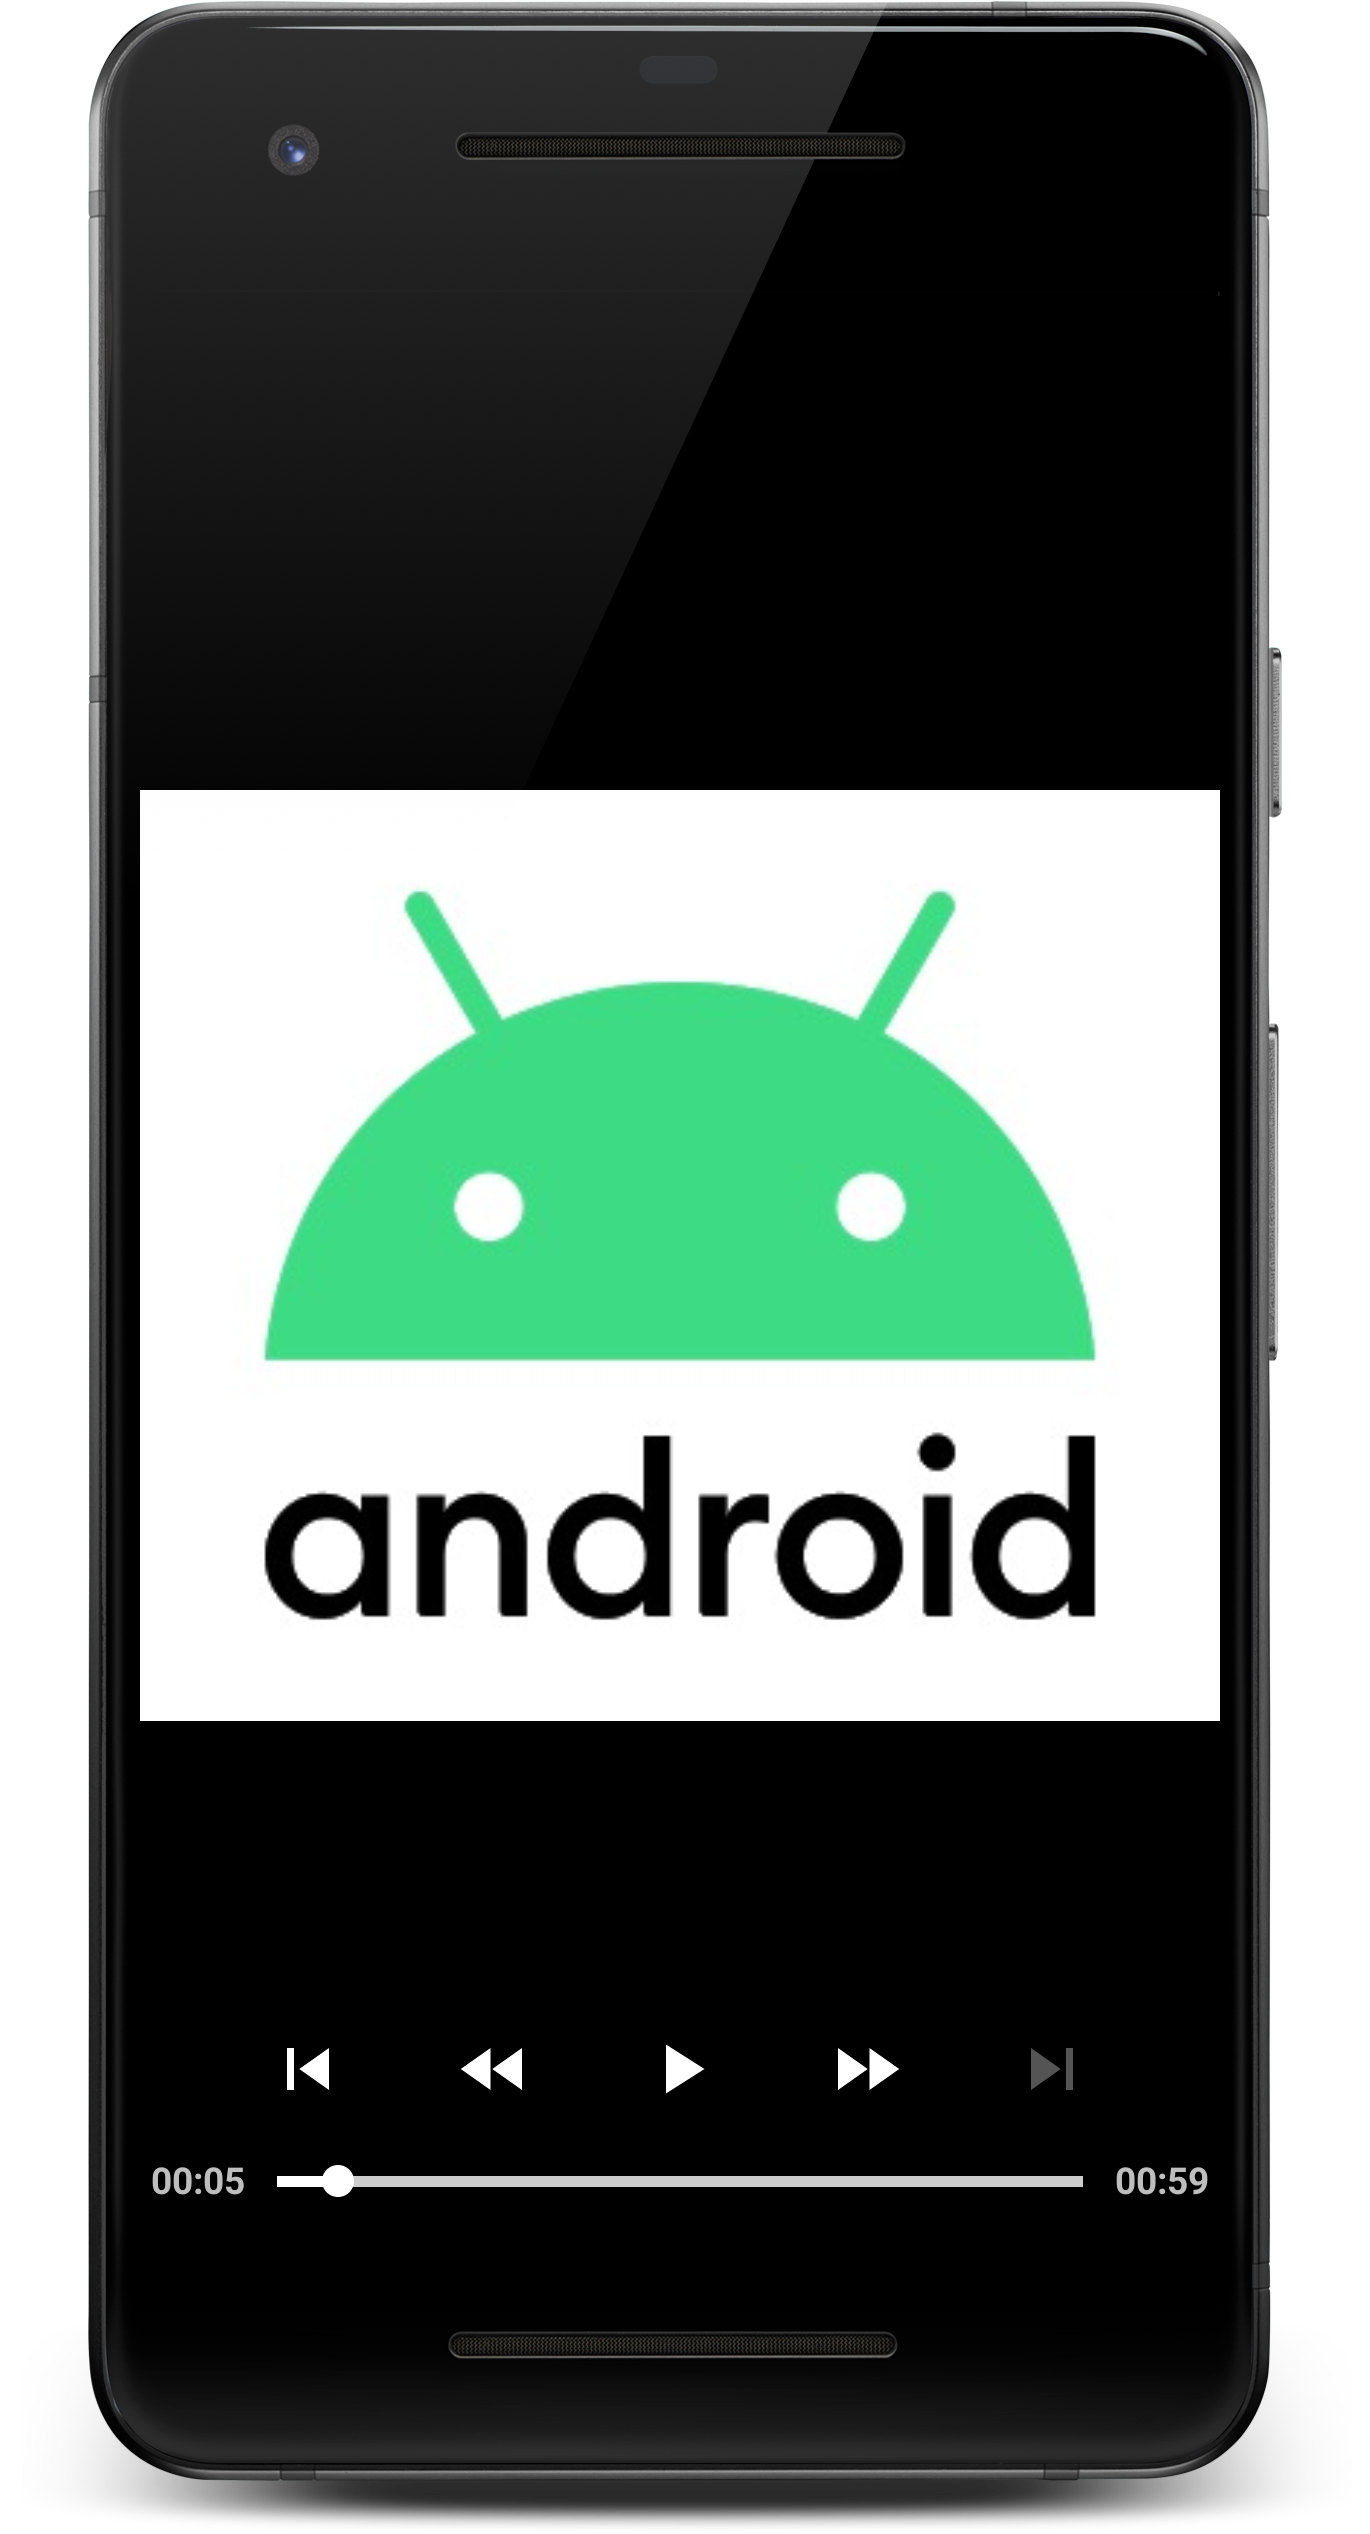
PlayerView에서 모두 처리됩니다. 아트워크 대신 동영상이 전체 화면으로 렌더링됩니다.
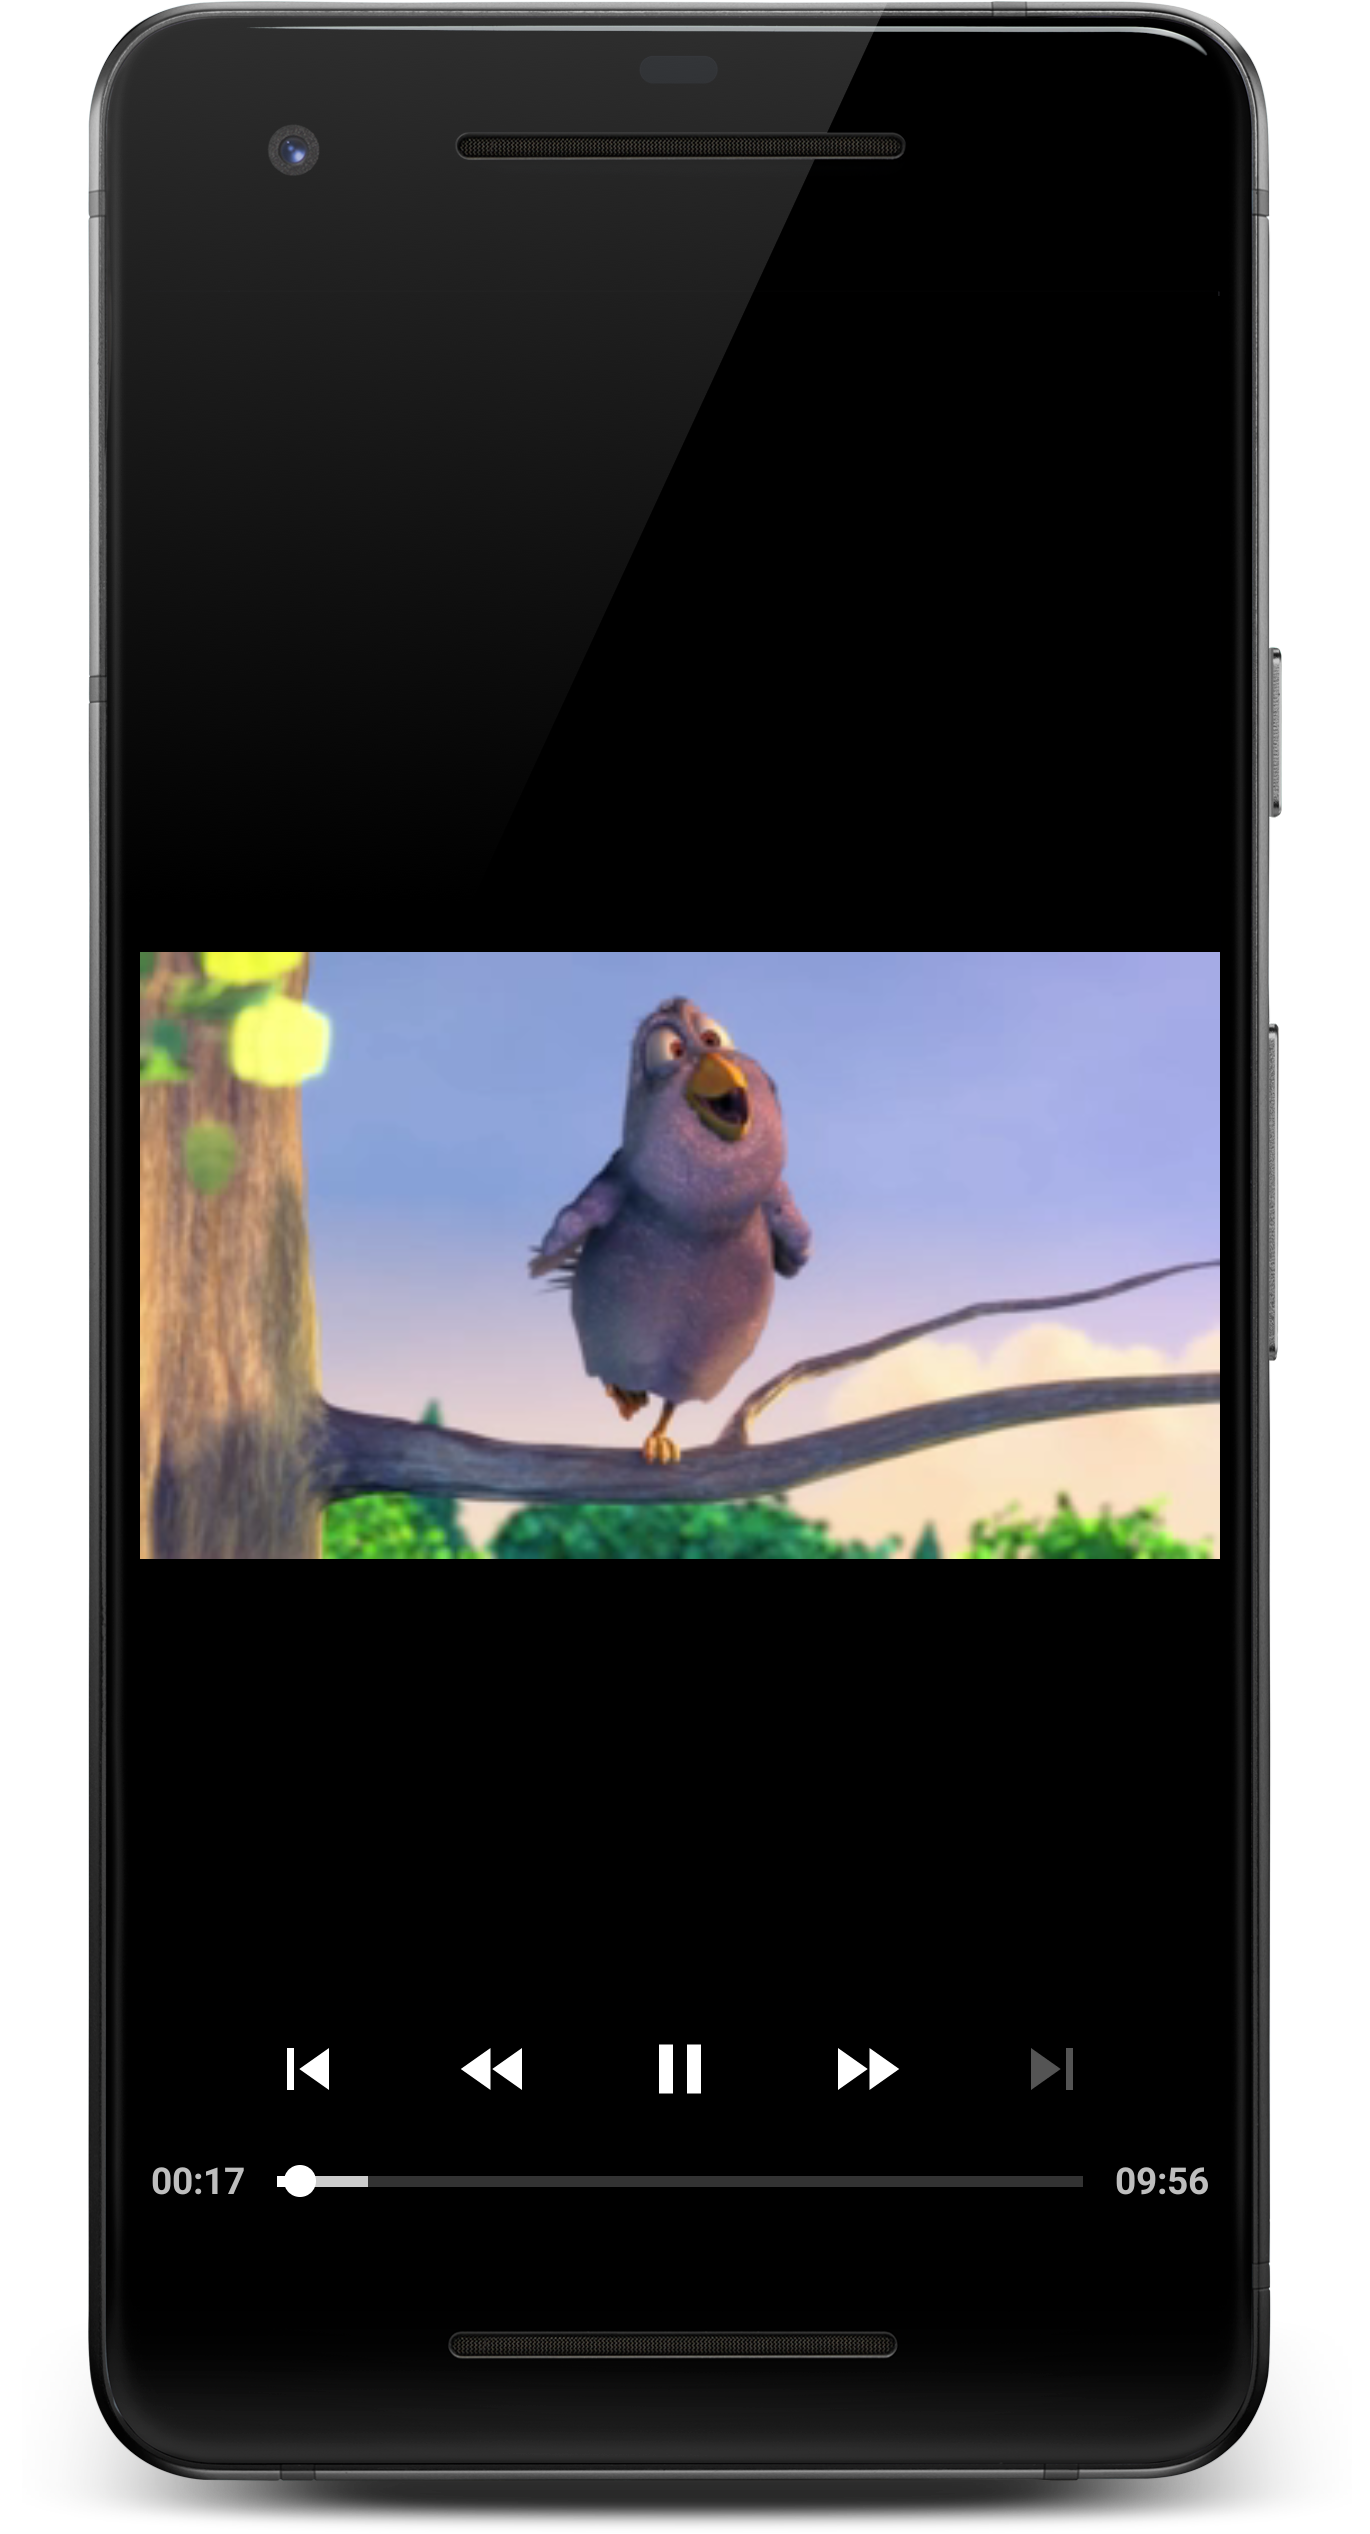
스크린샷: 동영상을 재생하는 앱
잘하셨습니다! 수명 주기 관리, 저장된 상태, UI 컨트롤을 모두 포함한 Android의 전체 화면 미디어 스트리밍용 앱을 만들었습니다.
4. 재생목록 만들기
현재 앱이 단일 미디어 파일을 재생합니다. 하지만 미디어 파일 두 개 이상을 순차적으로 재생하려면 어떻게 할까요? 이럴 때 재생목록이 필요합니다.
addMediaItem을 사용하여 player에 MediaItem을 추가하여 재생목록을 만들 수 있습니다. 그러면 원활하게 재생할 수 있고 사용자가 미디어 항목을 변경할 때 버퍼링 스피너가 표시되지 않도록 버퍼링이 백그라운드에서 처리됩니다.
- 다음 코드를
initializePlayer에 추가합니다.
PlayerActivity.kt
private void initializePlayer() {
  [...]
  exoPlayer.addMediaItem(mediaItem) // Existing code

  val secondMediaItem = MediaItem.fromUri(getString(R.string.media_url_mp3));
  exoPlayer.addMediaItem(secondMediaItem);
  [...]
}
재생 컨트롤이 어떻게 작동하는지 확인하세요.  및
및  아이콘을 사용하여 미디어 항목 시퀀스를 탐색할 수 있습니다.
스크린샷: 다음 버튼과 이전 버튼을 보여주는 재생 컨트롤
아주 편리합니다. 자세한 내용은 미디어 항목 및 재생목록 관련 개발자 문서와 재생목록 API와 관련된 이 문서를 참고하세요.
5. 가변 품질 스트리밍
가변 품질 스트리밍은 사용할 수 있는 네트워크 대역폭에 따라 스트림 품질이 변화시키는 미디어 스트리밍 기술입니다. 이를 통해 사용자는 대역폭이 허용하는 최고 품질의 미디어를 경험할 수 있습니다.
일반적으로 동일한 미디어 콘텐츠가 다양한 품질(비트 전송률 및 해상도)의 여러 트랙으로 분할됩니다. 사용할 수 있는 네트워크 대역폭에 따라 플레이어가 트랙을 선택합니다.
각 트랙은 지정된 시간 분량(일반적으로 2~10초)으로 분할됩니다. 따라서 사용할 수 있는 대역폭이 변경되면 플레이어가 신속하게 트랙 간에 전환할 수 있습니다. 플레이어는 이러한 시간 분량을 이어붙여 원활하게 재생합니다.
적응형 트랙 선택
가변 품질 스트리밍의 핵심은 현재 환경에 가장 적합한 트랙을 선택하는 것입니다. 적응형 트랙 선택을 사용하여 가변 품질 스트리밍 미디어를 재생하도록 앱을 업데이트하세요.
- 다음 코드로
initializePlayer를 업데이트합니다.
PlayerActivity.kt
private fun initializePlayer() {
   val trackSelector = DefaultTrackSelector(this).apply {
        setParameters(buildUponParameters().setMaxVideoSizeSd())
    }
   player = SimpleExoPlayer.Builder(this)
        .setTrackSelector(trackSelector)
        .build()
  [...]
}
먼저 미디어 항목에서 트랙을 선택하는 DefaultTrackSelector를 만듭니다. 그런 다음, 표준 화질 이하의 트랙만 선택하도록 trackSelector에 알립니다. 이 방법은 품질을 제한하고 사용자의 데이터를 절약하는 데 좋습니다. 마지막으로, SimpleExoPlayer 인스턴스를 빌드할 때 사용되도록 trackSelector를 빌더에 전달합니다.
적응형 미디어 항목 빌드
DASH는 널리 사용되는 가변 품질 스트리밍 형식입니다. DASH 콘텐츠를 스트리밍하려면 이전처럼 MediaItem를 만들어야 합니다. 단, 이번에는 fromUri가 아닌 MediaItem.Builder를 사용해야 합니다.
왜냐하면 fromUri는 파일 확장자를 사용하여 기본 미디어 형식을 확인하지만 DASH URI는 파일 확장자가 없어서 MediaItem을 생성할 때 MIME 유형의 APPLICATION_MPD를 제공해야 하기 때문입니다.
- 다음과 같이
initializePlayer를 업데이트합니다.
PlayerActivity.kt
private void initializePlayer() {
  [...]

  // Replace this line
  val mediaItem = MediaItem.fromUri(getString(R.string.media_url_mp4));

  // With this
   val mediaItem = MediaItem.Builder()
        .setUri(getString(R.string.media_url_dash))
        .setMimeType(MimeTypes.APPLICATION_MPD)
        .build()

  // Also remove the following lines
  val secondMediaItem = MediaItem.fromUri(getString(R.string.media_url_mp3))
    exoPlayer.addMediaItem(secondMediaItem)
}
- 앱을 다시 시작하고 DASH가 작동하는 가변 품질 동영상 스트리밍을 확인합니다. ExoPlayer를 사용하면 아주 간편합니다!
다른 가변 품질 스트리밍 형식
HLS(MimeTypes.APPLICATION_M3U8) 및 SmoothStreaming(MimeTypes.APPLICATION_SS)은 흔히 사용되는 가변 품질 스트리밍 형식이며 둘 다 ExoPlayer의 지원을 받습니다. 다른 적응형 미디어 소스의 생성에 관한 자세한 내용은 ExoPlayer 데모 앱을 참고하세요.
6. 이벤트 수신 대기
이전 단계에서는 점진적/적응형 미디어 스트림을 스트리밍하는 방법을 알아봤습니다. ExoPlayer는 다음을 비롯한 많은 작업을 백그라운드에서 처리합니다.
- 메모리 할당
- 컨테이너 파일 다운로드
- 컨테이너에서 메타데이터 추출
- 데이터 디코딩
- 화면 및 라우드스피커로 동영상, 오디오, 텍스트 렌더링
때로는 사용자의 재생 환경을 이해하고 개선하기 위해 런타임에 ExoPlayer가 무엇을 하는지 잘 아는 것이 유용합니다.
예를 들어 다음과 같이 하여 사용자 인터페이스에서 재생 상태 변경을 반영하는 것이 좋습니다.
- 플레이어가 버퍼링 상태로 전환될 때 로드 스피너 표시
- 트랙이 종료되면 '다음 볼만한 동영상' 옵션이 포함된 오버레이 표시
ExoPlayer는 유용한 이벤트의 콜백을 제공하는 리스너 인터페이스를 제공합니다. 리스너를 사용하여 플레이어의 상태를 로깅합니다.
수신
PlayerActivity클래스 외부에서 나중에 로깅에 사용할TAG상수를 만듭니다.
PlayerActivity.kt
private const val TAG = "PlayerActivity"
PlayerActivity클래스 외부 팩토리 함수에서Player.EventListener인터페이스를 구현합니다. 오류와 재생 상태 변경 등 중요한 플레이어 이벤트를 알리는 데 사용됩니다.- 다음 코드를 추가하여
onPlaybackStateChanged를 재정의합니다.
PlayerActivity.kt
private fun playbackStateListener() = object : Player.EventListener {
    override fun onPlaybackStateChanged(playbackState: Int) {
        val stateString: String = when (playbackState) {
            ExoPlayer.STATE_IDLE -> "ExoPlayer.STATE_IDLE      -"
            ExoPlayer.STATE_BUFFERING -> "ExoPlayer.STATE_BUFFERING -"
            ExoPlayer.STATE_READY -> "ExoPlayer.STATE_READY     -"
            ExoPlayer.STATE_ENDED -> "ExoPlayer.STATE_ENDED     -"
            else -> "UNKNOWN_STATE             -"
        }
        Log.d(TAG, "changed state to $stateString")
    }
}
PlayerActivity에서Player.EventListener유형의 비공개 멤버를 선언합니다.
PlayerActivity.kt
class PlayerActivity : AppCompatActivity() {
    [...]

    private val playbackStateListener: Player.EventListener = playbackStateListener()
}
재생 상태가 변경되면 onPlaybackStateChanged가 호출됩니다. 이 새로운 상태는 playbackState 매개변수에 의해 지정됩니다.
플레이어의 상태는 다음 4가지 중 하나일 수 있습니다.
상태 | 설명 |
| 플레이어가 인스턴스화되었지만 아직 준비되지는 않았습니다. |
| 버퍼링된 데이터가 충분하지 않아 플레이어가 현재 위치에서 재생할 수 없습니다. |
| 플레이어가 현재 위치에서 즉시 재생할 수 없습니다. 즉, 플레이어의 playWhenReady 속성이 |
| 플레이어가 미디어 재생을 완료했습니다. |
리스너 등록
콜백을 호출하려면 플레이어에 playbackStateListener를 등록해야 합니다. initializePlayer에서 합니다.
- 플레이어 준비 전에 리스너를 등록합니다.
PlayerActivity.kt
private void initializePlayer() {
    [...]
    exoPlayer.seekTo(currentWindow, playbackPosition)
    exoPlayer.addListener(playbackStateListener)
    [...]
}
메모리 누수를 야기할 수 있는 플레이어의 댕글링 참조를 방지하기 위해 깔끔하게 정리해야 합니다.
releasePlayer에서 리스너를 삭제합니다.
PlayerActivity.kt
private void releasePlayer() {
 player?.run {
   [...]
   removeListener(playbackStateListener)
   release()
 }
  player = null
}
- logcat을 열고 앱을 실행합니다.
- UI 컨트롤을 사용하여 재생을 찾고, 일시중지하고, 재개합니다. 로그에서 재생 상태 변경을 확인해야 합니다.
심화 정보
ExoPlayer는 사용자의 재생 환경을 이해하는 데 유용한 다수의 다른 리스너를 제공합니다. 오디오 및 동영상의 리스너뿐만 아니라 모든 리스너의 콜백이 포함된 AnalyticsListener도 있습니다. 가장 중요한 메서드에는 다음이 포함됩니다.
- 동영상의 첫 번째 프레임이 렌더링되면
onRenderedFirstFrame이 호출됩니다. 이를 통해 유의미한 콘텐츠가 화면에 표시될 때까지 대기해야 하는 시간을 계산할 수 잇습니다. - 동영상 프레임이 드롭되면
onDroppedVideoFrames가 호출됩니다. 드롭된 프레임은 버벅거리며 재생되고 사용자 경험이 저하될 수 있음을 나타냅니다. - 오디오 언더런이 있으면
onAudioUnderrun이 호출됩니다. 언더런이 있는 경우 사운드에 오디오 결함이 발생하며 언더런은 드롭된 동영상 프레임보다 더 쉽게 알아차릴 수 있습니다.
addAnalyticsListener를 사용하여 AnalyticsListener를 player에 추가할 수 있습니다. 오디오 및 동영상 리스너에 상응하는 메서드도 있습니다.
앱과 사용자에게 어떤 이벤트가 중요한지 생각해 보세요. 자세한 내용은 플레이어 이벤트 수신 대기를 참고하세요. 이벤트 리스너를 알아봤습니다!
7. 사용자 인터페이스 맞춤설정
지금까지 ExoPlayer의 PlayerControlView를 사용하여 사용자에게 재생 컨트롤러를 표시했습니다.
스크린샷: 기본 재생 컨트롤러
이러한 컨트롤의 기능이나 디자인과 분위기를 변경하려면 어떻게 할까요? 다행히 이러한 컨트롤은 고도로 맞춤설정할 수 있습니다.
간편하게 할 수 있는 첫 번째 맞춤설정은 컨트롤러를 사용하지 않는 것입니다. 이렇게 하려면 activity_player.xml 내부의 PlayerView 요소에 use_controller 속성을 사용하면 됩니다.
use_controller를false로 설정하면 컨트롤이 더 이상 표시되지 않습니다.
activity_player.xml
<com.google.android.exoplayer2.ui.PlayerView
   [...]
   app:use_controller="false"/>
FrameLayout에 다음 네임스페이스를 추가합니다.
activity_player.xml
<FrameLayout
  [...]
  xmlns:app="http://schemas.android.com/apk/res-auto">
지금 해 보세요.
동작 맞춤설정
PlayerControlView에는 동작에 영향을 주는 몇 가지 속성이 있습니다. 예를 들어 사용자가 마지막으로 상호작용한 후 컨트롤이 숨겨지기 전의 지연 시간(밀리초 단위)을 맞춤설정하려면 show_timeout을 사용합니다. 방법은 다음과 같습니다.
app:use_controller="false"를 삭제합니다.show_timeout을 사용하도록 플레이어 뷰를 변경합니다.
activity_player.xml
<com.google.android.exoplayer2.ui.PlayerView
   android:id="@+id/video_view"
   android:layout_width="match_parent"
   android:layout_height="match_parent"
   app:show_timeout="10000"/>
PlayerControlView의 속성을 프로그래매틱 방식으로 설정할 수도 있습니다.
디자인 맞춤설정
좋은 출발입니다. 하지만 PlayerControlView의 디자인을 변경하거나 표시할 버튼을 변경하려면 어떻게 할까요? PlayerControlView의 구현에서는 어떠한 버튼도 존재하지 않는다고 가정하므로 삭제하고 새로 추가하기가 쉽습니다.
PlayerControlView를 맞춤설정할 수 있는 방법을 살펴보세요.
- 새로운 레이아웃 파일
custom_player_control_view.xml을player-lib/res/layout/폴더에 만듭니다. - 레이아웃 폴더의 컨텍스트 메뉴에서 New - Layout resource file을 선택하고 이름을
custom_player_control_view.xml로 지정합니다.
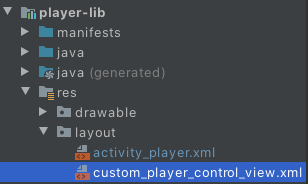
스크린샷: 재생 컨트롤 뷰의 레이아웃 파일이 생성됨
- 여기서 원본 레이아웃 파일을
custom_player_control_view.xml로 복사합니다. - ID가
@id/exo_prev및@id/exo_next인ImageButton요소를 삭제합니다.
맞춤 레이아웃을 사용하려면 activity_player.xml 파일에서 PlayerView 요소의 app:controller_layout_id 속성을 설정해야 합니다.
- 다음 코드 스니펫처럼 맞춤 파일의 레이아웃 ID를 사용합니다.
activity_player.xml
<com.google.android.exoplayer2.ui.PlayerView
   android:id="@+id/video_view"
   android:layout_width="match_parent"
   android:layout_height="match_parent"
   app:controller_layout_id="@layout/custom_player_control_view"/>
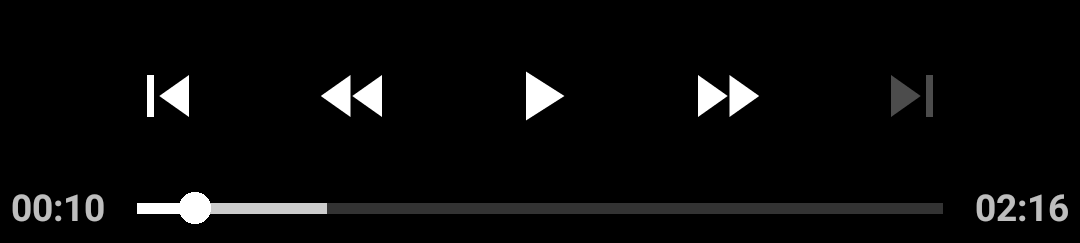
- 앱을 다시 시작합니다. 재생 컨트롤 뷰에 더 이상 이전 버튼과 다음 버튼이 없습니다.

스크린샷: 이전 버튼이나 다음 버튼이 없는 맞춤 재생 컨트롤 뷰
레이아웃 파일에서 원하는 대로 변경사항을 적용할 수 있습니다. 기본적으로 Android 테마의 색상은 선택되어 있으며, 앱의 디자인에 맞춰 이 색상을 재정의할 수 있습니다.
- 각
ImageButton요소에android:tint속성을 추가합니다.
custom_player_control_view.xml
<ImageButton android:id="@id/exo_rew"
   android:tint="#FF00A6FF"
   style="@style/ExoMediaButton.Rewind"/>
- 맞춤 파일에 있는 모든
android:textColor속성을 동일한 색상(#FF00A6FF)으로 변경합니다.
custom_player_control_view.xml
<TextView android:id="@id/exo_position"
   [...]
   android:textColor="#FF00A6FF"/>
<TextView android:id="@id/exo_duration"
   [...]
   android:textColor="#FF00A6FF"/>
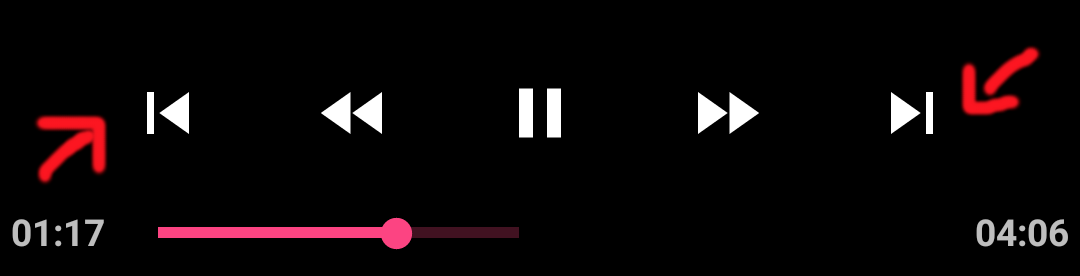
- 앱을 실행합니다. 이제 색상이 지정된 아름다운 UI 구성요소가 생겼습니다.

스크린샷: 색조가 들어간 버튼 및 텍스트 뷰
기본 스타일 재정의
이제 맞춤 레이아웃 파일을 만들었고 activity_player.xml에서 controller_layout_id를 사용하여 참조했습니다.
또 다른 접근 방식은 PlayerControlView에서 사용되는 기본 레이아웃 파일을 재정의하는 것입니다. PlayerControlView의 소스 코드를 보면 레이아웃에 R.layout.exo_player_control_view가 사용된다는 것을 알 수 있습니다. 파일 이름이 같은 고유한 레이아웃 파일을 만드는 경우 PlayerControlView는 고유 파일을 사용합니다.
- 방금 추가한
controller_layout_id속성을 삭제합니다. custom_player_control_view.xml파일을 삭제합니다.
이제 activity_player.xml의 PlayerView가 다음과 같이 표시됩니다.
activity_player.xml
<com.google.android.exoplayer2.ui.PlayerView
   android:id="@+id/video_view"
   android:layout_width="match_parent"
   android:layout_height="match_parent"/>
- 라이브러리 모듈
player-lib의res/layout폴더에 이름이exo_player_control_view.xml인 파일을 만듭니다. - 다음 모드를
exo_player_control_view.xml에 삽입하여 플레이 버튼, 일시중지 버튼, 로고가 포함된ImageView를 추가합니다.
exo_player**_control_view.xml**
<?xml version="1.0" encoding="utf-8"?>
<LinearLayout
   xmlns:android="http://schemas.android.com/apk/res/android"
   android:layout_width="match_parent"
   android:layout_height="wrap_content"
   android:layout_gravity="bottom"
   android:layoutDirection="ltr"
   android:background="#CC000000"
   android:orientation="vertical">

 <LinearLayout
   android:layout_width="match_parent"
   android:layout_height="wrap_content"
   android:gravity="center"
   android:paddingTop="4dp"
   android:orientation="horizontal">

   <ImageButton android:id="@id/exo_play"
      style="@style/ExoMediaButton.Play"/>

   <ImageButton android:id="@id/exo_pause"
      style="@style/ExoMediaButton.Pause"/>

 </LinearLayout>

 <ImageView
     android:contentDescription="@string/logo"
     android:src="@drawable/google_logo"
     android:layout_width="match_parent"
     android:layout_height="wrap_content"/>

</LinearLayout>
여기서는 고유한 요소를 추가하고 표준 컨트롤 요소와 혼합할 수 있는 방법을 보여줍니다. 이제 ExoPlayerView는 맞춤 컨트롤을 사용하며, 컨트롤 상호작용 시 숨기기와 표시를 위한 모든 로직은 보존됩니다.
8. 축하합니다
축하합니다. ExoPlayer와 앱의 통합에 관해 많은 내용을 알아봤습니다.
자세히 알아보기
ExoPlayer에 관해 자세히 알아보려면 개발자 가이드와 소스 코드를 확인하고 ExoPlayer 블로그를 구독하세요.