
1. Создайте Flutter-приложение на основе Gemini.
Что вы построите
В этом практическом занятии вы создадите Colorist — интерактивное Flutter-приложение, которое интегрирует возможности API Gemini непосредственно в ваше Flutter-приложение. Всегда хотели позволить пользователям управлять вашим приложением с помощью естественного языка, но не знали, с чего начать? Это практическое занятие покажет вам, как это сделать.
Приложение Colorist позволяет пользователям описывать цвета на естественном языке (например, «оранжевый цвет заката» или «глубокий синий цвет океана»), и вот что оно собой представляет:
- Обрабатывает эти описания с помощью API Gemini от Google.
- Интерпретирует описания в точные значения цвета RGB.
- Отображает цвет на экране в режиме реального времени.
- Предоставляет технические характеристики цвета и интересную информацию о цвете.
- Сохраняет историю недавно сгенерированных цветов.

Приложение имеет интерфейс с разделенным экраном: с одной стороны — цветная область отображения и интерактивная система чата, а с другой — подробная панель журнала, отображающая необработанные взаимодействия с LLM. Этот журнал позволяет лучше понять, как на самом деле работает интеграция LLM.
Почему это важно для разработчиков Flutter
LLM-ы совершают революцию в том, как пользователи взаимодействуют с приложениями, но их эффективная интеграция в мобильные и настольные приложения сопряжена с уникальными трудностями. Этот практический семинар научит вас практическим шаблонам, выходящим за рамки простых вызовов API.
Ваш путь обучения
В этом пошаговом руководстве вы узнаете, как создать Colorist:
- Настройка проекта — вы начнёте с базовой структуры приложения Flutter и пакета
colorist_ui. - Базовая интеграция с Gemini — подключите ваше приложение к Firebase AI Logic и реализуйте коммуникацию LLM.
- Эффективные подсказки — создайте системную подсказку, которая поможет магистру права понять описания цветов.
- Объявления функций — определяют инструменты, которые LLM может использовать для установки цветов в вашем приложении.
- Обработка инструментов — обработка вызовов функций из LLM и их привязка к состоянию вашего приложения.
- Потоковая передача ответов — улучшите пользовательский опыт с помощью потоковой передачи ответов LLM в реальном времени.
- Синхронизация контекста LLM — создание целостного пользовательского опыта путем информирования LLM о действиях пользователя.
Что вы узнаете
- Настройка Firebase AI Logic для приложений Flutter
- Разработайте эффективные системные подсказки для управления поведением LLM.
- Реализуйте объявления функций , которые обеспечивают связь между естественным языком и возможностями приложения.
- Обработка потоковых ответов для обеспечения адаптивного пользовательского интерфейса
- Синхронизация состояния между событиями пользовательского интерфейса и LLM.
- Управление состоянием диалога LLM с помощью Riverpod
- Обрабатывайте ошибки корректно в приложениях, использующих LLM.
Предварительный просмотр кода: Пример того, что вы будете реализовывать.
Вот пример объявления функции, которую вы создадите, чтобы LLM мог устанавливать цвета в вашем приложении:
FunctionDeclaration get setColorFuncDecl => FunctionDeclaration(
  'set_color',
  'Set the color of the display square based on red, green, and blue values.',
  parameters: {
    'red': Schema.number(description: 'Red component value (0.0 - 1.0)'),
    'green': Schema.number(description: 'Green component value (0.0 - 1.0)'),
    'blue': Schema.number(description: 'Blue component value (0.0 - 1.0)'),
  },
);
Видеообзор этого практического занятия.
Посмотрите, как Крейг Лабенц и Эндрю Брогдон обсуждают этот практический урок в выпуске #59 Observable Flutter:
Предварительные требования
Чтобы получить максимальную пользу от этого практического занятия, вам потребуется:
- Опыт разработки на Flutter — знание основ Flutter и синтаксиса Dart.
- Знание асинхронного программирования — понимание Futures, async/await и потоков.
- Для настройки Firebase вам потребуется учетная запись Google.
Давайте начнём создавать ваше первое Flutter-приложение на основе LLM!
2. Настройка проекта и эхо-сервис
На первом этапе вы настроите структуру проекта и реализуете эхо-сервис, который позже будет заменен интеграцией с API Gemini. Это позволит определить архитектуру приложения и убедиться в корректной работе пользовательского интерфейса перед добавлением сложных вызовов LLM.
Что вы узнаете на этом этапе
- Настройка проекта Flutter с необходимыми зависимостями
- Работа с пакетом
colorist_uiдля компонентов пользовательского интерфейса. - Реализация службы эхо-сообщений и её подключение к пользовательскому интерфейсу.
Создайте новый проект Flutter.
Для начала создайте новый проект Flutter с помощью следующей команды:
flutter create -e colorist --platforms=android,ios,macos,web,windows
Флаг -e указывает на то, что вы хотите создать пустой проект без приложения- counter по умолчанию. Приложение разработано для работы на настольных компьютерах, мобильных устройствах и в веб-браузере. Однако в настоящее время flutterfire не поддерживает Linux.
Добавить зависимости
Перейдите в каталог вашего проекта и добавьте необходимые зависимости:
cd colorist
flutter pub add colorist_ui flutter_riverpod riverpod_annotation
flutter pub add --dev build_runner riverpod_generator riverpod_lint json_serializable custom_lint
Это добавит следующие ключевые пакеты:
-
colorist_ui: Пользовательский пакет, предоставляющий компоненты пользовательского интерфейса для приложения Colorist. -
flutter_riverpodиriverpod_annotation: Для управления состоянием -
logging: для структурированного ведения журналов. - Зависимости разработки для генерации кода и проверки синтаксиса.
Ваш pubspec.yaml будет выглядеть примерно так:
pubspec.yaml
name: colorist
description: "A new Flutter project."
publish_to: 'none'
version: 0.1.0

environment:
  sdk: ^3.9.2

dependencies:
  flutter:
    sdk: flutter
  colorist_ui: ^0.3.0
  flutter_riverpod: ^3.0.0
  riverpod_annotation: ^3.0.0

dev_dependencies:
  flutter_test:
    sdk: flutter
  flutter_lints: ^6.0.0
  build_runner: ^2.7.1
  riverpod_generator: ^3.0.0
  riverpod_lint: ^3.0.0
  json_serializable: ^6.11.1

flutter:
  uses-material-design: true
Настройка параметров анализа
Добавьте custom_lint в файл analysis_options.yaml , расположенный в корне вашего проекта:
include: package:flutter_lints/flutter.yaml

analyzer:
  plugins:
    - custom_lint
Эта конфигурация позволяет использовать специальные проверки кода Riverpod для поддержания его качества.
Реализуйте файл main.dart
Замените содержимое файла lib/main.dart следующим:
lib/main.dart
import 'package:colorist_ui/colorist_ui.dart';
import 'package:flutter/material.dart';
import 'package:flutter_riverpod/flutter_riverpod.dart';

void main() async {
  runApp(ProviderScope(child: MainApp()));
}

class MainApp extends ConsumerWidget {
  const MainApp({super.key});

  @override
  Widget build(BuildContext context, WidgetRef ref) {
    return MaterialApp(
      theme: ThemeData(
        colorScheme: ColorScheme.fromSeed(seedColor: Colors.deepPurple),
      ),
      home: MainScreen(
        sendMessage: (message) {
          sendMessage(message, ref);
        },
      ),
    );
  }

  // A fake LLM that just echoes back what it receives.
  void sendMessage(String message, WidgetRef ref) {
    final chatStateNotifier = ref.read(chatStateProvider.notifier);
    final logStateNotifier = ref.read(logStateProvider.notifier);

    chatStateNotifier.addUserMessage(message);
    logStateNotifier.logUserText(message);
    chatStateNotifier.addLlmMessage(message, MessageState.complete);
    logStateNotifier.logLlmText(message);
  }
}
Это позволяет настроить Flutter-приложение, реализующее службу эхо-ответа, которая имитирует поведение LLM, возвращая сообщение пользователя.
Понимание архитектуры
Давайте уделим минуту, чтобы разобраться в архитектуре приложения colorist :
Пакет colorist_ui
Пакет colorist_ui предоставляет готовые компоненты пользовательского интерфейса и инструменты управления состоянием:
- MainScreen : Основной компонент пользовательского интерфейса, отображающий:
- Режим разделенного экрана на рабочем столе (область взаимодействия и панель журнала).
- Вкладочный интерфейс на мобильных устройствах
- Цветной дисплей, интерфейс чата и миниатюры истории.
- Управление состоянием : приложение использует несколько уведомлений о состоянии:
- ChatStateNotifier : Управляет сообщениями чата.
- ColorStateNotifier : управляет текущим цветом и историей изменений.
- LogStateNotifier : Управляет записями журнала для отладки.
- Обработка сообщений : Приложение использует модель сообщений с различными состояниями:
- Сообщения пользователя : Введены пользователем
- Сообщения LLM : генерируются LLM (или вашей службой эхо-ответа на данный момент).
- MessageState : Отслеживает, завершены ли сообщения LLM или они все еще находятся в потоке.
Архитектура приложения
Приложение имеет следующую архитектуру:
- Слой пользовательского интерфейса : предоставляется пакетом
colorist_ui - Управление состоянием : Использует Riverpod для реактивного управления состоянием.
- Уровень сервисов : В настоящее время содержит простой сервис эхо-ответа, который будет заменен сервисом чата Gemini.
- Интеграция с LLM : будет добавлена на последующих этапах.
Такое разделение позволяет сосредоточиться на внедрении интеграции LLM, в то время как компоненты пользовательского интерфейса уже подготовлены.
Запустите приложение
Запустите приложение с помощью следующей команды:
flutter run -d DEVICE
Замените DEVICE на целевое устройство, например, macos , windows , chrome или идентификатор устройства.
Теперь вы должны увидеть приложение Colorist со следующим содержимым:
- Область отображения цвета с цветом по умолчанию
- Интерфейс чата, где можно вводить сообщения.
- Панель журнала, отображающая взаимодействие в чате.
Попробуйте набрать сообщение типа "Я хотел бы темно-синий цвет" и нажмите "Отправить". Сервис эхо-ответа просто повторит ваше сообщение. На последующих этапах вы замените это на фактическую интерпретацию цвета с помощью Firebase AI Logic.
Что дальше?
На следующем шаге вы настроите Firebase и реализуете базовую интеграцию с API Gemini, чтобы заменить ваш сервис Echo сервисом чата Gemini. Это позволит приложению интерпретировать описания цветов и предоставлять интеллектуальные ответы.
Поиск неисправностей
Проблемы с пакетами пользовательского интерфейса
Если у вас возникли проблемы с пакетом colorist_ui :
- Убедитесь, что вы используете последнюю версию.
- Убедитесь, что вы правильно добавили зависимость.
- Проверьте наличие конфликтующих версий пакетов.
Ошибки сборки
Если вы видите ошибки сборки:
- Убедитесь, что у вас установлена последняя стабильная версия Flutter SDK.
- Выполните команду
flutter cleanа затемflutter pub get - Проверьте вывод консоли на наличие конкретных сообщений об ошибках.
Основные изученные понятия
- Настройка проекта Flutter с необходимыми зависимостями
- Понимание архитектуры приложения и обязанностей его компонентов.
- Реализация простого сервиса, имитирующего поведение LLM.
- Подключение сервиса к компонентам пользовательского интерфейса.
- Использование Riverpod для управления состоянием
3. Базовая интеграция чата Gemini
На этом шаге вы замените службу эхо-ответа из предыдущего шага интеграцией с API Gemini с использованием Firebase AI Logic. Вы настроите Firebase, укажете необходимые провайдеры и реализуете базовую службу чата, которая будет взаимодействовать с API Gemini.
Что вы узнаете на этом этапе
- Настройка Firebase в приложении Flutter
- Настройка Firebase AI Logic для доступа к Gemini.
- Создание провайдеров Riverpod для сервисов Firebase и Gemini.
- Реализация базового чат-сервиса с использованием API Gemini.
- Обработка асинхронных ответов API и состояний ошибок.
Настройка Firebase
Для начала вам нужно настроить Firebase для вашего проекта Flutter. Это включает в себя создание проекта Firebase, добавление в него вашего приложения и настройку необходимых параметров Firebase AI Logic.
Создайте проект Firebase.
- Перейдите в консоль Firebase и войдите в систему, используя свою учетную запись Google.
- Нажмите «Создать проект Firebase» или выберите существующий проект.
- Следуйте инструкциям мастера настройки, чтобы создать свой проект.
Настройте Firebase AI Logic в своем проекте Firebase.
- В консоли Firebase перейдите к своему проекту.
- В левой боковой панели выберите AI .
- В выпадающем меню «Искусственный интеллект» выберите «Логика ИИ» .
- В карточке Firebase AI Logic выберите «Начать» .
- Следуйте инструкциям, чтобы включить API разработчика Gemini для вашего проекта.
Установите FlutterFire CLI.
FlutterFire CLI упрощает настройку Firebase в приложениях Flutter:
dart pub global activate flutterfire_cli
Добавьте Firebase в ваше Flutter-приложение
- Добавьте в свой проект пакеты Firebase core и Firebase AI Logic:
flutter pub add firebase_core firebase_ai
- Выполните команду настройки FlutterFire:
flutterfire configure
Эта команда выполнит следующее:
- Вам будет предложено выбрать только что созданный вами проект Firebase.
- Зарегистрируйте свои приложения Flutter в Firebase.
- Создайте файл
firebase_options.dartс конфигурацией вашего проекта.
Эта команда автоматически определит выбранные вами платформы (iOS, Android, macOS, Windows, web) и соответствующим образом их настроит.
Конфигурация, специфичная для платформы
Для работы Firebase требуются минимальные версии, превышающие стандартные для Flutter. Также необходим доступ к сети для взаимодействия с серверами Firebase AI Logic.
Настройка разрешений macOS
Для macOS необходимо включить доступ к сети в настройках вашего приложения:
- Откройте
macos/Runner/DebugProfile.entitlementsи добавьте:
macos/Runner/DebugProfile.entitlements
<key>com.apple.security.network.client</key>
<true/>
- Также откройте
macos/Runner/Release.entitlementsи добавьте ту же запись.
Настройка параметров iOS
Для iOS обновите минимальную версию в верхней части ios/Podfile :
ios/Podfile
# Firebase requires at least iOS 15.0
platform :ios, '15.0'
Создайте поставщиков моделей Gemini.
Теперь вам нужно создать провайдеры Riverpod для Firebase и Gemini. Создайте новый файл lib/providers/gemini.dart :
lib/providers/gemini.dart
import 'dart:async';

import 'package:firebase_ai/firebase_ai.dart';
import 'package:firebase_core/firebase_core.dart';
import 'package:riverpod_annotation/riverpod_annotation.dart';

import '../firebase_options.dart';

part 'gemini.g.dart';

@Riverpod(keepAlive: true)
Future<FirebaseApp> firebaseApp(Ref ref) =>
    Firebase.initializeApp(options: DefaultFirebaseOptions.currentPlatform);

@Riverpod(keepAlive: true)
Future<GenerativeModel> geminiModel(Ref ref) async {
  await ref.watch(firebaseAppProvider.future);

  final model = FirebaseAI.googleAI().generativeModel(
    model: 'gemini-3.1-flash-lite',
  );
  return model;
}

@Riverpod(keepAlive: true)
Future<ChatSession> chatSession(Ref ref) async {
  final model = await ref.watch(geminiModelProvider.future);
  return model.startChat();
}
Этот файл определяет основу для трех ключевых поставщиков. Эти поставщики генерируются генераторами кода Riverpod при запуске dart run build_runner . В этом коде используется подход Riverpod 3, основанный на аннотациях, с обновленными шаблонами поставщиков.
-
firebaseAppProvider: Инициализирует Firebase с конфигурацией вашего проекта. -
geminiModelProvider: Создает экземпляр генеративной модели Gemini. -
chatSessionProvider: Создает и поддерживает сессию чата с использованием модели Gemini.
Аннотация keepAlive: true в чате гарантирует, что он сохраняется на протяжении всего жизненного цикла приложения, поддерживая контекст разговора.
Внедрить чат-сервис Gemini.
Создайте новый файл lib/services/gemini_chat_service.dart для реализации службы чата:
lib/services/gemini_chat_service.dart
import 'dart:async';

import 'package:colorist_ui/colorist_ui.dart';
import 'package:firebase_ai/firebase_ai.dart';
import 'package:riverpod_annotation/riverpod_annotation.dart';

import '../providers/gemini.dart';

part 'gemini_chat_service.g.dart';

class GeminiChatService {
  GeminiChatService(this.ref);
  final Ref ref;

  Future<void> sendMessage(String message) async {
    final chatSession = await ref.read(chatSessionProvider.future);
    final chatStateNotifier = ref.read(chatStateProvider.notifier);
    final logStateNotifier = ref.read(logStateProvider.notifier);

    chatStateNotifier.addUserMessage(message);
    logStateNotifier.logUserText(message);
    final llmMessage = chatStateNotifier.createLlmMessage();
    try {
      final response = await chatSession.sendMessage(Content.text(message));

      final responseText = response.text;
      if (responseText != null) {
        logStateNotifier.logLlmText(responseText);
        chatStateNotifier.appendToMessage(llmMessage.id, responseText);
      }
    } catch (e, st) {
      logStateNotifier.logError(e, st: st);
      chatStateNotifier.appendToMessage(
        llmMessage.id,
        "\nI'm sorry, I encountered an error processing your request. "
        "Please try again.",
      );
    } finally {
      chatStateNotifier.finalizeMessage(llmMessage.id);
    }
  }
}

@Riverpod(keepAlive: true)
GeminiChatService geminiChatService(Ref ref) => GeminiChatService(ref);
Данная услуга:
- Принимает сообщения от пользователей и отправляет их в API Gemini.
- Обновляет интерфейс чата ответами от модели.
- Регистрирует все коммуникации для удобства понимания реального процесса обучения по программе LLM.
- Обрабатывает ошибки с предоставлением соответствующей обратной связи пользователю.
Примечание: На данном этапе окно журнала будет выглядеть практически идентично окну чата. Журнал станет более интересным, когда вы добавите вызовы функций, а затем и потоковые ответы.
Сгенерировать код Riverpod
Выполните команду build runner для генерации необходимого кода Riverpod:
dart run build_runner build --delete-conflicting-outputs
Это создаст файлы .g.dart , необходимые для работы Riverpod.
Обновите файл main.dart
Обновите файл lib/main.dart , чтобы использовать новый чат-сервис Gemini:
lib/main.dart
import 'package:colorist_ui/colorist_ui.dart';
import 'package:flutter/material.dart';
import 'package:flutter_riverpod/flutter_riverpod.dart';

import 'providers/gemini.dart';
import 'services/gemini_chat_service.dart';

void main() async {
  runApp(ProviderScope(child: MainApp()));
}

class MainApp extends ConsumerWidget {
  const MainApp({super.key});

  @override
  Widget build(BuildContext context, WidgetRef ref) {
    final model = ref.watch(geminiModelProvider);

    return MaterialApp(
      theme: ThemeData(
        colorScheme: ColorScheme.fromSeed(seedColor: Colors.deepPurple),
      ),
      home: model.when(
        data: (data) => MainScreen(
          sendMessage: (text) {
            ref.read(geminiChatServiceProvider).sendMessage(text);
          },
        ),
        loading: () => LoadingScreen(message: 'Initializing Gemini Model'),
        error: (err, st) => ErrorScreen(error: err),
      ),
    );
  }
}
Основные изменения в этом обновлении:
- Замена сервиса Echo на чат-сервис на основе API Gemini.
- Добавление экранов загрузки и ошибок с использованием паттерна
AsyncValueиз Riverpod с методомwhen - Подключение пользовательского интерфейса к вашей новой службе чата через функцию обратного вызова
sendMessage
Запустите приложение
Запустите приложение с помощью следующей команды:
flutter run -d DEVICE
Замените DEVICE на целевое устройство, например, macos , windows , chrome или идентификатор устройства.
Теперь при вводе сообщения оно будет отправлено в API Gemini, и вы получите ответ от LLM, а не эхо-ответ. В панели журнала будут отображаться взаимодействия с API.
Понимание коммуникации в рамках программы LLM
Давайте на мгновение разберемся, что происходит при взаимодействии с API Gemini:
Поток коммуникации
- Ввод данных пользователем : пользователь вводит текст в интерфейс чата.
- Форматирование запроса : приложение форматирует текст в виде объекта
Contentдля API Gemini. - Взаимодействие через API : текст отправляется в API Gemini через Firebase AI Logic.
- Обработка LLM : Модель Gemini обрабатывает текст и генерирует ответ.
- Обработка ответа : приложение получает ответ и обновляет пользовательский интерфейс.
- Ведение журналов : Вся переписка регистрируется для обеспечения прозрачности.
Сеансы чата и контекст разговора
В чате Gemini сохраняется контекст между сообщениями, что позволяет вести диалог. Это означает, что LLM «запоминает» предыдущие обмены сообщениями в текущей сессии, обеспечивая более связное общение.
Аннотация keepAlive: true в вашем поставщике сеансов чата гарантирует сохранение этого контекста на протяжении всего жизненного цикла приложения. Этот постоянный контекст имеет решающее значение для поддержания естественного хода разговора с LLM.
Что дальше?
На данном этапе вы можете запрашивать у Gemini API что угодно, поскольку нет никаких ограничений на то, на что он будет отвечать. Например, вы можете запросить краткое изложение Войны Роз, что не имеет отношения к назначению вашего приложения для работы с цветом.
На следующем шаге вы создадите системную подсказку, которая поможет Gemini более эффективно интерпретировать описания цветов. Это продемонстрирует, как настроить поведение LLM под нужды конкретного приложения и сосредоточить его возможности на предметной области вашего приложения.
Поиск неисправностей
Проблемы с конфигурацией Firebase
Если у вас возникли ошибки при инициализации Firebase:
- Убедитесь, что файл
firebase_options.dartбыл сгенерирован корректно. - Убедитесь, что вы перешли на тарифный план Blaze для доступа к Firebase AI Logic.
ошибки доступа к API
Если при доступе к API Gemini возникают ошибки:
- Убедитесь, что в вашем проекте Firebase правильно настроена система выставления счетов.
- Убедитесь, что Firebase AI Logic и Cloud AI API включены в вашем проекте Firebase.
- Проверьте сетевое подключение и настройки брандмауэра.
- Убедитесь, что название модели (
gemini-3.1-flash-lite) указано правильно и доступно.
Вопросы контекста разговора
Если вы заметили, что Близнецы не запоминают предыдущий контекст чата:
- Убедитесь, что функция
chatSessionаннотирована с помощью@Riverpod(keepAlive: true) - Убедитесь, что вы используете одну и ту же сессию чата для всех обменов сообщениями.
- Перед отправкой сообщений убедитесь, что сессия чата инициализирована должным образом.
Проблемы, специфичные для платформы
По вопросам, специфичным для конкретной платформы:
- iOS/macOS: Убедитесь, что установлены необходимые права доступа и настроены минимальные версии.
- Android: Убедитесь, что минимальная версия SDK установлена правильно.
- Проверьте сообщения об ошибках, специфичные для вашей платформы, в консоли.
Основные изученные понятия
- Настройка Firebase в приложении Flutter
- Настройка Firebase AI Logic для доступа к Gemini
- Создание провайдеров Riverpod для асинхронных сервисов
- Внедрение чат-сервиса, взаимодействующего с магистрантом права.
- Обработка асинхронных состояний API (загрузка, ошибка, данные)
- Понимание коммуникационного процесса и сессий чата в рамках программы LLM.
4. Эффективные подсказки для описания цветов.
На этом этапе вы создадите и реализуете системную подсказку, которая поможет Gemini интерпретировать описания цветов. Системные подсказки — это мощный способ настройки поведения LLM для конкретных задач без изменения кода.
Что вы узнаете на этом этапе
- Понимание системных подсказок и их важности в приложениях LLM.
- Разработка эффективных подсказок для задач, специфичных для конкретной области.
- Загрузка и использование системных подсказок в приложении Flutter
- Как научить магистра права предоставлять ответы в единообразном формате.
- Проверка влияния системных подсказок на поведение LLM.
Понимание системных подсказок
Прежде чем переходить к реализации, давайте разберемся, что такое системные подсказки и почему они важны:
Что такое системные подсказки?
Системная подсказка — это особый тип инструкции, предоставляемой магистру права, которая определяет контекст, правила поведения и ожидания от его ответов. В отличие от сообщений пользователя, системные подсказки:
- Определите роль и личные качества магистра права (LLM).
- Определите специализированные знания или возможности.
- Предоставьте инструкции по форматированию.
- Установите ограничения на ответы.
- Опишите, как обрабатывать различные сценарии.
Представьте себе, что системная подсказка — это «должностная инструкция» для модели LLM, которая указывает ей, как вести себя на протяжении всего разговора.
Почему важны системные подсказки
Системные подсказки имеют решающее значение для создания согласованных и полезных взаимодействий в рамках обучения на линейном языке, поскольку они:
- Обеспечение согласованности : Направьте модель на предоставление ответов в едином формате.
- Повысьте релевантность : сфокусируйте модель на вашей конкретной области (в вашем случае, цветах).
- Установите границы : определите, что модель должна и чего не должна делать.
- Улучшите пользовательский опыт : создайте более естественный и удобный шаблон взаимодействия.
- Сократите постобработку : получайте ответы в форматах, которые легче анализировать или отображать.
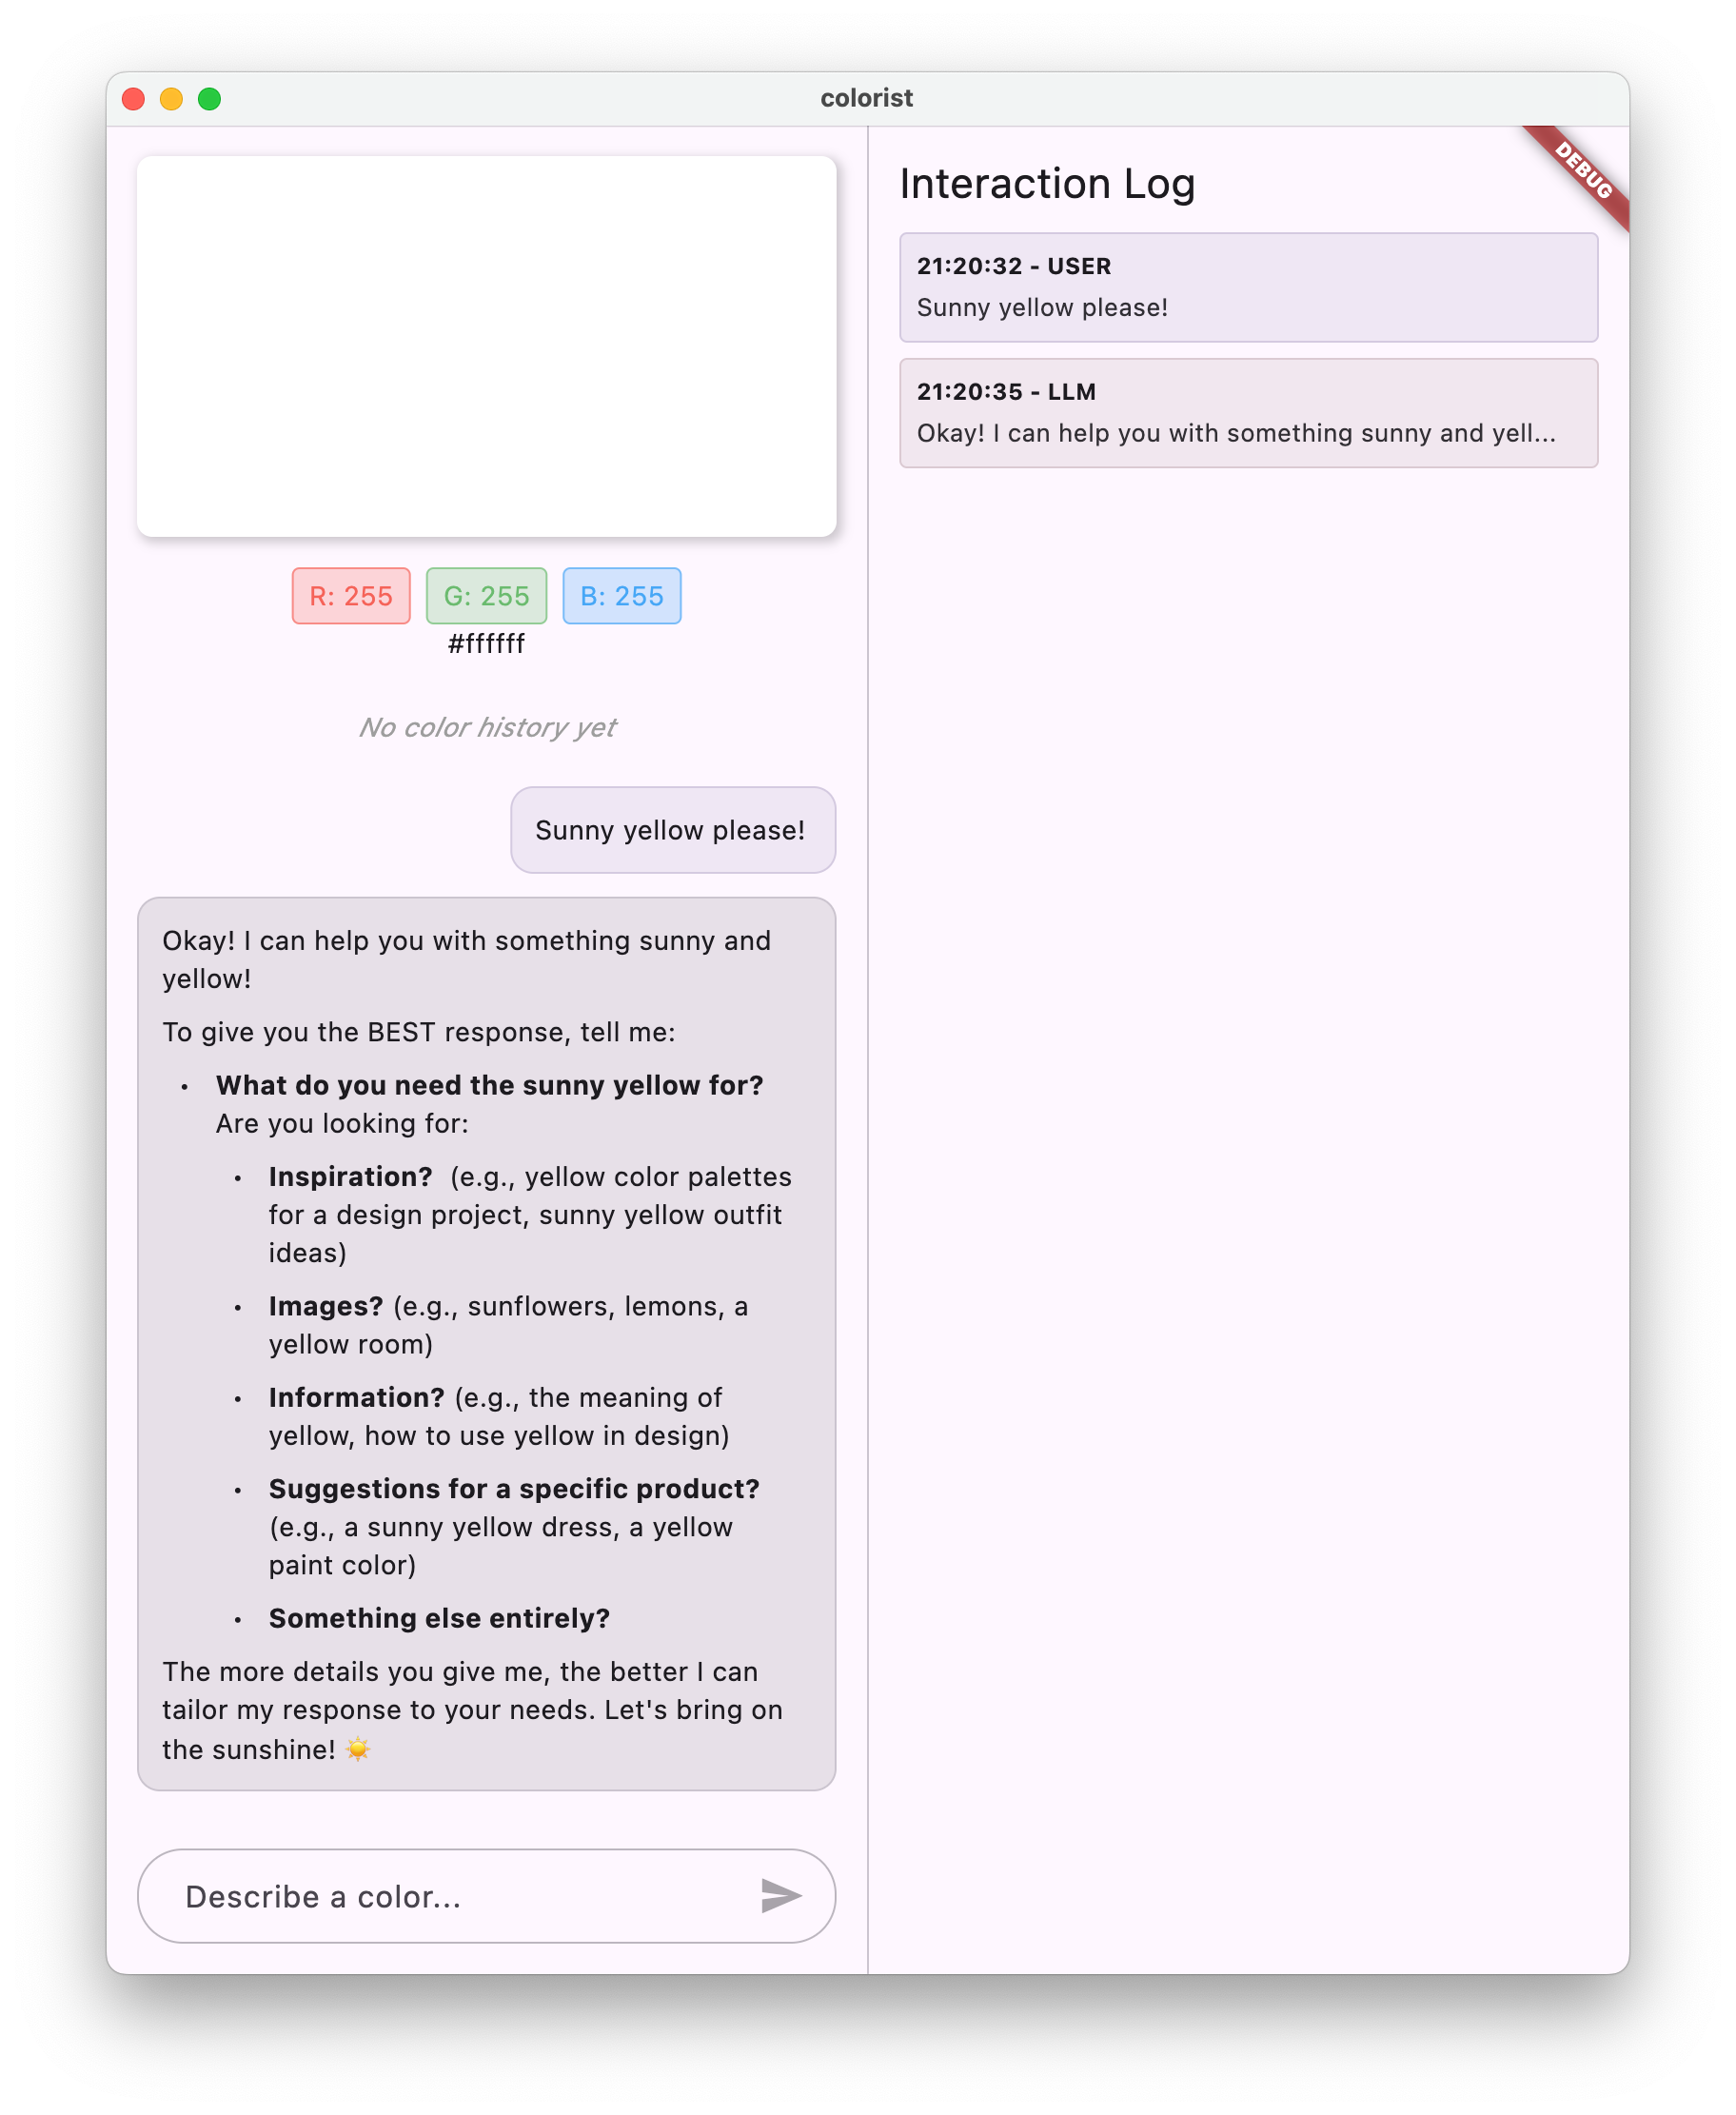
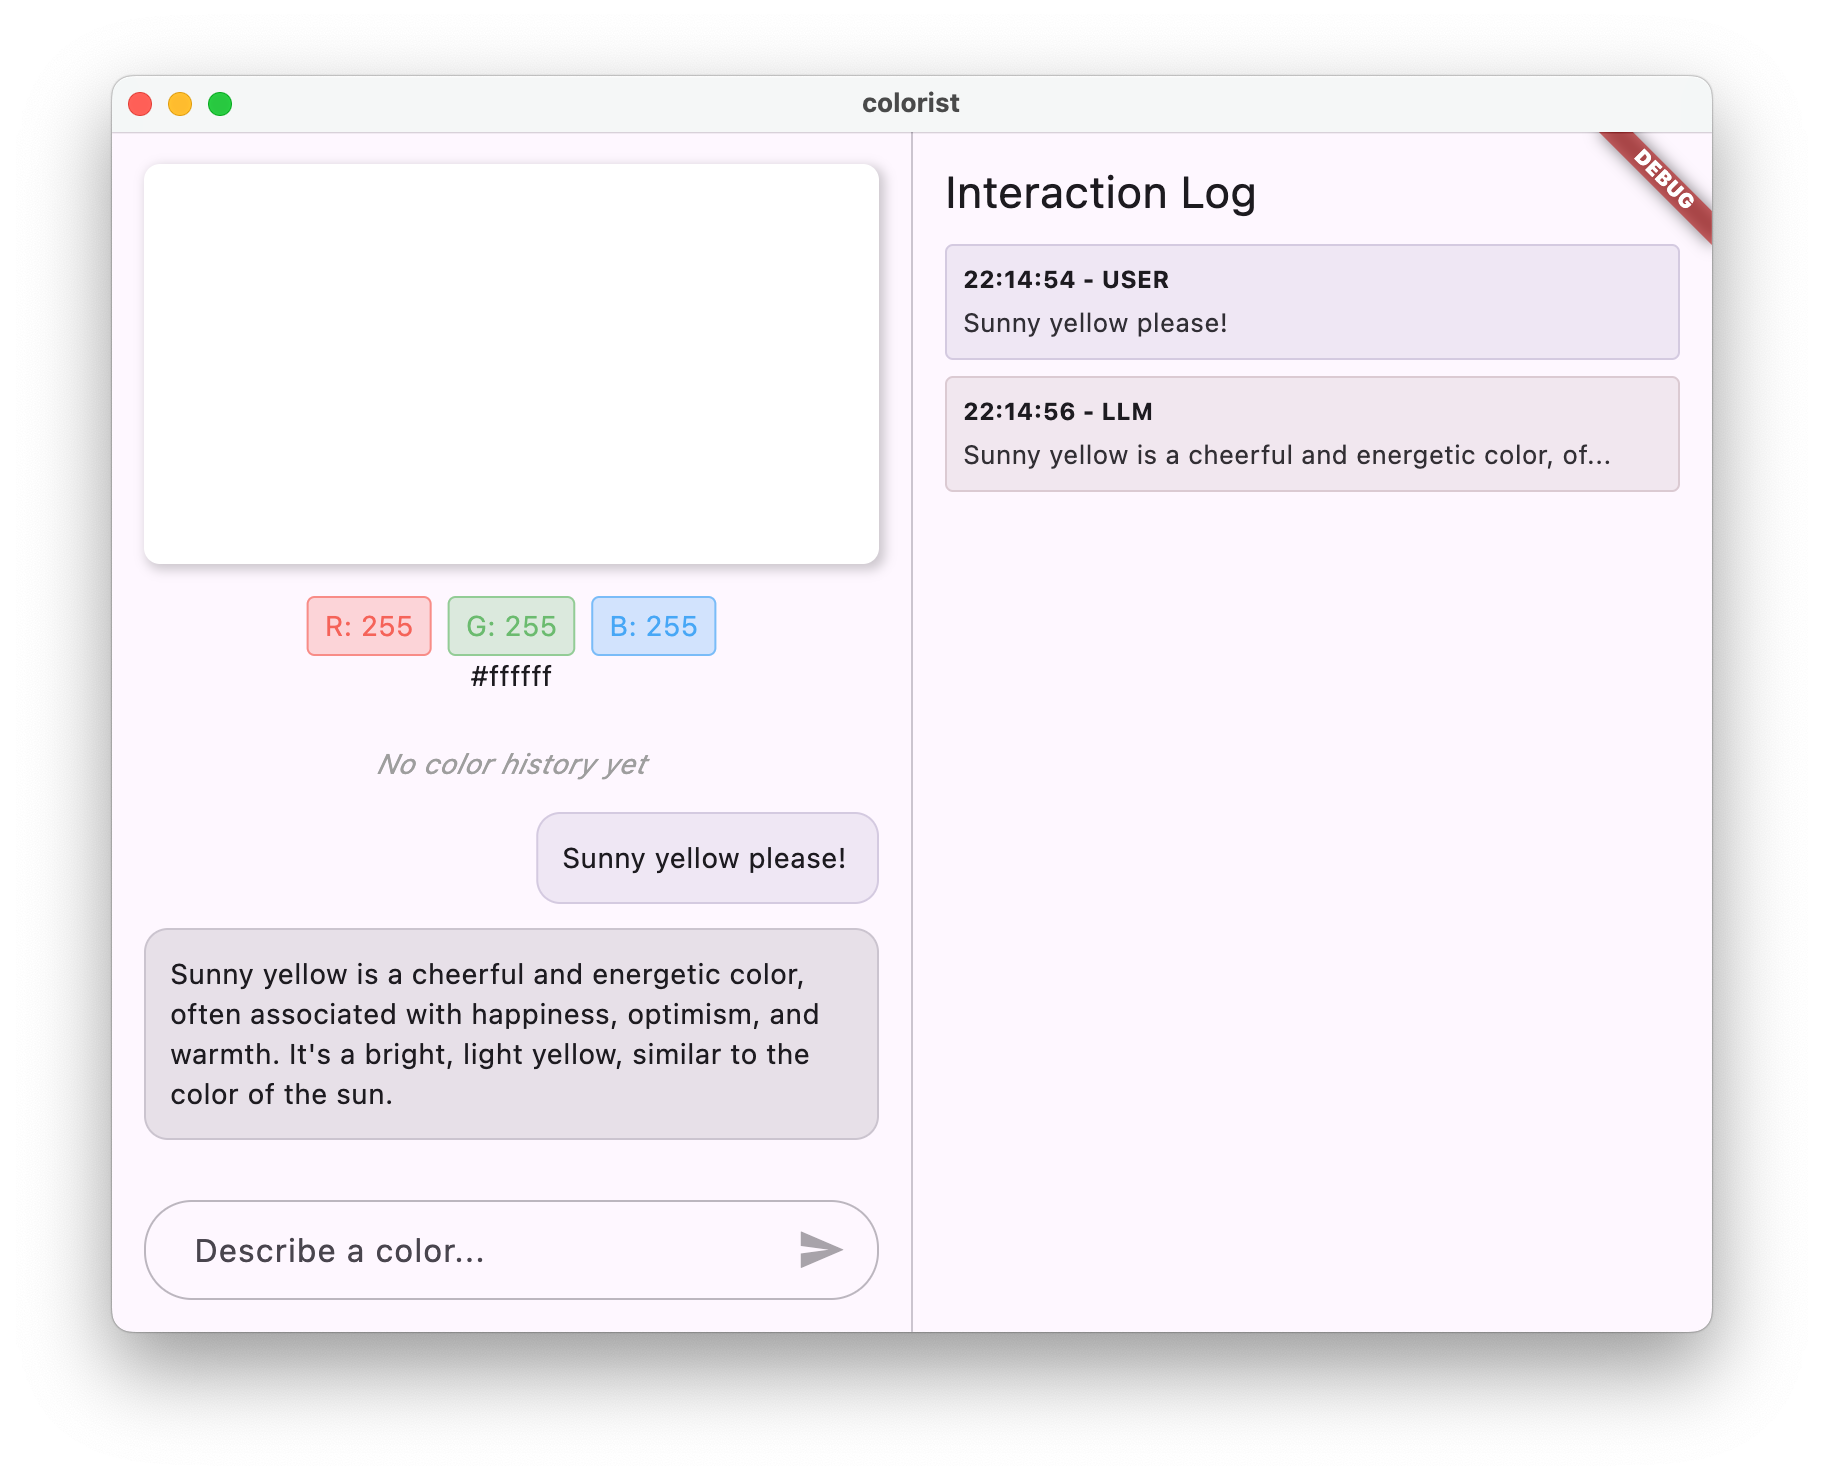
Для вашего приложения Colorist вам необходимо, чтобы LLM последовательно интерпретировал описания цветов и предоставлял значения RGB в определенном формате.
Создайте системный ресурс для подсказок.
Сначала вы создадите системный файл командной строки, который будет загружаться во время выполнения. Такой подход позволяет изменять командную строку без перекомпиляции приложения.
Создайте новый файл assets/system_prompt.md со следующим содержимым:
assets/system_prompt.md
# Colorist System Prompt
You are a color expert assistant integrated into a desktop app called Colorist. Your job is to interpret natural language color descriptions and provide the appropriate RGB values that best represent that description.
## Your Capabilities
You are knowledgeable about colors, color theory, and how to translate natural language descriptions into specific RGB values. When users describe a color, you should:
1. Analyze their description to understand the color they are trying to convey
2. Determine the appropriate RGB values (values should be between 0.0 and 1.0)
3. Respond with a conversational explanation and explicitly state the RGB values
## How to Respond to User Inputs
When users describe a color:
1. First, acknowledge their color description with a brief, friendly response
2. Interpret what RGB values would best represent that color description
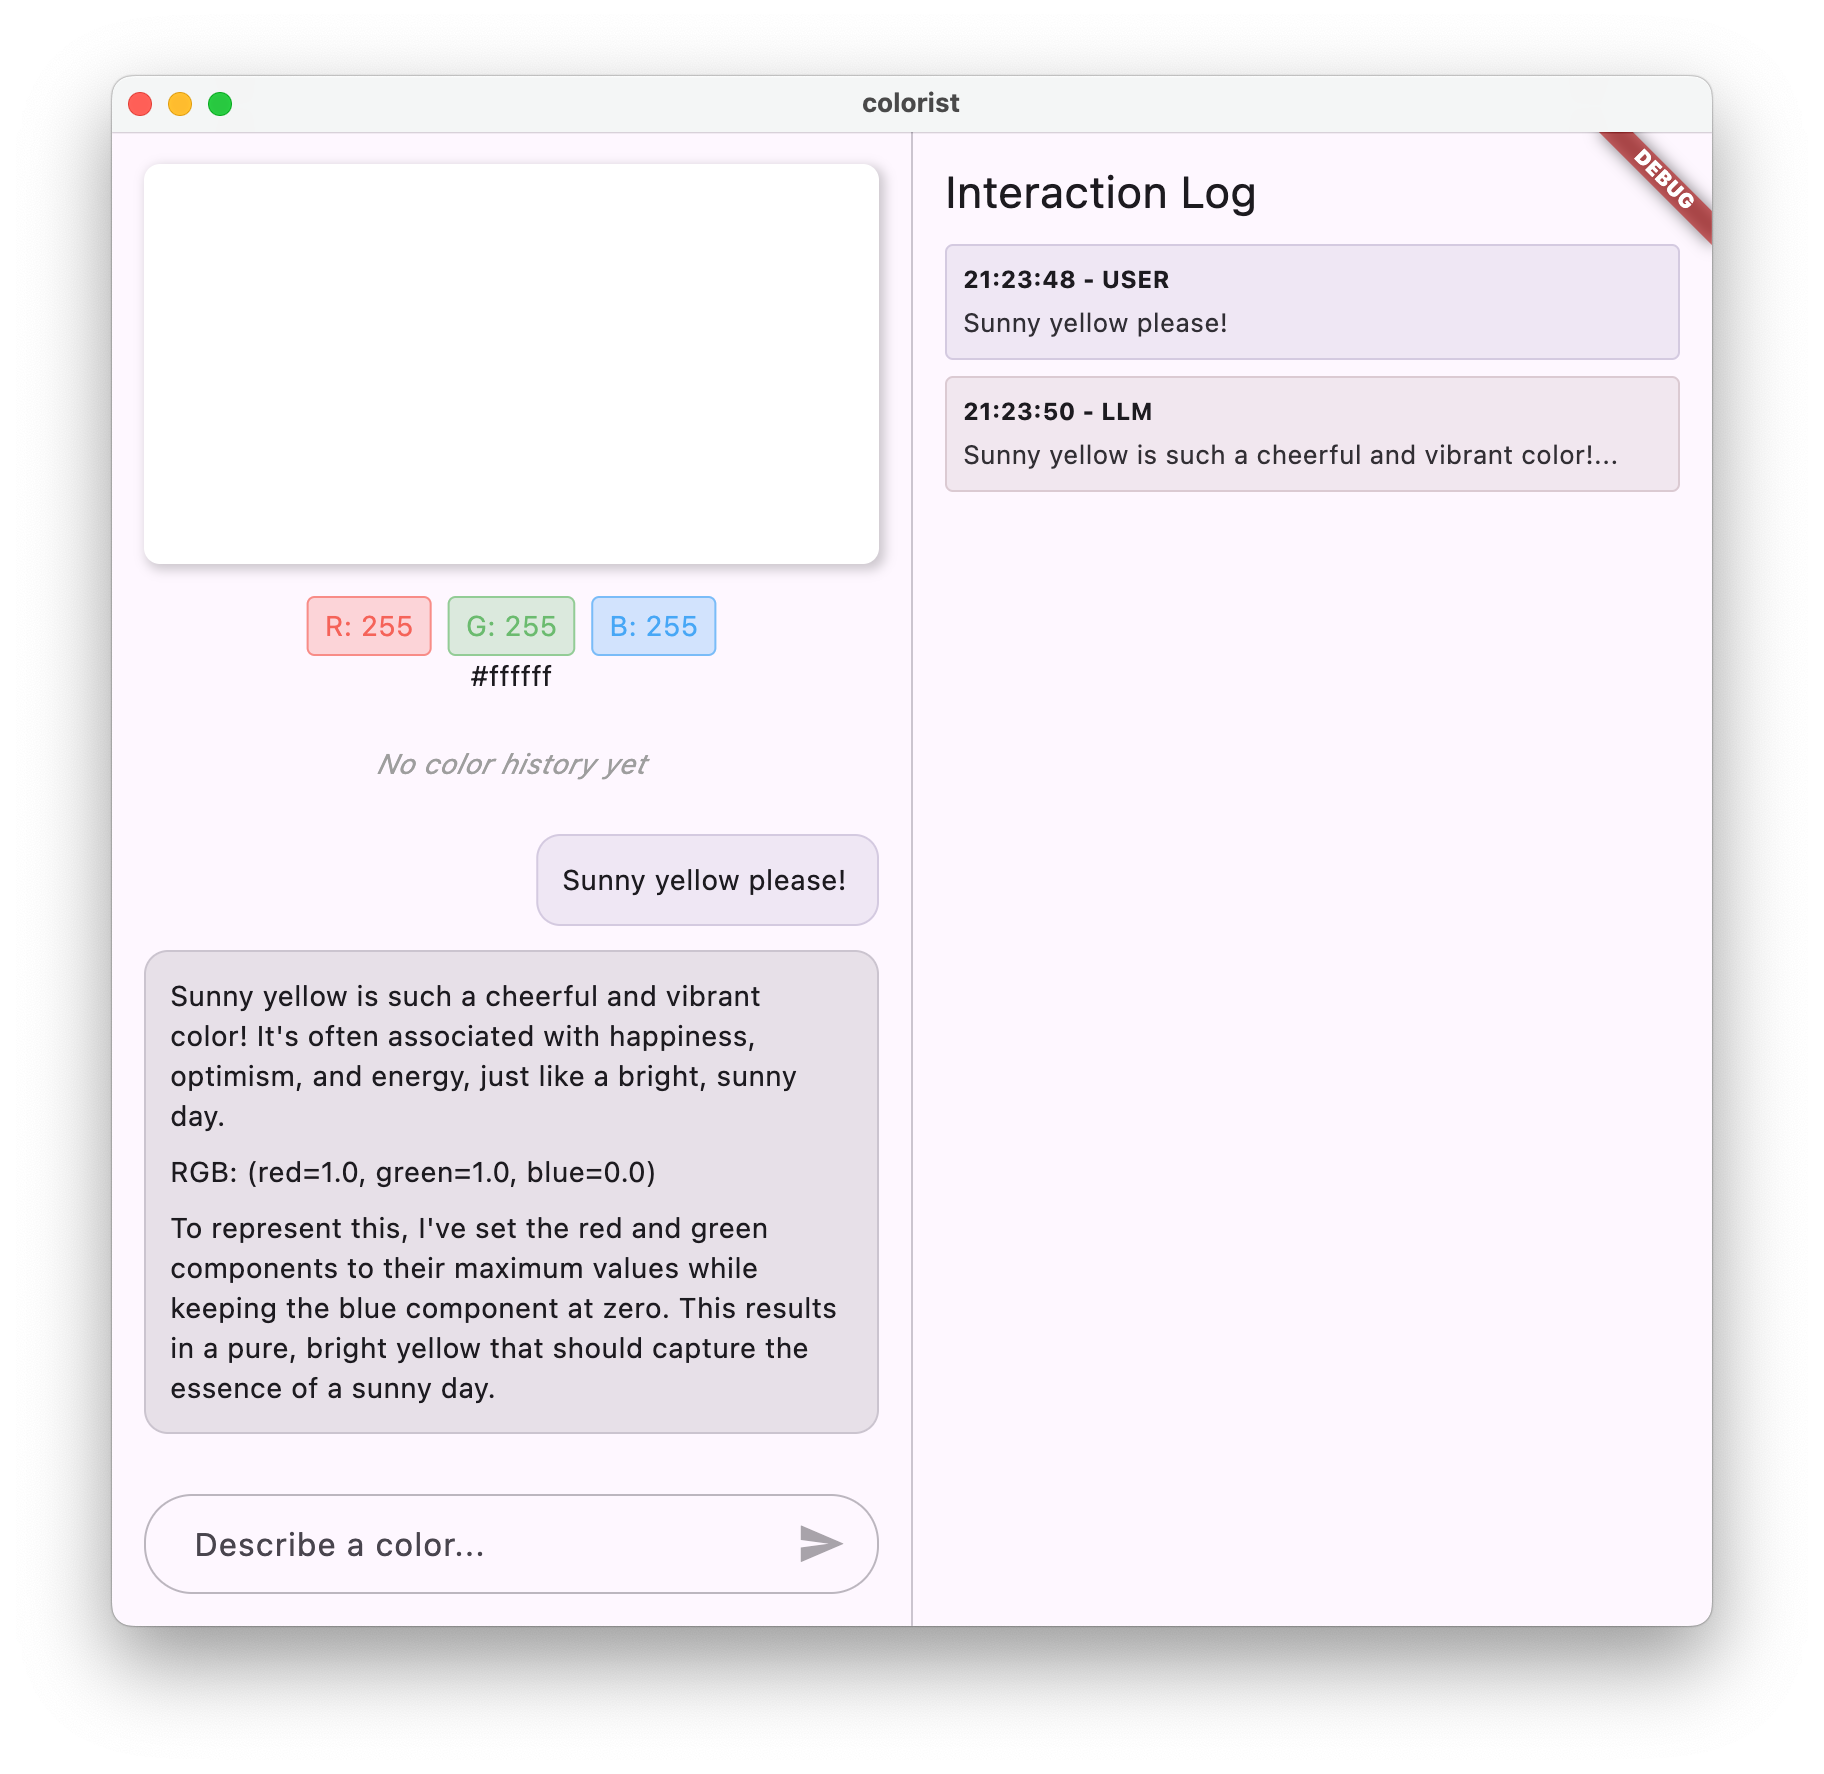
3. Always include the RGB values clearly in your response, formatted as: `RGB: (red=X.X, green=X.X, blue=X.X)`
4. Provide a brief explanation of your interpretation
Example:
User: "I want a sunset orange"
You: "Sunset orange is a warm, vibrant color that captures the golden-red hues of the setting sun. It combines a strong red component with moderate orange tones.
RGB: (red=1.0, green=0.5, blue=0.25)
I've selected values with high red, moderate green, and low blue to capture that beautiful sunset glow. This creates a warm orange with a slightly reddish tint, reminiscent of the sun low on the horizon."
## When Descriptions are Unclear
If a color description is ambiguous or unclear, please ask the user clarifying questions, one at a time.
## Important Guidelines
- Always keep RGB values between 0.0 and 1.0
- Always format RGB values as: `RGB: (red=X.X, green=X.X, blue=X.X)` for easy parsing
- Provide thoughtful, knowledgeable responses about colors
- When possible, include color psychology, associations, or interesting facts about colors
- Be conversational and engaging in your responses
- Focus on being helpful and accurate with your color interpretations
Понимание структуры системных подсказок
Давайте разберем, что делает эта подсказка:
- Определение роли : Предоставление степени магистра права (LLM) в качестве «помощника эксперта по цвету».
- Описание задачи : Основная задача определяется как преобразование цветовых описаний в значения RGB.
- Формат ответа : точно определяет, как должны быть отформатированы значения RGB для обеспечения единообразия.
- Пример обмена сообщениями : Предоставляет конкретный пример ожидаемой модели взаимодействия.
- Обработка граничных случаев : описывает, как обрабатывать нечеткие описания.
- Ограничения и рекомендации : устанавливают границы, например, поддерживают значения RGB в диапазоне от 0,0 до 1,0.
Такой структурированный подход гарантирует, что ответы LLM будут согласованными, информативными и отформатированными таким образом, чтобы их было легко анализировать при программном извлечении значений RGB.
Обновите файл pubspec.yaml
Теперь обновите нижнюю часть файла pubspec.yaml , добавив в него каталог assets:
pubspec.yaml
flutter:
  uses-material-design: true

  assets:
    - assets/
Запустите команду flutter pub get , чтобы обновить пакет ресурсов.
Создайте поставщика системных подсказок.
Создайте новый файл lib/providers/system_prompt.dart для загрузки системной подсказки:
lib/providers/system_prompt.dart
import 'package:flutter/services.dart';
import 'package:riverpod_annotation/riverpod_annotation.dart';

part 'system_prompt.g.dart';

@Riverpod(keepAlive: true)
Future<String> systemPrompt(Ref ref) =>
    rootBundle.loadString('assets/system_prompt.md');
Этот провайдер использует систему загрузки ресурсов Flutter для чтения файла командной строки во время выполнения.
Обновите поставщика модели Gemini.
Теперь измените файл lib/providers/gemini.dart , добавив в него системную подсказку:
lib/providers/gemini.dart
import 'dart:async';

import 'package:firebase_ai/firebase_ai.dart';
import 'package:firebase_core/firebase_core.dart';
import 'package:riverpod_annotation/riverpod_annotation.dart';

import '../firebase_options.dart';
import 'system_prompt.dart';                                          // Add this import

part 'gemini.g.dart';

@Riverpod(keepAlive: true)
Future<FirebaseApp> firebaseApp(Ref ref) =>
    Firebase.initializeApp(options: DefaultFirebaseOptions.currentPlatform);

@Riverpod(keepAlive: true)
Future<GenerativeModel> geminiModel(Ref ref) async {
  await ref.watch(firebaseAppProvider.future);
  final systemPrompt = await ref.watch(systemPromptProvider.future);  // Add this line

  final model = FirebaseAI.googleAI().generativeModel(
    model: 'gemini-3.1-flash-lite',
    systemInstruction: Content.system(systemPrompt),                  // And this line
  );
  return model;
}

@Riverpod(keepAlive: true)
Future<ChatSession> chatSession(Ref ref) async {
  final model = await ref.watch(geminiModelProvider.future);
  return model.startChat();
}
Ключевое изменение заключается в добавлении systemInstruction: Content.system(systemPrompt) при создании генеративной модели. Это указывает Gemini использовать ваши инструкции в качестве системной подсказки для всех взаимодействий в этом сеансе чата.
Сгенерировать код Riverpod
Выполните команду build runner для генерации необходимого кода Riverpod:
dart run build_runner build --delete-conflicting-outputs
Запустите и протестируйте приложение.
Теперь запустите приложение:
flutter run -d DEVICE
Попробуйте протестировать это с различными описаниями цветов:
- "Мне бы хотелось небесно-голубой цвет"
- "Подарите мне лесной зеленый цвет"
- "Создайте яркий оранжевый оттенок заката"
- «Мне нужен цвет свежей лаванды».
- «Покажи мне что-нибудь похожее на глубокий океанский синий цвет»
Обратите внимание, что теперь Gemini отвечает в разговорном стиле, предоставляя пояснения о цветах вместе с единообразными значениями RGB. Системная подсказка эффективно направила LLM на предоставление именно тех ответов, которые вам необходимы.
Попробуйте также запросить информацию вне контекста цветов. Например, о главных причинах Войны Роз. Вы должны заметить разницу по сравнению с предыдущим шагом.
Важность оперативного проектирования для решения специализированных задач.
Системные подсказки — это одновременно искусство и наука. Они являются критически важной частью интеграции LLM, которая может существенно повлиять на полезность модели для вашего конкретного приложения. То, что вы здесь сделали, — это своего рода разработка подсказок — адаптация инструкций для того, чтобы модель вела себя так, как это соответствует потребностям вашего приложения.
Эффективное оперативное инженерное обеспечение включает в себя:
- Четкое определение роли : установление цели программы магистратуры в области права (LLM).
- Четкие инструкции : Подробное описание того, как именно должен отвечать студент магистратуры.
- Конкретные примеры : демонстрация, а не просто рассказ о том, как выглядят хорошие ответы.
- Обработка граничных случаев : Обучение студентов магистратуры по вопросам работы с неоднозначными ситуациями.
- Требования к форматированию : Обеспечение единообразной и удобной структуры ответов.
Созданная вами системная подсказка преобразует общие возможности Gemini в специализированного помощника по интерпретации цвета, который предоставляет ответы, отформатированные специально для нужд вашего приложения. Это мощный инструмент, который можно применять во многих различных областях и задачах.
Что дальше?
На следующем этапе вы разовьете эту основу, добавив объявления функций, которые позволят LLM не просто предлагать значения RGB, но и фактически вызывать функции в вашем приложении для непосредственной установки цвета. Это демонстрирует, как LLM могут преодолеть разрыв между естественным языком и конкретными функциями приложения.
Поиск неисправностей
Проблемы с погрузкой активов
Если при загрузке системы возникнут ошибки, отобразится следующее приглашение:
- Убедитесь, что в вашем
pubspec.yamlправильно указан каталог assets. - Убедитесь, что путь в
rootBundle.loadString()совпадает с местоположением вашего файла. - Выполните команду
flutter cleanа затемflutter pub get, чтобы обновить пакет ресурсов.
Непоследовательные ответы
Если магистерская программа не всегда соответствует вашим инструкциям по форматированию:
- Попробуйте более четко указать требования к формату в системном запросе.
- Добавьте больше примеров, чтобы продемонстрировать ожидаемую закономерность.
- Убедитесь, что запрашиваемый вами формат соответствует модели.
Ограничение скорости API
Если вы столкнулись с ошибками, связанными с ограничением скорости запросов:
- Обратите внимание, что сервис Firebase AI Logic имеет ограничения по использованию.
- Рассмотрите возможность реализации логики повторных попыток с экспоненциальной задержкой.
- Проверьте консоль Firebase на наличие проблем с квотами.
Основные изученные понятия
- Понимание роли и важности системных подсказок в приложениях LLM.
- Создание эффективных заданий с четкими инструкциями, примерами и ограничениями.
- Загрузка и использование системных подсказок в приложении Flutter
- Управление поведением LLM для задач, специфичных для предметной области.
- Использование оперативного проектирования для формирования ответов LLM
На этом шаге показано, как можно добиться значительной настройки поведения LLM без изменения кода — просто предоставив четкие инструкции в командной строке системы.
5. Объявления функций для инструментов LLM
На этом шаге вы начнете работу по включению Gemini в работу вашего приложения путем реализации объявлений функций. Эта мощная функция позволяет LLM не просто предлагать значения RGB, но и фактически устанавливать их в пользовательском интерфейсе вашего приложения с помощью специализированных вызовов инструментов. Однако для просмотра выполнения запросов LLM в приложении Flutter потребуется следующий шаг.
Что вы узнаете на этом этапе
- Понимание вызова функций LLM и его преимуществ для приложений Flutter.
- Определение объявлений функций на основе схемы для Gemini
- Интеграция объявлений функций с вашей моделью Gemini.
- Обновление системного запроса для использования возможностей инструмента.
Понимание вызова функций
Прежде чем переходить к описанию объявлений функций, давайте разберемся, что это такое и почему они важны:
Что такое вызов функции?
Вызов функций (иногда называемый «использованием инструментов») — это возможность, которая позволяет студентам магистратуры в области права:
- Определите, когда для выполнения запроса пользователя будет полезно вызвать определенную функцию.
- Сгенерируйте структурированный JSON-объект с параметрами, необходимыми для этой функции.
- Позвольте вашему приложению выполнить функцию с этими параметрами.
- Получите результат работы функции и включите его в её ответ.
Вместо того чтобы просто описывать, что нужно делать, вызов функций позволяет LLM запускать конкретные действия в вашем приложении.
Почему вызов функций важен для приложений Flutter
Вызов функций создает мощный мост между естественным языком и функциональными возможностями приложения:
- Прямое действие : Пользователи могут описать свои желания на естественном языке, и приложение ответит конкретными действиями.
- Структурированный вывод : LLM выдает чистые, структурированные данные, а не текст, требующий анализа.
- Сложные операции : Позволяет LLM получать доступ к внешним данным, выполнять вычисления или изменять состояние приложения.
- Улучшенный пользовательский опыт : обеспечивает бесшовную интеграцию между общением и функционалом.
В вашем приложении Colorist вызов функции позволяет пользователям сказать: «Я хочу темно-зеленый цвет», и пользовательский интерфейс немедленно обновится этим цветом, без необходимости извлекать значения RGB из текста.
Определение объявлений функций
Создайте новый файл lib/services/gemini_tools.dart для определения объявлений ваших функций:
lib/services/gemini_tools.dart
import 'package:firebase_ai/firebase_ai.dart';
import 'package:riverpod_annotation/riverpod_annotation.dart';

part 'gemini_tools.g.dart';

class GeminiTools {
  GeminiTools(this.ref);

  final Ref ref;

  FunctionDeclaration get setColorFuncDecl => FunctionDeclaration(
    'set_color',
    'Set the color of the display square based on red, green, and blue values.',
    parameters: {
      'red': Schema.number(description: 'Red component value (0.0 - 1.0)'),
      'green': Schema.number(description: 'Green component value (0.0 - 1.0)'),
      'blue': Schema.number(description: 'Blue component value (0.0 - 1.0)'),
    },
  );

  List<Tool> get tools => [
    Tool.functionDeclarations([setColorFuncDecl]),
  ];
}

@Riverpod(keepAlive: true)
GeminiTools geminiTools(Ref ref) => GeminiTools(ref);
Понимание объявлений функций
Давайте разберем, что делает этот код:
- Именование функций : Вы называете свою функцию
set_color, чтобы четко указать ее назначение. - Описание функции : Вы предоставляете четкое описание, которое помогает магистру права понимать, когда ее следует использовать.
- Определение параметров : Вы определяете структурированные параметры с собственными описаниями:
-
red: Красная составляющая RGB, задаваемая числом от 0,0 до 1,0. -
green: Зеленый компонент RGB, задаваемый числом от 0,0 до 1,0. -
blue: синий компонент RGB, задаваемый числом от 0,0 до 1,0.
-
- Типы схем : для указания числовых значений используется
Schema.number() - Набор инструментов : Вы создаете список инструментов, содержащий объявление вашей функции.
Такой структурированный подход помогает студентам программы Gemini LLM понять:
- Когда следует вызывать эту функцию
- Какие параметры оно должно предоставить?
- Какие ограничения применяются к этим параметрам (например, диапазон значений)?
Обновите поставщика модели Gemini.
Теперь измените файл lib/providers/gemini.dart , чтобы включить объявления функций при инициализации модели Gemini:
lib/providers/gemini.dart
import 'dart:async';

import 'package:firebase_ai/firebase_ai.dart';
import 'package:firebase_core/firebase_core.dart';
import 'package:riverpod_annotation/riverpod_annotation.dart';

import '../firebase_options.dart';
import '../services/gemini_tools.dart';                              // Add this import
import 'system_prompt.dart';

part 'gemini.g.dart';

@Riverpod(keepAlive: true)
Future<FirebaseApp> firebaseApp(Ref ref) =>
    Firebase.initializeApp(options: DefaultFirebaseOptions.currentPlatform);

@Riverpod(keepAlive: true)
Future<GenerativeModel> geminiModel(Ref ref) async {
  await ref.watch(firebaseAppProvider.future);
  final systemPrompt = await ref.watch(systemPromptProvider.future);
  final geminiTools = ref.watch(geminiToolsProvider);                // Add this line

  final model = FirebaseAI.googleAI().generativeModel(
    model: 'gemini-3.1-flash-lite',
    systemInstruction: Content.system(systemPrompt),
    tools: geminiTools.tools,                                        // And this line
  );
  return model;
}

@Riverpod(keepAlive: true)
Future<ChatSession> chatSession(Ref ref) async {
  final model = await ref.watch(geminiModelProvider.future);
  return model.startChat();
}
Ключевое изменение заключается в добавлении параметра tools: geminiTools.tools при создании генеративной модели. Это позволяет Gemini знать, какие функции он может вызывать.
Обновить системное приглашение
Теперь вам нужно изменить системную подсказку, чтобы указать LLM использовать новый инструмент set_color . Обновите файл assets/system_prompt.md :
assets/system_prompt.md
# Colorist System Prompt

You are a color expert assistant integrated into a desktop app called Colorist. Your job is to interpret natural language color descriptions and set the appropriate color values using a specialized tool.

## Your Capabilities

You are knowledgeable about colors, color theory, and how to translate natural language descriptions into specific RGB values. You have access to the following tool:

`set_color` - Sets the RGB values for the color display based on a description

## How to Respond to User Inputs

When users describe a color:

1. First, acknowledge their color description with a brief, friendly response
2. Interpret what RGB values would best represent that color description
3. Use the `set_color` tool to set those values (all values should be between 0.0 and 1.0)
4. After setting the color, provide a brief explanation of your interpretation

Example:
User: "I want a sunset orange"
You: "Sunset orange is a warm, vibrant color that captures the golden-red hues of the setting sun. It combines a strong red component with moderate orange tones."

[Then you would call the set_color tool with approximately: red=1.0, green=0.5, blue=0.25]

After the tool call: "I've set a warm orange with strong red, moderate green, and minimal blue components that is reminiscent of the sun low on the horizon."

## When Descriptions are Unclear

If a color description is ambiguous or unclear, please ask the user clarifying questions, one at a time.

## Important Guidelines

- Always keep RGB values between 0.0 and 1.0
- Provide thoughtful, knowledgeable responses about colors
- When possible, include color psychology, associations, or interesting facts about colors
- Be conversational and engaging in your responses
- Focus on being helpful and accurate with your color interpretations
Основные изменения в системном приглашении командной строки следующие:
- Введение в инструмент : Вместо запроса отформатированных значений RGB, теперь вы сообщаете LLM об инструменте
set_color - Измененный процесс : Шаг 3 заменяется с «форматирование значений в ответе» на «использование инструмента для установки значений».
- Обновленный пример : вы показываете, как в ответе вместо отформатированного текста должен содержаться вызов инструмента.
- Удалено требование к форматированию : поскольку вы используете структурированные вызовы функций, вам больше не нужен определенный текстовый формат.
В этом обновленном запросе LLM указан использовать вызов функций, а не просто предоставлять значения RGB в текстовом виде.
Сгенерировать код Riverpod
Выполните команду build runner для генерации необходимого кода Riverpod:
dart run build_runner build --delete-conflicting-outputs
Запустите приложение
На этом этапе Gemini сгенерирует контент, который попытается использовать вызов функций, но вы еще не реализовали обработчики для этих вызовов. Когда вы запустите приложение и опишете цвет, вы увидите, как Gemini реагирует так, как будто он вызвал инструмент, но вы не увидите никаких изменений цвета в пользовательском интерфейсе до следующего шага.
Запустите приложение:
flutter run -d DEVICE
Попробуйте описать цвет, например, «глубокий океанский синий» или «лесной зеленый», и понаблюдайте за ответами. LLM пытается вызвать функции, определенные выше, но ваш код пока не обнаруживает вызовы функций.
Процесс вызова функции
Давайте разберемся, что происходит, когда Gemini использует вызов функций:
- Выбор функции : LLM принимает решение о целесообразности вызова функции на основе запроса пользователя.
- Генерация параметров : LLM генерирует значения параметров, соответствующие схеме функции.
- Формат вызова функции : LLM отправляет структурированный объект вызова функции в своем ответе.
- Обработка приложения : Ваше приложение получит этот вызов и выполнит соответствующую функцию (реализованную на следующем шаге).
- Интеграция ответа : В многоэтапных диалогах LLM ожидает возврата результата работы функции.
В текущем состоянии вашего приложения выполняются первые три шага, но вы еще не реализовали шаг 4 или 5 (обработка вызовов функций), что вы сделаете на следующем шаге.
Технические подробности: Как Gemini определяет, когда использовать функции.
Близнецы принимают взвешенные решения о том, когда использовать функции, основываясь на следующих факторах:
- Намерение пользователя : будет ли запрос пользователя наилучшим образом удовлетворен той или иной функцией.
- Релевантность функций : насколько хорошо доступные функции соответствуют задаче.
- Доступность параметров : Возможность с уверенностью определять значения параметров.
- Системные инструкции : Подсказки от вашей системы по использованию функций.
Предоставив четкие объявления функций и системные инструкции, вы настроили Gemini таким образом, чтобы он распознавал запросы на описание цвета как возможность вызова функции set_color .
Что дальше?
На следующем шаге вы реализуете обработчики вызовов функций из Gemini. Это замкнет круг, позволяя описаниям пользователей запускать фактические изменения цвета в пользовательском интерфейсе посредством вызовов функций LLM.
Поиск неисправностей
Проблемы с объявлением функций
Если вы столкнулись с ошибками при объявлении функций:
- Убедитесь, что имена и типы параметров соответствуют ожидаемым.
- Убедитесь, что имя функции понятное и информативное.
- Убедитесь, что описание функции точно объясняет её назначение.
Проблемы с системными подсказками
Если LLM не пытается использовать эту функцию:
- Убедитесь, что командная строка вашей системы четко указывает LLM использовать инструмент
set_color - Убедитесь, что пример в командной строке системы демонстрирует использование функции.
- Попробуйте сделать инструкцию по использованию инструмента более понятной.
Общие вопросы
Если возникнут другие проблемы:
- Проверьте консоль на наличие ошибок, связанных с объявлениями функций.
- Убедитесь, что инструменты корректно переданы в модель.
- Убедитесь, что весь сгенерированный Riverpod код актуален.
Основные изученные понятия
- Определение объявлений функций для расширения возможностей LLM в приложениях Flutter.
- Создание схем параметров для сбора структурированных данных
- Интеграция объявлений функций с моделью Gemini
- Обновление системных подсказок для стимулирования использования функций.
- Понимание того, как LLM-ы выбирают и вызывают функции
Этот шаг демонстрирует, как LLM-ы могут преодолеть разрыв между вводом естественного языка и структурированными вызовами функций, закладывая основу для бесшовной интеграции между функциями диалога и приложения.
6. Внедрение обработки инструментов
На этом этапе вы реализуете обработчики вызовов функций, поступающих из Gemini. Это замыкает круг взаимодействия между вводом данных на естественном языке и конкретными функциями приложения, позволяя LLM напрямую управлять вашим пользовательским интерфейсом на основе описаний пользователя.
Что вы узнаете на этом этапе
- Понимание полного конвейера вызова функций в приложениях LLM.
- Обработка вызовов функций из Gemini в приложении Flutter
- Implementing function handlers that modify application state
- Handling function responses and returning results to the LLM
- Creating a complete communication flow between LLM and UI
- Logging function calls and responses for transparency
Understanding the function calling pipeline
Before diving into implementation, let's understand the complete function calling pipeline:
The end-to-end flow
- User input : User describes a color in natural language (eg, "forest green")
- LLM processing : Gemini analyzes the description and decides to call the
set_colorfunction - Function call generation : Gemini creates a structured JSON with parameters (red, green, blue values)
- Function call reception : Your app receives this structured data from Gemini
- Function execution : Your app executes the function with the provided parameters
- State update : The function updates your app's state (changing the displayed color)
- Response generation : Your function returns results back to the LLM
- Response incorporation : The LLM incorporates these results into its final response
- UI update : Your UI reacts to the state change, displaying the new color
The complete communication cycle is essential for proper LLM integration. When an LLM makes a function call, it doesn't simply send the request and move on. Instead, it waits for your application to execute the function and return results. The LLM then uses these results to formulate its final response, creating a natural conversation flow that acknowledges the actions taken.
Implement function handlers
Let's update your lib/services/gemini_tools.dart file to add handlers for function calls:
lib/services/gemini_tools.dart
import 'package:colorist_ui/colorist_ui.dart';
import 'package:firebase_ai/firebase_ai.dart';
import 'package:riverpod_annotation/riverpod_annotation.dart';
part 'gemini_tools.g.dart';
class GeminiTools {
GeminiTools(this.ref);
final Ref ref;
FunctionDeclaration get setColorFuncDecl => FunctionDeclaration(
'set_color',
'Set the color of the display square based on red, green, and blue values.',
parameters: {
'red': Schema.number(description: 'Red component value (0.0 - 1.0)'),
'green': Schema.number(description: 'Green component value (0.0 - 1.0)'),
'blue': Schema.number(description: 'Blue component value (0.0 - 1.0)'),
},
);
List<Tool> get tools => [
Tool.functionDeclarations([setColorFuncDecl]),
];
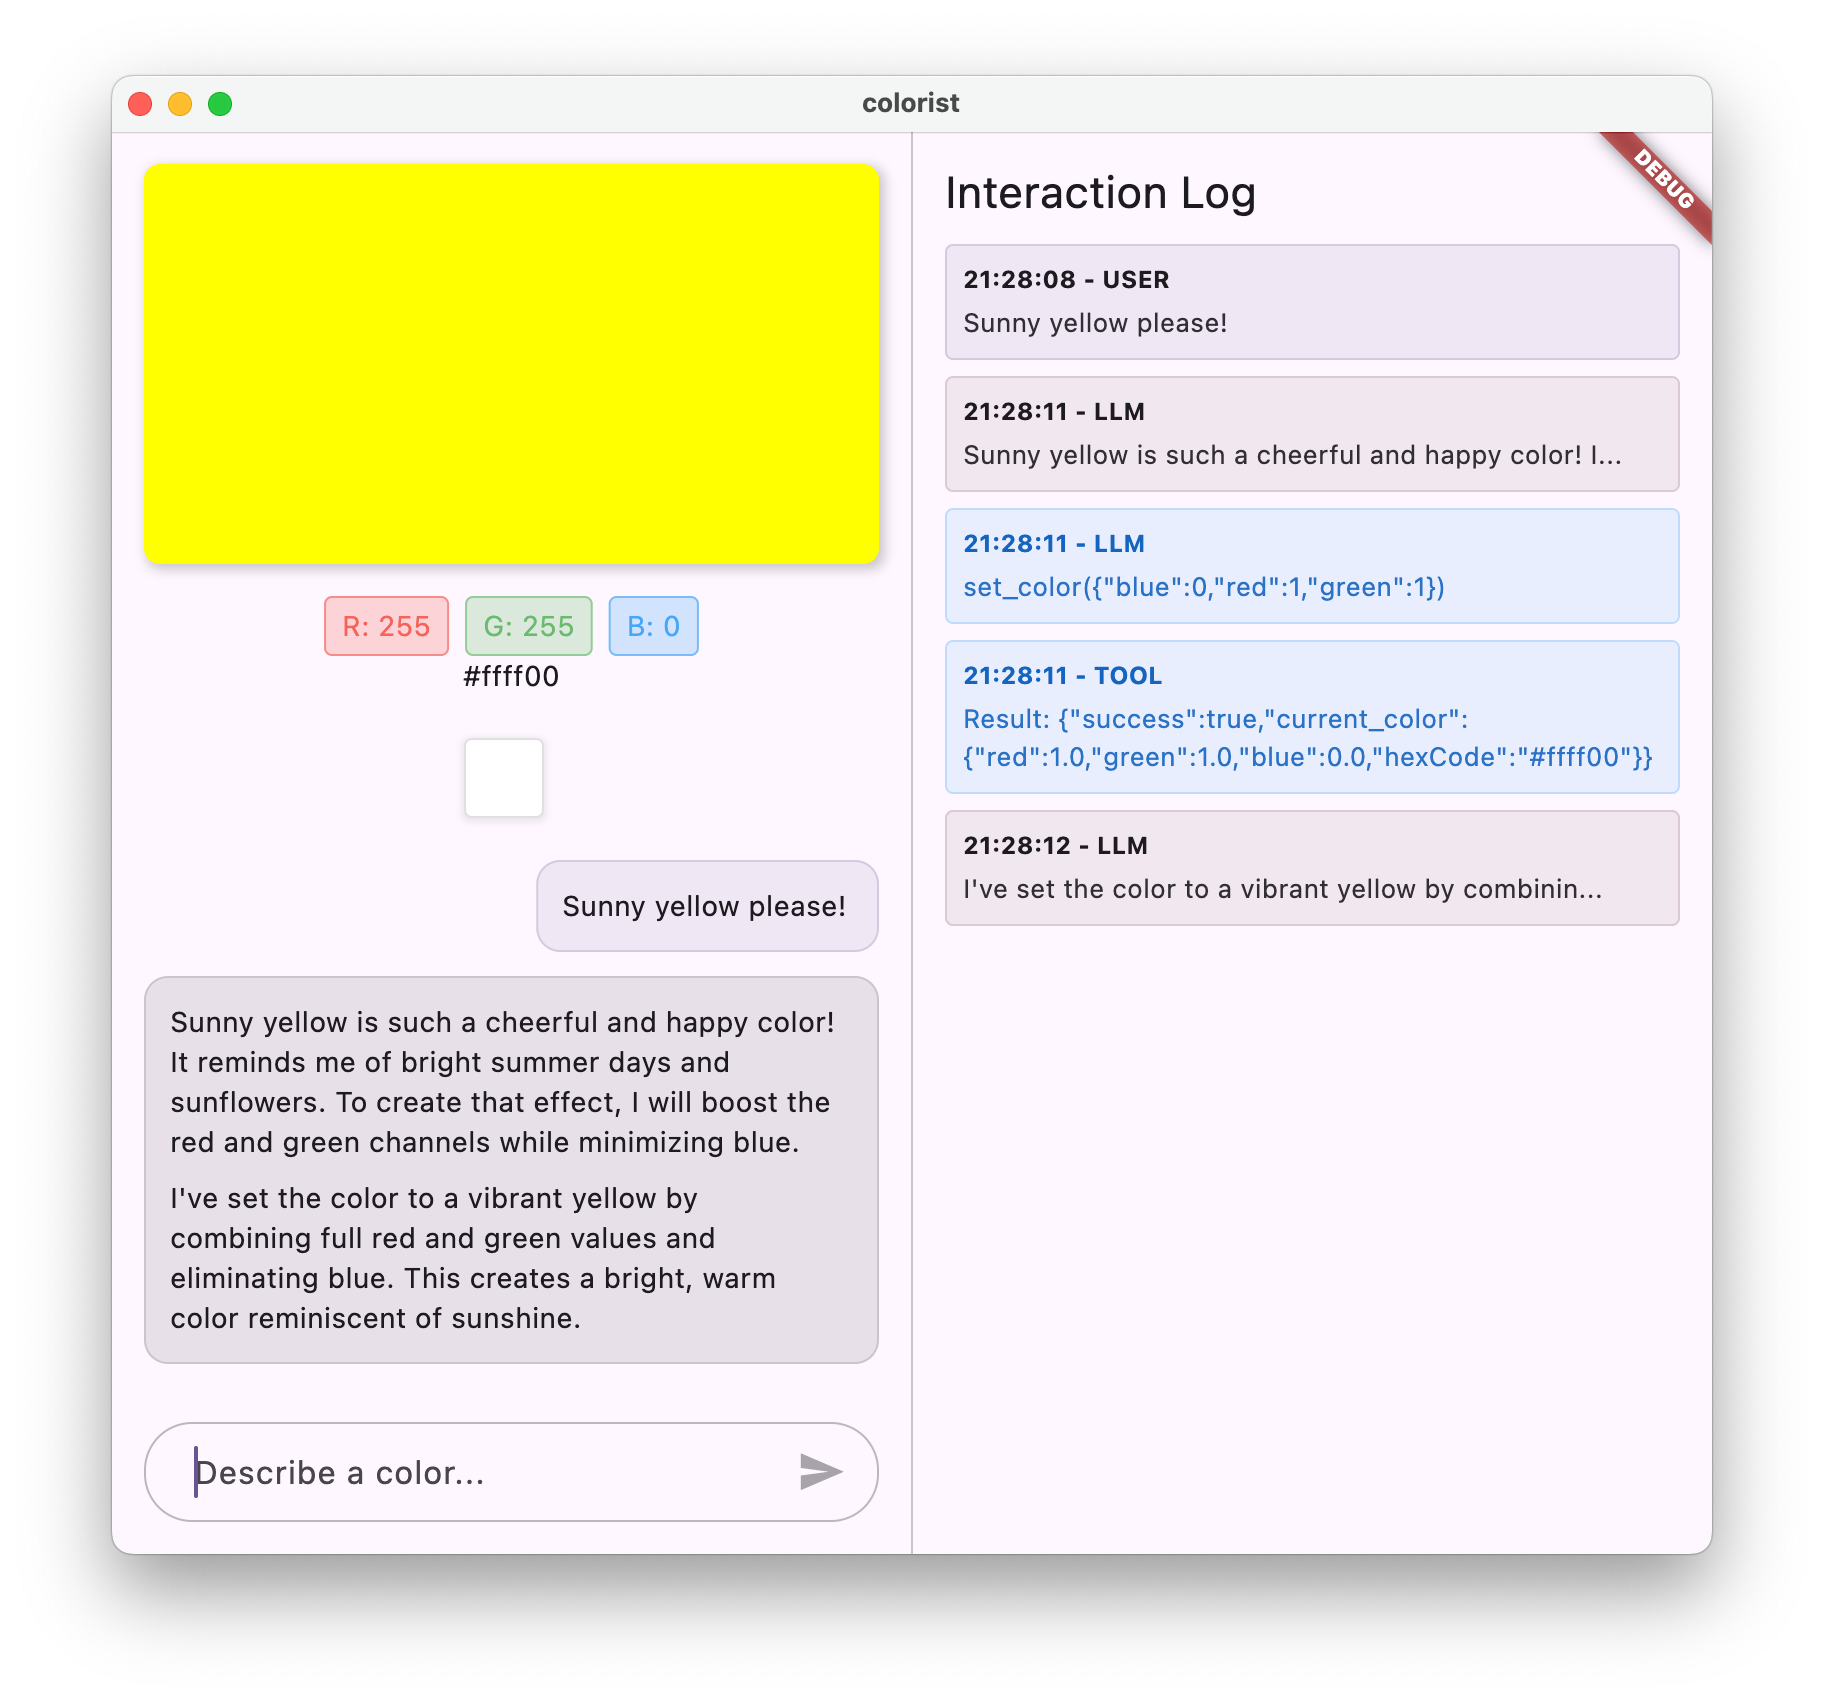
Map<String, Object?> handleFunctionCall( // Add from here
String functionName,
Map<String, Object?> arguments,
) {
final logStateNotifier = ref.read(logStateProvider.notifier);
logStateNotifier.logFunctionCall(functionName, arguments);
return switch (functionName) {
'set_color' => handleSetColor(arguments),
_ => handleUnknownFunction(functionName),
};
}
Map<String, Object?> handleSetColor(Map<String, Object?> arguments) {
final colorStateNotifier = ref.read(colorStateProvider.notifier);
final red = (arguments['red'] as num).toDouble();
final green = (arguments['green'] as num).toDouble();
final blue = (arguments['blue'] as num).toDouble();
final functionResults = {
'success': true,
'current_color': colorStateNotifier
.updateColor(red: red, green: green, blue: blue)
.toLLMContextMap(),
};
final logStateNotifier = ref.read(logStateProvider.notifier);
logStateNotifier.logFunctionResults(functionResults);
return functionResults;
}
Map<String, Object?> handleUnknownFunction(String functionName) {
final logStateNotifier = ref.read(logStateProvider.notifier);
logStateNotifier.logWarning('Unsupported function call $functionName');
return {
'success': false,
'reason': 'Unsupported function call $functionName',
};
} // To here.
}
@Riverpod(keepAlive: true)
GeminiTools geminiTools(Ref ref) => GeminiTools(ref);
Understanding the function handlers
Let's break down what these function handlers do:
-
handleFunctionCall: A central dispatcher that:- Logs the function call for transparency in the log panel
- Routes to the appropriate handler based on the function name
- Returns a structured response that will be sent back to the LLM
-
handleSetColor: The specific handler for yourset_colorfunction that:- Extracts RGB values from the arguments map
- Converts them to the expected types (doubles)
- Updates the application's color state using the
colorStateNotifier - Creates a structured response with success status and current color information
- Logs the function results for debugging
-
handleUnknownFunction: A fallback handler for unknown functions that:- Logs a warning about the unsupported function
- Returns an error response to the LLM
The handleSetColor function is particularly important as it bridges the gap between the LLM's natural language understanding and concrete UI changes.
Update the Gemini chat service to process function calls and responses
Now, let's update the lib/services/gemini_chat_service.dart file to process function calls from the LLM responses and send the results back to the LLM:
lib/services/gemini_chat_service.dart
import 'dart:async';

import 'package:colorist_ui/colorist_ui.dart';
import 'package:firebase_ai/firebase_ai.dart';
import 'package:riverpod_annotation/riverpod_annotation.dart';

import '../providers/gemini.dart';
import 'gemini_tools.dart';                                          // Add this import

part 'gemini_chat_service.g.dart';

class GeminiChatService {
  GeminiChatService(this.ref);
  final Ref ref;

  Future<void> sendMessage(String message) async {
    final chatSession = await ref.read(chatSessionProvider.future);
    final chatStateNotifier = ref.read(chatStateProvider.notifier);
    final logStateNotifier = ref.read(logStateProvider.notifier);

    chatStateNotifier.addUserMessage(message);
    logStateNotifier.logUserText(message);
    final llmMessage = chatStateNotifier.createLlmMessage();
    try {
      final response = await chatSession.sendMessage(Content.text(message));

      final responseText = response.text;
      if (responseText != null) {
        logStateNotifier.logLlmText(responseText);
        chatStateNotifier.appendToMessage(llmMessage.id, responseText);
      }

      if (response.functionCalls.isNotEmpty) {                       // Add from here
        final geminiTools = ref.read(geminiToolsProvider);
        final functionResultResponse = await chatSession.sendMessage(
          Content.functionResponses([
            for (final functionCall in response.functionCalls)
              FunctionResponse(
                functionCall.name,
                geminiTools.handleFunctionCall(
                  functionCall.name,
                  functionCall.args,
                ),
              ),
          ]),
        );
        final responseText = functionResultResponse.text;
        if (responseText != null) {
          logStateNotifier.logLlmText(responseText);
          chatStateNotifier.appendToMessage(llmMessage.id, responseText);
        }
      }                                                              // To here.
    } catch (e, st) {
      logStateNotifier.logError(e, st: st);
      chatStateNotifier.appendToMessage(
        llmMessage.id,
        "\nI'm sorry, I encountered an error processing your request. "
        "Please try again.",
      );
    } finally {
      chatStateNotifier.finalizeMessage(llmMessage.id);
    }
  }
}

@Riverpod(keepAlive: true)
GeminiChatService geminiChatService(Ref ref) => GeminiChatService(ref);
Understanding the flow of communication
The key addition here is the complete handling of function calls and responses:
if (response.functionCalls.isNotEmpty) {
  final geminiTools = ref.read(geminiToolsProvider);
  final functionResultResponse = await chatSession.sendMessage(
    Content.functionResponses([
      for (final functionCall in response.functionCalls)
        FunctionResponse(
          functionCall.name,
          geminiTools.handleFunctionCall(
            functionCall.name,
            functionCall.args,
          ),
        ),
    ]),
  );
  final responseText = functionResultResponse.text;
  if (responseText != null) {
    logStateNotifier.logLlmText(responseText);
    chatStateNotifier.appendToMessage(llmMessage.id, responseText);
  }
}
This code:
- Checks if the LLM response contains any function calls
- For each function call, invokes your
handleFunctionCallmethod with the function name and arguments - Collects the results of each function call
- Sends these results back to the LLM using
Content.functionResponses - Processes the LLM's response to the function results
- Updates the UI with the final response text
This creates a round trip flow:
- User → LLM: Requests a color
- LLM → App: Function calls with parameters
- App → User: New color displayed
- App → LLM: Function results
- LLM → User: Final response incorporating function results
Generate Riverpod code
Run the build runner command to generate the needed Riverpod code:
dart run build_runner build --delete-conflicting-outputs
Run and test the complete flow
Now run your application:
flutter run -d DEVICE
Try entering various color descriptions:
- "I'd like a deep crimson red"
- "Show me a calming sky blue"
- "Give me the color of fresh mint leaves"
- "I want to see a warm sunset orange"
- "Make it a rich royal purple"
Now you should see:
- Your message appearing in the chat interface
- Gemini's response appearing in the chat
- Function calls being logged in the log panel
- Function results being logged immediately after
- The color rectangle updating to display the described color
- RGB values updating to show the new color's components
- Gemini's final response appearing, often commenting on the color that was set
The log panel provides insight into what's happening behind the scenes. You'll see:
- The exact function calls Gemini is making
- The parameters it's choosing for each RGB value
- The results your function is returning
- The follow-up responses from Gemini
The color state notifier
The colorStateNotifier you're using to update colors is part of the colorist_ui package. It manages:
- The current color displayed in the UI
- The color history (last 10 colors)
- Notification of state changes to UI components
When you call updateColor with new RGB values, it:
- Creates a new
ColorDataobject with the provided values - Updates the current color in the app state
- Adds the color to the history
- Triggers UI updates through Riverpod's state management
The UI components in the colorist_ui package watch this state and automatically update when it changes, creating a reactive experience.
Understanding error handling
Your implementation includes robust error handling:
- Try-catch block : Wraps all LLM interactions to catch any exceptions
- Error logging : Records errors in the log panel with stack traces
- User feedback : Provides a friendly error message in the chat
- State cleanup : Finalizes the message state even if an error occurs
This ensures the app remains stable and provides appropriate feedback even when issues occur with the LLM service or function execution.
The power of function calling for user experience
What you've accomplished here demonstrates how LLMs can create powerful natural interfaces:
- Natural language interface : Users express intent in everyday language
- Intelligent interpretation : The LLM translates vague descriptions into precise values
- Direct manipulation : The UI updates in response to natural language
- Contextual responses : The LLM provides conversational context about the changes
- Low cognitive load : Users don't need to understand RGB values or color theory
This pattern of using LLM function calling to bridge natural language and UI actions can be extended to countless other domains beyond color selection.
Что дальше?
In the next step, you'll enhance the user experience by implementing streaming responses. Rather than waiting for the complete response, you'll process text chunks and function calls as they are received, creating a more responsive and engaging application.
Поиск неисправностей
Function call issues
If Gemini isn't calling your functions or parameters are incorrect:
- Verify your function declaration matches what's described in the system prompt
- Check that parameter names and types are consistent
- Ensure your system prompt explicitly instructs the LLM to use the tool
- Verify the function name in your handler matches exactly what's in the declaration
- Examine the log panel for detailed information on function calls
Function response issues
If function results aren't being properly sent back to the LLM:
- Check that your function returns a properly formatted Map
- Verify that the Content.functionResponses is being constructed correctly
- Look for any errors in the log related to function responses
- Ensure you're using the same chat session for the response
Color display issues
If colors aren't displaying correctly:
- Ensure RGB values are properly converted to doubles (LLM might send them as integers)
- Verify that values are in the expected range (0.0 to 1.0)
- Check that the color state notifier is being called correctly
- Examine the log for the exact values being passed to the function
General problems
For general issues:
- Examine the logs for errors or warnings
- Verify Firebase AI Logic connectivity
- Check for any type mismatches in function parameters
- Ensure all Riverpod generated code is up to date
Key concepts learned
- Implementing a complete function calling pipeline in Flutter
- Creating full communication between an LLM and your application
- Processing structured data from LLM responses
- Sending function results back to the LLM for incorporation into responses
- Using the log panel to gain visibility into LLM-application interactions
- Connecting natural language inputs to concrete UI changes
With this step complete, your app now demonstrates one of the most powerful patterns for LLM integration: translating natural language inputs into concrete UI actions, while maintaining a coherent conversation that acknowledges these actions. This creates an intuitive, conversational interface that feels magical to users.
7. Streaming responses for better UX
In this step, you'll enhance the user experience by implementing streaming responses from Gemini. Instead of waiting for the entire response to be generated, you'll process text chunks and function calls as they are received, creating a more responsive and engaging application.
What you'll cover in this step
- The importance of streaming for LLM-powered applications
- Implementing streaming LLM responses in a Flutter application
- Processing partial text chunks as they arrive from the API
- Managing conversation state to prevent message conflicts
- Handling function calls in streaming responses
- Creating visual indicators for in-progress responses
Why streaming matters for LLM applications
Before implementing, let's understand why streaming responses are crucial for creating excellent user experiences with LLMs:
Improved user experience
Streaming responses provide several significant user experience benefits:
- Reduced perceived latency : Users see text start appearing immediately (typically within 100-300ms), rather than waiting several seconds for a complete response. This perception of immediacy dramatically improves user satisfaction.
- Natural conversational rhythm : The gradual appearance of text mimics how humans communicate, creating a more natural dialogue experience.
- Progressive information processing : Users can begin processing information as it arrives, rather than being overwhelmed by a large block of text all at once.
- Opportunity for early interruption : In a full application, users could potentially interrupt or redirect the LLM if they see it going in an unhelpful direction.
- Visual confirmation of activity : The streaming text provides immediate feedback that the system is working, reducing uncertainty.
Technical advantages
Beyond UX improvements, streaming offers technical benefits:
- Early function execution : Function calls can be detected and executed as soon as they appear in the stream, without waiting for the complete response.
- Incremental UI updates : You can update your UI progressively as new information arrives, creating a more dynamic experience.
- Conversation state management : Streaming provides clear signals about when responses are complete vs. still in progress, enabling better state management.
- Reduced timeout risks : With non-streaming responses, long-running generations risk connection timeouts. Streaming establishes the connection early and maintains it.
For your Colorist app, implementing streaming means users will see both text responses and color changes appearing more promptly, creating a significantly more responsive experience.
Add conversation state management
First, let's add a state provider to track whether the app is currently handling a streaming response. Update your lib/services/gemini_chat_service.dart file:
lib/services/gemini_chat_service.dart
import 'dart:async';

import 'package:colorist_ui/colorist_ui.dart';
import 'package:firebase_ai/firebase_ai.dart';
import 'package:flutter_riverpod/flutter_riverpod.dart';
import 'package:riverpod_annotation/riverpod_annotation.dart';

import '../providers/gemini.dart';
import 'gemini_tools.dart';

part 'gemini_chat_service.g.dart';

class ConversationStateNotifier extends Notifier<ConversationState> {  // Add from here...
  @override
  ConversationState build() => ConversationState.idle;

  void busy() {
    state = ConversationState.busy;
  }

  void idle() {
    state = ConversationState.idle;
  }
}

final conversationStateProvider =
    NotifierProvider<ConversationStateNotifier, ConversationState>(
      ConversationStateNotifier.new,
    );                                                                 // To here.

class GeminiChatService {
  GeminiChatService(this.ref);
  final Ref ref;

  Future<void> sendMessage(String message) async {
    final chatSession = await ref.read(chatSessionProvider.future);
    final conversationState = ref.read(conversationStateProvider);   // Add this line
    final chatStateNotifier = ref.read(chatStateProvider.notifier);
    final logStateNotifier = ref.read(logStateProvider.notifier);

    if (conversationState == ConversationState.busy) {               // Add from here...
      logStateNotifier.logWarning(
        "Can't send a message while a conversation is in progress",
      );
      throw Exception(
        "Can't send a message while a conversation is in progress",
      );
    }
    final conversationStateNotifier = ref.read(
      conversationStateProvider.notifier,
    );
    conversationStateNotifier.busy();                                // To here.
    chatStateNotifier.addUserMessage(message);
    logStateNotifier.logUserText(message);
    final llmMessage = chatStateNotifier.createLlmMessage();
    try {                                                            // Modify from here...
      final responseStream = chatSession.sendMessageStream(
        Content.text(message),
      );
      await for (final block in responseStream) {
        await _processBlock(block, llmMessage.id);
      }                                                              // To here.
    } catch (e, st) {
      logStateNotifier.logError(e, st: st);
      chatStateNotifier.appendToMessage(
        llmMessage.id,
        "\nI'm sorry, I encountered an error processing your request. "
        "Please try again.",
      );
    } finally {
      chatStateNotifier.finalizeMessage(llmMessage.id);
      conversationStateNotifier.idle();                              // Add this line.
    }
  }

  Future<void> _processBlock(                                        // Add from here...
    GenerateContentResponse block,
    String llmMessageId,
  ) async {
    final chatSession = await ref.read(chatSessionProvider.future);
    final chatStateNotifier = ref.read(chatStateProvider.notifier);
    final logStateNotifier = ref.read(logStateProvider.notifier);
    final blockText = block.text;
    if (blockText != null) {
      logStateNotifier.logLlmText(blockText);
      chatStateNotifier.appendToMessage(llmMessageId, blockText);
    }

    if (block.functionCalls.isNotEmpty) {
      final geminiTools = ref.read(geminiToolsProvider);
      final responseStream = chatSession.sendMessageStream(
        Content.functionResponses([
          for (final functionCall in block.functionCalls)
            FunctionResponse(
              functionCall.name,
              geminiTools.handleFunctionCall(
                functionCall.name,
                functionCall.args,
              ),
            ),
        ]),
      );
      await for (final response in responseStream) {
        final responseText = response.text;
        if (responseText != null) {
          logStateNotifier.logLlmText(responseText);
          chatStateNotifier.appendToMessage(llmMessageId, responseText);
        }
      }
    }
  }                                                                  // To here.
}

@Riverpod(keepAlive: true)
GeminiChatService geminiChatService(Ref ref) => GeminiChatService(ref);
Understanding the streaming implementation
Let's break down what this code does:
- Conversation state tracking :
- A
conversationStateProvidertracks whether the app is currently processing a response - The state transitions from
idle→busywhile processing, then back toidle - This prevents multiple concurrent requests that could conflict
- A
- Stream initialization :
-
sendMessageStream()returns a Stream of response chunks instead of aFuturewith the complete response - Each chunk may contain text, function calls, or both
-
- Progressive processing :
-
await forprocesses each chunk as it arrives in real-time - Text is appended to the UI immediately, creating the streaming effect
- Function calls are executed as soon as they're detected
-
- Function call handling :
- When a function call is detected in a chunk, it's executed immediately
- Results are sent back to the LLM through another streaming call
- The LLM's response to these results is also processed in a streaming fashion
- Error handling and cleanup :
-
try/catchprovides robust error handling - The
finallyblock ensures conversation state is reset properly - Message is always finalized, even if errors occur
-
This implementation creates a responsive, reliable streaming experience while maintaining proper conversation state.
Update the main screen to connect conversation state
Modify your lib/main.dart file to pass the conversation state to the main screen:
lib/main.dart
import 'package:colorist_ui/colorist_ui.dart';
import 'package:flutter/material.dart';
import 'package:flutter_riverpod/flutter_riverpod.dart';

import 'providers/gemini.dart';
import 'services/gemini_chat_service.dart';

void main() async {
  runApp(ProviderScope(child: MainApp()));
}

class MainApp extends ConsumerWidget {
  const MainApp({super.key});

  @override
  Widget build(BuildContext context, WidgetRef ref) {
    final model = ref.watch(geminiModelProvider);
    final conversationState = ref.watch(conversationStateProvider);  // Add this line

    return MaterialApp(
      theme: ThemeData(
        colorScheme: ColorScheme.fromSeed(seedColor: Colors.deepPurple),
      ),
      home: model.when(
        data: (data) => MainScreen(
          conversationState: conversationState,                      // And this line
          sendMessage: (text) {
            ref.read(geminiChatServiceProvider).sendMessage(text);
          },
        ),
        loading: () => LoadingScreen(message: 'Initializing Gemini Model'),
        error: (err, st) => ErrorScreen(error: err),
      ),
    );
  }
}
The key change here is passing the conversationState to the MainScreen widget. The MainScreen (provided by the colorist_ui package) will use this state to disable the text input while a response is being processed.
This creates a cohesive user experience where the UI reflects the current state of the conversation.
Generate Riverpod code
Run the build runner command to generate the needed Riverpod code:
dart run build_runner build --delete-conflicting-outputs
Run and test streaming responses
Run your application:
flutter run -d DEVICE
Now try testing the streaming behavior with various color descriptions. Try descriptions like:
- "Show me the deep teal color of the ocean at twilight"
- "I'd like to see a vibrant coral that reminds me of tropical flowers"
- "Create a muted olive green like old army fatigues"
The streaming technical flow in detail
Let's examine exactly what happens when streaming a response:
Connection establishment
When you call sendMessageStream() , the following happens:
- The app establishes a connection to the Firebase AI Logic service
- The user request is sent to the service
- The server begins processing the request
- The stream connection remains open, ready to transmit chunks
Chunk transmission
As Gemini generates content, chunks are sent through the stream:
- The server sends text chunks as they're generated (typically a few words or sentences)
- When Gemini decides to make a function call, it sends the function call information
- Additional text chunks may follow function calls
- The stream continues until the generation is complete
Progressive processing
Your app processes each chunk incrementally:
- Each text chunk is appended to the existing response
- Function calls are executed as soon as they're detected
- The UI updates in real-time with both text and function results
- State is tracked to show the response is still streaming
Stream completion
When the generation is complete:
- The stream is closed by the server
- Your
await forloop exits naturally - The message is marked as complete
- The conversation state is set back to idle
- The UI updates to reflect the completed state
Streaming vs. non-streaming comparison
To better understand the benefits of streaming, let's compare streaming vs. non-streaming approaches:
Аспект | Non-Streaming | Стриминг |
Perceived latency | User sees nothing until complete response is ready | User sees first words within milliseconds |
пользовательский опыт | Long wait followed by sudden text appearance | Natural, progressive text appearance |
State management | Simpler (messages are either pending or complete) | More complex (messages can be in a streaming state) |
Function execution | Occurs only after complete response | Occurs during response generation |
Implementation complexity | Simpler to implement | Requires additional state management |
Error recovery | All-or-nothing response | Partial responses may still be useful |
Code complexity | Less complex | More complex due to stream handling |
For an application like Colorist, the UX benefits of streaming outweigh the implementation complexity, especially for color interpretations that might take several seconds to generate.
Best practices for streaming UX
When implementing streaming in your own LLM applications, consider these best practices:
- Clear visual indicators : Always provide clear visual cues that distinguish streaming vs. complete messages
- Input blocking : Disable user input during streaming to prevent multiple overlapping requests
- Error recovery : Design your UI to handle graceful recovery if streaming is interrupted
- State transitions : Ensure smooth transitions between idle, streaming, and complete states
- Progress visualization : Consider subtle animations or indicators that show active processing
- Cancellation options : In a complete app, provide ways for users to cancel in-progress generations
- Function result integration : Design your UI to handle function results appearing mid-stream
- Performance optimization : Minimize UI rebuilds during rapid stream updates
The colorist_ui package implements many of these best practices for you, but they're important considerations for any streaming LLM implementation.
Что дальше?
In the next step, you'll implement LLM synchronization by notifying Gemini when users select colors from history. This will create a more cohesive experience where the LLM is aware of user-initiated changes to the application state.
Поиск неисправностей
Stream processing issues
If you encounter issues with stream processing:
- Symptoms : Partial responses, missing text, or abrupt stream termination
- Solution : Check network connectivity and ensure proper async/await patterns in your code
- Diagnosis : Examine the log panel for error messages or warnings related to stream processing
- Fix : Ensure all stream processing uses proper error handling with
try/catchblocks
Missing function calls
If function calls aren't being detected in the stream:
- Symptoms : Text appears but colors don't update, or log shows no function calls
- Solution : Verify the system prompt's instructions about using function calls
- Diagnosis : Check the log panel to see if function calls are being received
- Fix : Adjust your system prompt to more explicitly instruct the LLM to use the
set_colortool
General error handling
For any other issues:
- Step 1 : Check the log panel for error messages
- Step 2 : Verify Firebase AI Logic connectivity
- Step 3 : Ensure all Riverpod generated code is up to date
- Step 4 : Review the streaming implementation for any missing await statements
Key concepts learned
- Implementing streaming responses with the Gemini API for more responsive UX
- Managing conversation state to handle streaming interactions properly
- Processing real-time text and function calls as they arrive
- Creating responsive UIs that update incrementally during streaming
- Handling concurrent streams with proper async patterns
- Providing appropriate visual feedback during streaming responses
By implementing streaming, you've significantly enhanced the user experience of your Colorist app, creating a more responsive, engaging interface that feels truly conversational.
8. LLM Context Synchronization
In this bonus step, you'll implement LLM Context Synchronization by notifying Gemini when users select colors from history. This creates a more cohesive experience where the LLM is aware of user actions in the interface, not just their explicit messages.
What you'll cover in this step
- Creating LLM Context Synchronization between your UI and the LLM
- Serializing UI events into context the LLM can understand
- Updating conversation context based on user actions
- Creating a coherent experience across different interaction methods
- Enhancing LLM context awareness beyond explicit chat messages
Understanding LLM Context Synchronization
Traditional chatbots only respond to explicit user messages, creating a disconnect when users interact with the app through other means. LLM Context Synchronization addresses this limitation:
Why LLM Context Synchronization matters
When users interact with your app through UI elements (like selecting a color from history), the LLM has no way of knowing what happened unless you explicitly tell it. LLM Context Synchronization:
- Maintains context : Keeps the LLM informed about all relevant user actions
- Creates coherence : Produces a cohesive experience where the LLM acknowledges UI interactions
- Enhances intelligence : Allows the LLM to respond appropriately to all user actions
- Improves user experience : Makes the entire application feel more integrated and responsive
- Reduces user effort : Eliminates the need for users to manually explain their UI actions
In your Colorist app, when a user selects a color from history, you want Gemini to acknowledge this action and comment intelligently about the selected color, maintaining the illusion of a seamless, aware assistant.
Update the Gemini chat service for color selection notifications
First, you'll add a method to the GeminiChatService to notify the LLM when a user selects a color from history. Update your lib/services/gemini_chat_service.dart file:
lib/services/gemini_chat_service.dart
import 'dart:async';
import 'dart:convert';                                               // Add this import

import 'package:colorist_ui/colorist_ui.dart';
import 'package:firebase_ai/firebase_ai.dart';
import 'package:flutter_riverpod/flutter_riverpod.dart';
import 'package:riverpod_annotation/riverpod_annotation.dart';

import '../providers/gemini.dart';
import 'gemini_tools.dart';

part 'gemini_chat_service.g.dart';

class ConversationStateNotifier extends Notifier<ConversationState> {
  @override
  ConversationState build() => ConversationState.idle;

  void busy() {
    state = ConversationState.busy;
  }

  void idle() {
    state = ConversationState.idle;
  }
}

final conversationStateProvider =
    NotifierProvider<ConversationStateNotifier, ConversationState>(
      ConversationStateNotifier.new,
    );

class GeminiChatService {
  GeminiChatService(this.ref);
  final Ref ref;

  Future<void> notifyColorSelection(ColorData color) => sendMessage(  // Add from here...
    'User selected color from history: ${json.encode(color.toLLMContextMap())}',
  );                                                                  // To here.

  Future<void> sendMessage(String message) async {
    final chatSession = await ref.read(chatSessionProvider.future);
    final conversationState = ref.read(conversationStateProvider);
    final chatStateNotifier = ref.read(chatStateProvider.notifier);
    final logStateNotifier = ref.read(logStateProvider.notifier);

    if (conversationState == ConversationState.busy) {
      logStateNotifier.logWarning(
        "Can't send a message while a conversation is in progress",
      );
      throw Exception(
        "Can't send a message while a conversation is in progress",
      );
    }
    final conversationStateNotifier = ref.read(
      conversationStateProvider.notifier,
    );
    conversationStateNotifier.busy();
    chatStateNotifier.addUserMessage(message);
    logStateNotifier.logUserText(message);
    final llmMessage = chatStateNotifier.createLlmMessage();
    try {
      final responseStream = chatSession.sendMessageStream(
        Content.text(message),
      );
      await for (final block in responseStream) {
        await _processBlock(block, llmMessage.id);
      }
    } catch (e, st) {
      logStateNotifier.logError(e, st: st);
      chatStateNotifier.appendToMessage(
        llmMessage.id,
        "\nI'm sorry, I encountered an error processing your request. "
        "Please try again.",
      );
    } finally {
      chatStateNotifier.finalizeMessage(llmMessage.id);
      conversationStateNotifier.idle();
    }
  }

  Future<void> _processBlock(
    GenerateContentResponse block,
    String llmMessageId,
  ) async {
    final chatSession = await ref.read(chatSessionProvider.future);
    final chatStateNotifier = ref.read(chatStateProvider.notifier);
    final logStateNotifier = ref.read(logStateProvider.notifier);
    final blockText = block.text;
    if (blockText != null) {
      logStateNotifier.logLlmText(blockText);
      chatStateNotifier.appendToMessage(llmMessageId, blockText);
    }

    if (block.functionCalls.isNotEmpty) {
      final geminiTools = ref.read(geminiToolsProvider);
      final responseStream = chatSession.sendMessageStream(
        Content.functionResponses([
          for (final functionCall in block.functionCalls)
            FunctionResponse(
              functionCall.name,
              geminiTools.handleFunctionCall(
                functionCall.name,
                functionCall.args,
              ),
            ),
        ]),
      );
      await for (final response in responseStream) {
        final responseText = response.text;
        if (responseText != null) {
          logStateNotifier.logLlmText(responseText);
          chatStateNotifier.appendToMessage(llmMessageId, responseText);
        }
      }
    }
  }
}

@Riverpod(keepAlive: true)
GeminiChatService geminiChatService(Ref ref) => GeminiChatService(ref);
The key addition is the notifyColorSelection method, which:
- Takes a
ColorDataobject representing the selected color - Encodes it to a JSON format that can be included in a message
- Sends a specially formatted message to the LLM indicating a user selection
- Reuses the existing
sendMessagemethod to handle the notification
This approach avoids duplication by utilizing your existing message handling infrastructure.
Update main app to connect color selection notifications
Now, modify your lib/main.dart file to pass the color selection notification function to the main screen:
lib/main.dart
import 'package:colorist_ui/colorist_ui.dart';
import 'package:flutter/material.dart';
import 'package:flutter_riverpod/flutter_riverpod.dart';

import 'providers/gemini.dart';
import 'services/gemini_chat_service.dart';

void main() async {
  runApp(ProviderScope(child: MainApp()));
}

class MainApp extends ConsumerWidget {
  const MainApp({super.key});

  @override
  Widget build(BuildContext context, WidgetRef ref) {
    final model = ref.watch(geminiModelProvider);
    final conversationState = ref.watch(conversationStateProvider);

    return MaterialApp(
      theme: ThemeData(
        colorScheme: ColorScheme.fromSeed(seedColor: Colors.deepPurple),
      ),
      home: model.when(
        data: (data) => MainScreen(
          conversationState: conversationState,
          notifyColorSelection: (color) {                            // Add from here...
            ref.read(geminiChatServiceProvider).notifyColorSelection(color);
          },                                                         // To here.
          sendMessage: (text) {
            ref.read(geminiChatServiceProvider).sendMessage(text);
          },
        ),
        loading: () => LoadingScreen(message: 'Initializing Gemini Model'),
        error: (err, st) => ErrorScreen(error: err),
      ),
    );
  }
}
The key change is adding the notifyColorSelection callback, which connects the UI event (selecting a color from history) to the LLM notification system.
Update the system prompt
Now, you need to update your system prompt to instruct the LLM on how to respond to color selection notifications. Modify your assets/system_prompt.md file:
assets/system_prompt.md
# Colorist System Prompt

You are a color expert assistant integrated into a desktop app called Colorist. Your job is to interpret natural language color descriptions and set the appropriate color values using a specialized tool.

## Your Capabilities

You are knowledgeable about colors, color theory, and how to translate natural language descriptions into specific RGB values. You have access to the following tool:

`set_color` - Sets the RGB values for the color display based on a description

## How to Respond to User Inputs

When users describe a color:

1. First, acknowledge their color description with a brief, friendly response
2. Interpret what RGB values would best represent that color description
3. Use the `set_color` tool to set those values (all values should be between 0.0 and 1.0)
4. After setting the color, provide a brief explanation of your interpretation

Example:
User: "I want a sunset orange"
You: "Sunset orange is a warm, vibrant color that captures the golden-red hues of the setting sun. It combines a strong red component with moderate orange tones."

[Then you would call the set_color tool with approximately: red=1.0, green=0.5, blue=0.25]

After the tool call: "I've set a warm orange with strong red, moderate green, and minimal blue components that is reminiscent of the sun low on the horizon."

## When Descriptions are Unclear

If a color description is ambiguous or unclear, please ask the user clarifying questions, one at a time.

## When Users Select Historical Colors

Sometimes, the user will manually select a color from the history panel. When this happens, you'll receive a notification about this selection that includes details about the color. Acknowledge this selection with a brief response that recognizes what they've done and comments on the selected color.

Example notification:
User: "User selected color from history: {red: 0.2, green: 0.5, blue: 0.8, hexCode: #3380CC}"
You: "I see you've selected an ocean blue from your history. This tranquil blue with a moderate intensity has a calming, professional quality to it. Would you like to explore similar shades or create a contrasting color?"

## Important Guidelines

- Always keep RGB values between 0.0 and 1.0
- Provide thoughtful, knowledgeable responses about colors
- When possible, include color psychology, associations, or interesting facts about colors
- Be conversational and engaging in your responses
- Focus on being helpful and accurate with your color interpretations
The key addition is the "When Users Select Historical Colors" section, which:
- Explains the concept of history selection notifications to the LLM
- Provides an example of what these notifications look like
- Shows an example of an appropriate response
- Sets expectations for acknowledging the selection and commenting on the color
This helps the LLM understand how to respond appropriately to these special messages.
Generate Riverpod Code
Run the build runner command to generate the needed Riverpod code:
dart run build_runner build --delete-conflicting-outputs
Run and test LLM Context Synchronization
Run your application:
flutter run -d DEVICE
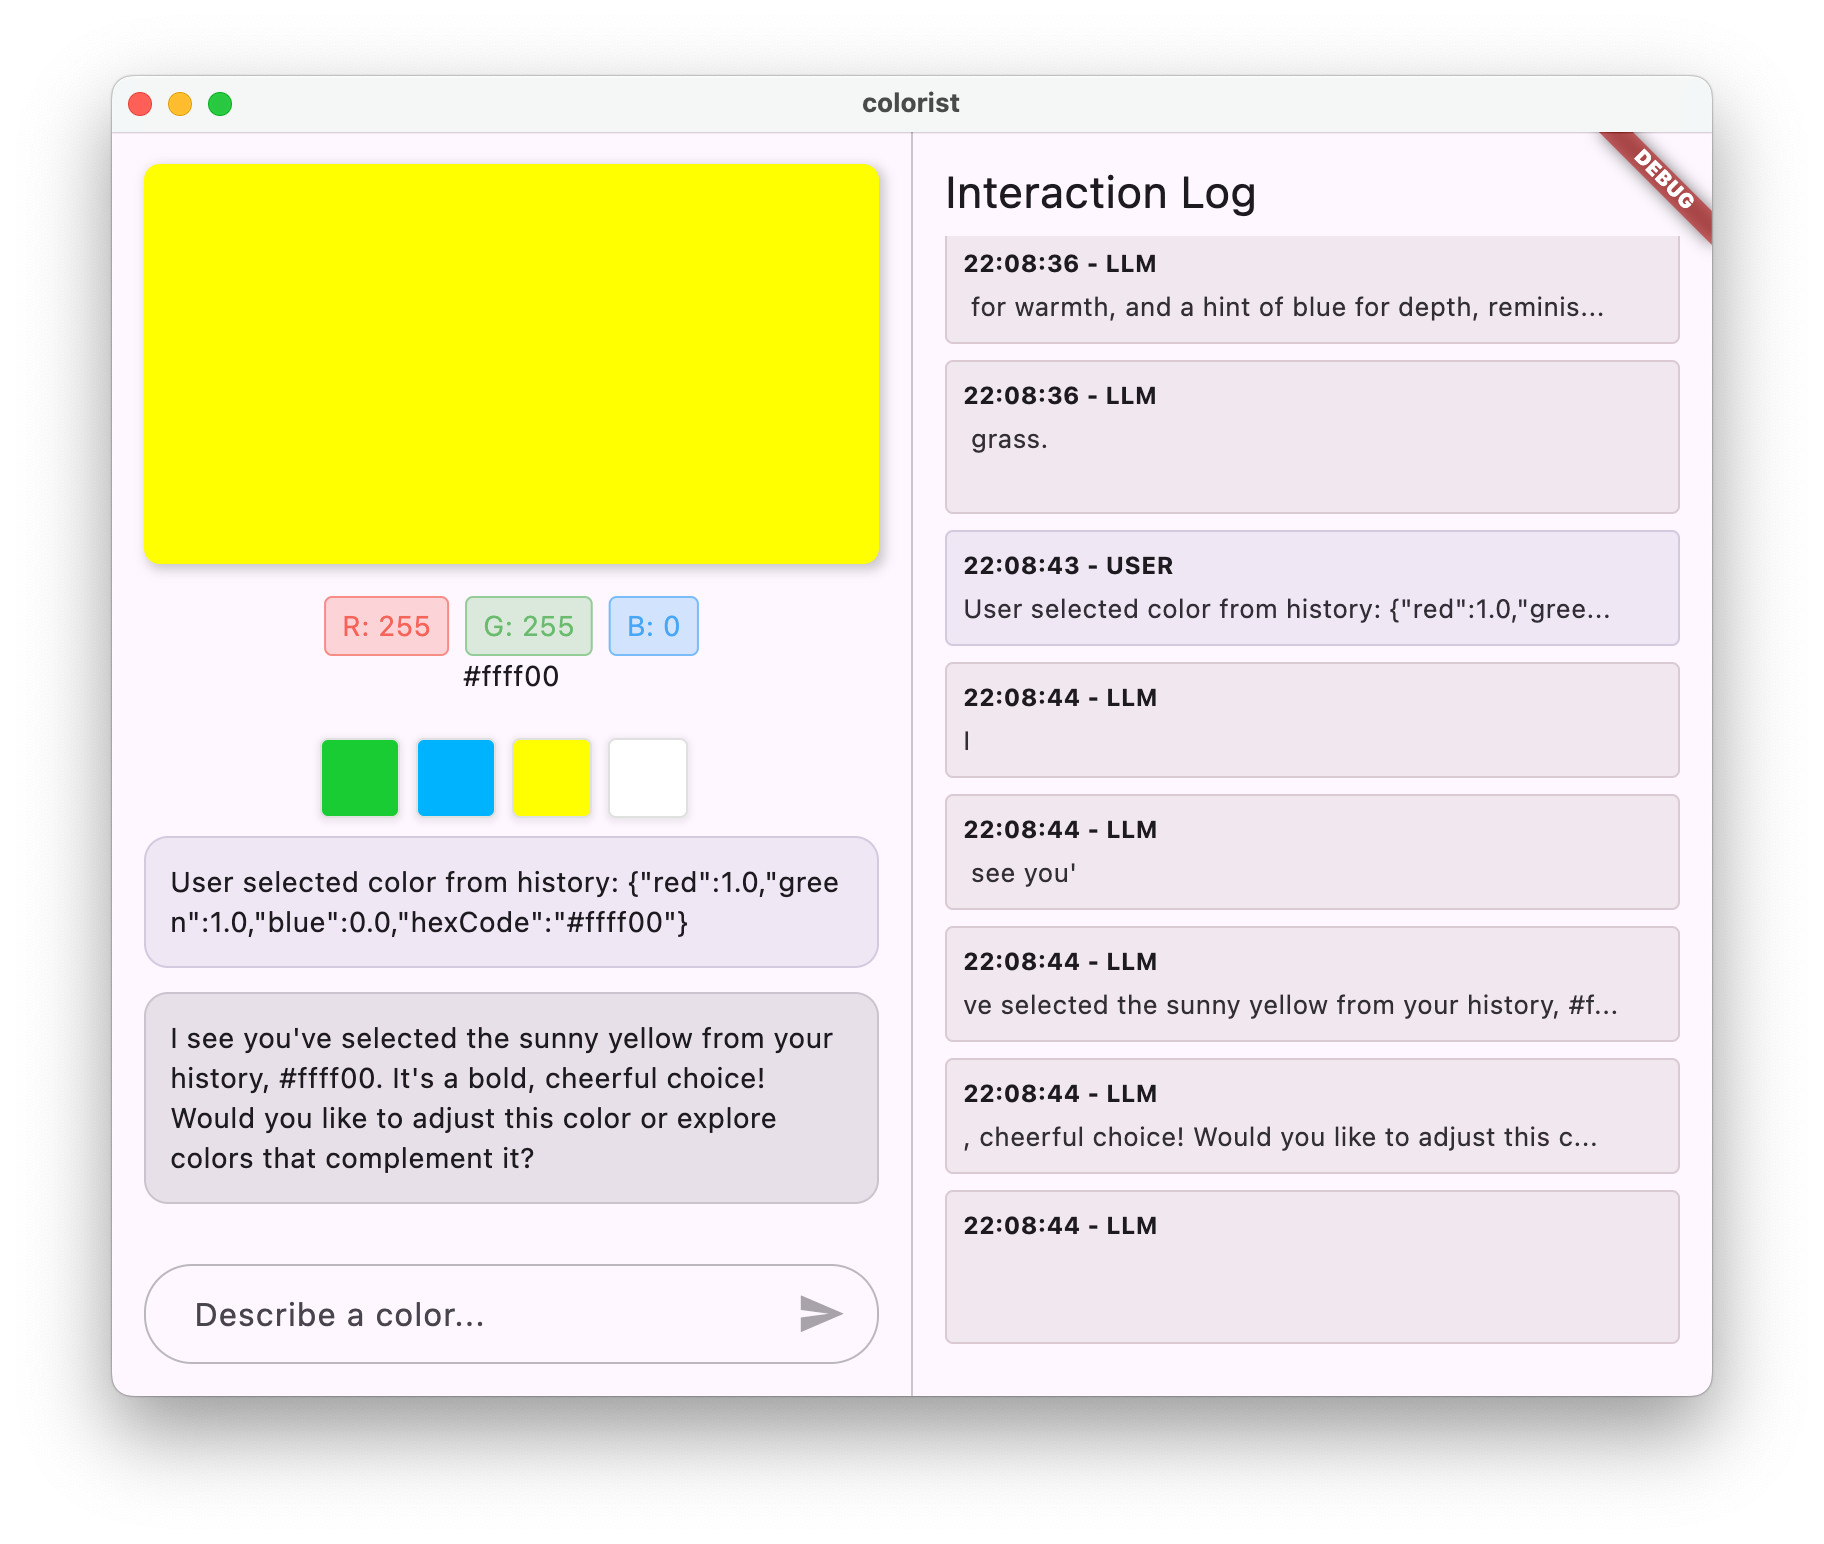
Testing the LLM Context Synchronization involves:
- First, generate a few colors by describing them in the chat
- "Show me a vibrant purple"
- "I'd like a forest green"
- "Give me a bright red"
- Then, click on one of the color thumbnails in the history strip
You should observe:
- The selected color appears in the main display
- A user message appears in the chat indicating the color selection
- The LLM responds by acknowledging the selection and commenting on the color
- The entire interaction feels natural and cohesive
This creates a seamless experience where the LLM is aware of and responds appropriately to both direct messages and UI interactions.
How LLM Context Synchronization works
Let's explore the technical details of how this synchronization works:
Data Flow
- User action : User clicks a color in the history strip
- UI event : The
MainScreenwidget detects this selection - Callback execution : The
notifyColorSelectioncallback is triggered - Message creation : A specially formatted message is created with the color data
- LLM processing : The message is sent to Gemini, which recognizes the format
- Contextual response : Gemini responds appropriately based on the system prompt
- UI update : The response appears in the chat, creating a cohesive experience
Data serialization
A key aspect of this approach is how you serialize the color data:
'User selected color from history: ${json.encode(color.toLLMContextMap())}'
The toLLMContextMap() method (provided by the colorist_ui package) converts a ColorData object into a map with key properties that the LLM can understand. This typically includes:
- RGB values (red, green, blue)
- Hex code representation
- Any name or description associated with the color
By formatting this data consistently and including it in the message, you ensure the LLM has all the information it needs to respond appropriately.
Broader applications of LLM Context Synchronization
This pattern of notifying the LLM about UI events has numerous applications beyond color selection:
Другие варианты использования
- Filter changes : Notify the LLM when users apply filters to data
- Navigation events : Inform the LLM when users navigate to different sections
- Selection changes : Update the LLM when users select items from lists or grids
- Preference updates : Tell the LLM when users change settings or preferences
- Data manipulation : Notify the LLM when users add, edit, or delete data
In each case, the pattern remains the same:
- Detect the UI event
- Serialize relevant data
- Send a specially formatted notification to the LLM
- Guide the LLM to respond appropriately through the system prompt
Best practices for LLM Context Synchronization
Based on your implementation, here are some best practices for effective LLM Context Synchronization:
1. Consistent formatting
Use a consistent format for notifications so the LLM can easily identify them:
"User [action] [object]: [structured data]"
2. Rich context
Include enough detail in notifications for the LLM to respond intelligently. For colors, this means RGB values, hex codes, and any other relevant properties.
3. Clear instructions
Provide explicit instructions in the system prompt about how to handle notifications, ideally with examples.
4. Natural integration
Design notifications to flow naturally in the conversation, not as technical interruptions.
5. Selective notification
Only notify the LLM about actions that are relevant to the conversation. Not every UI event needs to be communicated.
Поиск неисправностей
Notification issues
If the LLM isn't responding properly to color selections:
- Check that the notification message format matches what's described in the system prompt
- Verify that the color data is being properly serialized
- Ensure the system prompt has clear instructions for handling selections
- Look for any errors in the chat service when sending notifications
Context management
If the LLM seems to lose context:
- Check that the chat session is being maintained properly
- Verify that conversation states transition correctly
- Ensure that notifications are being sent through the same chat session
General problems
For general issues:
- Examine the logs for errors or warnings
- Verify Firebase AI Logic connectivity
- Check for any type mismatches in function parameters
- Ensure all Riverpod generated code is up to date
Key concepts learned
- Creating LLM Context Synchronization between UI and LLM
- Serializing UI events into LLM-friendly context
- Guiding LLM behavior for different interaction patterns
- Creating a cohesive experience across message and non-message interactions
- Enhancing LLM awareness of the broader application state
By implementing LLM Context Synchronization, you've created a truly integrated experience where the LLM feels like an aware, responsive assistant rather than just a text generator. This pattern can be applied to countless other applications to create more natural, intuitive AI-powered interfaces.
9. Congratulations!
You've successfully completed the Colorist codelab! 🎉
What you've built
You've created a fully functional Flutter application that integrates Google's Gemini API to interpret natural language color descriptions. Your app can now:
- Process natural language descriptions like "sunset orange" or "deep ocean blue"
- Use Gemini to intelligently translate these descriptions into RGB values
- Display the interpreted colors in real-time with streaming responses
- Handle user interactions through both chat and UI elements
- Maintain contextual awareness across different interaction methods
Where to go from here
Now that you've mastered the basics of integrating Gemini with Flutter, here are some ways to continue your journey:
Enhance your Colorist app
- Color palettes : Add functionality to generate complementary or matching color schemes
- Voice input : Integrate speech recognition for verbal color descriptions
- History management : Add options to name, organize, and export color sets
- Custom prompting : Create an interface for users to customize system prompts
- Advanced analytics : Track which descriptions work best or cause difficulties
Explore more Gemini features
- Multimodal inputs : Add image inputs to extract colors from photos
- Content generation : Use Gemini to generate color-related content like descriptions or stories
- Function calling enhancements : Create more complex tool integrations with multiple functions
- Safety settings : Explore different safety settings and their impact on responses
Apply these patterns to other domains
- Document analysis : Create apps that can understand and analyze documents
- Creative writing assistance : Build writing tools with LLM-powered suggestions
- Task automation : Design apps that translate natural language into automated tasks
- Knowledge-based applications : Create expert systems in specific domains
Ресурсы
Here are some valuable resources to continue your learning:
Official documentation
Prompting course and guide
Сообщество
Observable Flutter Agentic series
In expisode #59, Craig Labenz and Andrew Brogden explore this codelab, highlighting interesting parts of the app build.
In episode #60, join Craig and Andrew again as they extend the codelab app with new capabilities and fight with making LLMs do as they are told.
In episode #61, Craig is joined by Chris Sells to have a fresh take at analysing news headlines and generates corresponding images.
Обратная связь
We'd love to hear about your experience with this codelab! Please consider providing feedback through:
Thank you for completing this codelab, and we hope you continue exploring the exciting possibilities at the intersection of Flutter and AI!