
1. 소개
Flutter 앱에 인앱 구매를 추가하려면 App Store 및 Play 스토어를 올바르게 설정하고, 구매를 확인하고, 구독 혜택과 같은 필요한 권한을 부여해야 합니다.
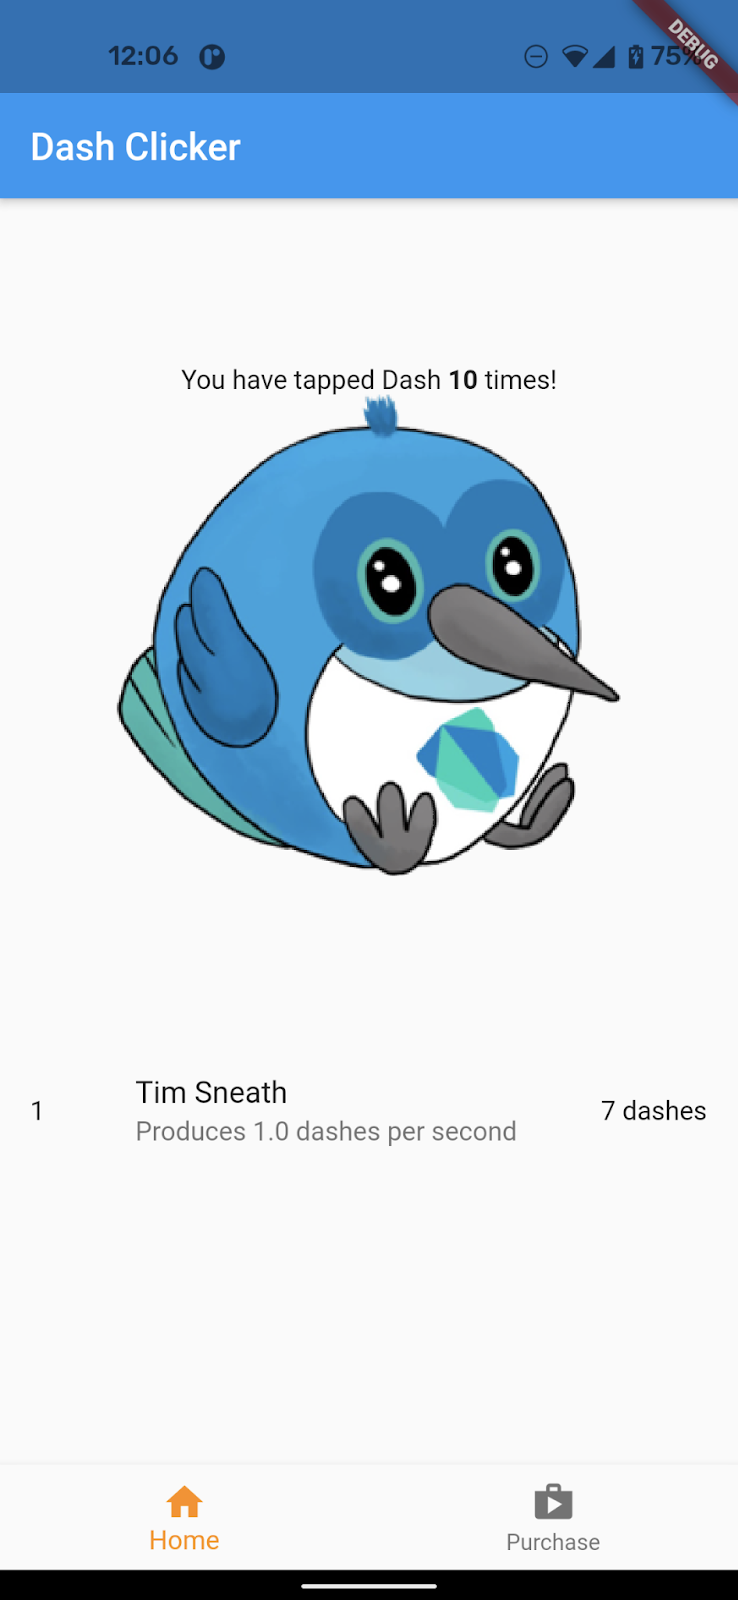
이 Codelab에서는 앱 (제공됨)에 세 가지 유형의 인앱 구매를 추가하고 Firebase를 사용하여 Dart 백엔드를 통해 이러한 구매를 확인합니다. 제공된 앱인 Dash Clicker에는 Dash 마스코트를 통화로 사용하는 게임이 포함되어 있습니다. 다음 구매 옵션을 추가합니다.
- 한 번에 2,000개의 대시를 구매할 수 있는 반복 가능한 구매 옵션입니다.
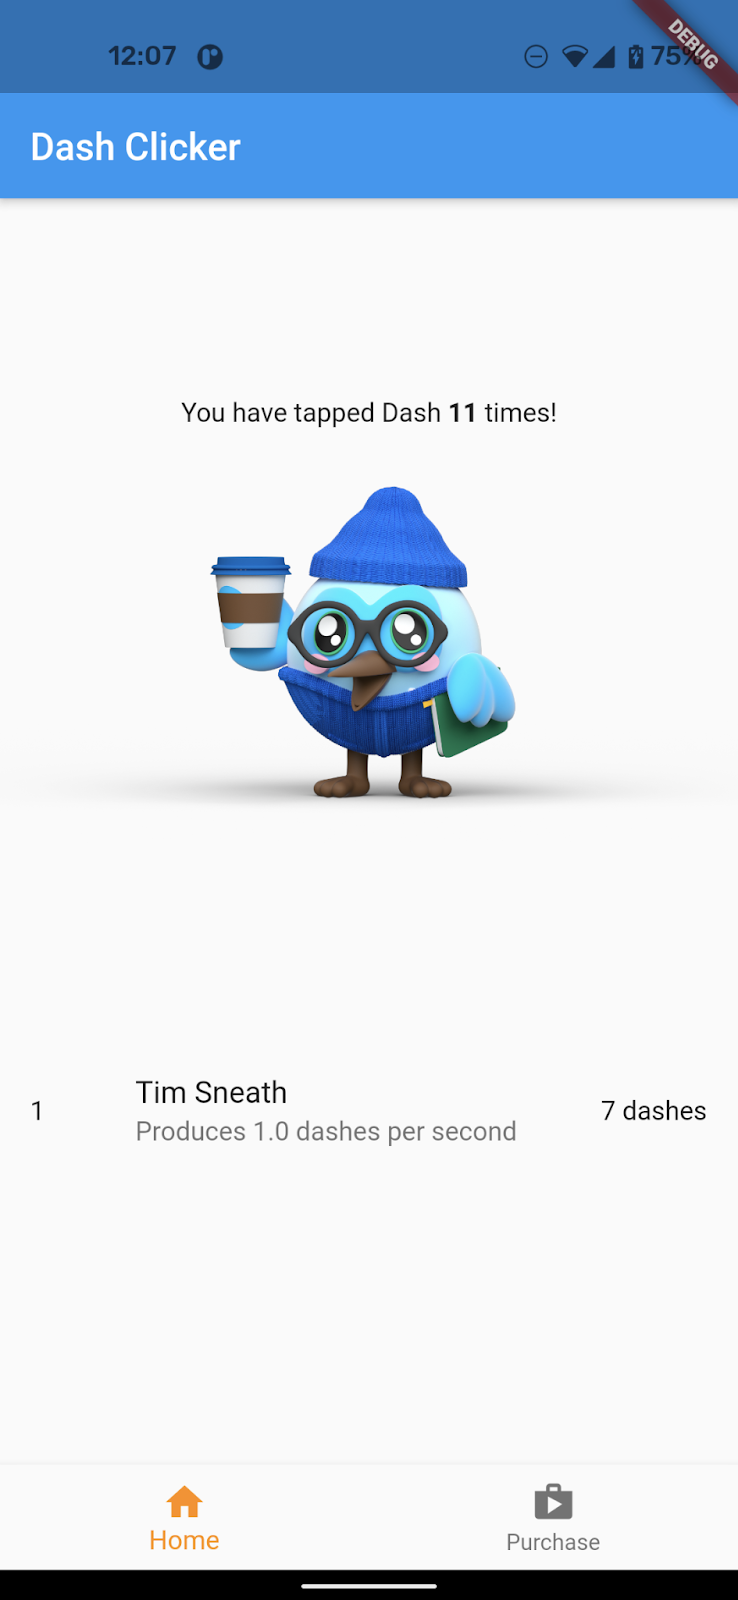
- 이전 스타일 대시를 최신 스타일 대시로 만드는 일회성 업그레이드 구매입니다.
- 자동으로 생성된 클릭수를 두 배로 늘리는 구독입니다.
첫 번째 구매 옵션은 사용자에게 2,000개의 대시라는 직접적인 혜택을 제공합니다. 이러한 상품은 사용자에게 직접 제공되며 여러 번 구매할 수 있습니다. 이러한 항목은 직접 사용되고 여러 번 사용할 수 있으므로 소모품이라고 합니다.
두 번째 옵션은 대시보드를 더 아름다운 대시보드로 업그레이드합니다. 한 번만 구매하면 영구적으로 사용할 수 있습니다. 이러한 구매는 앱에서 소비할 수 없지만 영구적으로 유효하므로 비소모성이라고 합니다.
세 번째이자 마지막 구매 옵션은 정기 결제입니다. 정기 결제가 활성 상태인 동안에는 사용자가 대시를 더 빨리 받지만 정기 결제 요금 지불을 중지하면 혜택도 사라집니다.
백엔드 서비스 (제공됨)는 Dart 앱으로 실행되고 구매가 이루어졌는지 확인하며 Firestore를 사용하여 저장합니다. Firestore는 프로세스를 더 쉽게 만드는 데 사용되지만 프로덕션 앱에서는 모든 유형의 백엔드 서비스를 사용할 수 있습니다.
빌드할 항목
- 소모품 구매 및 정기 결제를 지원하도록 앱을 확장합니다.
- 또한 구매한 항목을 확인하고 저장하도록 Dart 백엔드 앱을 확장합니다.
학습할 내용
- 구매 가능한 제품으로 App Store 및 Play 스토어를 구성하는 방법
- 스토어와 통신하여 구매를 확인하고 Firestore에 저장하는 방법
- 앱에서 구매를 관리하는 방법
필요한 항목
- Android 스튜디오
- Xcode (iOS 개발용)
- Flutter SDK
2. 개발 환경 설정
이 Codelab을 시작하려면 코드를 다운로드하고 iOS의 번들 식별자와 Android의 패키지 이름을 변경하세요.
코드 다운로드
명령줄에서 GitHub 저장소를 클론하려면 다음 명령어를 사용하세요.
git clone https://github.com/flutter/codelabs.git flutter-codelabs
또는 GitHub CLI 도구가 설치되어 있는 경우 다음 명령어를 사용합니다.
gh repo clone flutter/codelabs flutter-codelabs
샘플 코드는 여러 Codelab의 코드가 포함된 flutter-codelabs 디렉터리에 클론됩니다. 이 Codelab의 코드는 flutter-codelabs/in_app_purchases에 있습니다.
flutter-codelabs/in_app_purchases 아래의 디렉터리 구조에는 각 명명된 단계의 끝에 있어야 하는 위치의 스냅샷이 포함되어 있습니다. 시작 코드는 0단계에 있으므로 다음과 같이 이동합니다.
cd flutter-codelabs/in_app_purchases/step_00
앞으로 건너뛰거나 단계 후의 모습을 확인하려면 관심 있는 단계의 이름을 딴 디렉터리를 확인하세요. 마지막 단계의 코드는 complete 폴더에 있습니다.
스타터 프로젝트 설정
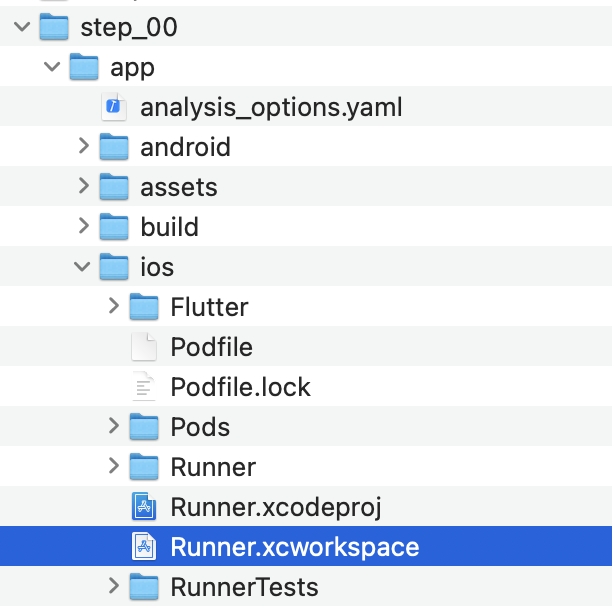
선호하는 IDE에서 step_00/app의 시작 프로젝트를 엽니다. 스크린샷에는 Android 스튜디오를 사용했지만 Visual Studio Code도 좋은 선택입니다. 어떤 편집기를 사용하든 최신 Dart 및 Flutter 플러그인이 설치되어 있는지 확인합니다.
만들려는 앱은 App Store 및 Play 스토어와 통신하여 어떤 제품이 어떤 가격으로 제공되는지 알아야 합니다. 모든 앱은 고유한 ID로 식별됩니다. iOS App Store에서는 번들 식별자라고 하고 Android Play 스토어에서는 애플리케이션 ID라고 합니다. 이러한 식별자는 일반적으로 역 도메인 이름 표기법을 사용하여 만들어집니다. 예를 들어 flutter.dev용 인앱 구매 앱을 만들 때는 dev.flutter.inapppurchase를 사용합니다. 앱의 식별자를 생각합니다. 이제 프로젝트 설정에서 이를 설정합니다.
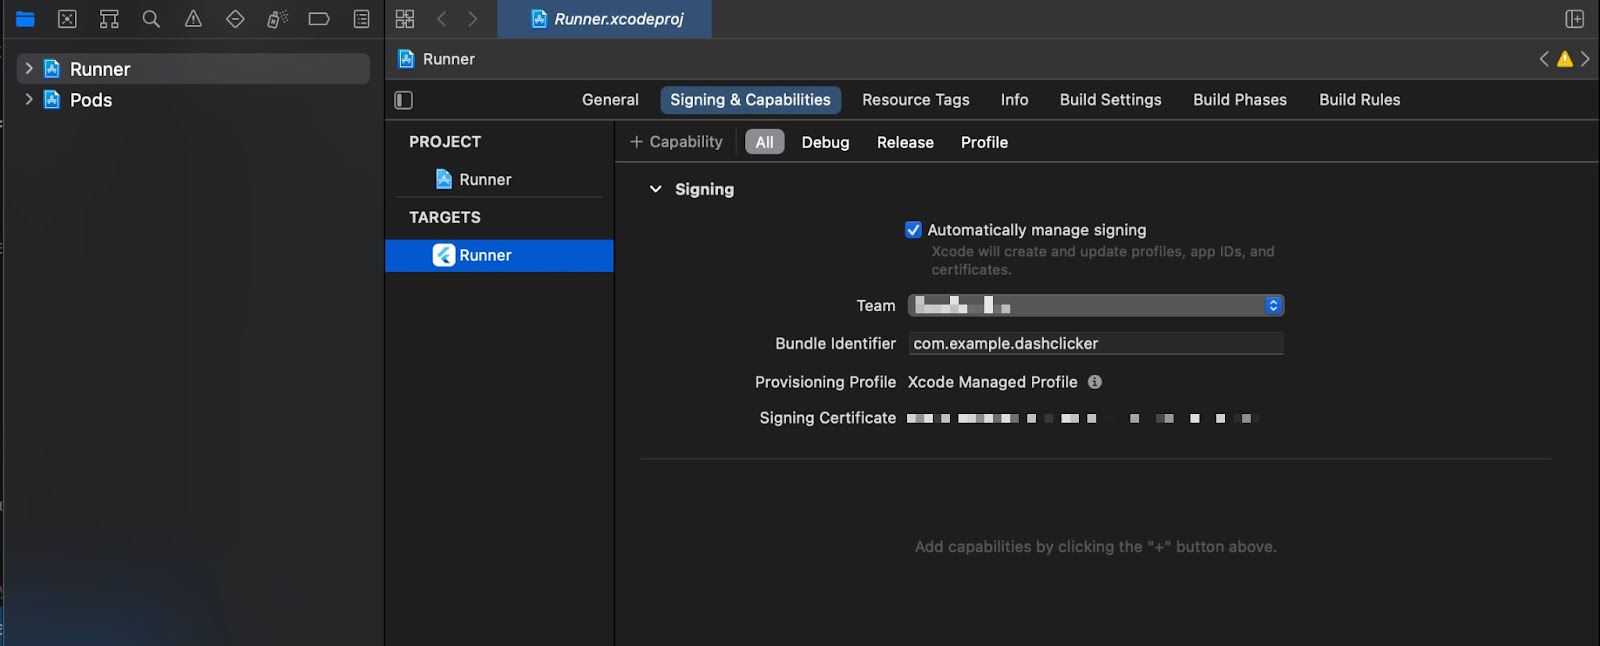
먼저 iOS의 번들 식별자를 설정합니다. 이렇게 하려면 Xcode 앱에서 Runner.xcworkspace 파일을 엽니다.
Xcode의 폴더 구조에서 Runner 프로젝트는 최상위에 있고 Flutter, Runner, Products 타겟은 Runner 프로젝트 아래에 있습니다. Runner를 더블클릭하여 프로젝트 설정을 수정하고 서명 및 기능을 클릭합니다. 팀 필드에 방금 선택한 번들 식별자를 입력하여 팀을 설정합니다.
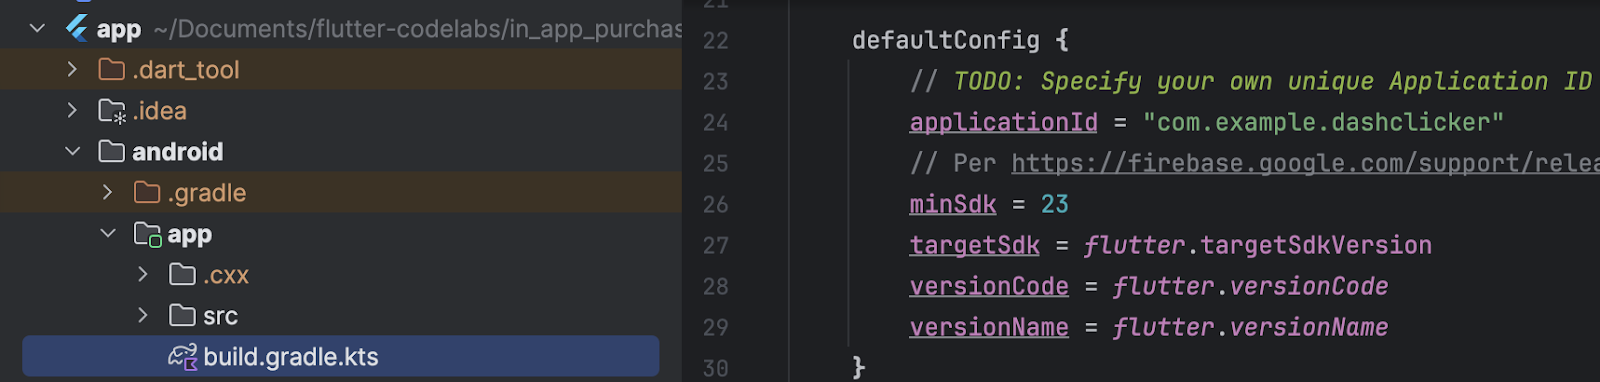
이제 Xcode를 닫고 Android 스튜디오로 돌아가 Android 구성을 완료할 수 있습니다. 이렇게 하려면 android/app,에서 build.gradle.kts 파일을 열고 applicationId (아래 스크린샷의 24번째 줄)를 iOS 번들 식별자와 동일한 애플리케이션 ID로 변경합니다. iOS 스토어와 Android 스토어의 ID는 동일하지 않아도 되지만 동일하게 유지하는 것이 오류가 발생할 가능성이 적으므로 이 Codelab에서도 동일한 식별자를 사용합니다.
3. 플러그인 설치
Codelab의 이 부분에서는 in_app_purchase 플러그인을 설치합니다.
pubspec에 종속 항목 추가
프로젝트의 종속 항목에 in_app_purchase를 추가하여 in_app_purchase를 pubspec에 추가합니다.
$ cd app
$ flutter pub add in_app_purchase dev:in_app_purchase_platform_interface
Resolving dependencies...
Downloading packages...
  characters 1.4.0 (1.4.1 available)
  flutter_lints 5.0.0 (6.0.0 available)
+ in_app_purchase 3.2.3
+ in_app_purchase_android 0.4.0+3
+ in_app_purchase_platform_interface 1.4.0
+ in_app_purchase_storekit 0.4.4
+ json_annotation 4.9.0
  lints 5.1.1 (6.0.0 available)
  material_color_utilities 0.11.1 (0.13.0 available)
  meta 1.16.0 (1.17.0 available)
  provider 6.1.5 (6.1.5+1 available)
  test_api 0.7.6 (0.7.7 available)
Changed 5 dependencies!
7 packages have newer versions incompatible with dependency constraints.
Try `flutter pub outdated` for more information.
pubspec.yaml을 열고 in_app_purchase이 dependencies 아래 항목으로, in_app_purchase_platform_interface이 dev_dependencies 아래 항목으로 나열되어 있는지 확인합니다.
pubspec.yaml
dependencies:
  flutter:
    sdk: flutter
  cloud_firestore: ^6.0.0
  cupertino_icons: ^1.0.8
  firebase_auth: ^6.0.1
  firebase_core: ^4.0.0
  google_sign_in: ^7.1.1
  http: ^1.5.0
  intl: ^0.20.2
  provider: ^6.1.5
  logging: ^1.3.0
  in_app_purchase: ^3.2.3

dev_dependencies:
  flutter_test:
    sdk: flutter
  flutter_lints: ^5.0.0
  in_app_purchase_platform_interface: ^1.4.0
4. App Store 설정
iOS에서 인앱 구매를 설정하고 테스트하려면 App Store에서 새 앱을 만들고 구매 가능한 제품을 만들어야 합니다. 아무것도 게시하거나 검토를 위해 앱을 Apple에 전송하지 않아도 됩니다. 이 작업을 수행하려면 개발자 계정이 필요합니다. 계정이 없으면 Apple 개발자 프로그램에 등록하세요.
유료 앱 계약
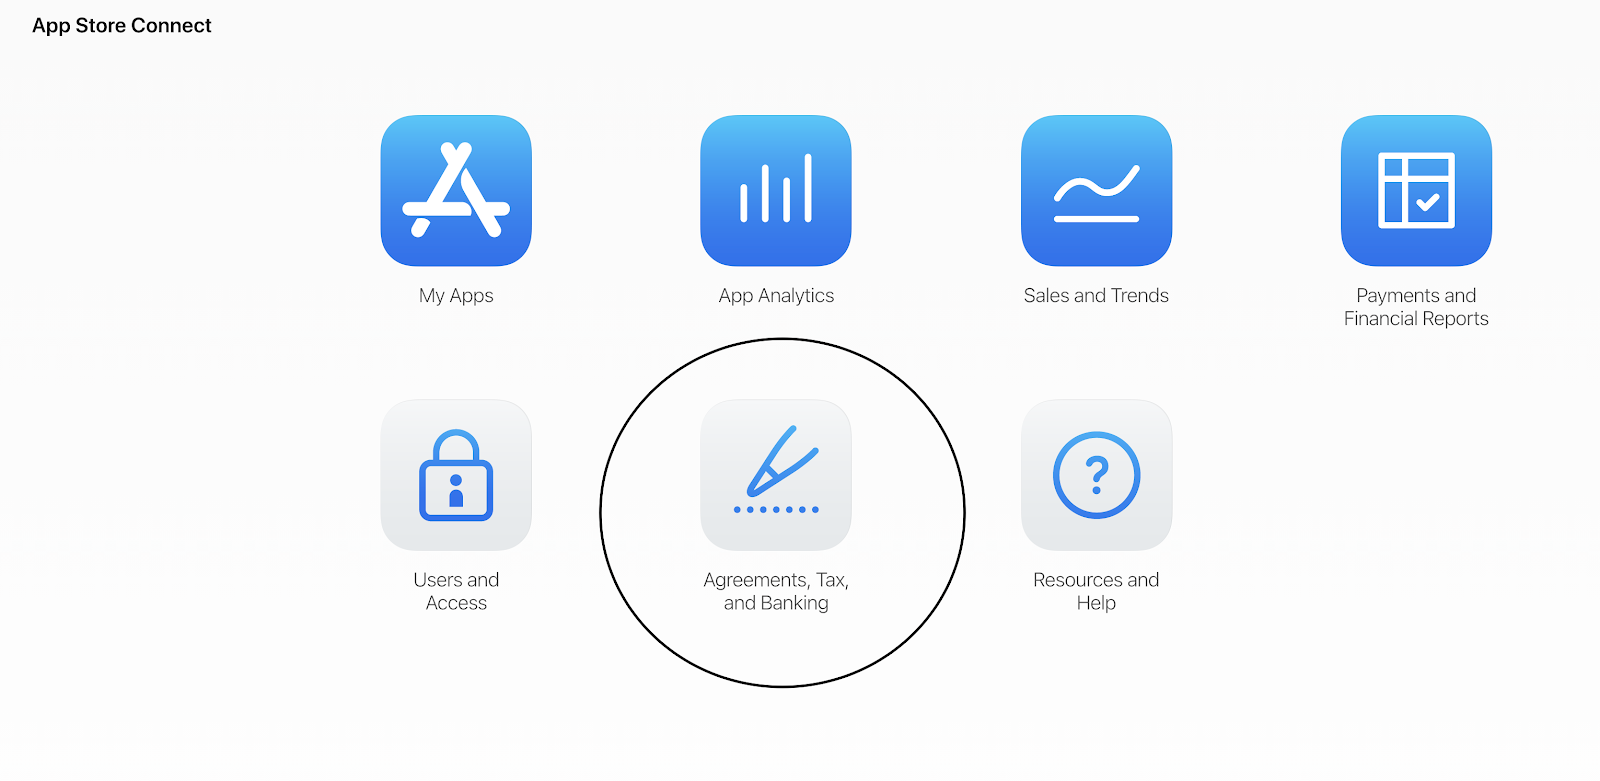
인앱 구매를 사용하려면 App Store Connect에서 유료 앱에 대한 계약이 활성 상태여야 합니다. https://appstoreconnect.apple.com/으로 이동하여 계약, 세금, 은행을 클릭합니다.
여기에는 무료 앱과 유료 앱에 대한 계약이 표시됩니다. 무료 앱의 상태는 활성 상태여야 하고 유료 앱의 상태는 신규여야 합니다. 약관을 확인하고 동의한 후 필요한 정보를 모두 입력해야 합니다.

모든 항목이 올바르게 설정되면 유료 앱의 상태가 활성으로 표시됩니다. 활성 계약이 없으면 인앱 구매를 사용해 볼 수 없으므로 이 단계는 매우 중요합니다.

앱 ID 등록
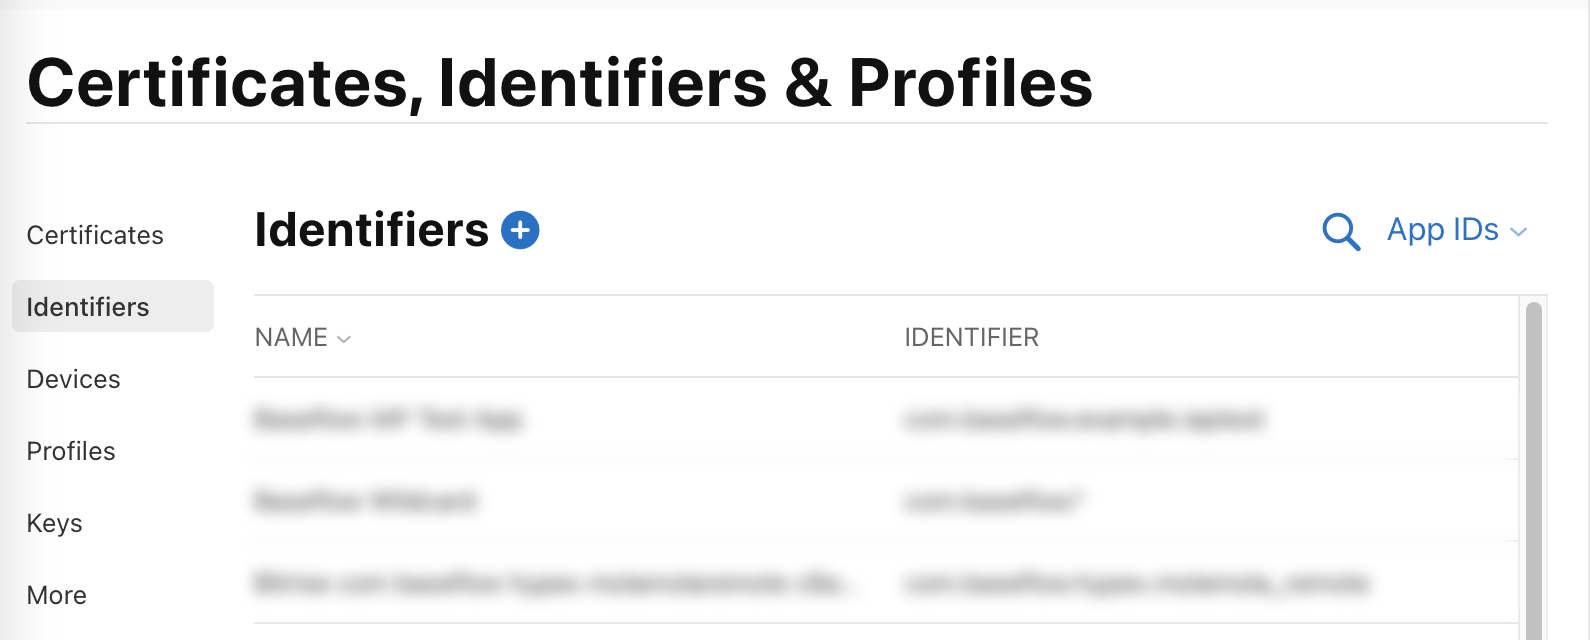
Apple Developer Portal에서 새 식별자를 만듭니다. developer.apple.com/account/resources/identifiers/list를 방문하여 식별자 헤더 옆에 있는 '더하기' 아이콘을 클릭합니다.
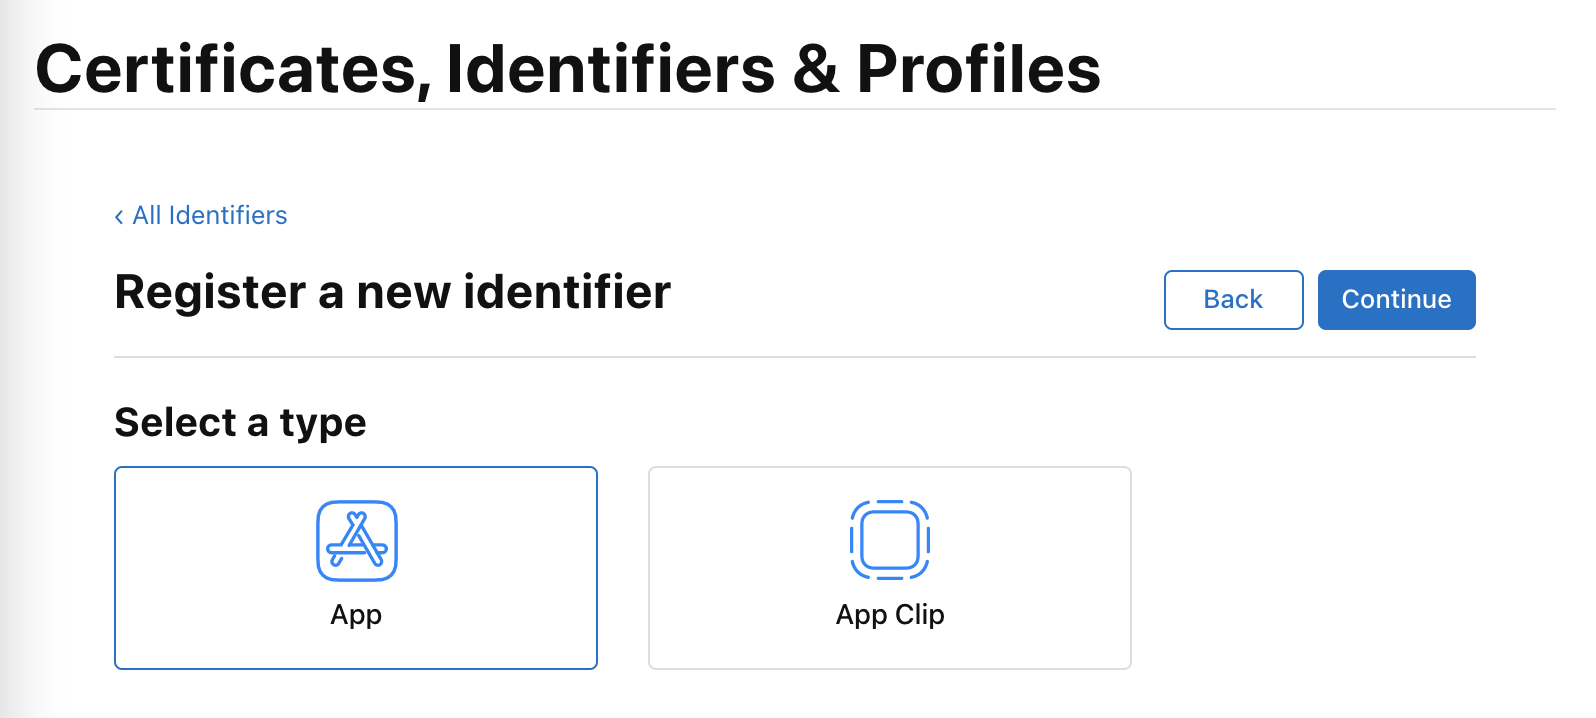
앱 ID 선택
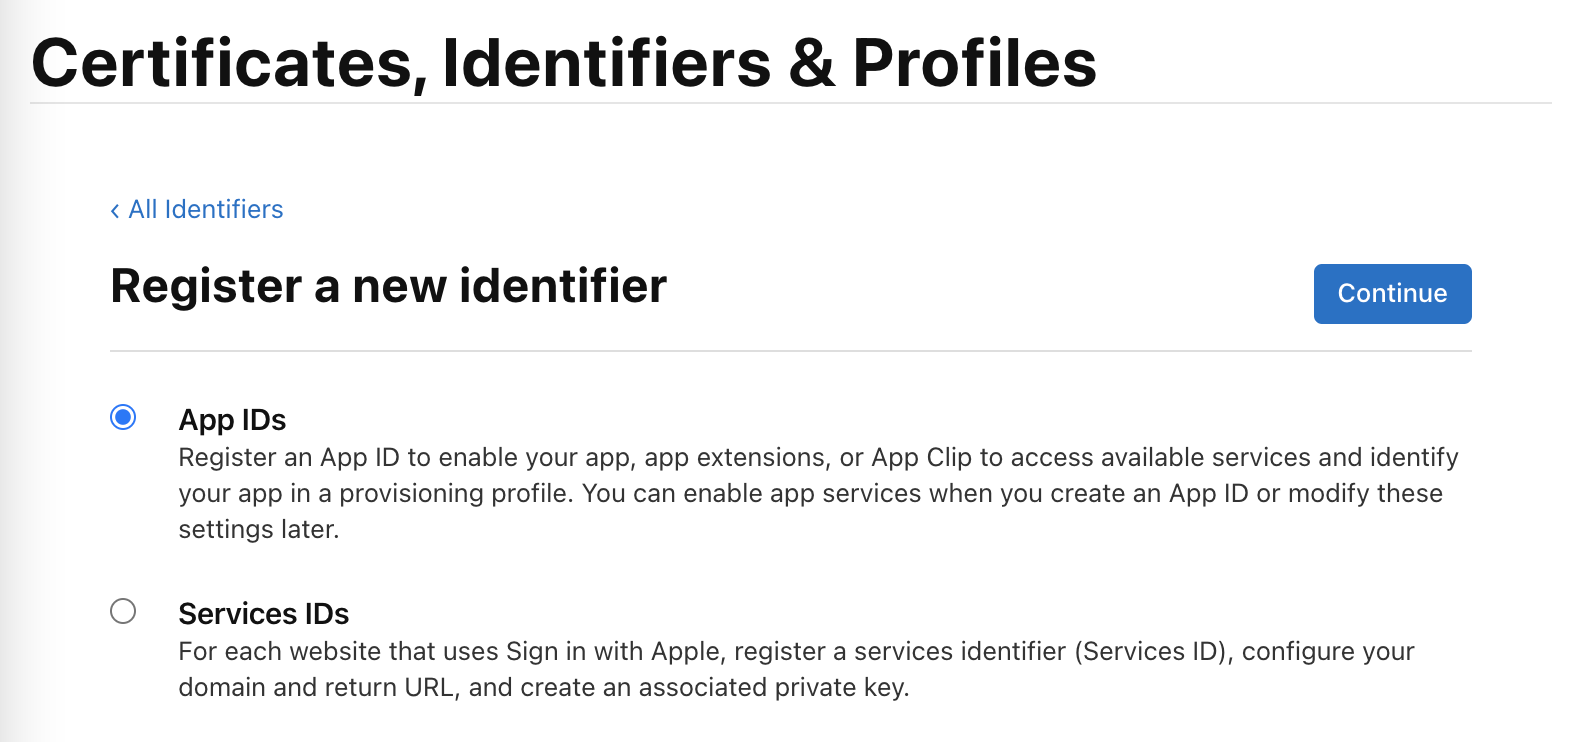
앱 선택
설명을 제공하고 번들 ID를 이전에 Xcode에서 설정한 것과 동일한 값으로 설정합니다.
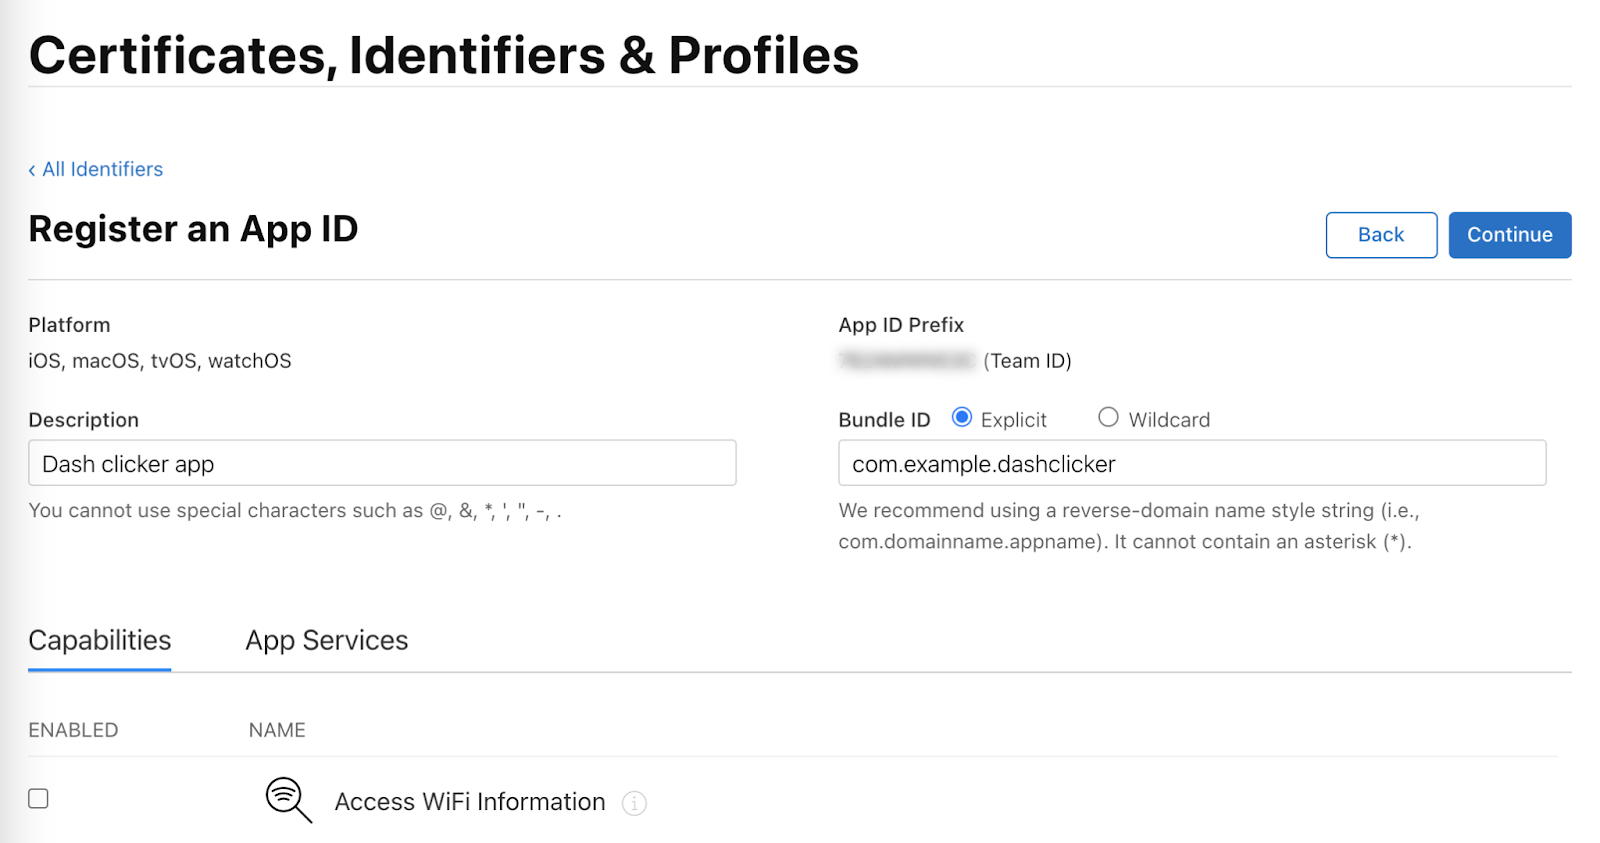
새 앱 ID를 만드는 방법에 대한 자세한 내용은 개발자 계정 도움말을 참고하세요.
새 앱 만들기
고유한 번들 식별자를 사용하여 App Store Connect에서 새 앱을 만듭니다.

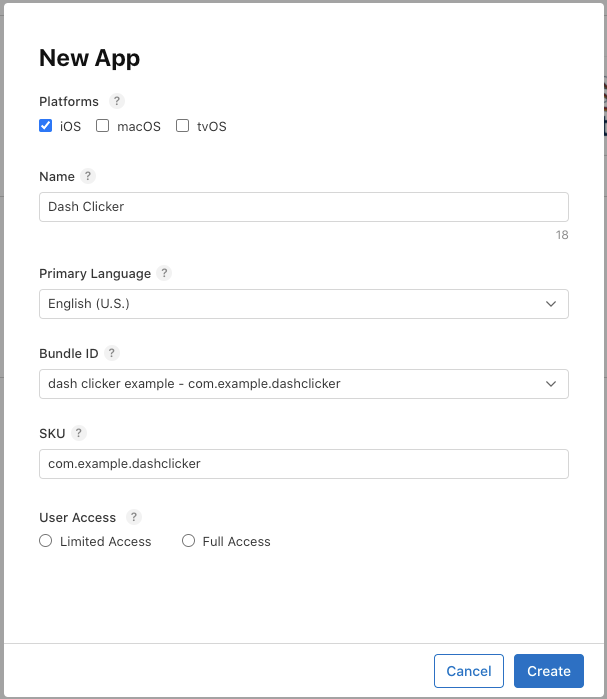
새 앱을 만들고 계약을 관리하는 방법에 관한 자세한 내용은 App Store Connect 도움말을 참고하세요.
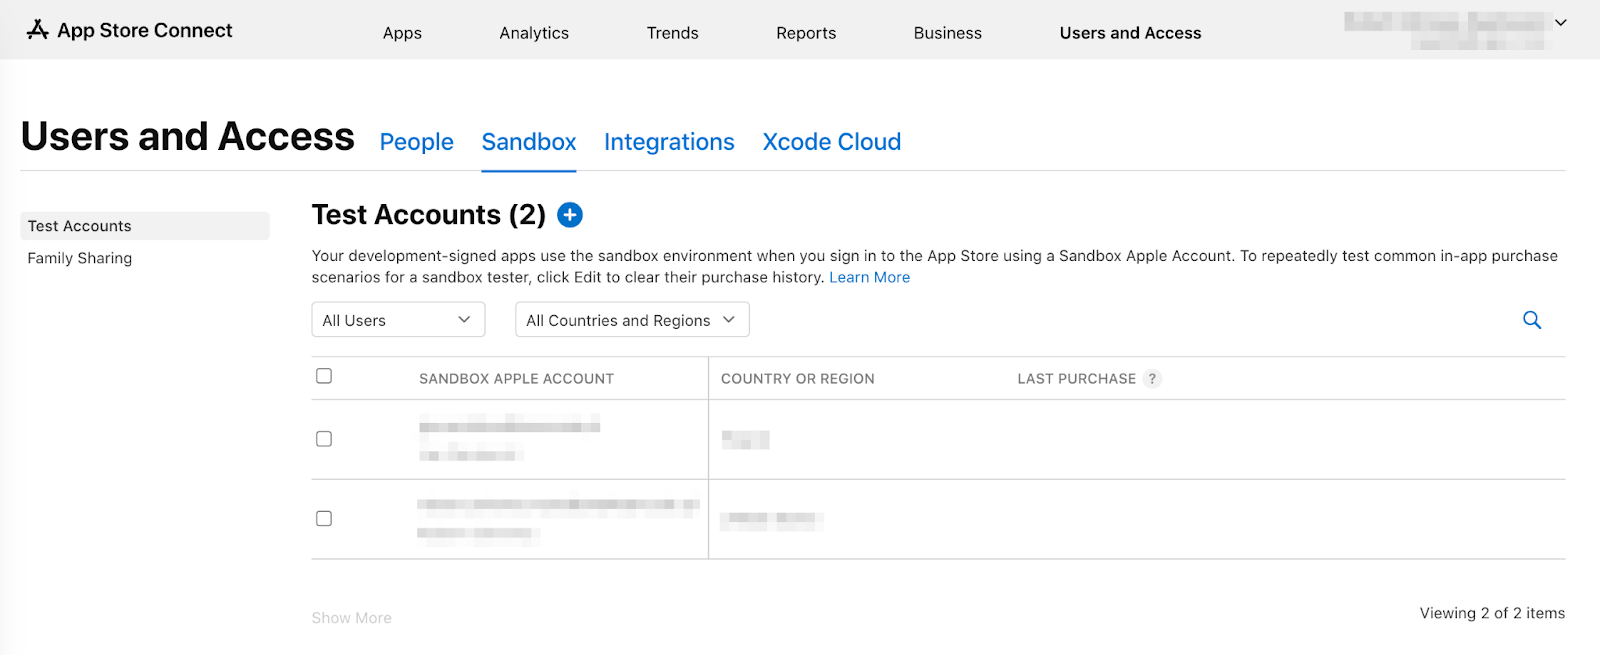
인앱 구매를 테스트하려면 샌드박스 테스트 사용자가 필요합니다. 이 테스트 사용자는 iTunes에 연결되어서는 안 됩니다. 인앱 구매 테스트에만 사용됩니다. Apple 계정에 이미 사용 중인 이메일 주소는 사용할 수 없습니다. 사용자 및 액세스에서 샌드박스로 이동하여 새 샌드박스 계정을 만들거나 기존 샌드박스 Apple ID를 관리합니다.
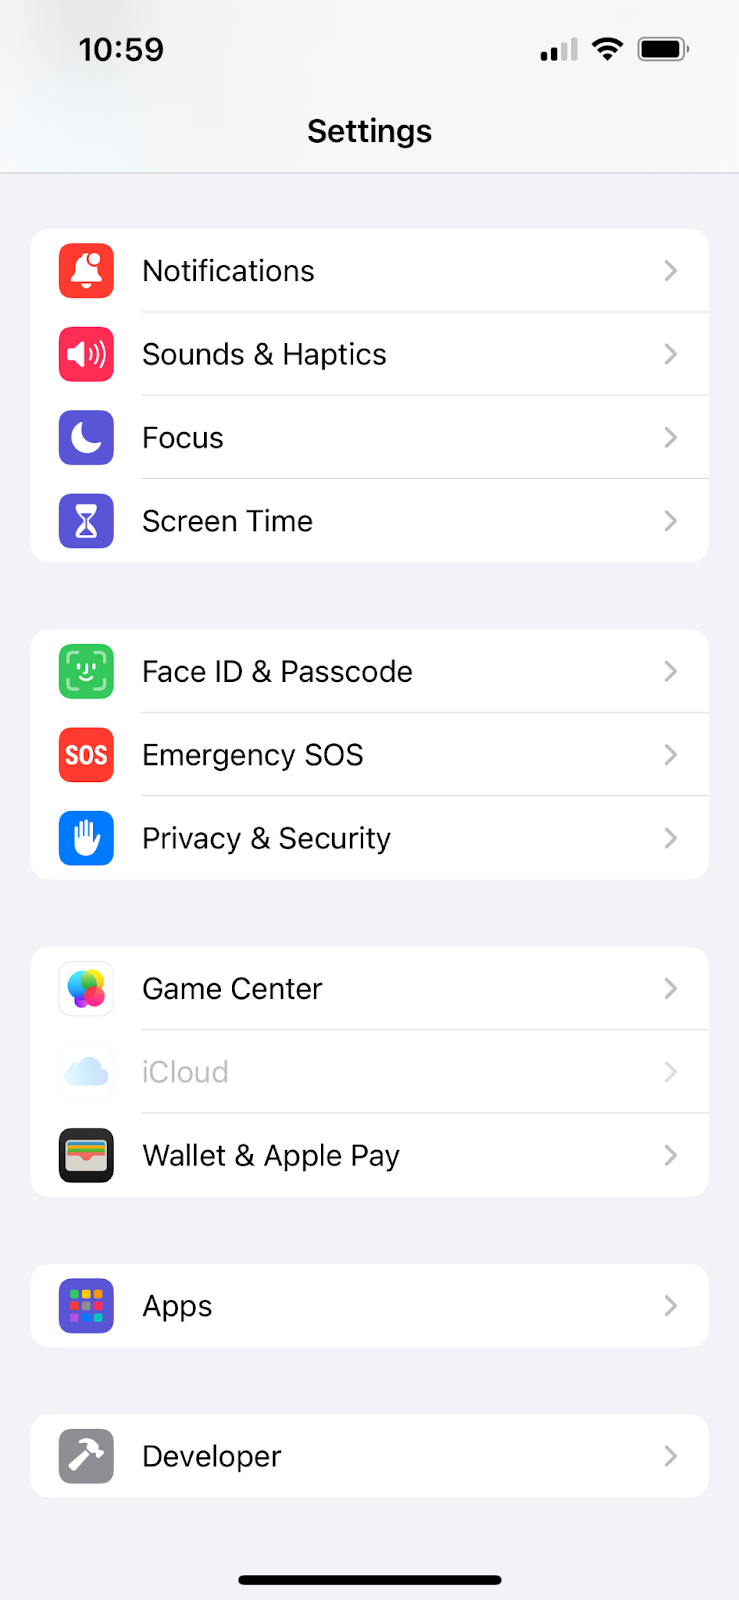
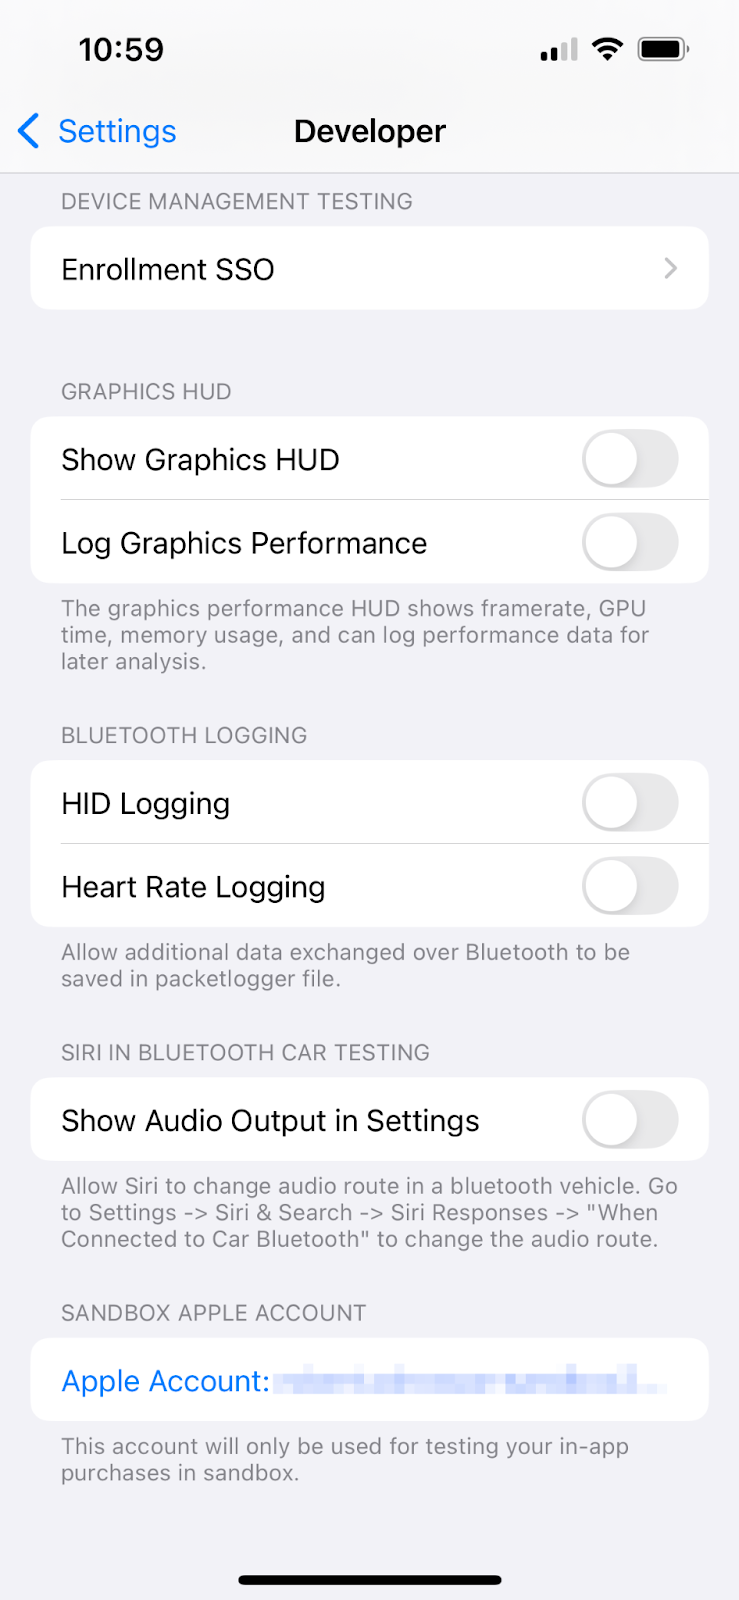
이제 설정 > 개발자 > 샌드박스 Apple 계정으로 이동하여 iPhone에서 샌드박스 사용자를 설정할 수 있습니다.
인앱 구매 구성하기
이제 구매 가능한 항목 3개를 구성합니다.
dash_consumable_2k: 여러 번 구매할 수 있는 소비성 구매로, 구매당 사용자에게 2,000개의 대시 (인앱 통화)를 부여합니다.dash_upgrade_3d: 한 번만 구매할 수 있으며 사용자가 클릭할 수 있는 외형이 다른 대시를 제공하는 소모성 없는 '업그레이드' 구매입니다.dash_subscription_doubler: 구독 기간 동안 클릭당 대시를 두 배로 부여하는 구독입니다.
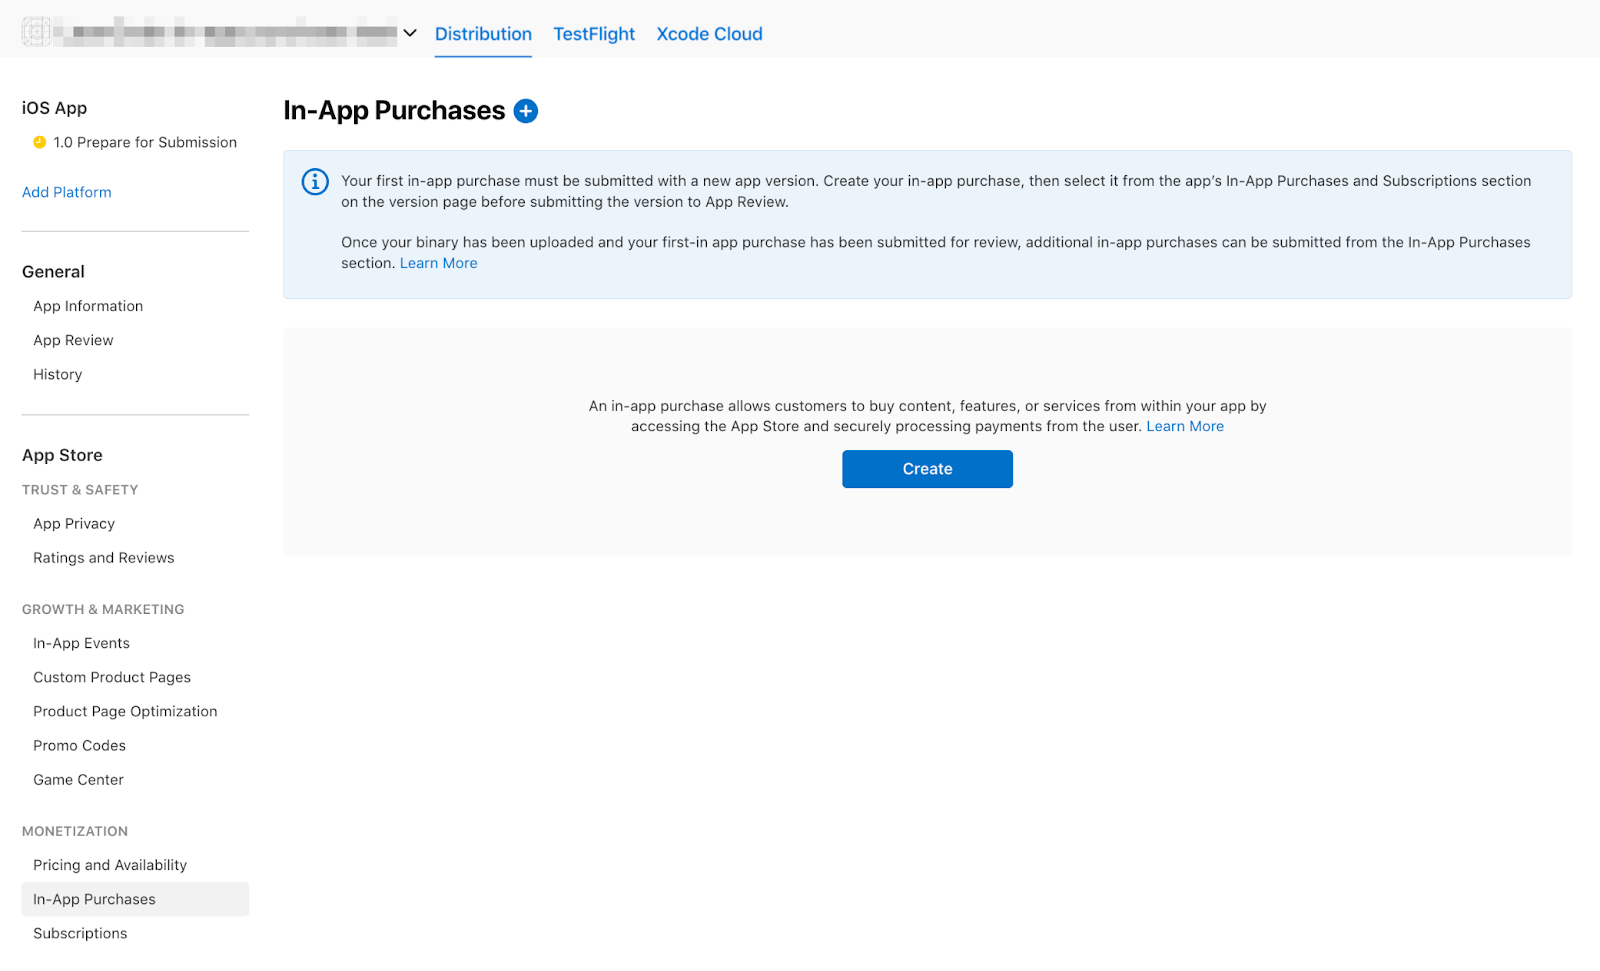
인앱 구매로 이동합니다.
지정된 ID로 인앱 구매를 만듭니다.
dash_consumable_2k을 소모품으로 설정합니다.dash_consumable_2k를 제품 ID로 사용합니다. 참조 이름은 App Store Connect에서만 사용되므로dash consumable 2k로 설정하면 됩니다.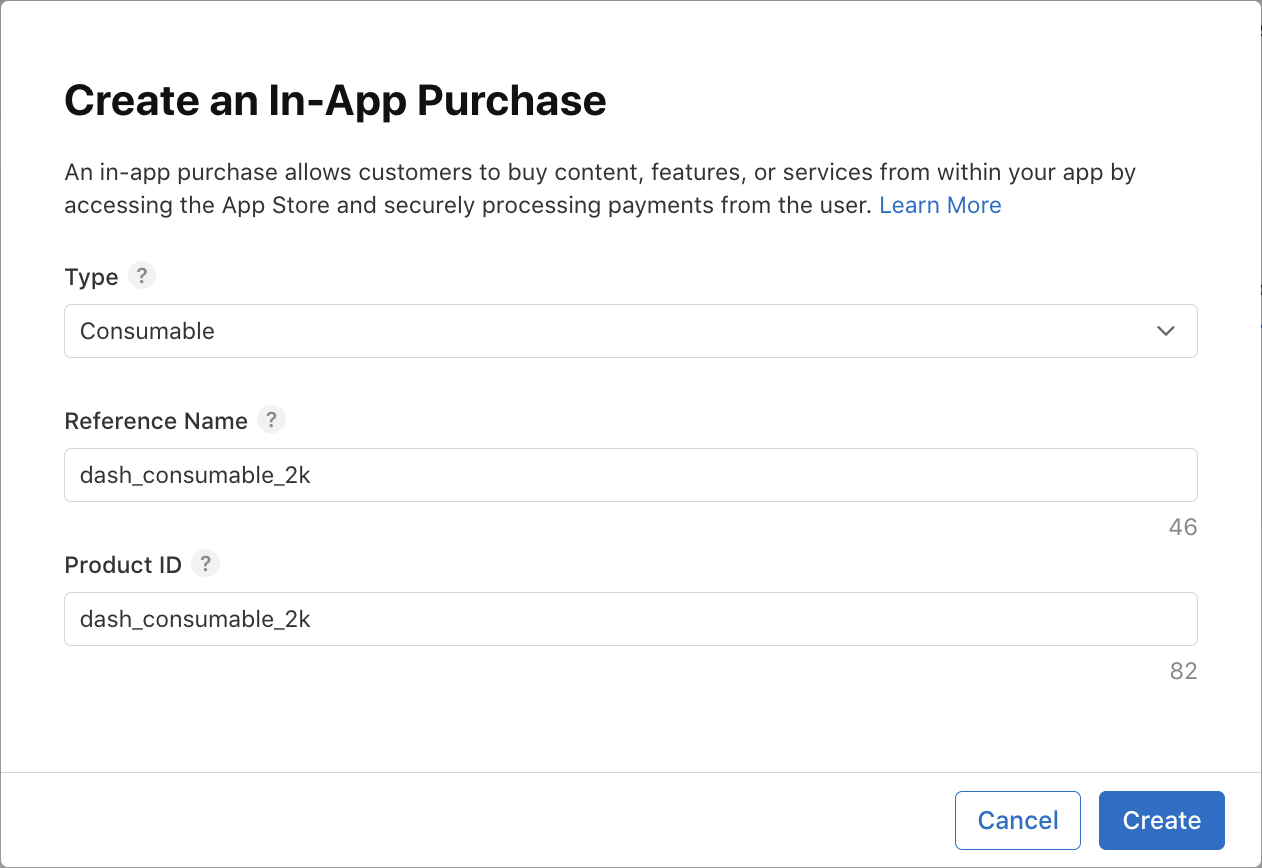 예약 가능 여부를 설정합니다. 제품이 샌드박스 사용자의 국가에서 제공되어야 합니다.
  가격을 추가하고 가격을
 $1.99또는 다른 통화로 이에 상응하는 금액으로 설정합니다.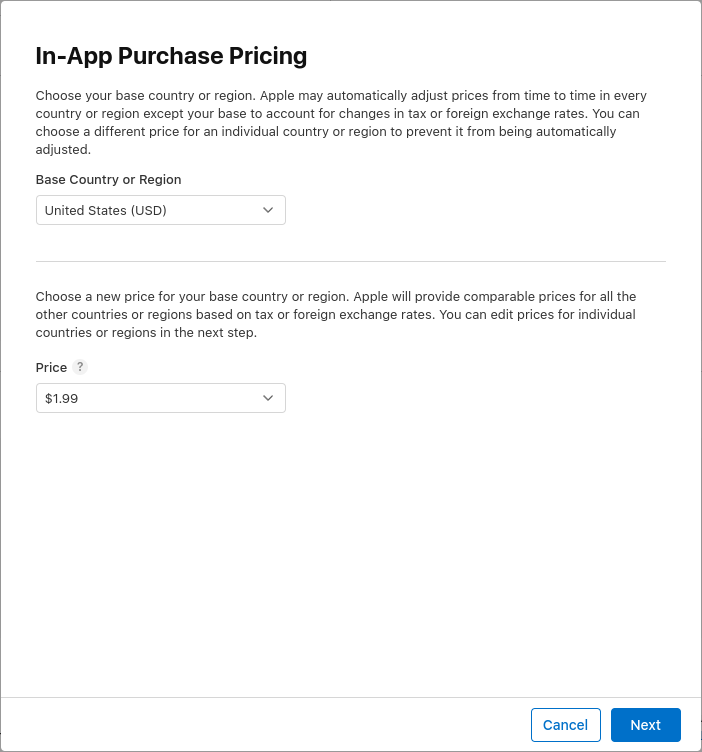 구매에 대한 현지화 버전을 추가합니다.
 2000 dashes fly out을 설명으로 사용하여 구매Spring is in the air을 호출합니다.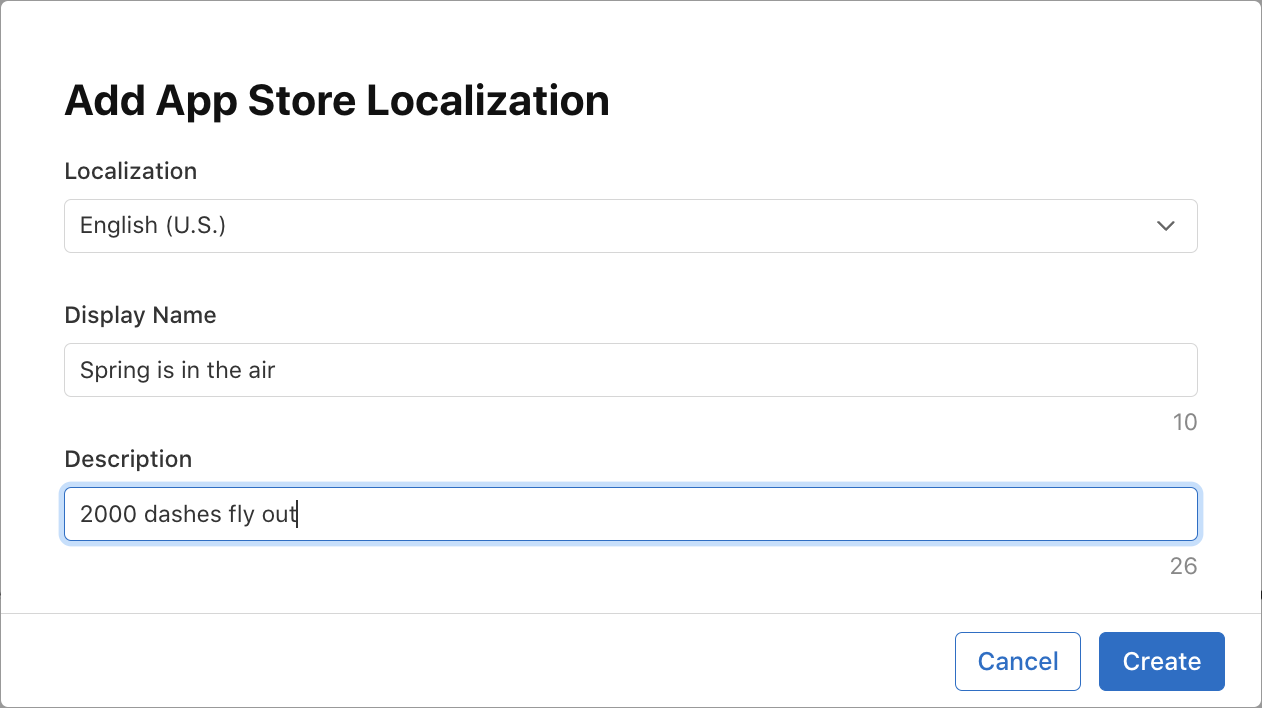 리뷰 스크린샷을 추가합니다. 제품이 검토를 위해 전송되지 않는 한 콘텐츠는 중요하지 않지만, 앱이 App Store에서 제품을 가져올 때 필요한 '제출 준비 완료' 상태가 되려면 콘텐츠가 필요합니다.
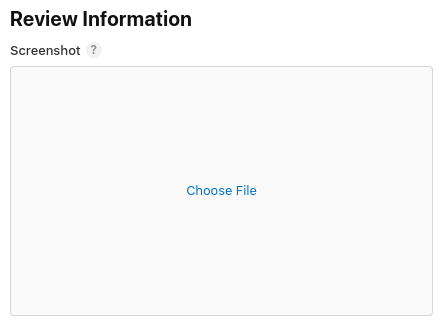
dash_upgrade_3d을 소모성 아님으로 설정합니다.dash_upgrade_3d를 제품 ID로 사용합니다. 참조 이름을dash upgrade 3d로 설정합니다.Brings your dash back to the future을 설명으로 사용하여 구매3D Dash을 호출합니다. 가격을$0.99로 설정합니다.dash_consumable_2k제품과 동일한 방식으로 재고를 구성하고 리뷰 스크린샷을 업로드합니다.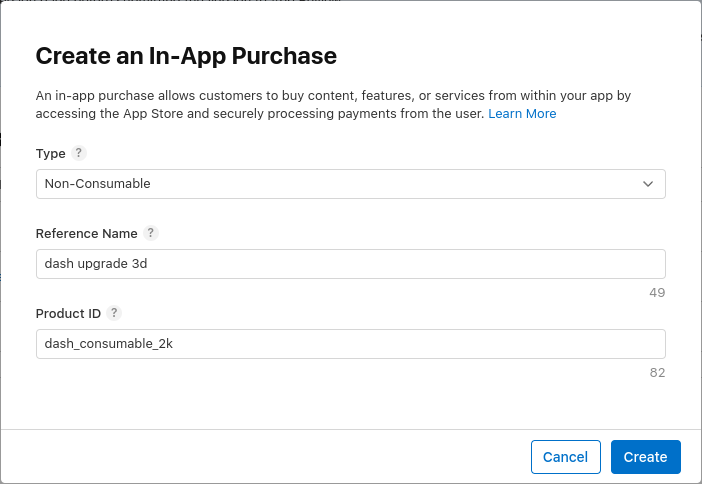
dash_subscription_doubler을 자동 갱신 정기 결제로 설정합니다. 정기 결제의 흐름은 약간 다릅니다. 먼저 정기 결제 그룹을 만들어야 합니다. 여러 정기 결제가 동일한 그룹에 속한 경우 사용자는 동시에 이러한 정기 결제 중 하나만 구독할 수 있지만 이러한 정기 결제 간에 업그레이드 또는 다운그레이드할 수 있습니다. 이 그룹의 이름을subscriptions로 지정해 줘.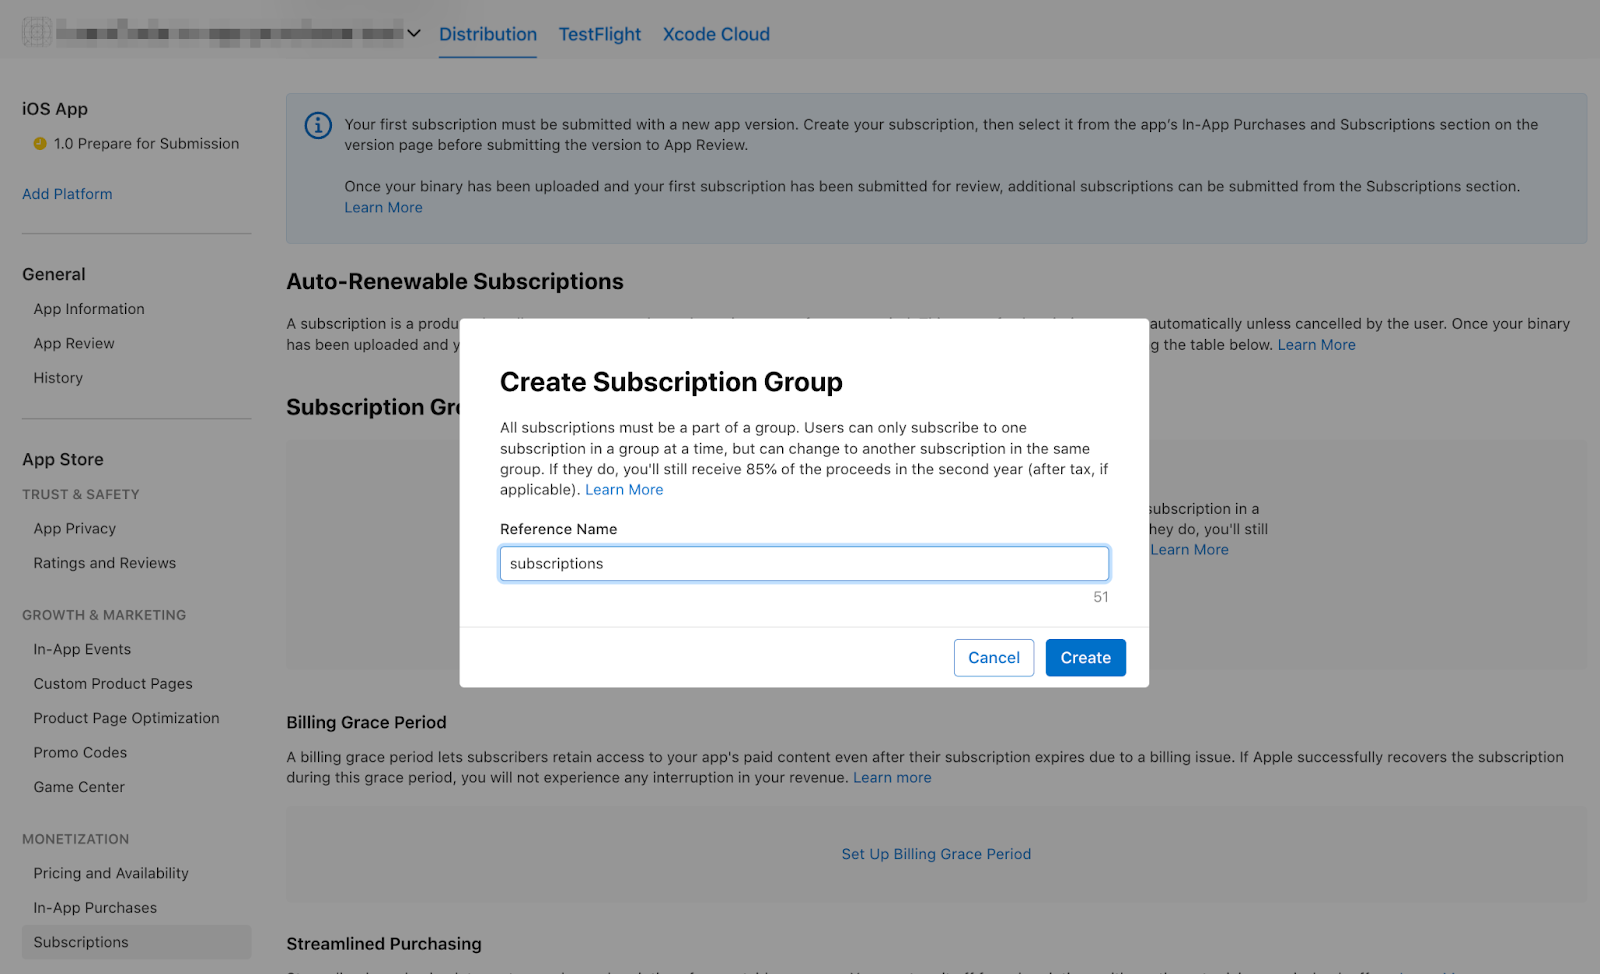 요금제 그룹의 현지화도 추가합니다.
 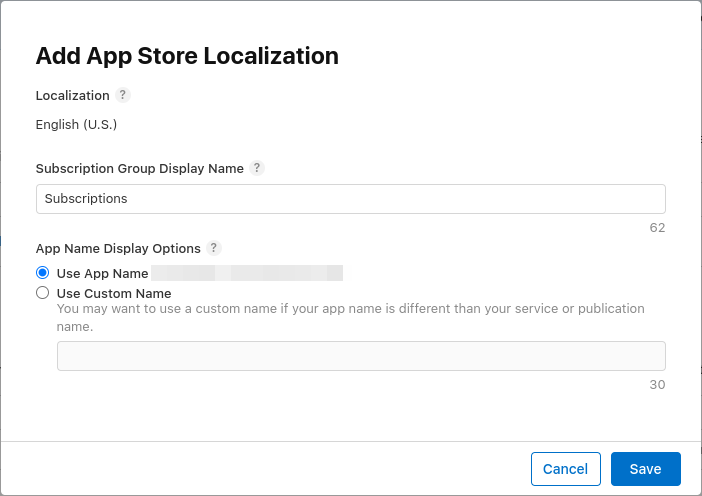 다음으로 구독을 만듭니다. 참조 이름을
 dash subscription doubler로 설정하고 제품 ID를dash_subscription_doubler로 설정합니다.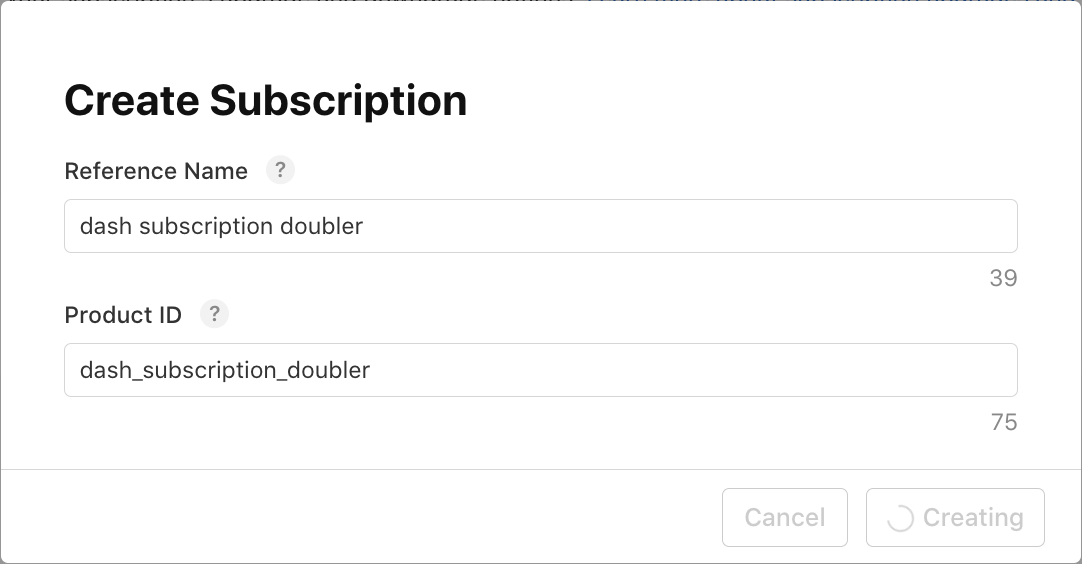 다음으로 구독 기간(1주일)과 현지화 언어를 선택합니다. 이 구독의 이름을
 Jet Engine으로 지정하고 설명은Doubles your clicks으로 지정해 줘. 가격을$0.49로 설정합니다.dash_consumable_2k제품과 동일한 방식으로 재고를 구성하고 리뷰 스크린샷을 업로드합니다.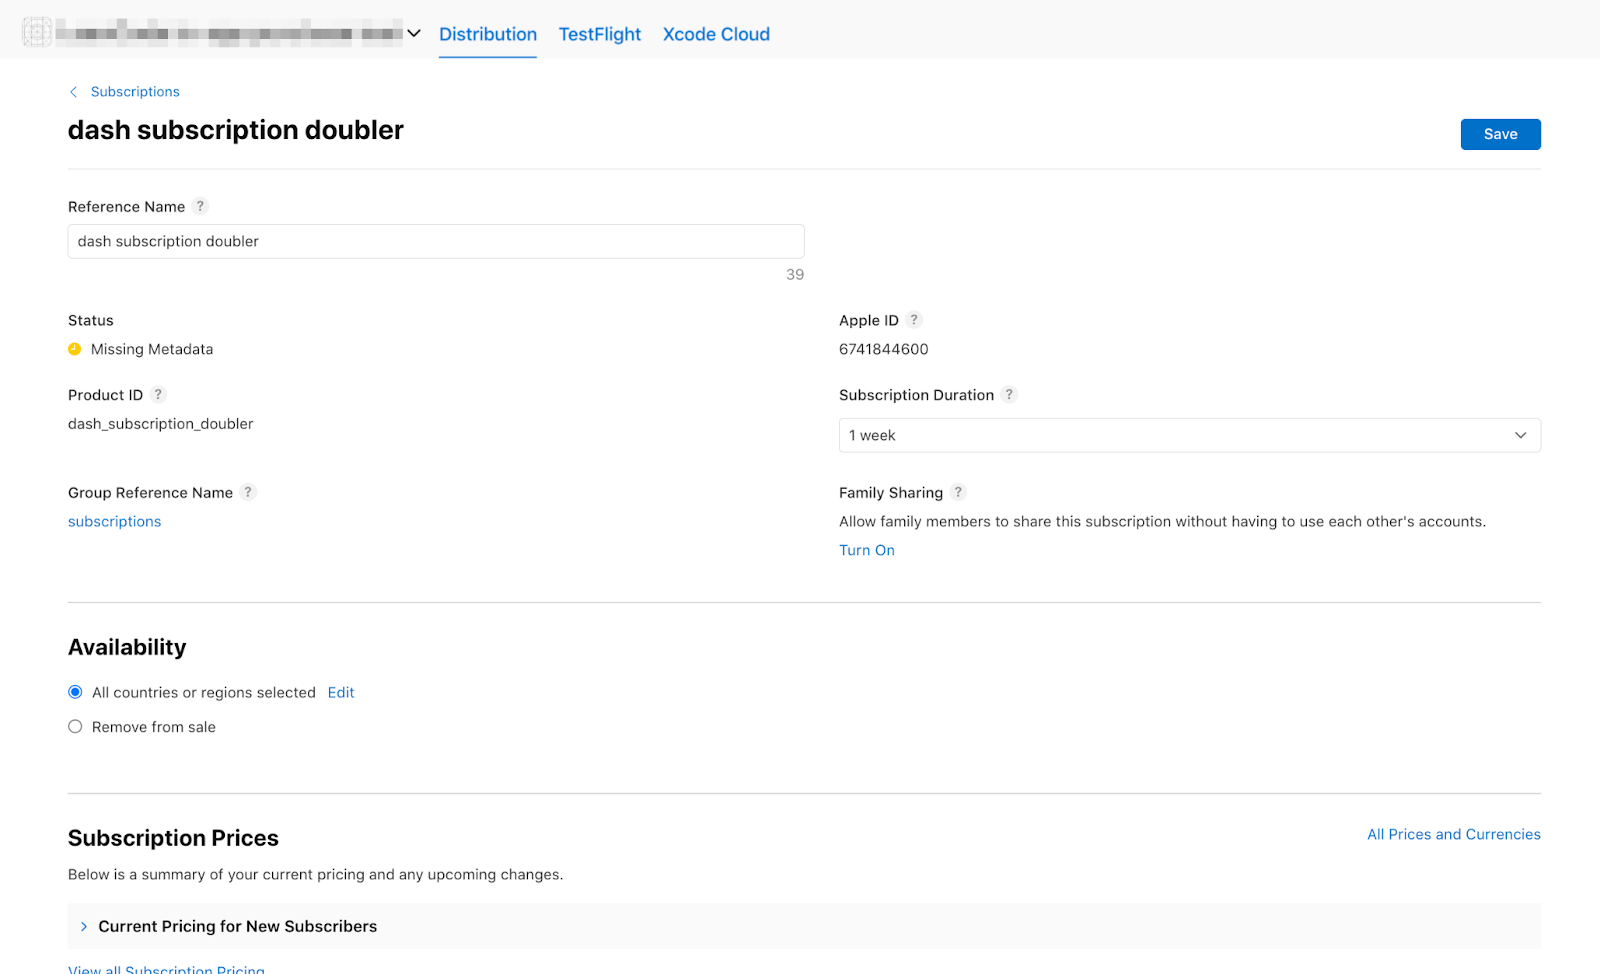
이제 목록에 제품이 표시됩니다.


5. Play 스토어 설정
App Store와 마찬가지로 Play 스토어에도 개발자 계정이 필요합니다. 아직 계정이 없으면 계정을 등록하세요.
새 앱 만들기
Google Play Console에서 새 앱을 만듭니다.
- Play Console을 엽니다.
- 모든 앱 > 앱 만들기를 선택합니다.
- 기본 언어를 선택하고 앱 제목을 추가합니다. Google Play에 표시하려는 앱 이름을 입력하세요. 이름은 나중에 변경할 수 있습니다.
- 애플리케이션이 게임이라고 지정합니다. 나중에 변경할 수 있습니다.
- 애플리케이션이 무료인지 유료인지 지정합니다.
- 콘텐츠 가이드라인 및 미국 수출 법규 선언을 완료합니다.
- 앱 만들기를 선택합니다.
앱을 만든 후 대시보드로 이동하여 앱 설정 섹션의 모든 작업을 완료합니다. 여기에서 콘텐츠 등급, 스크린샷 등 앱에 관한 정보를 제공합니다. 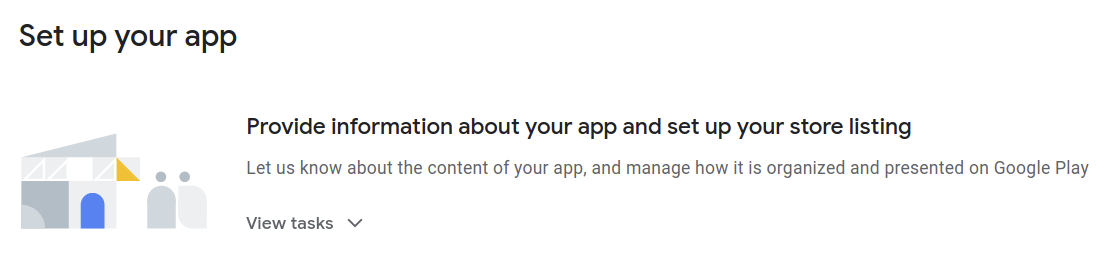
애플리케이션 서명
인앱 구매를 테스트하려면 Google Play에 업로드된 빌드가 하나 이상 있어야 합니다.
이를 위해서는 디버그 키가 아닌 다른 것으로 출시 빌드에 서명해야 합니다.
키 저장소 만들기
기존 키 저장소가 있는 경우 다음 단계로 건너뜁니다. 그렇지 않은 경우 명령줄에서 다음을 실행하여 하나 만듭니다.
Mac/Linux에서는 다음 명령어를 사용합니다.
keytool -genkey -v -keystore ~/key.jks -keyalg RSA -keysize 2048 -validity 10000 -alias key
Windows에서는 다음 명령어를 사용합니다.
keytool -genkey -v -keystore c:\Users\USER_NAME\key.jks -storetype JKS -keyalg RSA -keysize 2048 -validity 10000 -alias key
이 명령어는 key.jks 파일을 홈 디렉터리에 저장합니다. 파일을 다른 곳에 저장하려면 -keystore 매개변수에 전달하는 인수를 변경하세요. Keep the
keystore
파일은 비공개입니다. 공개 소스 제어에 체크인하지 마세요.
앱에서 키 저장소 참조
키 저장소에 대한 참조가 포함된 <your app dir>/android/key.properties이라는 파일을 만듭니다.
storePassword=<password from previous step>
keyPassword=<password from previous step>
keyAlias=key
storeFile=<location of the key store file, such as /Users/<user name>/key.jks>
Gradle에서 서명 구성
<your app dir>/android/app/build.gradle.kts 파일을 수정하여 앱의 서명을 구성합니다.
android 블록 앞에 속성 파일의 키 저장소 정보를 추가합니다.
import java.util.Properties
import java.io.FileInputStream

plugins {
    // omitted
}

val keystoreProperties = Properties()
val keystorePropertiesFile = rootProject.file("key.properties")
if (keystorePropertiesFile.exists()) {
    keystoreProperties.load(FileInputStream(keystorePropertiesFile))
}

android {
    // omitted
}
key.properties 파일을 keystoreProperties 객체에 로드합니다.
buildTypes 블록을 다음과 같이 업데이트합니다.
   buildTypes {
        release {
            signingConfig = signingConfigs.getByName("release")
        }
    }
모듈의 build.gradle.kts 파일에서 서명 구성 정보로 signingConfigs 블록을 구성합니다.
   signingConfigs {
        create("release") {
            keyAlias = keystoreProperties["keyAlias"] as String
            keyPassword = keystoreProperties["keyPassword"] as String
            storeFile = keystoreProperties["storeFile"]?.let { file(it) }
            storePassword = keystoreProperties["storePassword"] as String
        }
    }

    buildTypes {
        release {
            signingConfig = signingConfigs.getByName("release")
        }
    }
이제 앱의 출시 빌드가 자동으로 서명됩니다.
앱 서명에 관한 자세한 내용은 developer.android.com의 앱 서명을 참고하세요.
첫 번째 빌드 업로드
앱이 서명하도록 구성되면 다음을 실행하여 애플리케이션을 빌드할 수 있습니다.
flutter build appbundle
이 명령어는 기본적으로 출시 빌드를 생성하며 출력은 <your app dir>/build/app/outputs/bundle/release/에서 확인할 수 있습니다.
Google Play Console의 대시보드에서 테스트 및 출시 > 테스트 > 비공개 테스트로 이동하여 새로운 비공개 테스트 버전을 만듭니다.
그런 다음 빌드 명령어로 생성된 app-release.aab App Bundle을 업로드합니다.
저장을 클릭한 다음 버전 검토를 클릭합니다.
마지막으로 비공개 테스트에 출시 시작을 클릭하여 비공개 테스트 버전을 활성화합니다.
테스트 사용자 설정하기
인앱 구매를 테스트하려면 테스터의 Google 계정을 Google Play Console의 다음 두 위치에 추가해야 합니다.
- 특정 테스트 트랙 (내부 테스트)
- 라이선스 테스터
먼저 테스터를 내부 테스트 트랙에 추가합니다. 테스트 및 출시 > 테스트 > 내부 테스트로 돌아가 테스터 탭을 클릭합니다.
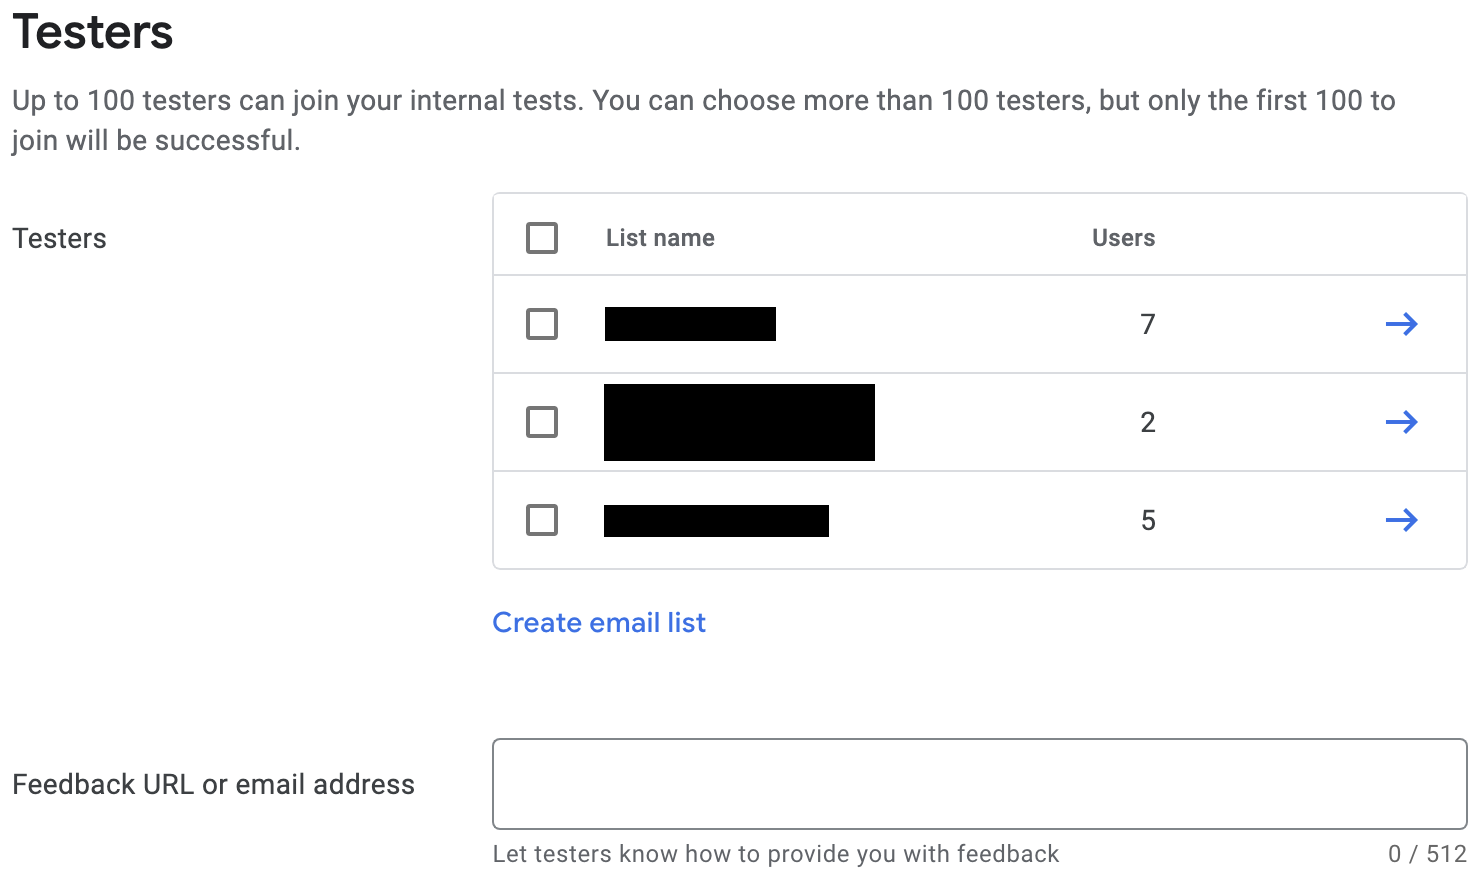
이메일 목록 만들기를 클릭하여 새 이메일 목록을 만듭니다. 목록에 이름을 지정하고 테스트 인앱 구매에 액세스해야 하는 Google 계정의 이메일 주소를 추가합니다.
그런 다음 목록의 체크박스를 선택하고 변경사항 저장을 클릭합니다.
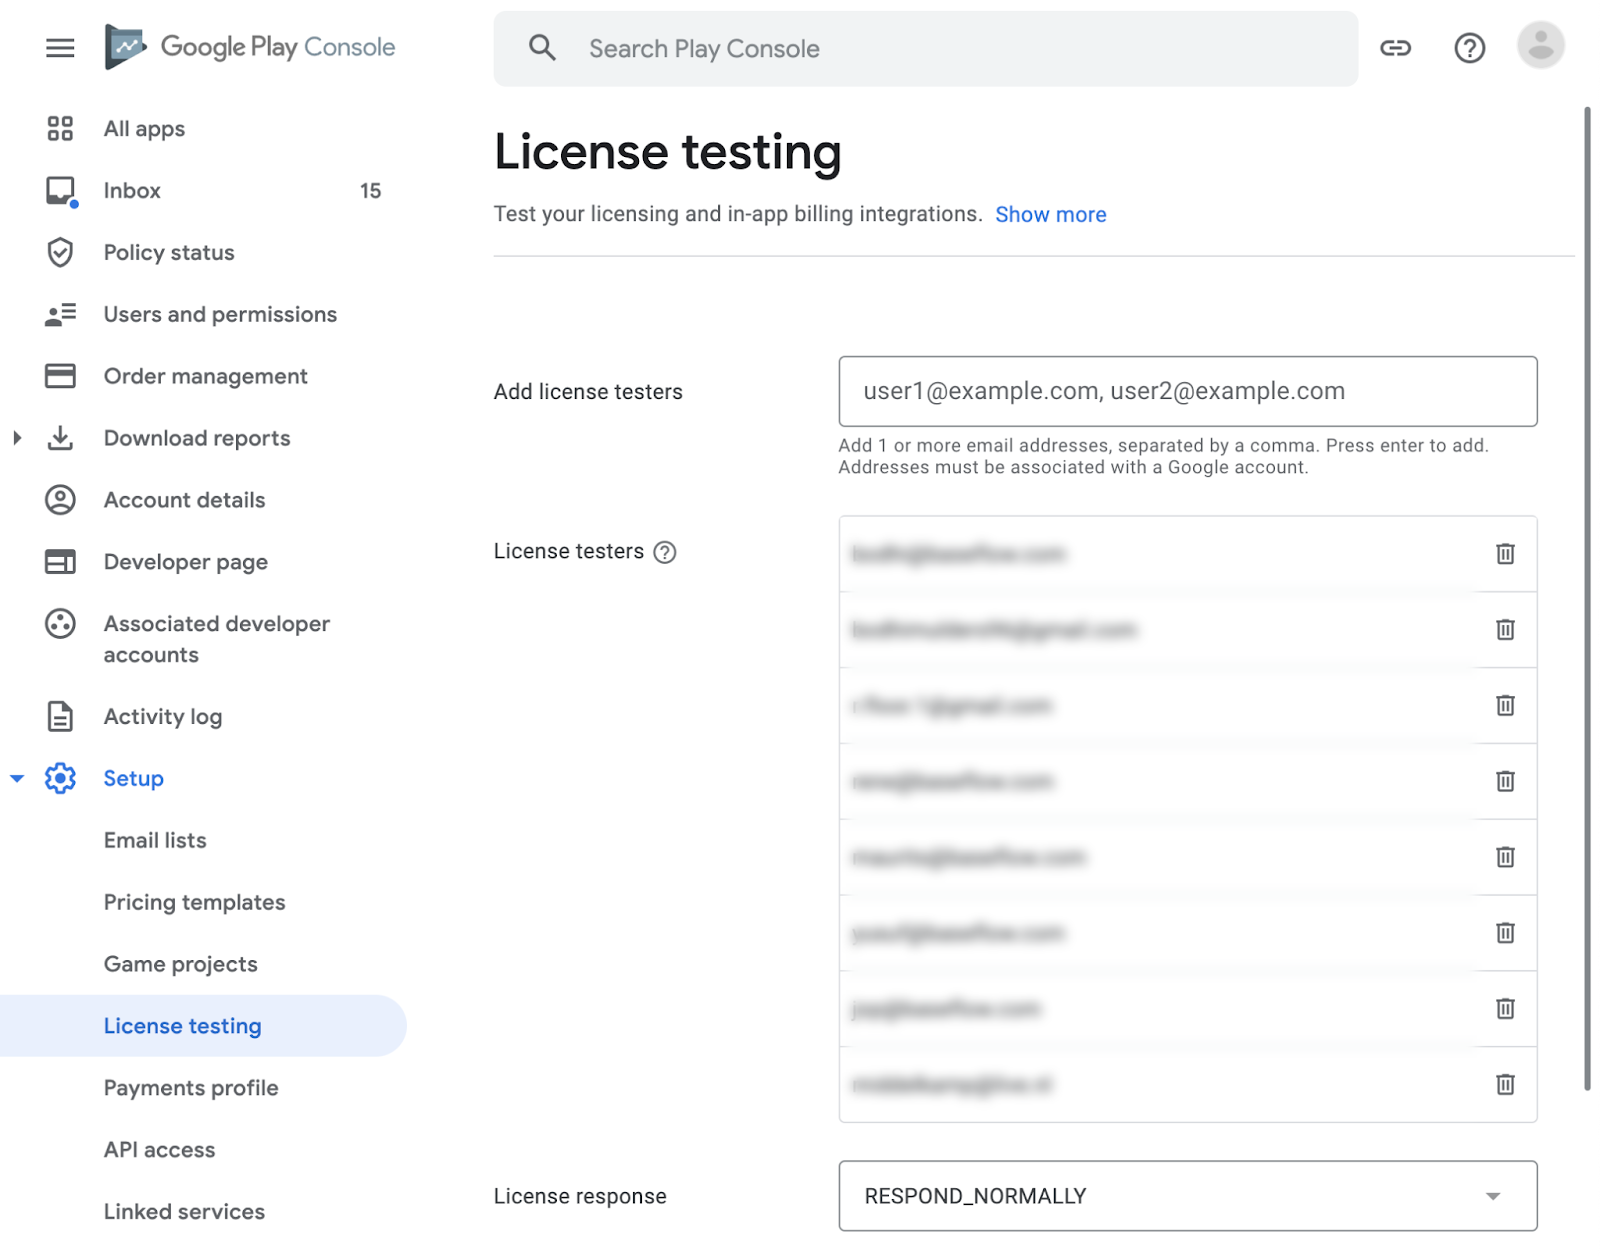
그런 다음 라이선스 테스터를 추가합니다.
- Google Play Console의 모든 앱 보기로 돌아갑니다.
- 설정 > 라이선스 테스트로 이동합니다.
- 인앱 구매를 테스트할 수 있어야 하는 테스터의 이메일 주소를 추가합니다.
- 라이선스 응답을
RESPOND_NORMALLY로 설정합니다. - 변경사항 저장을 클릭합니다.
인앱 구매 구성하기
이제 앱 내에서 구매 가능한 상품을 구성합니다.
App Store와 마찬가지로 다음 세 가지 구매를 정의해야 합니다.
dash_consumable_2k: 여러 번 구매할 수 있는 소비성 구매로, 구매당 사용자에게 2,000개의 대시 (인앱 통화)를 부여합니다.dash_upgrade_3d: 한 번만 구매할 수 있는 소모성 없는 '업그레이드' 구매로, 사용자가 클릭할 수 있는 대시보드가 외관상 다릅니다.dash_subscription_doubler: 구독 기간 동안 클릭당 대시를 두 배로 부여하는 구독입니다.
먼저 소모품과 비소모품을 추가합니다.
- Google Play Console로 이동하여 애플리케이션을 선택합니다.
- 수익 창출 > 제품 > 인앱 상품으로 이동합니다.
- 제품 만들기를 클릭합니다.
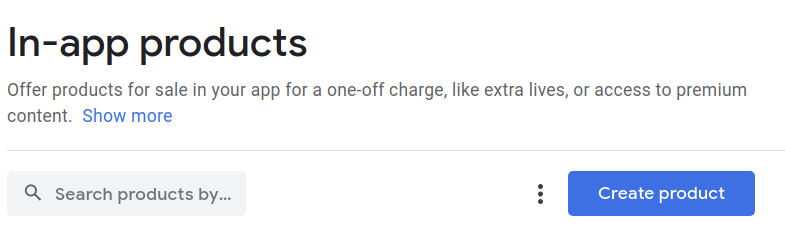
- 제품에 대한 필수 정보를 모두 입력합니다. 제품 ID가 사용하려는 ID와 정확히 일치하는지 확인합니다.
- 저장을 클릭합니다.
- 활성화를 클릭합니다.
- 비소비성 '업그레이드' 구매에 대해 이 과정을 반복합니다.
그런 다음 정기 결제를 추가합니다.
- Google Play Console로 이동하여 애플리케이션을 선택합니다.
- 수익 창출 > 제품 > 구독으로 이동합니다.
- 구독 만들기를 클릭합니다.

- 정기 결제에 필요한 정보를 모두 입력합니다. 제품 ID가 사용하려는 ID와 정확히 일치하는지 확인합니다.
- 저장을 클릭합니다.
이제 Play Console에서 구매가 설정됩니다.
6. Firebase 설정하기
이 Codelab에서는 백엔드 서비스를 사용하여 사용자의 구매를 확인하고 추적합니다.
백엔드 서비스를 사용하면 다음과 같은 여러 이점이 있습니다.
- 거래를 안전하게 확인할 수 있습니다.
- 앱 스토어의 결제 이벤트에 반응할 수 있습니다.
- 데이터베이스에서 구매를 추적할 수 있습니다.
- 사용자는 시스템 시계를 되감아 앱이 프리미엄 기능을 제공하도록 속일 수 없습니다.
백엔드 서비스를 설정하는 방법은 다양하지만 Google의 자체 Firebase를 사용하여 Cloud Functions 및 Firestore를 통해 설정합니다.
백엔드 작성은 이 Codelab의 범위를 벗어나므로 시작 코드에는 기본 구매를 처리하는 Firebase 프로젝트가 이미 포함되어 있습니다.
Firebase 플러그인도 스타터 앱에 포함되어 있습니다.
이제 Firebase 프로젝트를 만들고, 앱과 백엔드를 Firebase용으로 구성하고, 마지막으로 백엔드를 배포하면 됩니다.
Firebase 프로젝트 만들기
Firebase Console로 이동하여 새 Firebase 프로젝트를 만듭니다. 이 예시에서는 프로젝트 이름을 Dash Clicker라고 지정합니다.
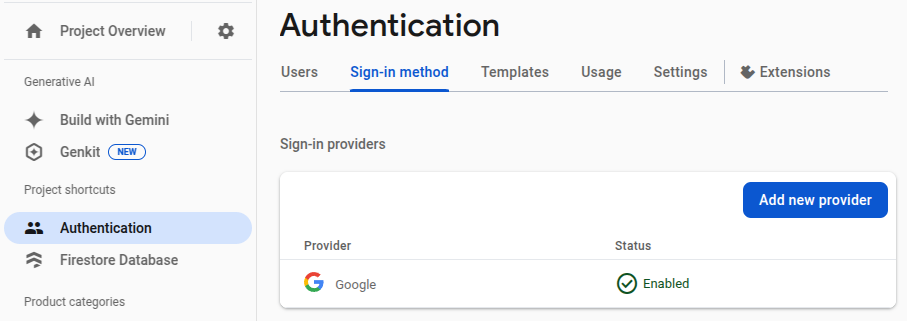
백엔드 앱에서는 구매를 특정 사용자에 연결하므로 인증이 필요합니다. 이를 위해 Google 로그인과 함께 Firebase의 인증 모듈을 사용합니다.
- Firebase 대시보드에서 인증으로 이동하여 필요한 경우 사용 설정합니다.
- 로그인 방법 탭으로 이동하여 Google 로그인 제공업체를 사용 설정합니다.
Firebase의 Firestore 데이터베이스도 사용하므로 이 옵션도 사용 설정합니다.
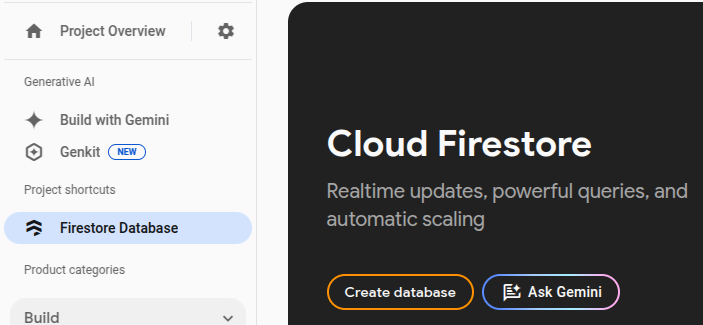
다음과 같이 Cloud Firestore 규칙을 설정합니다.
rules_version = '2';
service cloud.firestore {
  match /databases/{database}/documents {
    match /purchases/{purchaseId} {
      allow read: if request.auth != null && request.auth.uid == resource.data.userId
    }
  }
}
Flutter용 Firebase 설정
Flutter 앱에 Firebase를 설치하는 가장 권장되는 방법은 FlutterFire CLI를 사용하는 것입니다. 설정 페이지에 설명된 안내를 따릅니다.
flutterfire configure를 실행할 때 이전 단계에서 만든 프로젝트를 선택합니다.
$ flutterfire configure

i Found 5 Firebase projects.
? Select a Firebase project to configure your Flutter application with ›
❯ in-app-purchases-1234 (in-app-purchases-1234)
  other-flutter-codelab-1 (other-flutter-codelab-1)
  other-flutter-codelab-2 (other-flutter-codelab-2)
  other-flutter-codelab-3 (other-flutter-codelab-3)
  other-flutter-codelab-4 (other-flutter-codelab-4)
  <create a new project>
그런 다음 두 플랫폼을 선택하여 iOS와 Android를 사용 설정합니다.
? Which platforms should your configuration support (use arrow keys & space to select)? ›
✔ android
✔ ios
  macos
  web
firebase_options.dart를 재정의할지 묻는 메시지가 표시되면 '예'를 선택합니다.
? Generated FirebaseOptions file lib/firebase_options.dart already exists, do you want to override it? (y/n) › yes
Android용 Firebase 설정: 추가 단계
Firebase 대시보드에서 프로젝트 개요로 이동하여 설정을 선택하고 일반 탭을 선택합니다.
내 앱까지 아래로 스크롤한 다음 dashclicker (android) 앱을 선택합니다.

디버그 모드에서 Google 로그인을 허용하려면 디버그 인증서의 SHA-1 해시 디지털 지문을 제공해야 합니다.
디버그 서명 인증서 해시 가져오기
Flutter 앱 프로젝트의 루트에서 android/ 폴더로 디렉터리를 변경한 다음 서명 보고서를 생성합니다.
cd android
./gradlew :app:signingReport
서명 키 목록이 많이 표시됩니다. 디버그 인증서의 해시를 찾고 있으므로 Variant 및 Config 속성이 debug로 설정된 인증서를 찾습니다. 키 저장소는 홈 폴더의 .android/debug.keystore에 있을 가능성이 큽니다.
> Task :app:signingReport
Variant: debug
Config: debug
Store: /<USER_HOME_FOLDER>/.android/debug.keystore
Alias: AndroidDebugKey
MD5: XX:XX:XX:XX:XX:XX:XX:XX:XX:XX:XX:XX:XX:XX:XX:XX
SHA1: XX:XX:XX:XX:XX:XX:XX:XX:XX:XX:XX:XX:XX:XX:XX:XX:XX:XX:XX:XX
SHA-256: XX:XX:XX:XX:XX:XX:XX:XX:XX:XX:XX:XX:XX:XX:XX:XX:XX:XX:XX:XX:XX:XX:XX:XX:XX:XX:XX:XX:XX:XX:XX:XX
Valid until: Tuesday, January 19, 2038
SHA-1 해시를 복사하고 앱 제출 모달 대화상자의 마지막 필드를 작성합니다.
마지막으로 flutterfire configure 명령어를 다시 실행하여 서명 구성을 포함하도록 앱을 업데이트합니다.
$ flutterfire configure
? You have an existing `firebase.json` file and possibly already configured your project for Firebase. Would you prefer to reuse the valus in your existing `firebase.json` file to configure your project? (y/n) › yes
✔ You have an existing `firebase.json` file and possibly already configured your project for Firebase. Would you prefer to reuse the values in your existing `firebase.json` file to configure your project? · yes
iOS용 Firebase 설정: 추가 단계
Xcode를 사용하여 ios/Runner.xcworkspace을 엽니다. 또는 원하는 IDE를 사용합니다.
VSCode에서 ios/ 폴더를 마우스 오른쪽 버튼으로 클릭한 다음 open in xcode을 클릭합니다.
Android 스튜디오에서 ios/ 폴더를 마우스 오른쪽 버튼으로 클릭한 다음 flutter을 클릭하고 open iOS module in Xcode 옵션을 클릭합니다.
iOS에서 Google 로그인을 허용하려면 빌드 plist 파일에 CFBundleURLTypes 구성 옵션을 추가합니다. (자세한 내용은 google_sign_in 패키지 문서를 참고하세요.) 이 경우 파일은 ios/Runner/Info.plist입니다.
키-값 쌍이 이미 추가되었지만 값을 대체해야 합니다.
<string>..</string>요소로 둘러싸이지 않은GoogleService-Info.plist파일에서REVERSED_CLIENT_ID값을 가져옵니다.CFBundleURLTypes키 아래의ios/Runner/Info.plist파일에서 값을 바꿉니다.
<key>CFBundleURLTypes</key>
<array>
    <dict>
        <key>CFBundleTypeRole</key>
        <string>Editor</string>
        <key>CFBundleURLSchemes</key>
        <array>
            <!-- TODO Replace this value: -->
            <!-- Copied from GoogleService-Info.plist key REVERSED_CLIENT_ID -->
            <string>com.googleusercontent.apps.REDACTED</string>
        </array>
    </dict>
</array>
이제 Firebase 설정이 완료되었습니다.
7. 구매 업데이트 수신 대기
Codelab의 이 부분에서는 제품 구매를 위해 앱을 준비합니다. 이 프로세스에는 앱이 시작된 후 구매 업데이트와 오류를 수신하는 것이 포함됩니다.
구매 업데이트 수신
main.dart,에서 두 페이지가 포함된 BottomNavigationBar가 있는 Scaffold가 있는 위젯 MyHomePage을 찾습니다. 이 페이지에서는 DashCounter, DashUpgrades,, DashPurchases에 대해 세 개의 Provider도 만듭니다. DashCounter는 현재 대시 수를 추적하고 자동으로 증가시킵니다. DashUpgrades는 대시로 구매할 수 있는 업그레이드를 관리합니다. 이 Codelab에서는 DashPurchases에 중점을 둡니다.
기본적으로 제공업자의 객체는 해당 객체가 처음 요청될 때 정의됩니다. 이 객체는 앱이 시작될 때 구매 업데이트를 직접 수신하므로 lazy: false를 사용하여 이 객체에서 지연 로딩을 사용 중지하세요.
lib/main.dart
ChangeNotifierProvider<DashPurchases>(
  create: (context) => DashPurchases(
    context.read<DashCounter>(),
  ),
  lazy: false,                                             // Add this line
),
InAppPurchaseConnection 인스턴스도 필요합니다. 하지만 앱을 테스트할 수 있도록 연결을 모의하는 방법이 필요합니다. 이렇게 하려면 테스트에서 재정의할 수 있는 인스턴스 메서드를 만들고 main.dart에 추가합니다.
lib/main.dart
// Gives the option to override in tests.
class IAPConnection {
  static InAppPurchase? _instance;
  static set instance(InAppPurchase value) {
    _instance = value;
  }

  static InAppPurchase get instance {
    _instance ??= InAppPurchase.instance;
    return _instance!;
  }
}
다음과 같이 테스트를 업데이트합니다.
test/widget_test.dart
import 'package:dashclicker/main.dart';
import 'package:flutter_test/flutter_test.dart';
import 'package:in_app_purchase/in_app_purchase.dart';     // Add this import
import 'package:in_app_purchase_platform_interface/src/in_app_purchase_platform_addition.dart'; // And this import

void main() {
  testWidgets('App starts', (tester) async {
    IAPConnection.instance = TestIAPConnection();          // Add this line
    await tester.pumpWidget(const MyApp());
    expect(find.text('Tim Sneath'), findsOneWidget);
  });
}

class TestIAPConnection implements InAppPurchase {         // Add from here
  @override
  Future<bool> buyConsumable({
    required PurchaseParam purchaseParam,
    bool autoConsume = true,
  }) {
    return Future.value(false);
  }

  @override
  Future<bool> buyNonConsumable({required PurchaseParam purchaseParam}) {
    return Future.value(false);
  }

  @override
  Future<void> completePurchase(PurchaseDetails purchase) {
    return Future.value();
  }

  @override
  Future<bool> isAvailable() {
    return Future.value(false);
  }

  @override
  Future<ProductDetailsResponse> queryProductDetails(Set<String> identifiers) {
    return Future.value(
      ProductDetailsResponse(productDetails: [], notFoundIDs: []),
    );
  }

  @override
  T getPlatformAddition<T extends InAppPurchasePlatformAddition?>() {
    // TODO: implement getPlatformAddition
    throw UnimplementedError();
  }

  @override
  Stream<List<PurchaseDetails>> get purchaseStream =>
      Stream.value(<PurchaseDetails>[]);

  @override
  Future<void> restorePurchases({String? applicationUserName}) {
    // TODO: implement restorePurchases
    throw UnimplementedError();
  }

  @override
  Future<String> countryCode() {
    // TODO: implement countryCode
    throw UnimplementedError();
  }
}                                                          // To here.
lib/logic/dash_purchases.dart에서 DashPurchasesChangeNotifier 코드로 이동합니다. 현재 구매한 Dash에 추가할 수 있는 DashCounter만 있습니다.
스트림 구독 속성 _subscription (StreamSubscription<List<PurchaseDetails>> _subscription; 유형), IAPConnection.instance,, 가져오기를 추가합니다. 결과 코드는 다음과 같습니다.
lib/logic/dash_purchases.dart
import 'dart:async';

import 'package:flutter/foundation.dart';
import 'package:flutter/material.dart';
import 'package:in_app_purchase/in_app_purchase.dart';           // Add this import

import '../main.dart';                                           // And this import
import '../model/purchasable_product.dart';
import '../model/store_state.dart';
import 'dash_counter.dart';

class DashPurchases extends ChangeNotifier {
  DashCounter counter;
  StoreState storeState = StoreState.available;
  late StreamSubscription<List<PurchaseDetails>> _subscription;  // Add this line
  List<PurchasableProduct> products = [
    PurchasableProduct(
      'Spring is in the air',
      'Many dashes flying out from their nests',
      '\$0.99',
    ),
    PurchasableProduct(
      'Jet engine',
      'Doubles you clicks per second for a day',
      '\$1.99',
    ),
  ];

  bool get beautifiedDash => false;

  final iapConnection = IAPConnection.instance;                  // And this line

  DashPurchases(this.counter);

  Future<void> buy(PurchasableProduct product) async {
    product.status = ProductStatus.pending;
    notifyListeners();
    await Future<void>.delayed(const Duration(seconds: 5));
    product.status = ProductStatus.purchased;
    notifyListeners();
    await Future<void>.delayed(const Duration(seconds: 5));
    product.status = ProductStatus.purchasable;
    notifyListeners();
  }
}
_subscription이 생성자에서 초기화되므로 late 키워드가 _subscription에 추가됩니다. 이 프로젝트는 기본적으로 null이 불가능하도록 설정되어 있습니다 (NNBD). 즉, null이 가능하다고 선언되지 않은 속성에는 null이 아닌 값이 있어야 합니다. late 한정자를 사용하면 이 값의 정의를 지연할 수 있습니다.
생성자에서 purchaseUpdated 스트림을 가져와 스트림 수신 대기를 시작합니다. dispose() 메서드에서 스트림 구독을 취소합니다.
lib/logic/dash_purchases.dart
import 'dart:async';

import 'package:flutter/foundation.dart';
import 'package:flutter/material.dart';
import 'package:in_app_purchase/in_app_purchase.dart';

import '../main.dart';
import '../model/purchasable_product.dart';
import '../model/store_state.dart';
import 'dash_counter.dart';

class DashPurchases extends ChangeNotifier {
  DashCounter counter;
  StoreState storeState = StoreState.notAvailable;         // Modify this line
  late StreamSubscription<List<PurchaseDetails>> _subscription;
  List<PurchasableProduct> products = [
    PurchasableProduct(
      'Spring is in the air',
      'Many dashes flying out from their nests',
      '\$0.99',
    ),
    PurchasableProduct(
      'Jet engine',
      'Doubles you clicks per second for a day',
      '\$1.99',
    ),
  ];

  bool get beautifiedDash => false;

  final iapConnection = IAPConnection.instance;

  DashPurchases(this.counter) {                            // Add from here
    final purchaseUpdated = iapConnection.purchaseStream;
    _subscription = purchaseUpdated.listen(
      _onPurchaseUpdate,
      onDone: _updateStreamOnDone,
      onError: _updateStreamOnError,
    );
  }

  @override
  void dispose() {
    _subscription.cancel();
    super.dispose();
  }                                                        // To here.

  Future<void> buy(PurchasableProduct product) async {
    product.status = ProductStatus.pending;
    notifyListeners();
    await Future<void>.delayed(const Duration(seconds: 5));
    product.status = ProductStatus.purchased;
    notifyListeners();
    await Future<void>.delayed(const Duration(seconds: 5));
    product.status = ProductStatus.purchasable;
    notifyListeners();
  }
                                                           // Add from here
  void _onPurchaseUpdate(List<PurchaseDetails> purchaseDetailsList) {
    // Handle purchases here
  }

  void _updateStreamOnDone() {
    _subscription.cancel();
  }

  void _updateStreamOnError(dynamic error) {
    //Handle error here
  }                                                        // To here.
}
이제 앱이 구매 업데이트를 수신하므로 다음 섹션에서 구매를 진행합니다.
계속하기 전에 'flutter test"'로 테스트를 실행하여 모든 것이 올바르게 설정되었는지 확인하세요.
$ flutter test

00:01 +1: All tests passed!
8. 구매
이 Codelab 파트에서는 기존 모의 제품을 실제 구매 가능한 제품으로 대체합니다. 이러한 제품은 스토어에서 로드되어 목록에 표시되며 제품을 탭하면 구매할 수 있습니다.
Adapt PurchasableProduct
PurchasableProduct은 모의 제품을 표시합니다. purchasable_product.dart의 PurchasableProduct 클래스를 다음 코드로 바꿔 실제 콘텐츠를 표시하도록 업데이트합니다.
lib/model/purchasable_product.dart
import 'package:in_app_purchase/in_app_purchase.dart';

enum ProductStatus { purchasable, purchased, pending }

class PurchasableProduct {
  String get id => productDetails.id;
  String get title => productDetails.title;
  String get description => productDetails.description;
  String get price => productDetails.price;
  ProductStatus status;
  ProductDetails productDetails;

  PurchasableProduct(this.productDetails) : status = ProductStatus.purchasable;
}
dash_purchases.dart,에서 더미 구매를 삭제하고 빈 목록 List<PurchasableProduct> products = [];으로 바꿉니다.
사용 가능한 구매 로드
사용자가 구매할 수 있도록 하려면 스토어에서 구매를 로드하세요. 먼저 스토어를 사용할 수 있는지 확인합니다. 스토어를 사용할 수 없는 경우 storeState를 notAvailable로 설정하면 사용자에게 오류 메시지가 표시됩니다.
lib/logic/dash_purchases.dart
  Future<void> loadPurchases() async {
    final available = await iapConnection.isAvailable();
    if (!available) {
      storeState = StoreState.notAvailable;
      notifyListeners();
      return;
    }
  }
스토어를 사용할 수 있는 경우 사용 가능한 구매를 로드합니다. 이전 Google Play 및 App Store 설정이 주어졌을 때 storeKeyConsumable, storeKeySubscription,, storeKeyUpgrade가 표시됩니다. 예상 구매를 사용할 수 없는 경우 이 정보를 콘솔에 출력합니다. 이 정보를 백엔드 서비스에 전송할 수도 있습니다.
await iapConnection.queryProductDetails(ids) 메서드는 찾을 수 없는 ID와 찾을 수 있는 구매 가능한 제품을 모두 반환합니다. 대답의 productDetails를 사용하여 UI를 업데이트하고 StoreState을 available로 설정합니다.
lib/logic/dash_purchases.dart
import '../constants.dart';

// ...

  Future<void> loadPurchases() async {
    final available = await iapConnection.isAvailable();
    if (!available) {
      storeState = StoreState.notAvailable;
      notifyListeners();
      return;
    }
    const ids = <String>{
      storeKeyConsumable,
      storeKeySubscription,
      storeKeyUpgrade,
    };
    final response = await iapConnection.queryProductDetails(ids);
    products = response.productDetails
        .map((e) => PurchasableProduct(e))
        .toList();
    storeState = StoreState.available;
    notifyListeners();
  }
생성자에서 loadPurchases() 함수를 호출합니다.
lib/logic/dash_purchases.dart
  DashPurchases(this.counter) {
    final purchaseUpdated = iapConnection.purchaseStream;
    _subscription = purchaseUpdated.listen(
      _onPurchaseUpdate,
      onDone: _updateStreamOnDone,
      onError: _updateStreamOnError,
    );
    loadPurchases();                                       // Add this line
  }
마지막으로 storeState 필드의 값을 StoreState.available에서 StoreState.loading:로 변경합니다.
lib/logic/dash_purchases.dart
StoreState storeState = StoreState.loading;
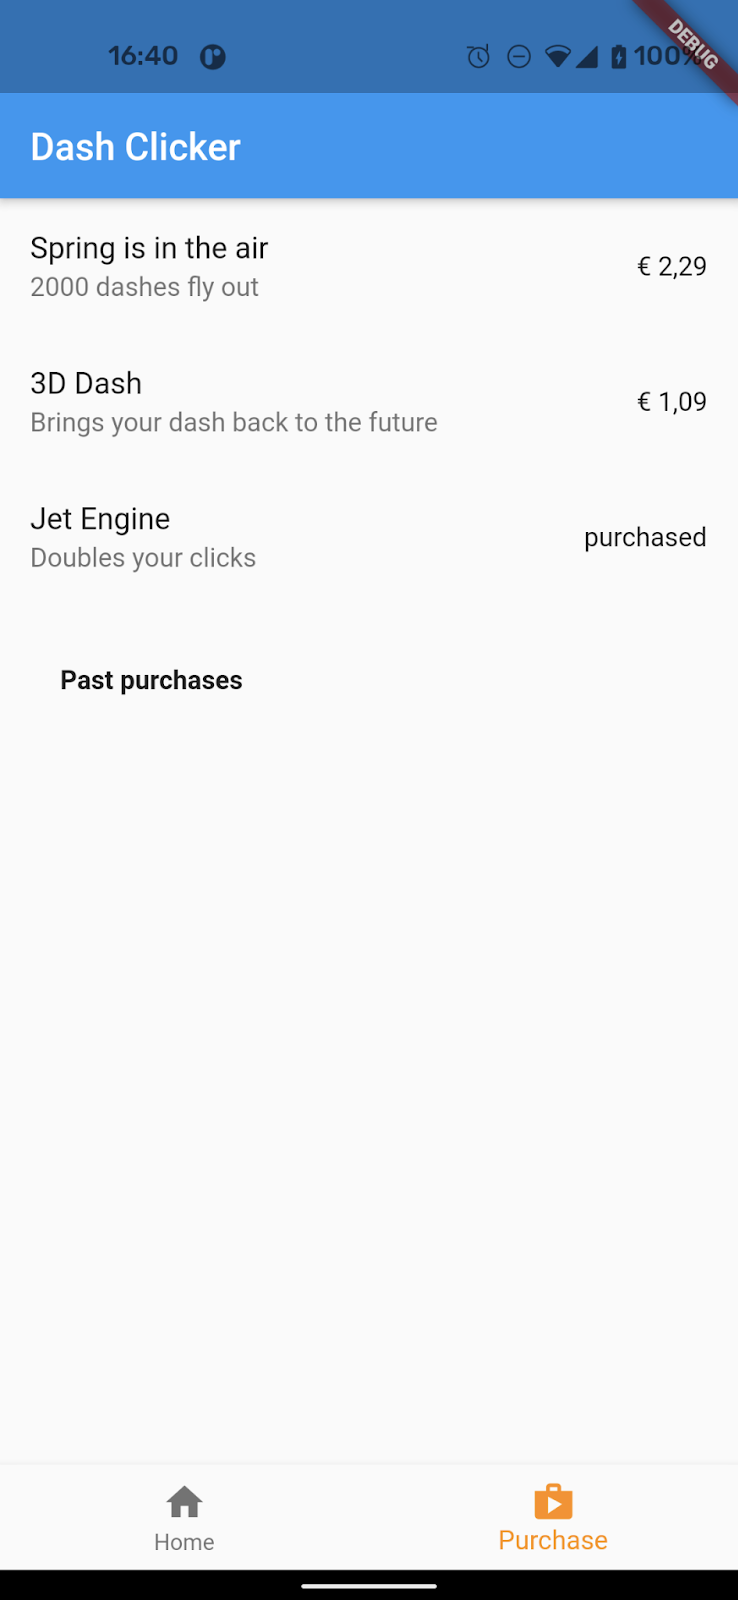
구매 가능한 제품 표시
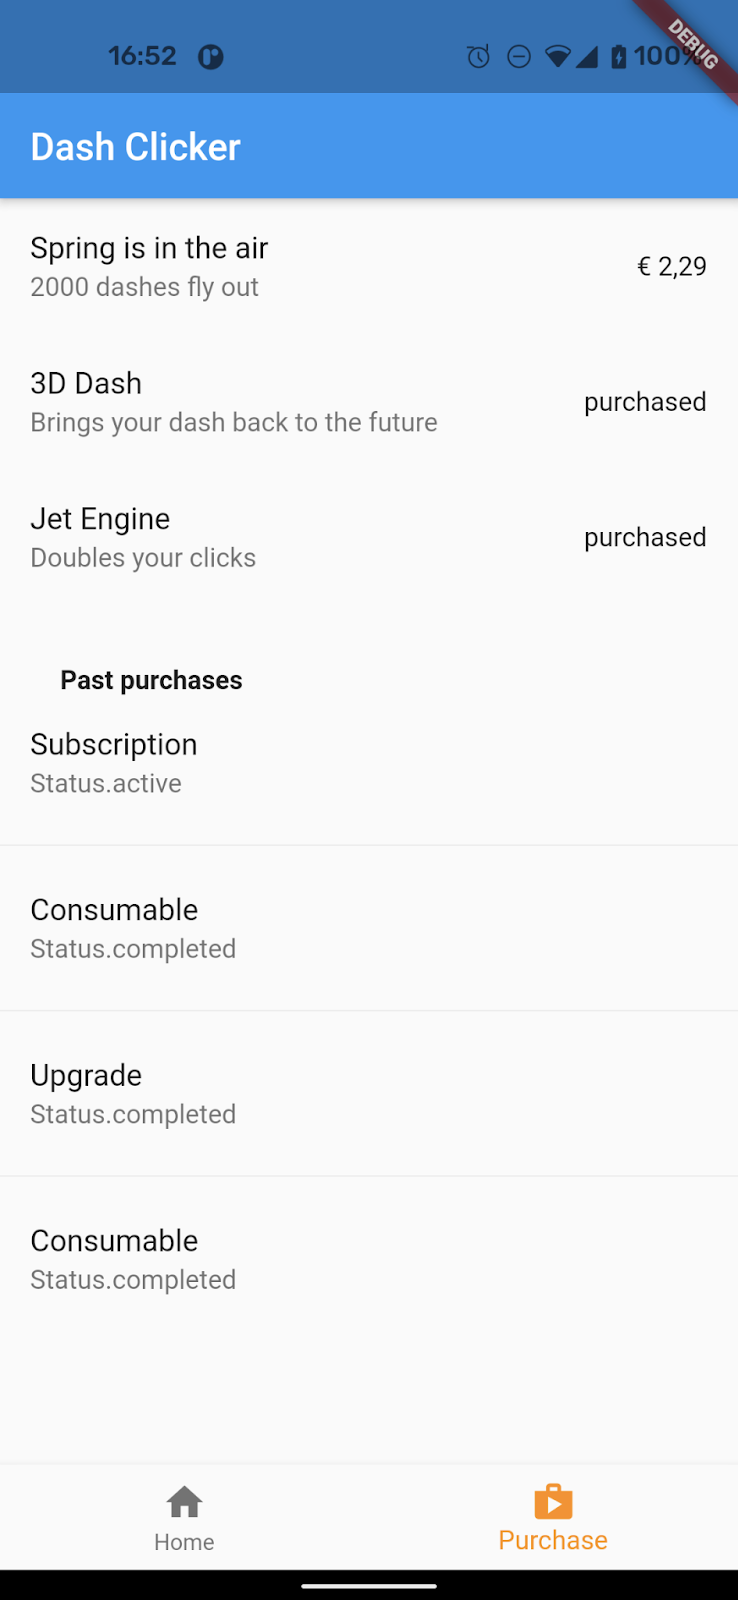
purchase_page.dart 파일을 고려해 보세요. PurchasePage 위젯은 StoreState에 따라 _PurchasesLoading, _PurchaseList, 또는 _PurchasesNotAvailable,를 표시합니다. 위젯에는 다음 단계에서 사용되는 사용자의 과거 구매 내역도 표시됩니다.
_PurchaseList 위젯은 구매 가능한 제품 목록을 표시하고 DashPurchases 객체에 구매 요청을 전송합니다.
lib/pages/purchase_page.dart
class _PurchaseList extends StatelessWidget {
  @override
  Widget build(BuildContext context) {
    var purchases = context.watch<DashPurchases>();
    var products = purchases.products;
    return Column(
      children: products
          .map(
            (product) => _PurchaseWidget(
              product: product,
              onPressed: () {
                purchases.buy(product);
              },
            ),
          )
          .toList(),
    );
  }
}
제품이 올바르게 구성된 경우 Android 및 iOS 스토어에서 사용 가능한 제품을 확인할 수 있습니다. 각 콘솔에 입력된 구매가 사용 가능해지기까지 시간이 걸릴 수 있습니다.
dash_purchases.dart로 돌아가서 제품을 구매하는 함수를 구현합니다. 소비성 상품과 비소비성 상품만 구분하면 됩니다. 업그레이드 및 정기 결제 제품이 소모품이 아닙니다.
lib/logic/dash_purchases.dart
  Future<void> buy(PurchasableProduct product) async {
    final purchaseParam = PurchaseParam(productDetails: product.productDetails);
    switch (product.id) {
      case storeKeyConsumable:
        await iapConnection.buyConsumable(purchaseParam: purchaseParam);
      case storeKeySubscription:
      case storeKeyUpgrade:
        await iapConnection.buyNonConsumable(purchaseParam: purchaseParam);
      default:
        throw ArgumentError.value(
          product.productDetails,
          '${product.id} is not a known product',
        );
    }
  }
계속하기 전에 _beautifiedDashUpgrade 변수를 만들고 beautifiedDash getter를 업데이트하여 이를 참조합니다.
lib/logic/dash_purchases.dart
  bool get beautifiedDash => _beautifiedDashUpgrade;
  bool _beautifiedDashUpgrade = false;
_onPurchaseUpdate 메서드는 구매 업데이트를 수신하고, 구매 페이지에 표시된 제품의 상태를 업데이트하고, 구매를 카운터 로직에 적용합니다. 구매를 처리한 후 completePurchase를 호출하여 스토어에서 구매가 올바르게 처리되었음을 알 수 있도록 하는 것이 중요합니다.
lib/logic/dash_purchases.dart
  Future<void> _onPurchaseUpdate(
    List<PurchaseDetails> purchaseDetailsList,
  ) async {
    for (var purchaseDetails in purchaseDetailsList) {
      await _handlePurchase(purchaseDetails);
    }
    notifyListeners();
  }

  Future<void> _handlePurchase(PurchaseDetails purchaseDetails) async {
    if (purchaseDetails.status == PurchaseStatus.purchased) {
      switch (purchaseDetails.productID) {
        case storeKeySubscription:
          counter.applyPaidMultiplier();
        case storeKeyConsumable:
          counter.addBoughtDashes(2000);
        case storeKeyUpgrade:
          _beautifiedDashUpgrade = true;
      }
    }

    if (purchaseDetails.pendingCompletePurchase) {
      await iapConnection.completePurchase(purchaseDetails);
    }
  }
9. 백엔드 설정
구매 추적 및 확인으로 넘어가기 전에 이를 지원하는 Dart 백엔드를 설정하세요.
이 섹션에서는 dart-backend/ 폴더를 루트로 사용합니다.
다음 도구가 설치되어 있는지 확인합니다.
- Dart
- Firebase CLI
기본 프로젝트 개요
이 프로젝트의 일부는 이 Codelab의 범위를 벗어나는 것으로 간주되므로 시작 코드에 포함되어 있습니다. 시작하기 전에 시작 코드에 이미 있는 내용을 검토하여 구조를 어떻게 지정할지 파악하는 것이 좋습니다.
이 백엔드 코드는 머신에서 로컬로 실행할 수 있으며, 사용하기 위해 배포할 필요가 없습니다. 하지만 개발 기기 (Android 또는 iPhone)에서 서버가 실행될 머신에 연결할 수 있어야 합니다. 그러려면 동일한 네트워크에 있어야 하며 컴퓨터의 IP 주소를 알아야 합니다.
다음 명령어를 사용하여 서버를 실행해 보세요.
$ dart ./bin/server.dart

Serving at http://0.0.0.0:8080
Dart 백엔드는 shelf 및 shelf_router를 사용하여 API 엔드포인트를 제공합니다. 기본적으로 서버는 경로를 제공하지 않습니다. 나중에 구매 확인 프로세스를 처리하는 경로를 만듭니다.
시작 코드에 이미 포함된 부분은 lib/iap_repository.dart의 IapRepository입니다. Firestore 또는 일반적인 데이터베이스와 상호작용하는 방법을 배우는 것은 이 Codelab과 관련이 없는 것으로 간주되므로 시작 코드에는 Firestore에서 구매를 생성하거나 업데이트하는 함수와 이러한 구매를 위한 모든 클래스가 포함되어 있습니다.
Firebase 액세스 설정
Firebase Firestore에 액세스하려면 서비스 계정 액세스 키가 필요합니다. Firebase 프로젝트 설정을 열고 서비스 계정 섹션으로 이동한 다음 새 비공개 키 생성을 선택하여 생성합니다.
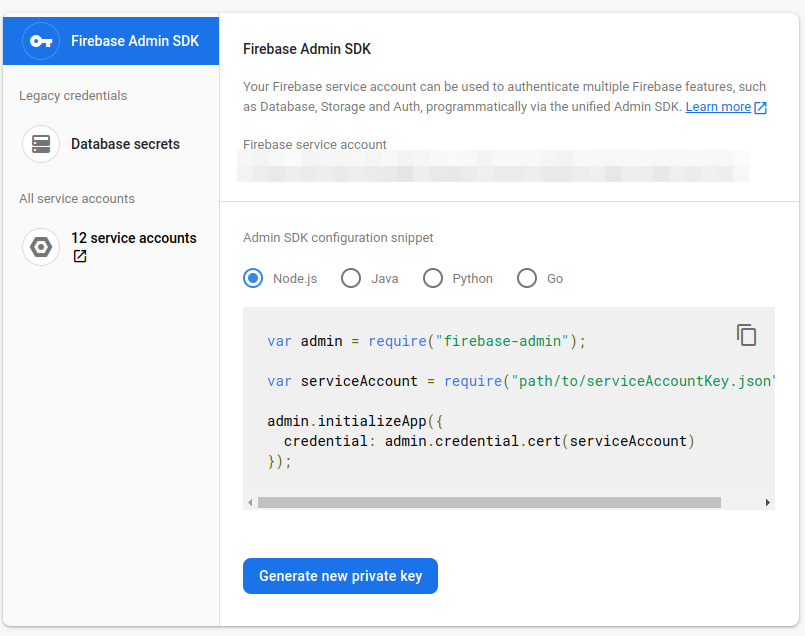
다운로드한 JSON 파일을 assets/ 폴더에 복사하고 이름을 service-account-firebase.json으로 바꿉니다.
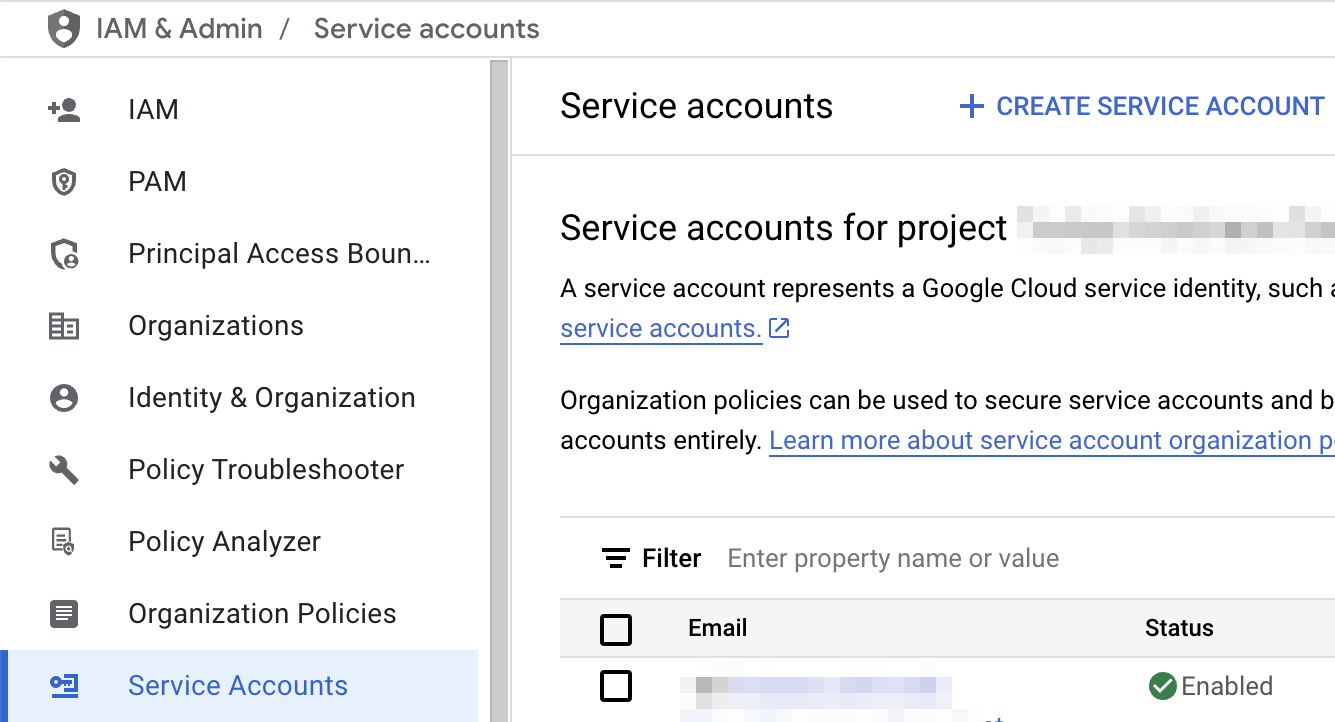
Google Play 액세스 권한 설정하기
구매를 확인하기 위해 Play 스토어에 액세스하려면 이러한 권한이 있는 서비스 계정을 생성하고 서비스 계정의 JSON 사용자 인증 정보를 다운로드해야 합니다.
- Google Cloud 콘솔에서 Google Play Android Developer API 페이지로 이동합니다.
 Google Play Console에서 기존 프로젝트를 만들거나 연결하도록 요청하는 경우 먼저 그렇게 한 다음 이 페이지로 돌아오세요.
 - 그런 다음 서비스 계정 페이지로 이동하여 + 서비스 계정 만들기를 클릭합니다.
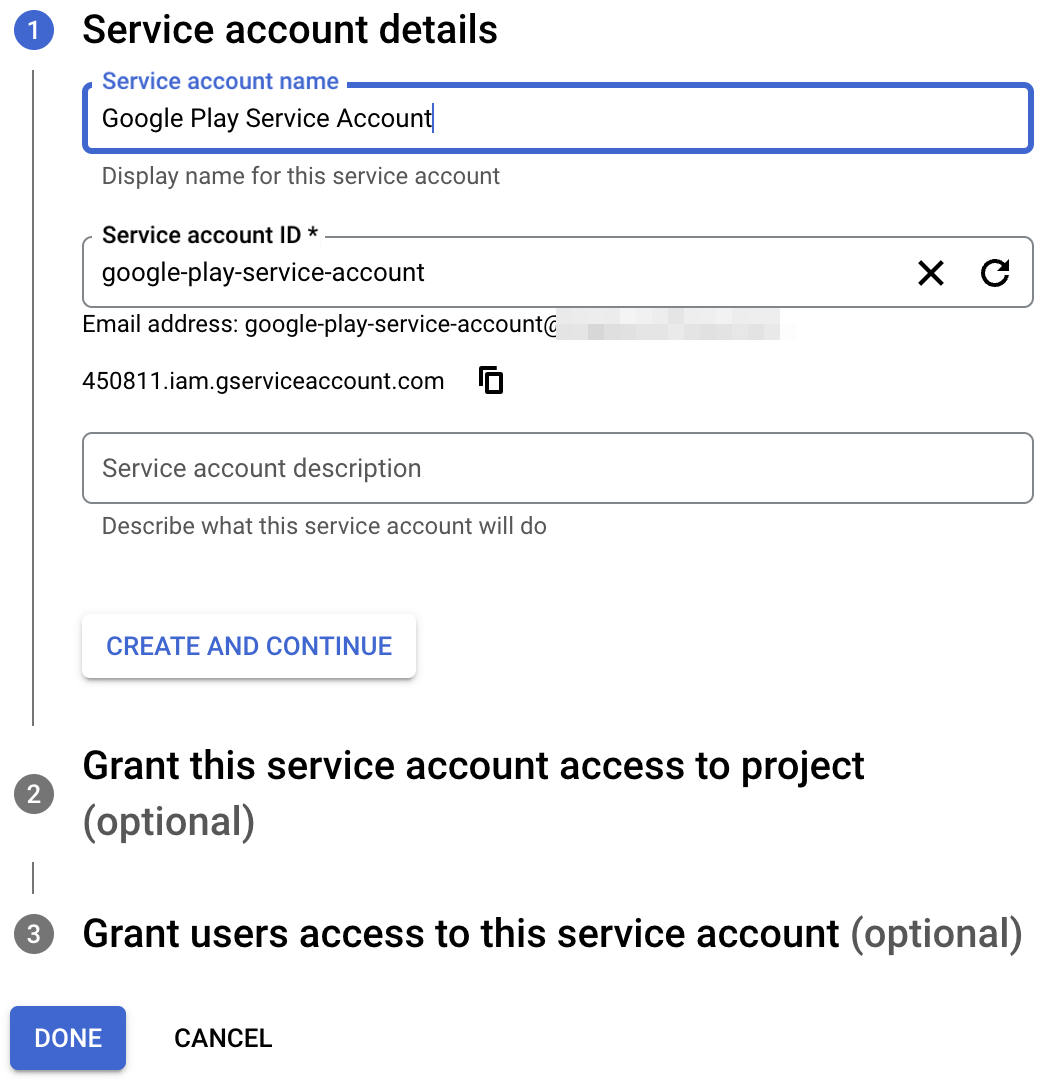
- 서비스 계정 이름을 입력하고 만들고 계속하기를 클릭합니다.
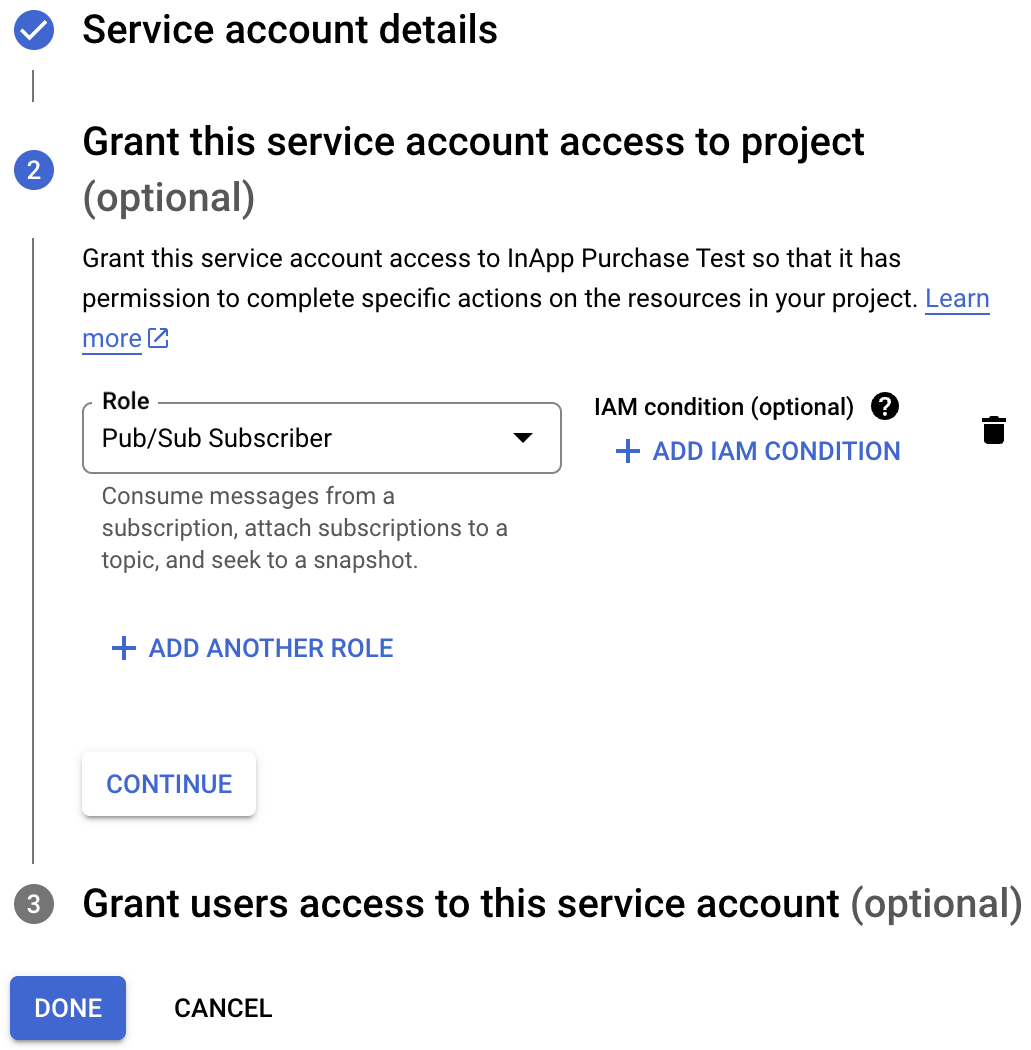
- Pub/Sub 구독자 역할을 선택하고 완료를 클릭합니다.
- 계정이 생성되면 키 관리로 이동합니다.
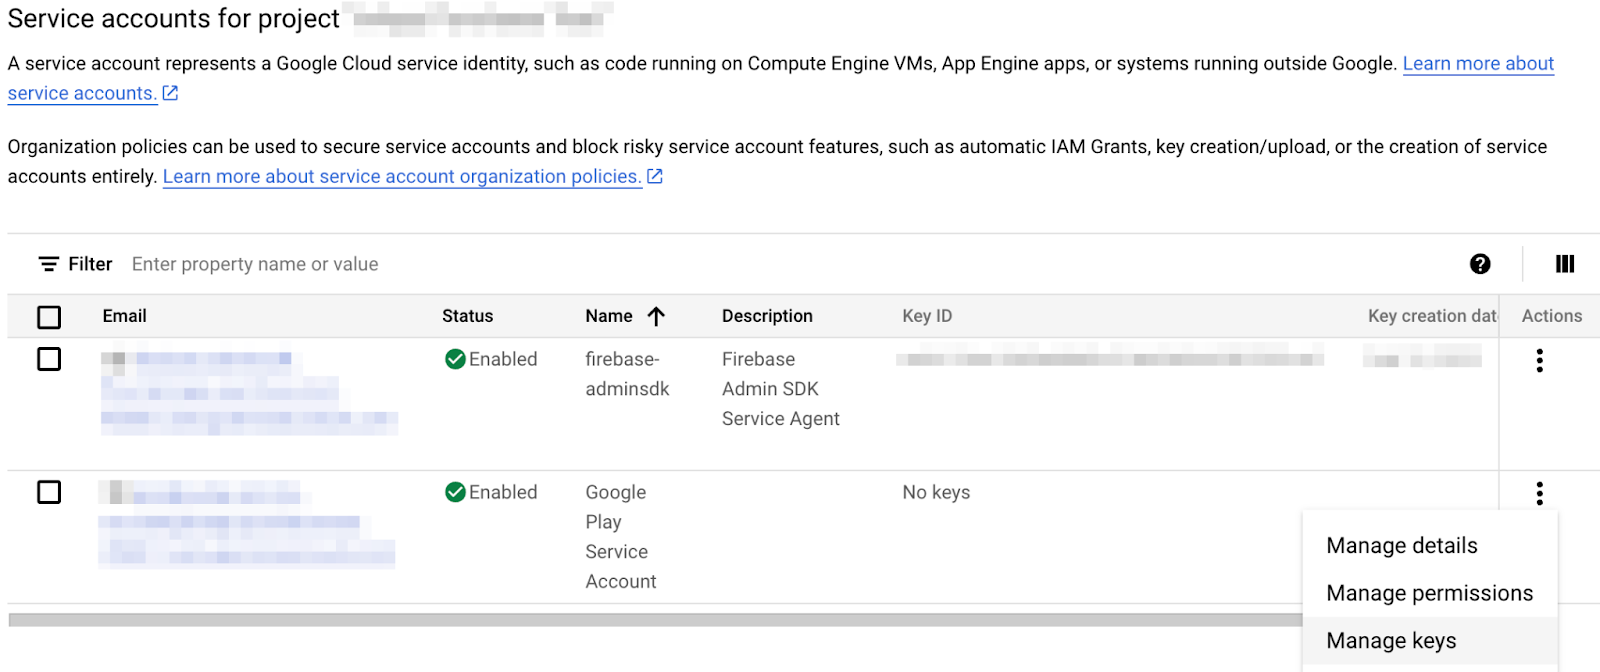
- 키 추가 > 새 키 만들기를 선택합니다.
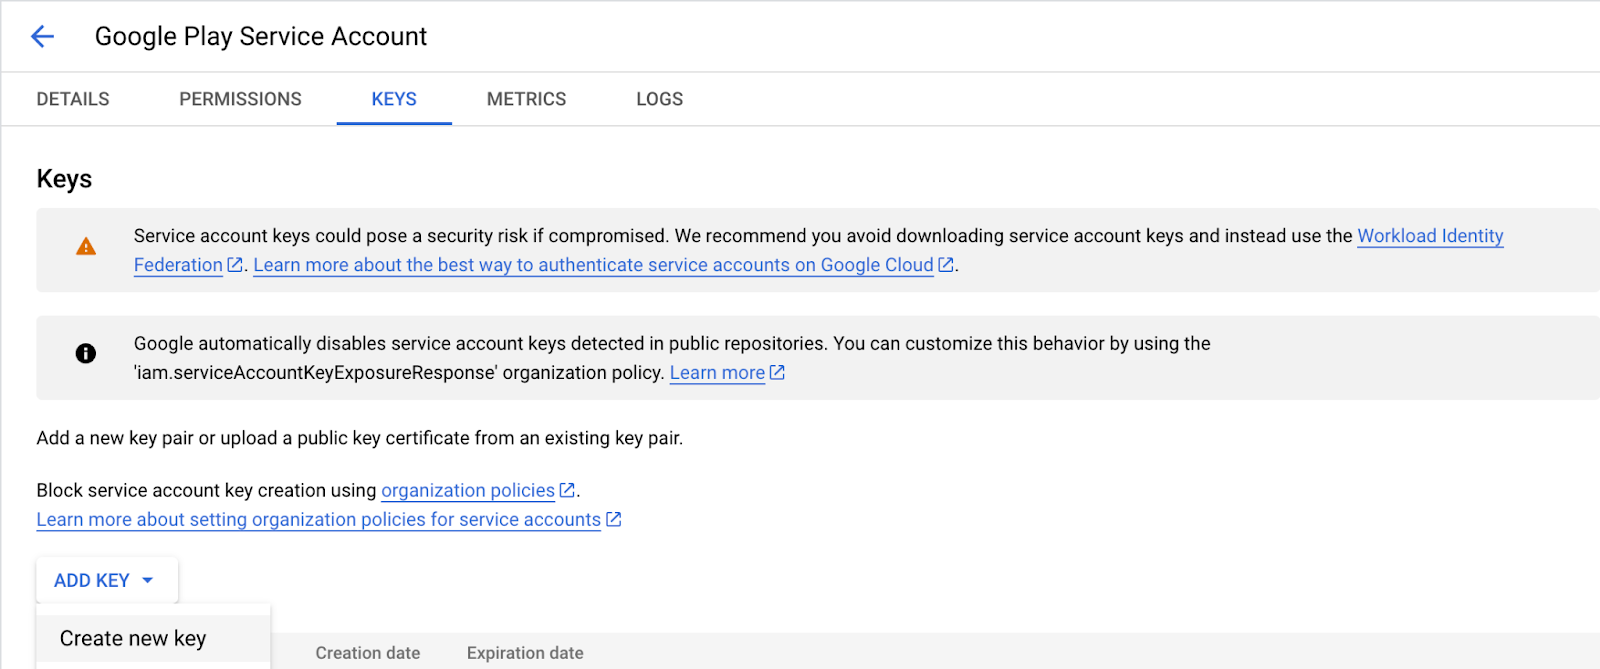
- JSON 키를 만들고 다운로드합니다.
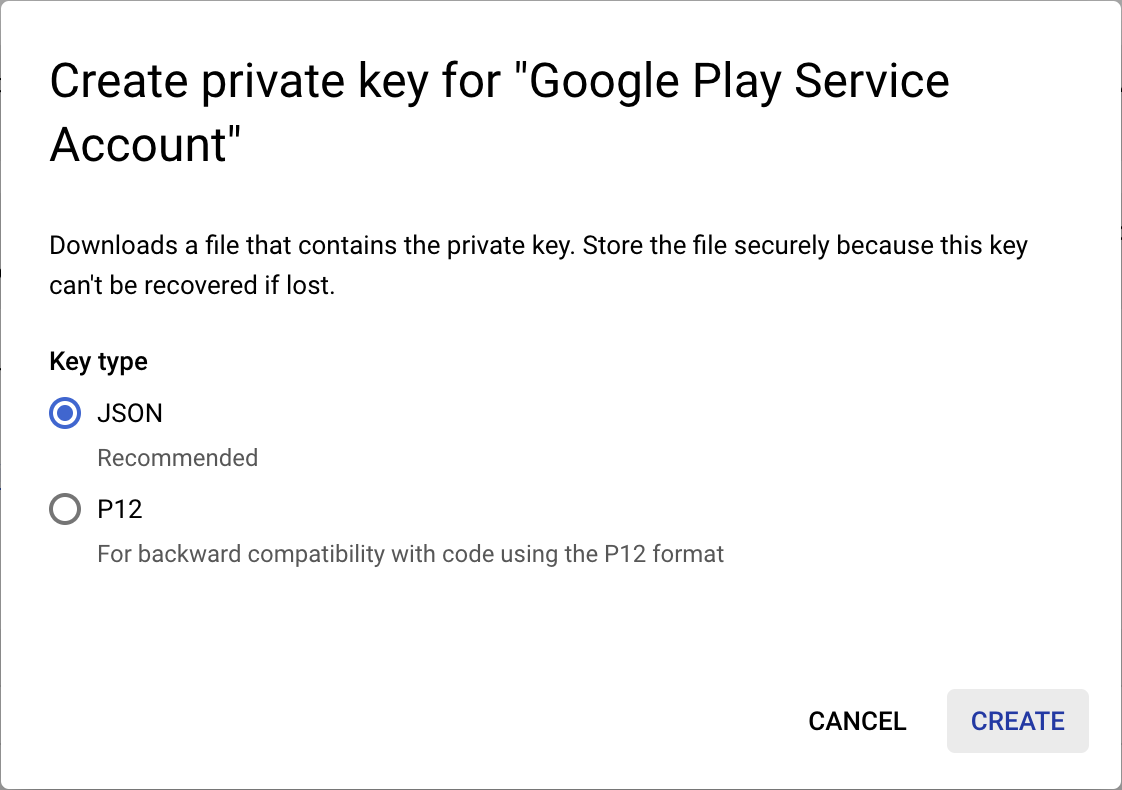
- 다운로드한 파일의 이름을
service-account-google-play.json,로 바꾸고assets/디렉터리로 이동합니다. - 그런 다음 Play Console의 사용자 및 권한 페이지로 이동합니다.

- 새 사용자 초대를 클릭하고 이전에 만든 서비스 계정의 이메일 주소를 입력합니다. 서비스 계정 페이지의 표에서 이메일을 확인할 수 있습니다.

- 애플리케이션에 재무 데이터 보기 및 주문 및 정기 결제 관리 권한을 부여합니다.
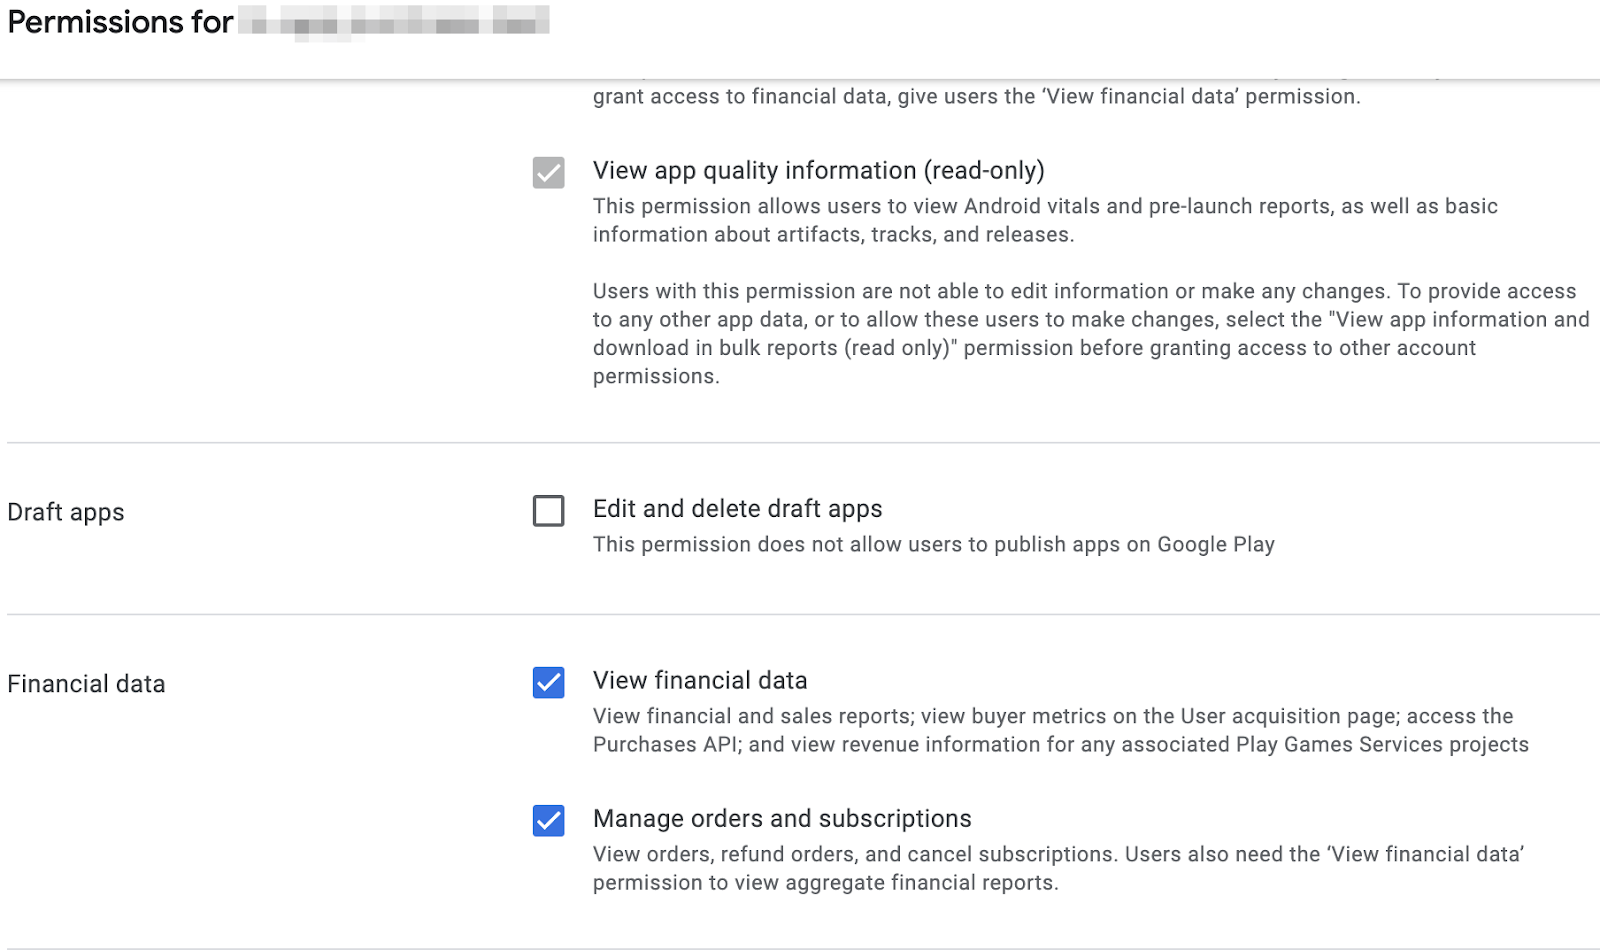
- 사용자 초대를 클릭합니다
마지막으로 해야 할 일은 lib/constants.dart,을 열고 androidPackageId 값을 Android 앱에 선택한 패키지 ID로 바꾸는 것입니다.
Apple App Store 액세스 설정
구매를 확인하기 위해 App Store에 액세스하려면 공유 비밀을 설정해야 합니다.
- App Store Connect를 엽니다.
- 내 앱으로 이동하여 앱을 선택합니다.
- 사이드바 탐색에서 일반 > 앱 정보로 이동합니다.
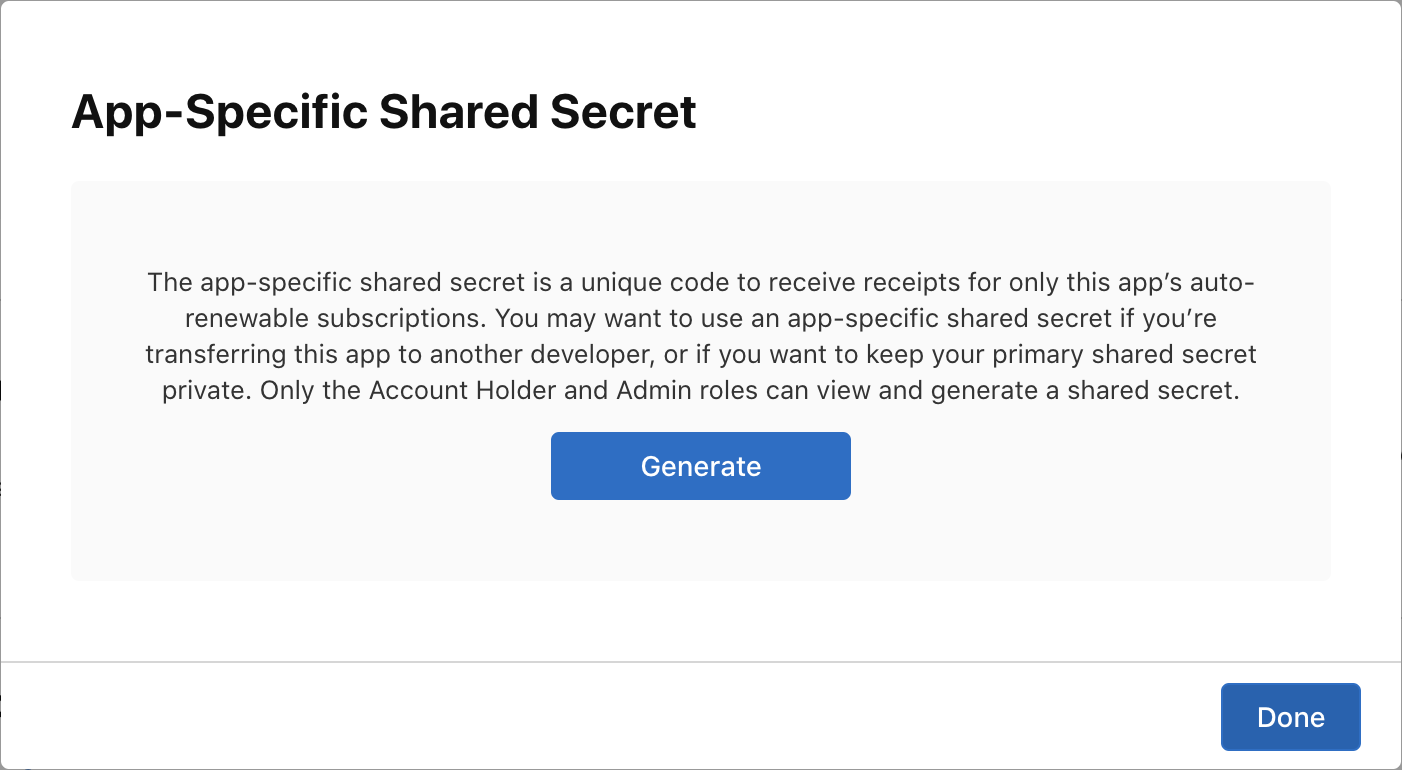
- 앱 전용 공유 보안 비밀 헤더 아래에서 관리를 클릭합니다.
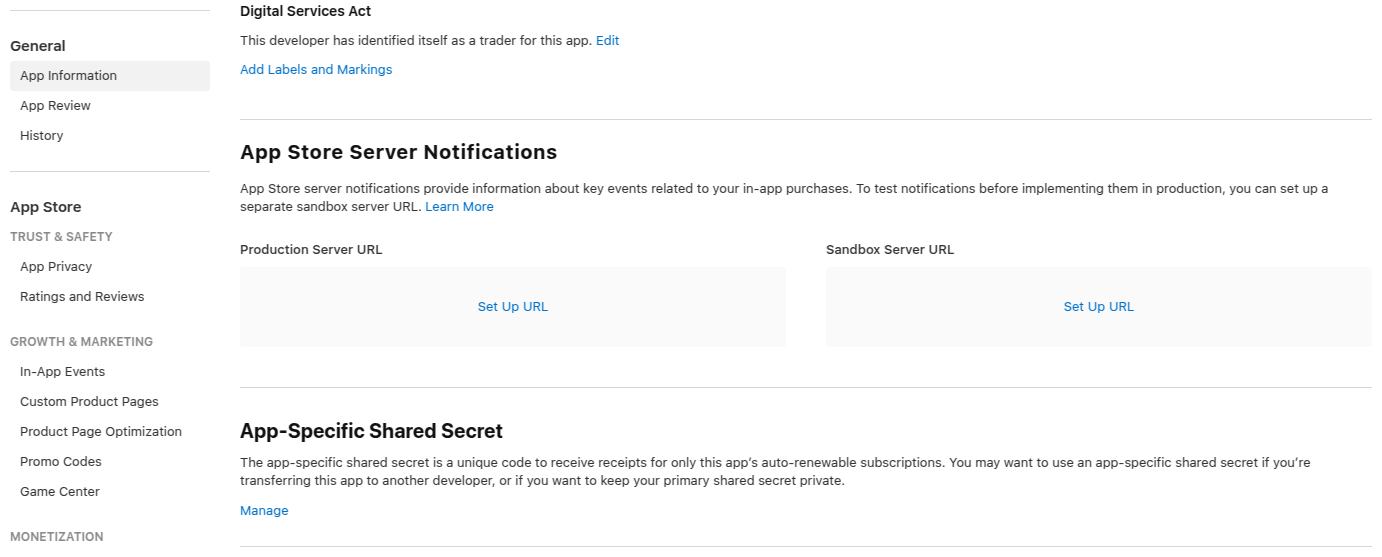
- 새 보안 비밀을 생성하고 복사합니다.
lib/constants.dart,을 열고appStoreSharedSecret값을 방금 생성한 공유 보안 비밀로 바꿉니다.
상수 구성 파일
계속하기 전에 lib/constants.dart 파일에 다음 상수가 구성되어 있는지 확인하세요.
androidPackageId: Android에서 사용되는 패키지 ID입니다(예:com.example.dashclicker).appStoreSharedSecret: 구매 확인을 실행하기 위해 App Store Connect에 액세스하는 데 사용되는 공유 보안 비밀입니다.bundleId: iOS에서 사용되는 번들 ID입니다(예:com.example.dashclicker).
나머지 상수는 당분간 무시해도 됩니다.
10. 구매 확인
구매 확인을 위한 일반적인 흐름은 iOS와 Android가 유사합니다.
두 스토어 모두 구매가 이루어지면 애플리케이션에서 토큰을 수신합니다.
이 토큰은 앱에서 백엔드 서비스로 전송되며, 백엔드 서비스는 제공된 토큰을 사용하여 각 스토어의 서버에서 구매를 확인합니다.
그러면 백엔드 서비스에서 구매를 저장하고 구매가 유효한지 여부를 애플리케이션에 회신할 수 있습니다.
사용자 기기에서 실행되는 애플리케이션이 아닌 백엔드 서비스가 스토어에서 유효성 검사를 실행하도록 하면 사용자가 시스템 시계를 되감는 등의 방법으로 프리미엄 기능에 액세스하는 것을 방지할 수 있습니다.
Flutter 측 설정
인증을 설정합니다.
구매를 백엔드 서비스로 전송할 예정이므로 사용자가 구매하는 동안 인증되었는지 확인해야 합니다. 인증 로직 대부분은 시작 프로젝트에 이미 추가되어 있으므로 사용자가 아직 로그인하지 않은 경우 PurchasePage에 로그인 버튼이 표시되는지 확인하기만 하면 됩니다. PurchasePage의 빌드 메서드 시작 부분에 다음 코드를 추가합니다.
lib/pages/purchase_page.dart
import 'package:flutter/material.dart';
import 'package:provider/provider.dart';

import '../logic/dash_purchases.dart';
import '../logic/firebase_notifier.dart';                  // Add this import
import '../model/firebase_state.dart';                     // And this import
import '../model/purchasable_product.dart';
import '../model/store_state.dart';
import '../repo/iap_repo.dart';
import 'login_page.dart';                                  // And this one as well

class PurchasePage extends StatelessWidget {
  const PurchasePage({super.key});

  @override
  Widget build(BuildContext context) {                     // Update from here
    var firebaseNotifier = context.watch<FirebaseNotifier>();
    if (firebaseNotifier.state == FirebaseState.loading) {
      return _PurchasesLoading();
    } else if (firebaseNotifier.state == FirebaseState.notAvailable) {
      return _PurchasesNotAvailable();
    }

    if (!firebaseNotifier.loggedIn) {
      return const LoginPage();
    }                                                      // To here.

    // ...
앱에서 확인 엔드포인트 호출
앱에서 http post 호출을 사용하여 Dart 백엔드에서 /verifypurchase 엔드포인트를 호출하는 _verifyPurchase(PurchaseDetails purchaseDetails) 함수를 만듭니다.
선택한 스토어 (Play 스토어의 경우 google_play, App Store의 경우 app_store), serverVerificationData, productID을 전송합니다. 서버는 구매가 확인되었는지 여부를 나타내는 상태 코드를 반환합니다.
앱 상수에서 서버 IP를 로컬 머신 IP 주소로 구성합니다.
lib/logic/dash_purchases.dart
import 'dart:async';
import 'dart:convert';                                     // Add this import

import 'package:flutter/foundation.dart';
import 'package:flutter/material.dart';
import 'package:http/http.dart' as http;                   // And this import
import 'package:in_app_purchase/in_app_purchase.dart';

import '../constants.dart';
import '../main.dart';
import '../model/purchasable_product.dart';
import '../model/store_state.dart';
import 'dash_counter.dart';
import 'firebase_notifier.dart';                           // And this one

class DashPurchases extends ChangeNotifier {
  DashCounter counter;
  FirebaseNotifier firebaseNotifier;                       // Add this line
  StoreState storeState = StoreState.loading;
  late StreamSubscription<List<PurchaseDetails>> _subscription;
  List<PurchasableProduct> products = [];

  bool get beautifiedDash => _beautifiedDashUpgrade;
  bool _beautifiedDashUpgrade = false;

  final iapConnection = IAPConnection.instance;

  DashPurchases(this.counter, this.firebaseNotifier) {     // Update this line
    final purchaseUpdated = iapConnection.purchaseStream;
    _subscription = purchaseUpdated.listen(
      _onPurchaseUpdate,
      onDone: _updateStreamOnDone,
      onError: _updateStreamOnError,
    );
    loadPurchases();
  }
main.dart:에서 DashPurchases 생성 시 firebaseNotifier 추가
lib/main.dart
        ChangeNotifierProvider<DashPurchases>(
          create: (context) => DashPurchases(
            context.read<DashCounter>(),
            context.read<FirebaseNotifier>(),
          ),
          lazy: false,
        ),
FirebaseNotifier에 사용자의 getter를 추가하여 사용자 ID를 구매 확인 함수에 전달할 수 있습니다.
lib/logic/firebase_notifier.dart
  Future<FirebaseFirestore> get firestore async {
    var isInitialized = await _isInitialized.future;
    if (!isInitialized) {
      throw Exception('Firebase is not initialized');
    }
    return FirebaseFirestore.instance;
  }

  User? get user => FirebaseAuth.instance.currentUser;     // Add this line

  Future<void> load() async {
    // ...
_verifyPurchase 함수를 DashPurchases 클래스에 추가합니다. 이 async 함수는 구매가 검증되었는지 여부를 나타내는 불리언을 반환합니다.
lib/logic/dash_purchases.dart
  Future<bool> _verifyPurchase(PurchaseDetails purchaseDetails) async {
    final url = Uri.parse('http://$serverIp:8080/verifypurchase');
    const headers = {
      'Content-type': 'application/json',
      'Accept': 'application/json',
    };
    final response = await http.post(
      url,
      body: jsonEncode({
        'source': purchaseDetails.verificationData.source,
        'productId': purchaseDetails.productID,
        'verificationData':
            purchaseDetails.verificationData.serverVerificationData,
        'userId': firebaseNotifier.user?.uid,
      }),
      headers: headers,
    );
    if (response.statusCode == 200) {
      return true;
    } else {
      return false;
    }
  }
구매를 적용하기 직전에 _handlePurchase에서 _verifyPurchase 함수를 호출합니다. 확인된 구매에만 적용해야 합니다. 프로덕션 앱에서는 스토어를 일시적으로 사용할 수 없을 때 체험 구독을 적용하는 등 이를 더 구체적으로 지정할 수 있습니다. 하지만 이 예에서는 구매가 확인되면 구매를 적용합니다.
lib/logic/dash_purchases.dart
  Future<void> _onPurchaseUpdate(
    List<PurchaseDetails> purchaseDetailsList,
  ) async {
    for (var purchaseDetails in purchaseDetailsList) {
      await _handlePurchase(purchaseDetails);
    }
    notifyListeners();
  }

  Future<void> _handlePurchase(PurchaseDetails purchaseDetails) async {
    if (purchaseDetails.status == PurchaseStatus.purchased) {
      // Send to server
      var validPurchase = await _verifyPurchase(purchaseDetails);

      if (validPurchase) {
        // Apply changes locally
        switch (purchaseDetails.productID) {
          case storeKeySubscription:
            counter.applyPaidMultiplier();
          case storeKeyConsumable:
            counter.addBoughtDashes(2000);
          case storeKeyUpgrade:
            _beautifiedDashUpgrade = true;
        }
      }
    }

    if (purchaseDetails.pendingCompletePurchase) {
      await iapConnection.completePurchase(purchaseDetails);
    }
  }
이제 앱에서 구매를 검증할 준비가 되었습니다.
백엔드 서비스 설정
다음으로 백엔드에서 구매를 확인하는 백엔드를 설정합니다.
구매 핸들러 빌드
두 매장의 인증 흐름이 거의 동일하므로 각 매장에 별도의 구현이 있는 추상 PurchaseHandler 클래스를 설정합니다.
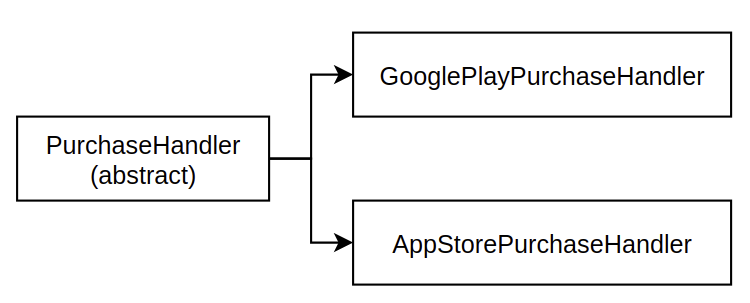
먼저 lib/ 폴더에 purchase_handler.dart 파일을 추가합니다. 여기에서 정기 결제와 비정기 결제라는 두 가지 구매 유형을 확인하는 두 가지 추상 메서드가 있는 추상 PurchaseHandler 클래스를 정의합니다.
lib/purchase_handler.dart
import 'products.dart';

/// Generic purchase handler,
/// must be implemented for Google Play and Apple Store
abstract class PurchaseHandler {
  /// Verify if non-subscription purchase (aka consumable) is valid
  /// and update the database
  Future<bool> handleNonSubscription({
    required String userId,
    required ProductData productData,
    required String token,
  });

  /// Verify if subscription purchase (aka non-consumable) is valid
  /// and update the database
  Future<bool> handleSubscription({
    required String userId,
    required ProductData productData,
    required String token,
  });
}
각 메서드에는 다음과 같은 세 가지 매개변수가 필요합니다.
userId:로그인한 사용자의 ID로, 구매를 사용자와 연결할 수 있습니다.productData:제품에 관한 데이터입니다. 잠시 후에 이를 정의할 것입니다.token:스토어에서 사용자에게 제공한 토큰입니다.
또한 이러한 구매 핸들러를 더 쉽게 사용할 수 있도록 정기 결제와 비정기 결제 모두에 사용할 수 있는 verifyPurchase() 메서드를 추가합니다.
lib/purchase_handler.dart
  /// Verify if purchase is valid and update the database
  Future<bool> verifyPurchase({
    required String userId,
    required ProductData productData,
    required String token,
  }) async {
    switch (productData.type) {
      case ProductType.subscription:
        return handleSubscription(
          userId: userId,
          productData: productData,
          token: token,
        );
      case ProductType.nonSubscription:
        return handleNonSubscription(
          userId: userId,
          productData: productData,
          token: token,
        );
    }
  }
이제 두 경우 모두 verifyPurchase를 호출할 수 있지만 구현은 별도로 유지할 수 있습니다.
ProductData 클래스에는 제품 ID (SKU라고도 함)와 ProductType를 비롯한 다양한 구매 가능한 제품에 관한 기본 정보가 포함되어 있습니다.
lib/products.dart
class ProductData {
  final String productId;
  final ProductType type;

  const ProductData(this.productId, this.type);
}
ProductType은 정기 결제 또는 비정기 결제일 수 있습니다.
lib/products.dart
enum ProductType { subscription, nonSubscription }
마지막으로 제품 목록은 동일한 파일에서 맵으로 정의됩니다.
lib/products.dart
const productDataMap = {
  'dash_consumable_2k': ProductData(
    'dash_consumable_2k',
    ProductType.nonSubscription,
  ),
  'dash_upgrade_3d': ProductData(
    'dash_upgrade_3d',
    ProductType.nonSubscription,
  ),
  'dash_subscription_doubler': ProductData(
    'dash_subscription_doubler',
    ProductType.subscription,
  ),
};
다음으로 Google Play 스토어와 Apple App Store의 자리표시자 구현을 정의합니다. Google Play로 시작하세요.
lib/google_play_purchase_handler.dart를 만들고 방금 작성한 PurchaseHandler를 확장하는 클래스를 추가합니다.
lib/google_play_purchase_handler.dart
import 'dart:async';

import 'package:googleapis/androidpublisher/v3.dart' as ap;

import 'constants.dart';
import 'iap_repository.dart';
import 'products.dart';
import 'purchase_handler.dart';

class GooglePlayPurchaseHandler extends PurchaseHandler {
  final ap.AndroidPublisherApi androidPublisher;
  final IapRepository iapRepository;

  GooglePlayPurchaseHandler(this.androidPublisher, this.iapRepository);

  @override
  Future<bool> handleNonSubscription({
    required String? userId,
    required ProductData productData,
    required String token,
  }) async {
    return true;
  }

  @override
  Future<bool> handleSubscription({
    required String? userId,
    required ProductData productData,
    required String token,
  }) async {
    return true;
  }
}
지금은 핸들러 메서드에 true를 반환합니다. 나중에 다룰 예정입니다.
생성자가 IapRepository의 인스턴스를 가져오는 것을 확인할 수 있습니다. 구매 핸들러는 이 인스턴스를 사용하여 나중에 Firestore에 구매 정보를 저장합니다. Google Play와 소통하려면 제공된 AndroidPublisherApi을 사용합니다.
다음으로 앱 스토어 핸들러에 대해서도 동일한 작업을 실행합니다. lib/app_store_purchase_handler.dart를 만들고 PurchaseHandler를 확장하는 클래스를 다시 추가합니다.
lib/app_store_purchase_handler.dart
import 'dart:async';

import 'package:app_store_server_sdk/app_store_server_sdk.dart';

import 'constants.dart';
import 'iap_repository.dart';
import 'products.dart';
import 'purchase_handler.dart';

class AppStorePurchaseHandler extends PurchaseHandler {
  final IapRepository iapRepository;

  AppStorePurchaseHandler(this.iapRepository);

  @override
  Future<bool> handleNonSubscription({
    required String userId,
    required ProductData productData,
    required String token,
  }) async {
    return true;
  }

  @override
  Future<bool> handleSubscription({
    required String userId,
    required ProductData productData,
    required String token,
  }) async {
    return true;
  }
}
좋습니다. 이제 구매 핸들러가 두 개 있습니다. 그런 다음 구매 확인 API 엔드포인트를 만듭니다.
구매 핸들러 사용
bin/server.dart를 열고 shelf_route를 사용하여 API 엔드포인트를 만듭니다.
bin/server.dart
import 'dart:convert';

import 'package:firebase_backend_dart/helpers.dart';
import 'package:firebase_backend_dart/products.dart';
import 'package:shelf/shelf.dart';
import 'package:shelf_router/shelf_router.dart';

Future<void> main() async {
  final router = Router();

  final purchaseHandlers = await _createPurchaseHandlers();

  router.post('/verifypurchase', (Request request) async {
    final dynamic payload = json.decode(await request.readAsString());

    final (:userId, :source, :productData, :token) = getPurchaseData(payload);

    final result = await purchaseHandlers[source]!.verifyPurchase(
      userId: userId,
      productData: productData,
      token: token,
    );

    if (result) {
      return Response.ok('all good!');
    } else {
      return Response.internalServerError();
    }
  });

  await serveHandler(router.call);
}

({String userId, String source, ProductData productData, String token})
getPurchaseData(dynamic payload) {
  if (payload case {
    'userId': String userId,
    'source': String source,
    'productId': String productId,
    'verificationData': String token,
  }) {
    return (
      userId: userId,
      source: source,
      productData: productDataMap[productId]!,
      token: token,
    );
  } else {
    throw const FormatException('Unexpected JSON');
  }
}
코드는 다음 작업을 실행합니다.
- 이전에 만든 앱에서 호출될 POST 엔드포인트를 정의합니다.
- JSON 페이로드를 디코딩하고 다음 정보를 추출합니다.
userId: 로그인한 사용자 IDsource: 사용된 스토어입니다(app_store또는google_play).productData: 이전에 만든productDataMap에서 가져옵니다.token: 스토어에 전송할 인증 데이터를 포함합니다.
- 소스에 따라
GooglePlayPurchaseHandler또는AppStorePurchaseHandler의verifyPurchase메서드를 호출합니다. - 인증이 성공하면 메서드가 클라이언트에
Response.ok를 반환합니다. - 확인에 실패하면 메서드는 클라이언트에
Response.internalServerError를 반환합니다.
API 엔드포인트를 만든 후에는 두 구매 핸들러를 구성해야 합니다. 이를 위해서는 이전 단계에서 획득한 서비스 계정 키를 로드하고 Android Publisher API 및 Firebase Firestore API를 비롯한 다양한 서비스에 대한 액세스를 구성해야 합니다. 그런 다음 종속 항목이 다른 두 구매 핸들러를 만듭니다.
bin/server.dart
import 'dart:convert';
import 'dart:io'; // new

import 'package:firebase_backend_dart/app_store_purchase_handler.dart'; // new
import 'package:firebase_backend_dart/google_play_purchase_handler.dart'; // new
import 'package:firebase_backend_dart/helpers.dart';
import 'package:firebase_backend_dart/iap_repository.dart'; // new
import 'package:firebase_backend_dart/products.dart';
import 'package:firebase_backend_dart/purchase_handler.dart'; // new
import 'package:googleapis/androidpublisher/v3.dart' as ap; // new
import 'package:googleapis/firestore/v1.dart' as fs; // new
import 'package:googleapis_auth/auth_io.dart' as auth; // new
import 'package:shelf/shelf.dart';
import 'package:shelf_router/shelf_router.dart';

Future<Map<String, PurchaseHandler>> _createPurchaseHandlers() async {
  // Configure Android Publisher API access
  final serviceAccountGooglePlay =
      File('assets/service-account-google-play.json').readAsStringSync();
  final clientCredentialsGooglePlay =
      auth.ServiceAccountCredentials.fromJson(serviceAccountGooglePlay);
  final clientGooglePlay =
      await auth.clientViaServiceAccount(clientCredentialsGooglePlay, [
    ap.AndroidPublisherApi.androidpublisherScope,
  ]);
  final androidPublisher = ap.AndroidPublisherApi(clientGooglePlay);

  // Configure Firestore API access
  final serviceAccountFirebase =
      File('assets/service-account-firebase.json').readAsStringSync();
  final clientCredentialsFirebase =
      auth.ServiceAccountCredentials.fromJson(serviceAccountFirebase);
  final clientFirebase =
      await auth.clientViaServiceAccount(clientCredentialsFirebase, [
    fs.FirestoreApi.cloudPlatformScope,
  ]);
  final firestoreApi = fs.FirestoreApi(clientFirebase);
  final dynamic json = jsonDecode(serviceAccountFirebase);
  final projectId = json['project_id'] as String;
  final iapRepository = IapRepository(firestoreApi, projectId);

  return {
    'google_play': GooglePlayPurchaseHandler(
      androidPublisher,
      iapRepository,
    ),
    'app_store': AppStorePurchaseHandler(
      iapRepository,
    ),
  };
}
Android 구매 확인: 구매 핸들러 구현
그런 다음 Google Play 구매 핸들러를 계속 구현합니다.
Google에서는 구매를 확인하는 데 필요한 API와 상호작용하기 위한 Dart 패키지를 이미 제공하고 있습니다. server.dart 파일에서 초기화한 후 GooglePlayPurchaseHandler 클래스에서 사용합니다.
정기 결제 유형이 아닌 구매의 핸들러를 구현합니다.
lib/google_play_purchase_handler.dart
  /// Handle non-subscription purchases (one time purchases).
  ///
  /// Retrieves the purchase status from Google Play and updates
  /// the Firestore Database accordingly.
  @override
  Future<bool> handleNonSubscription({
    required String? userId,
    required ProductData productData,
    required String token,
  }) async {
    print(
      'GooglePlayPurchaseHandler.handleNonSubscription'
      '($userId, ${productData.productId}, ${token.substring(0, 5)}...)',
    );

    try {
      // Verify purchase with Google
      final response = await androidPublisher.purchases.products.get(
        androidPackageId,
        productData.productId,
        token,
      );

      print('Purchases response: ${response.toJson()}');

      // Make sure an order ID exists
      if (response.orderId == null) {
        print('Could not handle purchase without order id');
        return false;
      }
      final orderId = response.orderId!;

      final purchaseData = NonSubscriptionPurchase(
        purchaseDate: DateTime.fromMillisecondsSinceEpoch(
          int.parse(response.purchaseTimeMillis ?? '0'),
        ),
        orderId: orderId,
        productId: productData.productId,
        status: _nonSubscriptionStatusFrom(response.purchaseState),
        userId: userId,
        iapSource: IAPSource.googleplay,
      );

      // Update the database
      if (userId != null) {
        // If we know the userId,
        // update the existing purchase or create it if it does not exist.
        await iapRepository.createOrUpdatePurchase(purchaseData);
      } else {
        // If we don't know the user ID, a previous entry must already
        // exist, and thus we'll only update it.
        await iapRepository.updatePurchase(purchaseData);
      }
      return true;
    } on ap.DetailedApiRequestError catch (e) {
      print(
        'Error on handle NonSubscription: $e\n'
        'JSON: ${e.jsonResponse}',
      );
    } catch (e) {
      print('Error on handle NonSubscription: $e\n');
    }
    return false;
  }
다음과 비슷한 방식으로 정기 결제 구매 핸들러를 업데이트할 수 있습니다.
lib/google_play_purchase_handler.dart
  /// Handle subscription purchases.
  ///
  /// Retrieves the purchase status from Google Play and updates
  /// the Firestore Database accordingly.
  @override
  Future<bool> handleSubscription({
    required String? userId,
    required ProductData productData,
    required String token,
  }) async {
    print(
      'GooglePlayPurchaseHandler.handleSubscription'
      '($userId, ${productData.productId}, ${token.substring(0, 5)}...)',
    );

    try {
      // Verify purchase with Google
      final response = await androidPublisher.purchases.subscriptions.get(
        androidPackageId,
        productData.productId,
        token,
      );

      print('Subscription response: ${response.toJson()}');

      // Make sure an order ID exists
      if (response.orderId == null) {
        print('Could not handle purchase without order id');
        return false;
      }
      final orderId = extractOrderId(response.orderId!);

      final purchaseData = SubscriptionPurchase(
        purchaseDate: DateTime.fromMillisecondsSinceEpoch(
          int.parse(response.startTimeMillis ?? '0'),
        ),
        orderId: orderId,
        productId: productData.productId,
        status: _subscriptionStatusFrom(response.paymentState),
        userId: userId,
        iapSource: IAPSource.googleplay,
        expiryDate: DateTime.fromMillisecondsSinceEpoch(
          int.parse(response.expiryTimeMillis ?? '0'),
        ),
      );

      // Update the database
      if (userId != null) {
        // If we know the userId,
        // update the existing purchase or create it if it does not exist.
        await iapRepository.createOrUpdatePurchase(purchaseData);
      } else {
        // If we don't know the user ID, a previous entry must already
        // exist, and thus we'll only update it.
        await iapRepository.updatePurchase(purchaseData);
      }
      return true;
    } on ap.DetailedApiRequestError catch (e) {
      print(
        'Error on handle Subscription: $e\n'
        'JSON: ${e.jsonResponse}',
      );
    } catch (e) {
      print('Error on handle Subscription: $e\n');
    }
    return false;
  }
}
주문 ID의 파싱을 용이하게 하는 다음 메서드와 구매 상태를 파싱하는 두 메서드를 추가합니다.
lib/google_play_purchase_handler.dart
NonSubscriptionStatus _nonSubscriptionStatusFrom(int? state) {
  return switch (state) {
    0 => NonSubscriptionStatus.completed,
    2 => NonSubscriptionStatus.pending,
    _ => NonSubscriptionStatus.cancelled,
  };
}

SubscriptionStatus _subscriptionStatusFrom(int? state) {
  return switch (state) {
    // Payment pending
    0 => SubscriptionStatus.pending,
    // Payment received
    1 => SubscriptionStatus.active,
    // Free trial
    2 => SubscriptionStatus.active,
    // Pending deferred upgrade/downgrade
    3 => SubscriptionStatus.pending,
    // Expired or cancelled
    _ => SubscriptionStatus.expired,
  };
}

/// If a subscription suffix is present (..#) extract the orderId.
String extractOrderId(String orderId) {
  final orderIdSplit = orderId.split('..');
  if (orderIdSplit.isNotEmpty) {
    orderId = orderIdSplit[0];
  }
  return orderId;
}
이제 Google Play 구매가 확인되어 데이터베이스에 저장됩니다.
그런 다음 iOS용 App Store 구매로 이동합니다.
iOS 구매 확인: 구매 핸들러 구현
App Store에서 구매를 인증하는 경우 이 프로세스를 더 쉽게 만들어 주는 app_store_server_sdk라는 서드 파티 Dart 패키지가 있습니다.
먼저 ITunesApi 인스턴스를 만듭니다. 샌드박스 구성을 사용하고 로깅을 사용 설정하여 오류 디버깅을 용이하게 합니다.
lib/app_store_purchase_handler.dart
  final _iTunesAPI = ITunesApi(
    ITunesHttpClient(ITunesEnvironment.sandbox(), loggingEnabled: true),
  );
이제 Google Play API와 달리 App Store에서는 정기 결제와 비정기 결제 모두에 동일한 API 엔드포인트를 사용합니다. 즉, 두 핸들러에 동일한 로직을 사용할 수 있습니다. 동일한 구현을 호출하도록 병합합니다.
lib/app_store_purchase_handler.dart
  @override
  Future<bool> handleNonSubscription({
    required String userId,
    required ProductData productData,
    required String token,
  }) {
    return handleValidation(userId: userId, token: token);
  }

  @override
  Future<bool> handleSubscription({
    required String userId,
    required ProductData productData,
    required String token,
  }) {
    return handleValidation(userId: userId, token: token);
  }

  /// Handle purchase validation.
  Future<bool> handleValidation({
    required String userId,
    required String token,
  }) async {

    // See next step
  }
이제 handleValidation를 구현합니다.
lib/app_store_purchase_handler.dart
  /// Handle purchase validation.
  Future<bool> handleValidation({
    required String userId,
    required String token,
  }) async {
    print('AppStorePurchaseHandler.handleValidation');
    final response = await _iTunesAPI.verifyReceipt(
      password: appStoreSharedSecret,
      receiptData: token,
    );
    print('response: $response');
    if (response.status == 0) {
      print('Successfully verified purchase');
      final receipts = response.latestReceiptInfo ?? [];
      for (final receipt in receipts) {
        final product = productDataMap[receipt.productId];
        if (product == null) {
          print('Error: Unknown product: ${receipt.productId}');
          continue;
        }
        switch (product.type) {
          case ProductType.nonSubscription:
            await iapRepository.createOrUpdatePurchase(
              NonSubscriptionPurchase(
                userId: userId,
                productId: receipt.productId ?? '',
                iapSource: IAPSource.appstore,
                orderId: receipt.originalTransactionId ?? '',
                purchaseDate: DateTime.fromMillisecondsSinceEpoch(
                  int.parse(receipt.originalPurchaseDateMs ?? '0'),
                ),
                type: product.type,
                status: NonSubscriptionStatus.completed,
              ),
            );
            break;
          case ProductType.subscription:
            await iapRepository.createOrUpdatePurchase(
              SubscriptionPurchase(
                userId: userId,
                productId: receipt.productId ?? '',
                iapSource: IAPSource.appstore,
                orderId: receipt.originalTransactionId ?? '',
                purchaseDate: DateTime.fromMillisecondsSinceEpoch(
                  int.parse(receipt.originalPurchaseDateMs ?? '0'),
                ),
                type: product.type,
                expiryDate: DateTime.fromMillisecondsSinceEpoch(
                  int.parse(receipt.expiresDateMs ?? '0'),
                ),
                status: SubscriptionStatus.active,
              ),
            );
            break;
        }
      }
      return true;
    } else {
      print('Error: Status: ${response.status}');
      return false;
    }
  }
이제 App Store 구매가 인증되고 데이터베이스에 저장됩니다.
백엔드 실행
이제 dart bin/server.dart를 실행하여 /verifypurchase 엔드포인트를 제공할 수 있습니다.
$ dart bin/server.dart
Serving at http://0.0.0.0:8080
11. 구매 내역 확인하기
사용자의 구매를 추적하는 데 권장되는 방법은 백엔드 서비스에서 추적하는 것입니다. 백엔드는 스토어의 이벤트에 응답할 수 있으므로 캐싱으로 인해 오래된 정보가 표시될 가능성이 적고 조작될 가능성도 적습니다.
먼저 빌드 중인 Dart 백엔드를 사용하여 백엔드에서 스토어 이벤트 처리를 설정합니다.
백엔드에서 스토어 이벤트 처리
스토어는 정기 결제가 갱신되는 등 발생하는 결제 이벤트를 백엔드에 알릴 수 있습니다. 백엔드에서 이러한 이벤트를 처리하여 데이터베이스의 구매를 최신 상태로 유지할 수 있습니다. 이 섹션에서는 Google Play 스토어와 Apple App Store 모두에 대해 설정합니다.
Google Play 결제 이벤트 처리
Google Play는 Cloud Pub/Sub 주제를 통해 결제 이벤트를 제공합니다. 이는 기본적으로 메시지를 게시하고 사용할 수 있는 메시지 대기열입니다.
이는 Google Play에만 해당하는 기능이므로 GooglePlayPurchaseHandler에 이 기능을 포함합니다.
먼저 lib/google_play_purchase_handler.dart를 열고 PubsubApi 가져오기를 추가합니다.
lib/google_play_purchase_handler.dart
import 'package:googleapis/pubsub/v1.dart' as pubsub;
그런 다음 PubsubApi를 GooglePlayPurchaseHandler에 전달하고 클래스 생성자를 수정하여 다음과 같이 Timer를 만듭니다.
lib/google_play_purchase_handler.dart
class GooglePlayPurchaseHandler extends PurchaseHandler {
  final ap.AndroidPublisherApi androidPublisher;
  final IapRepository iapRepository;
  final pubsub.PubsubApi pubsubApi; // new

  GooglePlayPurchaseHandler(
    this.androidPublisher,
    this.iapRepository,
    this.pubsubApi, // new
  ) {
    // Poll messages from Pub/Sub every 10 seconds
    Timer.periodic(Duration(seconds: 10), (_) {
      _pullMessageFromPubSub();
    });
  }
Timer는 10초마다 _pullMessageFromPubSub 메서드를 호출하도록 구성됩니다. 원하는 대로 지속 시간을 조정할 수 있습니다.
그런 다음 _pullMessageFromPubSub을 만듭니다.
lib/google_play_purchase_handler.dart
  /// Process messages from Google Play
  /// Called every 10 seconds
  Future<void> _pullMessageFromPubSub() async {
    print('Polling Google Play messages');
    final request = pubsub.PullRequest(maxMessages: 1000);
    final topicName =
        'projects/$googleCloudProjectId/subscriptions/$googlePlayPubsubBillingTopic-sub';
    final pullResponse = await pubsubApi.projects.subscriptions.pull(
      request,
      topicName,
    );
    final messages = pullResponse.receivedMessages ?? [];
    for (final message in messages) {
      final data64 = message.message?.data;
      if (data64 != null) {
        await _processMessage(data64, message.ackId);
      }
    }
  }

  Future<void> _processMessage(String data64, String? ackId) async {
    final dataRaw = utf8.decode(base64Decode(data64));
    print('Received data: $dataRaw');
    final dynamic data = jsonDecode(dataRaw);
    if (data['testNotification'] != null) {
      print('Skip test messages');
      if (ackId != null) {
        await _ackMessage(ackId);
      }
      return;
    }
    final dynamic subscriptionNotification = data['subscriptionNotification'];
    final dynamic oneTimeProductNotification =
        data['oneTimeProductNotification'];
    if (subscriptionNotification != null) {
      print('Processing Subscription');
      final subscriptionId =
          subscriptionNotification['subscriptionId'] as String;
      final purchaseToken = subscriptionNotification['purchaseToken'] as String;
      final productData = productDataMap[subscriptionId]!;
      final result = await handleSubscription(
        userId: null,
        productData: productData,
        token: purchaseToken,
      );
      if (result && ackId != null) {
        await _ackMessage(ackId);
      }
    } else if (oneTimeProductNotification != null) {
      print('Processing NonSubscription');
      final sku = oneTimeProductNotification['sku'] as String;
      final purchaseToken =
          oneTimeProductNotification['purchaseToken'] as String;
      final productData = productDataMap[sku]!;
      final result = await handleNonSubscription(
        userId: null,
        productData: productData,
        token: purchaseToken,
      );
      if (result && ackId != null) {
        await _ackMessage(ackId);
      }
    } else {
      print('invalid data');
    }
  }

  /// ACK Messages from Pub/Sub
  Future<void> _ackMessage(String id) async {
    print('ACK Message');
    final request = pubsub.AcknowledgeRequest(ackIds: [id]);
    final subscriptionName =
        'projects/$googleCloudProjectId/subscriptions/$googlePlayPubsubBillingTopic-sub';
    await pubsubApi.projects.subscriptions.acknowledge(
      request,
      subscriptionName,
    );
  }
방금 추가한 코드는 10초마다 Google Cloud의 Pub/Sub 주제와 통신하여 새 메시지를 요청합니다. 그런 다음 _processMessage 메서드에서 각 메시지를 처리합니다.
이 메서드는 수신 메시지를 디코딩하고 각 구매(정기 결제 및 비정기 결제 모두)에 관한 업데이트된 정보를 가져와 필요한 경우 기존 handleSubscription 또는 handleNonSubscription를 호출합니다.
각 메시지는 _askMessage 메서드로 확인해야 합니다.
그런 다음 server.dart 파일에 필수 종속 항목을 추가합니다. 사용자 인증 정보 구성에 PubsubApi.cloudPlatformScope를 추가합니다.
bin/server.dart
import 'package:googleapis/pubsub/v1.dart' as pubsub;      // Add this import

  final clientGooglePlay = await auth
      .clientViaServiceAccount(clientCredentialsGooglePlay, [
        ap.AndroidPublisherApi.androidpublisherScope,
        pubsub.PubsubApi.cloudPlatformScope,               // Add this line
      ]);
그런 다음 PubsubApi 인스턴스를 만듭니다.
bin/server.dart
final pubsubApi = pubsub.PubsubApi(clientGooglePlay);
마지막으로 GooglePlayPurchaseHandler 생성자에 전달합니다.
bin/server.dart
  return {
    'google_play': GooglePlayPurchaseHandler(
      androidPublisher,
      iapRepository,
      pubsubApi,                                           // Add this line
    ),
    'app_store': AppStorePurchaseHandler(
      iapRepository,
    ),
  };
Google Play 설정
pub/sub 주제에서 결제 이벤트를 사용하는 코드를 작성했지만 pub/sub 주제를 만들지 않았으며 결제 이벤트를 게시하지도 않습니다. 이제 이 기능을 설정할 시간입니다.
먼저 Pub/Sub 주제를 만듭니다.
constants.dart에서googleCloudProjectId값을 Google Cloud 프로젝트의 ID로 설정합니다.- Google Cloud 콘솔에서 Cloud Pub/Sub 페이지로 이동합니다.
- Firebase 프로젝트에 있는지 확인하고 + 주제 만들기를 클릭합니다.
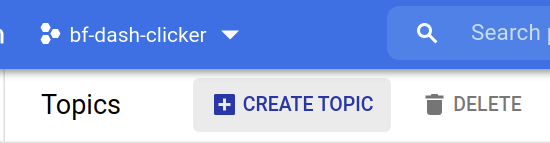
- 새 주제에
constants.dart의googlePlayPubsubBillingTopic에 설정된 값과 동일한 이름을 지정합니다. 이 경우 이름을play_billing로 지정합니다. 다른 항목을 선택하는 경우constants.dart를 업데이트해야 합니다. 주제를 만듭니다.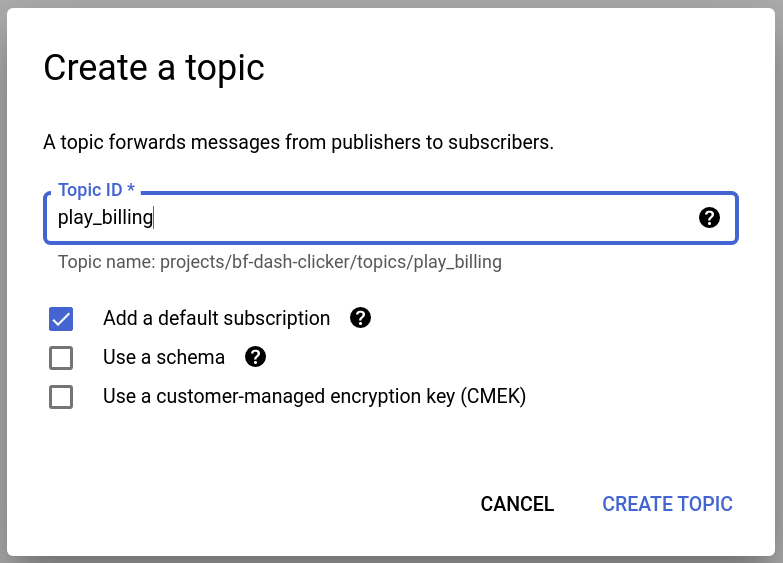
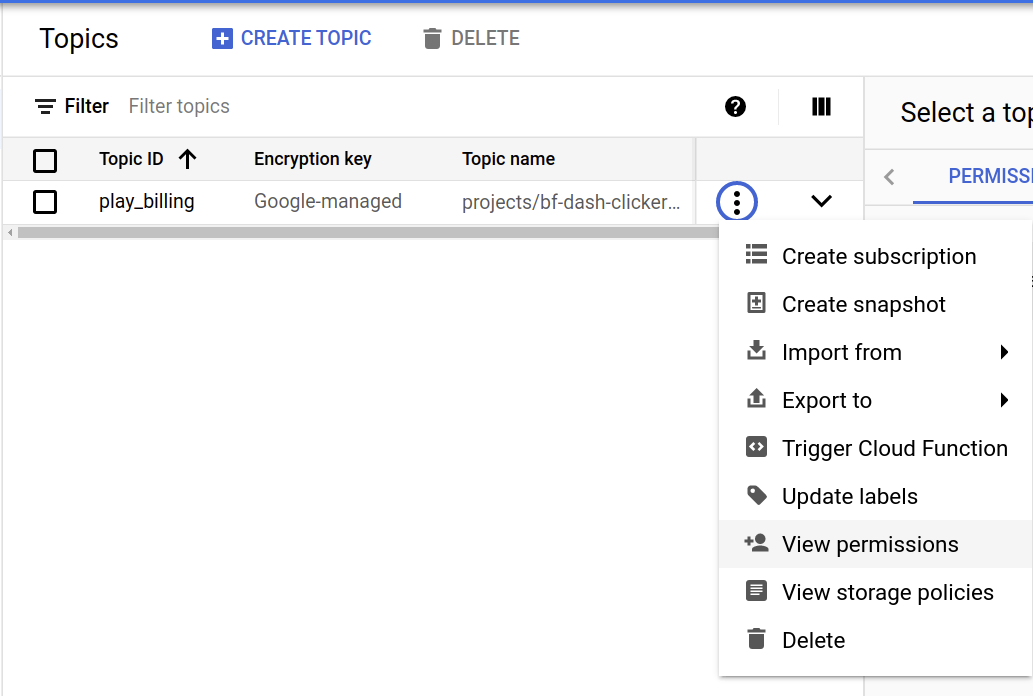
- Pub/Sub 주제 목록에서 방금 만든 주제의 세로 점 3개를 클릭하고 권한 보기를 클릭합니다.
- 오른쪽의 사이드바에서 주 구성원 추가를 선택합니다.
- 여기에서
google-play-developer-notifications@system.gserviceaccount.com을 추가하고 Pub/Sub 게시자 역할을 부여합니다.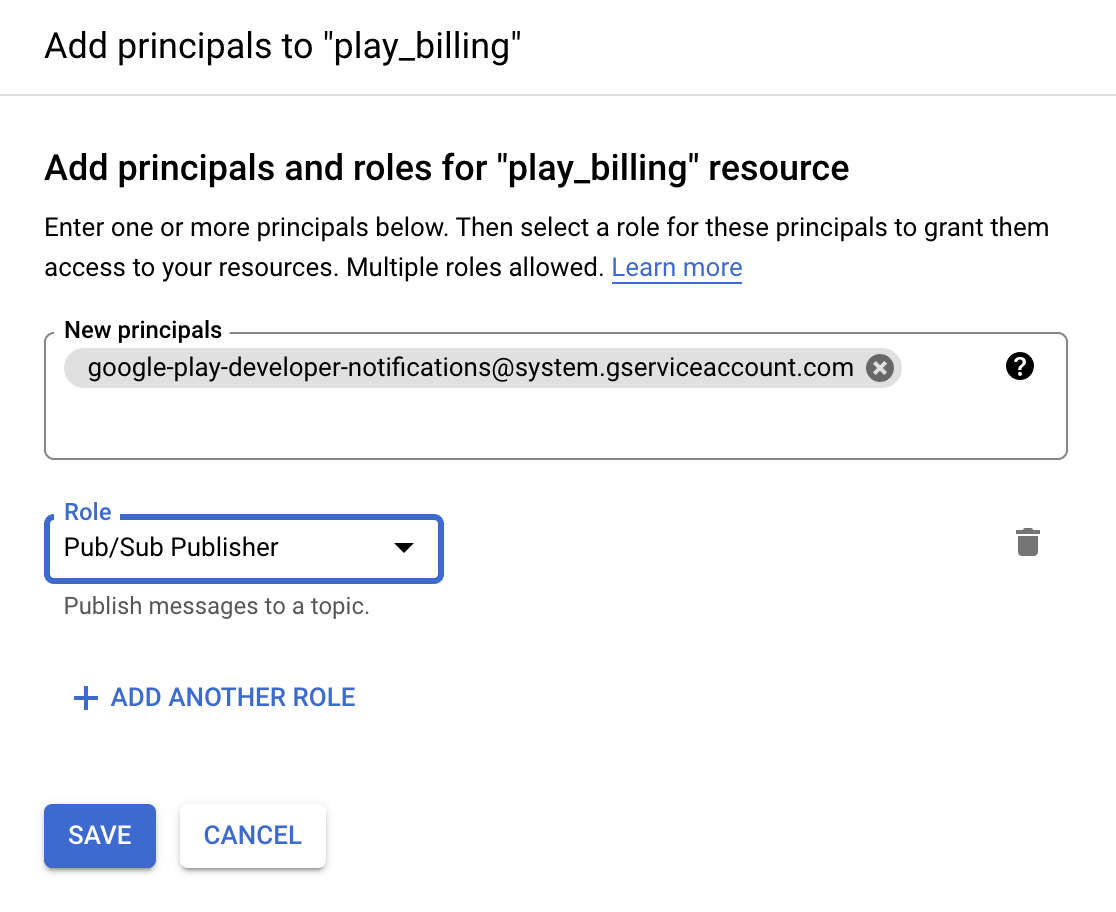
- 권한 변경사항을 저장합니다.
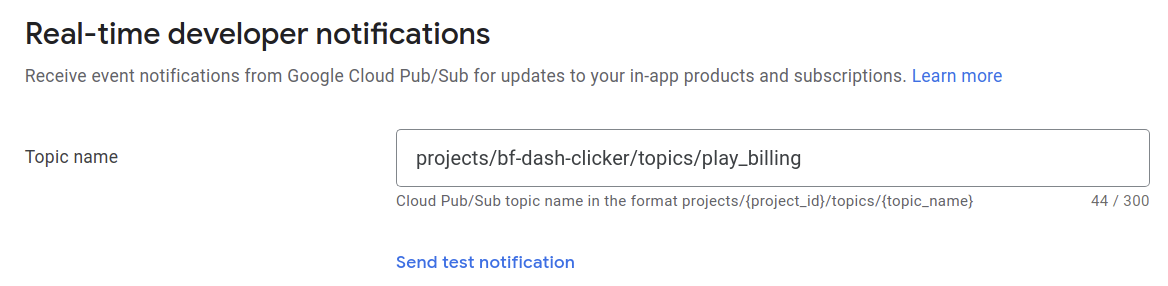
- 방금 만든 주제의 주제 이름을 복사합니다.
- Play Console을 다시 열고 모든 앱 목록에서 앱을 선택합니다.
- 아래로 스크롤하여 수익 창출 > 수익 창출 설정으로 이동합니다.
- 전체 주제를 입력하고 변경사항을 저장합니다.
이제 모든 Google Play 결제 이벤트가 주제에 게시됩니다.
App Store 결제 이벤트 처리
다음으로 App Store 결제 이벤트에 대해서도 동일한 작업을 실행합니다. App Store 구매에서 업데이트를 처리하는 효과적인 방법은 두 가지가 있습니다. 하나는 Apple에 제공하는 웹훅을 구현하는 것입니다. Apple은 이 웹훅을 사용하여 서버와 통신합니다. 두 번째 방법은 이 Codelab에서 다루는 방법으로, App Store Server API에 연결하여 정기 결제 정보를 수동으로 가져오는 것입니다.
이 Codelab에서 두 번째 솔루션에 중점을 두는 이유는 웹훅을 구현하려면 서버를 인터넷에 노출해야 하기 때문입니다.
프로덕션 환경에서는 두 가지를 모두 사용하는 것이 좋습니다. App Store에서 이벤트를 가져오는 웹훅과 이벤트가 누락되었거나 구독 상태를 다시 확인해야 하는 경우의 서버 API
먼저 lib/app_store_purchase_handler.dart를 열고 AppStoreServerAPI 종속 항목을 추가합니다.
lib/app_store_purchase_handler.dart
  final AppStoreServerAPI appStoreServerAPI;                 // Add this member

  AppStorePurchaseHandler(
    this.iapRepository,
    this.appStoreServerAPI,                                  // And this parameter
  );
_pullStatus 메서드를 호출하는 타이머를 추가하도록 생성자를 수정합니다. 이 타이머는 10초마다 _pullStatus 메서드를 호출합니다. 이 타이머 기간은 필요에 따라 조정할 수 있습니다.
lib/app_store_purchase_handler.dart
  AppStorePurchaseHandler(this.iapRepository, this.appStoreServerAPI) {
    // Poll Subscription status every 10 seconds.
    Timer.periodic(Duration(seconds: 10), (_) {
      _pullStatus();
    });
  }
그런 다음 다음과 같이 _pullStatus 메서드를 만듭니다.
lib/app_store_purchase_handler.dart
  /// Request the App Store for the latest subscription status.
  /// Updates all App Store subscriptions in the database.
  /// NOTE: This code only handles when a subscription expires as example.
  Future<void> _pullStatus() async {
    print('Polling App Store');
    final purchases = await iapRepository.getPurchases();
    // filter for App Store subscriptions
    final appStoreSubscriptions = purchases.where(
      (element) =>
          element.type == ProductType.subscription &&
          element.iapSource == IAPSource.appstore,
    );
    for (final purchase in appStoreSubscriptions) {
      final status = await appStoreServerAPI.getAllSubscriptionStatuses(
        purchase.orderId,
      );
      // Obtain all subscriptions for the order ID.
      for (final subscription in status.data) {
        // Last transaction contains the subscription status.
        for (final transaction in subscription.lastTransactions) {
          final expirationDate = DateTime.fromMillisecondsSinceEpoch(
            transaction.transactionInfo.expiresDate ?? 0,
          );
          // Check if subscription has expired.
          final isExpired = expirationDate.isBefore(DateTime.now());
          print('Expiration Date: $expirationDate - isExpired: $isExpired');
          // Update the subscription status with the new expiration date and status.
          await iapRepository.updatePurchase(
            SubscriptionPurchase(
              userId: null,
              productId: transaction.transactionInfo.productId,
              iapSource: IAPSource.appstore,
              orderId: transaction.originalTransactionId,
              purchaseDate: DateTime.fromMillisecondsSinceEpoch(
                transaction.transactionInfo.originalPurchaseDate,
              ),
              type: ProductType.subscription,
              expiryDate: expirationDate,
              status: isExpired
                  ? SubscriptionStatus.expired
                  : SubscriptionStatus.active,
            ),
          );
        }
      }
    }
  }
이 메서드는 다음과 같이 작동합니다.
- IapRepository를 사용하여 Firestore에서 활성 구독 목록을 가져옵니다.
- 각 주문에 대해 App Store Server API에 정기 결제 상태를 요청합니다.
- 해당 정기 결제 구매의 마지막 거래를 가져옵니다.
- 만료일을 확인합니다.
- 만료된 경우 Firestore의 구독 상태를 업데이트하여 만료된 것으로 표시합니다.
마지막으로 App Store Server API 액세스를 구성하는 데 필요한 코드를 모두 추가합니다.
bin/server.dart
import 'package:app_store_server_sdk/app_store_server_sdk.dart';  // Add this import
import 'package:firebase_backend_dart/constants.dart';            // And this one.


  // add from here
  final subscriptionKeyAppStore = File(
    'assets/SubscriptionKey.p8',
  ).readAsStringSync();

  // Configure Apple Store API access
  var appStoreEnvironment = AppStoreEnvironment.sandbox(
    bundleId: bundleId,
    issuerId: appStoreIssuerId,
    keyId: appStoreKeyId,
    privateKey: subscriptionKeyAppStore,
  );

  // Stored token for Apple Store API access, if available
  final file = File('assets/appstore.token');
  String? appStoreToken;
  if (file.existsSync() && file.lengthSync() > 0) {
    appStoreToken = file.readAsStringSync();
  }

  final appStoreServerAPI = AppStoreServerAPI(
    AppStoreServerHttpClient(
      appStoreEnvironment,
      jwt: appStoreToken,
      jwtTokenUpdatedCallback: (token) {
        file.writeAsStringSync(token);
      },
    ),
  );
  // to here

  return {
    'google_play': GooglePlayPurchaseHandler(
      androidPublisher,
      iapRepository,
      pubsubApi,
    ),
    'app_store': AppStorePurchaseHandler(
      iapRepository,
      appStoreServerAPI,                                     // Add this argument
    ),
  };
App Store 설정
다음으로 App Store를 설정합니다.
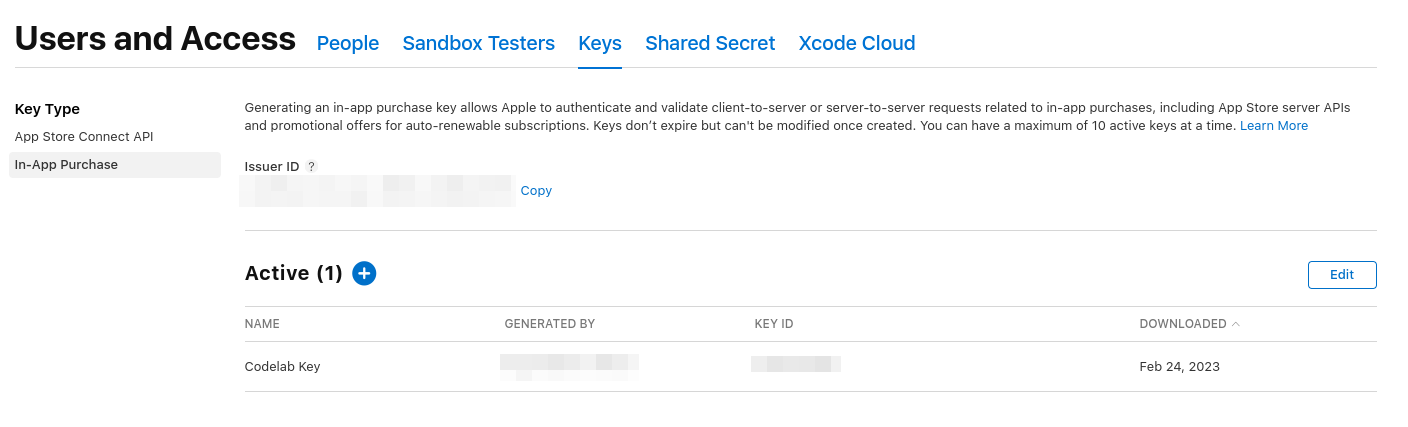
- App Store Connect에 로그인하고 Users and Access(사용자 및 액세스)를 선택합니다.
- 통합 > 키 > 인앱 구매로 이동합니다.
- '더하기' 아이콘을 탭하여 새 항목을 추가합니다.
- 'Codelab key'와 같은 이름을 지정합니다.
- 키가 포함된 p8 파일을 다운로드합니다.
SubscriptionKey.p8라는 이름으로 애셋 폴더에 복사합니다.- 새로 만든 키에서 키 ID를 복사하여
lib/constants.dart파일의appStoreKeyId상수로 설정합니다. - 키 목록의 맨 위에 있는 발급자 ID를 복사하여
lib/constants.dart파일의appStoreIssuerId상수로 설정합니다.
기기에서 구매 추적
구매를 추적하는 가장 안전한 방법은 클라이언트를 보호하기가 어렵기 때문에 서버 측에서 추적하는 것입니다. 하지만 앱이 정기 결제 상태 정보를 기반으로 조치를 취할 수 있도록 정보를 클라이언트로 다시 가져오는 방법이 있어야 합니다. Firestore에 구매를 저장하면 데이터를 클라이언트에 동기화하고 자동으로 업데이트할 수 있습니다.
List<PastPurchase> purchases의 모든 사용자 구매 데이터가 포함된 Firestore 저장소인 IAPRepo가 앱에 이미 포함되어 있습니다. 저장소에는 만료되지 않은 상태의 productId storeKeySubscription이 있는 구매가 있는 경우 true인 hasActiveSubscription,도 포함되어 있습니다. 사용자가 로그인하지 않은 경우 목록이 비어 있습니다.
lib/repo/iap_repo.dart
  void updatePurchases() {
    _purchaseSubscription?.cancel();
    var user = _user;
    if (user == null) {
      purchases = [];
      hasActiveSubscription = false;
      hasUpgrade = false;
      return;
    }
    var purchaseStream = _firestore
        .collection('purchases')
        .where('userId', isEqualTo: user.uid)
        .snapshots();
    _purchaseSubscription = purchaseStream.listen((snapshot) {
      purchases = snapshot.docs.map((document) {
        var data = document.data();
        return PastPurchase.fromJson(data);
      }).toList();

      hasActiveSubscription = purchases.any(
        (element) =>
            element.productId == storeKeySubscription &&
            element.status != Status.expired,
      );

      hasUpgrade = purchases.any(
        (element) => element.productId == storeKeyUpgrade,
      );

      notifyListeners();
    });
  }
모든 구매 로직은 DashPurchases 클래스에 있으며 여기에서 정기 결제를 적용하거나 삭제해야 합니다. 따라서 클래스에 iapRepo를 속성으로 추가하고 생성자에서 iapRepo를 할당합니다. 다음으로 생성자에 리스너를 직접 추가하고 dispose() 메서드에서 리스너를 삭제합니다. 처음에는 리스너가 빈 함수일 수 있습니다. IAPRepo은 ChangeNotifier이고 Firestore의 구매가 변경될 때마다 notifyListeners()를 호출하므로 구매한 제품이 변경될 때마다 purchasesUpdate() 메서드가 항상 호출됩니다.
lib/logic/dash_purchases.dart
import '../repo/iap_repo.dart';                              // Add this import

class DashPurchases extends ChangeNotifier {
  DashCounter counter;
  FirebaseNotifier firebaseNotifier;
  StoreState storeState = StoreState.loading;
  late StreamSubscription<List<PurchaseDetails>> _subscription;
  List<PurchasableProduct> products = [];
  IAPRepo iapRepo;                                           // Add this line

  bool get beautifiedDash => _beautifiedDashUpgrade;
  bool _beautifiedDashUpgrade = false;
  final iapConnection = IAPConnection.instance;

  // Add this.iapRepo as a parameter
  DashPurchases(this.counter, this.firebaseNotifier, this.iapRepo) {
    final purchaseUpdated = iapConnection.purchaseStream;
    _subscription = purchaseUpdated.listen(
      _onPurchaseUpdate,
      onDone: _updateStreamOnDone,
      onError: _updateStreamOnError,
    );
    iapRepo.addListener(purchasesUpdate);
    loadPurchases();
  }

  Future<void> loadPurchases() async {
    // Elided.
  }

  @override
  void dispose() {
    _subscription.cancel();
    iapRepo.removeListener(purchasesUpdate);                 // Add this line
    super.dispose();
  }

  void purchasesUpdate() {
    //TODO manage updates
  }
다음으로 main.dart.의 생성자에 IAPRepo를 제공합니다. Provider에서 이미 생성되었으므로 context.read를 사용하여 저장소를 가져올 수 있습니다.
lib/main.dart
        ChangeNotifierProvider<DashPurchases>(
          create: (context) => DashPurchases(
            context.read<DashCounter>(),
            context.read<FirebaseNotifier>(),
            context.read<IAPRepo>(),                         // Add this line
          ),
          lazy: false,
        ),
다음으로 purchaseUpdate() 함수의 코드를 작성합니다. dash_counter.dart,에서 applyPaidMultiplier 및 removePaidMultiplier 메서드는 각각 승수를 10 또는 1로 설정하므로 정기 결제가 이미 적용되었는지 확인할 필요가 없습니다. 구독 상태가 변경되면 구매 페이지에 이미 활성화되어 있음을 표시할 수 있도록 구매 가능한 제품의 상태도 업데이트합니다. 업그레이드 구매 여부에 따라 _beautifiedDashUpgrade 속성을 설정합니다.
lib/logic/dash_purchases.dart
  void purchasesUpdate() {
    var subscriptions = <PurchasableProduct>[];
    var upgrades = <PurchasableProduct>[];
    // Get a list of purchasable products for the subscription and upgrade.
    // This should be 1 per type.
    if (products.isNotEmpty) {
      subscriptions = products
          .where((element) => element.productDetails.id == storeKeySubscription)
          .toList();
      upgrades = products
          .where((element) => element.productDetails.id == storeKeyUpgrade)
          .toList();
    }

    // Set the subscription in the counter logic and show/hide purchased on the
    // purchases page.
    if (iapRepo.hasActiveSubscription) {
      counter.applyPaidMultiplier();
      for (var element in subscriptions) {
        _updateStatus(element, ProductStatus.purchased);
      }
    } else {
      counter.removePaidMultiplier();
      for (var element in subscriptions) {
        _updateStatus(element, ProductStatus.purchasable);
      }
    }

    // Set the Dash beautifier and show/hide purchased on
    // the purchases page.
    if (iapRepo.hasUpgrade != _beautifiedDashUpgrade) {
      _beautifiedDashUpgrade = iapRepo.hasUpgrade;
      for (var element in upgrades) {
        _updateStatus(
          element,
          _beautifiedDashUpgrade
              ? ProductStatus.purchased
              : ProductStatus.purchasable,
        );
      }
      notifyListeners();
    }
  }

  void _updateStatus(PurchasableProduct product, ProductStatus status) {
    if (product.status != ProductStatus.purchased) {
      product.status = ProductStatus.purchased;
      notifyListeners();
    }
  }
이제 백엔드 서비스에서 정기 결제 및 업그레이드 상태가 항상 최신 상태로 유지되고 앱과 동기화됩니다. 앱은 이에 따라 대시 클릭 게임에 정기 결제 및 업그레이드 기능을 적용합니다.
12. 완료
수고하셨습니다. Codelab을 완료했습니다. 이 Codelab의 완료된 코드는  complete 폴더에서 확인할 수 있습니다.
자세한 내용은 다른 Flutter Codelab을 참고하세요.