
1. Введение
Для добавления встроенных покупок в приложение Flutter необходимо правильно настроить магазины приложений App Store и Google Play, подтвердить покупку и предоставить необходимые разрешения, например, на получение бонусов по подписке.
В этом практическом задании вы добавите в приложение (предоставленное вам) три типа внутриигровых покупок и проверите их с помощью бэкенда на Dart с использованием Firebase. Предоставленное приложение, Dash Clicker, содержит игру, в которой в качестве валюты используется талисман Dash. Вам нужно будет добавить следующие варианты покупок:
- Возможность многократной покупки 2000 Dashs за один раз.
- Единоразовая покупка для модернизации, позволяющая превратить старую приборную панель в современную.
- Подписка, которая удваивает количество автоматически генерируемых кликов.
Первый вариант покупки дает пользователю прямую выгоду в размере 2000 Dashes. Эти Dashes доступны пользователю напрямую и могут быть приобретены многократно. Это называется расходным предметом, поскольку он расходуется напрямую и может быть использован несколько раз.
Второй вариант улучшает внешний вид Dash, делая его более привлекательным. Его нужно приобрести всего один раз, и он будет доступен навсегда. Такая покупка называется нерасходуемой, потому что приложение не может её использовать, но она действительна постоянно.
Третий и последний вариант покупки — это подписка. Пока подписка активна, пользователь будет получать Dashes быстрее, но когда он перестанет платить за подписку, преимущества также исчезнут.
Бэкенд-сервис (также предоставляемый вам) работает как приложение Dart, проверяет факт совершения покупок и сохраняет их с помощью Firestore. Firestore используется для упрощения процесса, но в вашем рабочем приложении вы можете использовать любой тип бэкенд-сервиса.


Что вы построите
- Вы расширите функционал приложения, чтобы оно поддерживало покупки расходных материалов и подписки.
- Вам также потребуется расширить функциональность серверного приложения на Dart для проверки и хранения приобретенных товаров.
Что вы узнаете
- Как настроить App Store и Play Store для добавления товаров, которые можно приобрести.
- Как связаться с магазинами для подтверждения покупок и их сохранения в Firestore.
- Как управлять покупками в вашем приложении.
Что вам понадобится
- Android Studio
- Xcode (для разработки под iOS)
- Flutter SDK
2. Настройка среды разработки.
Чтобы начать выполнение этого практического задания, скачайте код и измените идентификатор пакета для iOS и имя пакета для Android.
Скачать код
Для клонирования репозитория GitHub из командной строки используйте следующую команду:
git clone https://github.com/flutter/codelabs.git flutter-codelabs
Или, если у вас установлен инструмент командной строки GitHub , используйте следующую команду:
gh repo clone flutter/codelabs flutter-codelabs
Пример кода клонирован в каталог flutter-codelabs , который содержит код для набора практических заданий. Код для этого практического задания находится в flutter-codelabs/in_app_purchases .
Структура каталогов в папке flutter-codelabs/in_app_purchases содержит ряд снимков того, где вы должны находиться в конце каждого именованного шага. Начальный код находится на шаге 0, поэтому перейдите к нему следующим образом:
cd flutter-codelabs/in_app_purchases/step_00
Если вы хотите перейти к следующему шагу или посмотреть, как должен выглядеть результат после него, загляните в директорию, названную в честь интересующего вас шага. Код последнего шага находится в папке complete .
Создайте стартовый проект
Откройте стартовый проект из step_00/app в вашей любимой IDE. Для скриншотов мы использовали Android Studio, но Visual Studio Code также является отличным вариантом. В любом из этих редакторов убедитесь, что установлены последние версии плагинов Dart и Flutter.
Приложения, которые вы собираетесь создавать, должны взаимодействовать с App Store и Play Store, чтобы знать, какие продукты доступны и по какой цене. Каждое приложение идентифицируется уникальным идентификатором. Для iOS App Store это называется идентификатором пакета, а для Android Play Store — идентификатором приложения. Эти идентификаторы обычно создаются с использованием обратного обозначения доменного имени. Например, при создании приложения с встроенными покупками для flutter.dev вы будете использовать dev.flutter.inapppurchase . Придумайте идентификатор для вашего приложения, и теперь вы установите его в настройках проекта.
Сначала настройте идентификатор пакета для iOS. Для этого откройте файл Runner.xcworkspace в приложении Xcode.
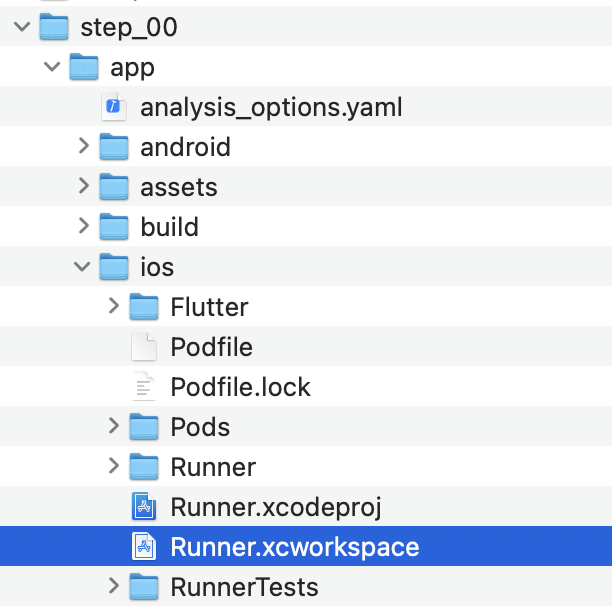
В структуре папок Xcode проект Runner находится вверху, а цели Flutter , Runner и Products — под проектом Runner. Дважды щелкните Runner , чтобы отредактировать настройки проекта, и нажмите «Подписание и возможности» . В поле «Команда» введите только что выбранный идентификатор пакета, чтобы задать команду.

Теперь вы можете закрыть Xcode и вернуться в Android Studio, чтобы завершить настройку для Android. Для этого откройте файл build.gradle.kts в папке android/app, и измените applicationId (строка 24 на скриншоте ниже) на идентификатор приложения, совпадающий с идентификатором пакета iOS. Обратите внимание, что идентификаторы для магазинов iOS и Android не обязательно должны совпадать, однако их совпадение снижает вероятность ошибок, поэтому в этом практическом занятии мы также будем использовать одинаковые идентификаторы.

3. Установите плагин
В этой части практического занятия вы установите плагин in_app_purchase.
Добавьте зависимость в pubspec.
Добавьте in_app_purchase в pubspec, указав in_app_purchase в зависимостях вашего проекта:
$ cd app
$ flutter pub add in_app_purchase dev:in_app_purchase_platform_interface
Resolving dependencies...
Downloading packages...
  characters 1.4.0 (1.4.1 available)
  flutter_lints 5.0.0 (6.0.0 available)
+ in_app_purchase 3.2.3
+ in_app_purchase_android 0.4.0+3
+ in_app_purchase_platform_interface 1.4.0
+ in_app_purchase_storekit 0.4.4
+ json_annotation 4.9.0
  lints 5.1.1 (6.0.0 available)
  material_color_utilities 0.11.1 (0.13.0 available)
  meta 1.16.0 (1.17.0 available)
  provider 6.1.5 (6.1.5+1 available)
  test_api 0.7.6 (0.7.7 available)
Changed 5 dependencies!
7 packages have newer versions incompatible with dependency constraints.
Try `flutter pub outdated` for more information.
Откройте файл pubspec.yaml и убедитесь, что в разделе dependencies у вас указана запись in_app_purchase , а в разделе dev_dependencies in_app_purchase_platform_interface .
pubspec.yaml
dependencies:
  flutter:
    sdk: flutter
  cloud_firestore: ^6.0.0
  cupertino_icons: ^1.0.8
  firebase_auth: ^6.0.1
  firebase_core: ^4.0.0
  google_sign_in: ^7.1.1
  http: ^1.5.0
  intl: ^0.20.2
  provider: ^6.1.5
  logging: ^1.3.0
  in_app_purchase: ^3.2.3

dev_dependencies:
  flutter_test:
    sdk: flutter
  flutter_lints: ^5.0.0
  in_app_purchase_platform_interface: ^1.4.0
4. Настройте App Store.
Для настройки встроенных покупок и их тестирования на iOS необходимо создать новое приложение в App Store и добавить в него товары, доступные для покупки. Публиковать приложение или отправлять его в Apple на проверку не требуется. Для этого необходима учетная запись разработчика. Если у вас её нет, зарегистрируйтесь в программе для разработчиков Apple .
Соглашения о платных приложениях
Для использования встроенных покупок вам также необходимо иметь действующее соглашение для платных приложений в App Store Connect. Перейдите по ссылке https://appstoreconnect.apple.com/ и нажмите «Соглашения, налоги и банковские операции» .

Здесь вы увидите соглашения для бесплатных и платных приложений. Статус бесплатных приложений должен быть «активный», а статус платных — «новый». Обязательно ознакомьтесь с условиями, примите их и введите всю необходимую информацию.

Когда все настройки будут выполнены правильно, статус платных приложений станет активным. Это очень важно, потому что без действующего соглашения вы не сможете использовать встроенные покупки.

Зарегистрировать идентификатор приложения
Создайте новый идентификатор на портале разработчиков Apple. Перейдите по ссылке developer.apple.com/account/resources/identifiers/list и нажмите значок «плюс» рядом с заголовком «Идентификаторы» .

Выберите идентификаторы приложений

Выберите приложение

Укажите описание и задайте идентификатор пакета таким образом, чтобы он совпадал с идентификатором пакета, ранее установленным в Xcode.

Дополнительные инструкции по созданию нового идентификатора приложения см. в разделе « Справка по учетной записи разработчика» .
Создание нового приложения
Создайте новое приложение в App Store Connect, используя свой уникальный идентификатор пакета.


Дополнительные инструкции по созданию нового приложения и управлению соглашениями см. в справке App Store Connect .
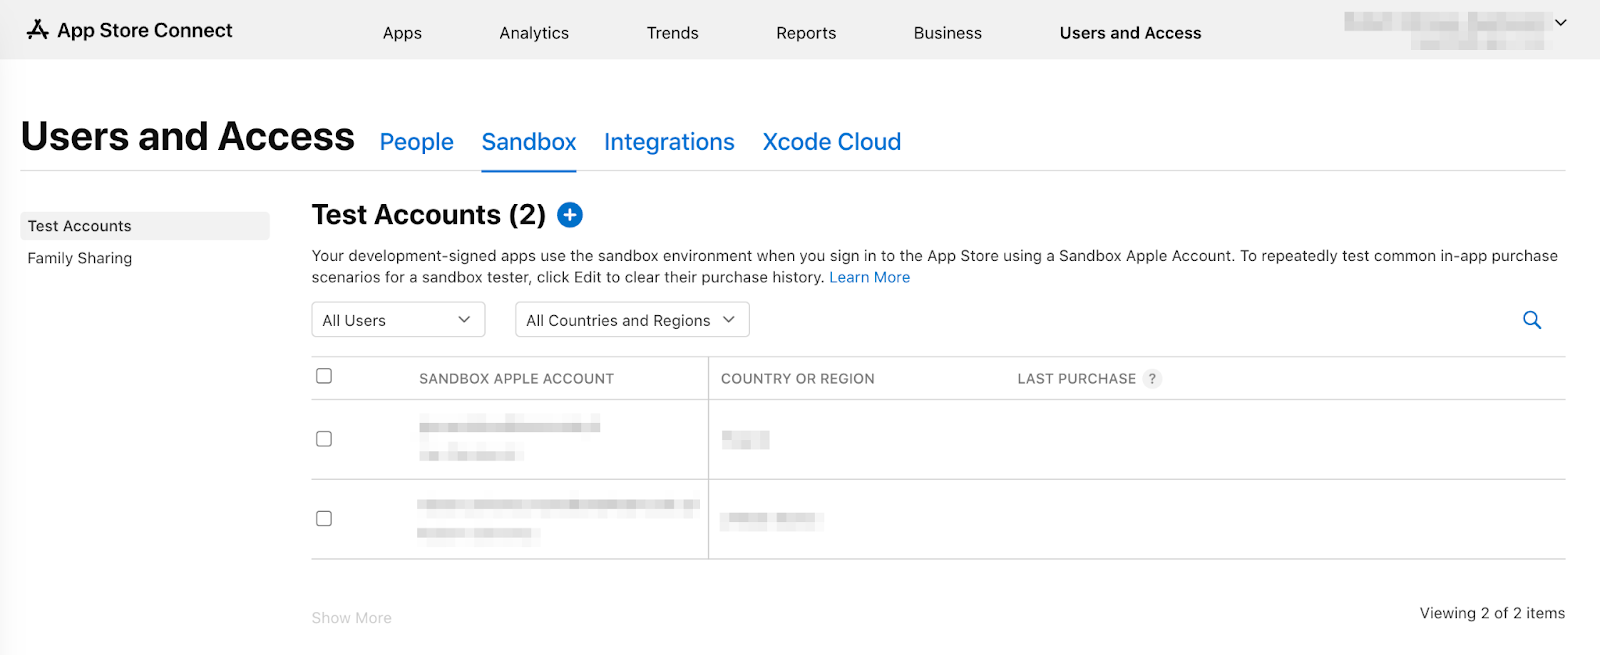
Для тестирования встроенных покупок вам потребуется тестовый пользователь в тестовой среде. Этот тестовый пользователь не должен быть подключен к iTunes — он используется только для тестирования встроенных покупок. Вы не можете использовать адрес электронной почты, который уже используется для учетной записи Apple. В разделе «Пользователи и доступ» перейдите в «Песочница» , чтобы создать новую учетную запись в тестовой среде или управлять существующими идентификаторами Apple в тестовой среде.
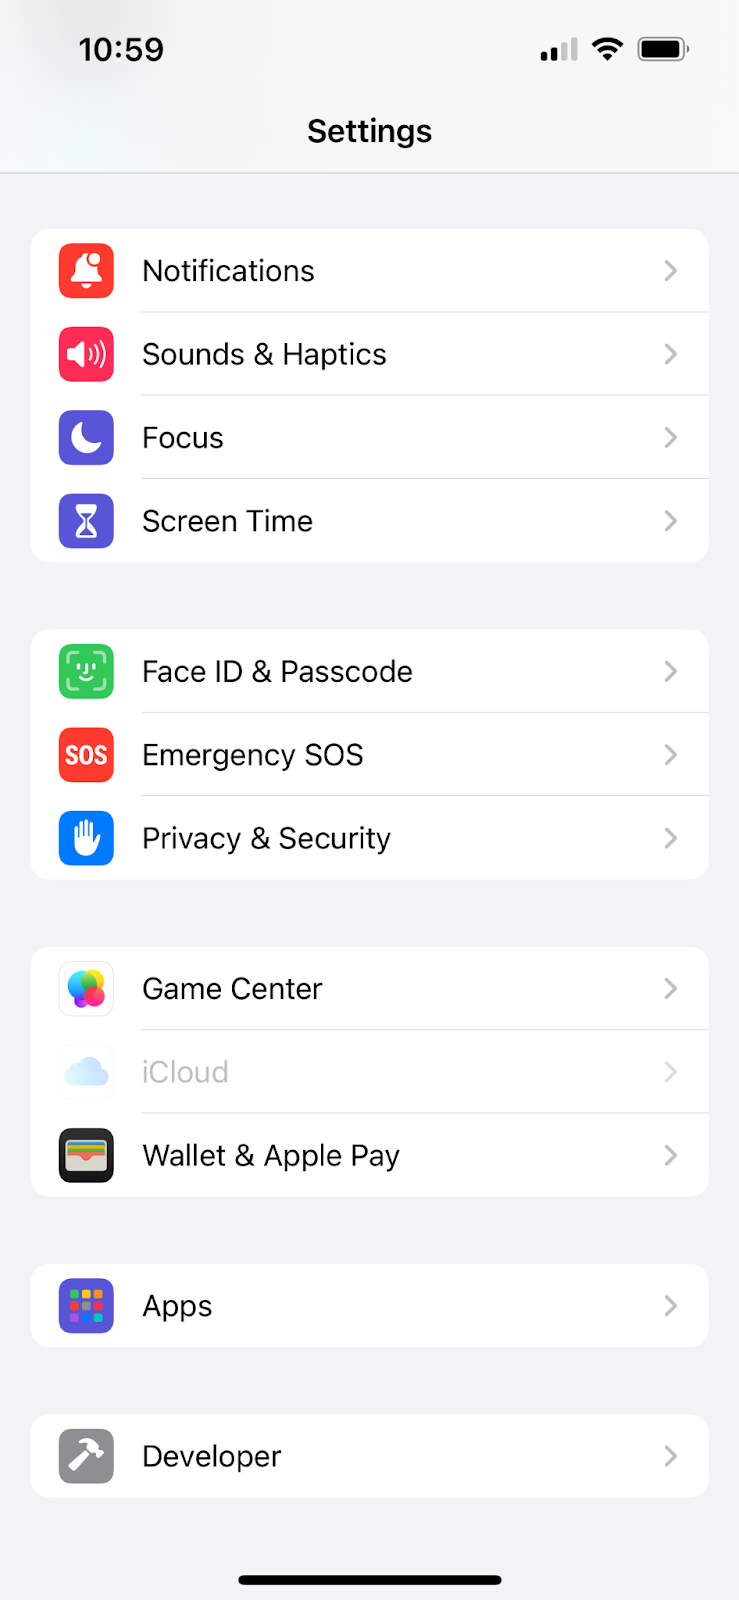
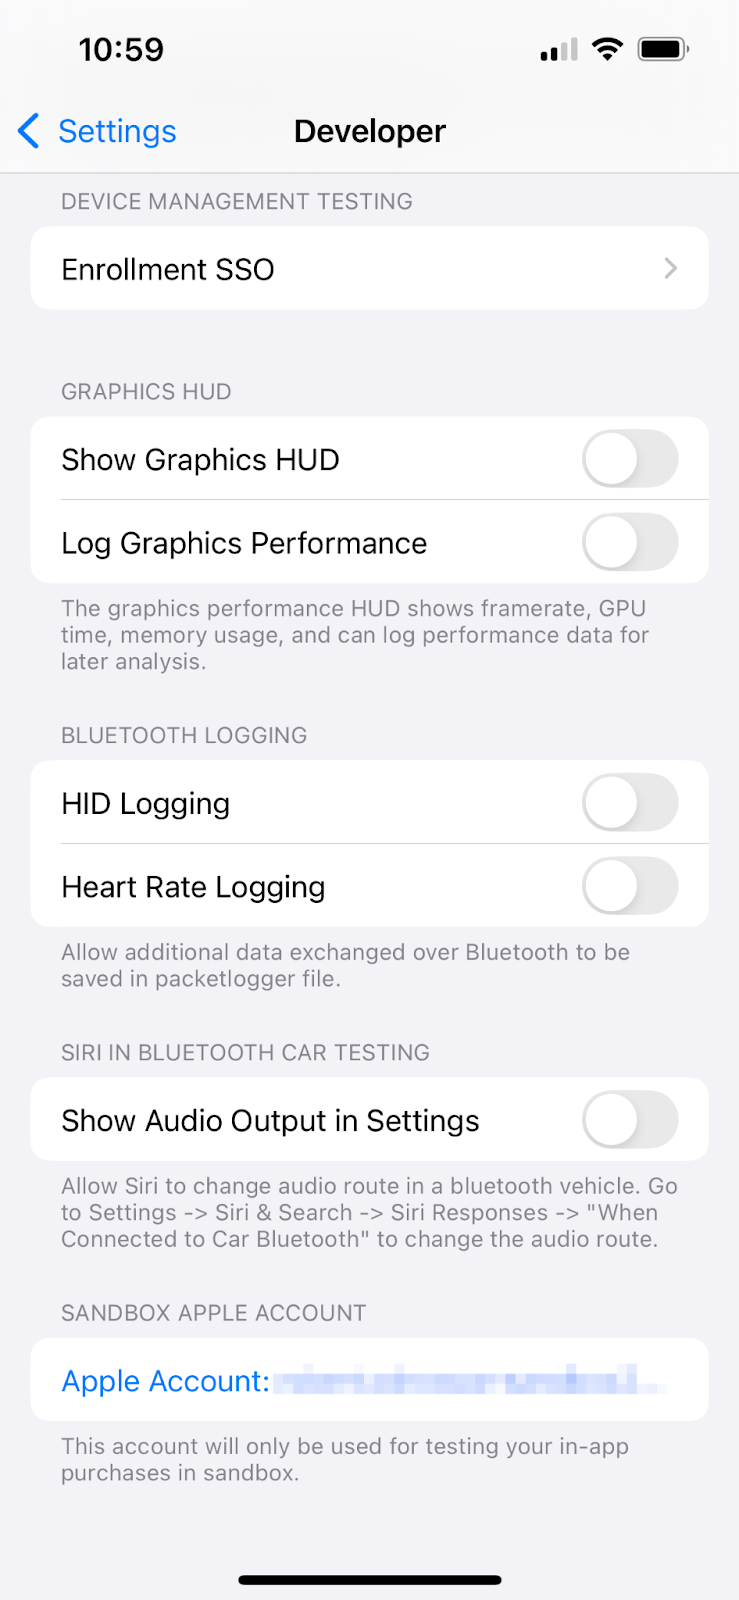
Теперь вы можете настроить пользователя в тестовой среде на своем iPhone, перейдя в Настройки > Разработчик > Учетная запись Apple в тестовой среде .
Настройка покупок внутри приложения
Теперь вам нужно будет настроить три товара, которые можно приобрести:
-
dash_consumable_2k: Расходуемый товар, который можно приобретать многократно, и за каждую покупку пользователь получает 2000 Dashes (внутриигровая валюта). -
dash_upgrade_3d: Нерасходуемый «апгрейд», который можно приобрести только один раз и который дает пользователю косметически другой Dash, на который можно нажать. -
dash_subscription_doubler: Подписка, которая предоставляет пользователю вдвое больше Dash за клик на протяжении всего срока действия подписки.
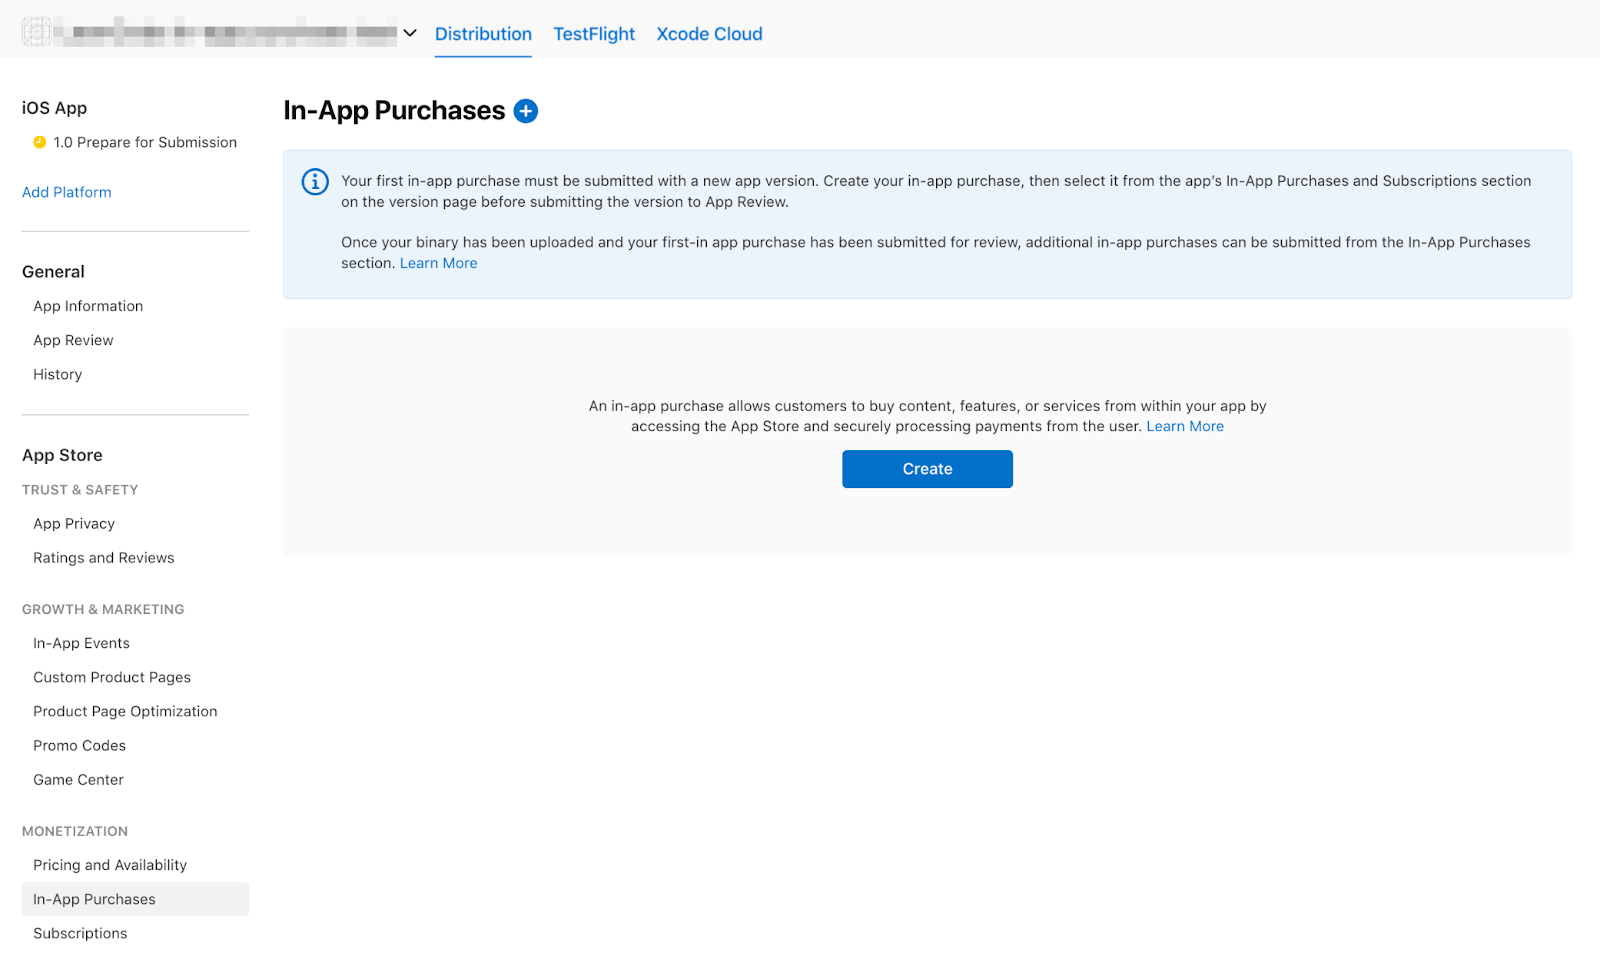
Перейдите в раздел «Встроенные покупки» .
Создавайте внутриигровые покупки, используя указанные идентификаторы:
- Настройте
dash_consumable_2kкак расходный материал . Используйтеdash_consumable_2kв качестве идентификатора продукта. Имя ссылки используется только в App Store Connect, просто установите его какdash consumable 2k.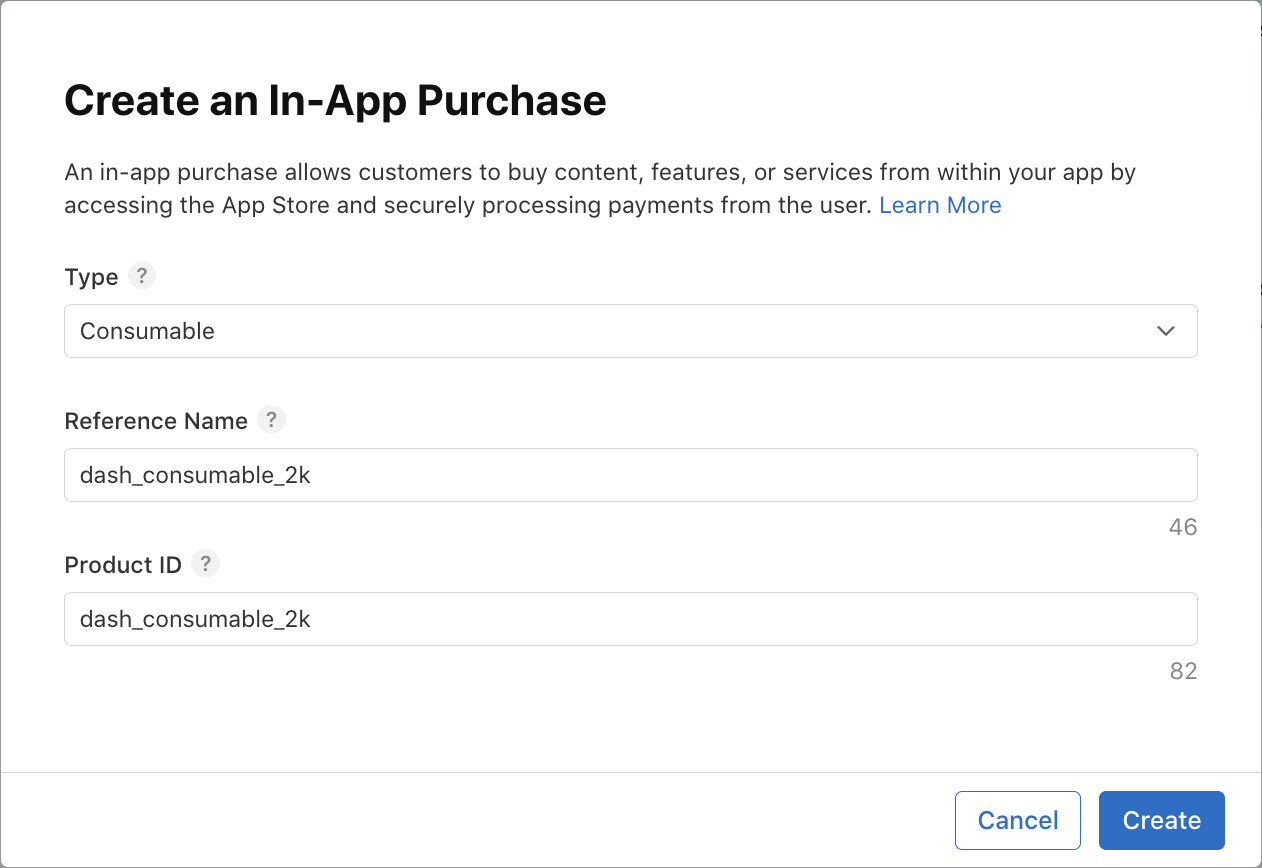 Настройте доступность. Продукт должен быть доступен в стране пользователя тестовой среды.
 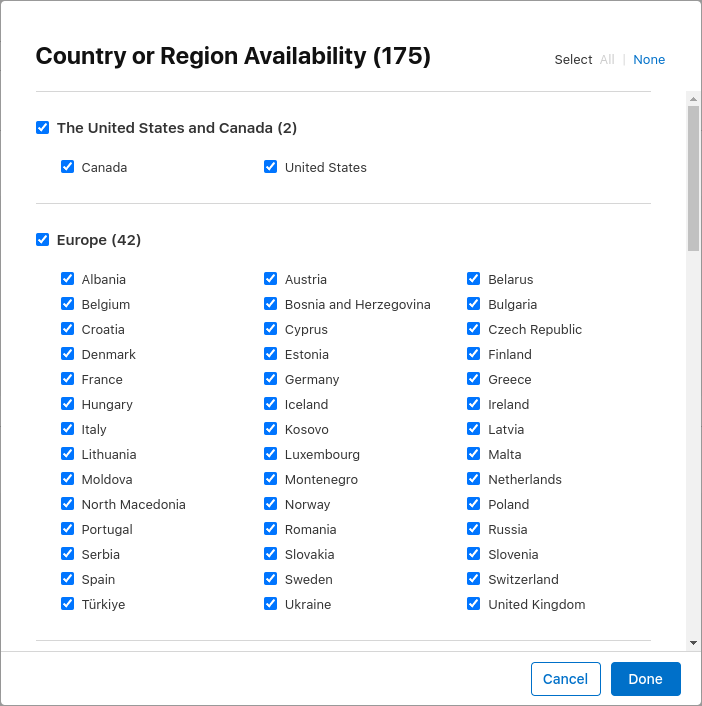 Добавьте информацию о ценах и установите цену в размере
 $1.99или эквивалентную сумму в другой валюте.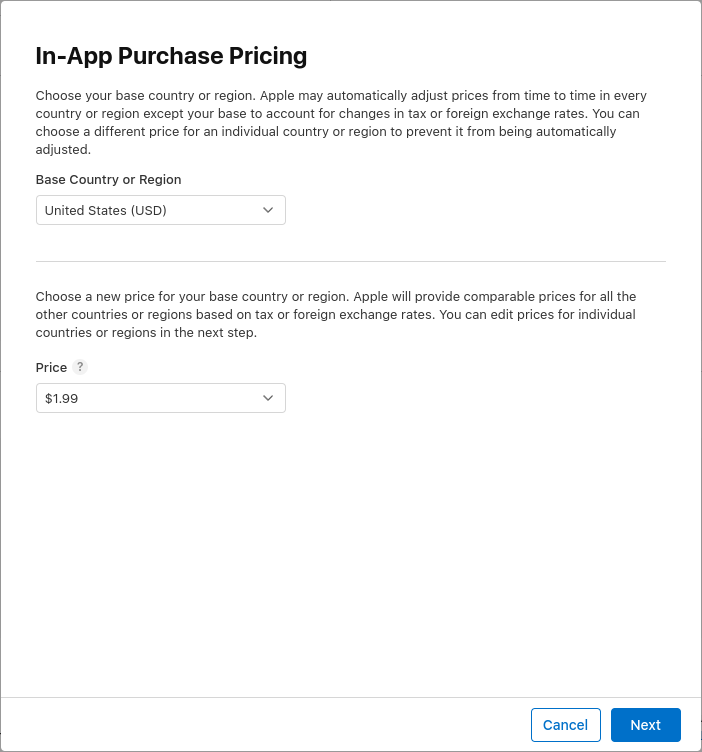 Добавьте локализацию для покупки. Назовите покупку
 Spring is in the airа в описании укажите2000 dashes fly out».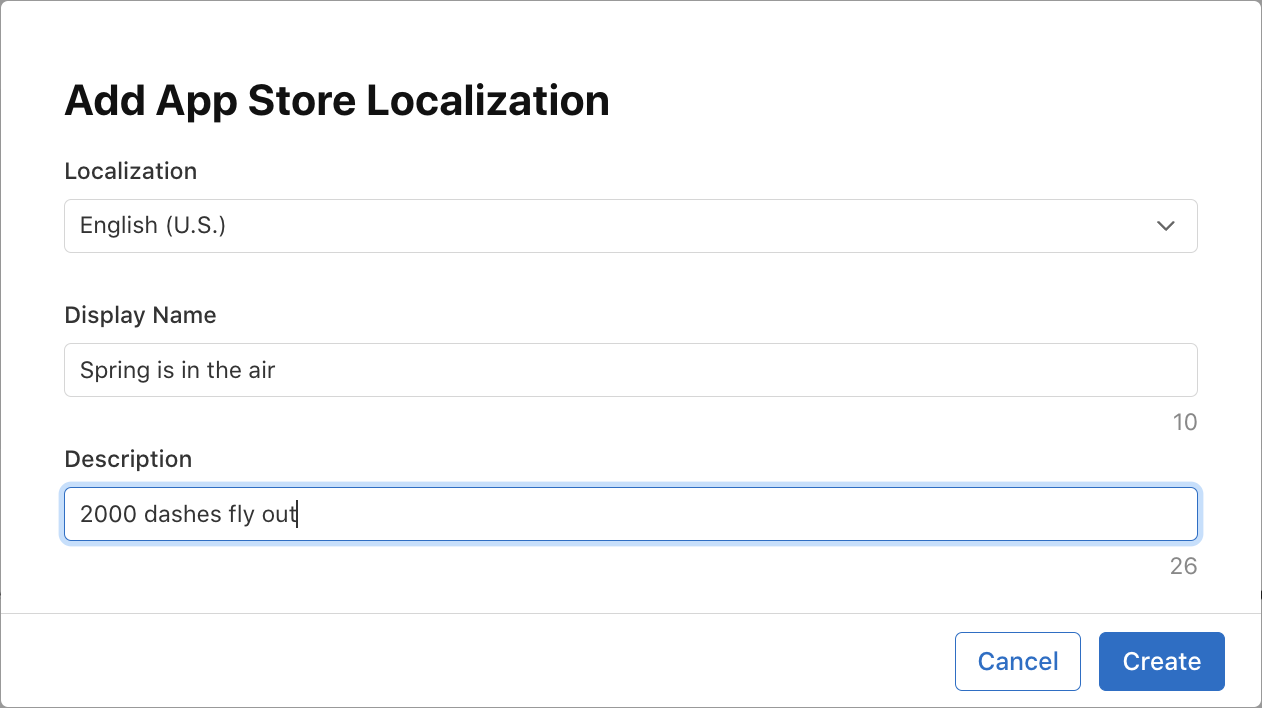 Добавьте скриншот отзыва. Содержание не имеет значения, если продукт не отправлен на проверку, но оно необходимо для того, чтобы продукт находился в состоянии «Готов к отправке», что требуется при загрузке продуктов из App Store.
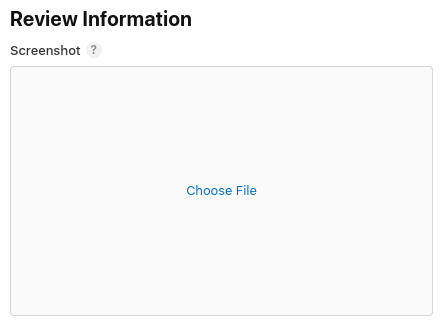
- Настройте
dash_upgrade_3dкак нерасходуемый товар . Используйтеdash_upgrade_3dв качестве идентификатора продукта. Задайте имя ссылки какdash upgrade 3d. Назовите покупку3D Dash, указав в описании «Brings your dash back to the future. Установите цену$0.99. Настройте доступность и загрузите скриншот отзыва так же, как и для продуктаdash_consumable_2k.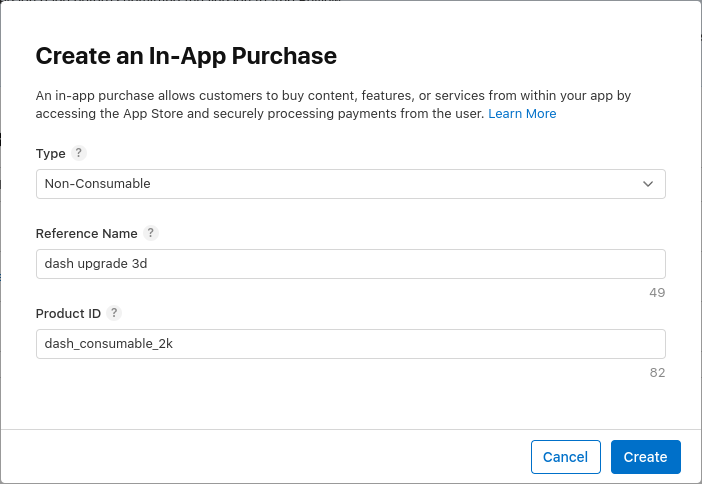
- Настройте
dash_subscription_doublerкак подписку с автоматическим продлением . Процесс работы с подписками немного отличается. Сначала необходимо создать группу подписок. Когда несколько подписок входят в одну группу, пользователь может одновременно подписаться только на одну из них, но может повышать или понижать уровень подписки между этими двумя группами. Просто назовите эту группуsubscriptions.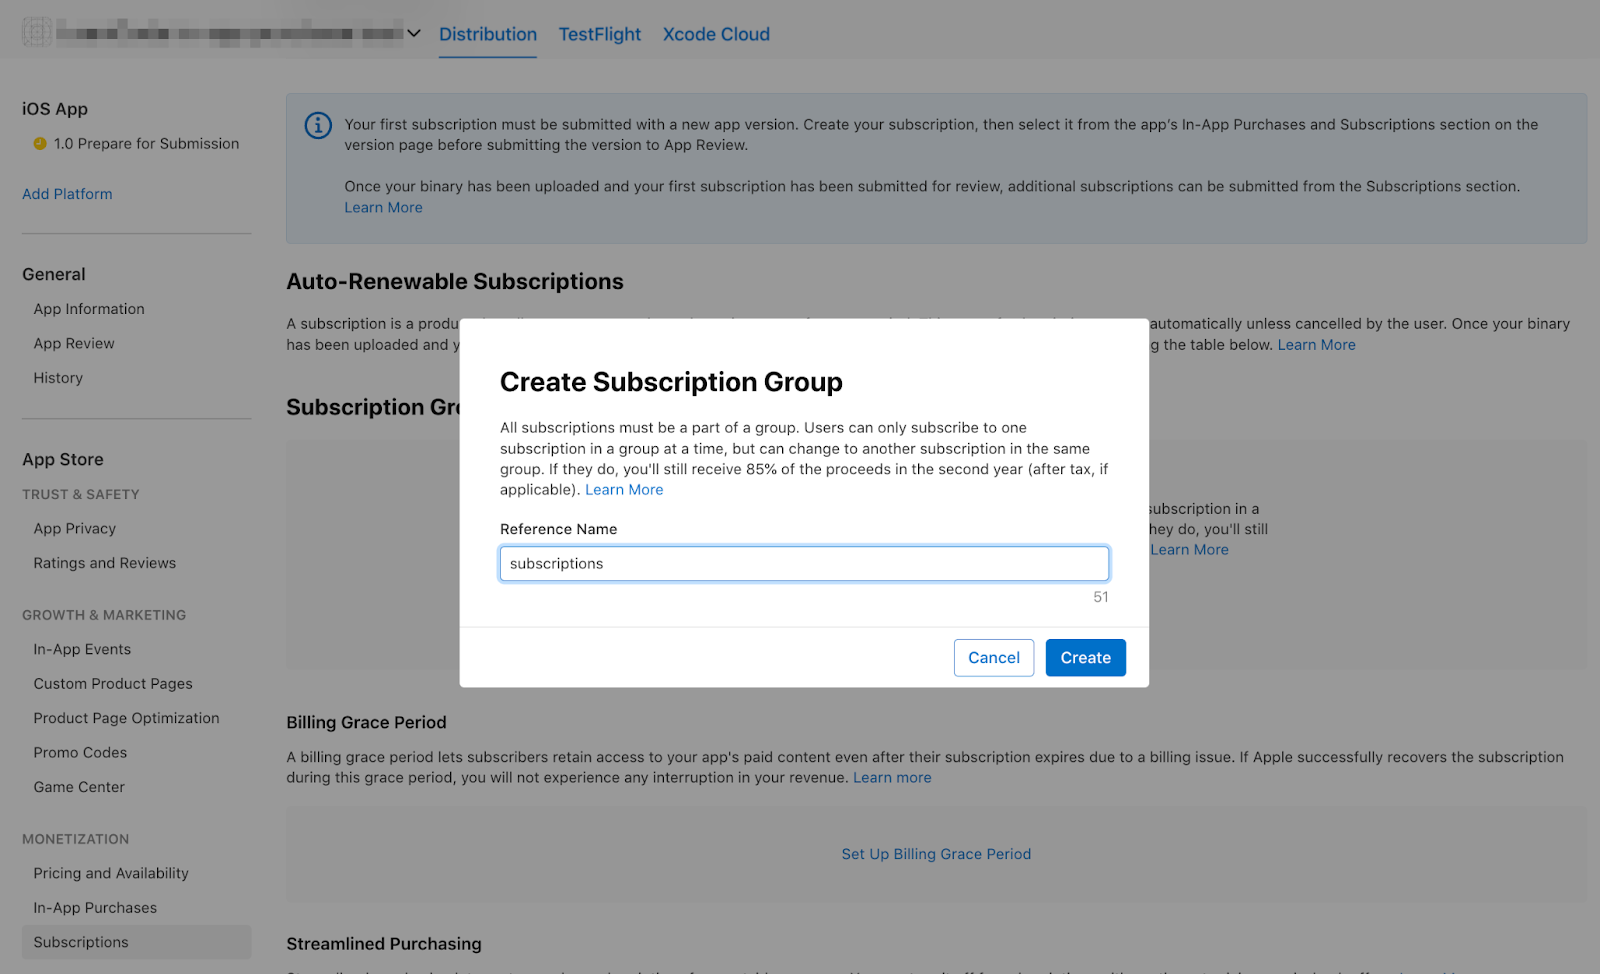 И добавьте локализацию для группы подписчиков.
 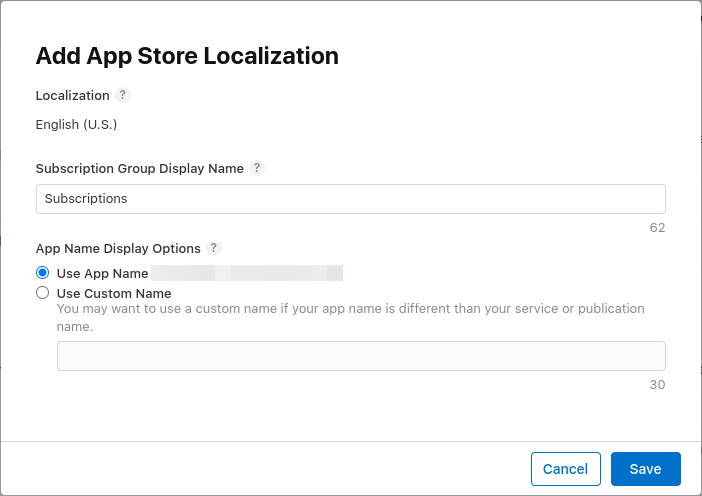 Далее вы создадите подписку. Установите в поле «Имя ссылки» значение
 dash subscription doubler, а в поле «Идентификатор продукта» —dash_subscription_doubler.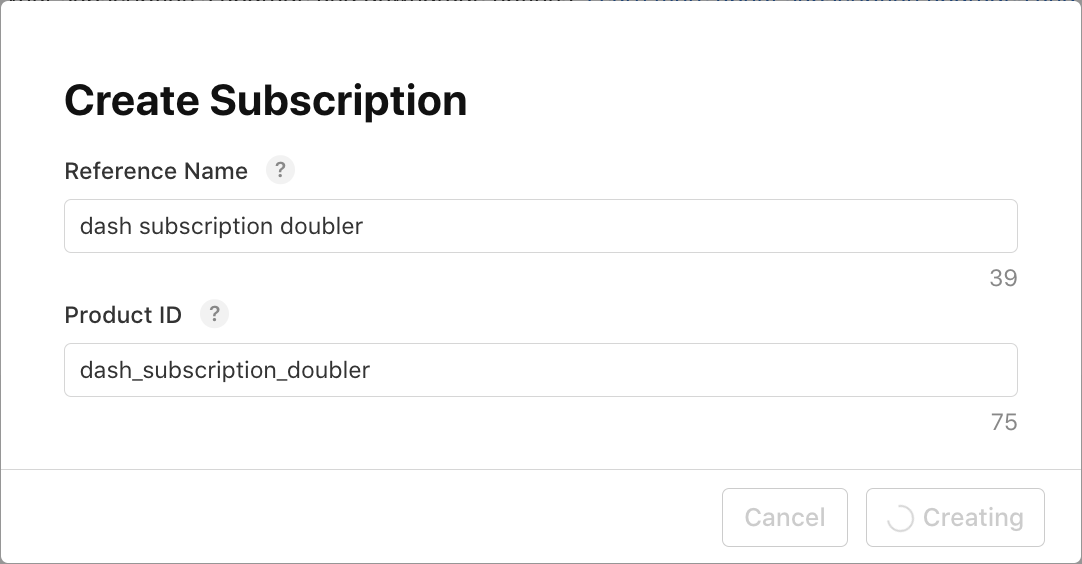 Далее выберите продолжительность подписки — 1 неделю — и локализацию. Назовите подписку
 Jet Engineс описанием «Doubles your clicks. Установите цену в$0.49. Настройте доступность и загрузите скриншот отзыва так же, как и для продуктаdash_consumable_2k.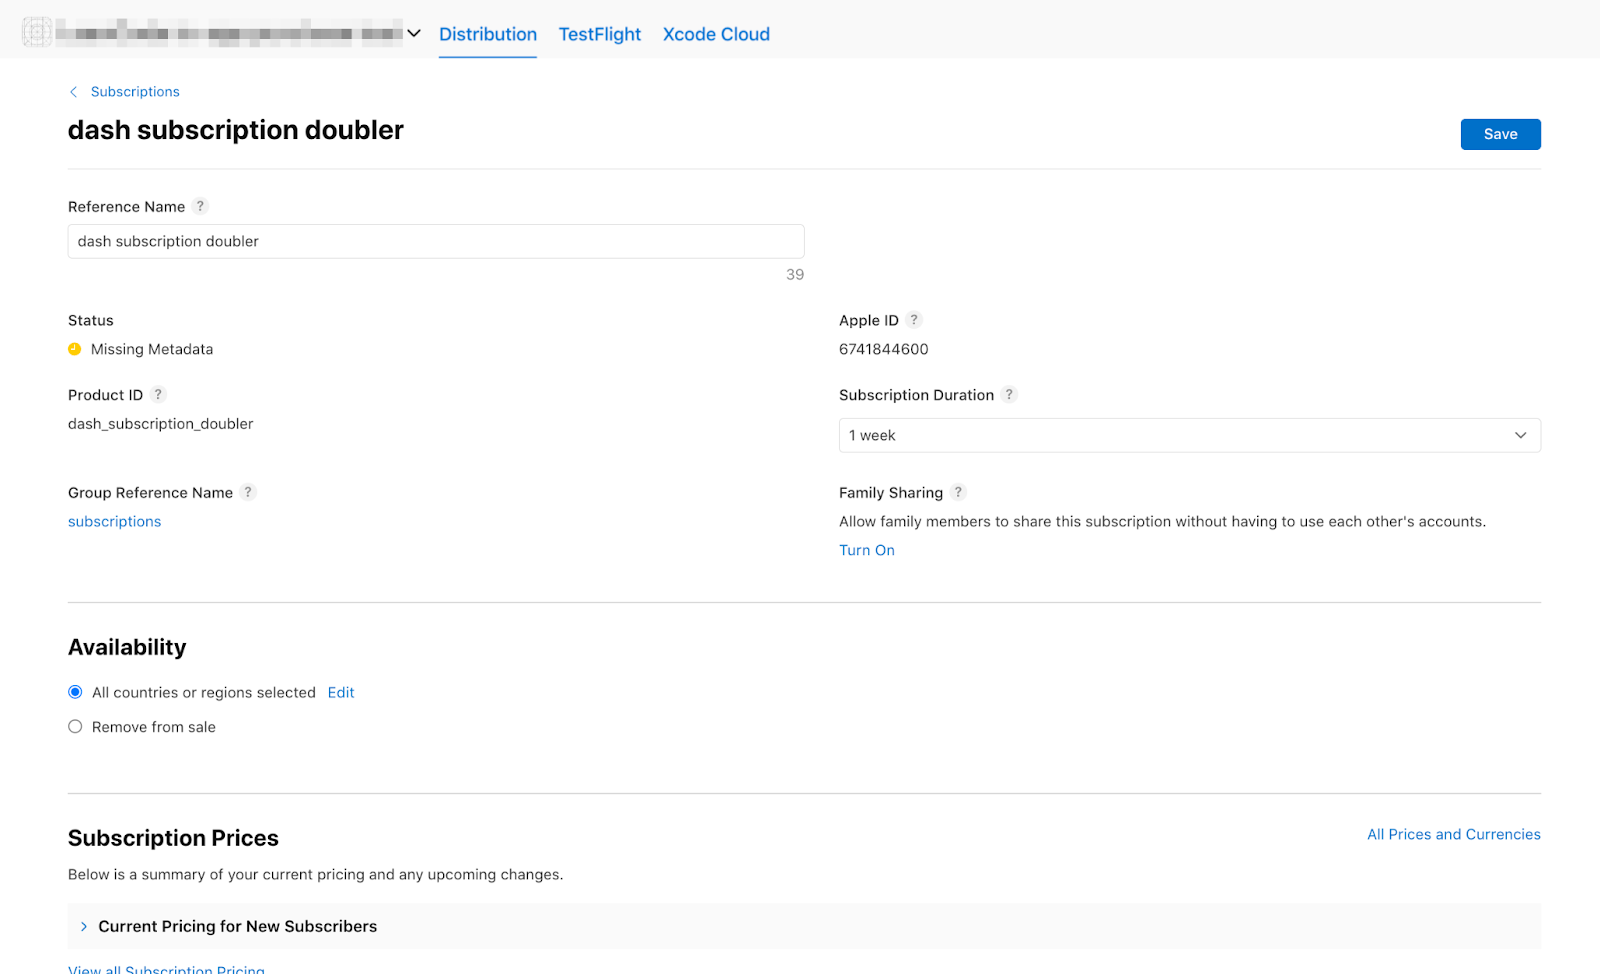
Теперь вы должны увидеть товары в списках:


5. Настройте Play Store.
Как и в случае с App Store, для Play Store вам также потребуется учетная запись разработчика. Если у вас ее еще нет, зарегистрируйте учетную запись .
Создать новое приложение
Создайте новое приложение в консоли Google Play:
- Откройте консоль Play .
- Выберите «Все приложения» > «Создать приложение».
- Выберите язык по умолчанию и добавьте название для вашего приложения. Введите название приложения так, как вы хотите, чтобы оно отображалось в Google Play. Вы можете изменить название позже.
- Укажите, что ваше приложение — игра. Вы можете изменить это позже.
- Укажите, является ли ваше приложение бесплатным или платным.
- Заполните требования к содержанию и декларации в соответствии с законами США об экспорте.
- Выберите «Создать приложение» .
После создания приложения перейдите на панель управления и выполните все задачи в разделе «Настройка приложения» . Здесь вы указываете некоторую информацию о своем приложении, например, рейтинг контента и скриншоты. 
Подпишите заявление
Для тестирования внутриигровых покупок необходимо загрузить как минимум одну сборку в Google Play.
Для этого вам необходимо подписать вашу релизную сборку ключом, отличным от отладочных ключей.
Создайте хранилище ключей
Если у вас уже есть хранилище ключей, перейдите к следующему шагу. В противном случае создайте его, выполнив следующую команду в командной строке.
На Mac/Linux используйте следующую команду:
keytool -genkey -v -keystore ~/key.jks -keyalg RSA -keysize 2048 -validity 10000 -alias key
В операционной системе Windows используйте следующую команду:
keytool -genkey -v -keystore c:\Users\USER_NAME\key.jks -storetype JKS -keyalg RSA -keysize 2048 -validity 10000 -alias key
Эта команда сохраняет файл key.jks в вашей домашней директории. Если вы хотите сохранить файл в другом месте, измените аргумент, передаваемый параметру -keystore . Сохраните
keystore
Файл является приватным; не добавляйте его в общедоступную систему контроля версий!
Укажите хранилище ключей из приложения.
Создайте файл с именем <your app dir>/android/key.properties , содержащий ссылку на ваше хранилище ключей:
storePassword=<password from previous step>
keyPassword=<password from previous step>
keyAlias=key
storeFile=<location of the key store file, such as /Users/<user name>/key.jks>
Настройка подписи в Gradle
Настройте подпись для вашего приложения, отредактировав файл <your app dir>/android/app/build.gradle.kts .
Добавьте информацию о хранилище ключей из файла свойств перед блоком android :
import java.util.Properties
import java.io.FileInputStream

plugins {
    // omitted
}

val keystoreProperties = Properties()
val keystorePropertiesFile = rootProject.file("key.properties")
if (keystorePropertiesFile.exists()) {
    keystoreProperties.load(FileInputStream(keystorePropertiesFile))
}

android {
    // omitted
}
Загрузите файл key.properties в объект keystoreProperties .
Обновите блок buildTypes следующим образом:
   buildTypes {
        release {
            signingConfig = signingConfigs.getByName("release")
        }
    }
В файле build.gradle.kts вашего модуля настройте блок signingConfigs , указав в нем информацию о конфигурации подписи:
   signingConfigs {
        create("release") {
            keyAlias = keystoreProperties["keyAlias"] as String
            keyPassword = keystoreProperties["keyPassword"] as String
            storeFile = keystoreProperties["storeFile"]?.let { file(it) }
            storePassword = keystoreProperties["storePassword"] as String
        }
    }

    buildTypes {
        release {
            signingConfig = signingConfigs.getByName("release")
        }
    }
Теперь релизные сборки вашего приложения будут подписываться автоматически.
Для получения дополнительной информации о подписании вашего приложения см. раздел «Подписание приложения на developer.android.com» .
Загрузите свою первую сборку
После настройки приложения для подписи вы сможете собрать его, выполнив следующую команду:
flutter build appbundle
Эта команда по умолчанию генерирует релизную сборку, результаты которой можно найти по адресу <your app dir>/build/app/outputs/bundle/release/
На панели управления в Google Play Console перейдите в раздел «Тестирование и релизы» > «Тестирование» > «Закрытое тестирование» и создайте новый релиз для закрытого тестирования.
Далее загрузите пакет приложения app-release.aab , сгенерированный командой сборки.
Нажмите «Сохранить» , а затем « Проверить релиз».
Наконец, нажмите кнопку «Начать развертывание» в разделе «Закрытое тестирование» , чтобы активировать выпуск закрытого тестирования.
Настройка тестовых пользователей
Для тестирования встроенных покупок необходимо добавить учетные записи Google ваших тестировщиков в консоли Google Play в двух местах:
- На конкретный испытательный полигон (внутренние испытания)
- В качестве тестировщика лицензий
Для начала добавьте тестировщика во внутреннюю группу тестирования. Вернитесь в раздел «Тестирование и релизы» > «Тестирование» > «Внутреннее тестирование» и перейдите на вкладку «Тестировщики» .

Создайте новый список рассылки, нажав кнопку «Создать список рассылки» . Присвойте списку имя и добавьте адреса электронной почты учетных записей Google, которым необходим доступ для тестирования внутриигровых покупок.
Далее установите флажок в списке и нажмите «Сохранить изменения» .
Затем добавьте тестировщиков лицензий:
- Вернитесь к разделу «Все приложения» в консоли Google Play.
- Перейдите в Настройки > Тестирование лицензий .
- Добавьте те же адреса электронной почты тестировщиков, которым необходимо иметь возможность тестировать внутриигровые покупки.
- Установите ответ лицензии в значение
RESPOND_NORMALLY. - Нажмите «Сохранить изменения».

Настройка покупок внутри приложения
Теперь вам нужно будет настроить товары, которые можно приобрести в приложении.
Как и в App Store, вам нужно указать три разных варианта покупки:
-
dash_consumable_2k: Расходуемый товар, который можно приобретать многократно, и за каждую покупку пользователь получает 2000 Dashes (внутриигровая валюта). -
dash_upgrade_3d: Нерасходуемый «апгрейд», который можно приобрести только один раз и который дает пользователю косметически другой Dash, на который можно нажать. -
dash_subscription_doubler: Подписка, которая предоставляет пользователю вдвое больше Dash за клик на протяжении всего срока действия подписки.
Сначала добавьте расходные и нерасходные материалы.
- Перейдите в консоль Google Play и выберите своё приложение.
- Перейдите в раздел Монетизация > Товары > Товары в приложении .
- Нажмите «Создать продукт»

- Введите всю необходимую информацию о вашем продукте. Убедитесь, что идентификатор продукта точно совпадает с идентификатором, который вы собираетесь использовать.
- Нажмите « Сохранить».
- Нажмите «Активировать» .
- Повторите процесс для покупки нерасходуемого "обновления".
Далее добавьте подписку:
- Перейдите в консоль Google Play и выберите своё приложение.
- Перейдите в раздел Монетизация > Товары > Подписки .
- Нажмите «Создать подписку»

- Введите всю необходимую информацию для вашей подписки. Убедитесь, что идентификатор продукта точно совпадает с идентификатором, который вы собираетесь использовать.
- Нажмите «Сохранить».
Теперь ваши покупки должны быть настроены в консоли Play.
6. Настройка Firebase
В этом практическом занятии вы будете использовать серверную часть для проверки и отслеживания покупок пользователей.
Использование серверной части имеет ряд преимуществ:
- Вы можете безопасно проверять транзакции.
- Вы можете реагировать на платежные события из магазинов приложений.
- Вы можете отслеживать покупки в базе данных.
- Пользователям не удастся обманом заставить ваше приложение предоставить доступ к премиум-функциям, перемотав системное время назад.
Хотя существует множество способов настройки серверной части, вы будете использовать для этого облачные функции и Firestore, а также собственную платформу Google Firebase.
Разработка бэкенда выходит за рамки данного практического занятия, поэтому в стартовый код уже включен проект Firebase, который обрабатывает базовые покупки, чтобы вы могли начать работу.
В стартовый пакет приложения также включены плагины Firebase.
Вам остаётся лишь создать собственный проект Firebase, настроить приложение и бэкенд для Firebase и, наконец, развернуть бэкенд.
Создайте проект Firebase.
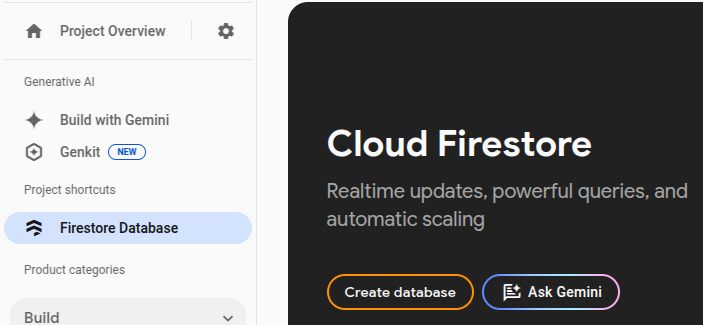
Перейдите в консоль Firebase и создайте новый проект Firebase. В этом примере назовите проект Dash Clicker.
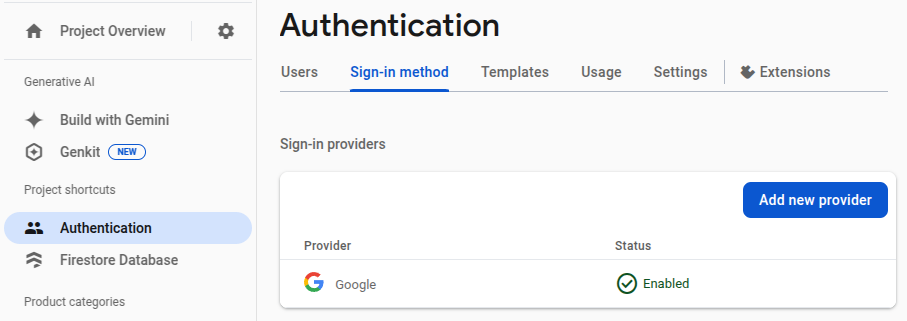
В серверной части приложения покупки привязываются к конкретному пользователю, поэтому необходима аутентификация. Для этого используйте модуль аутентификации Firebase с авторизацией через Google.
- На панели управления Firebase перейдите в раздел «Аутентификация» и включите ее при необходимости.
- Перейдите на вкладку «Способ входа» и включите поставщика услуг входа Google .
Поскольку вы также будете использовать базу данных Firestore от Firebase, включите и её.
Настройте правила Cloud Firestore следующим образом:
rules_version = '2';
service cloud.firestore {
  match /databases/{database}/documents {
    match /purchases/{purchaseId} {
      allow read: if request.auth != null && request.auth.uid == resource.data.userId
    }
  }
}
Настройка Firebase для Flutter
Рекомендуемый способ установки Firebase в приложение Flutter — использование CLI FlutterFire. Следуйте инструкциям, изложенным на странице настройки .
При запуске команды `flutterfire configure` выберите проект, созданный на предыдущем шаге.
$ flutterfire configure

i Found 5 Firebase projects.
? Select a Firebase project to configure your Flutter application with ›
❯ in-app-purchases-1234 (in-app-purchases-1234)
  other-flutter-codelab-1 (other-flutter-codelab-1)
  other-flutter-codelab-2 (other-flutter-codelab-2)
  other-flutter-codelab-3 (other-flutter-codelab-3)
  other-flutter-codelab-4 (other-flutter-codelab-4)
  <create a new project>
Далее, для включения iOS и Android выберите соответствующие платформы.
? Which platforms should your configuration support (use arrow keys & space to select)? ›
✔ android
✔ ios
  macos
  web
Когда появится запрос о переопределении файла firebase_options.dart, выберите «да».
? Generated FirebaseOptions file lib/firebase_options.dart already exists, do you want to override it? (y/n) › yes
Настройка Firebase для Android: дальнейшие шаги
На панели управления Firebase перейдите в раздел «Обзор проекта», выберите «Настройки» и перейдите на вкладку «Общие» .
Прокрутите вниз до раздела «Ваши приложения» и выберите приложение dashclicker (Android) .

Для авторизации в режиме отладки с помощью Google необходимо предоставить отпечаток хеша SHA-1 вашего отладочного сертификата.
Получите хэш вашего отладочного сертификата подписи.
В корневой директории вашего проекта Flutter перейдите в папку android/ а затем сгенерируйте отчет о подписании.
cd android
./gradlew :app:signingReport
Вам будет представлен большой список ключей подписи. Поскольку вам нужен хеш отладочного сертификата, найдите сертификат, у которого в свойствах Variant и Config установлено значение debug . Скорее всего, хранилище ключей находится в вашей домашней папке в каталоге .android/debug.keystore .
> Task :app:signingReport
Variant: debug
Config: debug
Store: /<USER_HOME_FOLDER>/.android/debug.keystore
Alias: AndroidDebugKey
MD5: XX:XX:XX:XX:XX:XX:XX:XX:XX:XX:XX:XX:XX:XX:XX:XX
SHA1: XX:XX:XX:XX:XX:XX:XX:XX:XX:XX:XX:XX:XX:XX:XX:XX:XX:XX:XX:XX
SHA-256: XX:XX:XX:XX:XX:XX:XX:XX:XX:XX:XX:XX:XX:XX:XX:XX:XX:XX:XX:XX:XX:XX:XX:XX:XX:XX:XX:XX:XX:XX:XX:XX
Valid until: Tuesday, January 19, 2038
Скопируйте хеш SHA-1 и заполните последнее поле в диалоговом окне отправки приложения.
Наконец, снова выполните команду flutterfire configure , чтобы обновить приложение и включить в него конфигурацию подписи.
$ flutterfire configure
? You have an existing `firebase.json` file and possibly already configured your project for Firebase. Would you prefer to reuse the valus in your existing `firebase.json` file to configure your project? (y/n) › yes
✔ You have an existing `firebase.json` file and possibly already configured your project for Firebase. Would you prefer to reuse the values in your existing `firebase.json` file to configure your project? · yes
Настройка Firebase для iOS: дальнейшие шаги
Откройте файл ios/Runner.xcworkspace с помощью Xcode . Или с помощью любой другой IDE по вашему выбору.
В VSCode щелкните правой кнопкой мыши на папке ios/ и выберите open in xcode .
В Android Studio щелкните правой кнопкой мыши на папке ios/ , затем выберите flutter а затем опцию « open iOS module in Xcode .
Чтобы разрешить вход через Google на iOS, добавьте параметр конфигурации CFBundleURLTypes в файлы plist вашей сборки. (Дополнительную информацию см. в документации пакета google_sign_in .) В данном случае файл называется ios/Runner/Info.plist .
Пары «ключ-значение» уже добавлены, но их значения необходимо заменить:
- Получите значение параметра
REVERSED_CLIENT_IDиз файлаGoogleService-Info.plist, без окружающего его элемента<string>..</string>. - Замените значение в файле
ios/Runner/Info.plistв разделеCFBundleURLTypes.
<key>CFBundleURLTypes</key>
<array>
    <dict>
        <key>CFBundleTypeRole</key>
        <string>Editor</string>
        <key>CFBundleURLSchemes</key>
        <array>
            <!-- TODO Replace this value: -->
            <!-- Copied from GoogleService-Info.plist key REVERSED_CLIENT_ID -->
            <string>com.googleusercontent.apps.REDACTED</string>
        </array>
    </dict>
</array>
Настройка Firebase завершена.
7. Следите за обновлениями о покупке.
В этой части практического задания вы подготовите приложение к покупке товаров. Этот процесс включает в себя отслеживание обновлений и ошибок, связанных с покупкой, после запуска приложения.
Слушайте обновления о покупках
В main.dart, найдите виджет MyHomePage , содержащий Scaffold с BottomNavigationBar , включающим две страницы. Эта страница также создает три Provider для DashCounter , DashUpgrades, и DashPurchases . DashCounter отслеживает текущее количество Dash и автоматически увеличивает его. DashUpgrades управляет улучшениями, которые можно приобрести за Dash. Данный практический пример посвящен DashPurchases .
По умолчанию объект поставщика определяется при первом запросе этого объекта. Этот объект отслеживает обновления покупок непосредственно при запуске приложения, поэтому отключите отложенную загрузку для этого объекта с помощью lazy: false .
lib/main.dart
ChangeNotifierProvider<DashPurchases>(
  create: (context) => DashPurchases(
    context.read<DashCounter>(),
  ),
  lazy: false,                                             // Add this line
),
Вам также потребуется экземпляр класса InAppPurchaseConnection . Однако, чтобы приложение оставалось тестируемым, вам нужен способ имитировать это соединение. Для этого создайте метод экземпляра, который можно переопределить в тесте, и добавьте его в main.dart .
lib/main.dart
// Gives the option to override in tests.
class IAPConnection {
  static InAppPurchase? _instance;
  static set instance(InAppPurchase value) {
    _instance = value;
  }

  static InAppPurchase get instance {
    _instance ??= InAppPurchase.instance;
    return _instance!;
  }
}
Обновите тест следующим образом:
test/widget_test.dart
import 'package:dashclicker/main.dart';
import 'package:flutter_test/flutter_test.dart';
import 'package:in_app_purchase/in_app_purchase.dart';     // Add this import
import 'package:in_app_purchase_platform_interface/src/in_app_purchase_platform_addition.dart'; // And this import

void main() {
  testWidgets('App starts', (tester) async {
    IAPConnection.instance = TestIAPConnection();          // Add this line
    await tester.pumpWidget(const MyApp());
    expect(find.text('Tim Sneath'), findsOneWidget);
  });
}

class TestIAPConnection implements InAppPurchase {         // Add from here
  @override
  Future<bool> buyConsumable({
    required PurchaseParam purchaseParam,
    bool autoConsume = true,
  }) {
    return Future.value(false);
  }

  @override
  Future<bool> buyNonConsumable({required PurchaseParam purchaseParam}) {
    return Future.value(false);
  }

  @override
  Future<void> completePurchase(PurchaseDetails purchase) {
    return Future.value();
  }

  @override
  Future<bool> isAvailable() {
    return Future.value(false);
  }

  @override
  Future<ProductDetailsResponse> queryProductDetails(Set<String> identifiers) {
    return Future.value(
      ProductDetailsResponse(productDetails: [], notFoundIDs: []),
    );
  }

  @override
  T getPlatformAddition<T extends InAppPurchasePlatformAddition?>() {
    // TODO: implement getPlatformAddition
    throw UnimplementedError();
  }

  @override
  Stream<List<PurchaseDetails>> get purchaseStream =>
      Stream.value(<PurchaseDetails>[]);

  @override
  Future<void> restorePurchases({String? applicationUserName}) {
    // TODO: implement restorePurchases
    throw UnimplementedError();
  }

  @override
  Future<String> countryCode() {
    // TODO: implement countryCode
    throw UnimplementedError();
  }
}                                                          // To here.
В lib/logic/dash_purchases.dart перейдите к коду класса DashPurchasesChangeNotifier . На данный момент там есть только DashCounter , который можно добавить к купленным вами Dashes.
Добавьте свойство подписки на поток, _subscription (типа StreamSubscription<List<PurchaseDetails>> _subscription; ), экземпляр IAPConnection.instance, и импорты. В результате код должен выглядеть следующим образом:
lib/logic/dash_purchases.dart
import 'dart:async';

import 'package:flutter/foundation.dart';
import 'package:flutter/material.dart';
import 'package:in_app_purchase/in_app_purchase.dart';           // Add this import

import '../main.dart';                                           // And this import
import '../model/purchasable_product.dart';
import '../model/store_state.dart';
import 'dash_counter.dart';

class DashPurchases extends ChangeNotifier {
  DashCounter counter;
  StoreState storeState = StoreState.available;
  late StreamSubscription<List<PurchaseDetails>> _subscription;  // Add this line
  List<PurchasableProduct> products = [
    PurchasableProduct(
      'Spring is in the air',
      'Many dashes flying out from their nests',
      '\$0.99',
    ),
    PurchasableProduct(
      'Jet engine',
      'Doubles you clicks per second for a day',
      '\$1.99',
    ),
  ];

  bool get beautifiedDash => false;

  final iapConnection = IAPConnection.instance;                  // And this line

  DashPurchases(this.counter);

  Future<void> buy(PurchasableProduct product) async {
    product.status = ProductStatus.pending;
    notifyListeners();
    await Future<void>.delayed(const Duration(seconds: 5));
    product.status = ProductStatus.purchased;
    notifyListeners();
    await Future<void>.delayed(const Duration(seconds: 5));
    product.status = ProductStatus.purchasable;
    notifyListeners();
  }
}
Ключевое слово late добавляется к _subscription потому что _subscription инициализируется в конструкторе. Этот проект по умолчанию настроен на непустые значения (NNBD), что означает, что свойства, которые не объявлены как допускающие значение null, должны иметь ненулевое значение. Квалификатор late позволяет отложить определение этого значения.
В конструкторе получите поток purchaseUpdated и начните прослушивание этого потока. В методе dispose() отмените подписку на поток.
lib/logic/dash_purchases.dart
import 'dart:async';

import 'package:flutter/foundation.dart';
import 'package:flutter/material.dart';
import 'package:in_app_purchase/in_app_purchase.dart';

import '../main.dart';
import '../model/purchasable_product.dart';
import '../model/store_state.dart';
import 'dash_counter.dart';

class DashPurchases extends ChangeNotifier {
  DashCounter counter;
  StoreState storeState = StoreState.notAvailable;         // Modify this line
  late StreamSubscription<List<PurchaseDetails>> _subscription;
  List<PurchasableProduct> products = [
    PurchasableProduct(
      'Spring is in the air',
      'Many dashes flying out from their nests',
      '\$0.99',
    ),
    PurchasableProduct(
      'Jet engine',
      'Doubles you clicks per second for a day',
      '\$1.99',
    ),
  ];

  bool get beautifiedDash => false;

  final iapConnection = IAPConnection.instance;

  DashPurchases(this.counter) {                            // Add from here
    final purchaseUpdated = iapConnection.purchaseStream;
    _subscription = purchaseUpdated.listen(
      _onPurchaseUpdate,
      onDone: _updateStreamOnDone,
      onError: _updateStreamOnError,
    );
  }

  @override
  void dispose() {
    _subscription.cancel();
    super.dispose();
  }                                                        // To here.

  Future<void> buy(PurchasableProduct product) async {
    product.status = ProductStatus.pending;
    notifyListeners();
    await Future<void>.delayed(const Duration(seconds: 5));
    product.status = ProductStatus.purchased;
    notifyListeners();
    await Future<void>.delayed(const Duration(seconds: 5));
    product.status = ProductStatus.purchasable;
    notifyListeners();
  }
                                                           // Add from here
  void _onPurchaseUpdate(List<PurchaseDetails> purchaseDetailsList) {
    // Handle purchases here
  }

  void _updateStreamOnDone() {
    _subscription.cancel();
  }

  void _updateStreamOnError(dynamic error) {
    //Handle error here
  }                                                        // To here.
}
Теперь приложение получает обновления о покупках, поэтому в следующем разделе вы совершите покупку!
Прежде чем продолжить, запустите тесты с помощью команды " flutter test" чтобы убедиться в правильности настройки всего.
$ flutter test

00:01 +1: All tests passed!
8. Совершайте покупки
В этой части практического задания вы замените существующие фиктивные товары реальными товарами, которые можно приобрести. Эти товары загружаются из магазинов, отображаются в списке и покупаются при нажатии на товар.
Адаптировать приобретаемый продукт
PurchasableProduct отображает фиктивный товар. Обновите его, чтобы отображалось фактическое содержимое, заменив класс PurchasableProduct в purchasable_product.dart следующим кодом:
lib/model/purchasable_product.dart
import 'package:in_app_purchase/in_app_purchase.dart';

enum ProductStatus { purchasable, purchased, pending }

class PurchasableProduct {
  String get id => productDetails.id;
  String get title => productDetails.title;
  String get description => productDetails.description;
  String get price => productDetails.price;
  ProductStatus status;
  ProductDetails productDetails;

  PurchasableProduct(this.productDetails) : status = ProductStatus.purchasable;
}
В файле dash_purchases.dart, удалите фиктивные покупки и замените их пустым списком: List<PurchasableProduct> products = []; .
Загрузить доступные покупки
Чтобы предоставить пользователю возможность совершить покупку, загрузите товары из магазина. Сначала проверьте, доступен ли магазин. Если магазин недоступен, установка storeState в значение notAvailable отобразит пользователю сообщение об ошибке.
lib/logic/dash_purchases.dart
  Future<void> loadPurchases() async {
    final available = await iapConnection.isAvailable();
    if (!available) {
      storeState = StoreState.notAvailable;
      notifyListeners();
      return;
    }
  }
Когда магазин станет доступен, загрузите доступные покупки. Учитывая предыдущую настройку Google Play и App Store, ожидайте увидеть storeKeyConsumable , storeKeySubscription, и storeKeyUpgrade . Если ожидаемая покупка недоступна, выведите эту информацию в консоль; вы также можете отправить эту информацию в бэкэнд-сервис.
Метод ` await iapConnection.queryProductDetails(ids) возвращает как идентификаторы, которые не найдены, так и найденные товары, которые можно приобрести. Используйте productDetails из ответа для обновления пользовательского интерфейса и установите StoreState в available .
lib/logic/dash_purchases.dart
import '../constants.dart';

// ...

  Future<void> loadPurchases() async {
    final available = await iapConnection.isAvailable();
    if (!available) {
      storeState = StoreState.notAvailable;
      notifyListeners();
      return;
    }
    const ids = <String>{
      storeKeyConsumable,
      storeKeySubscription,
      storeKeyUpgrade,
    };
    final response = await iapConnection.queryProductDetails(ids);
    products = response.productDetails
        .map((e) => PurchasableProduct(e))
        .toList();
    storeState = StoreState.available;
    notifyListeners();
  }
Вызовите функцию loadPurchases() в конструкторе:
lib/logic/dash_purchases.dart
  DashPurchases(this.counter) {
    final purchaseUpdated = iapConnection.purchaseStream;
    _subscription = purchaseUpdated.listen(
      _onPurchaseUpdate,
      onDone: _updateStreamOnDone,
      onError: _updateStreamOnError,
    );
    loadPurchases();                                       // Add this line
  }
Наконец, измените значение поля storeState с StoreState.available на StoreState.loading:
lib/logic/dash_purchases.dart
StoreState storeState = StoreState.loading;
Покажите товары, которые можно приобрести.
Рассмотрим файл purchase_page.dart . Виджет PurchasePage отображает _PurchasesLoading , _PurchaseList, или _PurchasesNotAvailable, в зависимости от StoreState . Виджет также отображает предыдущие покупки пользователя, которые используются на следующем шаге.
Виджет _PurchaseList отображает список товаров, доступных для покупки, и отправляет запрос на покупку объекту DashPurchases .
lib/pages/purchase_page.dart
class _PurchaseList extends StatelessWidget {
  @override
  Widget build(BuildContext context) {
    var purchases = context.watch<DashPurchases>();
    var products = purchases.products;
    return Column(
      children: products
          .map(
            (product) => _PurchaseWidget(
              product: product,
              onPressed: () {
                purchases.buy(product);
              },
            ),
          )
          .toList(),
    );
  }
}
При правильной настройке магазинов приложений Android и iOS вы сможете увидеть доступные товары. Обратите внимание, что после ввода данных в соответствующие консоли может потребоваться некоторое время, прежде чем покупки станут доступны.

Вернитесь к файлу dash_purchases.dart и реализуйте функцию покупки товара. Вам нужно лишь отделить расходные материалы от нерасходных. Товары, требующие обновления, и подписки относятся к нерасходным материалам.
lib/logic/dash_purchases.dart
  Future<void> buy(PurchasableProduct product) async {
    final purchaseParam = PurchaseParam(productDetails: product.productDetails);
    switch (product.id) {
      case storeKeyConsumable:
        await iapConnection.buyConsumable(purchaseParam: purchaseParam);
      case storeKeySubscription:
      case storeKeyUpgrade:
        await iapConnection.buyNonConsumable(purchaseParam: purchaseParam);
      default:
        throw ArgumentError.value(
          product.productDetails,
          '${product.id} is not a known product',
        );
    }
  }
Прежде чем продолжить, создайте переменную _beautifiedDashUpgrade и обновите геттер beautifiedDash , чтобы он ссылался на неё.
lib/logic/dash_purchases.dart
  bool get beautifiedDash => _beautifiedDashUpgrade;
  bool _beautifiedDashUpgrade = false;
Метод _onPurchaseUpdate получает обновления о покупке, обновляет статус товара, отображаемого на странице покупки, и применяет покупку к логике счетчика. Важно вызвать completePurchase после обработки покупки, чтобы магазин знал, что покупка обработана корректно.
lib/logic/dash_purchases.dart
  Future<void> _onPurchaseUpdate(
    List<PurchaseDetails> purchaseDetailsList,
  ) async {
    for (var purchaseDetails in purchaseDetailsList) {
      await _handlePurchase(purchaseDetails);
    }
    notifyListeners();
  }

  Future<void> _handlePurchase(PurchaseDetails purchaseDetails) async {
    if (purchaseDetails.status == PurchaseStatus.purchased) {
      switch (purchaseDetails.productID) {
        case storeKeySubscription:
          counter.applyPaidMultiplier();
        case storeKeyConsumable:
          counter.addBoughtDashes(2000);
        case storeKeyUpgrade:
          _beautifiedDashUpgrade = true;
      }
    }

    if (purchaseDetails.pendingCompletePurchase) {
      await iapConnection.completePurchase(purchaseDetails);
    }
  }
9. Настройка бэкэнда
Прежде чем переходить к отслеживанию и проверке покупок, настройте бэкэнд на Dart для поддержки этой функции.
В этом разделе работайте из папки dart-backend/ от имени корневого каталога.
Убедитесь, что у вас установлены следующие инструменты:
- Дарт
- Firebase CLI
Обзор базового проекта
Поскольку некоторые части этого проекта выходят за рамки данной практической работы, они включены в стартовый код. Перед началом работы рекомендуется ознакомиться с уже имеющимся стартовым кодом, чтобы составить представление о структуре проекта.
Этот бэкэнд-код может работать локально на вашем компьютере, вам не нужно его развертывать для использования. Однако вам необходимо иметь возможность подключиться с вашего устройства разработки (Android или iPhone) к компьютеру, на котором будет работать сервер. Для этого они должны находиться в одной сети, и вам нужно знать IP-адрес вашего компьютера.
Попробуйте запустить сервер, используя следующую команду:
$ dart ./bin/server.dart

Serving at http://0.0.0.0:8080
В бэкенде Dart для обслуживания API-интерфейсов используются shelf и shelf_router . По умолчанию сервер не предоставляет никаких маршрутов. Позже вы создадите маршрут для обработки процесса подтверждения покупки.
В стартовый код уже включен компонент IapRepository из lib/iap_repository.dart . Поскольку изучение взаимодействия с Firestore или базами данных в целом не считается актуальным для этого практического занятия, стартовый код содержит функции для создания или обновления покупок в Firestore, а также все классы для этих покупок.
Настройте доступ к Firebase.
Для доступа к Firebase Firestore вам потребуется ключ доступа к учетной записи службы. Сгенерируйте его, открыв настройки проекта Firebase и перейдя в раздел « Учетные записи служб» , затем выберите «Сгенерировать новый закрытый ключ» .

Скопируйте загруженный JSON-файл в папку assets/ и переименуйте его в service-account-firebase.json .
Настройте доступ к Google Play.
Для доступа к Play Store с целью проверки покупок необходимо создать учетную запись службы с соответствующими правами доступа и загрузить для нее учетные данные в формате JSON.
- Перейдите на страницу Google Play Android Developer API в консоли Google Cloud.
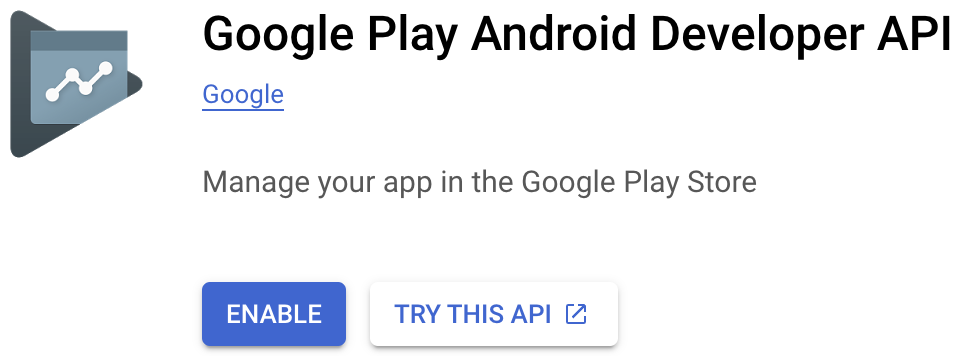 Если консоль Google Play запросит создание проекта или привязку к существующему проекту, сначала сделайте это, а затем вернитесь на эту страницу.
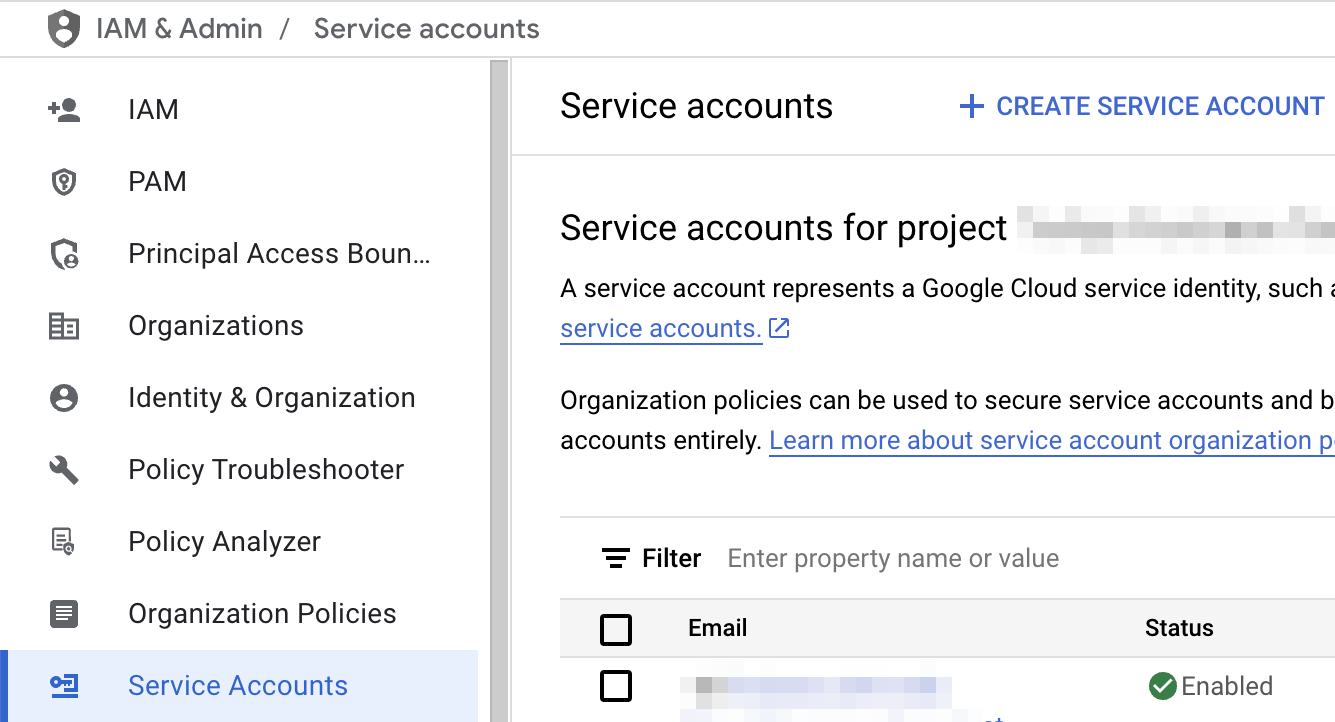
 - Далее перейдите на страницу «Служебные учетные записи» и нажмите «+ Создать служебную учетную запись» .
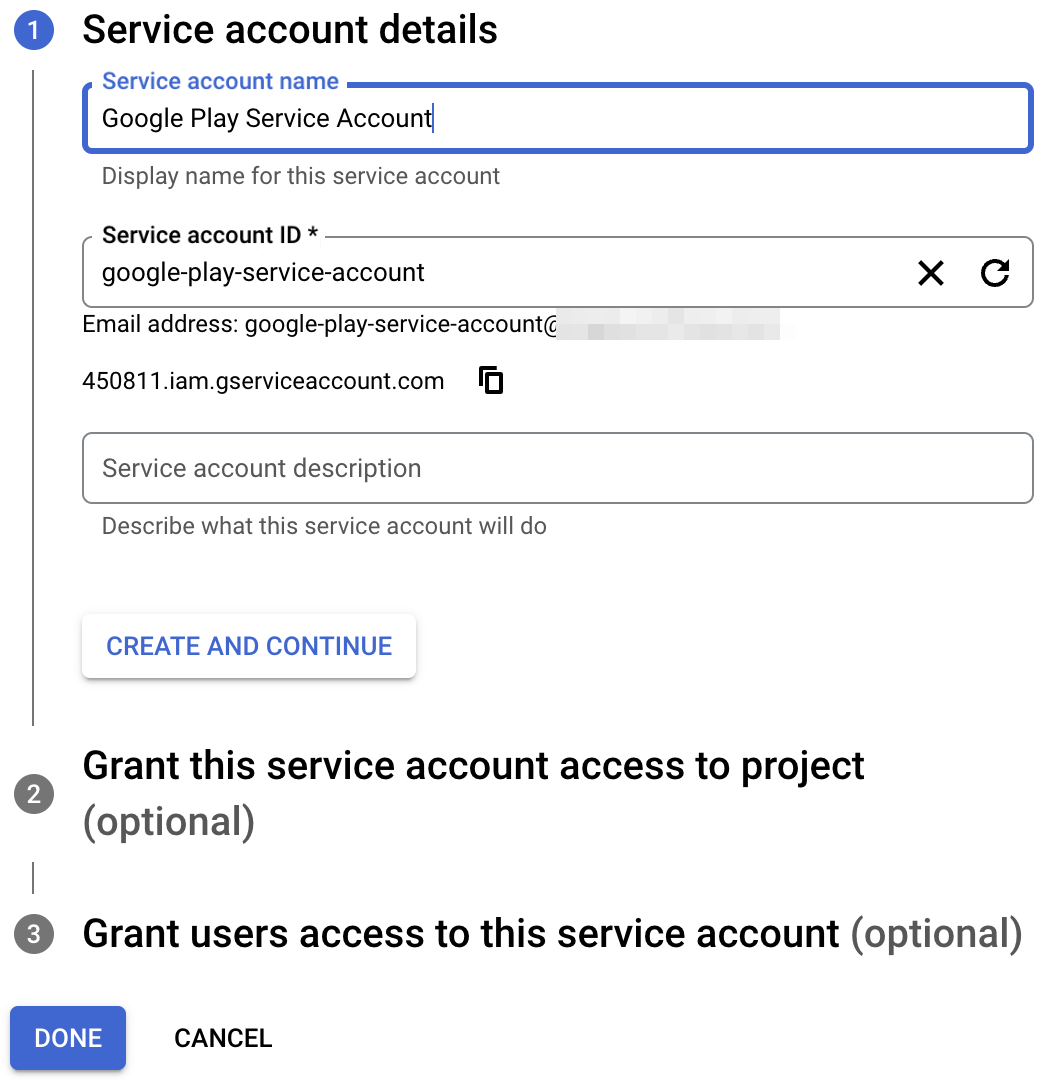
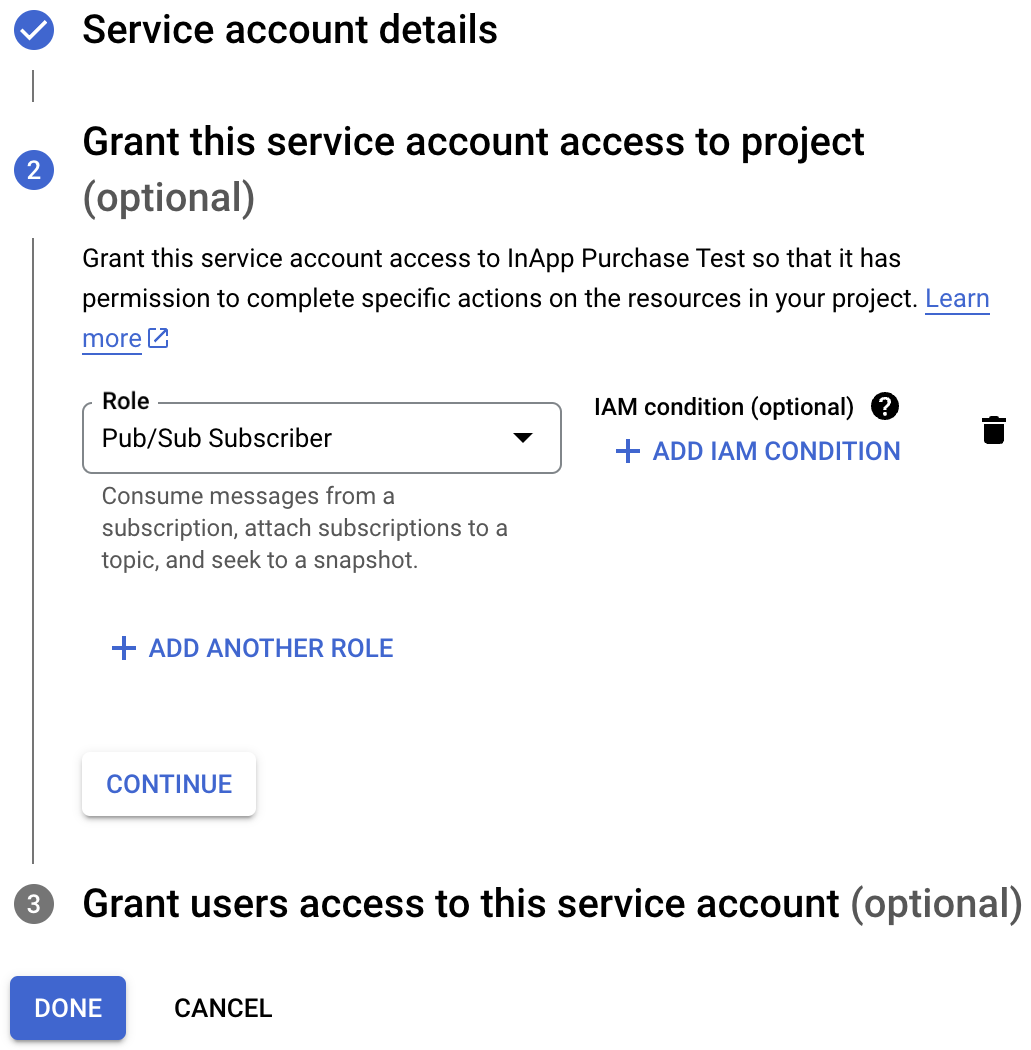
- Введите имя учетной записи службы и нажмите «Создать и продолжить» .
- Выберите роль подписчика Pub/Sub и нажмите «Готово» .
- После создания учетной записи перейдите в раздел «Управление ключами» .
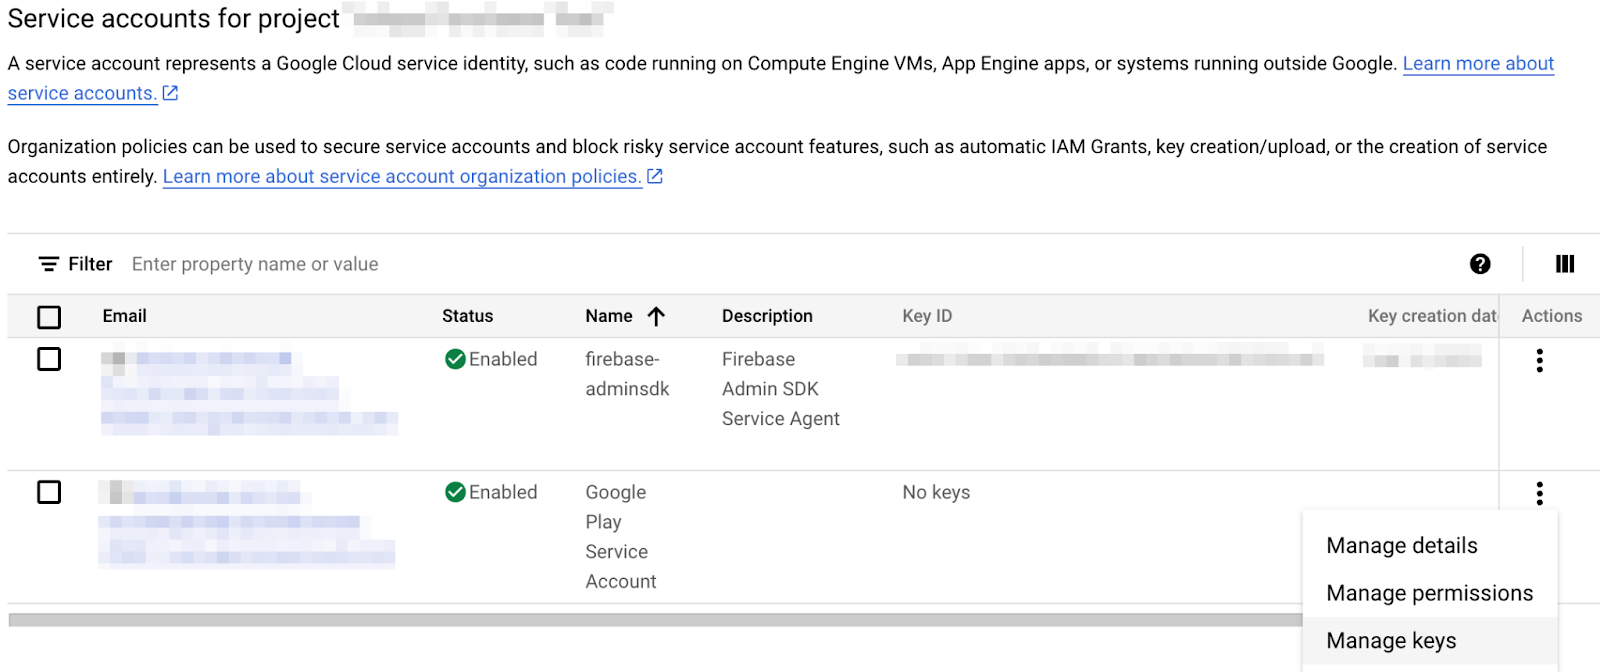
- Выберите «Добавить ключ» > «Создать новый ключ» .
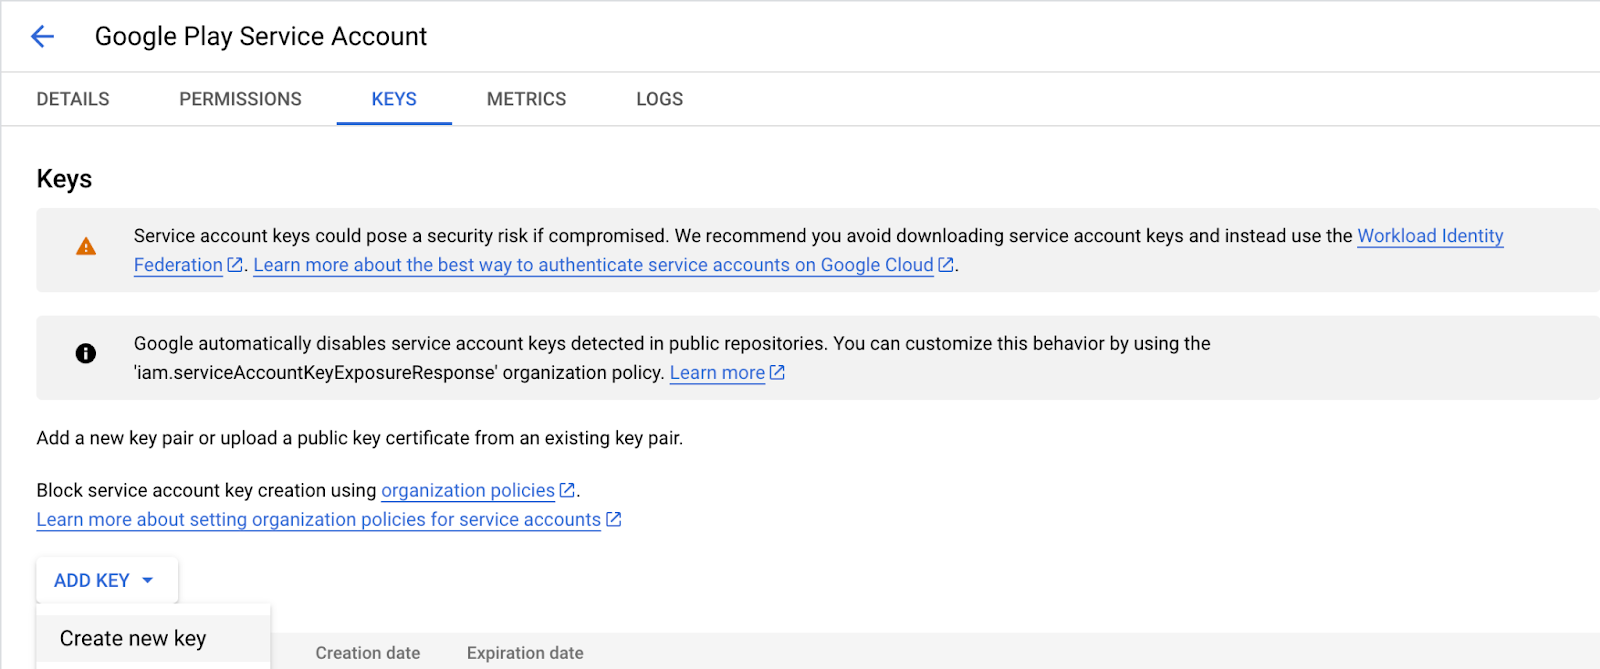
- Создайте и скачайте JSON-ключ.
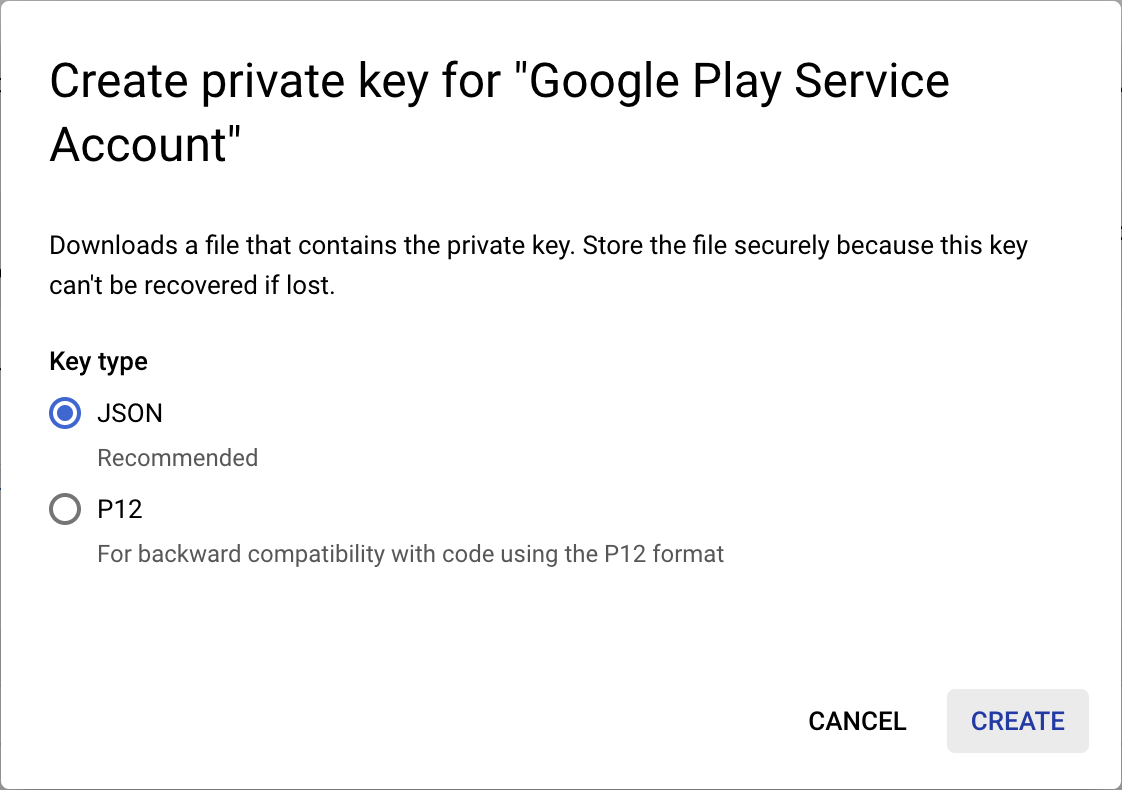
- Переименуйте загруженный файл в
service-account-google-play.json,и переместите его в каталогassets/. - Далее перейдите на страницу «Пользователи и разрешения» в Play Console.
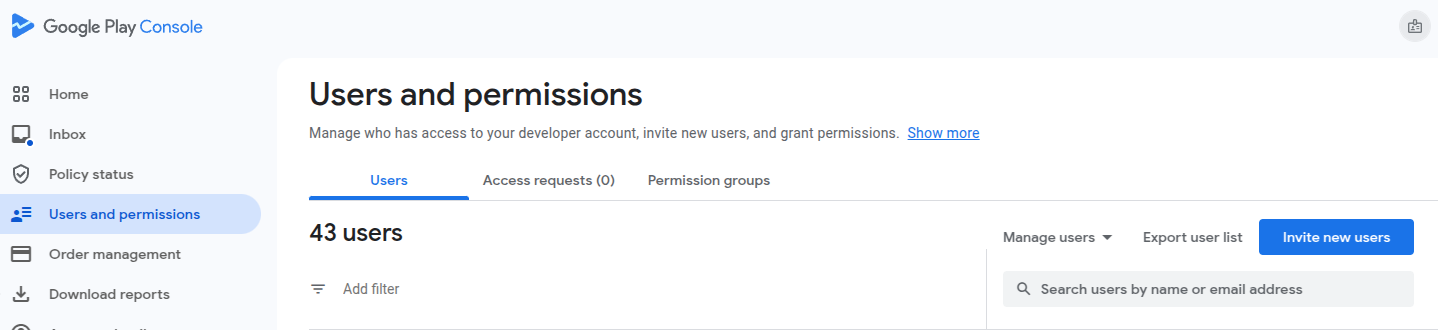
- Нажмите «Пригласить новых пользователей» и введите адрес электронной почты созданной ранее учетной записи службы. Адрес электронной почты можно найти в таблице на странице «Учетные записи служб».

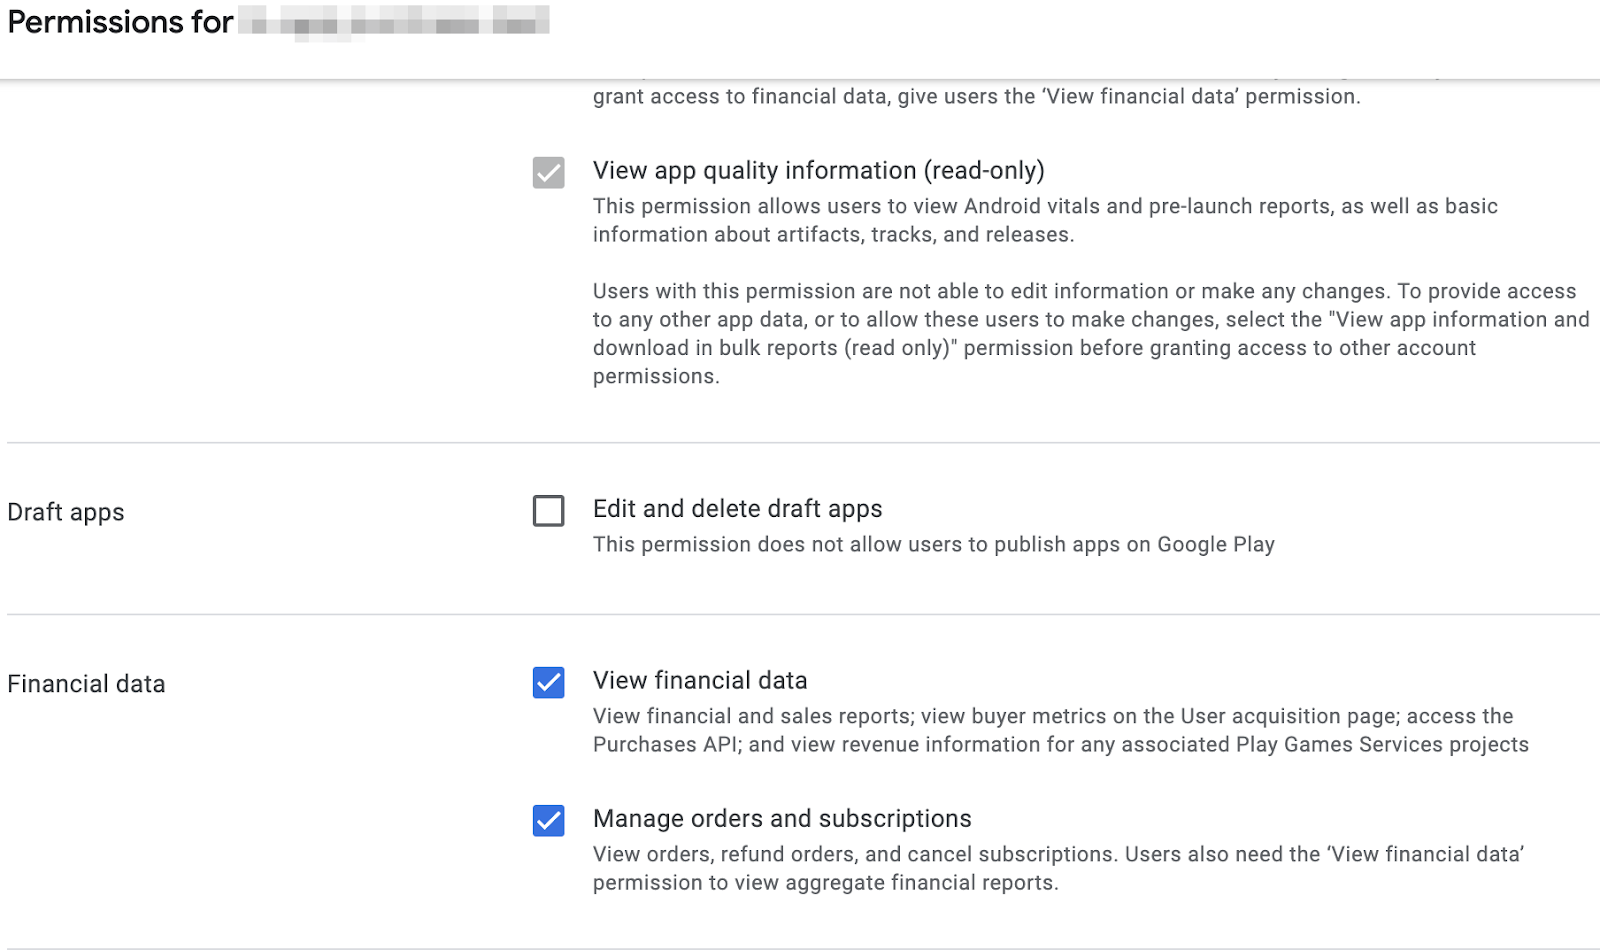
- Предоставьте приложению права на просмотр финансовых данных и управление заказами и подписками .
- Нажмите «Пригласить пользователя» .
Ещё один шаг, который нам нужно сделать, это открыть lib/constants.dart, и заменить значение androidPackageId на идентификатор пакета, который вы выбрали для своего Android-приложения.
Настройте доступ к Apple App Store.
Для доступа к App Store и подтверждения покупок необходимо создать общий секретный ключ:
- Откройте App Store Connect .
- Перейдите в раздел «Мои приложения» и выберите своё приложение.
- In the sidebar navigation, go to General > App information .
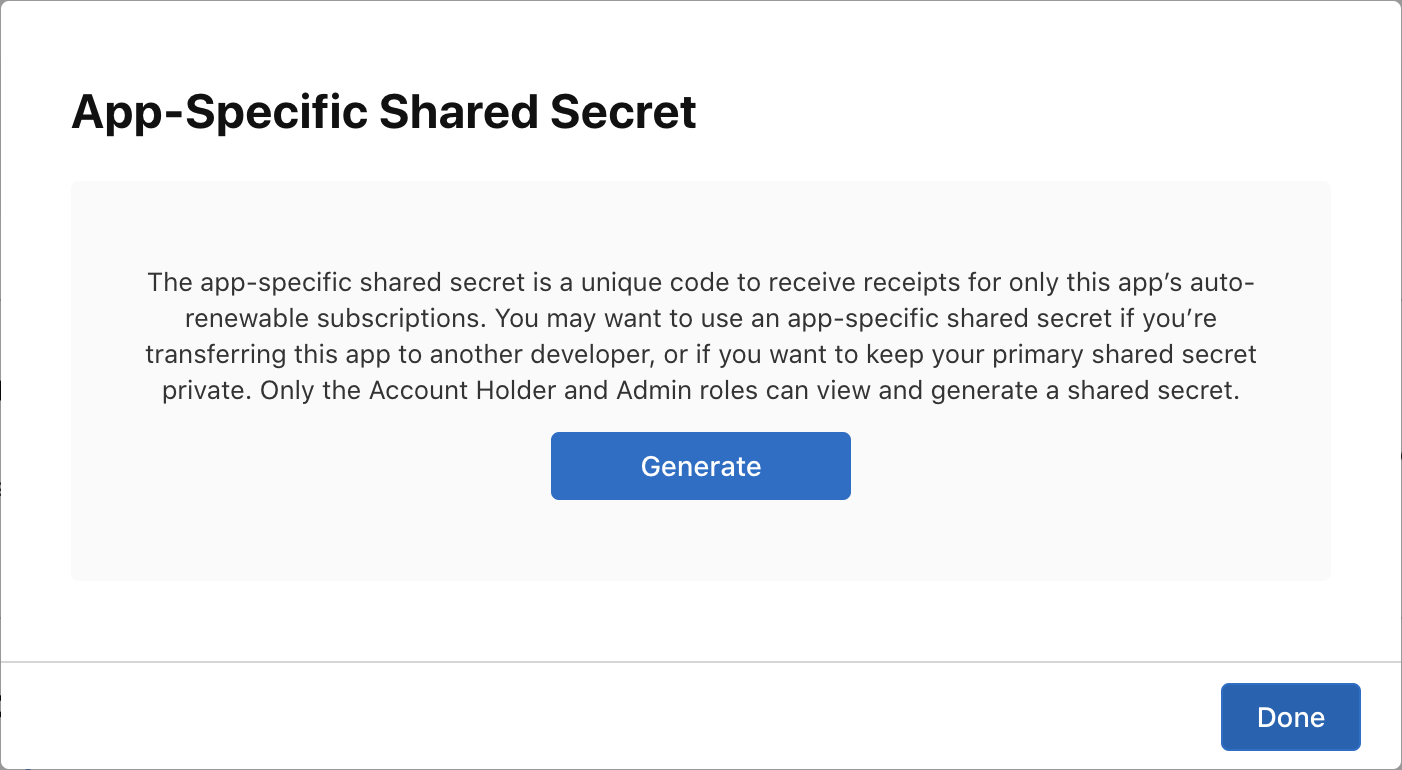
- Click Manage under App-Specific Shared Secret header.
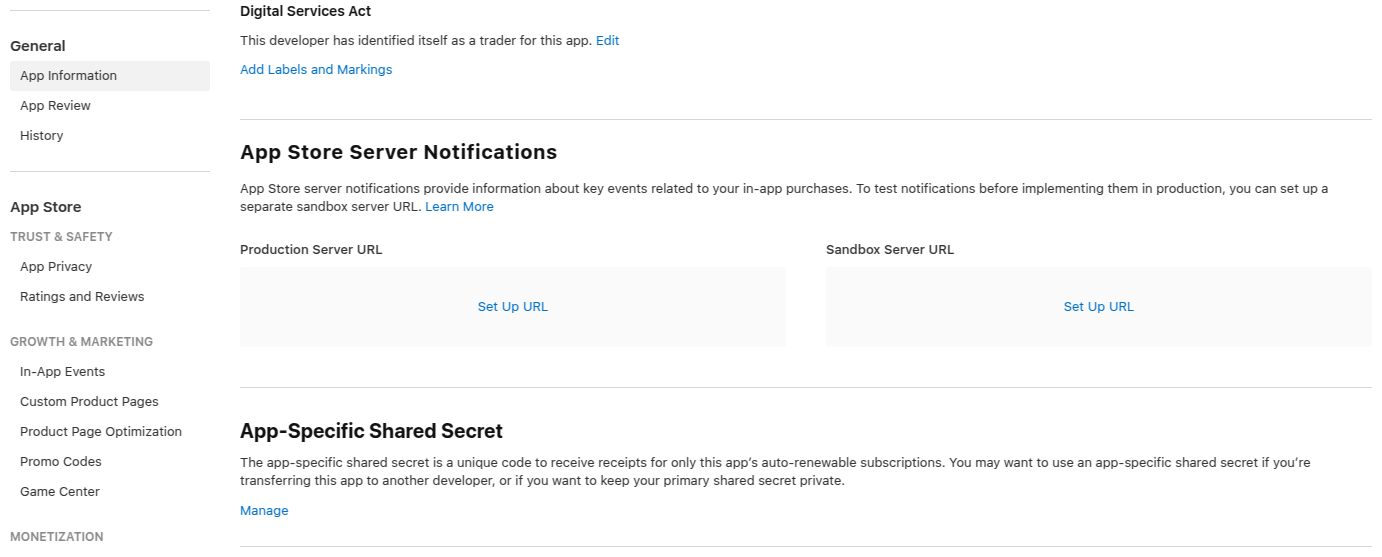
- Generate a new secret, and copy it.
- Open
lib/constants.dart,and replace the value ofappStoreSharedSecretwith the shared secret you just generated.
Constants configuration file
Before proceeding, make sure that the following constants are configured in the lib/constants.dart file:
-
androidPackageId: Package ID used on Android, such ascom.example.dashclicker -
appStoreSharedSecret: Shared secret to access App Store Connect to perform purchase verification. -
bundleId: Bundle ID used on iOS, such ascom.example.dashclicker
You can ignore the rest of the constants for the time being.
10. Verify purchases
The general flow for verifying purchases is similar for iOS and Android.
For both stores, your application receives a token when a purchase is made.
This token is sent by the app to your backend service, which then, in turn, verifies the purchase with the respective store's servers using the provided token.
The backend service can then choose to store the purchase, and reply to the application whether the purchase was valid or not.
By having the backend service do the validation with the stores rather than the application running on your user's device, you can prevent the user gaining access to premium features by, for example, rewinding their system clock.
Set up the Flutter side
Set up authentication
As you are going to send the purchases to your backend service, you want to make sure the user is authenticated while making a purchase. Most of the authentication logic is already added for you in the starter project, you just have to make sure the PurchasePage shows the login button when the user is not logged in yet. Add the following code to the beginning of the build method of PurchasePage :
lib/pages/purchase_page.dart
import 'package:flutter/material.dart';
import 'package:provider/provider.dart';

import '../logic/dash_purchases.dart';
import '../logic/firebase_notifier.dart';                  // Add this import
import '../model/firebase_state.dart';                     // And this import
import '../model/purchasable_product.dart';
import '../model/store_state.dart';
import '../repo/iap_repo.dart';
import 'login_page.dart';                                  // And this one as well

class PurchasePage extends StatelessWidget {
  const PurchasePage({super.key});

  @override
  Widget build(BuildContext context) {                     // Update from here
    var firebaseNotifier = context.watch<FirebaseNotifier>();
    if (firebaseNotifier.state == FirebaseState.loading) {
      return _PurchasesLoading();
    } else if (firebaseNotifier.state == FirebaseState.notAvailable) {
      return _PurchasesNotAvailable();
    }

    if (!firebaseNotifier.loggedIn) {
      return const LoginPage();
    }                                                      // To here.

    // ...
Call verification endpoint from the app
In the app, create the _verifyPurchase(PurchaseDetails purchaseDetails) function that calls the /verifypurchase endpoint on your Dart backend using an http post call.
Send the selected store ( google_play for the Play Store or app_store for the App Store), the serverVerificationData , and the productID . The server returns status code indicating whether the purchase is verified.
In the app constants, configure the server IP to your local machine IP address.
lib/logic/dash_purchases.dart
import 'dart:async';
import 'dart:convert';                                     // Add this import

import 'package:flutter/foundation.dart';
import 'package:flutter/material.dart';
import 'package:http/http.dart' as http;                   // And this import
import 'package:in_app_purchase/in_app_purchase.dart';

import '../constants.dart';
import '../main.dart';
import '../model/purchasable_product.dart';
import '../model/store_state.dart';
import 'dash_counter.dart';
import 'firebase_notifier.dart';                           // And this one

class DashPurchases extends ChangeNotifier {
  DashCounter counter;
  FirebaseNotifier firebaseNotifier;                       // Add this line
  StoreState storeState = StoreState.loading;
  late StreamSubscription<List<PurchaseDetails>> _subscription;
  List<PurchasableProduct> products = [];

  bool get beautifiedDash => _beautifiedDashUpgrade;
  bool _beautifiedDashUpgrade = false;

  final iapConnection = IAPConnection.instance;

  DashPurchases(this.counter, this.firebaseNotifier) {     // Update this line
    final purchaseUpdated = iapConnection.purchaseStream;
    _subscription = purchaseUpdated.listen(
      _onPurchaseUpdate,
      onDone: _updateStreamOnDone,
      onError: _updateStreamOnError,
    );
    loadPurchases();
  }
Add the firebaseNotifier with the creation of DashPurchases in main.dart:
lib/main.dart
        ChangeNotifierProvider<DashPurchases>(
          create: (context) => DashPurchases(
            context.read<DashCounter>(),
            context.read<FirebaseNotifier>(),
          ),
          lazy: false,
        ),
Add a getter for the User in the FirebaseNotifier, so you can pass the user ID to the verify purchase function.
lib/logic/firebase_notifier.dart
  Future<FirebaseFirestore> get firestore async {
    var isInitialized = await _isInitialized.future;
    if (!isInitialized) {
      throw Exception('Firebase is not initialized');
    }
    return FirebaseFirestore.instance;
  }

  User? get user => FirebaseAuth.instance.currentUser;     // Add this line

  Future<void> load() async {
    // ...
Add the function _verifyPurchase to the DashPurchases class. This async function returns a boolean indicating whether the purchase is validated.
lib/logic/dash_purchases.dart
  Future<bool> _verifyPurchase(PurchaseDetails purchaseDetails) async {
    final url = Uri.parse('http://$serverIp:8080/verifypurchase');
    const headers = {
      'Content-type': 'application/json',
      'Accept': 'application/json',
    };
    final response = await http.post(
      url,
      body: jsonEncode({
        'source': purchaseDetails.verificationData.source,
        'productId': purchaseDetails.productID,
        'verificationData':
            purchaseDetails.verificationData.serverVerificationData,
        'userId': firebaseNotifier.user?.uid,
      }),
      headers: headers,
    );
    if (response.statusCode == 200) {
      return true;
    } else {
      return false;
    }
  }
Call the _verifyPurchase function in _handlePurchase just before you apply the purchase. You should only apply the purchase when it's verified. In a production app, you can specify this further to, for example, apply a trial subscription when the store is temporarily unavailable. However, for this example, apply the purchase when the purchase is verified successfully.
lib/logic/dash_purchases.dart
  Future<void> _onPurchaseUpdate(
    List<PurchaseDetails> purchaseDetailsList,
  ) async {
    for (var purchaseDetails in purchaseDetailsList) {
      await _handlePurchase(purchaseDetails);
    }
    notifyListeners();
  }

  Future<void> _handlePurchase(PurchaseDetails purchaseDetails) async {
    if (purchaseDetails.status == PurchaseStatus.purchased) {
      // Send to server
      var validPurchase = await _verifyPurchase(purchaseDetails);

      if (validPurchase) {
        // Apply changes locally
        switch (purchaseDetails.productID) {
          case storeKeySubscription:
            counter.applyPaidMultiplier();
          case storeKeyConsumable:
            counter.addBoughtDashes(2000);
          case storeKeyUpgrade:
            _beautifiedDashUpgrade = true;
        }
      }
    }

    if (purchaseDetails.pendingCompletePurchase) {
      await iapConnection.completePurchase(purchaseDetails);
    }
  }
In the app everything is now ready to validate the purchases.
Set up the backend service
Next, set up the backend for verifying purchases on the backend.
Build purchase handlers
Because the verification flow for both stores is close to identical, set up an abstract PurchaseHandler class with separate implementations for each store.

Start by adding a purchase_handler.dart file to the lib/ folder, where you define an abstract PurchaseHandler class with two abstract methods for verifying two different kinds of purchases: subscriptions and non-subscriptions.
lib/purchase_handler.dart
import 'products.dart';

/// Generic purchase handler,
/// must be implemented for Google Play and Apple Store
abstract class PurchaseHandler {
  /// Verify if non-subscription purchase (aka consumable) is valid
  /// and update the database
  Future<bool> handleNonSubscription({
    required String userId,
    required ProductData productData,
    required String token,
  });

  /// Verify if subscription purchase (aka non-consumable) is valid
  /// and update the database
  Future<bool> handleSubscription({
    required String userId,
    required ProductData productData,
    required String token,
  });
}
As you can see, each method requires three parameters:
-
userId:The ID of the logged-in user, so you can tie purchases to the user. -
productData:Data about the product. You are going to define this in a minute. -
token:The token provided to the user by the store.
Additionally, to make these purchase handlers easier to use, add a verifyPurchase() method that can be used for both subscriptions and non-subscriptions:
lib/purchase_handler.dart
  /// Verify if purchase is valid and update the database
  Future<bool> verifyPurchase({
    required String userId,
    required ProductData productData,
    required String token,
  }) async {
    switch (productData.type) {
      case ProductType.subscription:
        return handleSubscription(
          userId: userId,
          productData: productData,
          token: token,
        );
      case ProductType.nonSubscription:
        return handleNonSubscription(
          userId: userId,
          productData: productData,
          token: token,
        );
    }
  }
Now, you can just call verifyPurchase for both cases, but still have separate implementations!
The ProductData class contains basic information about the different purchasable products, which includes the product ID (sometimes also referred to as SKU) and the ProductType .
lib/products.dart
class ProductData {
  final String productId;
  final ProductType type;

  const ProductData(this.productId, this.type);
}
The ProductType can either be a subscription or a non-subscription.
lib/products.dart
enum ProductType { subscription, nonSubscription }
Finally, the list of products is defined as a map in the same file.
lib/products.dart
const productDataMap = {
  'dash_consumable_2k': ProductData(
    'dash_consumable_2k',
    ProductType.nonSubscription,
  ),
  'dash_upgrade_3d': ProductData(
    'dash_upgrade_3d',
    ProductType.nonSubscription,
  ),
  'dash_subscription_doubler': ProductData(
    'dash_subscription_doubler',
    ProductType.subscription,
  ),
};
Next, define some placeholder implementations for the Google Play Store and the Apple App Store. Start with Google Play:
Create lib/google_play_purchase_handler.dart , and add a class that extends the PurchaseHandler you just wrote:
lib/google_play_purchase_handler.dart
import 'dart:async';

import 'package:googleapis/androidpublisher/v3.dart' as ap;

import 'constants.dart';
import 'iap_repository.dart';
import 'products.dart';
import 'purchase_handler.dart';

class GooglePlayPurchaseHandler extends PurchaseHandler {
  final ap.AndroidPublisherApi androidPublisher;
  final IapRepository iapRepository;

  GooglePlayPurchaseHandler(this.androidPublisher, this.iapRepository);

  @override
  Future<bool> handleNonSubscription({
    required String? userId,
    required ProductData productData,
    required String token,
  }) async {
    return true;
  }

  @override
  Future<bool> handleSubscription({
    required String? userId,
    required ProductData productData,
    required String token,
  }) async {
    return true;
  }
}
For now, it returns true for the handler methods; you'll get to them later.
As you might have noticed, the constructor takes an instance of the IapRepository . The purchase handler uses this instance to store information about purchases in Firestore later on. To communicate with Google Play, you use the provided AndroidPublisherApi .
Next, do the same for the app store handler. Create lib/app_store_purchase_handler.dart , and add a class that extends the PurchaseHandler again:
lib/app_store_purchase_handler.dart
import 'dart:async';

import 'package:app_store_server_sdk/app_store_server_sdk.dart';

import 'constants.dart';
import 'iap_repository.dart';
import 'products.dart';
import 'purchase_handler.dart';

class AppStorePurchaseHandler extends PurchaseHandler {
  final IapRepository iapRepository;

  AppStorePurchaseHandler(this.iapRepository);

  @override
  Future<bool> handleNonSubscription({
    required String userId,
    required ProductData productData,
    required String token,
  }) async {
    return true;
  }

  @override
  Future<bool> handleSubscription({
    required String userId,
    required ProductData productData,
    required String token,
  }) async {
    return true;
  }
}
Great! Now you have two purchase handlers. Next, create the purchase verification API endpoint.
Use purchase handlers
Open bin/server.dart and create an API endpoint using shelf_route :
bin/server.dart
import 'dart:convert';

import 'package:firebase_backend_dart/helpers.dart';
import 'package:firebase_backend_dart/products.dart';
import 'package:shelf/shelf.dart';
import 'package:shelf_router/shelf_router.dart';

Future<void> main() async {
  final router = Router();

  final purchaseHandlers = await _createPurchaseHandlers();

  router.post('/verifypurchase', (Request request) async {
    final dynamic payload = json.decode(await request.readAsString());

    final (:userId, :source, :productData, :token) = getPurchaseData(payload);

    final result = await purchaseHandlers[source]!.verifyPurchase(
      userId: userId,
      productData: productData,
      token: token,
    );

    if (result) {
      return Response.ok('all good!');
    } else {
      return Response.internalServerError();
    }
  });

  await serveHandler(router.call);
}

({String userId, String source, ProductData productData, String token})
getPurchaseData(dynamic payload) {
  if (payload case {
    'userId': String userId,
    'source': String source,
    'productId': String productId,
    'verificationData': String token,
  }) {
    return (
      userId: userId,
      source: source,
      productData: productDataMap[productId]!,
      token: token,
    );
  } else {
    throw const FormatException('Unexpected JSON');
  }
}
The code is doing the following:
- Define a POST endpoint that will be called from the app you created previously.
- Decode the JSON payload and extract the following information:
-
userId: Logged in user ID -
source: Store used, eitherapp_storeorgoogle_play. -
productData: Obtained from theproductDataMapyou created previously. -
token: Contains the verification data to send to the stores.
-
- Call to the
verifyPurchasemethod, either for theGooglePlayPurchaseHandleror theAppStorePurchaseHandler, depending on the source. - If the verification was successful, the method returns a
Response.okto the client. - If the verification fails, the method returns a
Response.internalServerErrorto the client.
After creating the API endpoint, you need to configure the two purchase handlers. This requires you to load the service account keys you obtained in the previous step and configure the access to the different services, including the Android Publisher API and the Firebase Firestore API. Then, create the two purchase handlers with the different dependencies:
bin/server.dart
import 'dart:convert';
import 'dart:io'; // new

import 'package:firebase_backend_dart/app_store_purchase_handler.dart'; // new
import 'package:firebase_backend_dart/google_play_purchase_handler.dart'; // new
import 'package:firebase_backend_dart/helpers.dart';
import 'package:firebase_backend_dart/iap_repository.dart'; // new
import 'package:firebase_backend_dart/products.dart';
import 'package:firebase_backend_dart/purchase_handler.dart'; // new
import 'package:googleapis/androidpublisher/v3.dart' as ap; // new
import 'package:googleapis/firestore/v1.dart' as fs; // new
import 'package:googleapis_auth/auth_io.dart' as auth; // new
import 'package:shelf/shelf.dart';
import 'package:shelf_router/shelf_router.dart';

Future<Map<String, PurchaseHandler>> _createPurchaseHandlers() async {
  // Configure Android Publisher API access
  final serviceAccountGooglePlay =
      File('assets/service-account-google-play.json').readAsStringSync();
  final clientCredentialsGooglePlay =
      auth.ServiceAccountCredentials.fromJson(serviceAccountGooglePlay);
  final clientGooglePlay =
      await auth.clientViaServiceAccount(clientCredentialsGooglePlay, [
    ap.AndroidPublisherApi.androidpublisherScope,
  ]);
  final androidPublisher = ap.AndroidPublisherApi(clientGooglePlay);

  // Configure Firestore API access
  final serviceAccountFirebase =
      File('assets/service-account-firebase.json').readAsStringSync();
  final clientCredentialsFirebase =
      auth.ServiceAccountCredentials.fromJson(serviceAccountFirebase);
  final clientFirebase =
      await auth.clientViaServiceAccount(clientCredentialsFirebase, [
    fs.FirestoreApi.cloudPlatformScope,
  ]);
  final firestoreApi = fs.FirestoreApi(clientFirebase);
  final dynamic json = jsonDecode(serviceAccountFirebase);
  final projectId = json['project_id'] as String;
  final iapRepository = IapRepository(firestoreApi, projectId);

  return {
    'google_play': GooglePlayPurchaseHandler(
      androidPublisher,
      iapRepository,
    ),
    'app_store': AppStorePurchaseHandler(
      iapRepository,
    ),
  };
}
Verify Android purchases: Implement the purchase hander
Next, continue implementing the Google Play purchase handler.
Google already provides Dart packages for interacting with the APIs you need to verify purchases. You initialized them in the server.dart file and now use them in the GooglePlayPurchaseHandler class.
Implement the handler for non-subscription-type purchases:
lib/google_play_purchase_handler.dart
  /// Handle non-subscription purchases (one time purchases).
  ///
  /// Retrieves the purchase status from Google Play and updates
  /// the Firestore Database accordingly.
  @override
  Future<bool> handleNonSubscription({
    required String? userId,
    required ProductData productData,
    required String token,
  }) async {
    print(
      'GooglePlayPurchaseHandler.handleNonSubscription'
      '($userId, ${productData.productId}, ${token.substring(0, 5)}...)',
    );

    try {
      // Verify purchase with Google
      final response = await androidPublisher.purchases.products.get(
        androidPackageId,
        productData.productId,
        token,
      );

      print('Purchases response: ${response.toJson()}');

      // Make sure an order ID exists
      if (response.orderId == null) {
        print('Could not handle purchase without order id');
        return false;
      }
      final orderId = response.orderId!;

      final purchaseData = NonSubscriptionPurchase(
        purchaseDate: DateTime.fromMillisecondsSinceEpoch(
          int.parse(response.purchaseTimeMillis ?? '0'),
        ),
        orderId: orderId,
        productId: productData.productId,
        status: _nonSubscriptionStatusFrom(response.purchaseState),
        userId: userId,
        iapSource: IAPSource.googleplay,
      );

      // Update the database
      if (userId != null) {
        // If we know the userId,
        // update the existing purchase or create it if it does not exist.
        await iapRepository.createOrUpdatePurchase(purchaseData);
      } else {
        // If we don't know the user ID, a previous entry must already
        // exist, and thus we'll only update it.
        await iapRepository.updatePurchase(purchaseData);
      }
      return true;
    } on ap.DetailedApiRequestError catch (e) {
      print(
        'Error on handle NonSubscription: $e\n'
        'JSON: ${e.jsonResponse}',
      );
    } catch (e) {
      print('Error on handle NonSubscription: $e\n');
    }
    return false;
  }
You can update the subscription purchase handler in a similar way:
lib/google_play_purchase_handler.dart
  /// Handle subscription purchases.
  ///
  /// Retrieves the purchase status from Google Play and updates
  /// the Firestore Database accordingly.
  @override
  Future<bool> handleSubscription({
    required String? userId,
    required ProductData productData,
    required String token,
  }) async {
    print(
      'GooglePlayPurchaseHandler.handleSubscription'
      '($userId, ${productData.productId}, ${token.substring(0, 5)}...)',
    );

    try {
      // Verify purchase with Google
      final response = await androidPublisher.purchases.subscriptions.get(
        androidPackageId,
        productData.productId,
        token,
      );

      print('Subscription response: ${response.toJson()}');

      // Make sure an order ID exists
      if (response.orderId == null) {
        print('Could not handle purchase without order id');
        return false;
      }
      final orderId = extractOrderId(response.orderId!);

      final purchaseData = SubscriptionPurchase(
        purchaseDate: DateTime.fromMillisecondsSinceEpoch(
          int.parse(response.startTimeMillis ?? '0'),
        ),
        orderId: orderId,
        productId: productData.productId,
        status: _subscriptionStatusFrom(response.paymentState),
        userId: userId,
        iapSource: IAPSource.googleplay,
        expiryDate: DateTime.fromMillisecondsSinceEpoch(
          int.parse(response.expiryTimeMillis ?? '0'),
        ),
      );

      // Update the database
      if (userId != null) {
        // If we know the userId,
        // update the existing purchase or create it if it does not exist.
        await iapRepository.createOrUpdatePurchase(purchaseData);
      } else {
        // If we don't know the user ID, a previous entry must already
        // exist, and thus we'll only update it.
        await iapRepository.updatePurchase(purchaseData);
      }
      return true;
    } on ap.DetailedApiRequestError catch (e) {
      print(
        'Error on handle Subscription: $e\n'
        'JSON: ${e.jsonResponse}',
      );
    } catch (e) {
      print('Error on handle Subscription: $e\n');
    }
    return false;
  }
}
Add the following method to facilitate the parsing of order IDs, as well as two methods to parse the purchase status.
lib/google_play_purchase_handler.dart
NonSubscriptionStatus _nonSubscriptionStatusFrom(int? state) {
  return switch (state) {
    0 => NonSubscriptionStatus.completed,
    2 => NonSubscriptionStatus.pending,
    _ => NonSubscriptionStatus.cancelled,
  };
}

SubscriptionStatus _subscriptionStatusFrom(int? state) {
  return switch (state) {
    // Payment pending
    0 => SubscriptionStatus.pending,
    // Payment received
    1 => SubscriptionStatus.active,
    // Free trial
    2 => SubscriptionStatus.active,
    // Pending deferred upgrade/downgrade
    3 => SubscriptionStatus.pending,
    // Expired or cancelled
    _ => SubscriptionStatus.expired,
  };
}

/// If a subscription suffix is present (..#) extract the orderId.
String extractOrderId(String orderId) {
  final orderIdSplit = orderId.split('..');
  if (orderIdSplit.isNotEmpty) {
    orderId = orderIdSplit[0];
  }
  return orderId;
}
Your Google Play purchases should now be verified and stored in the database.
Next, move on to App Store purchases for iOS.
Verify iOS purchases: Implement the purchase handler
For verifying purchases with the App Store, a third-party Dart package exists named app_store_server_sdk that makes the process easier.
Start by creating the ITunesApi instance. Use the sandbox configuration, as well as enable logging to facilitate error debugging.
lib/app_store_purchase_handler.dart
  final _iTunesAPI = ITunesApi(
    ITunesHttpClient(ITunesEnvironment.sandbox(), loggingEnabled: true),
  );
Now, unlike the Google Play APIs, the App Store uses the same API endpoints for both subscriptions and non-subscriptions. This means that you can use the same logic for both handlers. Merge them together so they call the same implementation:
lib/app_store_purchase_handler.dart
  @override
  Future<bool> handleNonSubscription({
    required String userId,
    required ProductData productData,
    required String token,
  }) {
    return handleValidation(userId: userId, token: token);
  }

  @override
  Future<bool> handleSubscription({
    required String userId,
    required ProductData productData,
    required String token,
  }) {
    return handleValidation(userId: userId, token: token);
  }

  /// Handle purchase validation.
  Future<bool> handleValidation({
    required String userId,
    required String token,
  }) async {

    // See next step
  }
Now, implement handleValidation :
lib/app_store_purchase_handler.dart
  /// Handle purchase validation.
  Future<bool> handleValidation({
    required String userId,
    required String token,
  }) async {
    print('AppStorePurchaseHandler.handleValidation');
    final response = await _iTunesAPI.verifyReceipt(
      password: appStoreSharedSecret,
      receiptData: token,
    );
    print('response: $response');
    if (response.status == 0) {
      print('Successfully verified purchase');
      final receipts = response.latestReceiptInfo ?? [];
      for (final receipt in receipts) {
        final product = productDataMap[receipt.productId];
        if (product == null) {
          print('Error: Unknown product: ${receipt.productId}');
          continue;
        }
        switch (product.type) {
          case ProductType.nonSubscription:
            await iapRepository.createOrUpdatePurchase(
              NonSubscriptionPurchase(
                userId: userId,
                productId: receipt.productId ?? '',
                iapSource: IAPSource.appstore,
                orderId: receipt.originalTransactionId ?? '',
                purchaseDate: DateTime.fromMillisecondsSinceEpoch(
                  int.parse(receipt.originalPurchaseDateMs ?? '0'),
                ),
                type: product.type,
                status: NonSubscriptionStatus.completed,
              ),
            );
            break;
          case ProductType.subscription:
            await iapRepository.createOrUpdatePurchase(
              SubscriptionPurchase(
                userId: userId,
                productId: receipt.productId ?? '',
                iapSource: IAPSource.appstore,
                orderId: receipt.originalTransactionId ?? '',
                purchaseDate: DateTime.fromMillisecondsSinceEpoch(
                  int.parse(receipt.originalPurchaseDateMs ?? '0'),
                ),
                type: product.type,
                expiryDate: DateTime.fromMillisecondsSinceEpoch(
                  int.parse(receipt.expiresDateMs ?? '0'),
                ),
                status: SubscriptionStatus.active,
              ),
            );
            break;
        }
      }
      return true;
    } else {
      print('Error: Status: ${response.status}');
      return false;
    }
  }
Your App Store purchases should now be verified and stored in the database!
Run the backend
At this point, you can run dart bin/server.dart to serve the /verifypurchase endpoint.
$ dart bin/server.dart
Serving at http://0.0.0.0:8080
11. Keep track of purchases
The recommended way to track your users' purchases is in the backend service. This is because your backend can respond to events from the store and thus is less prone to running into outdated information due to caching, as well as being less susceptible to being tampered with.
First, set up the processing of store events on the backend with the Dart backend you've been building.
Process store events on the backend
Stores have the ability to inform your backend of any billing events that happen, such as when subscriptions renew. You can process these events in your backend to keep the purchases in your database current. In this section, set this up for both the Google Play Store and the Apple App Store.
Process Google Play billing events
Google Play provides billing events through what they call a cloud pub/sub topic . These are essentially message queues that messages can be published on, as well as consumed from.
Because this is functionality specific to Google Play, you include this functionality in the GooglePlayPurchaseHandler .
Start by opening up lib/google_play_purchase_handler.dart , and adding the PubsubApi import:
lib/google_play_purchase_handler.dart
import 'package:googleapis/pubsub/v1.dart' as pubsub;
Then, pass the PubsubApi to the GooglePlayPurchaseHandler , and modify the class constructor to create a Timer as follows:
lib/google_play_purchase_handler.dart
class GooglePlayPurchaseHandler extends PurchaseHandler {
  final ap.AndroidPublisherApi androidPublisher;
  final IapRepository iapRepository;
  final pubsub.PubsubApi pubsubApi; // new

  GooglePlayPurchaseHandler(
    this.androidPublisher,
    this.iapRepository,
    this.pubsubApi, // new
  ) {
    // Poll messages from Pub/Sub every 10 seconds
    Timer.periodic(Duration(seconds: 10), (_) {
      _pullMessageFromPubSub();
    });
  }
The Timer is configured to call the _pullMessageFromPubSub method every ten seconds. You can adjust the Duration to your own preference.
Then, create the _pullMessageFromPubSub
lib/google_play_purchase_handler.dart
  /// Process messages from Google Play
  /// Called every 10 seconds
  Future<void> _pullMessageFromPubSub() async {
    print('Polling Google Play messages');
    final request = pubsub.PullRequest(maxMessages: 1000);
    final topicName =
        'projects/$googleCloudProjectId/subscriptions/$googlePlayPubsubBillingTopic-sub';
    final pullResponse = await pubsubApi.projects.subscriptions.pull(
      request,
      topicName,
    );
    final messages = pullResponse.receivedMessages ?? [];
    for (final message in messages) {
      final data64 = message.message?.data;
      if (data64 != null) {
        await _processMessage(data64, message.ackId);
      }
    }
  }

  Future<void> _processMessage(String data64, String? ackId) async {
    final dataRaw = utf8.decode(base64Decode(data64));
    print('Received data: $dataRaw');
    final dynamic data = jsonDecode(dataRaw);
    if (data['testNotification'] != null) {
      print('Skip test messages');
      if (ackId != null) {
        await _ackMessage(ackId);
      }
      return;
    }
    final dynamic subscriptionNotification = data['subscriptionNotification'];
    final dynamic oneTimeProductNotification =
        data['oneTimeProductNotification'];
    if (subscriptionNotification != null) {
      print('Processing Subscription');
      final subscriptionId =
          subscriptionNotification['subscriptionId'] as String;
      final purchaseToken = subscriptionNotification['purchaseToken'] as String;
      final productData = productDataMap[subscriptionId]!;
      final result = await handleSubscription(
        userId: null,
        productData: productData,
        token: purchaseToken,
      );
      if (result && ackId != null) {
        await _ackMessage(ackId);
      }
    } else if (oneTimeProductNotification != null) {
      print('Processing NonSubscription');
      final sku = oneTimeProductNotification['sku'] as String;
      final purchaseToken =
          oneTimeProductNotification['purchaseToken'] as String;
      final productData = productDataMap[sku]!;
      final result = await handleNonSubscription(
        userId: null,
        productData: productData,
        token: purchaseToken,
      );
      if (result && ackId != null) {
        await _ackMessage(ackId);
      }
    } else {
      print('invalid data');
    }
  }

  /// ACK Messages from Pub/Sub
  Future<void> _ackMessage(String id) async {
    print('ACK Message');
    final request = pubsub.AcknowledgeRequest(ackIds: [id]);
    final subscriptionName =
        'projects/$googleCloudProjectId/subscriptions/$googlePlayPubsubBillingTopic-sub';
    await pubsubApi.projects.subscriptions.acknowledge(
      request,
      subscriptionName,
    );
  }
The code you just added communicates with the Pub/Sub Topic from Google Cloud every ten seconds and asks for new messages. Then, processes each message in the _processMessage method.
This method decodes the incoming messages and obtains the updated information about each purchase, both subscriptions and non-subscriptions, calling the existing handleSubscription or handleNonSubscription if necessary.
Each message needs to be acknowledged with the _askMessage method.
Next, add the required dependencies to the server.dart file. Add the PubsubApi.cloudPlatformScope to the credentials configuration:
bin/server.dart
import 'package:googleapis/pubsub/v1.dart' as pubsub;      // Add this import

  final clientGooglePlay = await auth
      .clientViaServiceAccount(clientCredentialsGooglePlay, [
        ap.AndroidPublisherApi.androidpublisherScope,
        pubsub.PubsubApi.cloudPlatformScope,               // Add this line
      ]);
Then, create the PubsubApi instance:
bin/server.dart
final pubsubApi = pubsub.PubsubApi(clientGooglePlay);
And finally, pass it to the GooglePlayPurchaseHandler constructor:
bin/server.dart
  return {
    'google_play': GooglePlayPurchaseHandler(
      androidPublisher,
      iapRepository,
      pubsubApi,                                           // Add this line
    ),
    'app_store': AppStorePurchaseHandler(
      iapRepository,
    ),
  };
Google Play setup
You've written the code to consume billing events from the pub/sub topic, but you haven't created the pub/sub topic, nor are you publishing any billing events. It's time to set this up.
First, create a pub/sub topic:
- Set the value of
googleCloudProjectIdinconstants.dartto ID of your Google Cloud Project. - Visit the Cloud Pub/Sub page on the Google Cloud Console.
- Ensure that you're on your Firebase project, and click + Create Topic .

- Give the new topic a name, identical to the value set for
googlePlayPubsubBillingTopicinconstants.dart. In this case, name itplay_billing. If you choose something else, make sure to updateconstants.dart. Create the topic.
- In the list of your pub/sub topics, click the three vertical dots for the topic you just created, and click View permissions .

- In the sidebar on the right, choose Add principal .
- Here, add
google-play-developer-notifications@system.gserviceaccount.com, and grant it the role of Pub/Sub Publisher .
- Save the permission changes.
- Copy the Topic name of the topic you've just created.
- Open the Play Console again, and choose your app from the All Apps list.
- Scroll down and go to Monetize > Monetization Setup .
- Fill in the full topic and save your changes.

All Google Play billing events will now be published on the topic.
Process App Store billing events
Next, do the same for the App Store billing events. There are two effective ways to implement handling updates in purchases for the App Store. One is by implementing a webhook that you provide to Apple and they use to communicate with your server. The second way, which is the one you will find in this codelab, is by connecting to the App Store Server API and obtaining the subscription information manually.
The reason why this codelab focuses on the second solution is because you would have to expose your server to the Internet in order to implement the webhook.
In a production environment, ideally you would like to have both. The webhook to obtain events from the App Store, and the Server API in case you missed an event or need to double check a subscription status.
Start by opening up lib/app_store_purchase_handler.dart , and adding the AppStoreServerAPI dependency:
lib/app_store_purchase_handler.dart
  final AppStoreServerAPI appStoreServerAPI;                 // Add this member

  AppStorePurchaseHandler(
    this.iapRepository,
    this.appStoreServerAPI,                                  // And this parameter
  );
Modify the constructor to add a timer that will call to the _pullStatus method. This timer will be calling the _pullStatus method every 10 seconds. You can adjust this timer duration to your needs.
lib/app_store_purchase_handler.dart
  AppStorePurchaseHandler(this.iapRepository, this.appStoreServerAPI) {
    // Poll Subscription status every 10 seconds.
    Timer.periodic(Duration(seconds: 10), (_) {
      _pullStatus();
    });
  }
Then, create the _pullStatus method as follows:
lib/app_store_purchase_handler.dart
  /// Request the App Store for the latest subscription status.
  /// Updates all App Store subscriptions in the database.
  /// NOTE: This code only handles when a subscription expires as example.
  Future<void> _pullStatus() async {
    print('Polling App Store');
    final purchases = await iapRepository.getPurchases();
    // filter for App Store subscriptions
    final appStoreSubscriptions = purchases.where(
      (element) =>
          element.type == ProductType.subscription &&
          element.iapSource == IAPSource.appstore,
    );
    for (final purchase in appStoreSubscriptions) {
      final status = await appStoreServerAPI.getAllSubscriptionStatuses(
        purchase.orderId,
      );
      // Obtain all subscriptions for the order ID.
      for (final subscription in status.data) {
        // Last transaction contains the subscription status.
        for (final transaction in subscription.lastTransactions) {
          final expirationDate = DateTime.fromMillisecondsSinceEpoch(
            transaction.transactionInfo.expiresDate ?? 0,
          );
          // Check if subscription has expired.
          final isExpired = expirationDate.isBefore(DateTime.now());
          print('Expiration Date: $expirationDate - isExpired: $isExpired');
          // Update the subscription status with the new expiration date and status.
          await iapRepository.updatePurchase(
            SubscriptionPurchase(
              userId: null,
              productId: transaction.transactionInfo.productId,
              iapSource: IAPSource.appstore,
              orderId: transaction.originalTransactionId,
              purchaseDate: DateTime.fromMillisecondsSinceEpoch(
                transaction.transactionInfo.originalPurchaseDate,
              ),
              type: ProductType.subscription,
              expiryDate: expirationDate,
              status: isExpired
                  ? SubscriptionStatus.expired
                  : SubscriptionStatus.active,
            ),
          );
        }
      }
    }
  }
This method works as follow:
- Obtains the list of active subscriptions from Firestore using the IapRepository.
- For each order, it requests the subscription status to the App Store Server API.
- Obtains the last transaction for that subscription purchase.
- Checks the expiration date.
- Updates the subscription status on Firestore, if it is expired it will be marked as such.
Finally, add all the necessary code to configure the App Store Server API access:
bin/server.dart
import 'package:app_store_server_sdk/app_store_server_sdk.dart';  // Add this import
import 'package:firebase_backend_dart/constants.dart';            // And this one.


  // add from here
  final subscriptionKeyAppStore = File(
    'assets/SubscriptionKey.p8',
  ).readAsStringSync();

  // Configure Apple Store API access
  var appStoreEnvironment = AppStoreEnvironment.sandbox(
    bundleId: bundleId,
    issuerId: appStoreIssuerId,
    keyId: appStoreKeyId,
    privateKey: subscriptionKeyAppStore,
  );

  // Stored token for Apple Store API access, if available
  final file = File('assets/appstore.token');
  String? appStoreToken;
  if (file.existsSync() && file.lengthSync() > 0) {
    appStoreToken = file.readAsStringSync();
  }

  final appStoreServerAPI = AppStoreServerAPI(
    AppStoreServerHttpClient(
      appStoreEnvironment,
      jwt: appStoreToken,
      jwtTokenUpdatedCallback: (token) {
        file.writeAsStringSync(token);
      },
    ),
  );
  // to here

  return {
    'google_play': GooglePlayPurchaseHandler(
      androidPublisher,
      iapRepository,
      pubsubApi,
    ),
    'app_store': AppStorePurchaseHandler(
      iapRepository,
      appStoreServerAPI,                                     // Add this argument
    ),
  };
App Store setup
Next, set up the App Store:
- Login to App Store Connect , and select Users and Access .
- Go to Integrations > Keys > In-App Purchase .
- Tap on the "plus" icon to add a new one.
- Give it a name, such as "Codelab key".
- Download the p8 file containing the key.
- Copy it to the assets folder, with the name
SubscriptionKey.p8. - Copy the key ID from the newly created key and set it to
appStoreKeyIdconstant in thelib/constants.dartfile. - Copy the Issuer ID right at the top of the keys list, and set it to
appStoreIssuerIdconstant in thelib/constants.dartfile.

Track purchases on the device
The most secure way to track your purchases is on the server side because the client is hard to secure, but you need to have some way to get the information back to the client so the app can act on the subscription status information. By storing the purchases in Firestore, you can sync the data to the client and keep it updated automatically.
You already included the IAPRepo in the app, which is the Firestore repository that contains all of the user's purchase data in List<PastPurchase> purchases . The repository also contains hasActiveSubscription, which is true when there is a purchase with productId storeKeySubscription with a status that is not expired. When the user isn't logged in, the list is empty.
lib/repo/iap_repo.dart
  void updatePurchases() {
    _purchaseSubscription?.cancel();
    var user = _user;
    if (user == null) {
      purchases = [];
      hasActiveSubscription = false;
      hasUpgrade = false;
      return;
    }
    var purchaseStream = _firestore
        .collection('purchases')
        .where('userId', isEqualTo: user.uid)
        .snapshots();
    _purchaseSubscription = purchaseStream.listen((snapshot) {
      purchases = snapshot.docs.map((document) {
        var data = document.data();
        return PastPurchase.fromJson(data);
      }).toList();

      hasActiveSubscription = purchases.any(
        (element) =>
            element.productId == storeKeySubscription &&
            element.status != Status.expired,
      );

      hasUpgrade = purchases.any(
        (element) => element.productId == storeKeyUpgrade,
      );

      notifyListeners();
    });
  }
All purchase logic is in the DashPurchases class and is where subscriptions should be applied or removed. So, add the iapRepo as a property in the class and assign the iapRepo in the constructor. Next, directly add a listener in the constructor, and remove the listener in the dispose() method. At first, the listener can just be an empty function. Because the IAPRepo is a ChangeNotifier and you call notifyListeners() every time the purchases in Firestore change, the purchasesUpdate() method is always called when the purchased products change.
lib/logic/dash_purchases.dart
import '../repo/iap_repo.dart';                              // Add this import

class DashPurchases extends ChangeNotifier {
  DashCounter counter;
  FirebaseNotifier firebaseNotifier;
  StoreState storeState = StoreState.loading;
  late StreamSubscription<List<PurchaseDetails>> _subscription;
  List<PurchasableProduct> products = [];
  IAPRepo iapRepo;                                           // Add this line

  bool get beautifiedDash => _beautifiedDashUpgrade;
  bool _beautifiedDashUpgrade = false;
  final iapConnection = IAPConnection.instance;

  // Add this.iapRepo as a parameter
  DashPurchases(this.counter, this.firebaseNotifier, this.iapRepo) {
    final purchaseUpdated = iapConnection.purchaseStream;
    _subscription = purchaseUpdated.listen(
      _onPurchaseUpdate,
      onDone: _updateStreamOnDone,
      onError: _updateStreamOnError,
    );
    iapRepo.addListener(purchasesUpdate);
    loadPurchases();
  }

  Future<void> loadPurchases() async {
    // Elided.
  }

  @override
  void dispose() {
    _subscription.cancel();
    iapRepo.removeListener(purchasesUpdate);                 // Add this line
    super.dispose();
  }

  void purchasesUpdate() {
    //TODO manage updates
  }
Next, supply the IAPRepo to the constructor in main.dart. You can get the repository by using context.read because it's already created in a Provider .
lib/main.dart
        ChangeNotifierProvider<DashPurchases>(
          create: (context) => DashPurchases(
            context.read<DashCounter>(),
            context.read<FirebaseNotifier>(),
            context.read<IAPRepo>(),                         // Add this line
          ),
          lazy: false,
        ),
Next, write the code for the purchaseUpdate() function. In dash_counter.dart, the applyPaidMultiplier and removePaidMultiplier methods set the multiplier to 10 or 1, respectively, so you don't have to check whether the subscription is already applied. When the subscription status changes, you also update the status of the purchasable product so you can show in the purchase page that it's already active. Set the _beautifiedDashUpgrade property based on whether the upgrade is bought.
lib/logic/dash_purchases.dart
  void purchasesUpdate() {
    var subscriptions = <PurchasableProduct>[];
    var upgrades = <PurchasableProduct>[];
    // Get a list of purchasable products for the subscription and upgrade.
    // This should be 1 per type.
    if (products.isNotEmpty) {
      subscriptions = products
          .where((element) => element.productDetails.id == storeKeySubscription)
          .toList();
      upgrades = products
          .where((element) => element.productDetails.id == storeKeyUpgrade)
          .toList();
    }

    // Set the subscription in the counter logic and show/hide purchased on the
    // purchases page.
    if (iapRepo.hasActiveSubscription) {
      counter.applyPaidMultiplier();
      for (var element in subscriptions) {
        _updateStatus(element, ProductStatus.purchased);
      }
    } else {
      counter.removePaidMultiplier();
      for (var element in subscriptions) {
        _updateStatus(element, ProductStatus.purchasable);
      }
    }

    // Set the Dash beautifier and show/hide purchased on
    // the purchases page.
    if (iapRepo.hasUpgrade != _beautifiedDashUpgrade) {
      _beautifiedDashUpgrade = iapRepo.hasUpgrade;
      for (var element in upgrades) {
        _updateStatus(
          element,
          _beautifiedDashUpgrade
              ? ProductStatus.purchased
              : ProductStatus.purchasable,
        );
      }
      notifyListeners();
    }
  }

  void _updateStatus(PurchasableProduct product, ProductStatus status) {
    if (product.status != ProductStatus.purchased) {
      product.status = ProductStatus.purchased;
      notifyListeners();
    }
  }
You have now ensured that the subscription and upgrade status is always current in the backend service and synchronized with the app. The app acts accordingly and applies the subscription and upgrade features to your Dash clicker game.
12. All done!
Congratulations!!! You have completed the codelab. You can find the completed code for this codelab in the  complete folder.
To learn more, try the other Flutter codelabs .