
1. Objective of this lab
In this hands-on lab you will learn how to use Antigravity to create applications using Google Antigravity and deploy it in Google cloud. This lab will also introduce you to the concept of Spec Driven Development.
What you'll learn
- Understand the basics of Google Antigravity.
- Understand the basics of Spec Driven Development
- Learn how to easily deploy apps in Cloud Run.
Figure 1: Antigravity is the Google developed Agent First development tool.
2. Environment Setup
- Install Antigravity:
👉Download the [Google Antigravity](https://antigravity.google/docs/get-started) for your environment from [here](https://antigravity.google/).
👉Install Antigravity in your environment.
👉Go to the folder where your Antigravity is installed and double click to open the installer.
👉Follow the installer instructions to install Antigravity in your environment.
- Install Python
👉Go to https://www.python.org/downloads/ and install Python for your system.
- Install gcloud
👉gcloud is a command line tool that allows you to perform various operations on Google Cloud. Follow the instructions here to install gcloud in your environment.
👉Once installed, test the installation by opening your system terminal and typing gcloud in it. 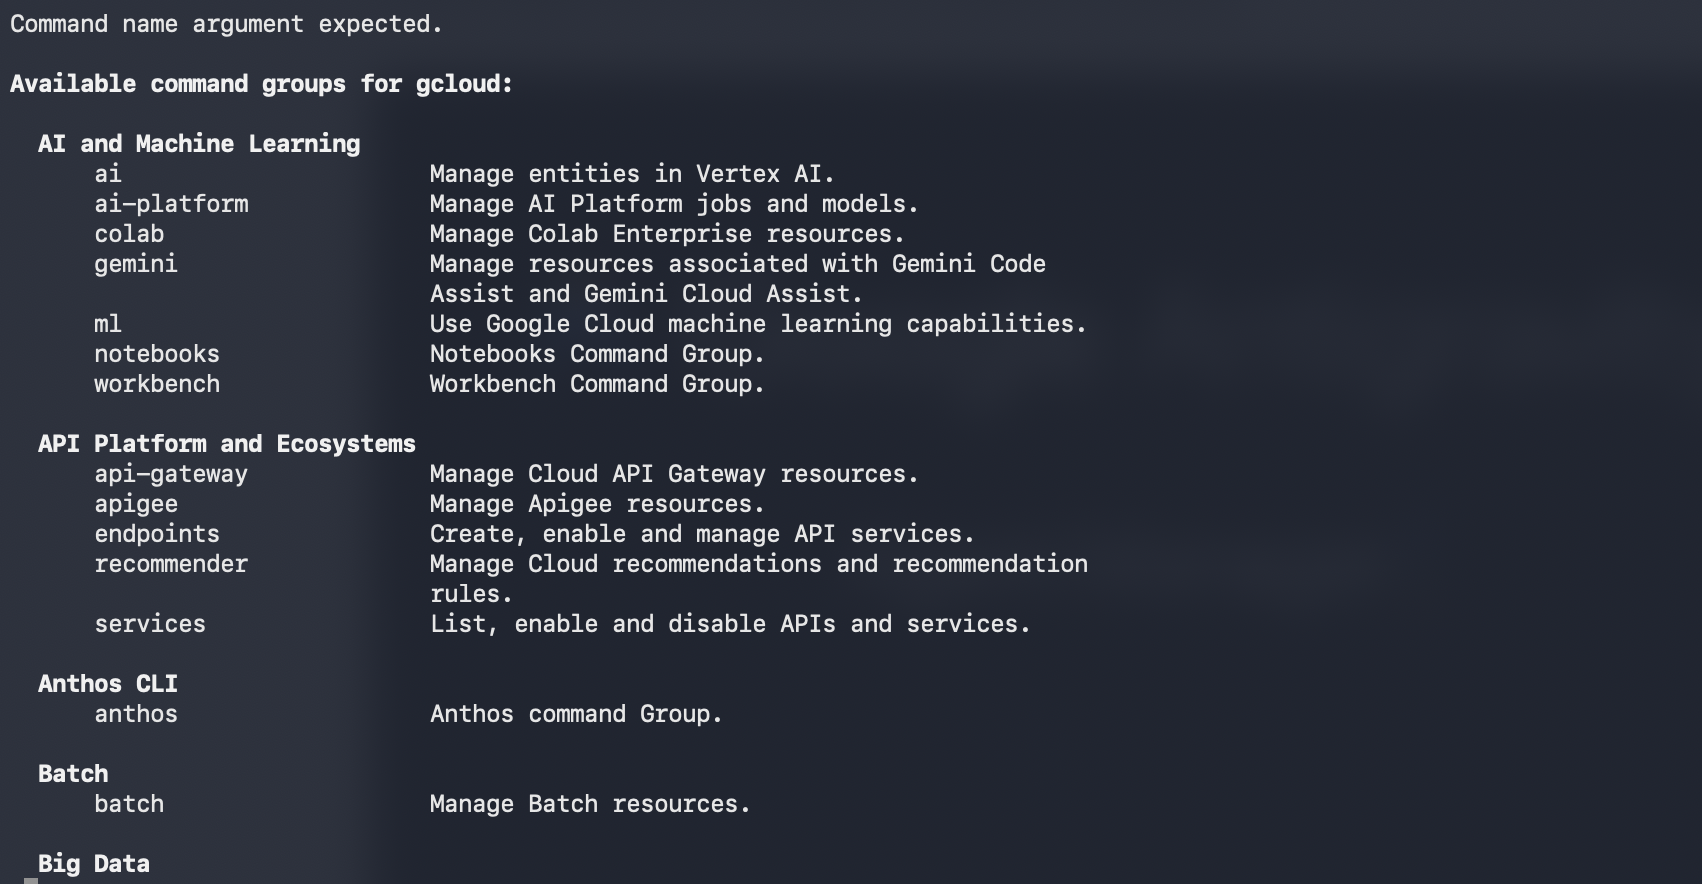
Figure 2: Once you install gcloud , you can test the installation by typing gcloud in your terminal
3. Project Setup
- If you already do not have a project that you can use, you will need to create a new project in the GCP console. Select the project that at the project selector (Top Left of the Google Cloud Console)
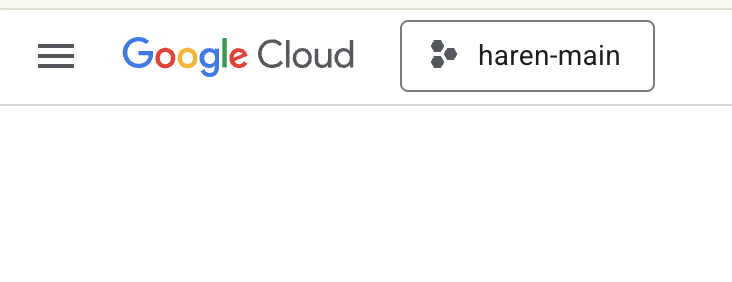
Figure 2: Clicking on the box right next to the Google Cloud logo allows you to select your project. Make sure your project is selected.
- In this lab, we will use Cloud Shell Editor to perform our tasks. Open the Cloud Shell and set the project using Cloud Shell.
- Click this link to navigate directly to Cloud Shell Editor
- Open the Terminal if it's not already open by Clicking Terminal>New Terminal from the menu. You can run all the commands in this tutorial in this terminal.
- You can check if the project is already authenticated using the following command in the Cloud Shell terminal.
gcloud auth list
- Run the following command in Cloud Shell to confirm your project
gcloud config list project
- Copy the project ID and use the following command to set it
gcloud config set project <YOUR_PROJECT_ID>
- If you can't remember your project ID, you can list all your project IDs with
gcloud projects list
4. Enable APIs
We need to enable some API services to run this lab. Run the following command in Cloud Shell.
gcloud services enable aiplatform.googleapis.com
gcloud services enable cloudresourcemanager.googleapis.com
Introducing the APIs
- Vertex AI API (
aiplatform.googleapis.com) enables access to the Vertex AI platform, allowing your application to interact with Gemini models for text generation, chat sessions, and function calling. - Cloud Resource Manager API (
cloudresourcemanager.googleapis.com) allows you to programmatically manage metadata for your Google Cloud projects, such as project ID and name, which is often required by other tools and SDKs to verify project identity and permissions.
5. Confirm if your Credits have been applied
In the Project Setup stage you applied for the free credits that enable you to use the services in Google Cloud. When you apply the credits a new free billing account called "Google Cloud Platform Trial Billing Account" is created. To make sure the credits have been applied follow the following steps in the Cloud Shell Editor
curl -s https://raw.githubusercontent.com/haren-bh/gcpbillingactivate/main/activate.py | python3
If successful , you should be able to see the result like below: If you see "Successfully linked project" your billing account is correctly set. By executing the step above you can check if your account is linked, if not linked it will link it for you. If you have not selected the project it will prompt you to choose a project or you can do so beforehand following the steps in project setup. 
Figure 3: Billing account linked confirmation
6. Introduction to Google Antigravity
Google Antigravity is an AI first software development tool developed by Google DeepMind. Google Antigravity leverages the Software Development knowhow accumulated over a long period of time with the cutting edge AI to deliver a smooth and seamless AI driven development experience for the developers.
Here are some of the key features of Google Antigravity.
The figure below shows the basic elements of Google Antigravity.
- 👉Open the browser and start exploring the various parts of the browser.
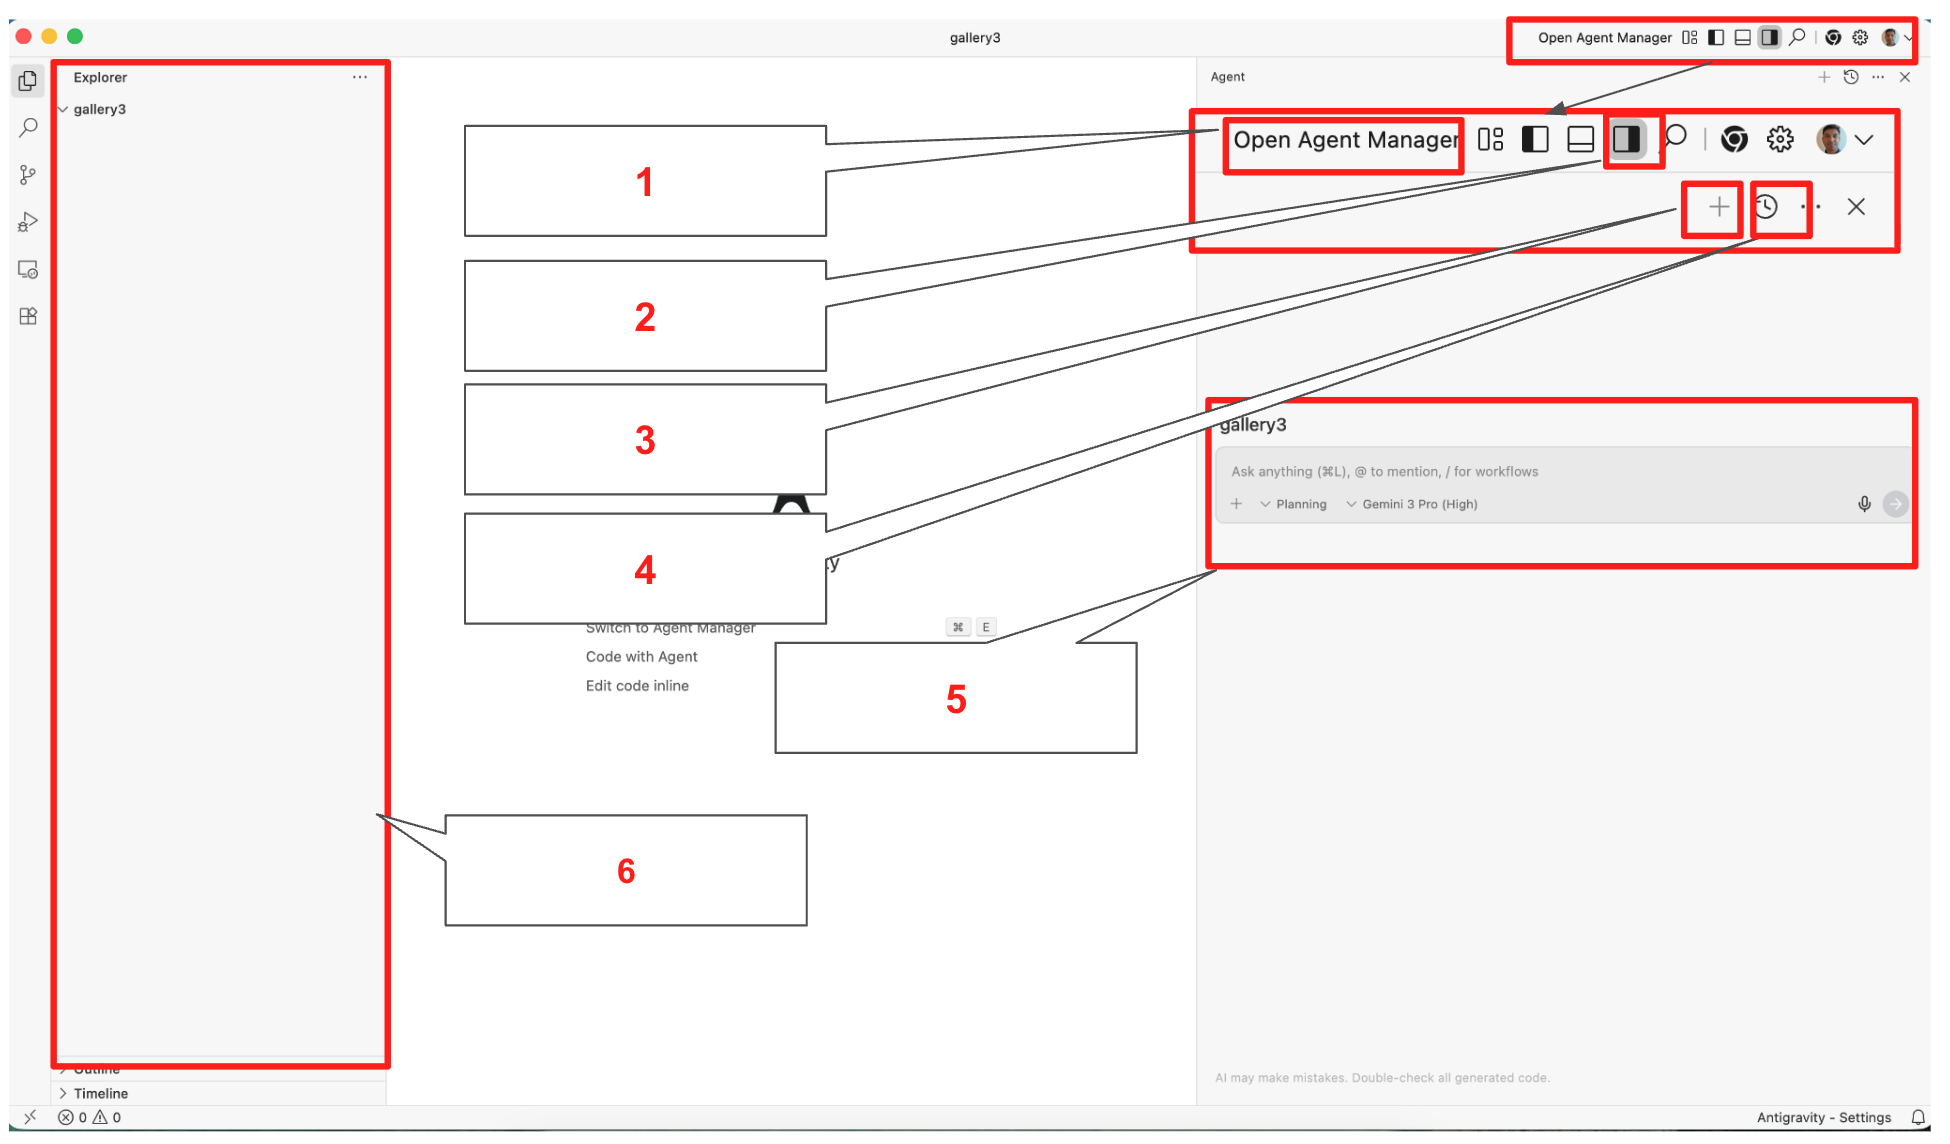
Figure 4: The basic elements of Google Antigravity, the details in Table 1
Table 1: Details of the basic components in Google Antigravity
|
|
|
|
|
|
|
|
|
|
|
|
|
|
|
|
|
|
|
|
|
- Built-in Gemini 3 and Nanobanana models: With Google Antigravity you can use the latest of Google flagship models like Gemini 3 and Nanobanana. Along with those models you can also use third party models like Claude.
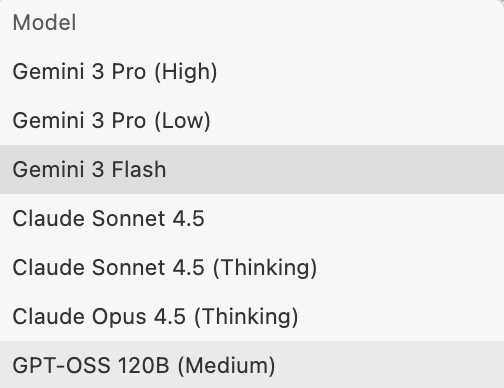
Figure 5: You have a choice to use many models in Google Antigravity 2. Agent driven coding: Antigravity provides a native agent driven coding experience that allows developers to stay productive without getting in their way.
- Planning and full user control: The agent takes your input and converts the task into a plan that the agent will ask for your approval before execution. This ensures that the user can change the direction of the agent anytime before execution of the task.
- User feedback:During the agent execution the user can provide the agent with the feedback if the user needs to provide additional instructions to the agent.
- Multi Agents: You can spawn multiple agents to work on different tasks simultaneously. For example, Agent A can be refactoring your auth logic while Agent B is writing unit tests for a new API, and Agent C is researching a library in the background.
- Agent across editor, terminal and browser: The Google Antigravity agents work across multiple surfaces.
- Editor: Google Antigravity agents write the code and present you the written code in the Editor.
- Terminal: Depending on the tasks the Google Antigravity agents may need access to your terminal to execute some commands. The agents can execute the commands for you when it's needed.
- Browser: Agents can also work with your browser. This is especially helpful if you need to test your web applications, the agent can run your application in the web browser, test it and debug it.
7. Introduction to AI Spec-Driven Development
Spec-Driven Development is an emerging software engineering paradigm that places structured specifications and AI agents at the core of the development lifecycle. Unlike the "prompt-and-patch" (trial and error) approach common in basic AI coding, SDD prioritizes meticulous requirement gathering, system/architecture design and test planning. It borrows the rigor of the Waterfall model's design phase but integrates it into a modern, agile iterative loop through automation. Even though the process requires you to do meticulous planning and documentation beforehand, this is actually an iterative process as the AI agents enable fast implementation and testing. This allows you to get faster feedback that can be used to improve the documentation.
The Core Philosophy
In this model, human engineers transition from "code writers" to "system architects." The primary human responsibility is the high-fidelity description of problems and solutions. This detailed output serves as the Single Source of Truth (SSOT), which AI agents use to generate, verify, and refine the codebase.
The SDD Lifecycle
The process has the following components. Step 1-3 are very much human focused while step 4-5 are AI Agent focused. This is an iterative process where after the end of a cycle the feedback can be used to improve on the specification.
- Requirement Gathering: Definitive identification of business logic, user needs, and system constraints.
- Architectural Design: Defining the system structure, data models, and integration points.
- System & Test Specification: The creation of machine-readable (or highly structured) documents that define what the system does and how it will be validated.
- Automated Code Generation: AI agents consume the specifications to produce production-ready code.
- Testing & Validation: Automated suites verify the generated code against the Test Specification.
Key Operational Principles
- The Design-Implementation Loop
Steps 1 through 5 are not a linear path but a continuous feedback loop. Because Code Generation (Step 4) and Testing (Step 5) are largely automated, the engineering team can shift most of their bandwidth to the first three stages. When a bug is found or a feature changes, the engineer updates the specification, not the code, and triggers the loop again.
- Modular Granularity
To maintain system integrity, SDD must be applied to fine-grained modules rather than monolithic blocks.
- Isolation: If a specific module fails validation, only that module needs to be re-specified and re-generated.
- Scalability: Small, well-defined modules prevent AI "hallucinations" and ensure that the context window of the AI agent remains focused and accurate.
- Quality Control
In this paradigm, the System Specification is the blueprint, and the Test Specification is the judge. Test Specification ensures that the generated code will always conform to the predetermined quality requirements. The whole process can be seamlessly integrated into the existing CICD pipeline ensuring that the overall system health also passes the quality requirement.
In this lab we will explore the basics of Spec-Driven Development using Google Antigravity
8. Developing a web application with Google Antigravity
In this lab we will create a simple photo gallery application. Nanobanana, the image generation model, is built inside Google Antigravity. We will use Nanobanana to create the necessary images.
Setup web browser
The web browser will be used for automatic testing of the app. In the steps below we will set up the browser so that Antigravity can automatically test the application.
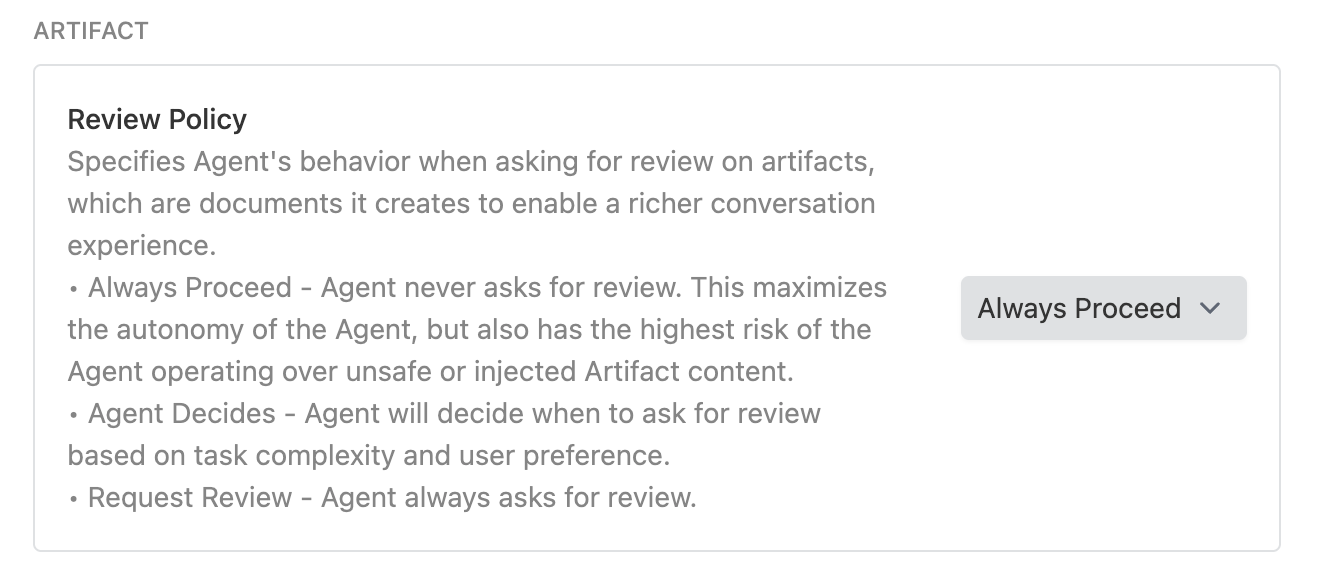
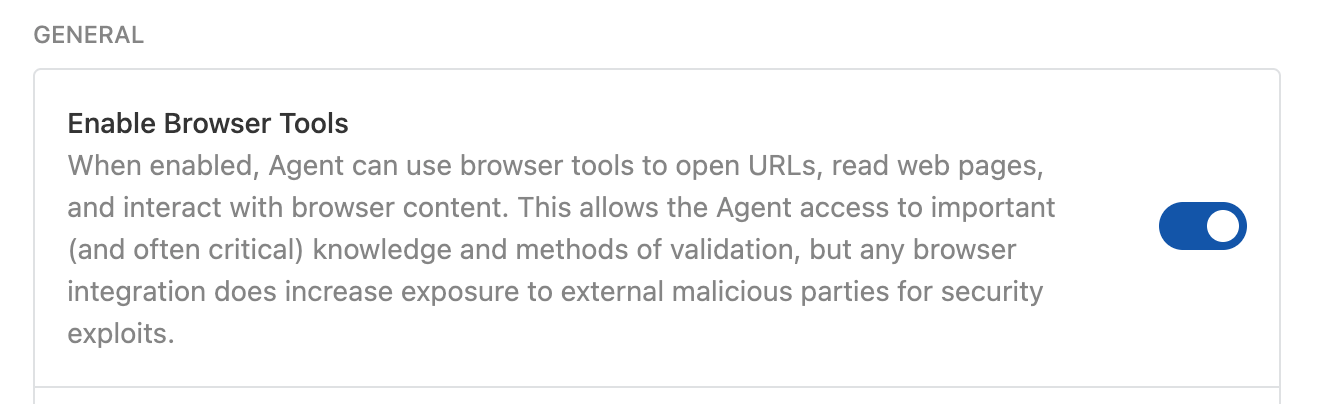
- 👉Click on the Settings button (Gear icon) on the top right corner and select "Open Antigravity User Settings"
- 👉Click Agent on the left pane and in ARTIFACT section, Review Policy Select "Always Proceed"
- 👉Click Browser on the left pane and make sure that Enable Browser Tools is Enabled.
Create Application with Google Antigravity
- 👉Open Google Antigravity by clicking on the Google Antigravity icon
- 👉Create a folder called "Gallery" in your personal folder folder eg. Desktop.
- 👉Press Open Folder in Antigravity and select Gallery folder. This will open a new workspace in the Gallery folder.
- 👉If the Agent pane is not already open, open it by clicking the "Toggle Agent Pane" button. Refer to Figure 4, button no. 2.
- 👉You can start coding by typing your instructions in the Agent Pane. It is very important to make the instructions as clear as possible. Enter the following in the Agent Pane
**English Version:**
Create a photo granary with following specs.

1. Visual Design & Layout
Title: The gallery must prominently display the title "My photo gallery" at the top.
Modern Grid: Images will be arranged in a responsive grid that spans the full width of the browser.
Clean Aesthetic: Use a minimalist design with consistent spacing (margins/padding) between photos and no heavy borders or shadows.
Image Scaling: Photos will automatically adjust their size to fit any screen (mobile to desktop) while maintaining their focus using modern CSS cropping techniques.

2. Photo Content
Quantity: The page will feature a total of 20 photos.
Nature Themes: The collection will include a diverse range of nature photography:
Landscape: Mountains, deserts, and forests.
Water: Waterfalls, oceans, and lakes.
Atmosphere: Northern lights, sunsets, and starry skies.
Macro: Close-ups of flowers, leaves, and moss.
Generate all the needed photos

3. Core Functionality (The "Lightroom" Effect)
Full-Screen View: Clicking any photo triggers a "Lightbox" mode where the background dims and the selected image appears in high resolution at the center of the screen.
Manual Navigation:
Right Arrow: Swaps the current view to the next image.
Left Arrow: Swaps the current view to the previous image.
Infinite Loop: Navigation is continuous; moving "next" from the 20th photo returns the user to the 1st photo.
Exit Strategy: Users can exit the full-screen view by clicking a "Close" button or tapping the dimmed area outside the image.

4. Technical Constraints (Strict)
Vanilla JavaScript Only: Absolutely no external libraries or frameworks (like jQuery, React, or Bootstrap). All logic must be written in raw, standard JavaScript.
Native HTML & CSS: Use only the built-in capabilities of modern web browsers to handle the layout and animations.
Zero Dependencies: The app should function perfectly as a standalone project with no need to download or link to outside scripts.

5. Perform the following tests
Open the App in a web browser
Click on the images and see the image opens in the lightbox
Check the navigation
Japanese Version:
以下の仕様でフォトギャラリーを作成してください。
1. ビジュアルデザインとレイアウト
タイトル: ページ上部に「My photo gallery」というタイトルを大きく表示すること。
モダンなグリッド: ブラウザの全幅に広がる、レスポンシブなグリッドレイアウトで画像を配置すること。
クリーンな審美性: ミニマリストなデザインを採用し、写真間の余白(マージン/パディング)を一定に保つこと。重い枠線やドロップシャドウは使用しない。
画像のスケーリング: モダンなCSSのトリミング技術(object-fitなど)を使用し、モバイルからデスクトップまで、フォーカスを維持したまま画面サイズに合わせて自動調整されるようにすること。

2. 写真の内容
枚数: 合計20枚の写真を掲載。
自然のテーマ: 多様な自然写真のコレクションにすること。
風景: 山、砂漠、森林。
水: 滝、海、湖。
空気・雰囲気: オーロラ、夕焼け、星空。
マクロ: 花、葉、苔の接写。
画像生成: 2枚の画像を生成し、それらを繰り返して20箇所に配置すること。

3. コア機能(ライトボックス・エフェクト)
全画面表示: 写真をクリックすると「ライトボックス」モードが起動し、背景が暗転して選択された画像が画面中央に高解像度で表示されること。
手動ナビゲーション:
右矢印: 次の画像に切り替え。
左矢印: 前の画像に切り替え。
無限ループ: ナビゲーションは連続的であること。20枚目の写真で「次へ」を押すと1枚目に戻る仕様。
終了方法: 「閉じる」ボタンをクリックするか、画像外の暗転したエリアをタップすることで全画面表示を終了できること。

4. 技術的制約(厳守)
純正JavaScript限定: 外部ライブラリやフレームワーク(jQuery、React、Bootstrapなど)は一切使用禁止。すべてのロジックは標準のJavaScript(生コード)で記述すること。
ネイティブのHTML & CSS: レイアウトやアニメーションには、モダンブラウザの標準機能のみを使用すること。
依存関係ゼロ: 外部スクリプトのダウンロードやリンクを必要とせず、単体で完全に動作するプロジェクトにすること。

5. 以下のテストを実行します
ウェブブラウザでアプリを開きます
画像をクリックすると、ライトボックスで画像が開きます
ナビゲーションを確認します
- 👉Click the Run button. Once you run the Agent should show you the execution plan like below.
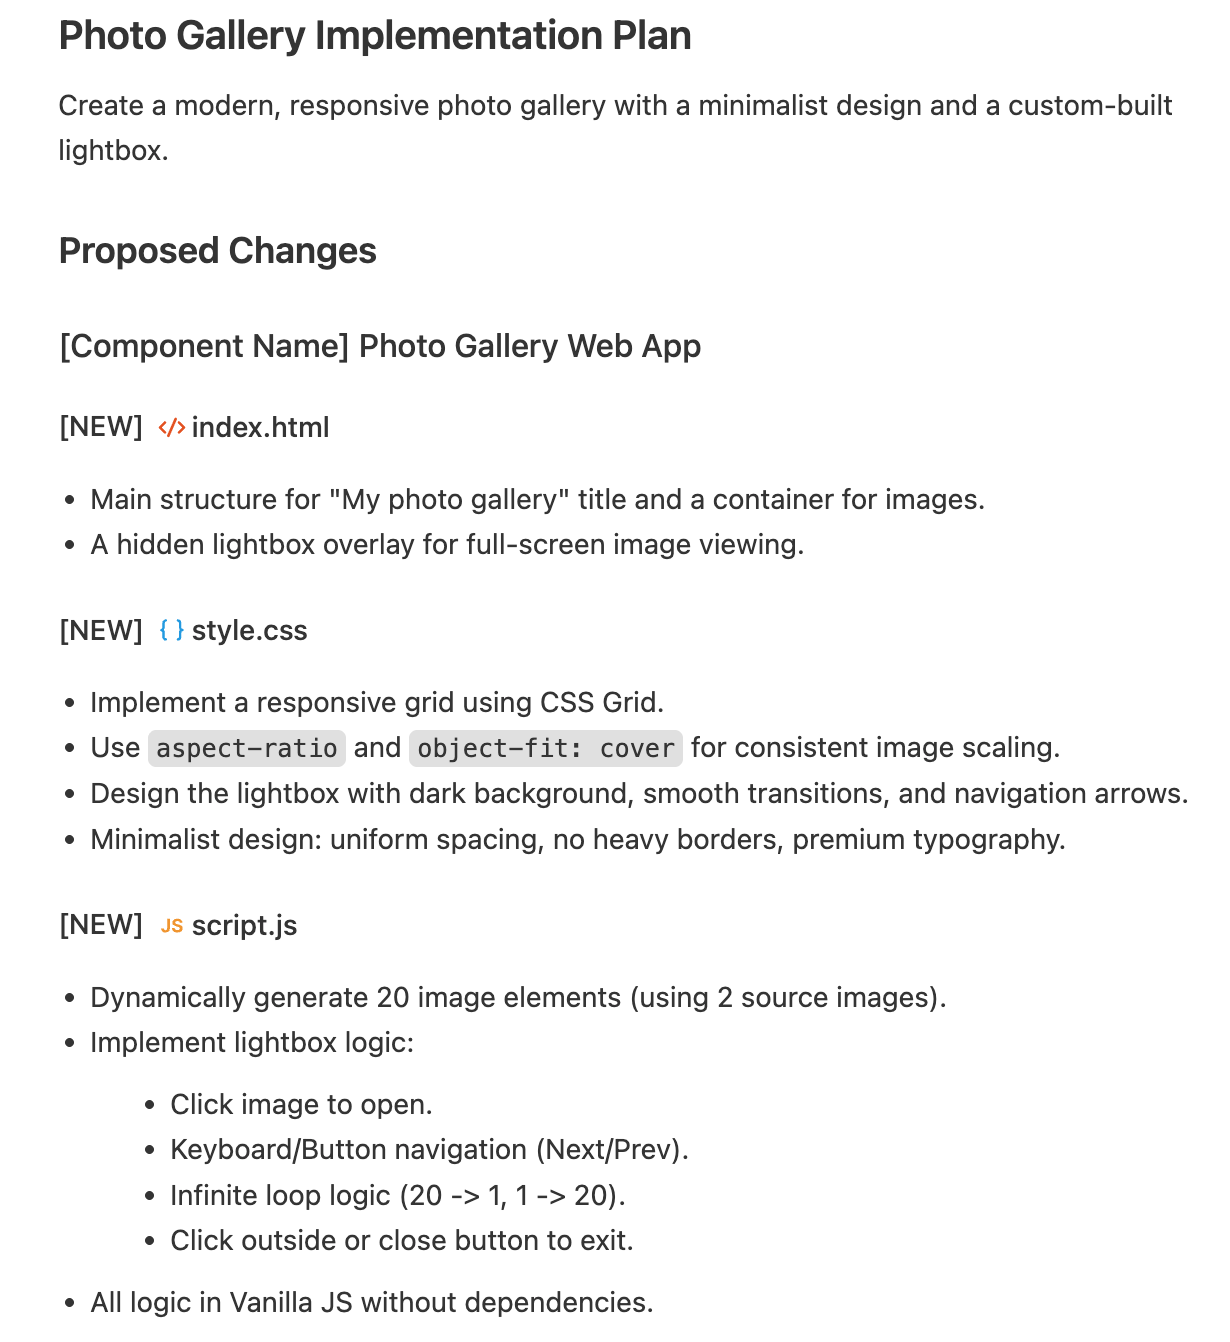
Figure 5: Antigravity agent will show you the implementation plan
- 👉You will get prompted to confirm, please confirm when prompted as below. Antigravity will automatically use Nanobanana and the selected LLM model to perform the task.
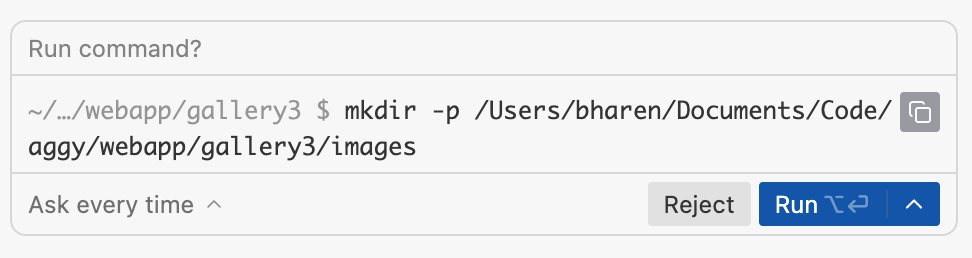 Figure 6: Antigravity wants to run a command , press **Run** to allow run.
 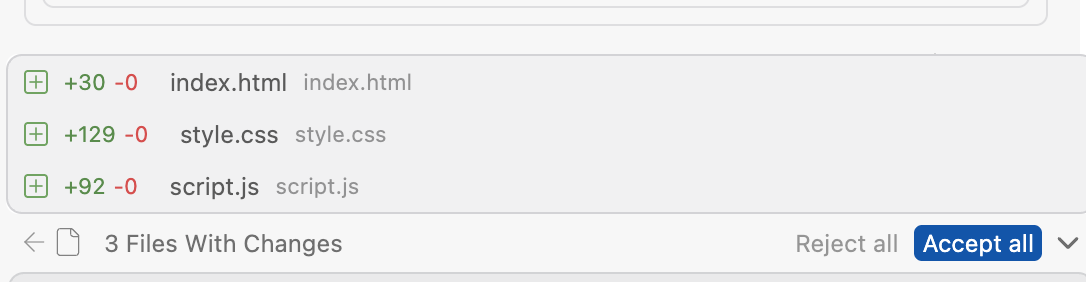 Figure 7: Press Accept all when prompted.
- 👉After the code is generated, Antigravity will open the browser and start testing. After testing it should provide you with the results of testing.
 Figure 8: Antigravity will show you the test results
 - 👉If prompted press "Accept All" to save all the code generated in the Agent Pane.
- 👉In the Explorer pane of Antigravity , you should have the newly generated code.
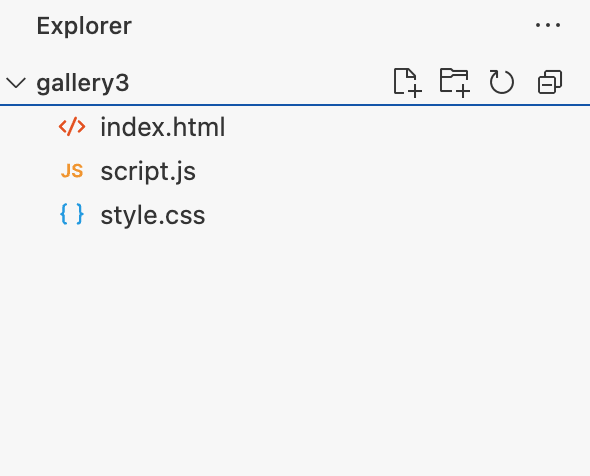 Figure 9: Final code
 - 👉To test the application right click on index.html, get the path of the file and paste the path in the web browser url bar.
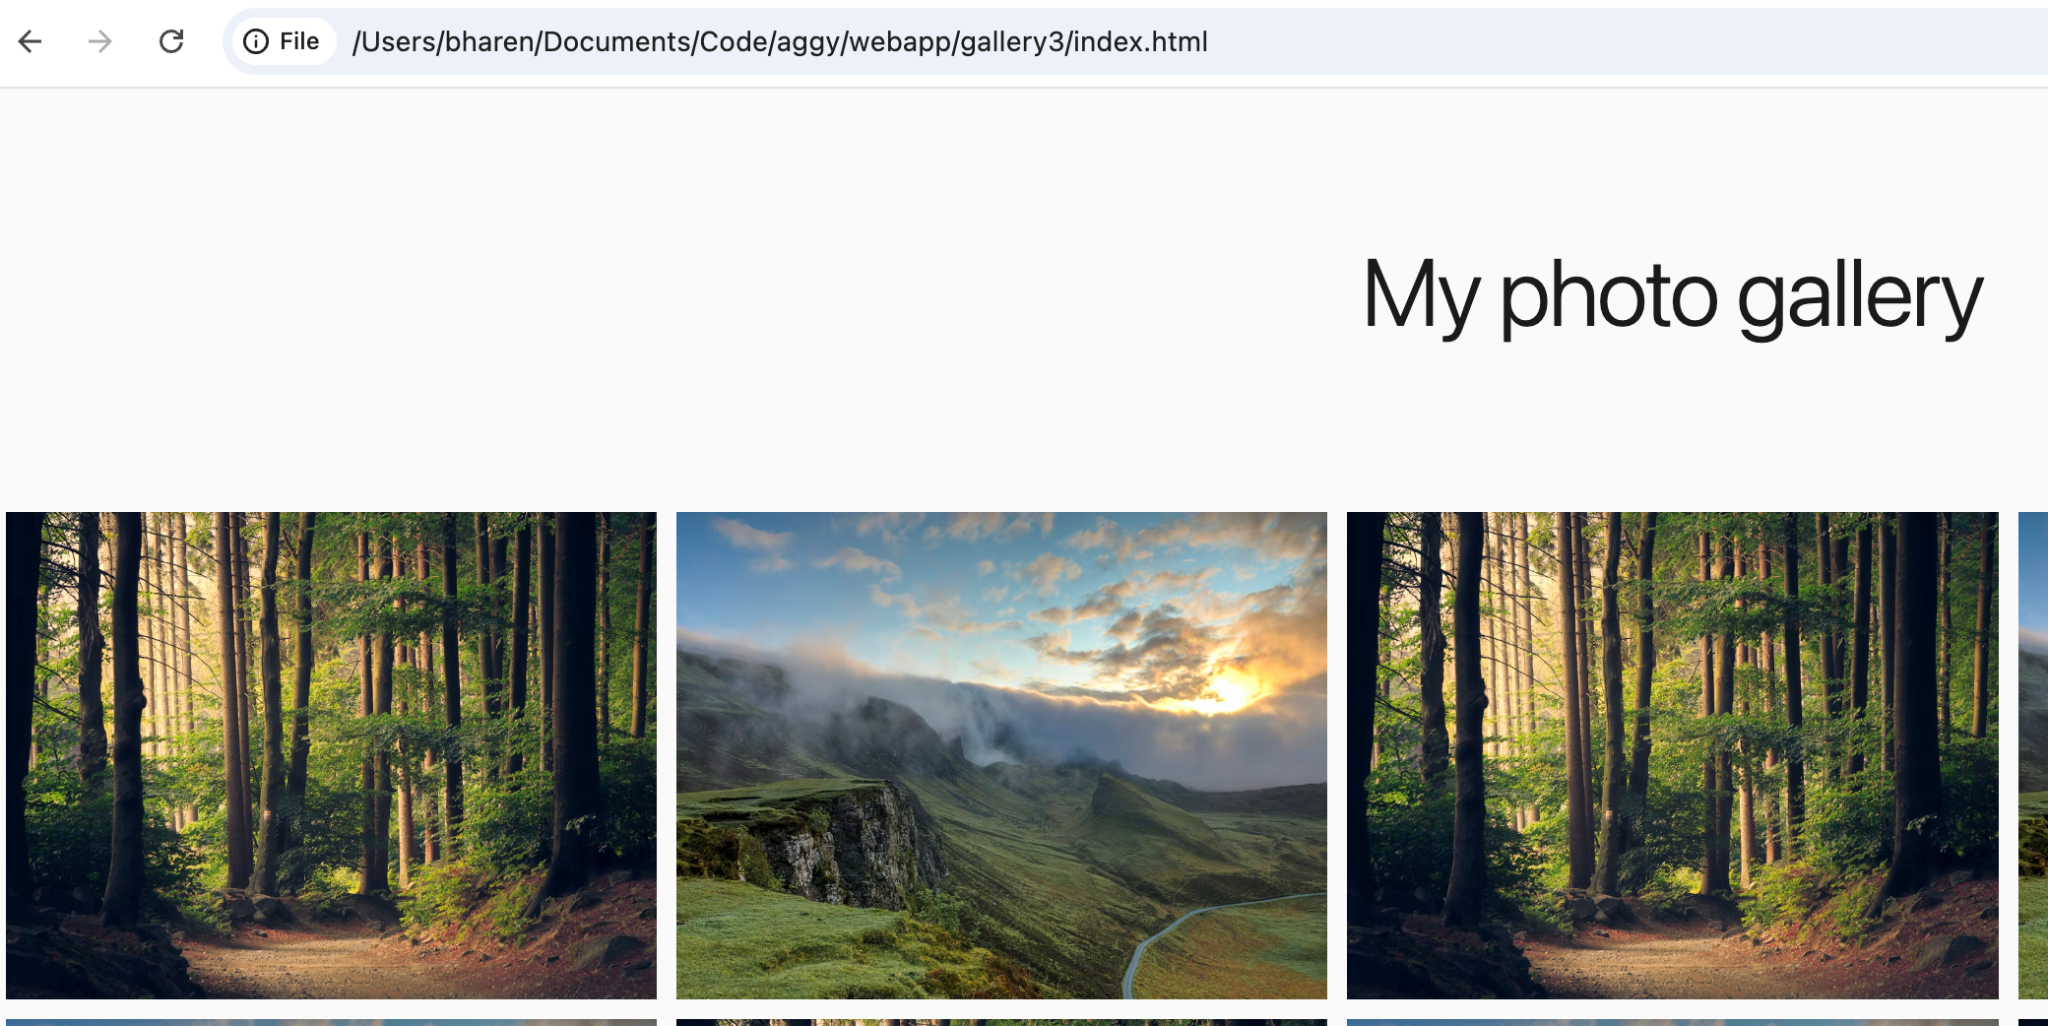
Figure 10: To test app, simply copy the path of index.html file in your web browser
9. Setup the Environment for deploy
- 👉Get your Google Cloud project id: Go to https://console.cloud.google.com
- 👉Click on the top left and copy your project id somewhere, we will use this in the next steps.
 Figure 11: Copy your project ID and keep it somewhere for the future reference
 - 👉In the Antigravity open terminal by Clicking Terminal->New Terminal from the menu.
- 👉We need to set the environment variables which are different for Windows and Mac/Linux. Replace "YOUR CLOUD PROJECT" with the one noted in step 2. Note for Windows Powershell users: Open Powershell in Admin mode
#This is only for Powershell users.

Set-ExecutionPolicy -ExecutionPolicy RemoteSigned -Scope CurrentUser
#For Windows (Powershell) follow the following steps.
$env:GOOGLE_CLOUD_PROJECT="YOUR CLOUD PROJECT"
$env:GOOGLE_CLOUD_LOCATION="us-central1"

#For Windows Command Prompt  follow the following steps.
set GOOGLE_CLOUD_PROJECT="YOUR CLOUD PROJECT"
set GOOGLE_CLOUD_LOCATION="us-central1"


#for Mac/Linux follow the following steps.
export GOOGLE_CLOUD_PROJECT="YOUR CLOUD PROJECT"
export GOOGLE_CLOUD_LOCATION="us-central1"
- 👉Log into the console, when prompted login to your google cloud in the browser.
gcloud auth login
gcloud auth application-default login
gcloud config set project YOUR CLOUD PROJECT
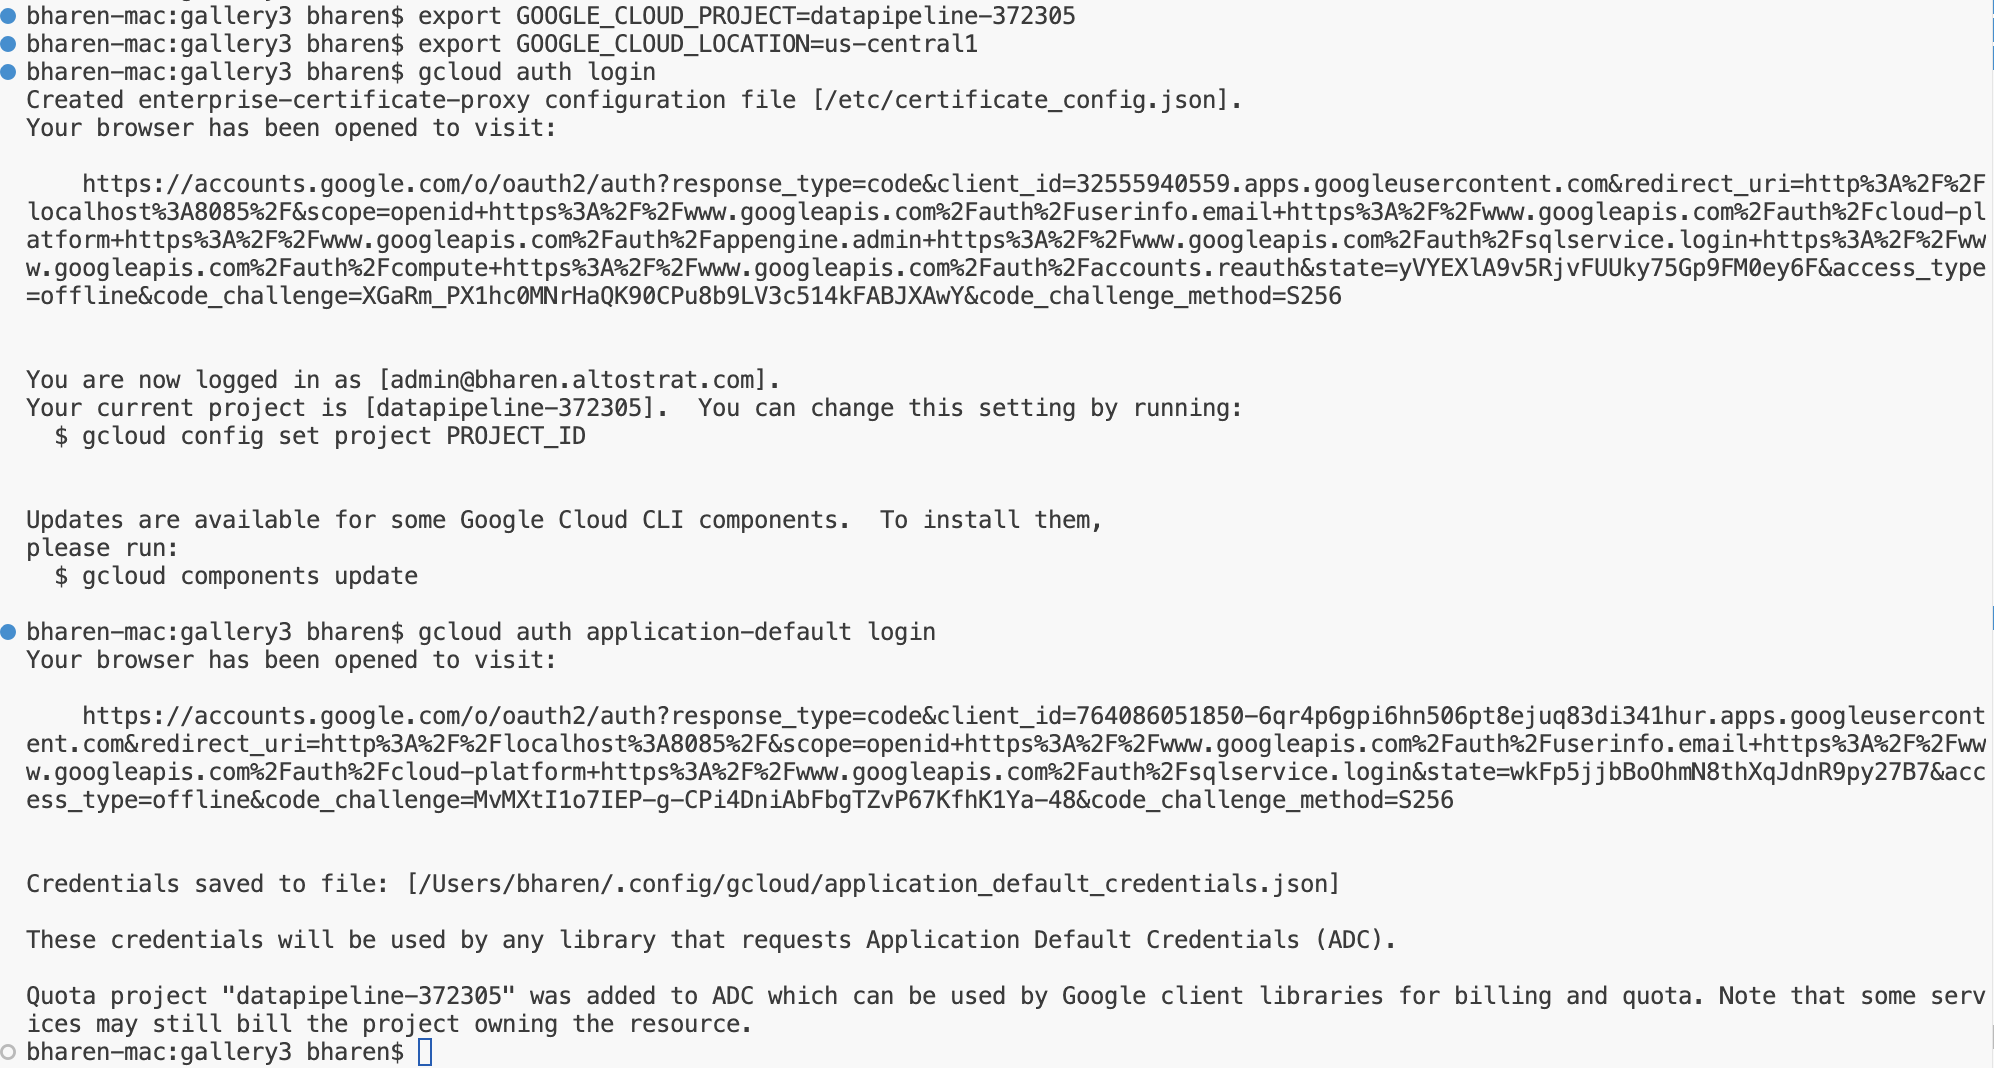 Figure 12: Perform the authentication
- 👉Install Cloud Run MCP Server. On the top right of the Antigravity window, click "..." . You should see the option "MCP Servers", click it. MCP servers are like the extensions for the agent that allow agents to access external data and tools.
- 👉Enter "Cloud Run" in the Search Box and Click on "Cloud Run"
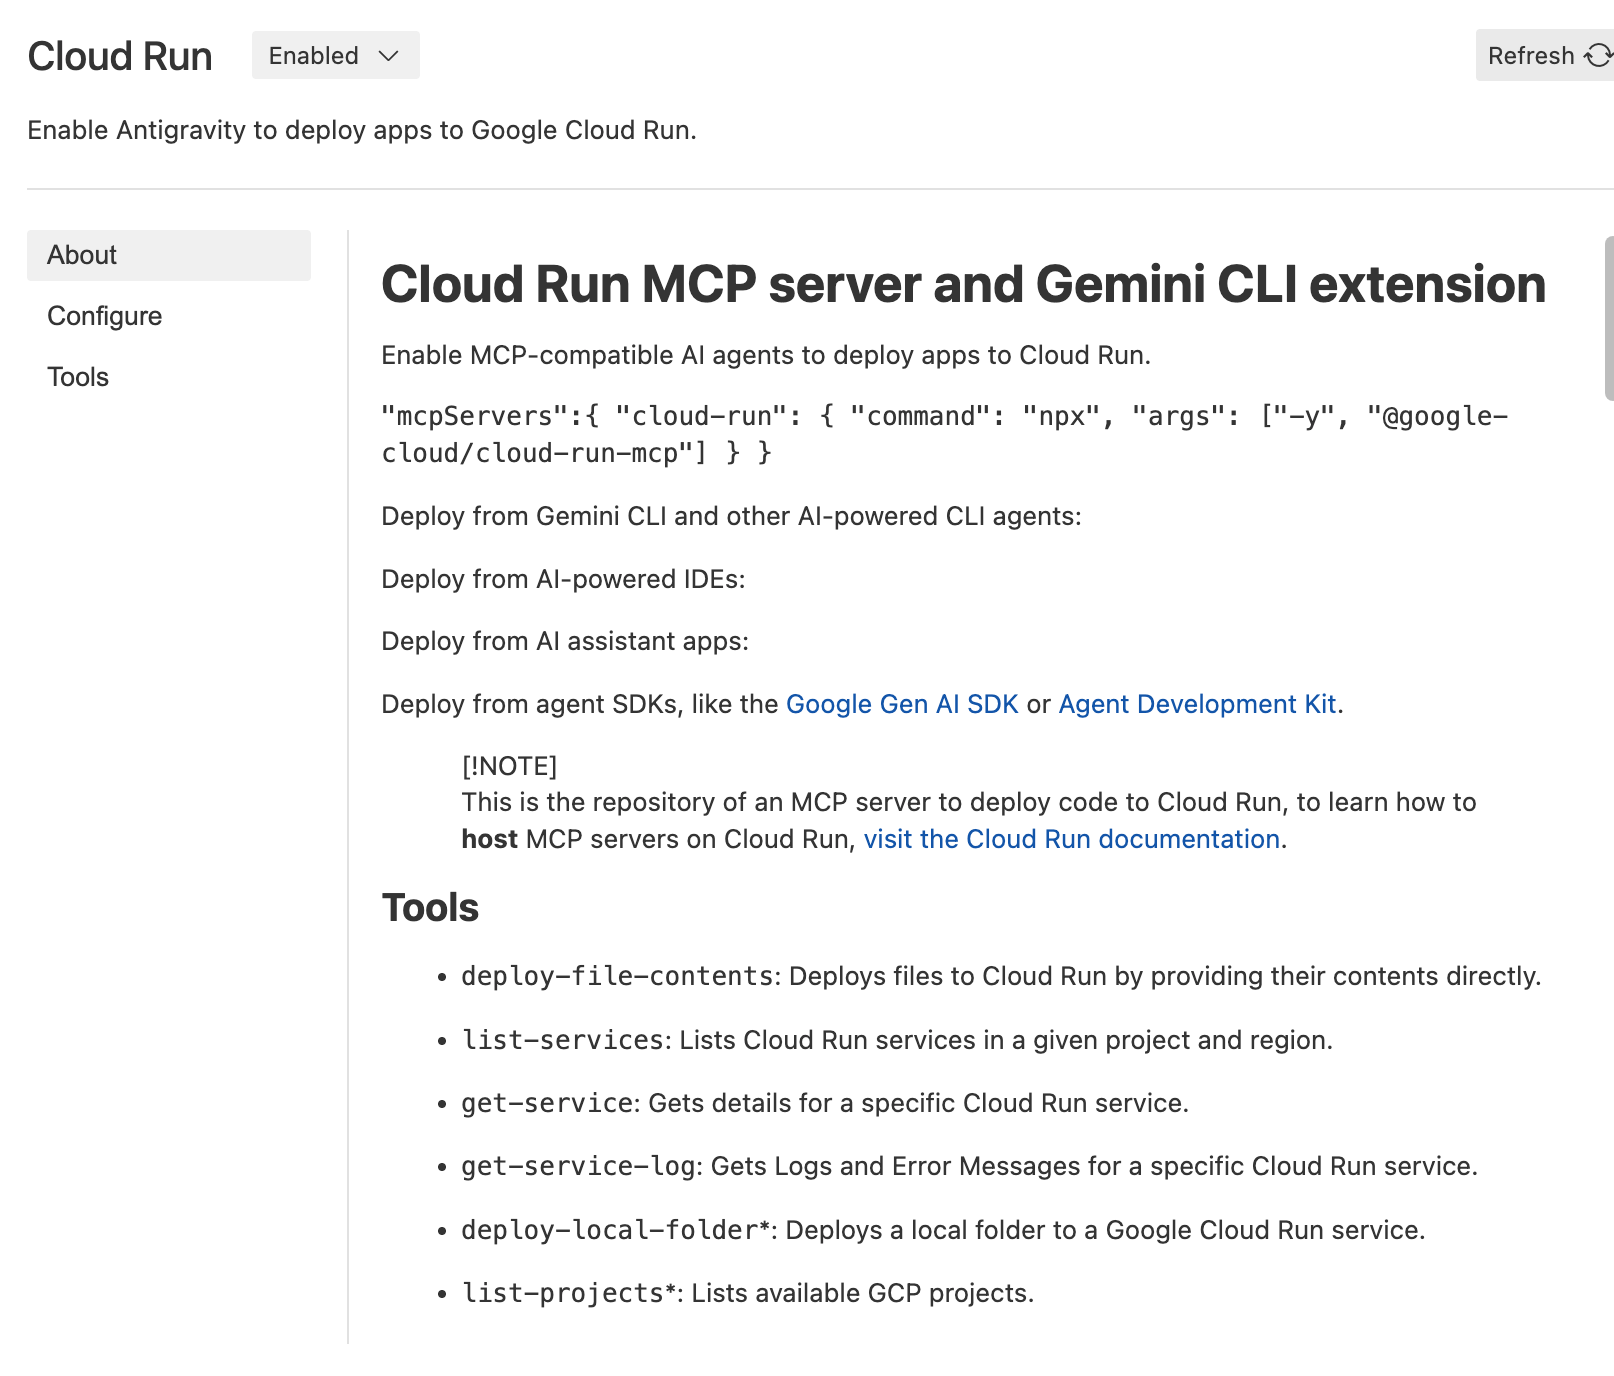 Figure 13: Cloud Run MCP server
 - 👉Go back to the Agent Pane by pressing the back Arrow key next to the MCP Servers title. Now we can start interacting with Google Cloud Run. Enter the following in the Agent Pane. This should automatically use Cloud Run MCP server and show you the list of services running in Cloud Run.
Find me the list of services running in Cloud Run.
- 👉Deploy the app with the following command. You can simply deploy using natural language. Antigravity will automatically use the MCP server to deploy.
Deploy this gallery static web application to cloud run with service name "photogallery". Use nginx and assume nginx will use port 80
- 👉The agent should show you where the app was deployed. Eg. https://photogallery-85469421903.us-central1.run.app . Cloud MCP Server makes it very simple to deploy your web app to cloud run.
10. Clean up
Now let's clean up what we just created.
- 👉Delete the Cloud Run app we just created. Go to the Cloud Run by accessing Cloud Run . You should be able to see the app you created in the previous step. Check on the box beside the app and click the Delete button.
 Figure 38: Deleting the Cloud Run app
11. Conclusion
Congratulations! You have successfully created an app using Google Antigravity following Spec Driven Development practices.You also learned how to deploy the application to Cloud Run. This is a significant achievement that covers the core lifecycle of a modern cloud-native application, providing you with a solid foundation for deploying your own complex systems.
Recap
In this lab you learned to:
- Create multi agent application using Google Antigravity
- Deploy the application to Cloud Run
Useful resources