
1. 概要
このラボでは、AI ワークロードの実行に使用できる AI インフラストラクチャについて説明します。次のものを使用します。
Google Kubernetes Engine(GKE) - 基盤となるコンテナ オーケストレーション プラットフォーム。
GKE マネージド DRANET - 高速インターコネクト ファブリックを TPU Pod に直接割り当てる動的リソース割り当てネットワーキング。
Tensor Processing Unit(TPU) - Google がカスタムビルドしたアクセラレータ チップ。
構成では、カスタム VPC と Autopilot GKE クラスタをデプロイします。マネージド DRANET を有効にするには、ComputeClass とリソース請求テンプレートを作成します。次に、vLLM、Hugging Face、ComputeClass、リソース請求テンプレートを使用するワークロードをデプロイします。最後に、ネットワーキング設定と Gemma 4 モデルへの接続をテストします。
構成では、Terraform、gcloud、kubectl の組み合わせが使用されます。
このラボでは、次のタスクの実行方法について学びます。
- VPC ネットワークを設定する
- GKE Autopilot クラスタを設定する
- ComputeClass と ResourceClaimTemplate を作成します。
- Hugging Face を介して TPU、vLLM、モニタリング、Gemma 4 を実行するデプロイを作成する
- LLM への接続をテストする
このラボでは、次のパターンを作成します。
図 1. 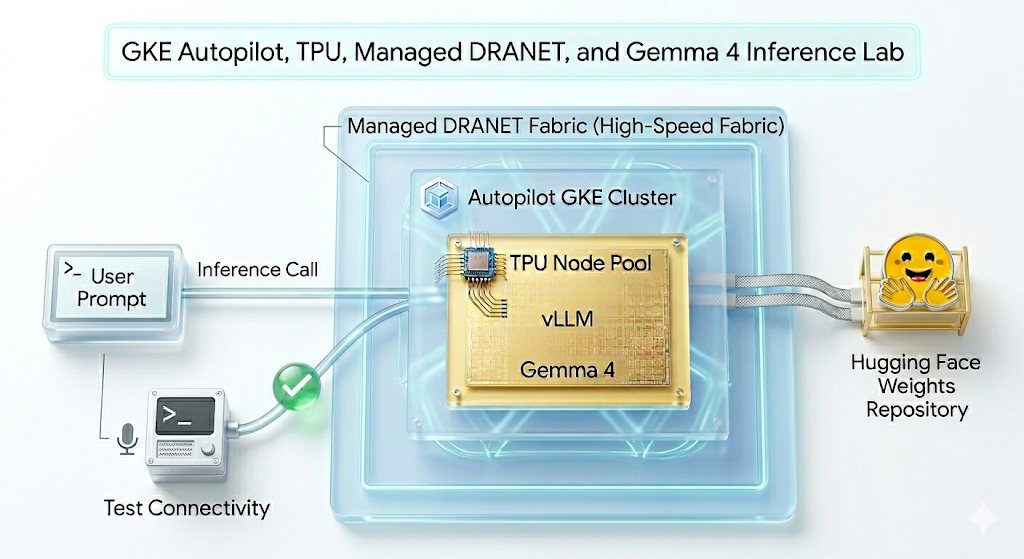
2. Google Cloud サービスの設定
セルフペース型の環境設定
- Google Cloud Console にログインして、プロジェクトを新規作成するか、既存のプロジェクトを再利用します。Gmail アカウントも Google Workspace アカウントもまだお持ちでない場合は、アカウントを作成してください。

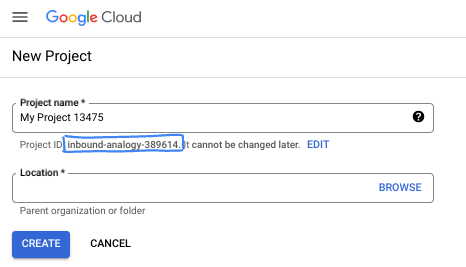
- プロジェクト名は、このプロジェクトの参加者に表示される名称です。Google API では使用されない文字列です。いつでも更新できます。
- プロジェクト ID は、すべての Google Cloud プロジェクトにおいて一意でなければならず、不変です(設定後は変更できません)。Cloud コンソールでは一意の文字列が自動生成されます。通常は、この内容を意識する必要はありません。ほとんどの Codelab では、プロジェクト ID(通常は
PROJECT_IDと識別されます)を参照する必要があります。生成された ID が好みではない場合は、ランダムに別の ID を生成できます。または、ご自身で試して、利用可能かどうかを確認することもできます。このステップ以降は変更できず、プロジェクトを通して同じ ID になります。 - なお、3 つ目の値として、一部の API が使用するプロジェクト番号があります。これら 3 つの値について詳しくは、こちらのドキュメントをご覧ください。
- 次に、Cloud のリソースや API を使用するために、Cloud コンソールで課金を有効にする必要があります。この Codelab の操作をすべて行って、費用が生じたとしても、少額です。このチュートリアルの終了後に請求が発生しないようにリソースをシャットダウンするには、作成したリソースを削除するか、プロジェクトを削除します。Google Cloud の新規ユーザーは、300 米ドル分の無料トライアル プログラムをご利用いただけます。
Cloud Shell を起動する
Google Cloud はノートパソコンからリモートで操作できますが、この Codelab では、Google Cloud Shell(Cloud 上で動作するコマンドライン環境)を使用します。
Google Cloud コンソールで、右上のツールバーにある Cloud Shell アイコンをクリックします。
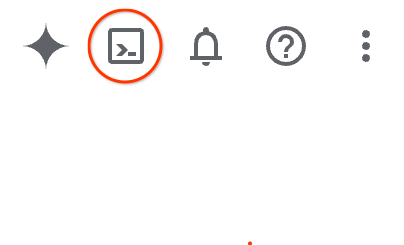
プロビジョニングと環境への接続にはそれほど時間はかかりません。完了すると、次のように表示されます。

この仮想マシンには、必要な開発ツールがすべて用意されています。永続的なホーム ディレクトリが 5 GB 用意されており、Google Cloud で稼働します。そのため、ネットワークのパフォーマンスと認証機能が大幅に向上しています。この Codelab での作業はすべて、ブラウザ内から実行できます。インストールは不要です。
3. Terraform で環境を設定する
このラボを行うには、TPU にアクセスできる必要があります。使用される正確なバージョンは TPU v6e です。
- アクセス権を取得するには、TPU プランのドキュメントに沿って TPU 割り当てを有効にする必要があります。
- 4 個の TPU v6e チップ(単一リージョンの 2x2 スライス)を必要とする小規模なデプロイを使用しています。
ct6e-standard-4t) - Hugging Face トークン: Gemma モデルの重みをダウンロードするには、アクセス トークンが必要です
ファイアウォール ルール、サブネット、Autopilot クラスタを含むカスタム VPC を作成します。クラウド コンソールを開き、使用するプロジェクトを選択します。
- コンソールの右上にある Cloud Shell を開き、Cloud Shell に正しいプロジェクト ID が表示されていることを確認し、アクセスを許可するプロンプトが表示されたら確認します。

gke-auto-tpuという名前のフォルダを作成して、そのフォルダに移動します
mkdir -p gke-auto-tpu && cd gke-auto-tpu
export PROJECT_ID=$(gcloud config get-value project)
echo $PROJECT_ID
- 次に、構成ファイルを追加します。これにより、次の terraform.tfvars、variables.tf、net.tf ファイルが作成されます。
cat << EOF > terraform.tfvars
project_id = "${PROJECT_ID}"
EOF

cat << 'EOF' > variables.tf
variable "project_id" {
  type = string
}

variable "region" {
  type    = string
  default = "us-east5"
}

variable "network_name" {
  type    = string
  default = "tpu-gke-vpc"
}

variable "subnet_name" {
  type    = string
  default = "tpu-sub1"
}

variable "cluster_name" {
  type    = string
  default = "tpu-auto-dra-cluster"
}
EOF

cat << 'EOF' > net.tf
terraform {
  required_version = ">= 1.5.0"
  required_providers {
    google = {
      source  = "hashicorp/google"
      version = "~> 7.32.0"
    }
  }
}

provider "google" {
  project = var.project_id
  region  = var.region
}

resource "google_compute_network" "tpu_vpc" {
  project                 = var.project_id
  name                    = var.network_name
  auto_create_subnetworks = false
  mtu                     = 8896
}

resource "google_compute_subnetwork" "tpu_subnet" {
  project       = var.project_id
  name          = var.subnet_name
  ip_cidr_range = "192.168.100.0/24"
  region        = var.region
  network       = google_compute_network.tpu_vpc.id
}

resource "google_compute_firewall" "allow_ssh" {
  project     = var.project_id
  name        = "${var.network_name}-allow-ssh"
  network     = google_compute_network.tpu_vpc.id
  direction   = "INGRESS"
  priority    = 1000

  allow {
    protocol = "tcp"
    ports    = ["22"]
  }

  source_ranges = ["0.0.0.0/0"]
}

resource "google_compute_firewall" "allow_internal" {
  project     = var.project_id
  name        = "${var.network_name}-allow-internal"
  network     = google_compute_network.tpu_vpc.id
  direction   = "INGRESS"
  priority    = 1000

  allow {
    protocol = "all"
  }

  source_ranges = ["172.16.0.0/12", "192.168.0.0/16"]
}

resource "google_container_cluster" "tpu_autopilot" {
  project  = var.project_id
  name     = var.cluster_name
  location = var.region

  enable_autopilot = true

  network    = google_compute_network.tpu_vpc.id
  subnetwork = google_compute_subnetwork.tpu_subnet.id

  release_channel {
    channel = "RAPID"
  }

  ip_allocation_policy {}

  deletion_protection = false
}
EOF
- gke-auto-tpu ディレクトリに移動し、次のコマンドを実行します。
terraform init作業ディレクトリを初期化します。これは最初の手順で、指定された構成に必要なプロバイダをダウンロードします。terraform plan -outは、インフラストラクチャをデプロイするために Terraform が実行するアクションを示す実行プランを生成します。-outを使用すると、実行プランを名前付きバイナリに保存できます。変更を加えることなく、何が起こるかを確認できます。terraform applyは更新を実行します。
terraform init
terraform plan -out vpc
terraform applyの実行後にデプロイを実行します。保存した実行プランを適用するため、確認を求めるプロンプトが表示されることなくすぐに実行されます。(6 ~ 10 分かかることがあります)
terraform apply vpc
- 設定を確認する
echo -e "\n=== Verifying GKE Autopilot Cluster ==="
gcloud container clusters list --filter="name:tpu-auto-dra-cluster" --project=$PROJECT_ID

echo -e "\n=== Verifying VPC Network ==="
gcloud compute networks list --filter="name:tpu-gke-vpc" --project=$PROJECT_ID

echo -e "\n=== Verifying Subnetwork ==="
gcloud compute networks subnets list --filter="name:tpu-sub1" --project=$PROJECT_ID

echo -e "\n=== Verifying Firewall Rules ==="
gcloud compute firewall-rules list --filter="name~tpu-gke-vpc-allow" --project=$PROJECT_ID
4. コンピューティング クラスとリソース請求テンプレートを作成する
ノードプールの構成を定義するカスタム ComputeClass リソースを作成する必要があります。この例では、TPU v6e チップ(ct6e-standard-4t))とマネージド DRANET ネットワークを使用します。
- 作成したクラスタに接続します(注: リージョンは、クラスタをデプロイしたリージョンに変更してください。)。
gcloud container clusters get-credentials tpu-auto-dra-cluster --region us-east5 --project=$PROJECT_ID
gke-auto-tpuディレクトリに移動し、次のコマンドを実行します。これにより、ComputeClass マニフェストが作成されます。別のリージョンを使用した場合は、ゾーン情報をクラスタのリージョン内のゾーンに変更する必要があります。
cat << 'EOF' > computeclass.yaml
apiVersion: cloud.google.com/v1
kind: ComputeClass
metadata:
  name: dranet-auto
spec:
  nodePoolAutoCreation:
    enabled: true
  nodePoolConfig:
    dra:
      networking:
        enabled: true
  priorities:
  - tpu:
      type: tpu-v6e-slice
      count: 4
      topology: "2x2"
    acceleratorNetworkProfile: auto
    location:
      zones:
      - us-east5-b
EOF
- ComputeClass を作成します。
kubectl apply -f computeclass.yaml

kubectl describe computeclass dranet-auto
gke-auto-tpuディレクトリで、次のコマンドを実行します。これにより、非 RDMA ネットワーク デバイスをサポートする ResourceClaimTemplate マニフェストが作成されます。
cat << 'EOF' > resourceclaimtpu.yaml
apiVersion: resource.k8s.io/v1
kind: ResourceClaimTemplate
metadata:
  name: all-netdev
spec:
  spec:
    devices:
      requests:
      - name: req-netdev
        exactly:
          deviceClassName: netdev.google.com
          allocationMode: All
EOF
- ResourceClaimTemplate を作成します。
kubectl apply -f resourceclaimtpu.yaml

kubectl describe resourceclaimtemplate all-netdev
シークレットを作成する
- このラボでは google/gemma-4-31B-it を使用するため、HF トークンを作成する必要があります。以下の
YOUR_ACTUAL_HUGGING_FACE_TOKENは、実際のトークンに置き換えてください。
export HF_TOKEN="YOUR_ACTUAL_HUGGING_FACE_TOKEN"
gke-auto-tpuディレクトリに移動し、次のコマンドを実行します。
kubectl create secret generic hf-secret --from-literal=hf_token=${HF_TOKEN}

kubectl get secrets hf-secret
5. ワークロード vLLM と Gemma をデプロイする
この設定では、ComputeClass を使用して、必要なハードウェアとネットワーキング(TPU v6e とマネージド DRANET)を自動的にプロビジョニングします。ResourceClaimTemplate を使用して、その高速ネットワークへのアクセスをリクエストするブループリントを定義します。また、スケーリング時に各 Pod の個々のネットワーク クレームを生成することで、それらをバインドする デプロイも定義します。
gke-auto-tpuディレクトリに移動し、次のコマンドを実行します。
cat << 'EOF' > gem4-auto-dra-tpu.yaml
apiVersion: apps/v1
kind: Deployment
metadata:
  name: gem4-dra-auto
spec:
  replicas: 1
  selector:
    matchLabels:
      app: gemma4-tpu
  template:
    metadata:
      labels:
        app: gemma4-tpu
        ai.gke.io/model: gemma-4-31b-it
        ai.gke.io/inference-server: vllm-tpu
    spec:
      dnsPolicy: Default
      resourceClaims:
      - name: netdev-claim
        resourceClaimTemplateName: all-netdev
      containers:
      - name: vllm-tpu-inference
        image: vllm/vllm-tpu:latest
        resources:
          requests:
            cpu: "30"
            memory: "240Gi"
            ephemeral-storage: "100Gi"
            google.com/tpu: "4"
          limits:
            cpu: "30"
            memory: "240Gi"
            ephemeral-storage: "100Gi"
            google.com/tpu: "4"
          claims:
          - name: netdev-claim
        command: ["python3", "-m", "vllm.entrypoints.openai.api_server"]
        args:
        - --model=$(MODEL_ID)
        - --tensor-parallel-size=4
        - --host=0.0.0.0
        - --port=8000
        - --max-model-len=32768
        - --max-num-batched-tokens=8192
        env:
        - name: MODEL_ID
          value: google/gemma-4-31B-it
        - name: HUGGING_FACE
          valueFrom:
            secretKeyRef:
              name: hf-secret
              key: hf_token
        - name: HF_TOKEN
          valueFrom:
            secretKeyRef:
              name: hf-secret
              key: hf_token
        volumeMounts:
        - mountPath: /dev/shm
          name: dshm
        startupProbe:
          httpGet:
            path: /health
            port: 8000
          failureThreshold: 240
          periodSeconds: 10
        livenessProbe:
          httpGet:
            path: /health
            port: 8000
          periodSeconds: 10
        readinessProbe:
          httpGet:
            path: /health
            port: 8000
          periodSeconds: 5
      volumes:
      - name: dshm
        emptyDir:
          medium: Memory
      nodeSelector:
        cloud.google.com/compute-class: dranet-auto
---
apiVersion: v1
kind: Service
metadata:
  name: gem4-dra-service
spec:
  selector:
    app: gemma4-tpu
  type: ClusterIP
  ports:
    - protocol: TCP
      port: 8000
      targetPort: 8000
---
apiVersion: monitoring.googleapis.com/v1
kind: PodMonitoring
metadata:
  name: gem4-monitoring
spec:
  selector:
    matchLabels:
      app: gemma4-tpu
  endpoints:
  - port: 8000
    path: /metrics
    interval: 30s
EOF
- デプロイを作成します。
kubectl apply -f gem4-auto-dra-tpu.yaml
- 完了ステータスをモニタリングするには、次のコマンドを実行します。Pod はノードがプロビジョニングされるまで待機してから続行します。これには 13 分以上かかることがあります。
kubectl get pods

kubectl get deployments

kubectl describe pods -l app=gemma4-tpu

echo "       __|__"
echo "  --@--(_|_)--@--"
echo ""
echo "Waiting for Autopilot to register the TPU node (this takes a few minutes)..."

until kubectl get nodes -l gke.networks.io/accelerator-network-profile=auto -o name | grep -q "node/"; do
  sleep 60
done

echo "TPU Node detected in cluster! Waiting for hardware to provision and become Ready..."

kubectl wait --for=condition=Ready nodes -l gke.networks.io/accelerator-network-profile=auto --timeout=900s
- ノードが作成され、Pod がスケジュールされると、コマンドを実行して Pod のログを表示できます。(追伸: ストリーミング用の **
-f** **フラグを追加できます**)。ログをモニタリングしているときに文字列(APIServer pid=1) INFO: 169.254.4.6:44290 - "GET /health HTTP/1.1" 200 OKが表示された場合、モデルがサービス提供の準備が整うまでに **15 分以上** かかります。
kubectl logs -l app=gemma4-tpu -f | sed -u '\,"GET /health HTTP/1.1" 200 OK,q'
- デプロイが完了したら、高速ネットワーキングが TPU Pod に正しく接続されていることを確認できます。次のコマンドを実行します。
for pod in $(kubectl get pods -l app=gemma4-tpu -o name); do
  echo "=== Checking Networking for $pod ==="
  kubectl exec $pod -- ls /sys/class/net
  echo ""
done
確認する内容: 標準の eth0 とともに、eth1 から ethxx までの追加のインターフェースが表示されます。
これらの追加のインターフェースは、高速マネージド DRANET ファブリックが Pod に正常に接続されていることを確認します。
6. curl を使用して AI モデルを操作する
デプロイした gemma-4-31B モデルを確認するには、サービスからローカルマシンへのポート転送を設定します。
- 現在の Cloud Shell で次のコマンドを実行します。
kubectl port-forward service/gem4-dra-service 8000:8000 &
- 次に、同じプロジェクトの追加の Cloud Shell ウィンドウを開き、
curlを使用してモデルとチャットします。このコマンドは、プロンプトを送信し、出力をターミナルに直接ストリーミングします。
time curl -sN http://127.0.0.1:8000/v1/chat/completions \
  -X POST \
  -H "Content-Type: application/json" \
  -d '{
    "model": "google/gemma-4-31B-it",
    "messages": [
      {
        "role": "user",
        "content": "How can GKE help deployment of AI workloads? Provide concise information. Keep the explanation under 300 words."
      }
    ],
    "max_tokens": 1024,
    "temperature": 0.7,
    "stream": true,
    "stream_options": {"include_usage": true}
  }' | grep '^data:' | sed 's/^data: //' | grep -v '\[DONE\]' | jq --unbuffered -j '
    (.choices[0].delta.content // empty),
    if .usage then "\n\n--- Usage ---\nPrompt: \(.usage.prompt_tokens)\nCompletion: \(.usage.completion_tokens)\nTotal: \(.usage.total_tokens)\n" else empty end
  '
- モデルからのレスポンスを確認する
オブザーバビリティ
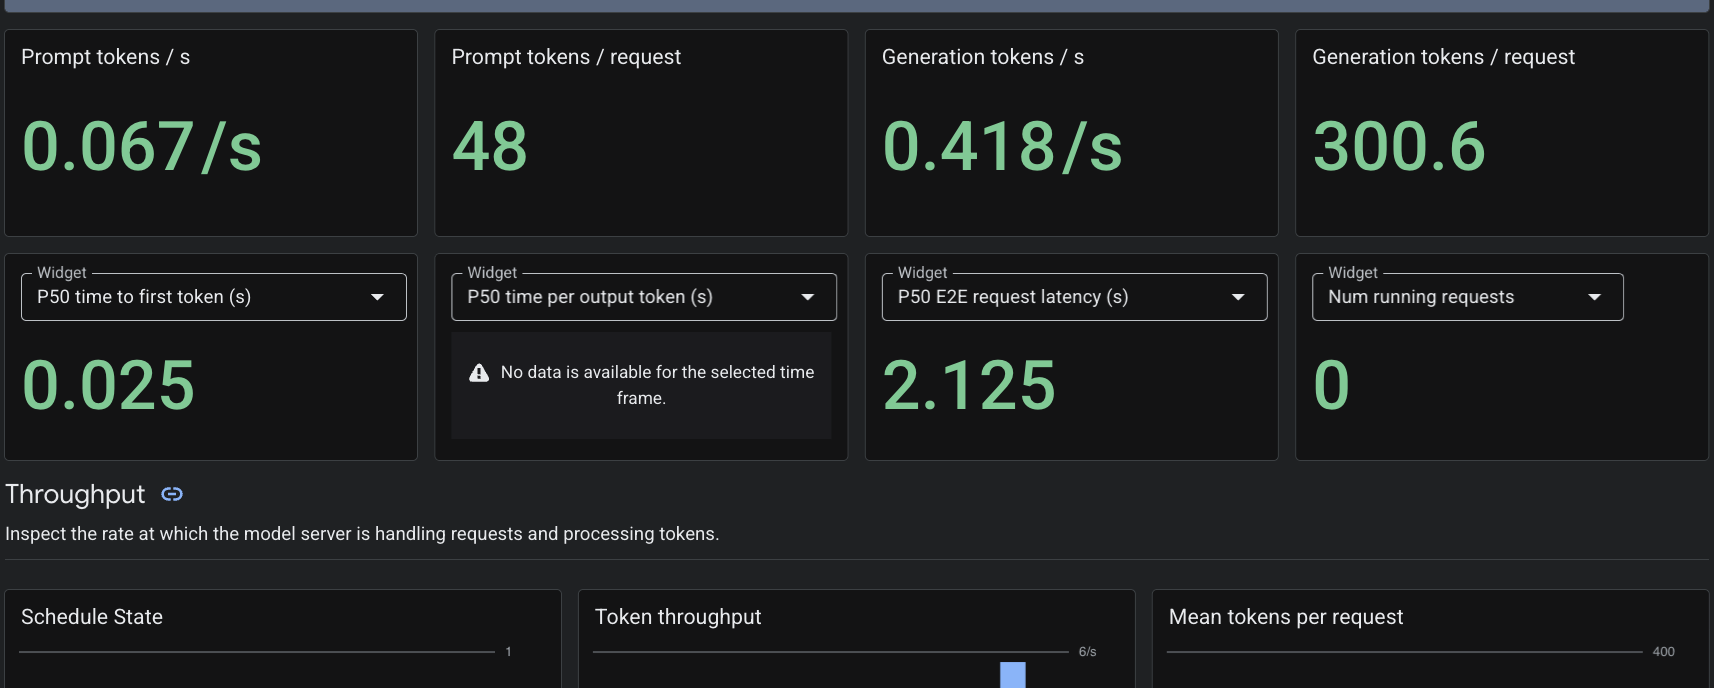
PodMonitoring カスタム リソースを適用したため、Cloud Monitoring はポート 8000 の vLLM コンテナから指標をスクレイピングします。Google Cloud コンソールの [Monitoring] -> [ダッシュボード] に移動すると、トークン生成レイテンシ、キューの長さ、KV キャッシュ使用量などの指標をネイティブに表示できます。
7. クリーンアップ
- 次のコマンドを実行して、リソースを削除します。
cd ~/gke-auto-tpu

kubectl delete -f gem4-auto-dra-tpu.yaml
kubectl delete -f resourceclaimtpu.yaml
kubectl delete -f computeclass.yaml
kubectl delete secret hf-secret
- 次のコマンドでインフラストラクチャをクリーンアップし、
yesと入力して確定します。
terraform destroy
8. 完了
GKE Autopilot にマネージド DRANET 環境を正常にデプロイし、TPU v6e ハードウェアを動的にプロビジョニングし、vLLM を使用して 310 億個のパラメータを含む Gemma 4 モデルをサービングしました。
GKE Autopilot を使用すると、Kubernetes が基盤となるノードのプロビジョニングとインフラストラクチャの管理を処理するため、AI ワークロードのデプロイに集中できます。
次のステップと詳細情報
GKE ネットワーキングの詳細を確認する。
次のラボを受講する
Google Cloud でクエストを続けるか、その他の Google Cloud ラボをご確認ください。