
1. ภาพรวม
แล็บนี้จะแนะนำให้คุณรู้จักกับ AI Infrastructure ที่ใช้เรียกใช้ภาระงาน AI ได้ โดยคุณจะได้ทำงานกับสิ่งต่อไปนี้
Google Kubernetes Engine (GKE) - แพลตฟอร์มการจัดการเป็นกลุ่มคอนเทนเนอร์พื้นฐาน
GKE managed DRANET - ระบบเครือข่ายการจัดสรรทรัพยากรแบบไดนามิกที่กำหนดผ้าอินเทอร์คอนเน็กต์ความเร็วสูงให้กับพ็อด TPU โดยตรง
Tensor Processing Unit (TPU) - ชิปตัวเร่งความเร็วที่ Google สร้างขึ้นเอง
หากต้องการกำหนดค่า คุณจะต้องทำให้ VPC ที่กำหนดเองและคลัสเตอร์ GKE Autopilot ใช้งานได้ หากต้องการเปิดใช้ DRANET ที่มีการจัดการ คุณจะต้องสร้าง ComputeClass และเทมเพลตการอ้างสิทธิ์ทรัพยากร จากนั้นทำให้ภาระงานที่ใช้ vLLM, Hugging Face, ComputeClass และ เทมเพลตการอ้างสิทธิ์ทรัพยากร ใช้งานได้ สุดท้าย คุณจะทดสอบการตั้งค่าเครือข่ายและการเชื่อมต่อกับโมเดล Gemma 4
การกำหนดค่าจะใช้การผสมผสานระหว่าง Terraform, gcloud และ kubectl
ในแล็บนี้ คุณจะได้เรียนรู้วิธีทำงานต่อไปนี้
- ตั้งค่าเครือข่าย VPC
- ตั้งค่าคลัสเตอร์ GKE Autopilot
- สร้าง ComputeClass และ ResourceClaimTemplate
- สร้างการทำให้ใช้งานได้ซึ่งเรียกใช้ TPU, vLLM, การตรวจสอบ และ Gemma 4 ผ่าน Hugging Face
- ทดสอบการเชื่อมต่อกับ LLM
ในแล็บนี้ คุณจะได้สร้างรูปแบบต่อไปนี้
Figure1. 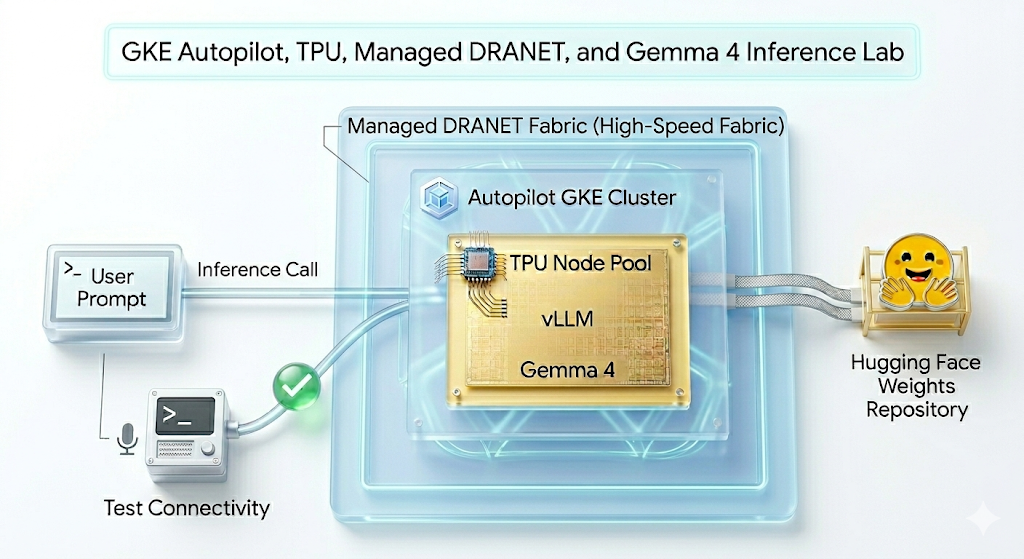
2. การตั้งค่าบริการ Google Cloud
การตั้งค่าสภาพแวดล้อมแบบทำตามคำแนะนำ
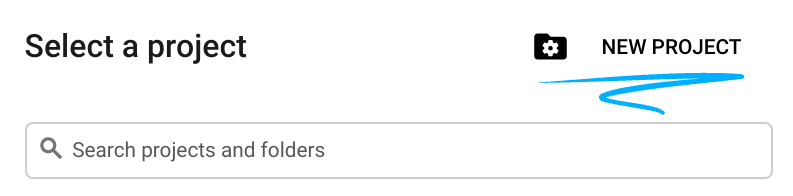
- ลงชื่อเข้าใช้ คอนโซล Google Cloud แล้วสร้างโปรเจ็กต์ใหม่หรือใช้โปรเจ็กต์ที่มีอยู่ หากยังไม่มีบัญชี Gmail หรือ Google Workspace คุณต้อง สร้างบัญชี

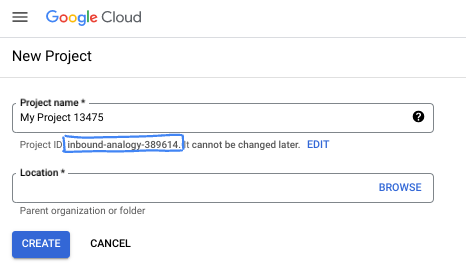
- ชื่อโปรเจ็กต์ คือชื่อที่แสดงสำหรับผู้เข้าร่วมโปรเจ็กต์นี้ ซึ่งเป็นสตริงอักขระที่ Google APIs ไม่ได้ใช้ คุณอัปเดตชื่อนี้ได้ทุกเมื่อ
- รหัสโปรเจ็กต์ ไม่ซ้ำกันในโปรเจ็กต์ Google Cloud ทั้งหมดและเปลี่ยนแปลงไม่ได้ (เปลี่ยนไม่ได้หลังจากตั้งค่าแล้ว) Cloud Console จะสร้างสตริงที่ไม่ซ้ำกันโดยอัตโนมัติ ซึ่งโดยปกติแล้วคุณไม่จำเป็นต้องสนใจว่าสตริงนั้นคืออะไร ใน Codelab ส่วนใหญ่ คุณจะต้องอ้างอิงรหัสโปรเจ็กต์ (โดยทั่วไปจะระบุเป็น
PROJECT_ID) หากไม่ชอบรหัสที่สร้างขึ้น คุณอาจสร้างรหัสแบบสุ่มอีกรหัสหนึ่ง หรือจะลองใช้รหัสของคุณเองและดูว่ารหัสนั้นพร้อมใช้งานหรือไม่ก็ได้ รหัสนี้จะเปลี่ยนแปลงไม่ได้หลังจากขั้นตอนนี้และจะคงอยู่ตลอดระยะเวลาของโปรเจ็กต์ - โปรดทราบว่ามีค่าที่ 3 คือหมายเลขโปรเจ็กต์ ซึ่ง API บางรายการใช้ ดูข้อมูลเพิ่มเติมเกี่ยวกับค่าทั้ง 3 นี้ได้ใน เอกสารประกอบ
- จากนั้นคุณจะต้อง เปิดใช้การเรียกเก็บเงิน ใน Cloud Console เพื่อใช้ทรัพยากร/API ของระบบคลาวด์ การทำตาม Codelab นี้จะไม่เสียค่าใช้จ่ายมากนัก หรืออาจไม่เสียค่าใช้จ่ายเลย หากต้องการปิดทรัพยากรเพื่อหลีกเลี่ยงการเรียกเก็บเงินนอกเหนือจากบทแนะนำนี้ คุณสามารถลบทรัพยากรที่สร้างขึ้นหรือลบโปรเจ็กต์ ผู้ใช้ Google Cloud รายใหม่มีสิทธิ์เข้าร่วมโปรแกรม ช่วงทดลองใช้ฟรี$300 USD
เริ่มต้น Cloud Shell
แม้ว่าคุณจะใช้งาน Google Cloud จากระยะไกลผ่านแล็ปท็อปได้ แต่ใน Codelab นี้คุณจะได้ใช้ Google Cloud Shell ซึ่งเป็นสภาพแวดล้อมบรรทัดคำสั่งที่ทำงานในระบบคลาวด์
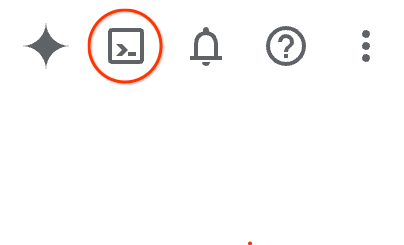
จาก คอนโซล Google Cloud ให้คลิกไอคอน Cloud Shell ในแถบเครื่องมือด้านขวาบน
ระบบจะจัดสรรและเชื่อมต่อกับสภาพแวดล้อมภายในเวลาไม่กี่วินาที เมื่อเสร็จแล้ว คุณควรเห็นข้อความคล้ายกับข้อความต่อไปนี้

เครื่องเสมือนนี้โหลดเครื่องมือสำหรับนักพัฒนาซอฟต์แวร์ทั้งหมดที่คุณต้องการ โดยมีไดเรกทอรีหลักขนาด 5 GB ที่คงอยู่ และทำงานบน Google Cloud ซึ่งช่วยเพิ่มประสิทธิภาพเครือข่ายและการตรวจสอบสิทธิ์ได้อย่างมาก คุณสามารถทำงานทั้งหมดใน Codelab นี้ได้ภายในเบราว์เซอร์ โดยไม่จำเป็นต้องติดตั้งสิ่งใด
3. ตั้งค่าสภาพแวดล้อมด้วย Terraform
หากต้องการทำแล็บนี้ คุณต้องมีสิทธิ์เข้าถึง TPU โดยเวอร์ชันที่ใช้คือ TPU v6e
- คุณควรทำตามเอกสารประกอบแผน TPU และ เปิดใช้โควต้า TPU เพื่อรับสิทธิ์เข้าถึง
- เราใช้การทำให้ใช้งานได้ขนาดเล็กที่ต้องใช้ชิป TPU v6e 4 รายการ (
ct6e-standard-4t)ซึ่งจะเป็น สไลซ์ 2x2 ในภูมิภาคเดียว - โทเค็น Hugging Face: คุณต้องมี โทเค็นเพื่อการเข้าถึง เพื่อดาวน์โหลดน้ำหนักโมเดล Gemma
เราจะสร้าง VPC ที่กำหนดเองพร้อมกฎไฟร์วอลล์ ซับเน็ต แล้วจึงสร้างคลัสเตอร์ Autopilot เปิด Cloud Console แล้วเลือกโปรเจ็กต์ที่จะใช้
- เปิด Cloud Shell ที่ด้านบนขวาของคอนโซล ตรวจสอบว่าคุณเห็นรหัสโปรเจ็กต์ ที่ถูกต้องใน Cloud Shell และยืนยันข้อความแจ้งเพื่ออนุญาตการเข้าถึง

- สร้างโฟลเดอร์ชื่อ
gke-auto-tpuแล้วย้ายไปยังโฟลเดอร์ดังกล่าว
mkdir -p gke-auto-tpu && cd gke-auto-tpu
export PROJECT_ID=$(gcloud config get-value project)
echo $PROJECT_ID
- ตอนนี้ให้เพิ่มไฟล์การกำหนดค่า ซึ่งจะสร้างไฟล์ terraform.tfvars , variables.tf, net.tf ดังนี้
cat << EOF > terraform.tfvars
project_id = "${PROJECT_ID}"
EOF

cat << 'EOF' > variables.tf
variable "project_id" {
  type = string
}

variable "region" {
  type    = string
  default = "us-east5"
}

variable "network_name" {
  type    = string
  default = "tpu-gke-vpc"
}

variable "subnet_name" {
  type    = string
  default = "tpu-sub1"
}

variable "cluster_name" {
  type    = string
  default = "tpu-auto-dra-cluster"
}
EOF

cat << 'EOF' > net.tf
terraform {
  required_version = ">= 1.5.0"
  required_providers {
    google = {
      source  = "hashicorp/google"
      version = "~> 7.32.0"
    }
  }
}

provider "google" {
  project = var.project_id
  region  = var.region
}

resource "google_compute_network" "tpu_vpc" {
  project                 = var.project_id
  name                    = var.network_name
  auto_create_subnetworks = false
  mtu                     = 8896
}

resource "google_compute_subnetwork" "tpu_subnet" {
  project       = var.project_id
  name          = var.subnet_name
  ip_cidr_range = "192.168.100.0/24"
  region        = var.region
  network       = google_compute_network.tpu_vpc.id
}

resource "google_compute_firewall" "allow_ssh" {
  project     = var.project_id
  name        = "${var.network_name}-allow-ssh"
  network     = google_compute_network.tpu_vpc.id
  direction   = "INGRESS"
  priority    = 1000

  allow {
    protocol = "tcp"
    ports    = ["22"]
  }

  source_ranges = ["0.0.0.0/0"]
}

resource "google_compute_firewall" "allow_internal" {
  project     = var.project_id
  name        = "${var.network_name}-allow-internal"
  network     = google_compute_network.tpu_vpc.id
  direction   = "INGRESS"
  priority    = 1000

  allow {
    protocol = "all"
  }

  source_ranges = ["172.16.0.0/12", "192.168.0.0/16"]
}

resource "google_container_cluster" "tpu_autopilot" {
  project  = var.project_id
  name     = var.cluster_name
  location = var.region

  enable_autopilot = true

  network    = google_compute_network.tpu_vpc.id
  subnetwork = google_compute_subnetwork.tpu_subnet.id

  release_channel {
    channel = "RAPID"
  }

  ip_allocation_policy {}

  deletion_protection = false
}
EOF
- ตรวจสอบว่าคุณอยู่ในไดเรกทอรี gke-auto-tpu แล้วเรียกใช้คำสั่งต่อไปนี้
terraform initเริ่มต้นไดเรกทอรีการทำงาน นี่เป็นขั้นตอนแรกและจะดาวน์โหลดผู้ให้บริการที่จำเป็นสำหรับการกำหนดค่าที่ระบุterraform plan -outสร้างแผนการดำเนินการ ซึ่งแสดงการดำเนินการที่ Terraform จะทำเพื่อทำให้โครงสร้างพื้นฐานของคุณใช้งานได้ แฟล็ก-outช่วยให้คุณบันทึกแผนการดำเนินการเป็นไบนารีที่มีชื่อได้ คุณจะเห็นสิ่งที่เกิดขึ้นโดยไม่ต้องทำการเปลี่ยนแปลงterraform applyเรียกใช้การอัปเดต
terraform init
terraform plan -out vpc
- ตอนนี้ให้เรียกใช้การทำให้ใช้งานได้หลังจากเรียกใช้
terraform applyเนื่องจากคุณกำลังใช้แผนการดำเนินการที่บันทึกไว้ ระบบจึงจะดำเนินการทันทีโดยไม่แจ้งให้ยืนยัน (การดำเนินการนี้อาจใช้เวลา 6-10 นาที)
terraform apply vpc
- ตรวจสอบการตั้งค่า
echo -e "\n=== Verifying GKE Autopilot Cluster ==="
gcloud container clusters list --filter="name:tpu-auto-dra-cluster" --project=$PROJECT_ID

echo -e "\n=== Verifying VPC Network ==="
gcloud compute networks list --filter="name:tpu-gke-vpc" --project=$PROJECT_ID

echo -e "\n=== Verifying Subnetwork ==="
gcloud compute networks subnets list --filter="name:tpu-sub1" --project=$PROJECT_ID

echo -e "\n=== Verifying Firewall Rules ==="
gcloud compute firewall-rules list --filter="name~tpu-gke-vpc-allow" --project=$PROJECT_ID
4. สร้าง ComputeClass และเทมเพลตการอ้างสิทธิ์ทรัพยากร
เราต้องสร้างทรัพยากร ComputeClass ที่กำหนดเองเพื่อกำหนดการกำหนดค่าสำหรับ Node Pool ในกรณีนี้ เราจะใช้ชิป TPU v6e (ct6e-standard-4t) และเครือข่าย DRANET ที่มีการจัดการ
- เชื่อมต่อกับคลัสเตอร์ที่คุณสร้างขึ้น (ป.ล. เปลี่ยนภูมิภาคเป็นภูมิภาคที่คุณทำให้คลัสเตอร์ใช้งานได้)
gcloud container clusters get-credentials tpu-auto-dra-cluster --region us-east5 --project=$PROJECT_ID
- ตรวจสอบว่าคุณอยู่ในไดเรกทอรี
gke-auto-tpuแล้วเรียกใช้คำสั่งต่อไปนี้ ซึ่งจะสร้างไฟล์ Manifest ของ ComputeClass โปรดทราบว่าหากคุณใช้ภูมิภาคอื่น คุณต้องเปลี่ยนข้อมูลโซนเป็นโซนภายในภูมิภาคของคลัสเตอร์
cat << 'EOF' > computeclass.yaml
apiVersion: cloud.google.com/v1
kind: ComputeClass
metadata:
  name: dranet-auto
spec:
  nodePoolAutoCreation:
    enabled: true
  nodePoolConfig:
    dra:
      networking:
        enabled: true
  priorities:
  - tpu:
      type: tpu-v6e-slice
      count: 4
      topology: "2x2"
    acceleratorNetworkProfile: auto
    location:
      zones:
      - us-east5-b
EOF
- ตอนนี้ให้สร้าง ComputeClass
kubectl apply -f computeclass.yaml

kubectl describe computeclass dranet-auto
- เรียกใช้คำสั่งต่อไปนี้ในไดเรกทอรี
gke-auto-tpuซึ่งจะสร้างไฟล์ Manifest ของ ResourceClaimTemplate ที่รองรับอุปกรณ์เครือข่ายที่ไม่ใช่ RDMA
cat << 'EOF' > resourceclaimtpu.yaml
apiVersion: resource.k8s.io/v1
kind: ResourceClaimTemplate
metadata:
  name: all-netdev
spec:
  spec:
    devices:
      requests:
      - name: req-netdev
        exactly:
          deviceClassName: netdev.google.com
          allocationMode: All
EOF
- ตอนนี้ให้สร้าง ResourceClaimTemplate
kubectl apply -f resourceclaimtpu.yaml

kubectl describe resourceclaimtemplate all-netdev
สร้างข้อมูลลับ
- แล็บนี้ใช้ google/gemma-4-31B-it ดังนั้นคุณจะต้อง สร้างโทเค็น HF แทนที่
YOUR_ACTUAL_HUGGING_FACE_TOKENด้านล่างด้วยโทเค็นจริง
export HF_TOKEN="YOUR_ACTUAL_HUGGING_FACE_TOKEN"
- ตรวจสอบว่าคุณอยู่ในไดเรกทอรี
gke-auto-tpuแล้วเรียกใช้คำสั่งต่อไปนี้
kubectl create secret generic hf-secret --from-literal=hf_token=${HF_TOKEN}

kubectl get secrets hf-secret
5. ทำให้ภาระงาน vLLM และ Gemma ใช้งานได้
การตั้งค่านี้ใช้ ComputeClass เพื่อจัดสรรฮาร์ดแวร์และเครือข่ายที่จำเป็น (TPU v6e และ DRANET ที่มีการจัดการ) โดยอัตโนมัติ และใช้ ResourceClaimTemplate เพื่อกำหนดพิมพ์เขียวสำหรับการขอสิทธิ์เข้าถึงเครือข่ายความเร็วสูงดังกล่าว รวมถึงการทำให้ใช้งานได้ ซึ่งผูกทรัพยากรเหล่านี้เข้าด้วยกันโดยการสร้างการอ้างสิทธิ์เครือข่ายแต่ละรายการสำหรับพ็อด แต่ละรายการเมื่อมีการปรับขนาด
- ตรวจสอบว่าคุณอยู่ในไดเรกทอรี
gke-auto-tpuแล้วเรียกใช้คำสั่งต่อไปนี้
cat << 'EOF' > gem4-auto-dra-tpu.yaml
apiVersion: apps/v1
kind: Deployment
metadata:
  name: gem4-dra-auto
spec:
  replicas: 1
  selector:
    matchLabels:
      app: gemma4-tpu
  template:
    metadata:
      labels:
        app: gemma4-tpu
        ai.gke.io/model: gemma-4-31b-it
        ai.gke.io/inference-server: vllm-tpu
    spec:
      dnsPolicy: Default
      resourceClaims:
      - name: netdev-claim
        resourceClaimTemplateName: all-netdev
      containers:
      - name: vllm-tpu-inference
        image: vllm/vllm-tpu:latest
        resources:
          requests:
            cpu: "30"
            memory: "240Gi"
            ephemeral-storage: "100Gi"
            google.com/tpu: "4"
          limits:
            cpu: "30"
            memory: "240Gi"
            ephemeral-storage: "100Gi"
            google.com/tpu: "4"
          claims:
          - name: netdev-claim
        command: ["python3", "-m", "vllm.entrypoints.openai.api_server"]
        args:
        - --model=$(MODEL_ID)
        - --tensor-parallel-size=4
        - --host=0.0.0.0
        - --port=8000
        - --max-model-len=32768
        - --max-num-batched-tokens=8192
        env:
        - name: MODEL_ID
          value: google/gemma-4-31B-it
        - name: HUGGING_FACE
          valueFrom:
            secretKeyRef:
              name: hf-secret
              key: hf_token
        - name: HF_TOKEN
          valueFrom:
            secretKeyRef:
              name: hf-secret
              key: hf_token
        volumeMounts:
        - mountPath: /dev/shm
          name: dshm
        startupProbe:
          httpGet:
            path: /health
            port: 8000
          failureThreshold: 240
          periodSeconds: 10
        livenessProbe:
          httpGet:
            path: /health
            port: 8000
          periodSeconds: 10
        readinessProbe:
          httpGet:
            path: /health
            port: 8000
          periodSeconds: 5
      volumes:
      - name: dshm
        emptyDir:
          medium: Memory
      nodeSelector:
        cloud.google.com/compute-class: dranet-auto
---
apiVersion: v1
kind: Service
metadata:
  name: gem4-dra-service
spec:
  selector:
    app: gemma4-tpu
  type: ClusterIP
  ports:
    - protocol: TCP
      port: 8000
      targetPort: 8000
---
apiVersion: monitoring.googleapis.com/v1
kind: PodMonitoring
metadata:
  name: gem4-monitoring
spec:
  selector:
    matchLabels:
      app: gemma4-tpu
  endpoints:
  - port: 8000
    path: /metrics
    interval: 30s
EOF
- สร้างการทำให้ใช้งานได้
kubectl apply -f gem4-auto-dra-tpu.yaml
- หากต้องการตรวจสอบสถานะความสมบูรณ์ ให้เรียกใช้คำสั่งต่อไปนี้ พ็อดจะรอจนกว่าระบบจะจัดสรรโหนดก่อนจึงจะดำเนินการต่อได้ ซึ่งอาจใช้เวลา 13 นาทีขึ้นไป
kubectl get pods

kubectl get deployments

kubectl describe pods -l app=gemma4-tpu

echo "       __|__"
echo "  --@--(_|_)--@--"
echo ""
echo "Waiting for Autopilot to register the TPU node (this takes a few minutes)..."

until kubectl get nodes -l gke.networks.io/accelerator-network-profile=auto -o name | grep -q "node/"; do
  sleep 60
done

echo "TPU Node detected in cluster! Waiting for hardware to provision and become Ready..."

kubectl wait --for=condition=Ready nodes -l gke.networks.io/accelerator-network-profile=auto --timeout=900s
- หลังจากสร้างโหนดและกำหนดเวลาให้พ็อดทำงานแล้ว คุณสามารถเรียกใช้คำสั่งเพื่อดูบันทึกของพ็อดได้ (ป.ล. คุณสามารถเพิ่มแฟล็ก **
-f** **สำหรับการสตรีม**) การดำเนินการนี้จะใช้เวลาไม่เกิน **15 นาทีขึ้นไป** หากคุณดูบันทึก เมื่อเห็นสตริง(APIServer pid=1) INFO: 169.254.4.6:44290 - "GET /health HTTP/1.1" 200 OKแสดงว่าโมเดลพร้อมให้บริการแล้ว
kubectl logs -l app=gemma4-tpu -f | sed -u '\,"GET /health HTTP/1.1" 200 OK,q'
- เมื่อการทำให้ใช้งานได้พร้อมใช้งานแล้ว คุณสามารถยืนยันว่าเครือข่ายความเร็วสูงเชื่อมต่อกับพ็อด TPU อย่างถูกต้อง โดยเรียกใช้คำสั่งต่อไปนี้
for pod in $(kubectl get pods -l app=gemma4-tpu -o name); do
  echo "=== Checking Networking for $pod ==="
  kubectl exec $pod -- ls /sys/class/net
  echo ""
done
สิ่งที่ควรสังเกต: คุณควรเห็น eth0 มาตรฐานพร้อมกับอินเทอร์เฟซเพิ่มเติม เช่น eth1 ถึง ethxx
อินเทอร์เฟซเพิ่มเติมเหล่านี้ยืนยันว่าผ้า DRANET ที่มีการจัดการความเร็วสูงเชื่อมต่อกับพ็อดเรียบร้อยแล้ว
6. โต้ตอบกับโมเดล AI โดยใช้ curl
หากต้องการยืนยันโมเดล gemma-4-31B ที่คุณทำให้ใช้งานได้ ให้ตั้งค่าการส่งต่อพอร์ตจากบริการไปยังเครื่องในเครื่อง
- เรียกใช้คำสั่งนี้ใน Cloud Shell ปัจจุบัน
kubectl port-forward service/gem4-dra-service 8000:8000 &
- ตอนนี้ให้เปิดหน้าต่าง Cloud Shell เพิ่มเติมสำหรับโปรเจ็กต์เดียวกันเพื่อแชทกับโมเดลโดยใช้
curlคำสั่งนี้จะส่งข้อความแจ้งและสตรีมเอาต์พุตไปยังเทอร์มินัลโดยตรง
time curl -sN http://127.0.0.1:8000/v1/chat/completions \
  -X POST \
  -H "Content-Type: application/json" \
  -d '{
    "model": "google/gemma-4-31B-it",
    "messages": [
      {
        "role": "user",
        "content": "How can GKE help deployment of AI workloads? Provide concise information. Keep the explanation under 300 words."
      }
    ],
    "max_tokens": 1024,
    "temperature": 0.7,
    "stream": true,
    "stream_options": {"include_usage": true}
  }' | grep '^data:' | sed 's/^data: //' | grep -v '\[DONE\]' | jq --unbuffered -j '
    (.choices[0].delta.content // empty),
    if .usage then "\n\n--- Usage ---\nPrompt: \(.usage.prompt_tokens)\nCompletion: \(.usage.completion_tokens)\nTotal: \(.usage.total_tokens)\n" else empty end
  '
- ดูคำตอบจากโมเดล
ความสามารถในการสังเกต
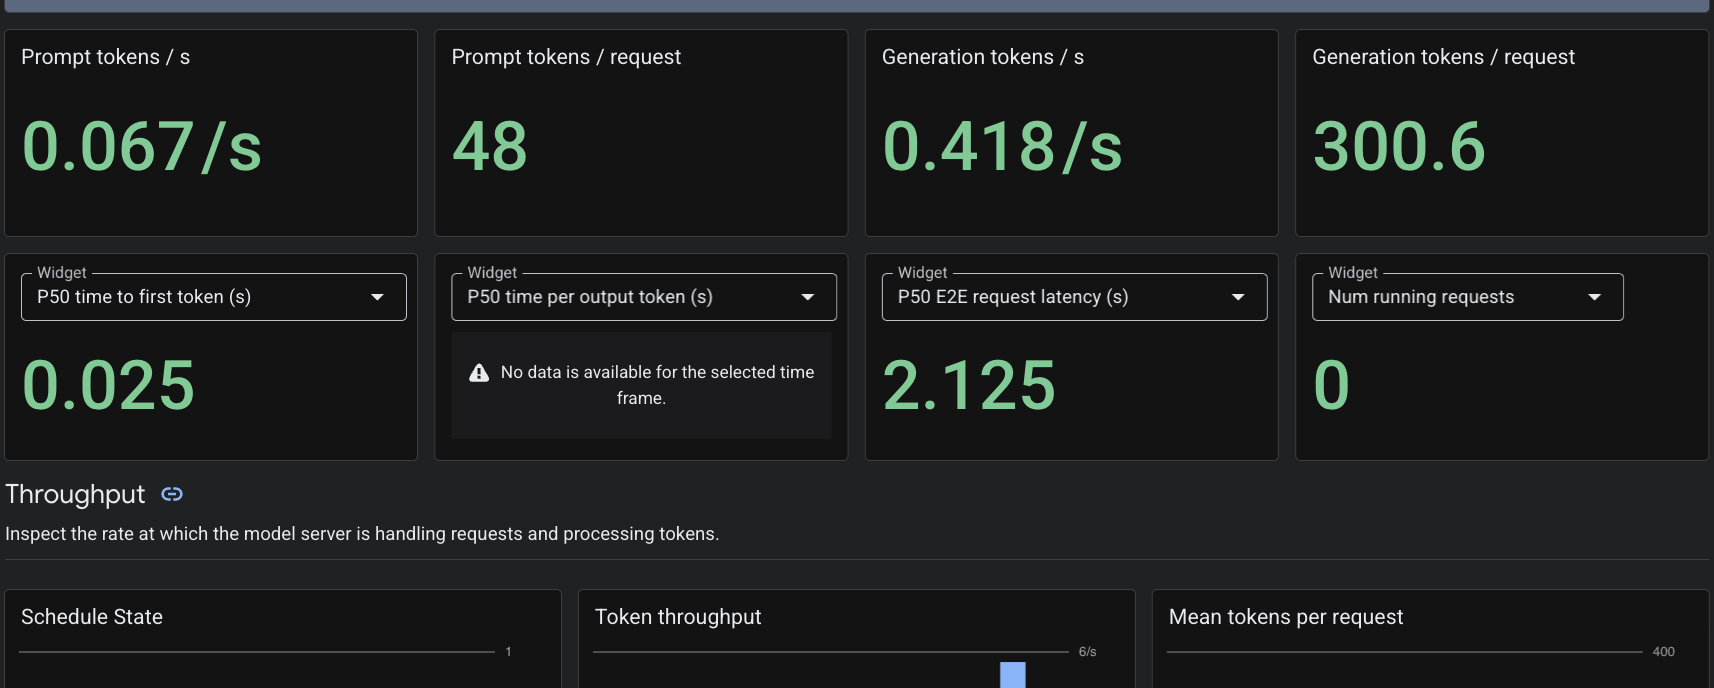
เนื่องจากเราใช้ทรัพยากรที่กำหนดเอง PodMonitoring Cloud Monitoring จะดึงข้อมูลเมตริกจากคอนเทนเนอร์ vLLM ในพอร์ต 8000 คุณสามารถไปที่ คอนโซล Google Cloud Monitoring -> Dashboards เพื่อดูเมตริก เช่น เวลาในการตอบสนองของการสร้างโทเค็น ความยาวคิว และการใช้แคช KV ได้โดยตรง
7. ล้างข้อมูล
- ลบทรัพยากรโดยเรียกใช้คำสั่งต่อไปนี้
cd ~/gke-auto-tpu

kubectl delete -f gem4-auto-dra-tpu.yaml
kubectl delete -f resourceclaimtpu.yaml
kubectl delete -f computeclass.yaml
kubectl delete secret hf-secret
- ล้างข้อมูลโครงสร้างพื้นฐานโดยใช้คำสั่งต่อไปนี้ แล้วพิมพ์
yesเพื่อยืนยัน
terraform destroy
8. ขอแสดงความยินดี
คุณทำให้สภาพแวดล้อม DRANET ที่มีการจัดการใช้งานได้บน GKE Autopilot จัดสรรฮาร์ดแวร์ TPU v6e แบบไดนามิก และให้บริการโมเดล Gemma 4 ที่มีพารามิเตอร์จำนวนมากถึง 31 พันล้านรายการโดยใช้ vLLM ได้สำเร็จ
การใช้ GKE Autopilot ช่วยให้ Kubernetes จัดการการจัดสรรโหนดและการจัดการโครงสร้างพื้นฐานเบื้องหลังได้ คุณจึงมุ่งเน้นไปที่การทำให้ภาระงาน AI ใช้งานได้โดยสมบูรณ์
ขั้นตอนถัดไป / ดูข้อมูลเพิ่มเติม
อ่านเพิ่มเติมเกี่ยวกับ เครือข่าย GKE
ทำแล็บถัดไป
ทำภารกิจต่อไปกับ Google Cloud และลองดูแล็บอื่นๆ ของ Google Cloud ดังนี้